

Page 1

Environmental Express, Inc.
!
www.envexp.com 1
!
AutoBlock Plus Operation Manual and Instructions
CONTENTS
i. Introduction/General Information 2
ii. AutoBlock Warranty Information 3
1.0 Installing the AutoBlock 6
2.0 Hooking up inert gas to the AutoBlock 9
3.0 Service Screen 10
4.0 Creating a Method 15
5.0 Operator Test 18
6.0 Manual Operation 20
7.0 Data Viewer 21
8.0 Troubleshooting/Maintenance 23
9.0 Powering Off the AutoBlock 25
10.0 Warnings and Notifications 27
Page 2

AutoBlock Plus Operation Manual and Instructions
!
2 800.745.8218/843.881.6560
i. INTRODUCTION/GENERAL INFORMATION
The AutoBlock has been designed specifically for your laboratory to provide safe, clean, and efficient sample
digestions. It is capable of digesting water, wastewater, soils, and other materials typically digested using hotplate
chemistry.
UNIT DIMENSIONS
The dimensions of the AutoBlock are 36"W x 24"L x 38.5"H and the unit weighs 250 lbs. A minimum of 2" of extra
space should be allowed for around the sides of the unit. Additional space will be needed for reagents and the
waste carboy.
UNPACKING
Your AutoBlock has been packaged in a custom-made shipping crate.
It is highly recommended that you retain all packaging material for the warranty period in the unlikely event that
the AutoBlock must be returned for repairs. See Warranty for complete details.
Spend adequate time reading this instruction manual before unpacking your AutoBlock. While unpacking keep in
mind there are many fragile components. A quality control sheet from the factory has been included. Use this list to
inventory components as they are unpacked.
NOTE: Residual water may be found in the internal plumbing of your AutoBlock. This includes the pump, reagent,
and drain lines. This water is non-hazardous and was used for system checks and calibration during quality control
inspection.
WHAT’S INCLUDED
• 1 AutoBlock unit
• 1 Laptop loaded with AutoBlock Software
• 1 jump drive with AutoBlock Software and AutoBlock Operation Manual and Instructions
• 1 power cord
• 1 USB cable
• 3 sample racks
• 6' of ½" ID drain tubing
• 1 10L waste carboy
• ½" barb fitting for the waste carboy
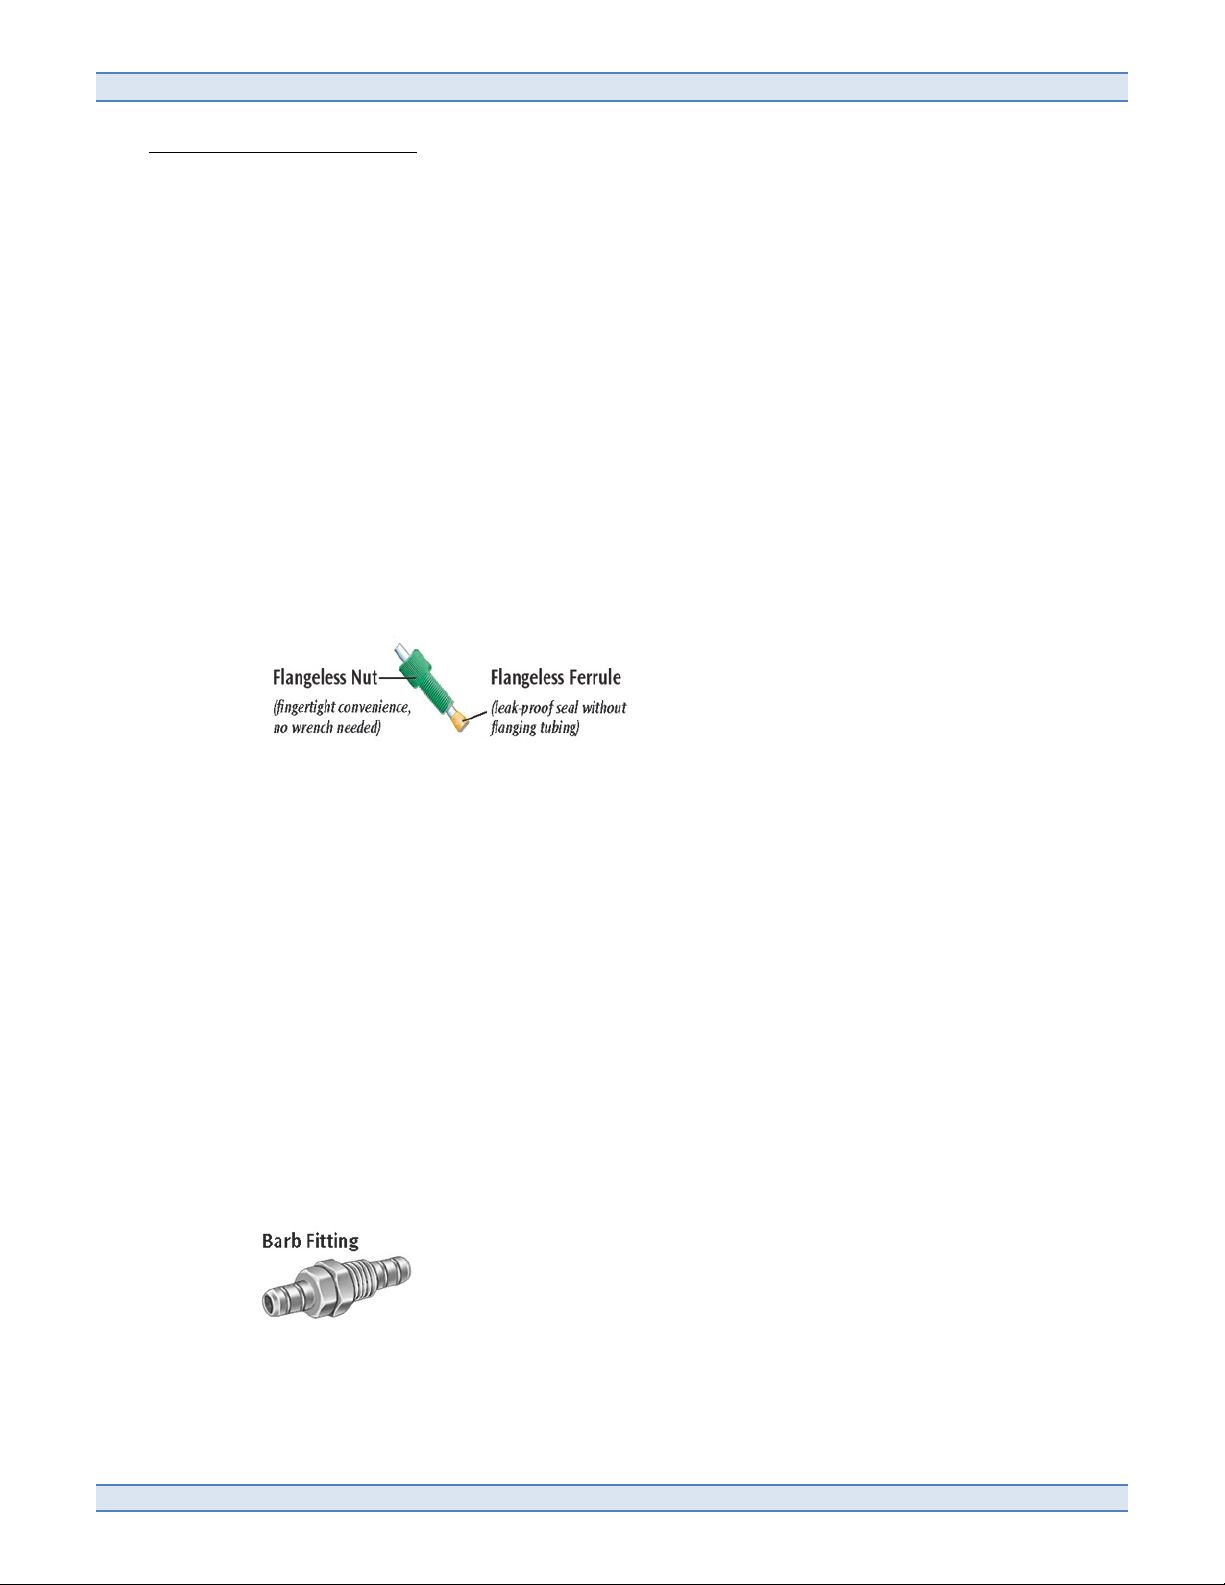
• 10 flangeless nuts
• 12 flangeless ferrules
• 50' of 1/16" ID PTFE reagent tubing
! !
Page 3

Environmental Express, Inc.
!
www.envexp.com 3
!
ii. AutoBlock Warranty Agreement
The Warranty
The Environmental Express AutoBlock is warranted to heat, hold temperature, automatically add reagents, lift
racks, cool samples, and perform a fill-to-volume step using an external computer (not included in this warranty)
with software for a period of ONE YEAR.
This warranty covers parts, shipping, and labor for a period of 365 days from the original ship date. This warranty
applies only in the case of damage or failure caused by reasonable and normal laboratory use.
How the Warranty Works
Upon receipt of the AutoBlock it is the laboratory’s responsibility to inventory all parts and immediately notify
Environmental Express of any suspected defects or missing parts. If during the first 365 days following the original
ship date the unit malfunctions, a telephone call to troubleshoot the issue must be initiated by the laboratory. If it
is deemed by the technical staff of Environmental Express that the problem cannot be fixed by the lab, and that the
failure occurred during normal and accepted laboratory operations, then a written Return Authorization Form will
be issued by Environmental Express. The AutoBlock will be returned to Environmental Express or a related repair /
manufacturing facility in its original shipping container.
Environmental Express will make every effort to troubleshoot and fix any problems with the customer while the
instrument is at the laboratory. This may mean working with laboratory personnel to perform minor fixes, an
Environmental Express representative going to the laboratory to troubleshoot and repair the instrument, or having
a 3rd party come to the laboratory’s location for repairs.
Charges Not Covered by the Warranty
Failure to retain the original shipping crate and all other packaging materials could result in additional charges
should it become necessary for the unit to ship back to Environmental Express.
Failure to adhere to AutoBlock maintenance instructions and requirements can void all warranties and result in
damage to the AutoBlock, loss of samples, and create repair issues not covered by the warranty. See maintenance
section instructions for more information.
Failure to continually pressurize the AutoBlock cabinet with clean incoming air will void all warranties and result in
damage to the AutoBlock.
Warranty Disclaimer
Environmental Express makes no other warranty, expressed or implied. Environmental Express shall not be liable
for consequential, incidental, specific or any other indirect damages resulting in economic loss or property damages
sustained by any customer from use of this product.
Environmental Express does not warrant the AutoBlock against damage resulting from chemical reactions that may
occur between reagents or between samples and reagents or between various liquids and components of the
AutoBlock. It is the responsibility of the laboratory to verify the compatibility of the reagents, heat and time!!
Page 4

AutoBlock Plus Operation Manual and Instructions
!
4 800.745.8218/843.881.6560
indexes, the compatibility of each sample matrix, and other varying digestion method conditions prior to operation.
Repair Approval
If your system requires attention beyond basic maintenance, please follow the guidelines below. Failure to do so
could result in loss of warranty protection and increased charges.
Any attempt by laboratory personnel to repair the AutoBlock without first obtaining written consent from
Environmental Express may void all or part of the Warranty, expressed or implied. Call 800-745-8218 (or 1-843-8816560 outside the US) to obtain approval before beginning any repair work.
In-Lab Troubleshooting & Repairs
The AutoBlock has been engineered so that mechanically minded laboratory personnel can perform most
troubleshooting, repairs, and tests. Technical assistance in such circumstances is always provided over the phone or
e-mail by Environmental Express, whether the AutoBlock is in or out of the warranty period. There is no charge for
this assistance.
On-Site Repair
In the unlikely event that an Environmental Express representative or approved 3rd party representative must come
on-site for repairs it is the laboratory’s responsibility to schedule the repair with Environmental Express on a
mutually agreed upon date. The laboratory must also put the AutoBlock through decontamination procedures to
remove traces or sample or reagents in the lines and waste areas of the unit. A decontamination form will be
provided to the laboratory by Environmental Express and must be filled out and returned by the customer prior to
arrival at the laboratory’s location.
Repair by Manufacturer
In the unlikely event that the unit must be returned to the manufacturer it is the laboratory’s responsibility to:
1. Obtain a Return Authorization Form
2. Decontaminate the AutoBlock to remove traces of sample and/or reagent prior to packaging and shipping.
A decontamination form will be provided to the laboratory by Environmental Express and must be filled
out and returned by the customer before any repair work can be done on the unit.
3. Properly pack the AutoBlock in approved packaging only.
4. Place a Purchase Order with Environmental Express for repair (for any out-of-warranty repairs).
Return Packaging & Shipping
It is the responsibility of the laboratory to retain in good condition the original crate and other packaging material
for a period no less than 365 days following the receipt of the AutoBlock. If the original shipping container is not
available, a new shipping container must be purchased from Environmental Express prior to shipment. Shipping
charges and insurance from your laboratory to Environmental Express and return shipping charges via standard
trucking line will be the responsibility of the lab except for approved Warranty claims.
Page 5

Environmental Express, Inc.
!
www.envexp.com 5
!
Inspection Upon Receipt and Repair
Environmental Express representatives will inspect, repair, and return the unit in a timely manner bearing all costs
covered by the warranty. However, if it is determined by Environmental Express that the damage to the AutoBlock
was caused by negligence or improper use or improper packaging / shipment, no warranty shall apply. In such case
reasonable and customary repair charges will apply including freight and insurance cost to and from the laboratory.
Additional Information & Help
If you have any questions or concerns do not hesitate to contact Environmental Express at 800-745-8218 (or 1-843881-6560 outside the US). Standard hours of operation are 8:30am – 5:30pm EST, Monday through Friday, except
holidays. You can also e-mail questions to info@envexp.com at any point. Please include your name, company
name, telephone, and instrument serial number (if applicable). A technical representative will respond as quickly as
possible.
!
! !
Page 6
AutoBlock Plus Operation Manual and Instructions
!
6 800.745.8218/843.881.6560
1.0 INSTALLING THE AUTOBLOCK
1.1 Ventilation (if unit is purchased with the fume hood)
1.1.1 The AutoBlock exhaust is located on the top right portion of the unit. Install a 4" diameter
acid-resistant duct and clamp to the exhaust outlet. Vent using state & federal guidelines.
1.1.2 When connecting ductwork, verify zero to negative pressure to prevent backflow. The length
of the duct should not exceed 25'. Vent the duct to the outside of the laboratory building or plumb
into the existing ductwork.
1.1.3 If the fume hood is not purchased with the unit the AutoBlock must be placed in a fume
hood for proper ventilation.
1. 2 Reagent Lines
1.2.1 Cut appropriate lengths of 1/16" PTFE reagent tubing, not to exceed 5' lengths. The ends
need to be a square-cut face.
1.2.2 Slide the flangeless nut over the tubing with the nut threads facing the tubing end.
1.2.3 Slide the flangeless ferrule over the tubing with the tapered portion of the ferrule facing
towards the nut. The large diameter of the ferrule should be pushed to the end of the tubing.
1.2.4 AutoBlock reagent ports are located on both sides of the unit. Ports 1-5 are located on the
left side while ports 6-10 are located on the right.
1.2.5 Insert the tubing with the flangeless ferrule into the receiving port until it bottoms. While
holding the tubing tighten the flangeless nut finger tight. The tubing should not be able to move in
the port.
1.2.6 Repeat for all desired ports.
NOTE: PORTS #1 AND #6 MUST ALWAYS REMAIN DI WATER!!
1.3 Drain Line & Carboy
1.3.1 Remove the ½" barb fitting from the bag of supplied parts.
1.3.2 Remove the nut from the fitting.
Page 7

Environmental Express, Inc.
!
www.envexp.com 7
!
1.3.3 Remove the cap from the carboy.
1.3.4 Place the fitting into the cap. The threaded portion of the barb fitting should be on the
inside of the cap.
1.3.5 Place the washer and then the nut onto the barb fitting and tighten.
1.3.6 Place the cap back on the carboy.
1.3.7 The barb fitting for the drain line is located on the right side towards the back of the unit.
Place the supplied ½" tubing onto the barb fitting and the other end on the barb fitting on the
carboy.
NOTE: Ensure the tubing goes in a DOWNWARD direction the entire length to avoid
back-ups.
1.3.8 In the fluidics compartment there is a safety drain in the case of a catastrophic failure
to one of the pumps or 5-way valve assemblies. This drain is located under the unit and will
evacuate any pooled reagent from the interior cabinet of the AutoBlock. A tray or tubing
and container should be placed at the outlet point to contain any potential liquid coming
from this drain port.
Page 8
AutoBlock Plus Operation Manual and Instructions
!
8 800.745.8218/843.881.6560
1.4 Installing the Software
1.4.1 To install the software, insert the jump drive provided into the USB port of your computer.
1.4.2 Connect the AutoBlock to the computer using the USB cable provided.
1.4.3 Turn on the AutoBlock using the rocker switch located on the left side of the instrument.
1.4.4 Double-click on the “AutoBlock Installer” program.
1.4.5 Follow the prompts and click “Next” to continue through the install process.
1.4.6 Once the software installation is complete, click “Next” to finish. The computer may or may
not ask you to reboot at this point. The software will then install the proper USB serial adapter to
your computer if required.
NOTE: You may need to have administrative rights to your computer for the USB serial adapter to
properly install.
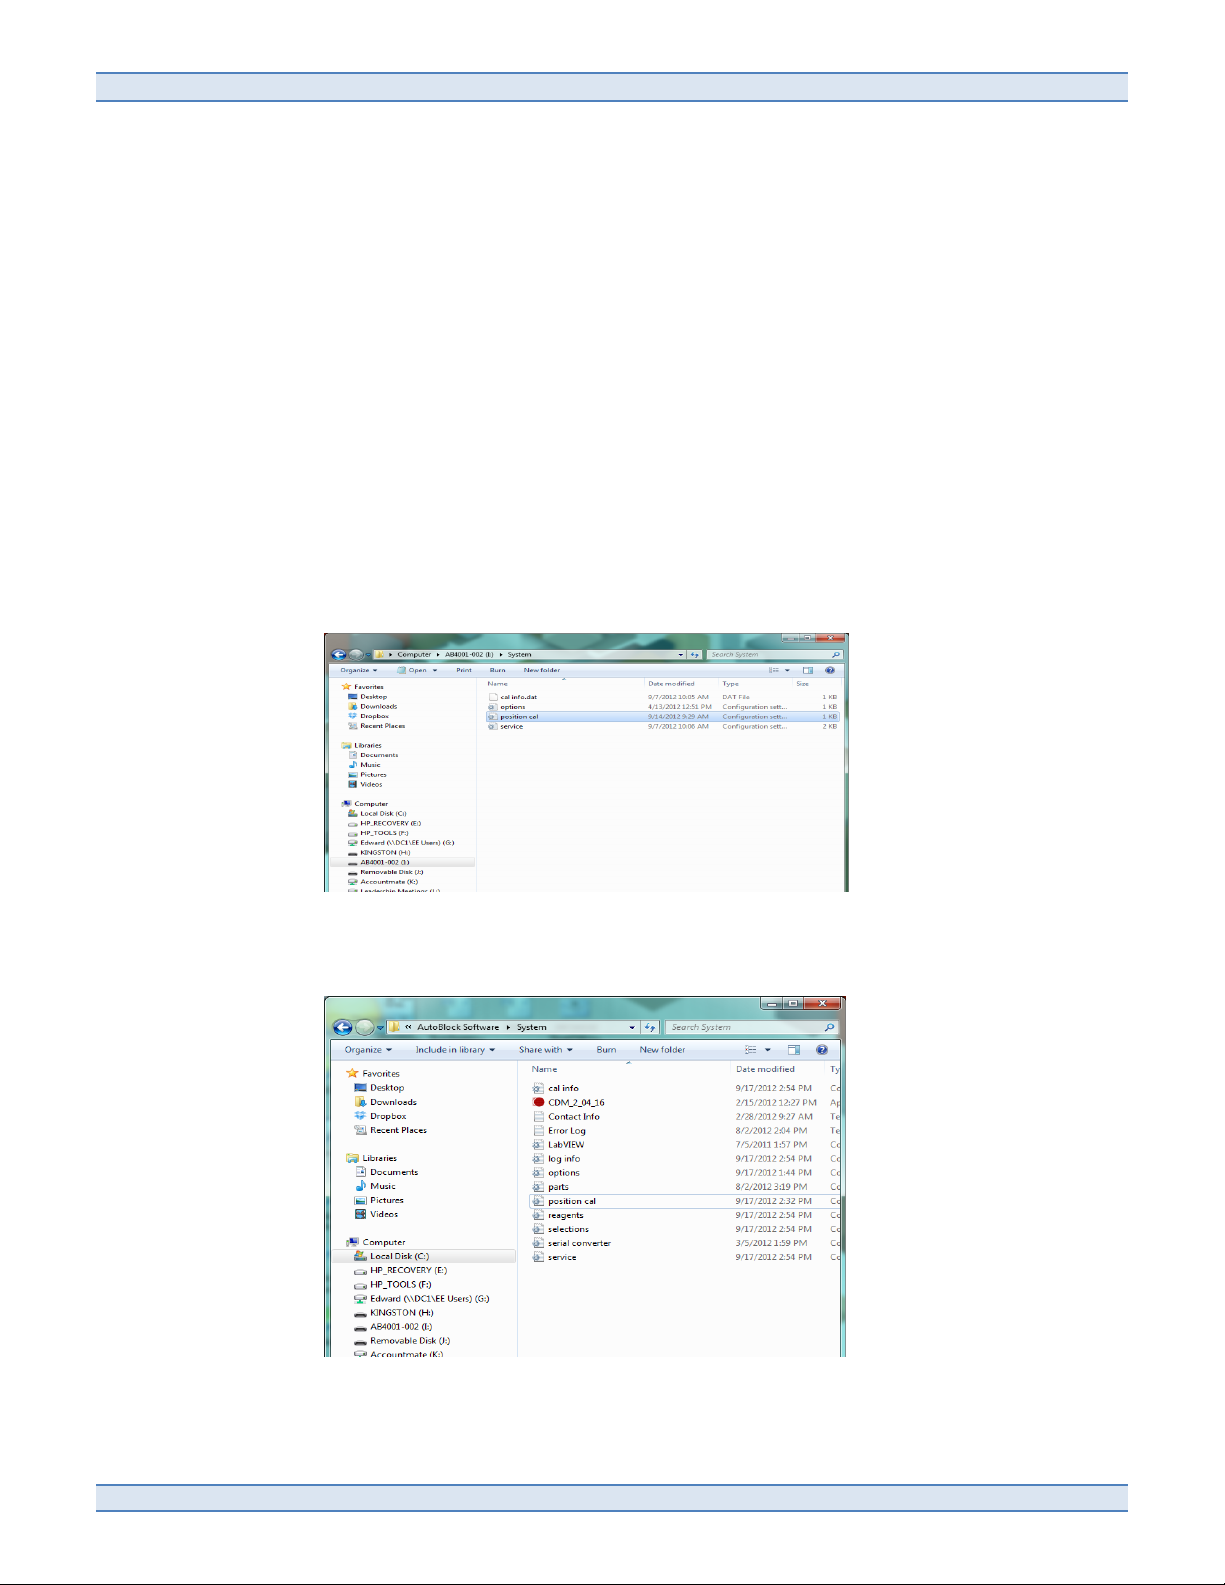
1.4.7 Once finished find the “System” folder from the jump drive.!!
!
1.4.8 Next open windows explorer and navigate to folder location:
C://AutoBlock Software/System and find the System folder as shown below:
!
1.4.9 Highlight all files from the system folder on the jump drive and copy them by right-clicking
on the files.
Page 9
Environmental Express, Inc.
!
www.envexp.com 9
!
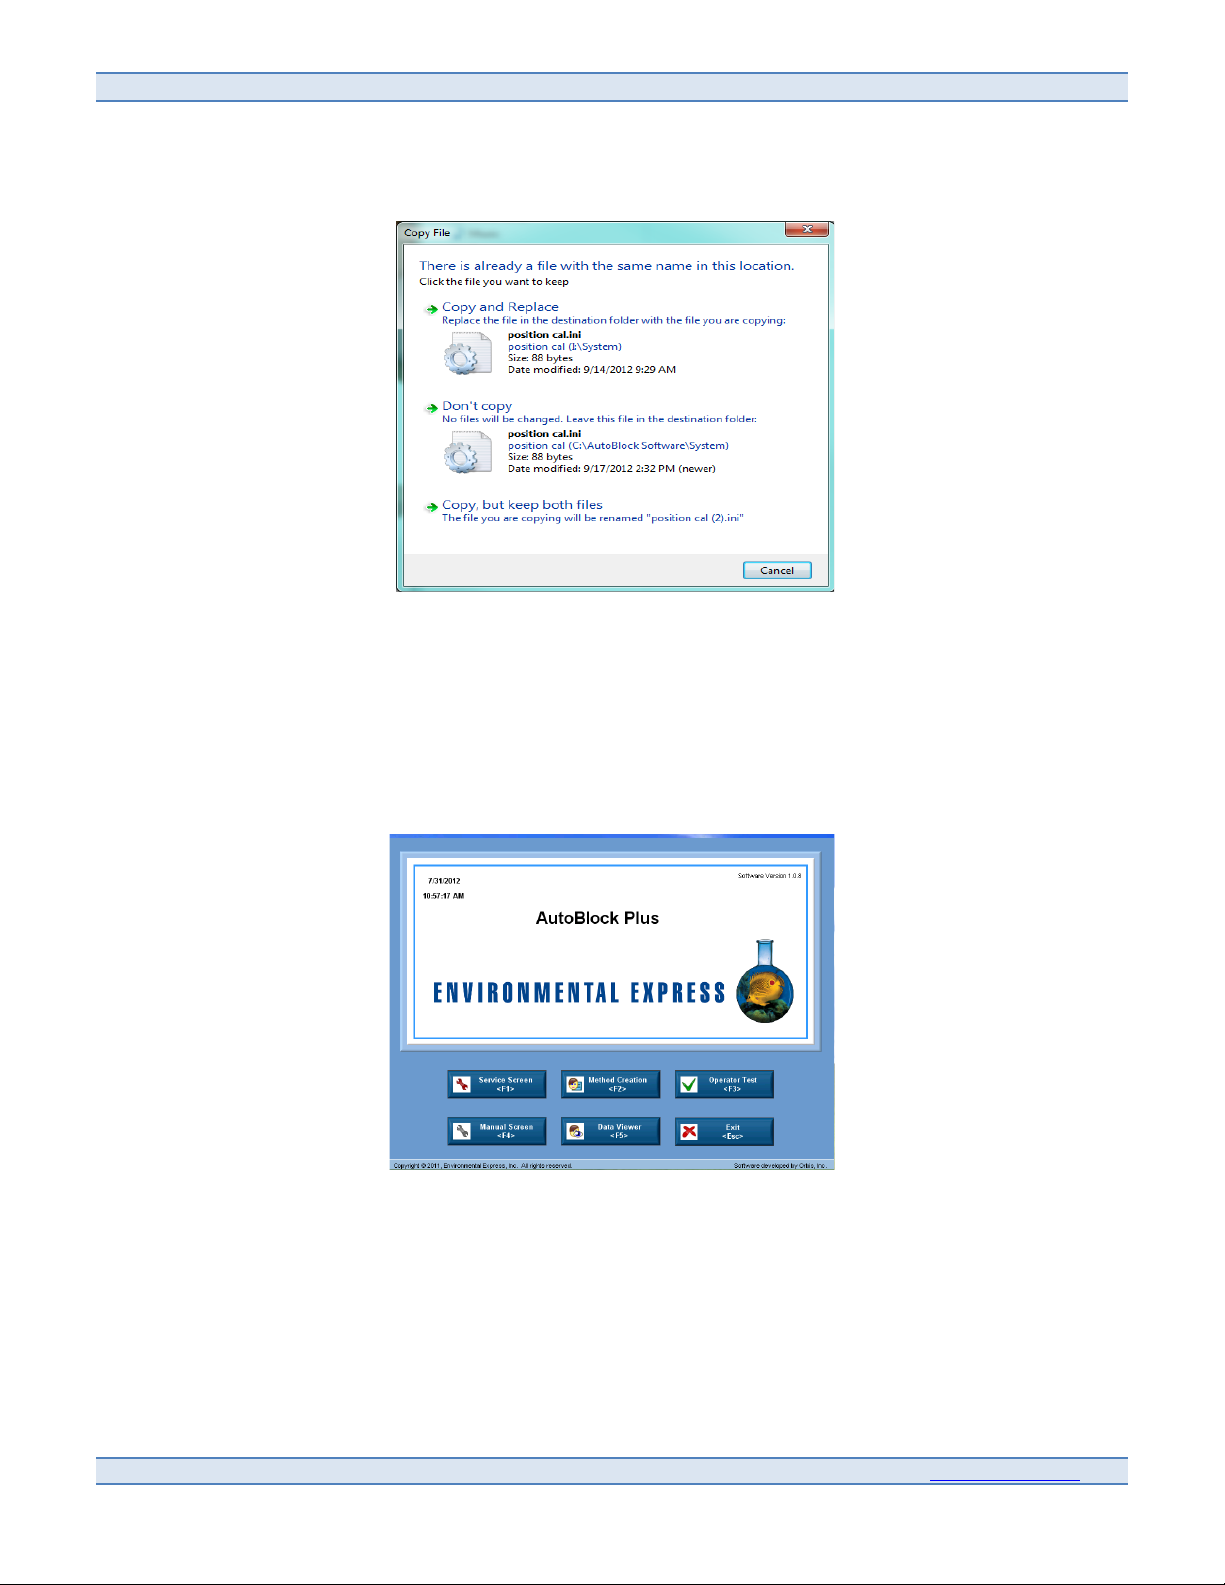
1.4.10 Paste in the System folder from the C://AutoBlock Software directory and over-write
all files.
!
!
!
1.4.11 Once the software installation is complete, an AutoBlock icon will appear on your desktop.
If the icon does not appear you can find the program by clicking on the Start button and
proceeding to “Programs” in the menu.
1.4.12 Double-click on the AutoBlock icon to open the software.!!!
NOTE: The AutoBlock must be powered on for the software to open up.
!
Page 10

AutoBlock Plus Operation Manual and Instructions
!
10 800.745.8218/843.881.6560
2.0 HOOKING UP INERT GAS TO THE AUTOBLOCK
2.1 Inert gas must be hooked up to the AutoBlock to prevent corrosion to the components in the cabinet of
the unit. The gas must be inert (i.e. Nitrogen or Air) and from a source different from the air in the
laboratory.
NOTE: This gas must be flowing through the cabinet of the AutoBlock at all times, even when the unit is not
running. This is a preventative measure to decrease corrosion to the components of the AutoBlock due to the
corrosive materials used in the digestion procedures.
2.2 Hook the gas up to the unit by placing tubing over the hose barb on the front panel of the AutoBlock.
2.3 The input gas should be set to 40 - 100 psi going into the unit. The regulator inside the cabinet will
then step the pressure down to the correct psi (10 psi).
2.4 A pressure sensor is located in the cabinet of the AutoBlock to ensure there is a constant stream of
fresh air going into the unit. If the pressure sensor does not detect air going through it will shut the
instrument down.
Page 11

Environmental Express, Inc.
!
www.envexp.com 11
!
3.0 SERVICE SCREEN
From the Main Screen, click on the Service Screen button for access to any service related items.
3.1 Reagents Tab
3.1.1 To assign a reagent to a specific port, click the drop-down arrow on the port number and
select the appropriate reagent. The reagent is now assigned to that port.
NOTE: Ports #1 and #6 will always be assigned to DI Water and cannot be changed.
3.1.2 To add a new reagent, click on the “ADD REAGENT” button.
3.1.2.1 Enter the reagent name (20 character maximum).
3.1.2.2 Assign a viscosity to the reagent.
3.1.2.3 Type in any notes in the details field and click OK (25 character maximum).
3.1.3 To delete a reagent, highlight the reagent you wish to delete and click on the “DELETE
REAGENT” button. A pop-up will appear prompting the user to either confirm the deletion or
cancel.
NOTE: The user cannot delete H2O as a reagent as this must always be used in the AutoBlock
methods and is always assigned to ports 1 and 6.
Page 12

AutoBlock Plus Operation Manual and Instructions
!
12 800.745.8218/843.881.6560
3.2 Temperature Calibration Tab
3.2.1 The graphite block temperature should be calibrated on an annual basis and always
performed when installing the AutoBlock for the first time.
3.2.2 In the Temp Cal screen, press the “ENABLE HEAT” button to heat the graphite block to 90°C.
3.2.3 Once the block has reached 90°C, allow it to stabilize for 15 minutes.
3.2.4 Read the temperature inside an empty well with an IR Thermometer traceable to NIST.
3.2.5 Enter the actual temperature value in the field and click the “Graphite Save Cal” button to
save the updated value.
3.2.6 To calibrate the Sample Probe temperature, fill a digestion tube (SC475 or equivalent) with
deionized water and place into the graphite block.
3.2.7 Once the heating block temperature has stabilized, place the Sample Probe thermocouple
into the vial along with an NIST traceable thermometer and allow the water temperature to
stabilize.
3.2.8 Record the actual temperature in the field and click the “PROBE SAVE CAL” button.
Page 13

Environmental Express, Inc.
!
www.envexp.com 13
!
3.3 Pump Calibration Tab
3.3.1 To calibrate the pump, inject 30mL of deionized water, using the manual screen (see Section
5.1), into a pre-weighed digestion vessel. Use Port 1 to calibrate Pump 1 and use Port 6 to calibrate
Pump 2.
3.3.2 After injection, click the “Initialize” button to return the probe and racks to their home
positions.
3.3.3 Weigh the vessel a second time and subtract the original weight to obtain the volume of
deionized water injected.
3.3.4 Enter the actual injection volume in the appropriate field and press either the “Pump 1 Save
Cal” or “Pump 2 Save Cal” buttons, depending on which pump was calibrated.
3.3.5 Perform the pump calibration on both pumps at least once every 30 days.
Page 14

AutoBlock Plus Operation Manual and Instructions
!
14 800.745.8218/843.881.6560
3.4 Maintenance Tab
3.4.1 The Maintenance tab lists the items that require routine service.
3.4.2 Each service item lists the last date serviced, how often the service should take place, the
number of days remaining until service is required, and an “Info” button describing what the
service is.
3.4.3 When an item’s service is due the “Due?” column will change from a green “NO” to a red
“YES”.
3.4.4 The user will also be prompted when the software is first opened if an item is due to be
serviced.
NOTE: The AutoBlock and software will allow users to run the instrument without servicing any
items that are due or overdue. It is the user’s responsibility to maintain the instrument within the
requirements of the AutoBlock.
3.4.5 When an item has been serviced, click the button under the “Serviced?” column to update.
The software will then update the “Date Serviced” and “Days Remaining” columns.
3.4.6 The user can modify the expiration time for all service items based on individual laboratory
needs. Environmental Express does not recommend increasing the time. Doing so could lead
to failures in the AutoBlock and void the warranty.
Page 15

Environmental Express, Inc.
!
www.envexp.com 15
!
3.5 Supplies Tab
3.5.1 The supplies tab lists part numbers and descriptions of items that may need to be replaced
from time to time. If a part number you require is not listed on this tab contact Customer Service at
1-800-745-8218 to obtain a part number and price. All updated pricing can be found on the
website at www.envexp.com.
3.5.2 Contact information for Environmental Express is also included on this tab.
3.6 Data Log Tab
!
3.6.1 The data log tab allows the user to choose the type of data logging that occurs during a
digestion method.
3.6.2 The user can log method data, graphite block temperature, and/or sample temperature by
clicking on the appropriate buttons.
Page 16

AutoBlock Plus Operation Manual and Instructions
!
16 800.745.8218/843.881.6560
4.0 CREATING A METHOD
From the Main Screen, click on the Method Creation button. The AutoBlock will come with several pre-programmed
EPA methods, however the software allows for users to create their own methods or modify existing ones.
1.5 Creating a Method
!
! ! 4.1.1 To create a method, press the “Delete All” button to clear the method template.
4.1.1.1 A prompt will appear asking the user if they want to delete all steps. Click “Delete
All” to proceed.
4.1.2 Choose the actions from the “Method Steps” box on the left side of the screen. Each action
will prompt the user for more information based on the action chosen.
4.1.2.1 INJECT: Select the desired reagent from the available list and specify the volume to
be injected.
NOTE: The reagent must be assigned to a port to be available for selection. See Section 3.1
for assigning reagents to ports.
4.1.2.2 HEAT TEMP / HEAT TIME: Enter the desired graphite block temperature. The
software will then prompt the user to enter the length of time the AutoBlock should heat.
NOTE: The heat temp is for the graphite block temperature only, not the sample
temperature. The user should expect a 10 – 15 degree drop in sample temperature from the
graphite block temperature and should verify this prior to running a digestion method.
4.1.2.3 COOL TIME: Enter the amount of time to cool samples.
NOTE: When injecting reagents after a heat step it is important to cool the samples prior to
doing so. A minimum of 20 minutes of cool time is required before injecting a reagent after
heating.
4.1.2.4 PAUSE: Method execution will stop until the user recognizes a prompt to continue.
A comments area (limited to 50 characters) is available to provide information on the
pause step.
Page 17

Environmental Express, Inc.
!
www.envexp.com 17
!
4.1.2.5 FILL: Final fill to volume. The user can choose what final volume the AutoBlock
should fill all samples to, from 5 – 50mL. The reagent used for the fill step will always be
deionized water from Port #1. In the event samples go to dryness during the digestion
method one can choose whether or not the AutoBlock fills these cups to the desired final
volume or not.
4.1.3 The user can move steps up or down in the method by clicking on the “Move Up” or “Move
Down” buttons.
4.1.4 Once all information for the method is entered press the “SAVE AS” button and name the
method. The new method will be saved to the Methods folder.
Page 18

AutoBlock Plus Operation Manual and Instructions
!
18 800.745.8218/843.881.6560
4.2 Modifying an Existing Method
4.2.1 To modify an existing method, press the “LOAD” button and choose the appropriate method
from the Methods folder to modify and click OK.
!
4.2.2 The method steps will appear on the screen.
4.2.3 Highlight any step and click “Edit Step” to make any necessary changes. Once the changes are
complete click “OK”.
4.2.4 To delete a step highlight the step and click “Delete Step”.
4.2.5 To add a step, choose the function from the “Method Steps” box and click “Add Step”. The
software will then prompt the user to enter any other necessary information for this step.
4.2.6 The user can move steps up or down in the method by clicking on the “Move Up” or “Move
Down” buttons.
4.2.7 Once the method is modified click “SAVE” to overwrite it or “SAVE AS” to create a new
method file.
!
Page 19

Environmental Express, Inc.
!
www.envexp.com 19
!
5.0 OPERATOR TEST
From the Main Screen, click on the Operator Test button.
!
5.1 Select a method by clicking the “Select Method” button and choose the appropriate file from the
Method folder.
5.1.1 The user can view this method by clicking the “View Method” button. No edits can be made
to the method from this screen.
!
5.1.2 Ensure all method reagents match the reagents assigned to the ports of the AutoBlock.
5.2 There are optional fields for “Batch #”, “Operator Name”, and “Notes”. The user can enter appropriate
information in these fields if desired.
5.3 Click on the individual cells in the sample grid to match the location of the samples loaded into the
AutoBlock. Once the cell is activated it will turn green on the grid.
5.3.1 In addition to highlighting individual cells the user can highlight all cells by clicking “All On”
or individual columns by clicking the appropriate column button.
Page 20

AutoBlock Plus Operation Manual and Instructions
!
20 800.745.8218/843.881.6560
!
! ! 5.4 Once ready, click “Start Method”.
5.5 A pre-test checklist will pop-up to prompt the user to check the reagent bottles and to ensure
the door to the AutoBlock is closed.
5.6 The AutoBlock will track the total digestion time in the lower left corner of the screen.
5.7 If the AutoBlock detects any errors during operation, the unit will sound an audible alarm and
immediately abort the method. A note will appear in the method information field explaining why
the AutoBlock aborted the method.
5.7.1 The user should check the four (4) indicator lights under the cell position grid for
indications of leak and/or pressure issues.
!
! !
Page 21

Environmental Express, Inc.
!
www.envexp.com 21
!
6.0 MANUAL OPERATION
From the Main Screen, click on the Manual Screen button. The manual interface screen allows the user to manually
perform all functions of the AutoBlock. It will be used for calibration steps and is also useful for troubleshooting.
!
6.1 Injecting a Reagent
6.1.1 To inject a reagent, choose the desired reagent from the reagent list by clicking on and
highlighting it.
6.1.2 It is necessary to purge and prep the injection line before injecting into a cup. The AutoBlock
requires a minimum of 4.0 mL of reagent to fully prep and purge the reagent line. Move the probe
over the drain prior to prepping and purging with a reagent by pressing the "Move to Drain"
button under System Controls in the Manual Interface.
6.1.2.1 Under the “Injection Control” field, enter 4.0 mL as the reagent volume and press
“Inject”. Ensure that reagent is injected into the drain. If not, repeat the process until it is
visually seen that reagent has been injected into the drain.
6.1.3 Once the reagent is prepped and purged, enter the desired volume of reagent to be injected
in the “Injection Control” field.
6.1.4 Highlight the cell(s) you wish to inject reagent into by clicking on them in the cell position
grid.
6.1.5 Move the rack to the “FILL” position by sliding the indicator arrow up to “FILL” under the
“Rack Position” control.
6.1.6 Press “Inject” and the AutoBlock will inject the desired amount of reagent into the
highlighted cells.
Page 22

AutoBlock Plus Operation Manual and Instructions
!
22 800.745.8218/843.881.6560
6.2 Heating the Graphite Block
6.2.1 To manually heat the graphite block, select the desired temperature in the “Temp Control”
section of the screen.
6.2.2 Press “Enable Heat” and the block will heat to the desired temperature.
6.2.3 Press “Disable Heat” to turn the heat off.
6.3 Moving the Sample Probe
6.3.1 Designate!the!desired!probe!location!by!highlighting!the!cell!on!the!cell!position!grid.
6.3.2 Click “Move to Position” under System Controls and the probe will move to the position.
6.3.3 Click “Move to Drain” to move the probe over the drain. You will need to do this prior to
manually injecting any reagents.
6.3.4 Click “Initialize” to home the motors of the AutoBlock. This will move the racks to the down
position and move the probe to the back right corner of the AutoBlock.
6.4 Turning the Fan On and Off
6.4.1 To turn the fan on and/or off move the slide button up for “ON” and down for “OFF”.
NOTE: If the graphite temperature is greater than 40°C the fan cannot be turned off.
6.5 Aborting in the Manual Mode
6.5.1 If the user needs to abort a function during the manual mode, all buttons except “Initialize”
will become unavailable. It is necessary to return the racks and probe back to their home positions
once an abort occurs to reset the software.
6.6 Status Updates
6.6.1 The manual mode will also give the user status updates on probe and rack position, as well
as leak detectors and pressure sensors.
7.0 DATA VIEWER
7.1 The AutoBlock software will log data as dictated by the user in the Data Log section of the Service
Screen (see Section 3.6).
7.2 Once a digestion method is complete or has been aborted by the user or AutoBlock, a file for that
digestion is created. Files are named by the date of the digestion and stored in their own file.
7.3 To open these files, click on the “LOAD” button in the Data Viewer screen.
Page 23

Environmental Express, Inc.
!
www.envexp.com 23
!
!
7.4 Click on the desired file to open and click “OK”.
!
7.5 A .dat file is then displayed on the screen. One can print the data by pressing the “PRINT” button.
!
7.6 Users can also convert the .dat files to another format by right-clicking on the file name and saving as a
different file type.
Page 24

AutoBlock Plus Operation Manual and Instructions
!
24 800.745.8218/843.881.6560
8.0 TROUBLESHOOTING/MAINTENANCE
8.1 Cabinet Pressure – If air is not properly entering the cabinet of the AutoBlock the instrument will not
allow the user to run a method. An error message will appear on the screen stating there is no airflow going
into the cabinet and the method will be aborted. Go to the manual screen and observe the green and red
indicator lights near the bottom of the screen. Look for “Cabinet Pressure”. This light will be red if the
pressure sensor is not sensing airflow and green if it is.
8.1.2 If the light is red check the incoming air into the unit to ensure it is at 40 psi. The pressure
sensor will not work properly without the correct amount of incoming air.
8.1.3 If there is sufficient air entering the unit, remove the left and right panels of the AutoBlock.
8.1.4 Check the tubing coming from the air inlet to the regulator to ensure there are no cracks and
it is tightly secured.
8.1.5 Check the regulator inside the cabinet. The dial should read 10 psi +/- 2 psi if there is proper
air flow. Ensure the tubing leaving the regulator is intact and secure.
8.1.6 The tubing leaving the regulator goes around the back of the unit and has a series of pin
holes to diffuse air into the cabinet. This tube hooks up to the pressure sensor on the right side of
the AutoBlock. Locate the pressure sensor and ensure the tubing is properly attached.
8.1.7 If the incoming air is within specifications, the internal regulator is working, and all tubing is
intact, check the adjustment screw on the pressure sensor. This is a hex-shaped screw that takes a
5/64" Allen wrench to adjust. Turn the adjustment screw to the left to open up the pressure sensor
valve to allow more airflow in. Observe the “Cabinet Pressure” indicator light in the manual screen
to see if it turns from red to green showing proper air flow.
8.1.8 If the problem continues to exist contact Environmental Express Technical Support at
1-800-745-8218.
8.2 Changing the HEPA filter (only applicable to units with a fume hood)
8.2.1 Close the fume hood door.
8.2.2 Remove the two side screws holding the HEPA filter in place.
8.2.3 Open the fume hood door.
8.2.4 Unscrew the third button screw while holding the HEPA filter in place from behind.
8.2.5 Remove the case containing the HEPA filter.
8.2.6 Push the old HEPA filter out and replace with the new one ensuring the black gasket on the
filter is facing out of the case.
8.2.7 Re-attach the HEPA filter with the 3 screws. The black gasket on the HEPA filter should be
placed against the interior wall of the fume hood.
Page 25

Environmental Express, Inc.
!
www.envexp.com 25
!
! 8.3 Changing the exhaust fan (only applicable to units with a fume hood)
8.3.1 Remove the front panel from the fume hood to access the hood chamber.
8.3.2 Remove the flexible exhaust tubing from the inlet side of the fan.
8.3.3 Disconnect the quick-disconnect wire from the fan to the AutoBlock.
8.3.4 Remove the two mounting screws holding the fan to the back of the fume hood.
8.3.5 Rotate the fan out of the exhaust port. It will slide out.
8.3.6 Insert the new fan into the exhaust port.
8.3.7 Place a bead of silicone sealant around the fan where it joins the exhaust port.
8.3.8 Re-attach the fan to the fume hood with the two mounting screws.
8.3.9 Re-connect the quick-disconnect wire from the fan to the AutoBlock.
8.3.10 Replace the flexible exhaust tubing to the inlet side of the fan.
8.3.11 Replace the front panel to the fume hood.
8.4 Changing the pump tubing
8.4.1 The peristaltic pump tubing should be checked periodically for flattening, cracks, and overall
wear and tear.
8.4.2 Remove the front, lower panel of the AutoBlock located below the front door.
8.4.3 Move the locking lever on the peristaltic pump from the right to the left opening up the
pump head to access the tubing.
8.4.4 Pull the tubing out of the pump head.
8.4.5 Disconnect the tubing by unscrewing the left and right thumb screws connecting the pump
tubing to the 1/16” reagent addition line and the ¼” reagent line coming from the 5-way valve
assembly.
8.4.6 Check the ferrules from the PTFE lines and replace if necessary.
8.4.7 Attach a new peristaltic pump tube.
8.4.8 Place the pump tubing in the pump head by lining it up in the two v-notch grooves that hold
the tubing in place.
8.4.9 Move the locking lever to the right to lock the peristaltic pump tube in place.
Page 26

AutoBlock Plus Operation Manual and Instructions
!
26 800.745.8218/843.881.6560
8.5 Changing the pump head
8.5.1 Remove the pump tubing (see section 8.4).
8.5.2 Remove the two mounting screws attaching the pump head to the AutoBlock.
8.5.3 Remove the pump head.
8.5.4 Insert a new pump head by lining up the mounting screws and lining up the drive screw.
NOTE: It is important to line up the drive screw with the coupling of the pump motor. The left or
right panels will need to be removed to do this properly. A flat-head screwdriver can be used to turn
the drive in the pump head to properly line up the drive screw.
8.5.5 Screw the two mounting screws into the pump head to attach it to the AutoBlock.
8.5.6 Check to ensure the peristaltic pump drive screw is properly lined up with the pump motor
by turning the pump head drive screw with a flat head screw driver. Look in the left or right panel
to see if the motor drive shaft moves. If it does it is properly installed.
8.5.7 Replace the left / right and lower front panels.
8.6 Changing the PTFE reagent addition lines
8.6.1 Remove the front lower and side panels from the AutoBlock.
8.6.2 Remove the pump tubing from the pump head (see Section 8.4)
8.6.3 Unscrew the flangeless nut connected to the rectangular connection on the pump
tubing end.
8.6.4 Pull the 1/16" tubing free from the flangeless nut and pull through the grommet holding the
tubing in place.
8.6.5 The tubing must then be pulled free from the wire / tubing management system.
8.6.6 Replace tubing and secure flangeless nut.
8.7 Changing VICI Emitters
8.7.1 Remove the old VICI emitters from the interior cabinet of the AutoBlock.
8.7.2 Peel off the adhesive strip backing from the new emitter and place near or in the same place
as the old emitter.
9.0 POWERING OFF THE AUTOBLOCK
9.1!!To!power!off!the!AutoBlock,!press!the!“EXIT”!button!on!the!Main!Screen!to!shut!down!the!
software.!
!
9.2!!It!is!now!safe!to!p o w e r !d o w n !t he !AutoBlock!using!the !r o ck e r!s witch.!
!
9.3!!It!is!required!to!lea v e!the!inert!gas!on!to!keep!a!slow!trickle!of!fre sh!air!go ing !through!the!system!
to!reduce!the!corrosion!of!parts!in!the!m e tals!dige stion !labo rato ry.!
Page 27

Environmental Express, Inc.
!
www.envexp.com 27
!
10. WARNINGS AND NOTIFICATIONS
10.5 Electrical requirements
10.5.1 – Voltage: 120V, ~60Hz, 12A (Domestic)
10.5.2 – Voltage: 230V, ~50HZ, 6A (INTL)
10.5.3 - Power should not vary greater than 10%. Use the supplied power cord or equivalent to
connect to the power supply. For safety reasons, a separate power receptacle should be provided
for each SPE-Express. Do not use extension cords or outlet adaptors. Make certain that power
outlets are earth-grounded at the grounding pin.
10.6 This equipment is designed to be used with the original factory equipment.
Any components or replacement parts need to be sourced through environmental express. Any other
components that are used may violate warranty or intended use of the unit.
10.7 Equipment or components having a mass of 18kg or more will require the use of multiple
persons or equipment for lifting and carrying to desired positions. This is a safety requirement. The
unit weight exceeds 18kg and requires multiple people for lifting.
10.8 Warning labels
10.8.1 - FOR THE CONNECTION OF INERT GAS.
10.8.2 - Hot surface in the interior chamber
10.8.3 - Check power requirements before use. Voltage and fuse should be in accordance
with supply.
10.9 This equipment is designed to operation in following environmental conditions
10.9.1 – Ambient temperature: 5° C - 30°C
10.9.2 – Ambient relative humidity: 0-85% RH
10.9.3 – Altitude: sea level to 2400 meters
10.10 This equipment needs to be used in conjunction with an electrical surge protector. The
electrical surge protector needs to be rated accordingly to the source supply. The main power cord of the
unit should be interfaced with the surge protector.
10.10.1- Power should not vary greater than 10%. Use the supplied power cord or equivalent to
connect to the power supply. For safety reasons, a separate power receptacle should be provided
for each SPE-Express. Do not use extension cords or outlet adaptors. Make certain that power
outlets are earth-grounded at the grounding pin.
10.11 This unit may need periodic cleaning depending on usage.
An acid neutralizing cleaner is recommended for acid sample preparations.
Page 28

AutoBlock Plus Operation Manual and Instructions
!
28 800.745.8218/843.881.6560
10.12 The unit does not liberate any known poisonous substances. Caution is recommended as any
exposed surface may have acid vapor residue due to usage. to maintain the maximum life of the
electrical components, the inert gas line must remain connected and operational even when the unit is
not in service.
10.12.1 – waste from the drain line should be neutralized and disposed of with a waste
management service.
10.12.2 – any liquid discharge should be treated as potentially acidic and disposed of using a
waste management service.
10.13 All surfaces and accessories that are exposed to elevated temperatures within the digestion
chamber are considered a burn risk and should be treated with caution.
10.14 If this equipment is used in a matter other than specified, the protection provided by the
equipment may be impaired.
10.15 Do not replace power supply cords with inadequately rated replacement cords.
It is recommended that these are supplied through environmental express.
10.16 All replacement parts are needed to be supplied by Environmental Express.
This includes the replacement of valves, tubing, heater elements, and control boards.
10.17 Replacement FuSES are rated for a maximum voltage of 250v.
Each individual fuse is rated as 6A or 12A depending on the system purchased.
10.18 When servicing equipment, service personnel should:
10.18.1 – Remove power supply when working in the electrical cabinet.
10.18.2 – Prolonged use of the unit may result in acid residue on the various surface. The unit
should be cleaned periodically and hand protection should be worn when servicing the unit.
10.18.3 – All personal protective gear should be work when using equipment. This includes
safety eyewear, gloves, and closed toed footwear.
10.18.4 – Servicing of the equipment should be performed in a well ventilated area
 Loading...