


R1SOHO Access Point
Setup and Installation
P/N 9033728-01
ENJOY THE FREEDOM OF WIRELESS NETWORKING
enterasys.com
™


NOTE: Only qualified personnel should perform i nsta l lati on
NOTE
procedures.
NOTICE
Enterasys Networks and its licensors reserve the right to make changes in specifications and other
information contai ned in this documen t wit hout prior notice. The rea der should in all cases consult
Enterasys Network s to de te rm ine whether any such ch anges have been made.
The hardware, firm w a re, or soft w are described in this ma nua l is subje ct to change without no tice.
IN NO EVENT SHALL ENTERASYS NETWORKS AND ITS LICENSORS BE LIABLE FOR
ANY INCIDENTAL, INDIRECT, SPECIAL, OR CONSEQUENTIAL DAMAGES
WHATSOEVER (INCLUDING BUT NOT LIMITED TO LOST PROFITS) ARISING OUT OF OR
RELATED TO THIS MANUAL OR THE INFORMATION CONTAINED IN IT, EVEN IF
ENTERASYS NETWORKS AND ITS LICENSORS HAVE BEEN ADVISED OF, KNOWN, OR
SHOULD HAVE KNOWN, THE POSSIBILITY OF SUCH DAMAGES
© December 2001 by Enterasys Networks
TM
, Inc.
All Rights Reserved. Printed in the United States of America.
Enterasys Networks
35 Industrial Way
Rochester, NH 03867
.
Order Number: 9033728-01
Enterasys, Enterasys Networks, RoamAbout and the RoamAbout logo are trademarks or registered
trademarks of Enterasys Networks, Inc.
Apple, the Apple logo, Macintosh, and PowerBook are trademarks or registered trademarks of Apple
Computer, Inc.
Microsoft, Windows, and Windows NT are either trademarks or registered trademarks of Mic rosoft
Corporation.
PC Card is a tradem ar k of P CM CI A.
All other trademarks and registered trademarks ar e the property of their respecti v e holders.
Web Site: http://www.enterasys.com/wireless
i

FCC Notice
Note: This equipme nt has been te sted and fou nd to comply with the lim its for a Class B digi tal devic e,
pursuant to part 15 of the FCC Ru le s. These limits are designed to provide reasonable protecti on
against harmful interference in a residential installation. This equipme nt generates, uses and can
radiate radio frequency energy and, if not installed and used in accordance with the instructions, may
cause harmful in t erfer ence to radi o co mmunicat io ns. Ho wever, there is no gua rantee that inte rfe renc e
will not occur in a particular installation. If this equipment does cause harmful interference to radio or
television reception, w hich can be determined by turning the equipm ent off and on, the user is
encouraged to t ry to correct the interference by one or more of th e following measures:
• Reorient or relocate the receiving antenna.
• Increase the separation between the equipment and rec e ive r.
• Connect the equipment into an outlet on a circuit different from that to which the receiver is
connected.
• Consult the dealer or an e xperienced rad io/TV technic ia n for help.
CAUTION: Changes or modifications made to this de vi ce which are not expre ssly
!
CAUTION
approved by the party respo n s ible for compliance could vo i d the us er’s authority to
operate the equip m ent.
Industry Canada (Canada) - Class B Computing Device:
This Class B d igital apparatus complies with Canadian IC ES-003.
Cet appareil numérique de la classe B est conforme à la norme NMB- 003 du Canada.
Europe - EC Declaration of Conformity
This device complies with Low Voltage Directive 73/23/EEC and EMC Directive 89/336/EEC.
VCCI Notice
This is a Class B product ba sed on the standard of the Voluntary Control Council for Interferenc e
from Information Technology Eq ui pment (VCCI). If th is is used near a rad io or television re ceiver in
a domestic environm ent, it may cause radio in te rfe rence. Install and use th e e quipment according to
the instruction man ual.
Wichtige Sicherheitshinweise (Germany)
1. Bitte lesen Sie diese Hinweise sorgfältig durc h.
2. Heben Sie diese Anleitung für den späteren Gebrauch auf.
3. Vor jedem Reinigen ist das Gerät vom Stromnetz zu trennen. V erwenden Sie keine Flüssigoder
Aerosolreiniger. Am besten eignet sich ein angefeuchtetes Tuch zur Reinigung.
4. Die Netzanschlu ßsteckdo se soll na he de m Gerät angebracht und leicht zugänglich sein.
5. Das Gerät ist vor Feuchtigke it zu schützen.
ii
6. Bei der Aufstellung des Gerätes ist auf sicheren Stand zu achten. Ein Kippen oder Fallen
könnte Beschädigungen hervorrufen.
7. Die Belüftungsöffnungen dienen der Luftzirkulation, die das Gerät vor Überhitzung schützt.
Sorgen Sie dafür, daß diese Öffnungen nicht abgedeckt werden.
8. Beachten Sie beim Anschluß an das Stromnetz die Anschlußwerte.
9. Verlegen Sie die Netzanschlußleitung so, daß niemand darüber fallen kann. Es sol lte auch nichts
auf der Leitung abgestellt werden.
10. Alle Hinweise und Warnungen, die sich am Gerät befin de n, sind zu beachten.
11. Wird das Gerät über einen längeren Z ei tra um nicht benutzt, sollte n Sie es vom Stromnetz
trennen. Somit wird im Falle einer Überspannung eine Beschädigung vermieden.
12. Durch die Lüftungsöffnungen dürfen niemals G egenstände oder Flüssigkeiten in das Gerät
gelangen. Dies könnte einen Brand bzw. elektrischen Schlag auslösen.
13. Öffnen sie niemals das Gerät. Das Gerät darf aus Gründen der elektrischen Sicherheit nur von
authorisiertem Servicepersonal geöffnet werden.
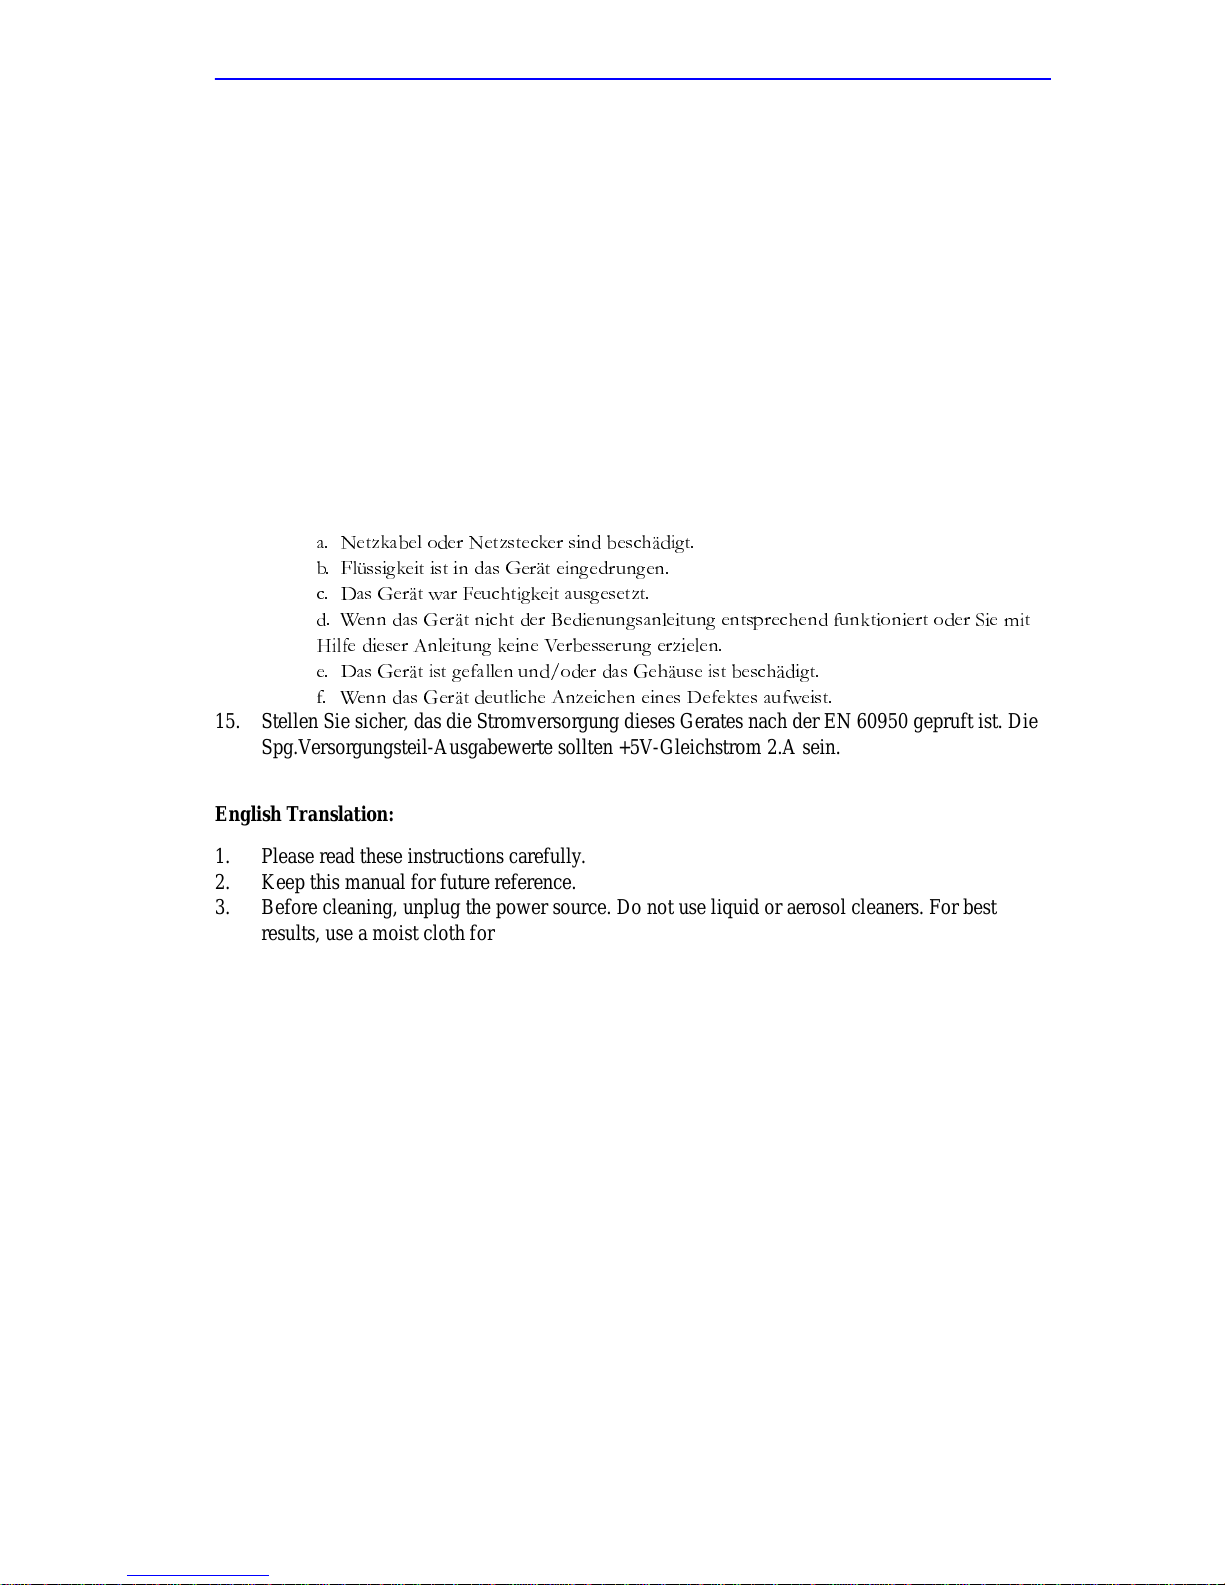
14. Wenn folgende Situationen auftreten ist das Gerät vom Stromnetz zu trennen und von einer
qualifizier ten Servicest e lle zu überprüfen:
D 1HW]NDEHORGHU1HW]VWHFNHUVLQGEHVFKlGLJW
E )OVVLJNHLWLVWLQGDV*HUlWHLQJHGUXQJHQ
F 'DV*HUlWZDU)HXFKWLJNHLWDXVJHVHW]W
G :HQQGDV*HUlWQLFKWGHU%HGLHQXQJVDQOHLWXQJHQWVSUHFKHQGIXQNWLRQLHUWRGHU6LHPLW
+LOIHGLHVHU$QOHLWXQJNHLQH9HUEHVVHUXQJHU]LHOHQ
H 'DV*HUlWLVWJHIDOOHQXQGRGHUGDV*HKlXVHLVWEHVFKlGLJW
I :HQQGDV*HUlWGHXWOLFKH$Q]HLFKHQHLQHV'HIHNWHVDXIZHLVW
15. Stellen Sie sicher, das die Stromversorgung dieses Gerates nach der EN 60950 gepruft is t. D ie
Spg.Versorgungsteil-Ausgabewerte sol lten +5V-Gleichstrom 2.A sein.
Englis h T ranslation:
1. Please read these instructions carefully.
2. Keep this manual for future reference.
3. Before cleaning, unplug the power source . Do no t use liq ui d or aerosol cleaners. For be st
results, use a moist clot h for cleaning.
4. The power jack should be close to the device and easily ac ce ssible.
5. Do not expose the devic e t o hum i d ity.
6. When setting up the dev ic e, ma ke su re it is located on a solid, even surfac e. Tilting and falls
may cause damage.
7. The ventilatio n ope nings are designed for air ci rc ulation, which pro tect s the device from
overheating. Make sure not to c ove r or block these openin gs.
8. When connecting to a power source, pay attention to the correct power values.
9. Do not put the power cable where peo ple can fall over it. Do no t put anything on the cabl e.
10. Pay attention to all notices and warnings on the device.
11. If you do not use the device for a longer while, unplug the power cord. This prevents damage in
case of power surges.
12. Make sure no liquids or any items get into the device through the ventilation openings.
13. Ne ver open the device. For reas ons of elect rical safet y, the device must on ly be opened by
authorized servic e pe rsonnel.
14. In the following situations, unplug the device from the powe r sourc e a nd ha ve it checked by a
qualified service station:
a. Power cord or power plug is damaged.
b. Liquid has gotten into the device.
c. The device was exposed to humidity.
iii

d. If the device does not function according to the operation manual, or you cannot improve its
condition with the help of the manual .
e. The device has been dropped and/or the casing is damaged.
f. If the devi ce shows clear signs of a defect.
15. Make sure that the power source of this device compl ie s with EN 60950. The power supply
output values should be +5V DC 2.4A.
The sound pressure level at the workplace according to DIN 45 635 Part 1000 is 70dB(A) or les.
Restrictions for EU/EFTA Countries to R&TTE Directive:
AUS B DK FIN
FDGRIRE
I LUX NL P
ESUK
CH
Important Notice:
Me m be r states in E U w ith rest rictive u se for this prod uct a re
crossed out !
Les états m e m b r es d e l'Union Euro pé enne avec une
utilisation r e strictive de ce produit sont rayé s !
Mitglied s s taa t en d er EU mit einges c h ränkten
Nutzungsrechten für dieses Produkt sind herausgestrichen
Gli Stati membri nella Comunità Europea (EU) con
restrizioni su ll'uso di que sti pro dotti s on o con tra sseg na ti di
seguito!
Low power radio LAN product operating in 2.4 GHz band
for Home and Office environments.
Notice Importante:
Produit réseau local radio basse puissance opérant dans la bande de fréquence
2,4GHz pour les environnements bureautiques et résidentielles.
Wichtige Mitteilung
Low Power FunkLAN Produkt für den Home- und
Office-Bereich, das im 2.4GHz Band ar be it et.
Nota Importante:
Apparati Radio LAN a bassa potenza, operanti a 2.4GHz, per ambienti
domestico ed ufficio.
- Belgie B Gebruik buiten gebouw alleen op kana le n 11 (2462 MHz) , 12
(2467 MHz), en 13 (2472 MHz).
Voor privé-gebruik buiten gebouw over publieke grond ov er
afstand kleine r dan 300m geen
registratie bij BIPT/IBPT nodig; voor gebruik over afstand grote r
dan 300m is wel registratie bij BIPT/IBPT nodig. V oor publiek
gebruik buiten gebo uw e n is licentie van BIPT/IBPT verplicht.
Voor registratie of licentie kunt u contac t op nemen met BIPT.
iv

- Belgium B For outdoor usage only channel 11 (2462 MHz), 12 (2467 MHz),
and 13 (2472 MHz) ar e al lowed.
For private usage outside buildings across public grounds over less
than 300m no special registration with IBPT/BIPT is required.
Registration to IBPT/BIPT is required for private usage outsi de
buildings across public grounds over more than 300m . A n IBPT/
BIPT licence is required for
public usage outside building. For registration and license please
contact IBPT/BIPT.
- Belgique B L’utilisation en extérieur est autorisé sur le canal 11 (2462 MHz),
12 (2467 MHz), et 13 (24 72 MHz).
Dans le cas d’une utilisation privée, à l’extérieur d’un bâtiment,
au-dessus d’un espace public, aucun enregistrement n’est nécessaire pour une distance de mo ins de 300m. Pour une distance
supérieure à 300m un enregistrement auprès de l’IBPT est requise.
Pour une utilisation publique à l’extérieur de bâtiments, une
licence de l’IBPT est re qui se. Pou r les enr egis tr eme nts et lice nc es,
veuillez contacter l’IBPT.
- France F: Bande de fréquence restreinte : seuls les canaux 10, 11, 12, 13
(2457, 2462, 2467, et 2472 MHz respectivement) doivent être util-
isés en France.
T oute utilisation, qu'elle soit intérieure ou extérieure, est soumise à
autorisation. Vous pouvez contact e r l'Autorité de Régulation des
Télécommuniations (http://www.art-telecom.fr
) pour la procédure
à suivre.
- France F: Restricted frequency ba nd: only channels 10, 11, 12, 13 (2457,
2462, 2467, and 2472 MHz r espectively) may be used in France.
License required for every installation, indoor and outdoor
installations. Please cont act ART for procedure to follow.
- Deutschland D: Anmeldung im Outdoor-Bereich notwending , ab er nicht genehmigungspflichtig. Bitte mit Händler die Vorgehen s w eise abstimmen.
- Germany D: License required for out door installations. Check wi th re sel ler for
procedure to follow
- Italia I: E' necessaria la concessio ne ministeriale anche per l'uso int erno.
Verificare con i rivenditori la pro ce dura da seguire.
L'uso per installazione in este rni non e' permessa.
- Italy I: License required for indoor use. Use with outdoor installations not
allowed.
v

- the Netherlands NL License required for outdoor installations. Check with reseller for
procedure to follow.
- Nederlands NL Licentie verplicht voor gebruik met buitenantennes. Neem contact
op met verkoper voor ju is t e procedure
Europe – EU Declaration of Conformity
Hereby ENTERASYS NetworksTM declares that thi s RoamAbout IEEE 802.11 PC Card is in
compliance with the essential requirement s and other relevant provisions of Dir ec ti ve 1999/5/EC,
Directive 89/336/EEC, and Directive 73/23/EEC.
TM
ENTERASYS Networks
direktiivin 1999/5/ EY, direktiivin 89/3 36/EEC ja direktiivin 73/23/EEC oleellisten vaatimusten ja
sitä koskevien näiden direktiivien muiden ehtojen mukainen.
vakuuttaa täten että RoamAbout IEEE 802.11 PC Card tyyppinen laite on
ENTERASYS Networks
TM
déclare que la carte PC RoamAbout IEEE 802.11 est conforme aux
conditions essentielles et aux dispositions relatives à la directive 1999/5/EC, la directive 89/336/EEC,
et à la directive 73/23/EEC.
vi

CONTENTS
CHAPTER 1 PREPARING FOR INSTALLATION
In This Chapter............................................................................1-1
Kit Contents.................................................................................1-1
Site Requirements and Specifications.........................................1-3
System Requirements .................................................. ..... 1-3
Hardware Specifications....................................................1-3
Electrical and Environmental Specifications......................1-4
Power Supply and Connector Specifications (World) ........1-5
CHAPTER 2 HARDWARE INSTALLATION
In This Chapter............................................................................2-1
Front and Back Panel..................................................................2-1
Front Panel LEDs ..............................................................2-2
Back Panel......................................................................... 2-2
Selecting the Installation Location............................................... 2-3
Installation ...................................................................................2-3
CHAPTER 3 SETTING UP TO USE THE ROAMABOUT R1
In This Chapter............................................................................3-1
Checking the Wireless PC Card..................................................3-2
Setting up your Computer............................................................ 3-3
Installing the TCP/IP Protocol in your PC..........................3-3
Installation ............................................................... 3-3
Setting TCP/IP to Work with the RoamAbout R1 .... 3-3
Dynamic IP Allocation via a DHCP Server ..............3-4
Manual IP Configuration ..........................................3-4
Verifying the TCP/IP Connection .............................3-4
Determining How your IP Address is Issued......................3-5
Windows 95/98/Me ..................................................3-5
Windows NT 4.0 ...................................................... 3-6
Windows 2000 .........................................................3-7
Macintosh ................................................................ 3-8
Disabling HTTP Proxy .......................................................3-9
Using Internet Explorer ............................................3-9
Using Netscape .......................................................3-9
vii

Obtaining IP Settings........................................................3-10
Windows 95/98/Me ................................................3-10
Windows 2000 .......................................................3-10
Windows NT ...........................................................3-11
Macintosh ..............................................................3-11
CHAPTER 4 ROAMABOUT R1 CONFIGURATION
In This Chapter ............................................................................4-1
Accessing the RoamAbout R1 Web Management.......................4-2
Configuring the RoamAbout R1...................................................4-3
Configuring the RoamAbout R1 for a Dynamic IP Address4-4
Configuring the RoamAbout R1 for a Static IP Address.....4-6
Configuring the RoamAbout R1 for PPPoE........................4-7
RoamAbout R1 Print Server ........................................................4-8
Installing the RoamAbout R1 Print Server..........................4-8
Configuring the RoamAbout R1 Print Server .....................4-8
Windows 95/98/NT ...................................................4-8
Windows 2000/Me ...................................................4-9
Macintosh ................................................................4-9
UNIX ......................................................................4-10
APPENDIX A CABLE AND PORT PIN-OUT ASSIGNMENTS
Ethernet Cable............................................................................ A-1
Specifications .................................................................... A-1
Twisted-pair Cable ............................................................ A-1
Straight-through Cable...................................................... A-2
Crossover Cable................................................................A-2
RJ-45 Port Pin Assignments....................................................... A-2
HPNA Cable......................................................................A-3
Specifications ........................... ............................... A-3
Wiring Conventions ................................................. A-3
Pin Assignments ..................................................... A-3
Serial Port Pin Assignments ....................................................... A-4
Serial Port to 9-Pin COM Port on PC ................................ A-5
Serial Port to 25-Pin DCE Port on Modem........................A-5
Serial Port to 25-Pin DTE Port on PC ............................... A-6
Printer Port Pin Assignments......................................................A-7
DB-25 Printer Port Pin Assignments .................................A-7
APPENDIX B TROUBLESHOOTING
viii

Chapter 1
Preparing for Installation
This chapter describes the pre-installation requirements and the RoamAbout R1
specifications. Before installing the RoamAbout R1, you must complete the following
tasks:
• Review the site requirements and specifications.
• Select the location to install the RoamAbout R1.
In This Chapter
Information in this chapt er is present ed as follows:
Topic Page
Kit Contents 1-1
Site Requirements and Specifications 1-3
System Requirements 1-3
Hardware Specifications 1-3
Electrical and Environmental Specifications 1-4
Power Supply and Connector Specifications (World) 1-5
Kit Contents
Inspect all cartons for shippi ng damage.After unpacking the RoamAbout R1, check the
contents of the box to ensure that you received the components shown in
descriptions are listed in
Representative.
Table 1-1. Report any discrepancies to your Enterasys
Figure 1-1. The
1-1

Figure 1-1: RoamAbout R1 Kit Contents
1
3
2
k
in
L
N1
LA
ity
tiv
c
A
N
A
W
N
LA
RW
W
P
3
4
Table 1-1: Kit Contents Description
# Description
5
etup
S
and
Installation
uide
G
2
6
6
1 RoamAbout R1 SOHO Access Poin t
RBTR1-AX (North America*)
RBTR1-AB (Europe*)
RBTR1-AK (UK*)
RBTR1-AU (Australia*)
2 Power adapter (5V, 2.4A)
3CAT5 Cable
4 Four rubber feet
5 RoamAbout R1 SOHO Access Point Setup and Installation Guide
(this document )
6 RoamAbout R1 SOHO Access Point V1.0 Kit CD-ROM
*Important:
To meet the Regulatory requirements for your country, please be
sure you only in stall the RoamAbou t R1 SOHO Access Point la beled with the
correct model number for your country. For example, if you are installing the
RoamAbout in the USA, only install the RoamAbout product labeled
RBTR1-AX.
1-2

Site Requirements and Specifications
Please review the site requirements and specifications before you install the RoamAbout
R1.
System Requirements
You must have the following mi ni mum requirements:
• Internet access from your local telephone company or ISP using an xDSL modem,
Cable modem, ISDN TA, or PSTN analog modem. Y ou may also have access over the
telephone system to an analog modem at another site.
• A PC using a fixed IP address or dynamic IP address assignment via DHCP , as well as
a Gateway server address and DNS server address from your service provider.
• For wired L AN connecti on, you need a co mputer equip ped with a 10 Mb ps, 100 Mbps,
or 10/100 Mbps Fast Ethernet card, or a USB-to-Ethernet converter. For wireless LAN
connections, each computer must have an 11 Mbps wireless adapter.
• A RoamAbout PC Card for each co mputer. The RoamAbout R1 supports up to 32
users.
• TCP/IP network protocol installed on each PC that needs to access the Internet.
• A Java-enabled Web browser, Microsoft Internet Explorer V5.0 (or higher) or
Netscape Communicator V4.0 (or higher) installed on one PC at your site to configure
the RoamAbout R1.
Hardware Specifications
The hardware and port (Interface) speci fi cations are listed in Table 1-2 and Table 1-3.
Table 1-2: RoamAbout R1 Physical Specifications
Parameter RoamAbout R1
Width 188 mm. (7.41 in.)
Depth 99 mm. (3.90 in.)
Length 334 mm. (13.16 i n.)
Weight 1.15 kg (2.53 lbs.)
1-3

Table 1-3: RoamAbout R1 Port Specifications
Interface Description
WAN 10Base-T, one RJ-45 port
Serial, one RS232 DB-9 connector
LAN 10BASE-T/100BASE-TX
Three RJ-45 Ports
WLAN Standard: IEEE 802.11b, Direct Sequence Spread Spectrum
(DSSS)
Transmissio n Rate: 11 Mbps, aut omatic fallback to 5.5, 2, or
1 Mbps
Maximum Chan nels: US/Canada: 11, Europe (ETSI): 13
Range Indo ors : U p to 16 0 ft . (50 m)
Range Outdoors: Up to 480 ft. (150 m)
Frequen c y: US/Canada/ Eur o pe : 2.400-2.483 5 GH z
Sensitivity: 1, 2, 5.5 Mbps: -80 dBm; 11 Mbps: -76 dbm
typical
Modulation: CCK, BPSK, QPSK
Encryption: 40-bit/128-bit WEP
Maximum Clients: 32
Printer Parallel
One DB-25 printer port
Electrical and Environmental Specifications
Ensure that the environmental and electrical specifications are within the ranges described
Table 1-4.
in
Table 1-4: Environmental Specifications
Parameter Description
Operating
Environment:
Temperature 0°C to 50°C (32°F to 122°F)
Relative humidi ty 5 % to 95% (no n-c o nd ensin g)
Altitude Sea level to 4000 meters (13,123 feet) above sea
level at 50°C (122°F)
Air flow Convect ion cooled
Shock
1-4
Amplitude 10G , shock spectrum
on each axis
1
/2 sine, 3 sh ocks

Parameter Description
Vibration 10 Hz to 150 Hz, 20 sw e ep s/a xis @ 0.5G, and 5
Hz to 50 Hz up to 5G
Non-operating
Environment:
Packaged Drop 38 inches from floor
Shock -
Transportation
(Packaged)
4,000 bumps @ 10G
Power Supply and Connector Specifications (World)
The RoamAbout R1 power and connector specificati ons are listed in Table 1-5. These
specifications are provided for customers who want to provide th eir own site operating
power for the RoamAbout R1.
Enterasys assumes no responsibility if the specifications set forth be low are not followed.
You must use the power supply included with this product. Power supply
outputs and current ratings should not exceed the stated minimum voltages
and should not fall below the stated minimum voltages.
Table 1-5: RoamAbout R1 Power Supply Specifications (World)
Parameter Value
Power Connector Coaxial Type Power Plug that mates with
Switchcra ft RAPC712 Jack (Switch cra f t 76 0 or
equivalent).
Dimensions:
Power Consump tio n 10 Watts max. @100 to 240 VAC
Voltage I nput
Heat Dissipation 34.1 BTU/hr. max. @ 100 to 240 VAC
• Inside Diameter: 2.5 mm. (0.100 inches)
• Outside Diameter: 5.5 mm. (0.218 inches)
• Barrel Length: 9.5 mm. (0.375 inches)
• 5V DC (2.0A)
• Polarity Independent
1-5


Chapter 2
Hardware installation
This chapter provides the RoamAbout R1 LED information and the device connection
instructions.
In This Chapter
Information in this chapter is presented as follows:
Topic Page
Front and Back Panel 2-1
Front Panel LEDs 2-2
Back Panel 2-2
Selecting the Installation Location 2-3
Installation 2-3
Front and Back Panel
The RoamAbout R1 front panel and back panel are shown in Figure 2-1.
Figure 2-1: Front and Back Panel
Front Panel
LAN1PWR WLAN WAN 2 3
Link
Activity
RESET
PRINTER COM
Back Panel
WAN
1
23
5V
2A MAX
2-1

Front Panel LEDs
The front panel of the RoamAbout R1 provide s indic ator LEDs (Ligh t Emit tin g Diodes)
for easy monito ring and troubleshooting. The LEDs are described in
Table 2-1: LEDs
LED Condition Status
Table 2-1.
Power
On The RoamAbout R1 is receiving power.
(Green)
WLAN
(Green)
On The WLAN Port established a valid wireless
connection.
LAN:
Link
(Green)
Activity
(Amber)
On The indicated LAN port es tablished a valid
network connection.
Flashing The indicated LAN port is transmitting or
receiving traffic.
Back Panel
The back panel provides connections for power and to the wired devices.
Item Description
LEDs Power, WLAN, WAN and LAN port status indicators.
Wireless
Antennas
Dual antennas provide optimal reception by dynamically
choosing the best antenna for each client.
Reset Button Use this button to reset the power and restore the default
factory settings. Press the button in for 5 seconds to reset to
the factory default settings.
Printer Port Parallel port (25-pins, D-type, female). Connect the shared
printer to this port.
COM Port Serial port (9-pins, D-type, male). Connect your ISDN TA or
56K analog modem to this port.
WAN Port WAN port (RJ-45). Connect your Cable modem, xDSL
modem, or an Ethernet rout er to this port.
LAN Ports Fast Ethernet ports (RJ-45). Conn ect devices on your local
area network to these ports (such as a PC , hub or switch).
Power Inlet Connect the included power adapter to this inlet.
WARNING: The included power adapter is DC
5V/2A. Using the wrong type of power a dapter
may cause damage to the unit.
2-2

Selecting the Installation Location
You can place the RoamAbout R1 in any convenient location, complying with the site
requirements and the following:
• Keep the RoamAbout R1 away fro m heating devices
• Do not place the RoamAbout R1 in a dusty or wet environment.
Refer to for
Appendix A, for cable and port-pin assignments.
Installation
This section describes how to connect devices to the RoamAbout R1.
• Do not apply power to the RoamAbout R1 until instructed to do so.
• Do not plug a phone jack connector into any RJ-45 por t. This may dama ge
the RoamAbout R1. Use only twisted-pair cables with RJ-45 connectors
that conform with FCC standards.
NOTE
1. Connect to the LAN:
• Use 100-ohm shielded or unshielded twisted-pair cable with RJ-45
connecto rs fo r all co nnect ions . Use catego ry 3 ,4, or 5 for conn ection s that
operate at 100 Mb ps .
• Make sure each twisted-pair cabl e does not exceed 100 meters (328 feet)
a. Wired: Y ou can connect the RoamAbout R1 to a computer, hub, or a switch. Run
the Ethernet cable from one of the LAN ports on the back panel of the
RoamAbout R1 to the computer ‘s network adapter or to another device. Connec t
computers directly into the RoamAbout R1 LAN ports 1 to 3 on the back panel.
If you have more than three comput ers to connect with cable s, co nnect a hub or
a switch (using its uplink port) to one of the ports. Then connect additional
computers to that dev ice.
b. Wireless: You can connect the RoamAbou t R1 to you r PC usi ng a PC Card.
Position both antennas on the back of the RoamAbout R1 into the desired
positions. For more effectiv e coverage, position one antenna along the verti cal
axis and the other along the horizontal axis. The antennas provide more effective
coverage when positioned along alternate axes. Ensure that the computer is
within radio range of the RoamAbout R1.
2. Connect to the WAN: Prepare the Ethernet cable for connecting the RoamAbout R1
to a cable/xDSL modem or Ethernet Router. Prepare a serial cable for connecting the
RoamAbout R1 to an ISDN TA or PSTN modem.
a. Connect your cable, ASDL/xDSL modem, to the WAN port on the back panel.
2-3

b. Connect your external dial-up modem or an ISDN modem to the RoamAbout R1
COM port on the back panel.
3. Connect to a printer: Ensure that you installed the RoamAbout R1 Print Server
located on the CD-ROM. To share a printer between computers, connect it to the
RoamAbout R1 Printer po rt o n t he ba c k pa ne l u sing a stand ar d parall el prin te r cab le.
Or, if your printer already has an Ethernet Card, you can plug it into ports 1, 2 or 3 on
the RoamAbout R1 back panel.
4. Apply power to the RoamAbout R1: Connect the power adapter to the RoamAbout
R1. Plug the power adapter into the power jack. Verify that the Power LED is on
(green).
5. Go to
Chapter 3 set up your computer to configure the RoamAbout R1.
2-4

Chapter 3
Setting up to use the RoamAbout R1
This chapter provides the information to configure your Windows 95, 98, 2000, Me,
Windows NT 4.0, and Mac OS 7.x and 8.x operating systems to use the RoamAbout.
Refer to the appropriate operating syst em section for instructions.
After the hardware setup is complete as described in
following before you can use the RoamAbout R1:
• Ensure that each wireless PC Card is properly installed in each computer, along with
its associated drivers and utilities.
NOTE
• Configure your computer to connect to the Roam About R1.
RoamAbout PC Cards are sold separate ly . Con tact your Enterasys
representative for more information.
Chapter 2, you need to perform the
In This Chapter
Information in this chapter is presented as follows:
Topic Page
Checking the Wireless PC Card 3-2
Setting up your Computer 3-3
Inst alling th e TCP/IP Protocol in your PC 3-3
Setting TCP/IP to Work with the RoamAbout R1 3-3
Verifying the TCP/IP Connection 3-4
Determining How your IP Address is Issued 3-5
Wi nd ow s 95/98/Me 3-5
Windows NT 4.0 3-6
Windows 2000 3-7
Macintosh 3-8
3-1

Topic Page
Disabling HTTP Proxy 3-9
Obtaining IP Settings 3-10
Win d ow s 95/98 / Me 3 -10
Windows 2000 3-10
Windows NT 3-11
Macintosh 3-11
Checking the Wireless PC Card
Make sure each PC Card is properl y installed, along wi th all associated drivers and
utilities. Refer to the RoamAbout 802.11 PC Card Drivers and Utilitie s documentation for
complete setup information. You can download the information from our web site,
www .ent erasys.com/wirele ss.You may need to change certain settings for yo ur PC Card to
communicate with the RoamAbout R1.
Use the following values :
• Network Type: Peer-to-Peer
• Wireless Network Name: default
• Channel: 6 for North America; 7 for European (ETSI)
• WEP Security: Disable
NOTE
Enterasys Networks recommends establishing your wired
connections to the RoamAbout R1 before setting up your wireless
connections. Refer to
Chapter 2.
3-2

Setting up your Computer
You must configure your computer to use the RoamAbout R1. This section describes how
to perform the following:
1. Install the TCP/IP Protocol in your PC
2. Determine how your ISP issues your IP Address
3. Disable HTTP Proxy in your browser
4. Obtain your IP settings
Installing the TCP/IP Protocol in your PC
If you do not have the TCP/IP Protocol installed on the client PC’s you need to install it
and configure it to use the RoamAbout R1.This section describes how to install and
configure the TCP/IP Protocol.
Installation
Perform the following steps to install the TCP/IP Protocol on your PC:
1. Click on Start and sel ec t Setting s-->Co ntrol Panel.
2. Double-click on the Network icon, and select the Configuration tab.
3. Select the Protocol button and click on Add.
4. Select Microsoft from the list of manufacturers, and TCP/IP fro m the list of Netwo rk
Protocols.
5. Click on OK to complete the installation.
6. Restart your computer.
Setting TCP/IP to Work with the RoamAbout R1
Perform the following steps to setup TCP/IP:
1. Click on Start and sel ec t Setting s-->Co ntrol Panel.
2. Double-click on the Network icon, and select the Configuration tab.
3. Select the TCP/IP line that was assigned to your network card.
4. Click on the Properties button to set the TCP/IP Protocol to work with the
RoamAbout R1.
5. You can dynamically assign TCP/IP address settings to a client (see
Allocation via a DHCP Server
address settings (see
Address is 192.168.2.1.
Dynamic IP
), or you can manually configure a client with
Manual IP Configuration). The RoamAbout R1 default IP
3-3

Dynamic IP Allocation via a DHCP Server
Perform the following steps to dynamically assign TPC/IP address settings to a client:
1. Select the IP Address tab in the TCP/IP Properties dialog box.
2. Select Obtain an IP address automatically.
3. Select the DNS Configuration tab.
4. Select Disable DNS.
5. Click on OK.
6. Restart your computer.
Manual IP Configuration
Perform the following steps to manually assign TPC/IP address settings to a client:
1. Select the IP Address tab in the TCP/IP Properties dialog box.
2. Select Specify an IP address. Select an IP Address based on the default network
192.168.2.X (where X is between 1 and 254), and use 255.255.255.0 for the subn et
mask.
3. Select the Gateway tab.
4. Enter the IP Address of the RoamAbout R1 (the default is 192.168.2.1), and click on
Add.
5. Select the DNS Configuration tab.
6. Enter the IP Address of the RoamAbout R1 (the default is 192.168.2.1), and click on
Add.
DNS requests are automatically relaye d to the DNS server prov id ed by your ISP.
Otherwise, add specific serve r s in t o t he DNS Server Search Order field and click Add.
Verifying the TCP/IP Connection
After you inst all the TCP/IP co mmunication pr otocol and conf igure an IP addr ess in the
same network with the RoamAbout R1, you can use the Ping command to check if your
computer is successfully connected to the RoamAbout R1. The following example shows
how the Ping procedure can be executed in an MS-DOS window.
ping 192.168.2.1
If the following messa ges appear:
Pinging 192.168.2.1 with 32 bytes of data:
Reply from 192.168.2.1: bytes=32 time=2ms TTL=64
A communication link between your computer and the RoamAbout R1 has been
successfully established.
3-4

If you get the following messages:
Pinging 192.168.2.1 with 32 bytes of data:
Request timed out.
There may be somethin g wrong in yo ur in stalla tio n pro c edu re. Check the follo win g item s
in sequence:
1. Check the Ethernet cable to ensure that it is correctly connected between the
RoamAbout R1 and your computer. The LAN LED on the RoamAbout R 1 and the
Link LED of the network card on your computer must be on.
2. Ensure that TCP/IP proper ly configured on your computer. If th e IP address of the
RoamAbou t R1 is 192. 168.2 .1 , the IP add ress o f yo ur PC must b e f rom 19 2.16 8. 2.2 -
192.168.2.254 and the default gateway must be 192.168.2.1 .
Determining How your IP Address is Issued
You need to determine how your ISP issues your IP address . M a ny ISP’s issue these
numbers automatically using a ne tworking technology known as Dynamic Host
Configuration Protocol, or DHCP. Other ISP’s specify the IP address and associated
numbers, which you must enter manually. This is also known as a static IP address. How
your ISP assigns yo ur IP address determi nes how you confi gure your computer. Refer to
your operating system section for instructions.
NOTE
Windows 95/98/M e
Perform the following steps to det ermine how your I P address assignmen t i s determined
and configure the TCP/IP settings on Windows 95/98/Me:
1. From the Windows desktop, click the Start button. Choose Settings, then click
Control Panel.
2. From Control Panel, double-click the Network icon.
3. Select the Configuration tab, then double-click the TCP/IP that is listed with your
network card.
4. Select the IP Address tab.
If Obtain an IP address automatically is already selected, your computer is already
The following instructio ns may not completel y match your operating system.
configured f or DH C P. Cl ic k Cancel to close each window, and go to the
HTTP Proxy
section of this document.
Disabling
3-5

5. Locate your IP address and Subnet Mask. Record th em here:
IP Address___ ____________________ ____________________ __________
Subnet Mask____________________________ _______________________
6. Click the Gateway tab and record the numbers listed under Inst alled gateway s
here:__________________________________________________________
______________________________________________________________
______________________________________________________________
______________________________________________________________
7. Click the DNS Configuration tab. Locate the DNS servers liste d unde r DNS Server
Search Orde r. Record any l isted addresses
here:_________________________________________________________
_____________________________________________________________
_____________________________________________________________
_____________________________________________________________
8. Click the IP Address tab, and then click Obtain an IP address automatically. Click
OK.
9. Windows may need your Windows 95/98/Me operating system CD to copy some files.
When the copying is complete, you are prompted to restart your system. Click Yes and
your computer will shut down and rest art .
10. Go to the
Obtaining IP Settings section in this chapter.
Windows NT 4.0
Perform the following steps to det ermine how your I P address assignmen t i s determined
and configure the TCP/IP settings on Windows NT:
1. From the Windows desktop click Start, then Settings, and Control Panel.
2. Double-click the Network icon.
3. Select the Protocols tab.
4. Double-click TCP/IP Protocol.
5. Select the IP Address tab.
6. In the Adapter drop-down list , ensure that your Ethernet adapter is selected.
If Obtain an IP address automatically is already selected, your computer is already
configured f or DH C P. Cl ic k Cancel to close each window, and go to the
HTTP Proxy
section of this document.
Disabling
7. In the TCP/IP Properties dialog box, click the IP address tab to locat e your IP
address, subnet Mask , an d default gateway. Record them here:
IP Address___ ____________________ ____________________ _________
Subnet Mask____________________________ ______________________
Gateway_____________________________________________________
3-6

8. Click the DNS tab to see the primary and secondary DNS servers. Record the servers
here:
_____________________________________________________________
_____________________________________________________________
9. After writing down your IP settings, click the IP address tab. Select Obtain IP
address automatically and clic k OK. C lick OK again to close the Network window.
10. Windows may copy some files. When the copying is complete, you are prompted to
restart your system. Click Yes and your computer will shut down and restart.
11. Go to the
Obtaining IP Settings.
Windows 2000
Perform the following steps to det ermine how your I P address assignmen t i s determined
and configure the TCP/IP settings on Windows 2000:
1. From the Windows desktop, click the Start button. Choose Settings, then click
Control Panel.
2. Double-click the Network & Dial-Up Connections icon.
3. Double-click the icon that corresponds with the connection to your RoamAbout R1.
4. Click Properties.
5. Double-click Inter n et Pr ot o c ol (T CP/I P) .
6. All then information you need to record is in the In ternet Protocol (TCP/ I P )
Properties dialog box. Record the information here:
_____________________________________________________________
_____________________________________________________________
_____________________________________________________________
_____________________________________________________________
If Obtain an IP address automatically and Obtain DNS server address
automatically are already selected, your computer is already configured for DHCP.
Click Cancel to close each window, and go to the
of this docum e nt.
7. Select Obtain an IP address automatically and then select Obtain DNS server
address automatically. Then click OK.
8. Click OK, or Close, to clo se each window.
9. Go to the
Obtaining IP Settings section in this chapter.
Disabling HTTP Proxy section
3-7

Macintosh
Perform the following steps to det ermine how your I P address assignmen t i s determined
and configure the TCP/IP settings on Macintosh:
1. Pull down the Apple Me nu . Cl ic k Con tr ol Pa ne ls an d se le c t TC P/IP.
2. In the Connect Via: field, select Ethernet or Built-In Ethernet (based on your MAC
Address).
3. If Using DHCP Server is already selected in the Configure field, your computer is
already configured for DHCP. Close the TCP/IP dialog box, and go to the
HTTP Proxy
section of this document.
Disabling
4. If you are using a static IP Address, select Manually in the Configure field.
a. Enter 192.168.123.x (where x is any number between 1 and 253). This number
must be different for each computer on the network.
b. Enter 255.255.255.0 in the Subnet Mask field.
c. Enter 192.168.123. 254 on the Rou ter Address fie ld. This is the R oamAbout R1
default IP Address.
d. Enter the two domain nam e server addresse s (provid ed by you r ISP) in the N ame
Server field.
e. Optio na l: En ter starti ng and e ndi ng do main na m es as instru cted by your serv ic e
provider.
f. Close the dialog box, and then click on Save.
g. Go to
Disabling HTTP Proxy.
3-8

Disabling HTTP Proxy
You need to verify t hat the HTTP Proxy f eature of your web br owser is disable d. This
allows you to view the RoamAbout R1 configurat io n pages. The following st eps are for
Internet Explorer and for Netscape.
Using Internet Explore r
Perform the following steps to disable HTTP Proxy:
1. Open Internet Explorer and click on the Stop button. Click on Tools, then Internet
Options.
2. In the Internet Options window click on the Connections tab.
3. Click on the LAN Settings... button.
4. Clear all check boxes.
5. Click on OK, and then click on OK again to close the Internet Options window.
6. Go to the
Obtaining IP Settings section of this document.
Using Netscape
Perform the following steps to disable HTTP Proxy:
1. Open Netscape and click on the Stop button. Click on Edit, then click on
Preferences...
2. In the Preferences window, under Category, double-click on Advanced, then click
on Proxies.
3. Select Direct connection to the Internet, then click on OK.
4. Repeat these steps for each computer connected to your RoamAbout R1.
5. Go to the
Obtaining IP Settings section of this document.
3-9

Obtaining IP Settings
You need to obtain new n etwork se ttings after yo u c onfigur ed yo ur c omputer t o co nnect to
the RoamAbout R1. By releasing old IP settings and renewing them with settings from
your RoamAbout R1, you also verify that your computer is configured correctly.
Windows 95/98/M e
Perform the following steps to obtain new IP settings on Windows 95/98/Me:
1. From your system task bar, click on Start-->Run...
2. Type WINIPCFG in the Run dialog box, then click on OK. It may take a minute or
two for the IP Configuration window to appear.
3. From the dro p- down menu, select your network car d. Click on Release and then on
Renew. Verify that your IP address is n ow 192.168.2.x xx, your Subnet Mask is
255.255.25 5.0, and your Defa ult Gateway is 192.168.2.1. These values confirm that
your RoamAbo u t R1 is functi oning.
4. Click on OK to close the IP Configuration window.
Your compu te r is now co nfigured to conne ct to yo ur R oa m Abo ut R1.
5. Go to
Chapter 4, RoamAbout R1 Configuration.
Windows 2000
Perform the following steps to obtain new IP settings on Windows 200 0:
1. From the Wi ndows desktop, cli c k on Start-->Programs-->Accessories, and select
Command Prompt.
2. In the Command Prompt window, typ e IPCONFIG /RELEASE and press th e
<ENTER> key.
3. Type IPCONFIG /RENEW and press the <ENTER> key. Ver ify that your IP
address is now 192.168.2.xxx, your Subnet Mask is 255.255.255.0 and your Default
Gateway is 192.168.2.1. These values confirm that your RoamAbout R1 is
functioning.
4. Type EXIT and press <ENTER> to close the Command Prompt window.
Your compu te r is now co nfigured to conne ct to yo ur R oa m Abo ut R1.
5. Go to
Chapter 4, RoamAbout R1 Configuration.
3-10

Windows NT
Perform the following steps to obtain new IP settings on Windows NT:
1. From the Windows desktop, click the Start button, then Programs, and Command
Prompt.
2. In the Command Prompt window, typ e IPCONFIG/RELEASE and p re ss the
<ENTER> key.
3. Type IPCONFIG/RENEW and press the <ENTER> key. Verify that your IP address
is now 192.168.2.xxx, your Subnet Mask is 255.255.255.0, and your Default Gateway
is 192.168.2.1 . T hes e va lu e s con f irm that yo ur Roa m Abo ut R1 is functioning.
4. Type EXIT and <ENTER> to close the Command Prompt win dow.
Your compu te r is now co nf i gu r e d to co nn e ct to yo ur Roa m A bo ut R1.
5. Go to
Chapter 4, RoamAbout R1 Configuration.
Macintosh
Perform the following steps to obtain new IP settings o n Macintosh:
1. Select Control Panels and then TCP/IP from the Apple Menu .
2. In the TCP/IP window, your new settings will be shown. Verify that your IP address
is now 192.1 68.2.xx x, your Subne t Mask is 255.25 5.255.0 an d your Default Gatewa y
is 192.168.2.1 . T hes e va lu e s con f irm that yo ur Roa m Abo ut R1 is functioning.
3. Close the TCP/IP window.
Your compu te r is now co nf i gu r e d to co nn e ct to yo ur Roa m A bo ut R1.
4. Go to
Chapter 4, RoamAbout R1 Configuration.
3-11


Chapter 4
RoamAbout R1 Configuration
After you configure your computer and retrieve your new network settings from the
RoamAbout R1 as described in
settings for your LAN. The RoamAbout R1 is managed through a web interface. The
following sections provid e basic configura tio n information. Refer to the RoamAbout R1
Web Management help and the RoamAbout R1 SOHO Access Point User’s Guide, located
on the CD, for advanced configuration information.
In This Chapter
Information in this chapter is presented as follows:
Topic Page
Accessing the RoamAbout R1 Web Management 4-2
Chapter 3 you need to configure the RoamAbout R1
Configuring the RoamAbout R1 4-3
Configuring the RoamAbout R1 for a Dynamic IP
4-4
Address
Configuring the RoamAbou t R1 for a S tati c IP Addr ess 4-6
Configuring the RoamAbout R1 for PPPoE 4-7
RoamAbout R1 Print Server 4-8
Installing the RoamAbout R1 Print Server 4-8
Configuring the RoamAbout R1 Print Server 4-8
4-1

Accessing the RoamAbout R1 Web Management
Perform the following steps t o access the RoamAbout R1 manag ement pages:
1. Open your web browser (i.e. Internet Explorer or Netscape Navigator) and click on the
stop button.
2. In the Address field type http://192.168.2.1 and press <ENTER>. The RoamAbout
R1 Login screen appears.
3. Enter the default password of password in the passwo r d field. The RoamAbout R1
web console management Main page appears. See Figure 4-1.
NOTE
log out of the cu rrent session on the system before you can manage
the RoamAbout R1 from a different system.
The Web Management session automatically logs you out after 5
minutes of idle time. You mu st log back into tha t managemen t station
and log out before you can manage the RoamAbout R1 from any
other management station.
Figure 4-1: Main Page
Only one management session can be logged in at a time.You must
4-2

Configuring the RoamAbout R1
Perform the following steps to configure the RoamAbout R1:
1. Click on Setup in the Main page.
The RoamAbout R1’s automated setup process takes you through each step for setting
up your RoamA bo ut R1.
2. Click on Start to start the configur a tio n.
NOTE
security of your network.
3. In the Change Password screen, enter your current password in the Current
Password field. If you did not change the password, the default password is
password. Choose a password for your Roam About R1 and enter it in the next two
fields, New Password and Re-Enter Password for Verification.
4. Click on SAVE when finished.
5. Select your time zone from the list and click on SAVE.
6. Use the LAN page to configure the LAN (Local Area Network) settings of your
RoamAbout R1. These setting s will only be vi sible to your local network a nd not to
the Internet.
a. In most appli cations, you should not chang e the IP address from the default
(192.168.2.1). If you are implementing your RoamAbout R1 into an existing
network, you may need to change it to match you r current addressing scheme.
b. By using the RoamAbout R1’s built-in DHCP (Dynamic Host Configuration
Protocol) server you are allowi ng the RoamAbo ut R1 to hand le all the IP
addressing on your Local Area Network (LAN). If you have a server on your
network that requires a static IP address, you may still use the DHCP server and
manually assign a static IP address to your server.
Enterasys Networks recommends chan ging the password for the
Enterasys Networks recommends leaving the DHCP Server enabled. If you want
to handle all the IP addressing on your network, click disable.
c. There is usually no need to change the IP addres s poo l.
7. Click SAVE when finished.
4-3

The LAN side of your RoamAbout R1 is now con f igured. But you must still configure it
to connect to the Internet. There are three different general conf igurations for high-speed
Internet connections. You need to know about your Internet connection to determine
which configuration to use. Much of what you need to know has already been recorded in
your IP settings from earlier steps.
Here are some guidelines to determ ine which confi gur ation you shoul d use:
• If you co nnect to the Intern et u sing a C able Modem , your I SP pr obably u ses DHCP to
issue an IP address to you. If you use a Cable Modem or you know you use a dynamic
IP address, go to
Address
• If you connect to the Internet using a DSL Modem, your ISP probably requires you to
manually ente r your TCP/IP settings. If you have a DSL connection or if you know
you use a static IP address, go to
.
IP Address
• If you connect to the Internet using a DSL Modem and you use a login name and
passwor d, yo ur ISP use s PPP oE. I f your ISP requ ires a login nam e and a pas sword or
you know your I SP uses PPPoE, go to
PPPoE
.
Configuring the RoamAbout R1 for a Dynamic IP
Configuring the Roam About R1 for a Static
.
Configuring the RoamAbout R1 for
Configuring the RoamAbout R1 for a Dynamic IP Address
Perform the following steps t o configure the RoamAbout R1 for a dy namic IP address:
1. Click on WAN in the Main page.
2. Click on the Dynamic IP address radio butto n, and t hen cli ck Mor e Configur ation .
The Host Name is optional, but may be required by some ISP’s. The default MAC
address is set to the WAN’s
when registering
You can use the Clone MAC Address button to copy the MAC address of the
Ethernet Card installed by your ISP (in your PC) and replace the WAN MAC address
with this MAC address.
If you subscribe to an @Home cable service, your computer probably requires a Host
Name to obtain an IP address from the @Home network.
3. If you have a host name provided by your ISP (i.e. CX-1234-56789) enter it in the
Host Name field.
Some ISP’s register the MAC Address of your network card. A MAC (Media Access
Control) Address is a unique identification number (in hexadecimal digits) given to
each networking device. Once your MAC address is registered, the ISP’s server will
verify that the MAC address you ar e connecting with matches the one that’s
registered. If i t does not match, you cannot connect .
for Internet service, and do not change it unless required by your ISP.
physical interface on the RoamAbout R1. Use this address
4-4

The RoamAbout R1’s MAC Address will not be the same as your network card’s
address—and therefore will not be the same as the address that your ISP has
registered—so you may need the R oa m About R1 to clone the addre s s fro m yo ur
network card. Then the ISP will find a MAC Address that matches the one they have
recorded.
4. If you need to clone the MAC Address from your network card, click on Clone MAC
Address. The MAC Address field disp l ays the new address.
5. Click on SAVE when finished.
A Domain Nam e Serve r (DNS) is like an ind ex of IP address es and We b addre sses. If
you type a Web address into your browser, such as www.whitehouse.go v, a DNS
server will find that name in its index and find the matching IP address:
198.137.240.92. Most ISP’s provide a DNS server for speed and conv eni ence. Since
you are conn ectin g to th e In te rnet with dynamic IP settin gs, it’s likely that your DNS
servers are also provided d ynamically.
6. If you are connecting t o the Internet with a dynamic IP add r ess, you probably do not
need to ente r anything here. However, if there is a DNS server that you would rather
use, enter the DNS server address es i n t he spaces provided.
___________________________________________________________
___________________________________________________________
_____________________________________________________________
7. Click on SAVE when finished.
Many ISP’s use modems that automatically configur e th emselves. Sometimes
connection i nformation is stored on the modem and needs to be updated. You may
need to shut down and restart your modem after the configured is complete.
8. Restart your cable modem by removing the pow er, waiting a few seconds, and then
reconnecting it.
The configuration is complete and your RoamAbout R1 is now connected to the
Internet. There are also some advanced configuration options that may be configured,
but changing these options is not recommended unless needed.
For instructions for the advanced configuration options, refer to the RoamAbout R1
SOHO Access Point User’s Guide located on the CD-ROM.
4-5

Configuring the RoamAbout R1 for a Static IP Address
Perform the following steps to con f igure the RoamAbout R1 for a static IP address:
1. Click on WAN in the Main page.
2. Click on the Static IP Address radi o b ut t on , a nd th e n clic k on Mo re Co nfi gur a tio n.
3. Enter the IP address, subnet mask, and gateway provided to you by your ISP in t he
appropriate fields. You recorded these numbers earlier when you config ured your
computer to connect to the RoamAbout R1.
4. Click SAVE when finished.
A Domain Name Server (DNS) is like an index of names and Web addresses. If you
type a Web address into your browser, such as www.whitehouse.gov, a DNS se rver
will find that name in it’s index and find the match ing IP address: 198 .137.240.92 .
Most ISPs provide a DNS server for speed and convenience. Since you are connecting
to the Internet with static IP settings, it’s likely that your ISP has also provided DNS
server addresses.
5. Enter the DNS server address(es) in t he sp aces provided.
___________________________________________________________
___________________________________________________________
____________________________________________________________
6. Click SAVE when finished.
Many ISP’s use modems that automatically conf ig ure. So metim e s conne ctio n
information is stored on the modem and needs to be updated. You may need to shut
down and restart your modem after the configuration is complete.
7. Restart your modem by removing the power, waitin g a f e w seconds, and then
reconnecting it.
The configuration is complete and your RoamAbout R1 is now connected to the
Internet. There are also some advanced configuration options that may be configured,
but changing these options is not recommended unless needed. For instructions for the
advanced configuration options, refer to the RoamAbout R1 SOHO Access Point
User’s Guide located on the CD.
4-6

Configuring the RoamAbout R1 for PPPoE
Perform the following steps to configure the RoamAbout R1 for PPPoE:
1. Click on WAN in the Main page.
2. Click on the PPP ov er Eth ernet radio butt on, and t hen clic k on More Co nfiguration.
3. Enter the User Name an d Pa ss word required by yo ur I SP in the ap pr o p r iat e f ie lds .
Enter the password again for verification in the Please retype password field.
4. If your ISP has pro vide d you wi th a Service Name enter it in the Service Name field,
otherwise, leave i t blank.
5. Click SAVE when finished.
6. If you are connecting to the Internet through PPPoE, you probably do not need to enter
anything here. However, if there i s another DNS server that you would rather use,
enter the DNS server addresse s in th e spaces provided.
7. Click SAVE when finished.
Many ISP’s use modems that automatically conf ig ure. So metim e s conne ctio n
information is stored on the modem and needs to be updated. You may need to shut
down and restart your modem after t he configured is complete.
8. Restart your m od em by r em o vin g th e p ow e r , w ai t a f ew s e co nd s , and then reconn e ct
the power.
The configuration is complete and your RoamAbout R1 is now connected to the
Internet. There are also some advanced configuration options that may be configured,
but changing these options is not recommended unless needed. For instructions for the
advanced configuration options, refer to the RoamAbout R1 SOHO Access Point
User’s Guide located on the CD.
4-7

RoamAbout R1 Print Server
Use the RoamAbout R1’s built-in prin t server to conn ect you r printe r to the RoamAbou t
R1, and to print f r om any computer on y our network. Each computer must have a print
client installed to communicate with the RoamAbout R1’s print server.
If you are running Windows 95, 98 or NT, you must install the RoamAbout R1
Printer Server program and then configure it.
NOTE
Windows 2000/Me and Macintos h operating sys tems have a print
client already installe d. You do not need to in stall the RoamA bout R1
print server. However, you must configure the prin t client.
Installing the RoamAbout R1 Print Server
You must install the RoamAbout Print Server on Windows 95/98 and Windows NT
operating systems to print to the printer attached to the RoamAbout R1.
Perform the following steps to install the RoamAbout R1 print server:
1. Insert the Installation CD into your CD-ROM drive. Auto Run start the installation
procedure.
If Auto Run does not start, click Start and Run... in the task bar. Type D:\Setup
(where D is your CD-R OM drive) and cl ick OK.
2. InstallShield guides you through the installation process.
3. Click Next for each window, to accept the defaults, and Finish when complete.
4. Windows must rebo ot for the c han ges to take p lace . Whe n prom pt ed to re boo t, se lect
Yes and click OK. The default installation path is
C:\Programs\RoamAbou t\RoamAbout R1 Print Server.The directory contains an
uninstall program, if you ever want to uninstall it.
Configuring the RoamAbout R1 Print Server
After the RoamAbout R1 print server is installed, it must be configured to work properly.
Refer to the section that lists your operating system for instructions.
Windows 95/98/N T
1. Click Start, click Settings, and then select Printers.
2. Double-click on Add Printer.
3. Follow the screen prompts to add your prin ter as a Local pr inter for Wind ows 95 /9 8
or as a printer m a naged by My Computer for Windows NT.
4. Select the printer you have attached to the RoamAbout R1 from the list of
manufacturers and printers.
4-8

5. Select the RoamAbout R1 Print Server (the default port name is 100) and cli c k
Configure Port…
6. Enter the RoamAbout R1 IP address in the IP address field (default is 192.168.2.1)
and click OK.
7. You are prompte d to prin t a test pa ge. C lic k Yes to make sure that your printer is
configured correctly.
Your prin ter appears i n the Printers window. Your computer is configured to print via
the RoamAbout R1 Print Server.
8. Repeat these steps on each computer conne cted to the RoamAbout R1.
Windows 2000/M e
1. Click Start, click Settings, and then select Printers.
2. Double-click on Add Printer.
3. Select Network printer and click Next
4. For Windows Me, enter the IP address of the RoamAbout R1 in the field, Network
path or qu eue name. For Windows 2000, select Connect to a prin ter on the
Internet or on your Intranet.
5. Enter the IP address of the RoamAbout R1 in the URL: field. The default IP address
is 192.168.2.1. Click Next when finished.
6. Select the printer you have attached to the RoamAbout R1 from the list of
manufacturers and printers.
7. Follow the prompts to finish installing the printer.
8. You are prompte d to prin t a test pa ge. C lic k Yes to make sure that your printer is
configured correctly.
Your prin ter appears i n the Printers window. Your computer is configured to print via
the RoamAbout R1 Print Server.
9. Repeat these steps on each computer conne cted to the RoamAbout R1.
Macintosh
1. Locate the Desktop Printer Utility (usually loc ated in the Apple Extras folder on your
hard disk).
2. Select the Printer (LPR), and click OK.
3. Change the Postscript Printer Description Fi le (or PPD) to match your printer. This fil e
came with your pr inter software. If not, contact your manufacturer.
Select Change under Internet Printer and clic k OK.
4-9

4. Enter the LAN I P Address of the RoamAbout R1. The default is 192.168.123.254.
5. Enter lp for the queue name.
6. Click Verify to ensure a connectio n i s made, then click OK.
7. Go to the File menu and select Save.
8. Enter a name and location for the desktop printer icon and click OK.
9. Set your pri nting options by highlig hting the Desktop Printer icon and select Change
Setup from the Printing Menu.
10. Repeat Steps 1-9 on all of the Mac OS computers on your network.
UNIX
You can use the LPR protocol to acc ess t he RoamAbout R1 Print Server. The UNIX
station configuration must correct. The R1 printer server
queue name is lpt1.
4-10

Appendix A
Cable and Port Pin-out Assignments
This Appendix provides the cable and port pin-out assignments.
Ethernet Cable
Specifications
Cable Types and Specifications
Cable Type Max. Length Connector
10BASE-T Cat. 3, 4, 5 100-ohm UTP 100 m (328 ft) RJ-45
100BASE-TXCat. 5 100-ohm UTP 100 m (328 ft) RJ-45
Twisted-pair Cable
DO NOT plug a phone jack connector into any RJ-45 port. Use
only twisted-pair cables with RJ-45 connecto rs that conf orm with
FCC standards.
For 10BASE-T/100BASE-TX connections, a twisted-pair cable must have two pairs of
wires. Each wire pair is identified by two different colors. For example, one wire might be
red and the other, red with white str ipes. Also, an RJ-45 connector must be attached
both ends of the cable. All RJ-45 ports on the RoamAbout R1,
support automatic MDI/MDI-X configuration. This means that you can use
straight-through cable to attach th e LAN ports to any network device. However, when
connecting the WAN port to a broadband modem, you will need to use either
straight-through or cross-over cable, depending on the port type used on the modem.
except for the WAN port,
to
Figure A-1 illustrates how the pins on the RJ-45 connector are numbered. Be sure to
hold the connectors in the same orientation when attaching the wires to the pins.
Figure A-1: Connector Pin Numbers
A-1

Straight-through Cable
Straight-Through RJ-45 Pin Assignments
End 1 End 2
1 (TD+) 1 (TD+)
2 (TD-) 2 (TD-)
3 (RD+) 3 (RD+)
6 (RD-) 6 (RD-)
Pins 4, 5, 7 and 8 are not connected.
Crossover Cable
Crossover RJ-45 Pin Assignments
End 1 End 2
1 (TD+) 3 (RD+)
2 (TD-) 6 (RD-)
3 (RD+) 1 (TD+)
6 (RD-) 2 (TD-)
Pins 4, 5, 7 and 8 are not connected.
RJ-45 Port Pin Assignments
All LAN ports on the Roa mAbou t R1 sup po rt au tom atic M DI/MDI-X c o nfig ur ati on. Th is
means that the pin signals in use will d epend on wheth er the LAN port is operating in MDI
or MDI-X
Pin MDI Signal Name* MDI-X Signal Name*
1 Transmit Data (TD+) Receive Data (RD+)
mode.
The WAN port is only configured for MDI-X mode.
2 Transmit Data (TD-) Receive Data (RD-)
3 Receive Data (RD+) Transmit Data (TD+)
6 Receive Data (RD-) Transmit Data (RD-)
A-2

Pin MDI Signal Name* MDI-X Signal Name*
Pins 4, 5, 7 and 8 are not connected.
* The “+” and “-” signs represent the polarity of the wires that make up each
wire pair.
HPNA Cable
Use standard telephone cable to connect the RJ-11 telephone wall outlet to the RJ-11 port
on the EZ Connect Internet Gatewa y.
DO-NOT plug a phone jack connector into any RJ-45 port. For
Ethernet connections, use only twisted-pair cables with RJ-45
connectors that conform with FCC standards.
Specifications
Cable Types and Specifications
Cable Type Max. Length Connector
HPNA standard phone cable 152.4 m (500
RJ-11
ft.)
Wiring Conventions
For HPNA connections, a twisted-pair cable must have one pairs of wires. Each wire pair
is identified by two different colors. For example, one wire might be red and the other, red
with white stripes. Also, an RJ-11 connector mu st be attached to both ends of the cabl e.
Each wire pair must be attach ed to the RJ-11 connectors in a specific orientation . The
following figure illustrates how the pins on the RJ-11 connector are numbered. Be sure to
hold the connectors in the same orientation when attaching the wires to the pins.
Figure A-2: RJ-1 1 Connector Pin Numbers
Pin Assignments
With phone cable, only pins 3 and 4 are used.
RJ-11 Pin Assignments
Pin Assignment*
3Ring
A-3

RJ-11 Pin Assignments
4Tip
1,2,5,6 Rx+
Serial Port Pin Assignments
The DB-9 serial port, see Figure A-3, located on the rear panel is used to connect the
RoamAbout R1 to an ISDN T A or PSTN modem. The pin assignments used to connect to
this port are provided in the following tables.
Figure A-3: DB-9 Serial Port Pin Numbers
EIA
Circuit
CF 109 DCD
BB 104 RxD (Received
BA 103 TxD
CD 108.2 DTR
AB 102 SG
CC 107 DSR
CA 105 RTS
CCITT
Signal
Description R1 DB9
(Data Carrier
Detected)
Data)
(Transmitted
Data)
(Data Terminal
Ready)
(Signal Ground)
(Data Set Ready)
(Request-toSend)
DTE Pin #
1 1 8 <------
2 2 3 <------
3 3 2 ------>
4 4 20 ------>
5 5 7 -------
6 6 6 <------
7 7 4 ------>
PC DB9
DTE
Pin #
Modem
DB25
DCE
Pin #
Signal
Direction
DTE-DCE
CB 106 CTS
(Clear-to-Send)
CE 125 RI (Ring
Indicator)
A-4
8 8 5 <------
9 9 22 <------

Serial Port to 9-Pin COM Port on PC
RoamAbout R1’s
9-Pin Serial Port
1 DCD -----------DCD ------------ 1
2 RXD <---------TXD ------------ 3
3 TXD -----------RXD ----------> 2
4 DTR -----------DSR ----------> 6
5 SGND -----------SGND ---------- 5
6 DSR -----------DTR ------------ 4
7 RTS -----------CTS -----------> 8
8 CTS <---------RTS ------------- 7
9 RI -----------RI --------------- 9
CCITT Signal PC’s 9-Pin COM Port
Serial Port to 25-Pin DCE Port on Modem
RoamAbout R1’s
9-Pin Serial Port
1 <---------DCD ------------ 8
2 <---------RXD ------------ 3
3 -----------TXD ----------> 2
4 -----------DTR ----------> 20
5 -----------SGND ---------- 7
6 <---------DSR ------------ 6
7 -----------RTS -----------> 4
8 <---------CTS ------------- 5
9 <---------RI --------------- 22
CCITT Signal Modem’s 25-Pin DCE Port
A-5

Serial Port to 25-Pin DTE Port on PC
RoamAbout R1’s
9-Pin Serial Port
1 DCD 8 DCD
2 RXD 3 TXD
Null Modem PC’s 25-Pin DTE Port
3 TXD 2 RXD
4 DTR 20 DTR
5 SGND 7 SGND
6 DSR 6 DSR
7 RTS 4 RTS
8 CTS 5 CTS
9 RI 22 RI
A-6

Printer Port Pin Assignments
The DB-25 parallel port on the RoamAbout R1’s rear panel is used to connect the
RoamAbout R1 to a printer. When a printer is attached to this port, any PCs attached to the
RoamAbout R1’s LAN ports can pass files to the printer. The pin assignments used to
connect to the printer port are provided in the following table.
Figure A-4: DB-25 Printer Port Pin Numbers
25
DB-25 Printer Port Pin Assignments
Pin Signal Name Direction
1 -Strobe T o printer
2 +Data 0 To printer
3 +Data 1 To printer
4 +Data 2 To printer
5 +Data 3 To printer
6 +Data 4 To printer
7 +Data 5 To printer
8 +Data 6 To printer
9 +Data 7 To printer
10 - ACK To print server
11 + Busy T o print server
12 + Paper End To print s e r ver
13 + Select To print server
14 - Auto Feed No connection
15 - Error To print server
16 - Init To printer
17 - Select No connection
18-25 GND Ground
A-7


Appendix B
Troubleshooting
If you cannot resolve connect ion problems after checking t he i ndicators, refer the
following troubleshooting information.
Troubleshooting Chart
Symptom Action
Power LED is Off Externa l power supply has fai led or is disconnected.
• Check connections between the RoamAbout R1, the
external power supply, and the wall outlet.
• If the power indicator does not turn on when the
power cord is plu gged in, you may have a problem
with the power outlet, power cord, or external power
supply.
However, if the unit powers off after running for a while,
check for loose power connections, power losses or
surges at the power outlet.
If you still cannot isolate the problem, then the external
power supply may be defective. In this case, contact
Enterasys Networks Technical Support for assistance.
Link LED is Off
• Verify that the RoamAbout R1 and attached device
are powered on.
• Be sure the cable is plugged into both the
RoamAbout R1 and the corresponding device.
• V erify that the pro per cable type is used and its le ngth
does not exceed specified limits.
• Be sure that the network interface on the attached
device is configured for the pr oper communication
speed and duplex mode.
• Check the adapter on the attached device and cable
connections for possibl e defects. Replace the
defective adapte r o r cable if necessary.
B-1

Troubleshooting Chart
Symptom Action
Network Connection Problems
Cannot Ping the
RoamAbout R1 from
the attached LAN, or the
RoamAbout R1 cannot
Ping any device on th e
attached LAN
Mobile users cannot
access the RoamAbout
R1
Management Problems
Cannot connect using
the Web browser
• V erify that IP addresses are properly configured. For
most applications, you should use the RoamAbout
R1’s DHCP function to dynamically assign IP
addresses to any host on the attached LAN. However,
if you manually configure any IP addresses on the
LAN, verify that the same network address (network
component of the IP address) and subnet mask are
used for both the RoamAbout R1 and attached LAN
devices.
• Be sure the device you want to ping (or from which
you are pinging ) has been configured for TCP/IP.
• Make sure th at the RoamAbout R1 and all mobile
users are configure d t o use the same radio channel,
wireless domain, and encryption keys.
• Ensure that all mo bi le users are within range of the
RoamAbout R1.
• Try power cycling the RoamAbout R1.
• Ensure that you co nfigured the Roam A b ou t R 1 wi t h
a valid IP address, subnet mask and default gateway.
• Check that you have a valid network connect ion to
the RoamAbout R1 and that the port you are using
has not been disabled.
• Check the network cabling between the management
station and the RoamAbout R1.
• Verify that there is no other management station
accessing the RoamAbout R1 web management. The
RoamAbout R1 can only be managed from one
management station at a time.
• V erify that you logged out of the management station
that you were previously using to manage the
RoamAbout R1. If that session timed-out, you must
log back into that management station and log out
before you can manage the RoamAbout R1 from any
other management station.
Forgot or lost the
password
Printer Server
The printer cannot print,
or prints illegible
characters
B-2
Press the RESET button on the rear panel for 5 seconds
to restore the factory defaults.
Make sure the parallel cable between the RoamAbout R1
and printer is connected, and in good condition.
 Loading...