

Page 1
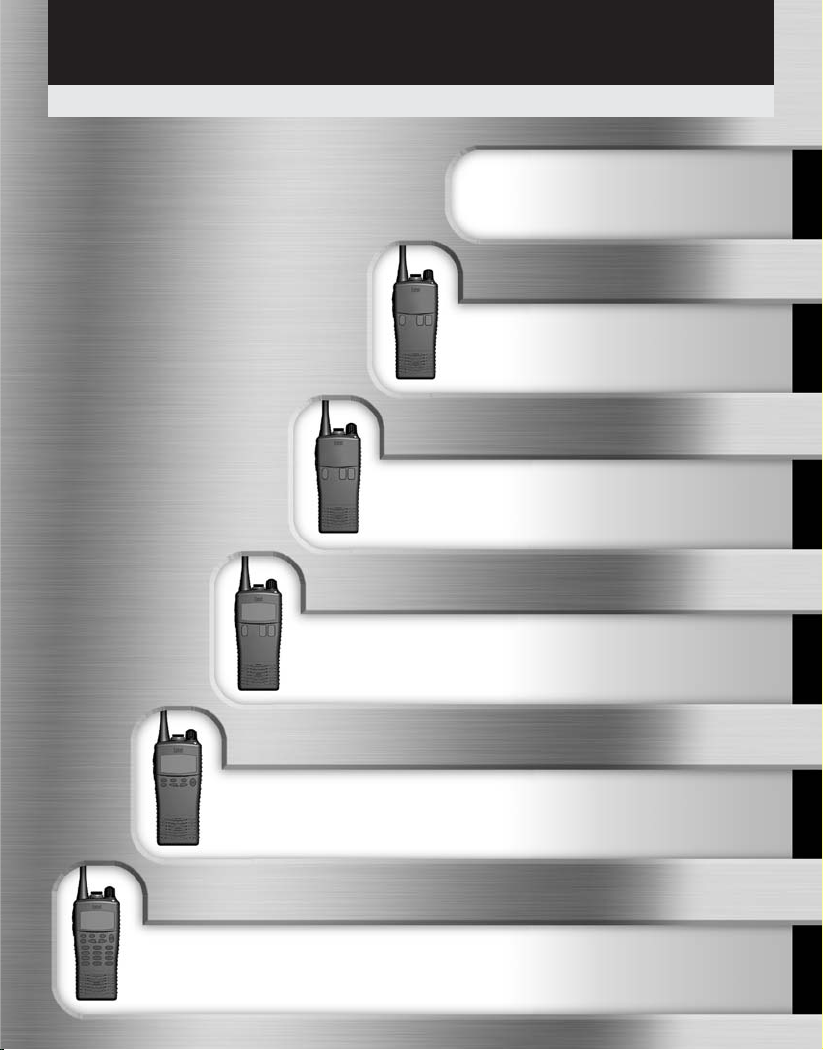
HT702/712/722/782(U)
Entry
User Guide – HT700 Series
v01/10
Common Information
(all models)
HT702S/712S/722S/782S(U)
Entry Selcall
HT703/713/723/783(U)
Entry LCD
HT705/715/725/785(U)
Advanced Selcall, 8-key
HT706/716/726/786(U)
Advanced Selcall, Full Keypad
Professional submersible handheld transceivers
Page 2

Common
Table of Contents
Common Information (all models) Page
Certification 2
Radio / battery care 3
Battery care / information 4
Packing List 5
Optional Accessories 5 & 6
Preparing Your Radio For Use 6 & 7
HT702/712/722/782(U)
Feature List 8
Controls & Indicators 9
HT702S/712S/722S/782S(U)
Feature List 10
Controls & Indicators 11
HT703/713/723/783(U)
Feature List 12
Controls & Indicators 13
HT705/715/725/785(U)
Feature List 14
Controls & Indicators 15
LCD Icons 16
HT706/716/726/786(U)
Feature List 18
Controls & Indicators 19
LCD Icons 20
Introduction
This guide covers the ‘basics’ of your radio’s operation. To meet your exact
requirements the radio may have been customised by your Entel authorised dealer.
These features will be explained in a separate guide issued by the dealer.
1
Page 3

2
Common
Certification
Declaration of Conformity
The HT700 series transceiver displays "CE" on the serial number label, indicating its
compliance with the essential requirements of the EEC directive for Electromagnetic
Compatibility.
CE Compliance Statement
We Entel UK Limited
OF:
320 Centennial Avenue
Centennial Park
Elstree
Borehamwood
Hertfordshire
United Kingdom
WD6 3TJ
Declare under our sole responsibility that the product:HT700 series VHF/UHF handheld transceiver
Serial Number ________________________________
To which this declaration relates, is in accordance with directive 99/5/EC
and conforms to the following standard or other nominative documents:EN 300 086-2 V1.1.1, EN 301 489-1 V1.5.1:2003, EN 60065:2002
Following provisions of the R&TTE directive.
M Austin
Quality Manager
Page 4

3
Common
Radio care
Advice
• Do not use options or accessories not
specified by Entel
• Ensure that the radio is used within the
parameters for which it was designed
• Please switch the transceiver off before
connecting optional accessories
Warning
Turn the transceiver off in the following locations:
• In explosive atmospheres (flammable gas, dust
including metallic & grain powders etc)
• Whilst taking on fuel or while parked near
fuel station
• Near explosives or blasting sites
• In aircraft, medical institutions or near
persons known to be wearing a pacemaker
Caution
• Do not disassemble or modify the transceiver
for any reason
• Do not transmit while touching the antenna
terminal or any exposed metallic parts of the
aerial as this may result in a burn
• Please check and observe regulations in your
country with regards to use whilst driving
End of Life Disposal
• When your Entel transceiver reaches the end
of its useful life, please ensure that the unit is
disposed of in an environmentally friendly way.
For country specific information please see
www.entel.co.uk/recycling.
Introduction
Your Entel radio is supplied with a high performance Lithium Ion (Li-Ion) battery.
These batteries:
• Extend talk time
• Reduce the battery’s size and weight
• Do not suffer from ‘memory effect’ that
reduces the life of Ni-Cad and NiMH
batteries
• Have a low toxicity, therefore reducing the
impact on the environment
Battery Pack Precautions
• Switch the transceiver OFF before charging
• Charge the battery pack before use
• Do not recharge the battery pack if it is
Battery care
already fully charged. This could lead to a
premature battery replacement warning
message. (See Battery Communications on
page 4)
• Charge the battery in accordance with the
instructions enclosed with your charger
• Do not charge the transceiver and/or
battery pack if they are wet
The battery pack includes potentially
hazardous components. Please:
• Do not disassemble or reconstruct battery
• Do not short-circuit the battery
• Do not incinerate or apply heat to the battery
• Do not immerse the battery unless attached
securly to the radio in water or get it wet by
other means
Page 5
4
Common
Battery care / information
Battery Communications
Each battery used with your radio has a
microprocessor fitted, which logs the number of
times your battery has been charged.
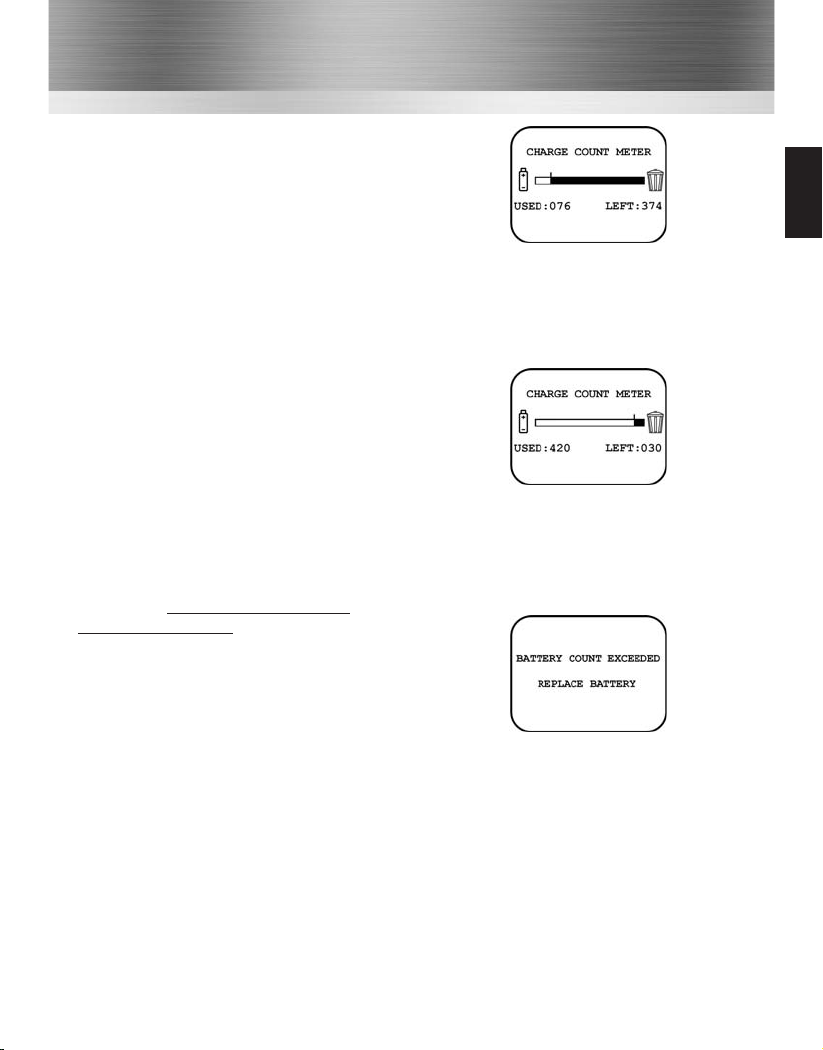
On a radio with an LCD display, the number of
times the battery has been charged, together with
the remaining charge cycles available, will be
shown during switch on. On the advanced 8-key
and 20-key models, battery charge cycle
information may also be accessed via the menu. (If
not de-activated by your dealer)
The warranty on all batteries is 12 months from
new, or 450 charge cycles, whichever is the
sooner. After 420 cycles, at switch on the radio
will emit a series of short tones, and on LCD
models a waste bin icon will flash to alert you to
the need to buy a new battery.
Note: only genuine Entel batteries should be used.
Only genuine batteries offer the battery charge
count feature informing you when the battery is
reaching the end of its useful life. Customer
satisfaction is assured as you can not be supplied
with sub standard, potentially dangerous battery
packs from 3rd party manufacturers, ensuring it
delivers the expected capacity and endurance.
On HT series batteries a breathable membrane is
used. This is clearly marked on the battery label.
Piercing the membrane will allow water ingress to
the battery, and will invalidate the warranty.
After 450 cycles, at switch on the radio will emit a
series of long beeps, and LCD models the
message will change to BATTERY COUNT
EXCEEDED REPLACE BATTERY.
The radio will
continue to operate but its operational time
may be reduced, eventually failing all together.
• Do not charge the battery near fires or under
direct sunlight
• Use only the specified charger and observe
charging requirements
• Do not pierce the battery with any object or
strike it with an instrument
• Do not use the battery pack if it is damaged
in any way
• Do not reverse-charge or reverse-connect
the battery
• Do not touch a ruptured or leaking battery
If liquids from the battery get into your
eyes, immediately:
Wash your eyes out with fresh water avoiding
rubbing them. Seek medical treatment
Battery Pack
• If a battery is not to be used for an extended
period of time (e.g. several months) remove
the battery pack from the equipment and
store in a cool and dry location (around 0°C)
part charged. Do not fully discharge the
battery before storage.
• Each charge cycle reduces the battery’s life.
Minimise the number of times you charge
your battery especially in hotter
environments which further shortens a
battery’s life.
Page 6

Common
Packing List
• HT7XX Radio
• CNB750E Rechargeable 1800mAh Li-Ion battery
• CBH750 Spring loaded belt clip
• CATXX Antenna
• User guide CD
• Single way charger (only supplied with HT7X2, HT7X2S and HT7X3 models)
Optional Accessories
Battery & Charger Options
CNB750E Spare 1800mAh Lithium-Ion battery pack with rear clip
CSAHT 1-way intelligent rapid charger, 100-240v
CSBHT 6-way intelligent, rapid charger, 100-240v
CCAHT-230 1-way trickle charger with 230V mains adapter
CCAHT-110 1-way trickle charger with 110V mains adapter
CCAHT-12 1-way trickle charger with cigar lighter lead, 12V DC operation
CBE750 Dummy battery and regulator with cigar lighter plug
Carry Options
CFC750 HT 2.0 series soft leatherette case finished in black with carry strap
CLC752 HT7X2 heavy duty black leather case with strap & belt loop
CLC753 HT7X3 & HT7X5 heavy duty black leather case with strap & belt loop
CLC756 HT7X6 heavy duty black leather case with strap & belt loop
CBH750 Spare spring loaded belt clip
Audio Accessory Options
CMP1/750 Compact medium duty speaker microphone with earpiece jack
CMP750 Heavy duty submersible speaker microphone
EHP9 D-shaped earpiece (plugs into CMP1/750 or CMP750 above)
EA12/750 D-shaped earpiece with in-line PTT/microphone & VOX*
EA15/750 Earpiece microphone with transparent acoustic tube & VOX*
EA19/750 D-shaped earpiece with boom microphone and in-line PTT & VOX*
EHP750 D-Shaped earpiece (connects directly to radio)
EPT40/750 Bone conductive earpiece microphone with PTT
CXR5/750 Bone conductive skull microphone with in-line PTT
CXR16/750 D-shaped earpiece and throat microphone with in-line PTT
5
Page 7
Common
Antenna Options
CXW640 Antenna adapter for external aerial
CAT20 Helical antenna VHF
CAT80 Whip antenna UHF
CAT20S Stubby antenna VHF
CAT80S Stubby antenna UHF
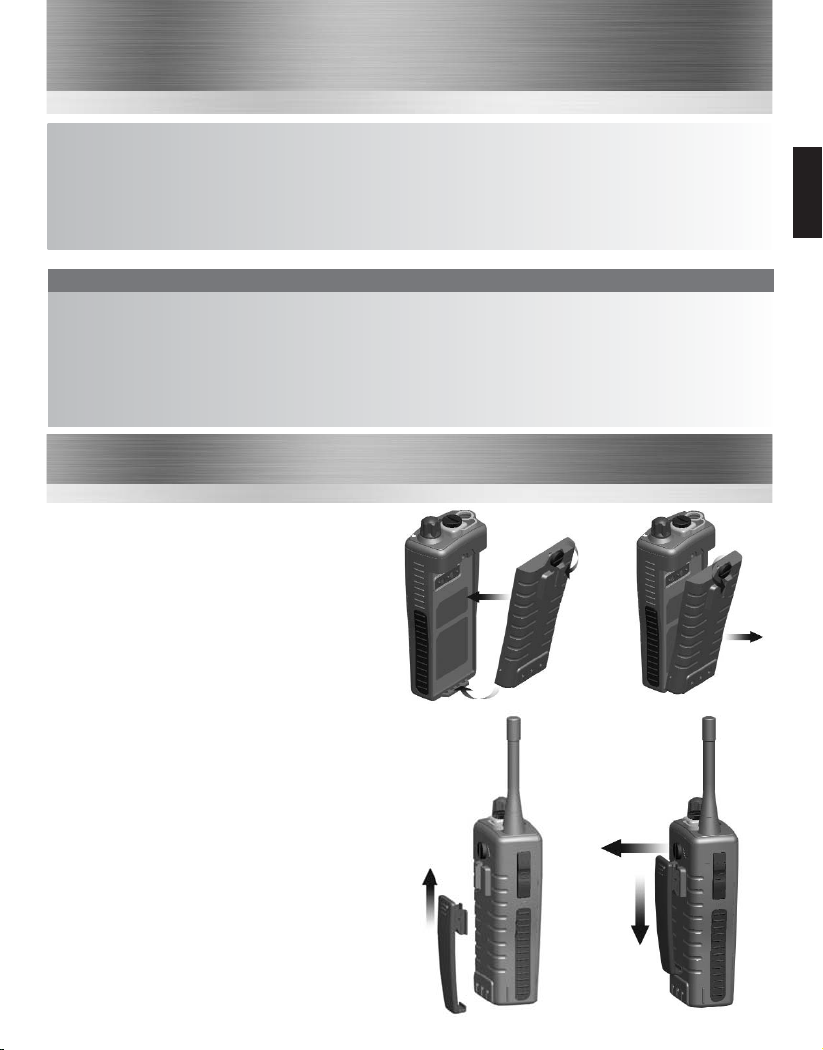
Attaching / Removing the Battery Pack
1 To attach, locate the pegs on the bottom of
the battery and place into the slots on the
radio. Then press the top of the battery against
the radio. Secure battery by tightening the
screw clockwise by hand. (Do not over
tighten)
2 To remove, unscrew the locking screw
anticlockwise and pull the battery away from
the top of the radio.
Attaching / Removing the Belt Clip
1 To attach, press the clip into the slot on
the back of the battery and slide up until
you hear a “click”.
2 To remove, pull the tab (a) towards the
belt clip. Then slide the belt clip
downwards (b).
Optional Accessories cont...
For complete up to date list of optional
accessories visit www.entel.co.uk
1
2
1
2
a
b
6
Preparing Your Radio For Use
CHP1/750 Light weight single earpiece headset with in-line PTT & VOX*
CHP750HS Single earpiece ear defender headset with boom mic and in line PTT for hard hat & VOX*
CHP750HD Double earpiece defender headset with boom mic and in line PTT for hard hat & VOX*
CHP750D Double earpiece headband defender headset with boom mic and in line PTT & VOX*
CHP750BT Bluetooth double earpiece headband defender headset with boom mic and ear cup PTT
* VOX = Voice Operated Transmit (hands free operation)
CAT10S-78 78MHz compressed antenna
CAT10S-85 85MHz compressed antenna
CAT10S 66-88MHz uncut compressed antenna
CAT700-40 30-50MHz antenna
Bluetooth option board in radio is required to use Bluetooth audio accessories.
Page 8
7
Common
Preparing Your Radio For Use cont...
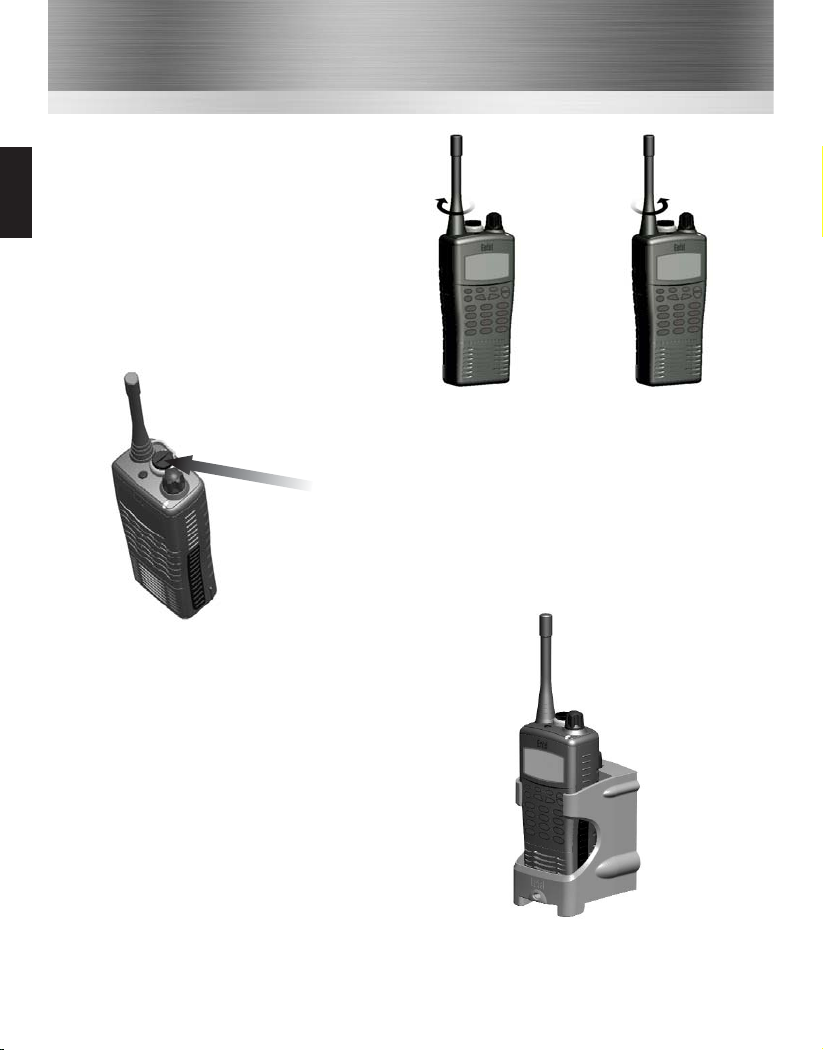
Attaching / Removing the Aerial
1 To attach, carefully align the aerial with the
socket. Screw in the aerial clockwise (taking
care not to cross the thread) until it is seated
firmly against the top of the radio.
2 To remove, unscrew the aerial
anti-clockwise.
1
2
Attaching / Removing Audio Accessories
1 To attach, remove the accessory cover by unscrewing the
locking screw anti-clockwise (leave cover attached or store in a
safe place). Attach accessory plug by locating over the socket.
Carefully tighten the locking screw clockwise until finger tight
(do not tighten with a screwdriver etc).
2 To remove, unscrew the locking screw by hand in an anti-
clockwise direction (carefully use a coin or screwdriver if too
tight). Ensure you re-fit the accessory cover so as to protect
the socket.
Charging Your Radio
Several charger options are available. Please refer to your
charger user guide.
Turning your radio on
Turn your radio on by pressing the on / off button on the front of the radio. The radio will bleep and
the LED will illuminate constant yellow for approximately 4 seconds, followed by a second “warble” (if
not disabled by the Dealer when programmed).
Page 9
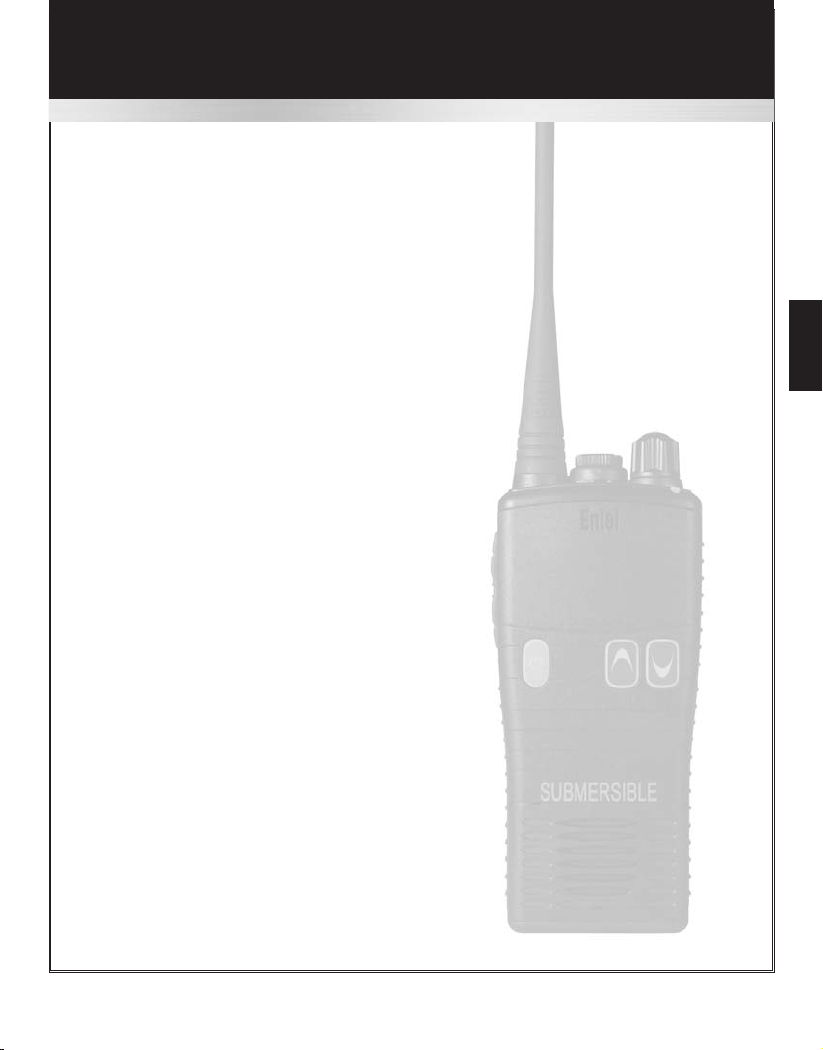
HT7X2
Standard Features:
• 16 programmable channels
• Full transmit power output (5 Watts VHF, 4 Watts UHF)
• CTCSS & DCS (analogue & digital squelch) with squelch tail elimination (removes the ‘shh’ noise)
• Exceptionally loud and clear audio
• Robust design, exceeds MIL-STD-810C/D/E/F
• Environmentally protected to IP68 i.e. submersible to 5 metres for up to 60 minutes
• 1800mAH Lithium-Ion battery for superior operational time
• Full band switching allows access to all channels in each band
• Battery charge count
• Radio cloning mode
• Low battery alert indicates when the battery needs recharging
Dealer programmable features:
• VOX for hands free operation
• High/Low transmit power
• Normal & priority scan (programmable per channel position)
• Panic (personal attack) button causes high pitch, high volume, siren tone to be emitted from the
radio’s speaker
• Key lock button
• Prefixed minimum volume level and fixed bleep level
• Channel monitor (CTCSS/DCS Defeat)
• Talkaround (allows communication away from a base station)
• Transmit time out-timer (ensures channels are not blocked)
• Voice scrambler with 1 code per channel (option)
• Automatic power save to further increase operational time
• User adjustable squelch
HT702/712/722/782(U)
8
Page 10
9
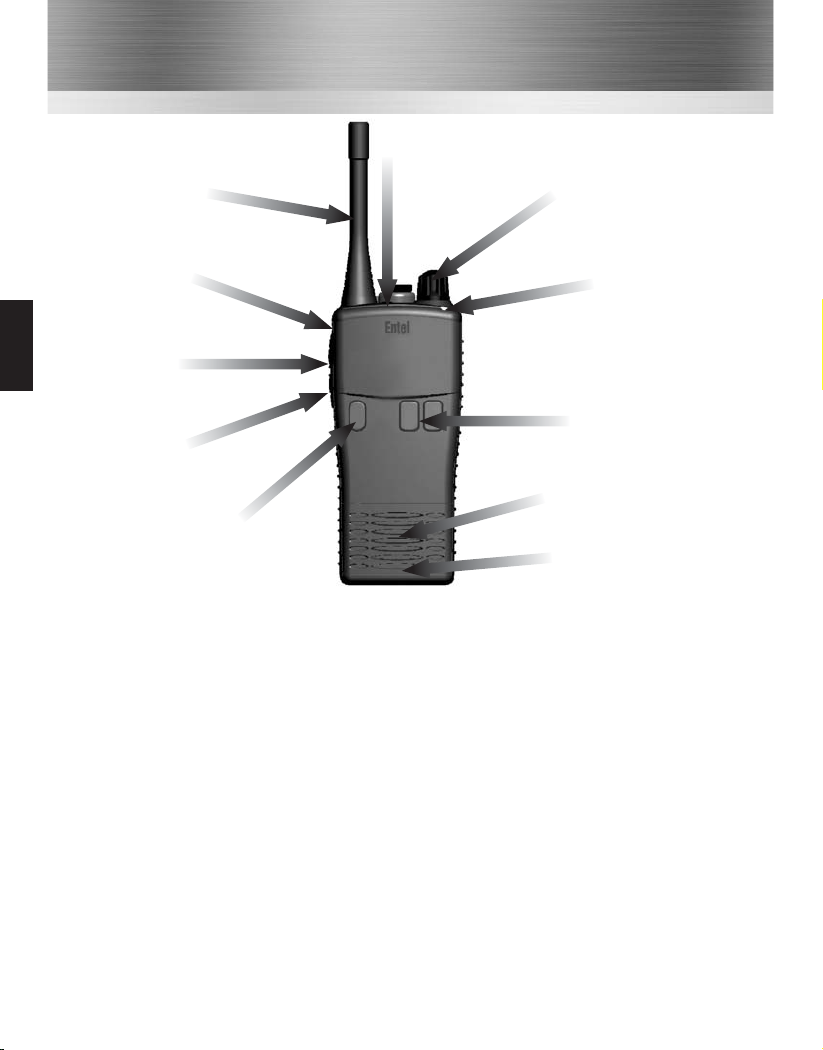
Controls & Indicators
HT7X2
3
Channel / Scan
control
Antenna
5 Dealer
programmable
button 1
4
Push To Talk
(PTT) button
6
Dealer
programmable
button 2
1
On / Off
2
Volume control
Speaker
Microphone
1
On / Off button. Press to turn radio on, press and hold to turn off.
2
Press up / down buttons to increase / reduce volume.
3
Channel / Scan control. Rotate to select the desired channel or scan setting.
4
Push To Talk (PTT) button. Press to speak and release to listen.
5
Dealer programmable button 1 (ask your dealer for more information).
6
Dealer programmable button 2 (ask your dealer for more information).
7
Dealer programmable button 3 (ask your dealer for more information).
8
LED indicator.
• RED steady = Transmitting
• RED flashing slowly = Battery needs re-charging
• GREEN steady = Receiving
• YELLOW steady = Non valid signal detected
• YELLOW flashing rapidly = Scanning
7
Dealer
programmable
button 3
8
LED indicator
Page 11
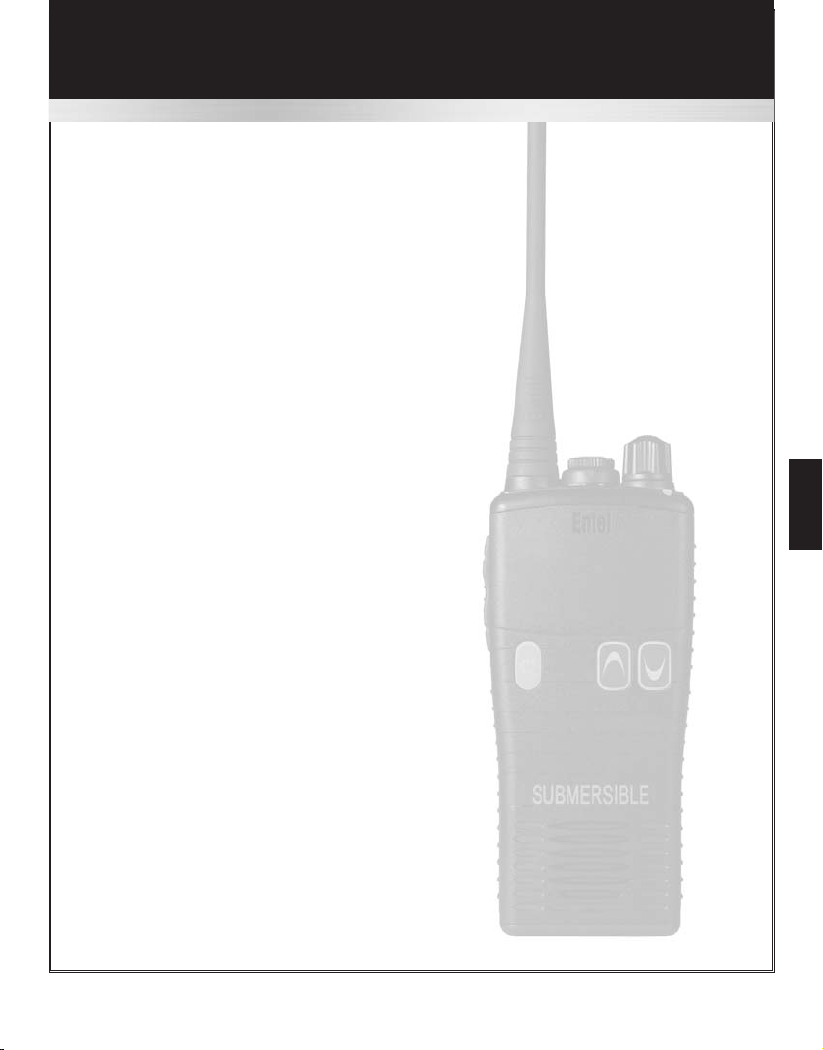
HT7X2S
All the features of the HT702/712/722/782 (see page 8) plus the following features:
Standard Features:
• Entry level selective calling
• Voice scrambler with 4 codes per channel included as standard
Dealer programmable features:
• Open or closed channel modes (allows private conversations)
• Call a group, individual or all radios at once
• Up to 16 pre-programmed contacts
• Multiple ringtones
• Stun (disable) a lost or stolen radio
• Revive (enable) a recovered radio
• Panic button with remote alert
• Emergency microphone live
• Automatic Lone-Worker alarm mode
• Automatic Man-Down alarm mode (optional)
• Silent alarm call mode
• Continue emergency alarm even if radio switched off
HT702S/712S/722S/782S(U)
10
Page 12
11
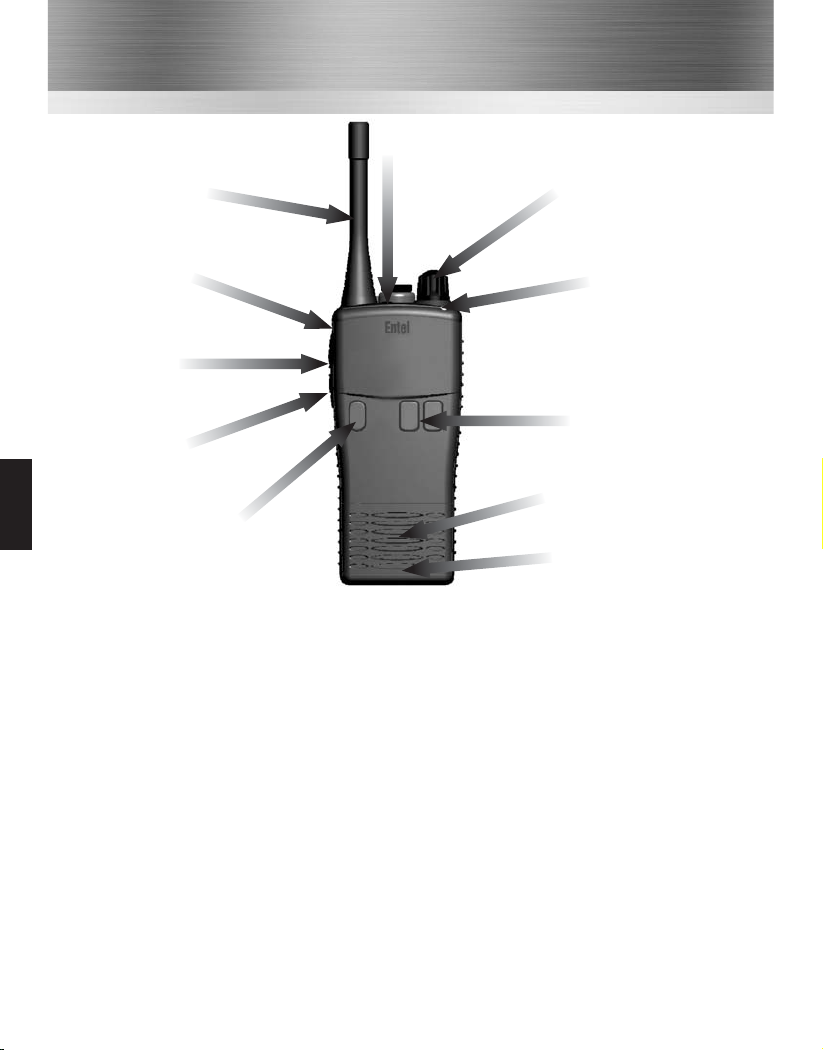
Controls & Indicators
HT7X2S
1
On / Off button. Press to turn radio on, press and hold to turn off.
2
Press up / down buttons to increase / reduce volume.
3
Channel / Scan / Contact control. Rotate to select the desired channel or scan setting.
4
Push To Talk (PTT) button. Press to speak and release to listen.
5
Dealer programmable button 1 (ask your dealer for more information).
6
Dealer programmable button 2 (ask your dealer for more information).
7
Dealer programmable button 3 (ask your dealer for more information).
8
LED indicator.
• RED steady = Transmitting
• RED flashing slowly = Battery needs re-charging
• GREEN steady = Receiving
• GREEN flashing slowly = Selcall received
• YELLOW steady = Non valid signal detected
• YELLOW flashing rapidly = Scanning
Antenna
5 Dealer
programmable
button 1
4
Push To Talk
(PTT) button
6
Dealer
programmable
button 2
1
On / Off
2
Volume control
Speaker
Microphone
7
Dealer
programmable
button 3
8
LED indicator
3
Channel / Scan /
Contact Control
Page 13
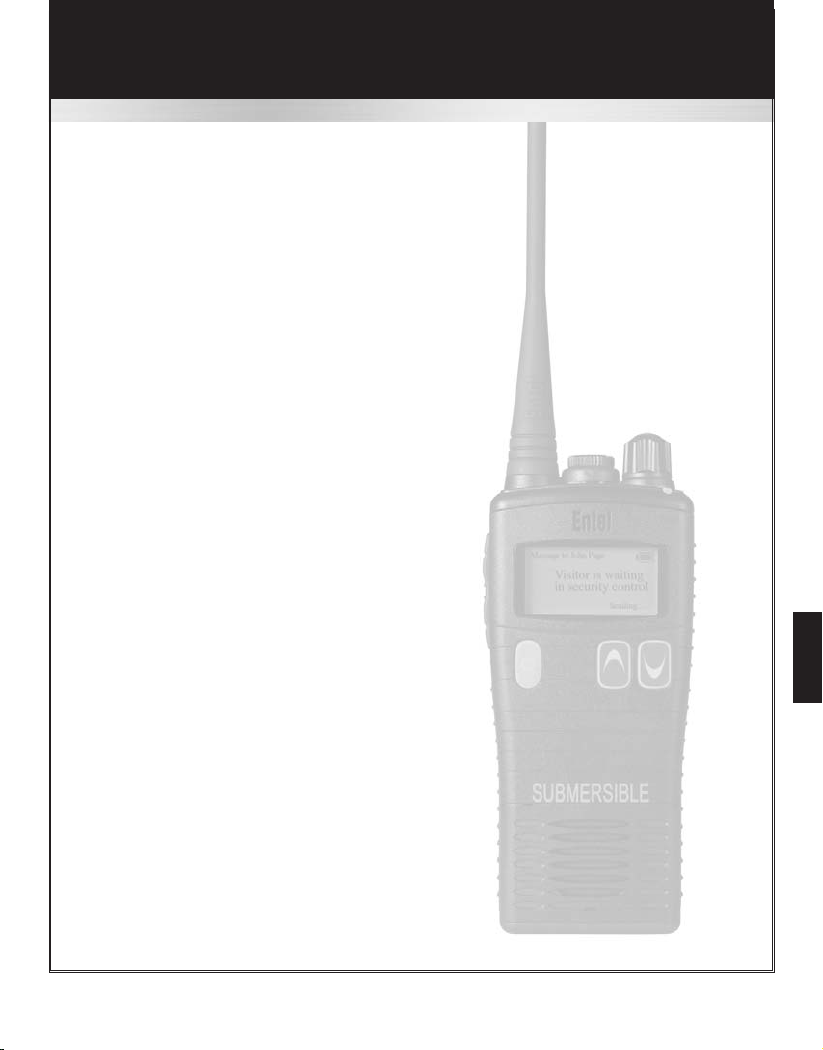
HT7X3
All the features of the HT702/712/722/782 (see page 8) plus the following additional features:
Standard Features:
• LCD screen to display channel number / battery charge count
• 255 channel capacity
HT703/713/723/783(U)
12
Page 14
13
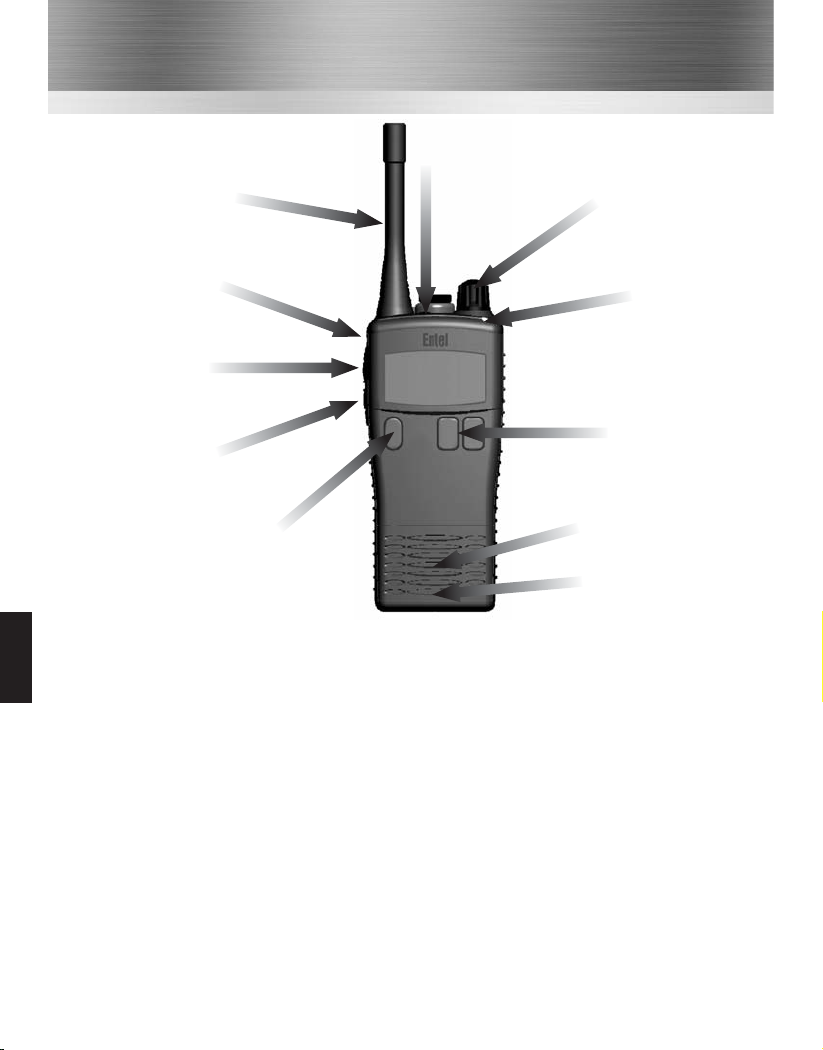
HT7X3
Controls & Indicators
1
On / Off button. Press to turn radio on, press and hold to turn off.
2
Channel / Scan control or volume control (dealer definable).
3
Channel / Scan control or volume control (dealer definable).
4
Push To Talk (PTT) button. Press to speak and release to listen.
5
Dealer programmable button 1 (ask your dealer for more information).
6
Dealer programmable button 2 (ask your dealer for more information).
7
Dealer programmable button 3 (ask your dealer for more information) and LED indicator.
8
LED indicator.
• RED steady = Transmitting
• RED flashing slowly = Battery needs re-charging
• GREEN steady = Receiving
• GREEN flashing slowly = Selcall / message received
• YELLOW steady = Non valid signal detected
• YELLOW flashing rapidly = Scanning
Antenna
5 Dealer
programmable
button 1
4
Push To Talk
(PTT) button
6
Dealer
programmable
button 2
1
On / Off
2
Channel / Scan control
or volume control
(dealer definable)
Speaker
Microphone
7
Dealer
programmable
button 3
3
Channel / Scan control
or volume control
(dealer definable)
8
LED indicator
Page 15
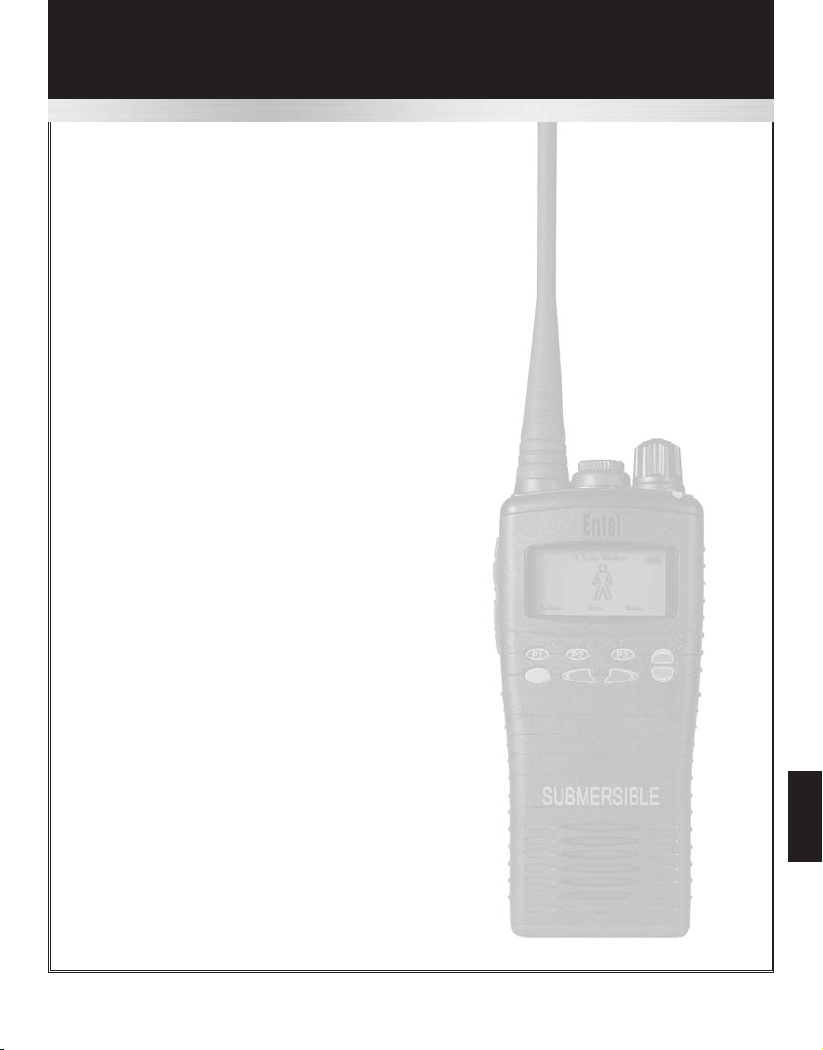
HT7X5
HT705/715/725/785(U)
14
All the features of the HT703/713/723/783 (see page 12) plus the following features:
Standard Features:
• Advanced selective calling
• Voice scrambler with up to 4 codes per channel
• Intuitive menus (like a mobile phone)
• Info button (user guide built-in to radio)
Dealer programmable features:
• Speed dial
• Who's calling (caller ID)
• 255 user contact list (just like a mobile phone)
• Missed, received & dialled numbers lists
• Multiple ring / alert tones
• Power on password option
• Manual location information sent with emergency call
• Fully automatic indoor location (option)
• Send / Receive status messages
Page 16
15
Controls & Indicators
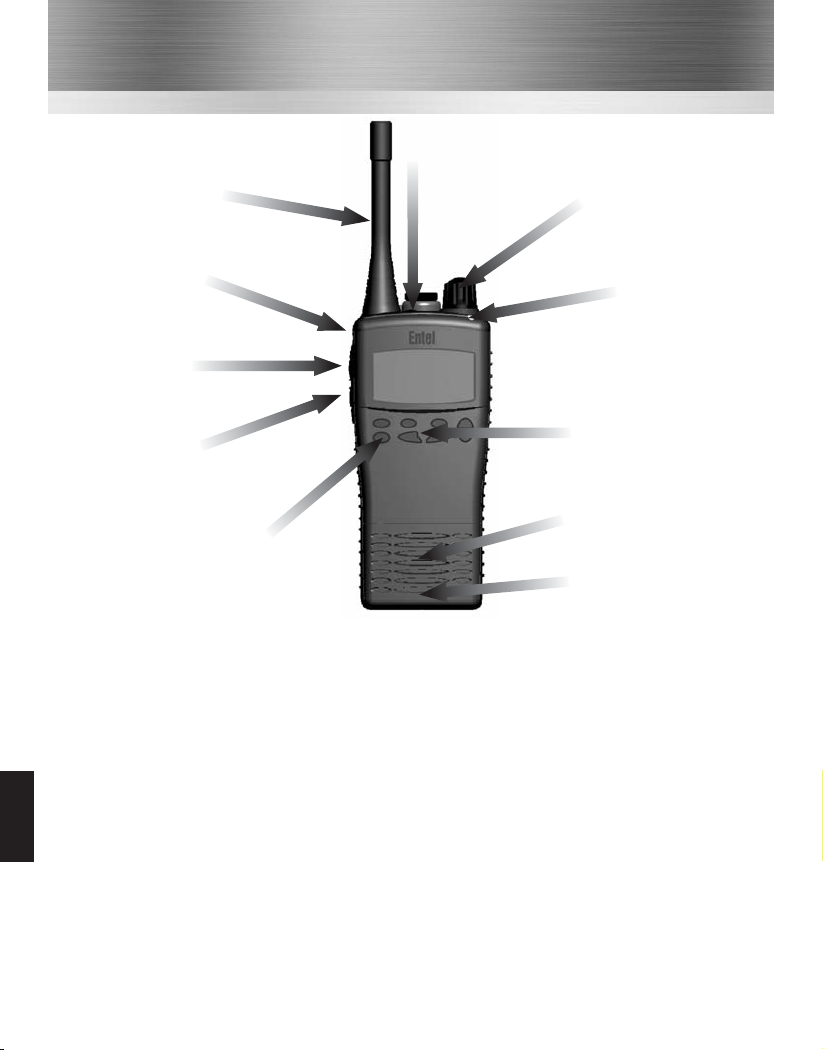
HT7X5
3
Dealer programmable
multi-function buttons
1
On/Off button. Press to turn radio on, press and hold to turn off.
2
Multi-function dealer programmable control (ask your dealer for more information).
3
Dealer programmable multi function buttons.
4
Push To Talk button. Press to speak and release to listen.
5
Dealer programmable button 1 (ask your dealer for more information).
6
Dealer programmable button 2 (ask your dealer for more information).
7
Dealer programmable button 3 (ask your dealer for more information).
8
LED indicator.
• RED steady = Transmitting
• RED flashing slowly = Battery needs re-charging
• GREEN steady = Receiving
• GREEN flashing slowly = Selcall / message received
• YELLOW steady = Non valid signal detected
• YELLOW flashing rapidly = Scanning
Antenna
5 Dealer
programmable
button 1
4
Push To Talk
(PTT) button
6
Dealer
programmable
button 2
1
On / Off
Speaker
Microphone
7
Dealer
programmable
button 3
8
LED indicator
2
Multi-function control
Page 17
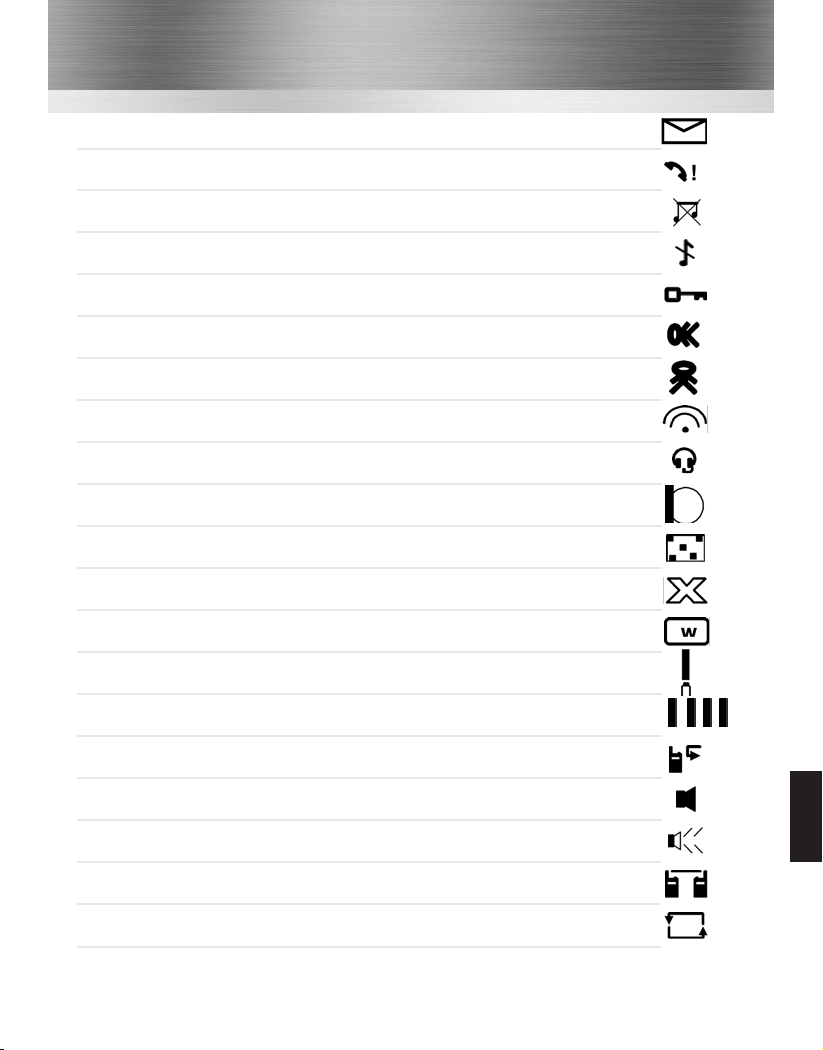
HT7X5
16
• Message Received
• Missed Call
• Key Bleeps Off
• Silent Profile
• Keypad Locked
• Man Down
• Lone Worker
• Bluetooth device connected
• Accessory Connected
• VOX Enabled
• Scramble Enabled
• Do Not Disturb
• Whisper Mode
• Battery State
• Receive strength / TX Output Low / Mid / High
• Call Diverted
• Speaker muted
• Speaker unmuted
• Talkaround enabled
• Channel scanning
RX / L / M / H
LCD Indicators
Page 18

17
INTENTIONALLY
LEFT BLANK
Page 19
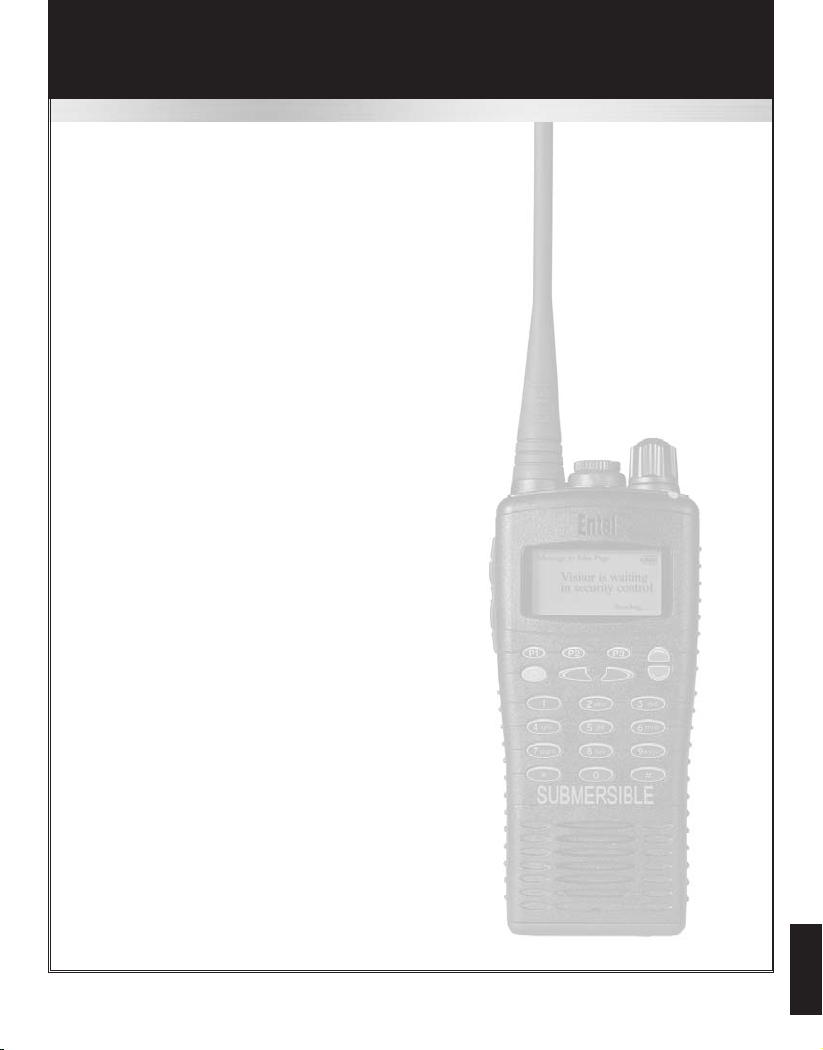
HT7X6
HT706/716/726/786(U)
18
All the features of the HT705/715/725/785 (see page 14) plus the following features:
Standard Features:
• Keypad
Dealer programmable features:
• Edit contact list
• Free dial radio contacts
• Free dial telephone numbers
• Free dial DTMF numbers
Page 20
19
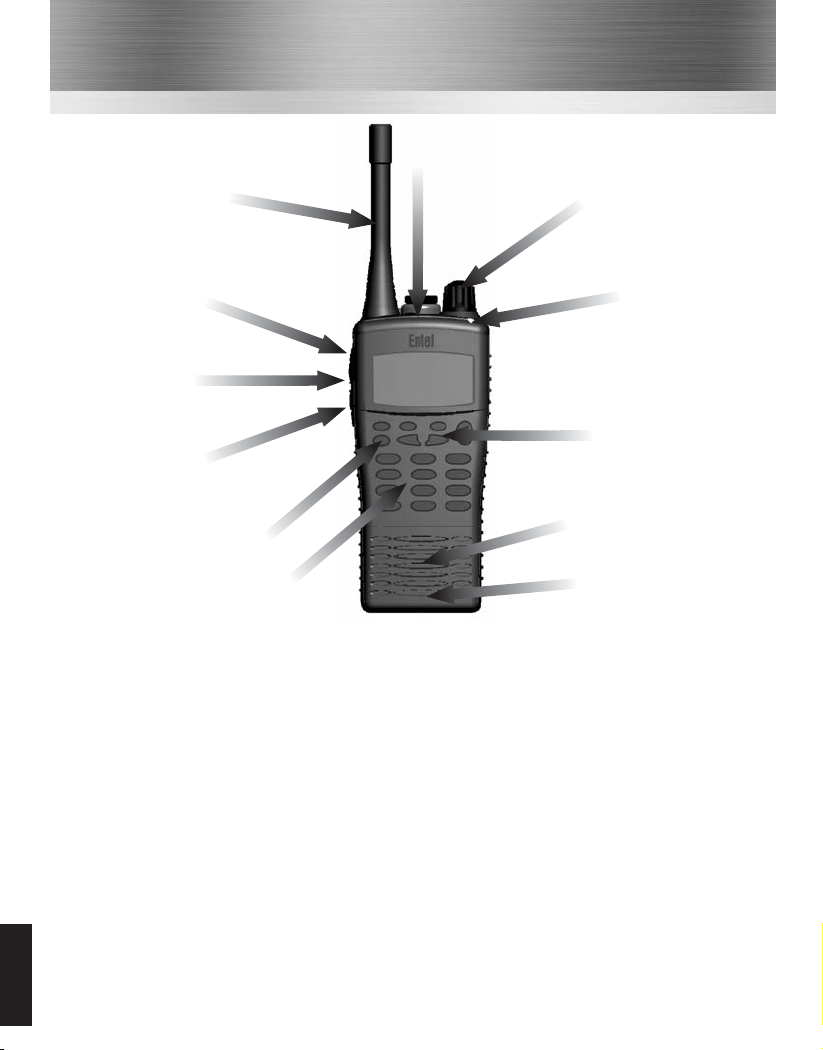
Controls & Indicators
HT7X6
1
On / Off button. Press to turn radio on, press and hold to turn off.
2
Multi-function dealer programmable control (ask your dealer for more information).
3
Dealer programmable / function buttons.
4
Push To Talk (PTT) button. Press to speak and release to listen.
5
Dealer programmable button 1 (ask your dealer for more information).
6
Dealer programmable button 2 (ask your dealer for more information).
7
Dealer programmable button 3 (ask your dealer for more information).
8
LED indicator
• RED steady = Transmitting
• RED flashing slowly = Battery needs re-charging
• GREEN steady = Receiving
• GREEN flashing slowly = Selcall received
• YELLOW steady = Non valid signal detected
• YELLOW flashing rapidly = Scanning
3
Dealer programmable
multi-function buttons
Antenna
5 Dealer
programmable
button 1
4
Push To Talk
(PTT) button
6
Dealer
programmable
button 2
1
On / Off
Speaker
Microphone
7
Dealer
programmable
button 3
3
Multi-function rotary
control
Keypad
8
LED indicator
Page 21
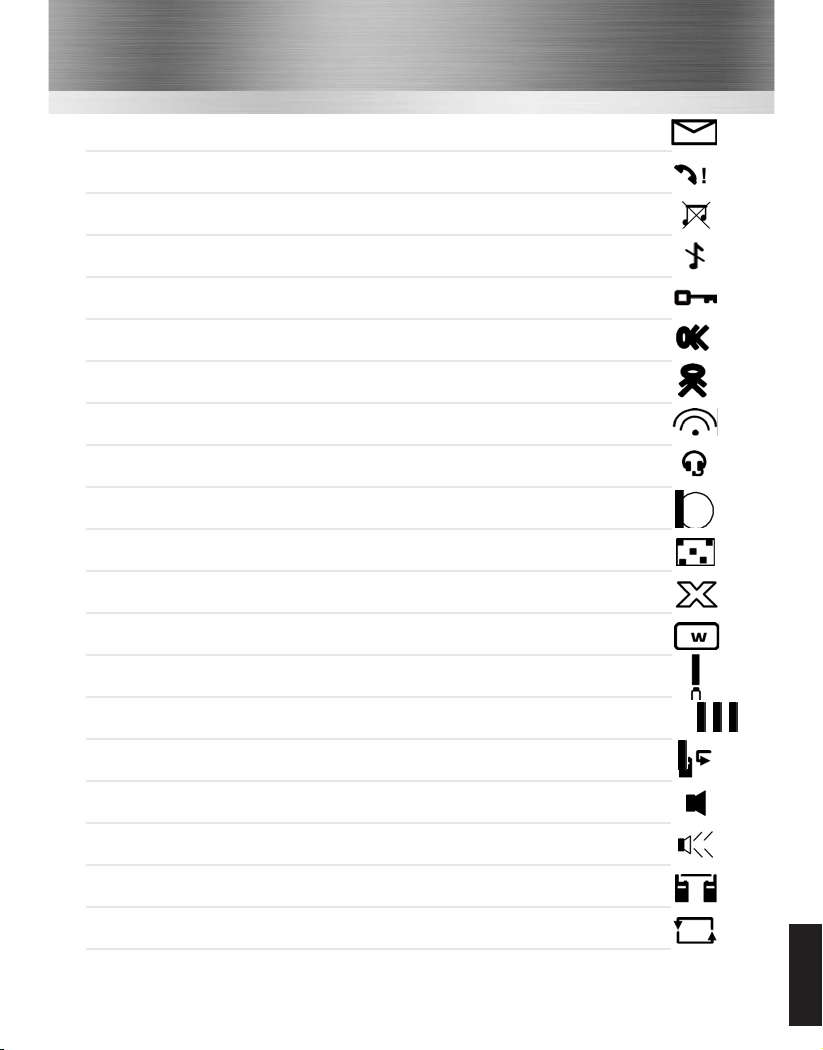
HT7X6
LCD Indicators
20
• Message Received
• Missed Call
• Key Bleeps Off
• Silent Profile
• Keypad Locked
• Man Down
• Lone Worker
• Bluetooth device connected
• Accessory Connected
• VOX Enabled
• Scramble Enabled
• Do Not Disturb
• Whisper Mode
• Battery State
• Receive strength / TX Output Low / Mid / High
• Call Diverted
• Speaker muted
• Speaker unmuted
• Talkaround enabled
• Channel scanning
RX / L / M
Page 22

21
NOTES
Page 23

22
NOTES
Page 24
‘the
choice’
professional’s
Headquarters: United Kingdom www.entel.co.uk
Copyright Entel UK Ltd. 2009
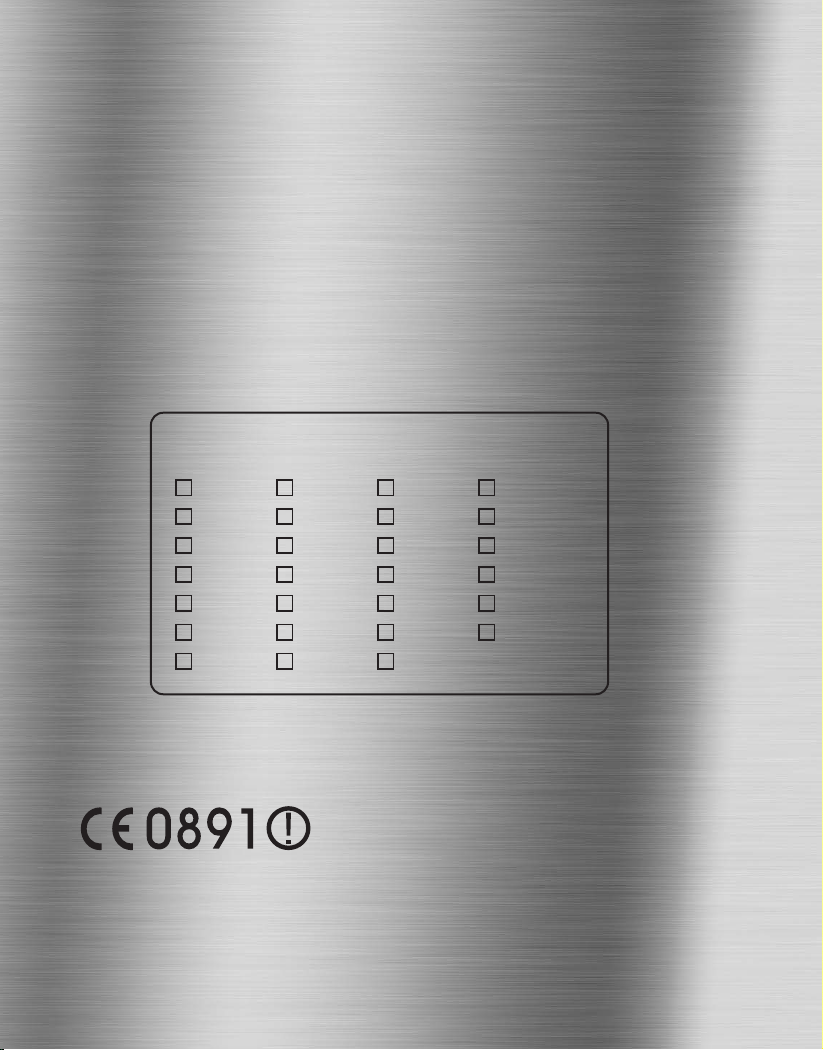
<Intended Country Of Use>
BE
BG
CZ
DK
DE
EE
IE
EL
ES
FR
IT
CY
LV
LT
LU
HU
MT
NL
AT
PL
PT
RO
SI
SK
FI
SE
UK
Registered Community Design Application 000810890
U.S. Design Patent Pending No. 23/182,829
Copyright and Unregistered Design Right Entel UK 2009
All rights reserved
 Loading...