

Enster NST-IPH6092NPSD User Manual

LPR IP camera
User manual

1. Features
2. Technical Parameter
3. Installation and setting
4. Login and Function Setting
4.1 Login
4.2 TF Card Format & Browser
4.3 Media Setting
4.3.1 Video Setting
4.3.2 Image Setting
4.3.3 Audio Setting
4.4 Network Setting
4.4.1 Network
4.4.2 ONVIF
4.4.3 P2P
4.5 Alarm Setting
4.5.1 Alarm in
4.5.2 Motion Detection Setting
4.5.3 Alarm Setting
4.6 Advanced Settings
4.6.1 User Setting
4.6.2 Auto Snap
4.6.3 E-mail Alarm Setting
4.6.4 FTP Server Setting
4.7 System Setting
4.7.1 Time Setting
4.7.2 Browser SD Card content
4.8 Default Factory Settings and Ports

The camera adopts 2.1 Mega Pixel 1/2.8” SONY Exmor progressive scan CMOS sensor, featured WDR, low illumination, high
definition. Special LPR technology applied: Highlight Compression (HLC) adjustable, multi-section shutter speeds, LED illuminators
brightness adjustable, AGC adjustable, digital display setting, automatic snapshot and FTP upload, etc.
Easy setting: no need professionals, no need client software. Manual setting all the function on control board inside camera. Connect NVR
or computer, playback video, pause and see license plates clearly.
.1 Features:
1. 2.0mega pixel SONY Exmor CMOS sensor, progressive scan, WDR, low illumination, high definition
2. Embedded intelligent algorithms for best viewing license plate day and night.
3. ONVIF protocol, GB28181 protocol, compatible with main NVR manufacturer, Hikvision, Dahua, etc.
4. HLC (highlight compression) function, auto shift from daytime setting mode to night setting mode. Good anti-headlights night effect.
5. WDR adjust
6. 1-3 lanes surveillance.
7. Shutter speed adjustable: 6 traffic modes selectable: 30KM/H, 60KM/H, 90KM/H,120KM/H,150KM/H,180KM/H standard mode
8. Easy setting: no need professionals, no need client software. Manual setting all the function on control board inside camera. Connect N
VR or computer, playback video, pause and see license plates clearly.
Varifocal lens: f=6-22mm
1.8 Inch LCD display menu: LED luminance value, HLC intensity, AGC value, current traffic mode...ETC
11. 4 PCS white bright lights.Color image at night. Night vision distance <20 M. Luminance
Add + / decrease-, adjustable no matter in daytime or at night. Auto shift from daytime setting mode to night setting mode.
12. IP66, waterproof. . High quality double shield housing.Heater, FAN Option
13. Support auto snapshot number plates when connection with inductive loops, etc trigger.
Snapshot JPG images store in TF card (max.32G) and/or FTP server. (TF card excluded).
14. double front glasses to avoid light halo and spot when LED is ON.
15.IR illuminator option, black & white image at night.
Applicable in: freeway, city road, country road, entrance/exit of community, school, hospital, industrial park, parking lot or
garage, toll gate, etc. Surveillance place

2.Technical Parameter
Model: NST-IPH6092NPSD
Sensor
1/2.8" SONY 2.1 Mega pixel Exmor progressive CMOS sensor
Resolution max.
Full HD/1080P(1920x1080) + Full D1
Min. illumination
color:0.05 Lux at F1.2 / LED illuminator ON:0.001Lux at F1.2
WDR Y
video codec
H.264 Main Profile @ Level 4.1 / Motion JPEG
streams
FHD/1080P + Full D1
Frame rate
25 fps / 30fps
video stream
H.264& M-JPEG video stream:video out multichannel video at max. Resolution. Frame rate and video steam
adjustable,H.264 support VBR/CBR
16:9 display
support
ROI Y
Video
Lens
f= 6-22 3MP fixed lens
Network port
1 RJ45,10/100M self adaptive Ethernet port, 1 BNC,1 power supply port
network protocol IPv4, TCP/IP, UDP, HTTP, DHCP, RTP/RTCP/RTSP, FTP, UPnP, DDNS, NTP, IGMP, ICMP ,etc
Network
access agreement
WEB, SDK API, ONVIF
video PC or NVR
Storage
Snapshot images TF card and/or FTP upload
OS
Microsoft Windows XP/Windows 7/IE:Microsoft Internet Explorer 6.x or above
Video out
1.0Vp-p,75Ω
Power supply
DC12V
Operating temperature
-10℃—50℃
General
N.W. (approx.) 2.5KG

3. Installation and setting
3.1Connect DC12V power supply, if the upper casing is open, the indicator light is on
3.2When the image appears in the monitor, adjust the focus and Iris to get clear image. Surveillance area: max. 5-8
meters wide.
3.3Digital
display: current traffic mode and its parameters.
To select various traffic mode by Rocker Switch UP or DOWN. The indicator is ON for the selected traffic mode. Five traffic
modes following:
License plate camera parameters control on LCD display (menu) and left and right (parameter setting keys)
3.3.1 License plate camera setting environment mode: Parking mode, Road mode. Factory default:
Parking mode.
3.3.2 Support speed: 30km / h, 60km / h ,, 90km / h ,, 120km / h ,, 150km / h ,, 180km / h, the Factory
default: 30km / h
3.3.3 HSBLC 4 levels: Auto, Low mode, Mid mode, High mode, The higher mode Factory default: Mid
mode
3.3.4WDR 4 levels: Closed, Low mode, Mid mode, High mode, The higher mode Factory default: Auto
3.3.5Environmental Brightness 4 levels: Auto, Low mode, Mid mode, High mode, The higher mode
Factory default: Low mode
3.3.6 Light brightness, 13 levels adjustable, users can make adjustments with the actual effect of the
plate according to site
3.3.7 The photosensitive start value, the photosensitive start values are 13 adjustable, the value
greater, the brightness darker. Factory default: 7 Level
3.3.8 3D Noise Reduction 4 levels: Auto, Low mode, mid mode, High mode, the higher mode Factory
default: Auto
3.3.9Language: Chinese, English . Factory default: English
3.4
::
NVR access protocol ONVIF, port 8080
4. Login and Function Setting
4.1 Login
Connect PC or NVR via internet for live view or recording when finish setting.
Using main Browsers (e.g.: IE browser)
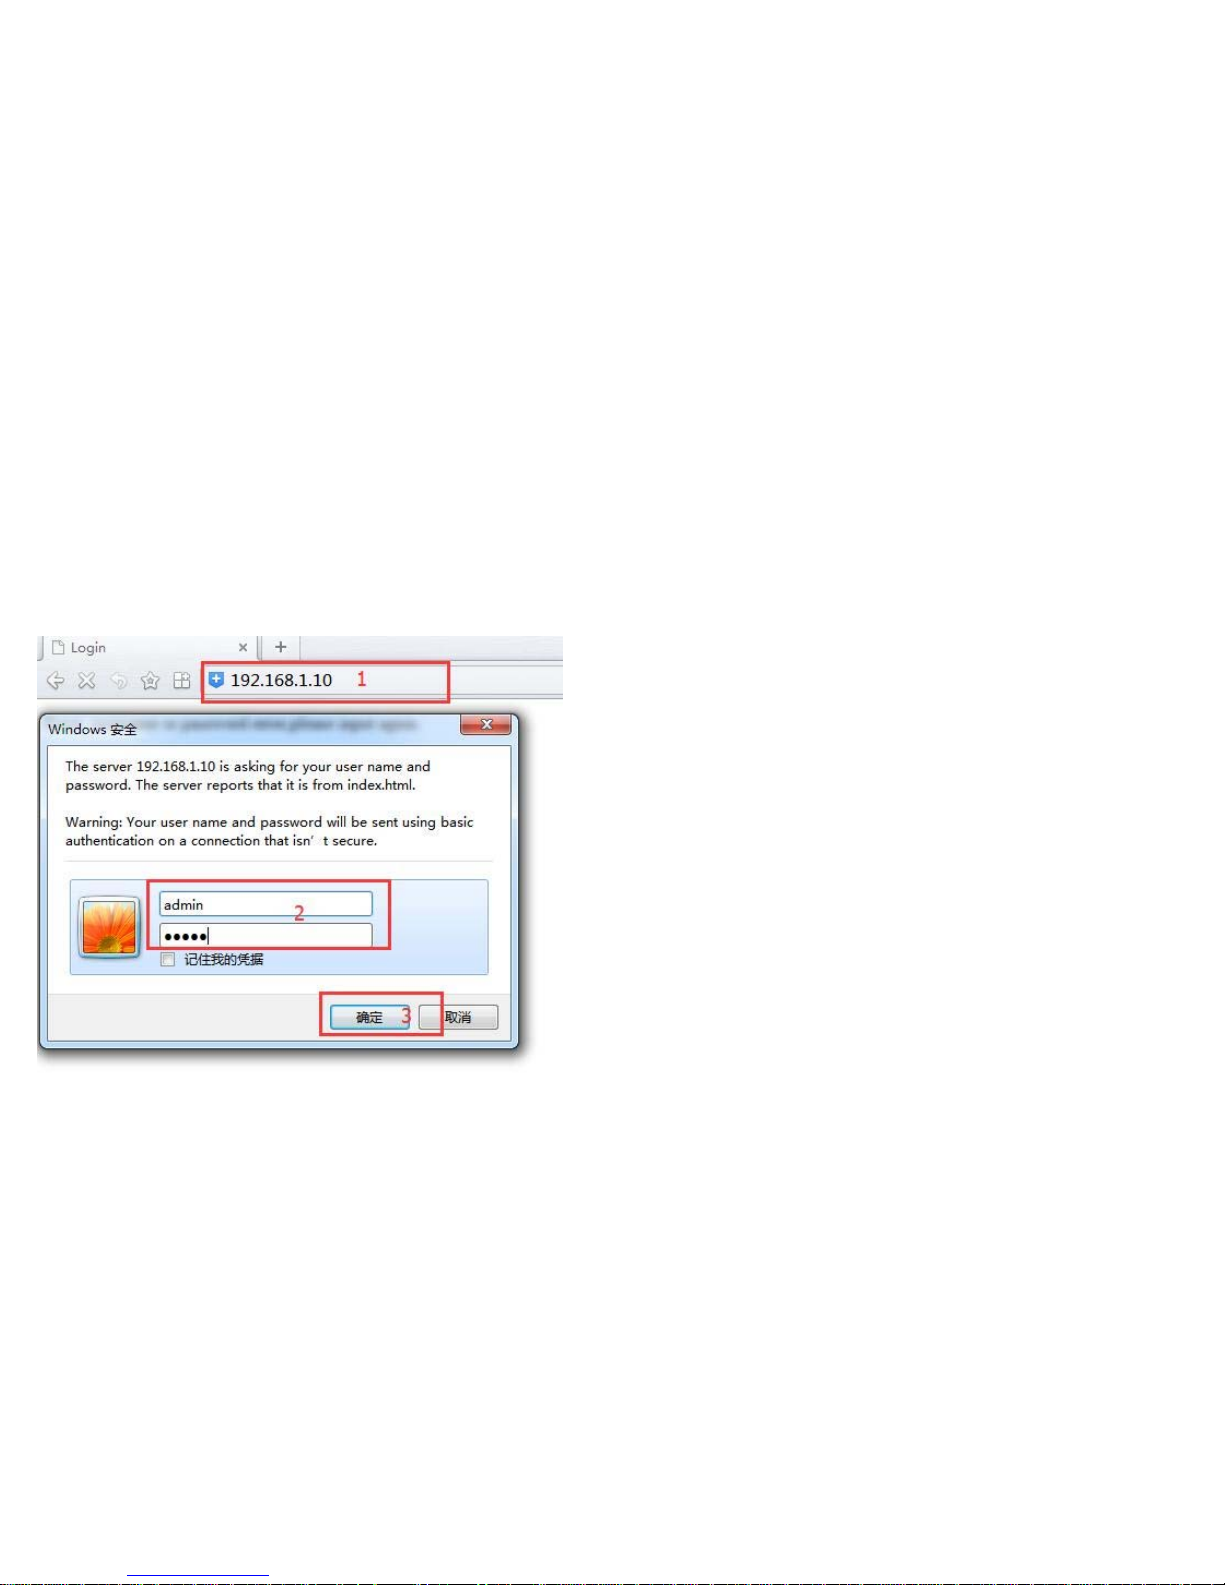
Default Factory IP Address: 192.168.1.10
Default Factory User Name: admin
Default Factory Password: admin
Step A: (Ref. P4.1-1) “Input IP Address – Fill in user and password – OK”
(P4.1-1)
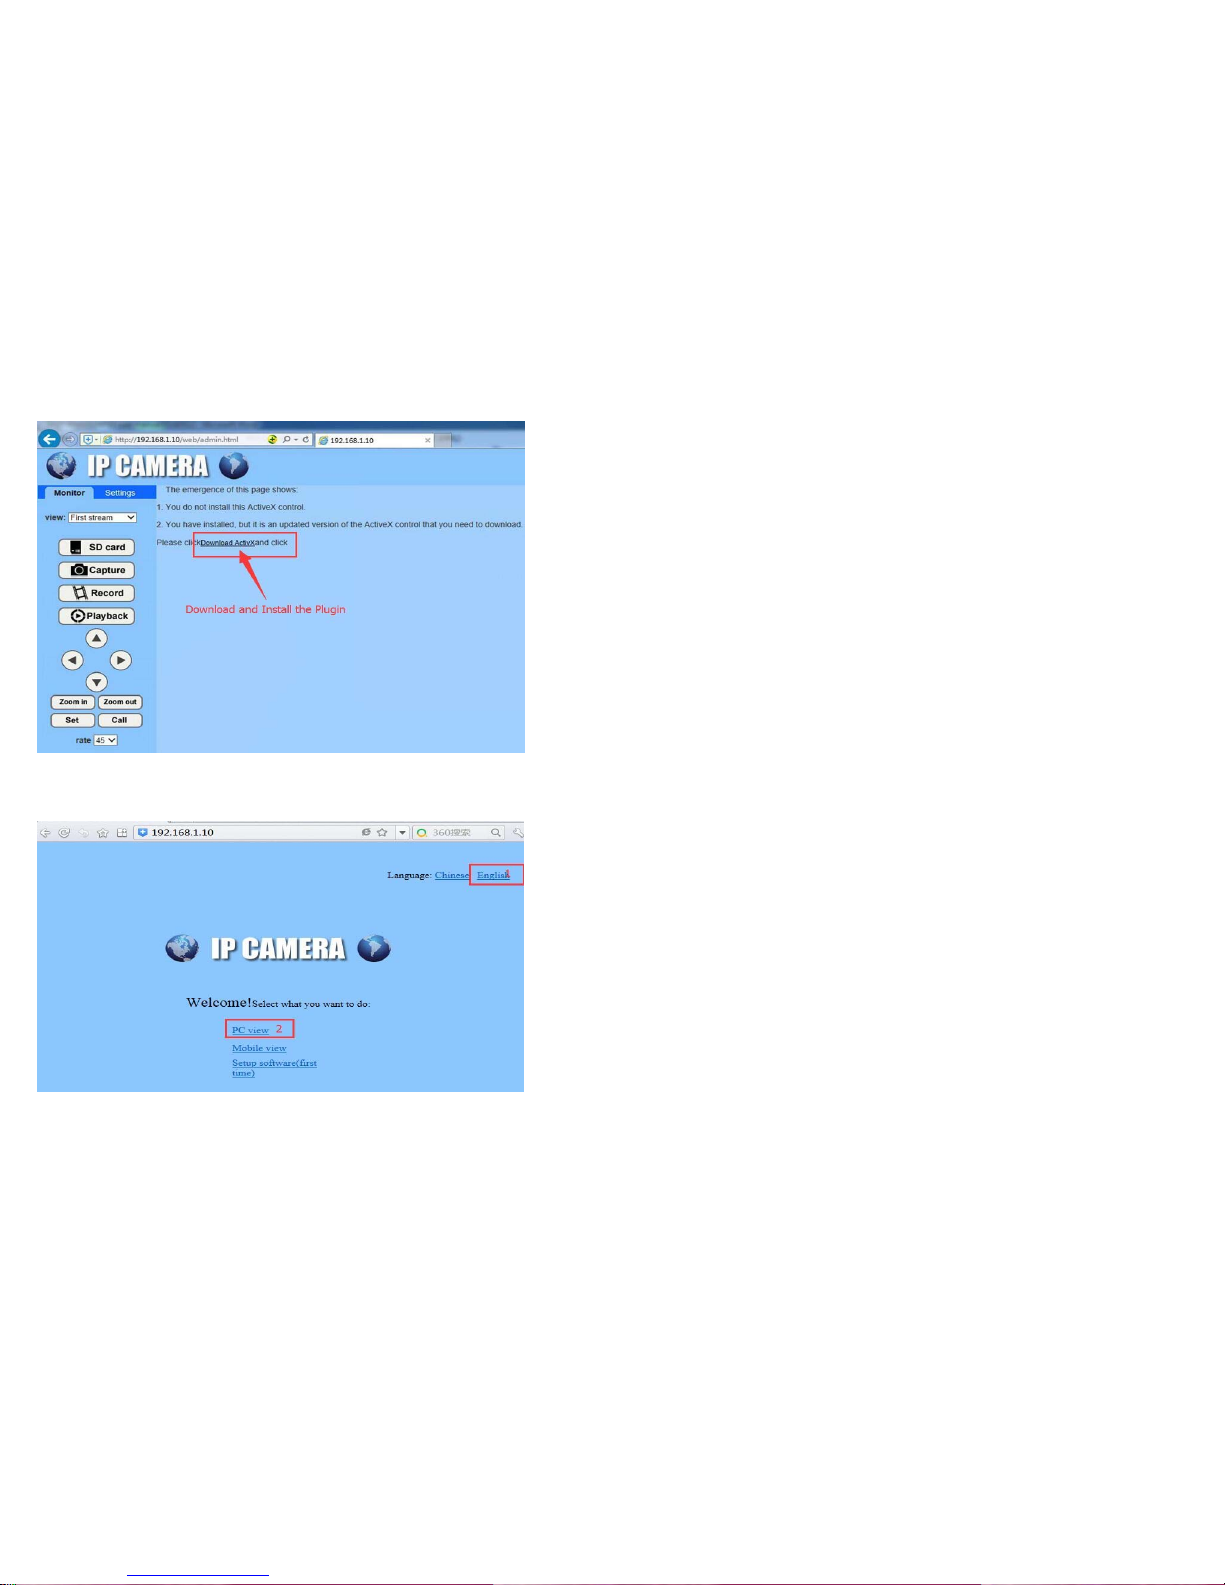
Step B: (Ref. P4.1-2) Download and install the “ActiveX” plug-in
(P4.1-2)
Step C: (Ref P4.1-3) “ English – PC View”
(P4.1-3)
 Loading...