

Page 1

Installation instruction
of the flat solar collectors models ES1V2.0, ES1V2.65,
ES2V/2.0 AL, ES2V/2.65
integrated in the slate roof.
Installation instruction
of the flat solar collectors models
ES1V2.0, ES1V2.65,
ES2V/2.0 AL, ES2V/2.65
integrated in the slate roof.
02/2012 Get acquainted before starting the installation.
Page 2

Installation instruction
of the flat solar collectors models ES1V2.0, ES1V2.65,
ES2V/2.0 AL, ES2V/2.65
integrated in the slate roof.
1. Introduction
Lightning protection
In case the height at which the collectors are to be installed exceeds 20 metres
and a building is not equipped with the lightning protection it is necessary to
connect all electrically conducting elements with an earth rod (minimal earth
rod cross-section – 16mm2), and then with a compensating potential.
In case the height at which the collectors are to be installed does not exceed
20 metres it is not necessary to provide the lightning protection.
If the building is equipped with the lightning protection it is important to
check the connection of the solar system to the lightning protection. That task
should be performed by an electrician.
Recycling
Completely used up solar collectors can be returned to the manufacturer.
The returned solar collectors shall be utilized by the manufacturer in the way
which is the least burdensome for the natural environment.
2. Safety during installation
Before commencing the installation work it is necessary to immediately
get acquainted with the safety tips!
2.1. Notes included in the instruction.
The installation instruction includes important information concerning safety
and proper positioning of the collectors on the roof as well as the correct
execution of the hydraulic connection. Drawings and information included in
the instruction apply to a vertical installation of the collectors.
Installation of the collators can only be performed by qualified personnel with
professional experience in the field of water supply and gas systems.
Upon completion of works an installer should hand over the installation
instruction to a customer and clearly explain the principles of operation and
directions essential to a proper operation of the solar system.
2.2 Application
This instruction includes a description of an vertical assembly set to carry out
the installation of solar collectors (vertically and horizontally) on the roof
with the inclination ranging from 30o up to 65o.
The assembly set shall exclusively be used to perform the installation of solar
collectors, it must not be used to install different devices on the roof.
Installation of only solar collectors on the supporting structure guarantees its
safety of operation.
Page 3
Installation instruction
of the flat solar collectors models ES1V2.0, ES1V2.65,
ES2V/2.0 AL, ES2V/2.65
integrated in the slate roof.
3. Before commencing the installation.
D
irections!
As the work on the roof can be dangerous it is recommended to hire a
roofwork firm.
DANGER OF GETTING SCALED.
In case the collectors and assembly materials are exposed to solar radiation
for a long time, there is a risk of getting scalded by hot elements.
In order to avoid the danger of scalding you should:
use protective clothing,
cover the collectors and the assembly materials with canvas cover
(thanks to which the heating up by sunbeams will be reduced).
3.1 Transport and storage.
during transport the collector connectors are protected by rubber caps,
collectors should be stored in a dry place. In case the collectors are stored
outside they should be protected against weather conditions.
3.2 Technical Documentation
Solar installation set consists of different components. Before
installing any of the components you should become
familiar with an adequate instruction.
A separate installation instruction is attached to a given device or a piece
equipment.
Installation instruction of solar collectors,
installation instruction of the pump group,
installation instruction of the solar controller,
installation instruction of the hot water container.
3.1 Completeness of delivery
Before commencing the installation it is necessary to check if the delivery is
complete and the delivered components are free of damage.
− in case of discovering any damages the defected elements or parts should
be immediately replaced,
− the replacement needs to be carried out with the application of original
spare parts only.
− the basic set is designed for two solar collectors, extending the solar
instalation for each successive solar collector is associated with
purchase an aditional extension set for each solar collector
Page 4
Installation instruction
of the flat solar collectors models ES1V2.0, ES1V2.65,
ES2V/2.0 AL, ES2V/2.65
integrated in the slate roof.
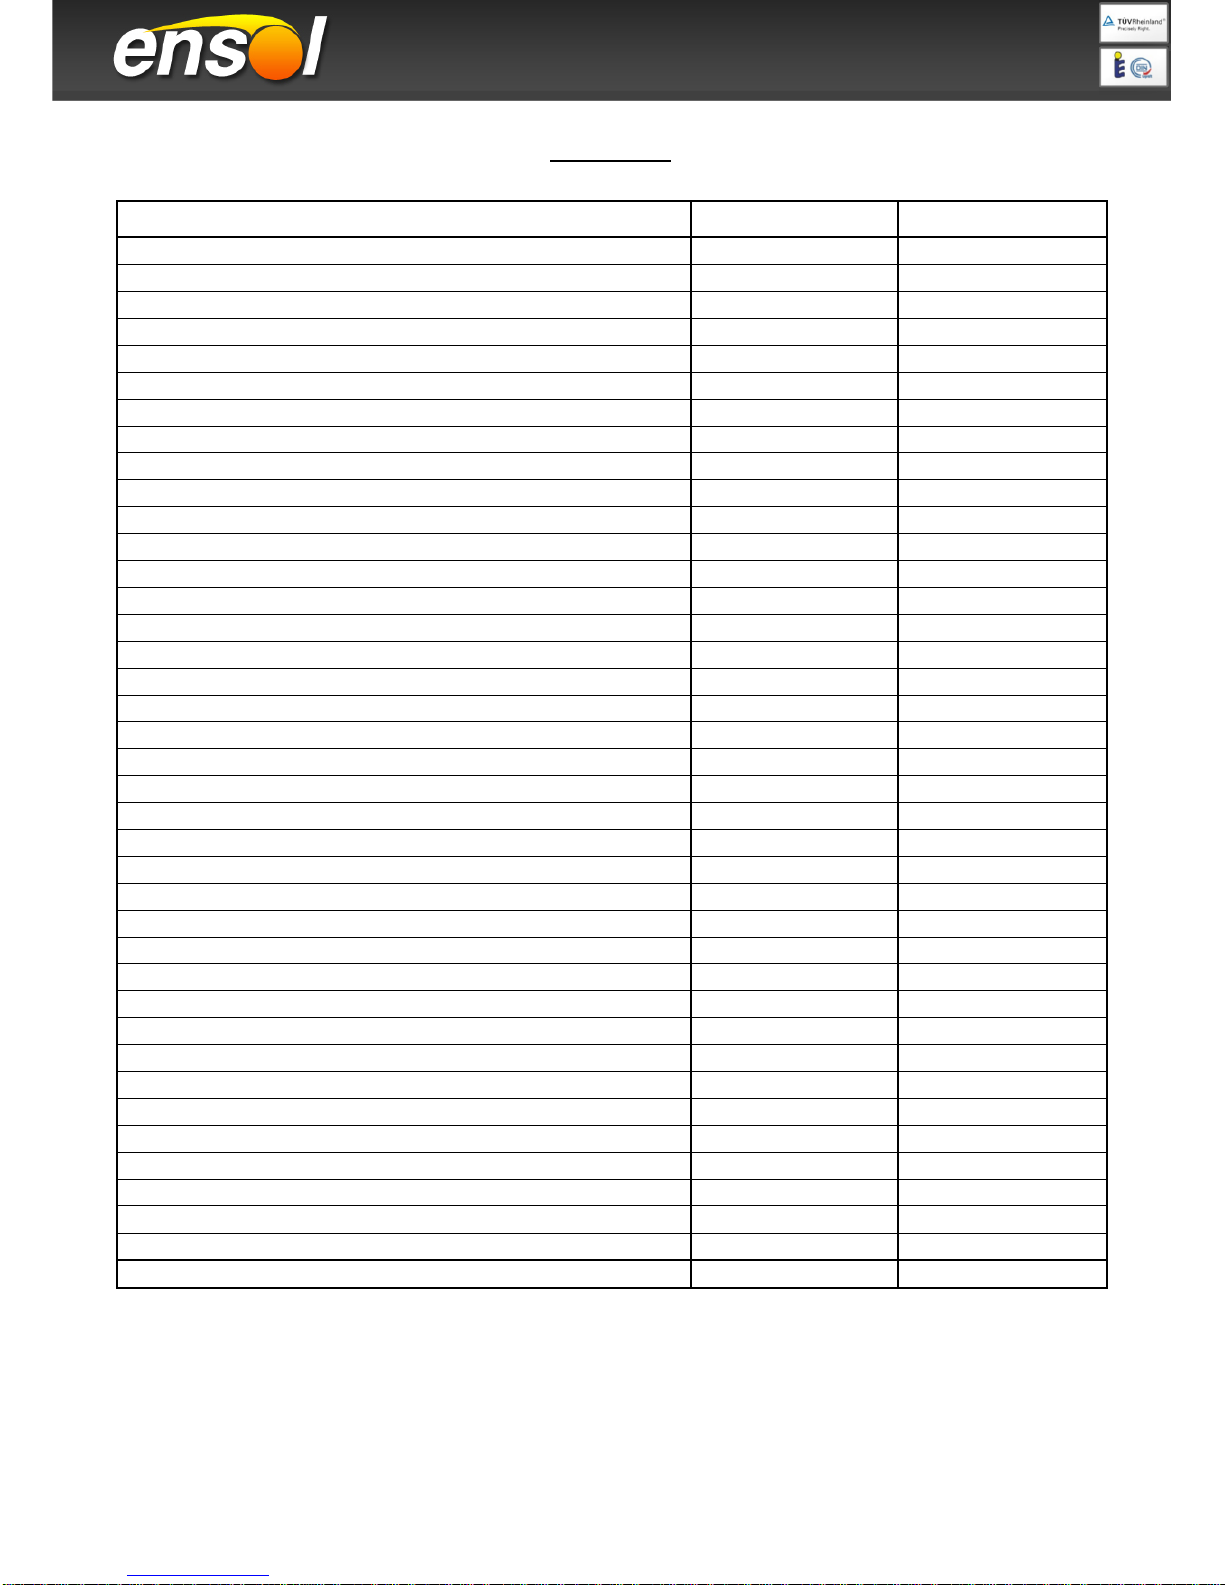
List of Items
Basic set Extension set
Description Quantity
Left top edge flashing 1 Right top edge flashing 1 Top extension flashing 1 1
Left lower edge flashing 1 Right lower edge flashing 1 Lower extension flashing 1 1
Left side flashing 1 Right side flashing Hook-in element Connecting plates 26 -
Centre flashing 1 1
Support frame for centre flashing 1 1
Cover flashing left 1 Cover flashing right 1 Cover flashing 1
Wind protection rail 2 1
Collector bracket 4 2
Collector clamping (40 x 40mm) 4 Linear collector clamping bar (114 x 30mm) 2 2
Seal strip 20/20 5lfm 1,5lfm
Wood wedge 2 1
Coloured and sealed screw 4,5 x 35mm 2
Self-tapping screw A2 4,2 x 13mm 9
Coloured and sealed self-tapping screw A2 4,2 x 13mm 14 7
Sheet strip 2
Wood screw 4 x 30mm 28 10
Wood screw 5 x 40mm 12 4
Wood screw 5 x 110mm 6 3
3.4 Additional tools and equipment
- level,
- harness with protective rope (to work high above ground),
−
scaffolding, a roof ladder or a crane.
Page 5

Installation instruction
of the flat solar collectors models ES1V2.0, ES1V2.65,
ES2V/2.0 AL, ES2V/2.65
integrated in the slate roof.
3.5 Location of a collector
Potential quantity of the absorbed radiation depends on a proper location of
the absorber in relation to falling sunbeams.
Optimum is a perpendicular position of a collector surface in relation to the
falling solar radiation.
Recommended location of a collector:
inclination angle:
40 – 45o for a year-long installation,
approximately 30o for installations used in summer,
approximately 60o for installations used in winter,
positioning of a collector in the southern direction (or approximate to the
southern direction).
Solar collectors must not be installed at the inclination below 30o or
over 75o.
It is recommended to install the collectors on the southern roof slope. During
the installation work particular attention should be paid to protect the
collectors from being overturned by strong winds. Permissible snow
and wind load amounts to max. 2,0 kN/m².
Collectors field should be located in such a way that the absorber will
not be shadowed by the adjacent buildings, trees, etc.
In case of a larger number of collector fields it is important that the front row
of the collectors do not shadow the back one.
3.6 Technical data for the flat collector models: ES1V/2.0, ES1V/2.65,
ES2V/2.0 AL, ES2V/2.65
Flat collector
Symbol ES1V/2.0 ES2V/2.0 AL ES1V/2.65 ES2V/2.65
Unit
Width A 1006 1006 1120 1120 mm
Height B 2007 2007 2356 2356 mm
Depth C 85 85 85 85 mm
Collector weight m 40 40 49 49 kg
Area S 2,02 2,02 2,65 2,65 m
2
Connectors: Cu pipe Φ 22 22 22 22 mm
Fluid volume V 1.8 1.8 2.2 2.2 dm
3
Max working pressure p
max
6.0 6.0 6.0 6.0 bar
Optimum flow min. - max. m 60-90 40-60 75-105 75-105 dm3/h
Required space
ES1V/2,0 and ES2V/2,0 AL for vertical installation
Required about 2400 mm in height and 1800 mm in width for the first
collector and + 1110 mm in width for each consecutive one. In case of
mounting a collector on the inclined roof the minimum distance between
collectors and the roof edge is 1m.
Page 6
Installation instruction
of the flat solar collectors models ES1V2.0, ES1V2.65,
ES2V/2.0 AL, ES2V/2.65
integrated in the slate roof.
ES1V/2,65, ES2V/2,65 for vertical installation
Required about 2800 mm in height and 1900 mm in width for the first
collector and + 1220 mm in width for each consecutive one. In case of
mounting a collector on the inclined roof the minimum distance between
collectors and the roof edge is 1m.
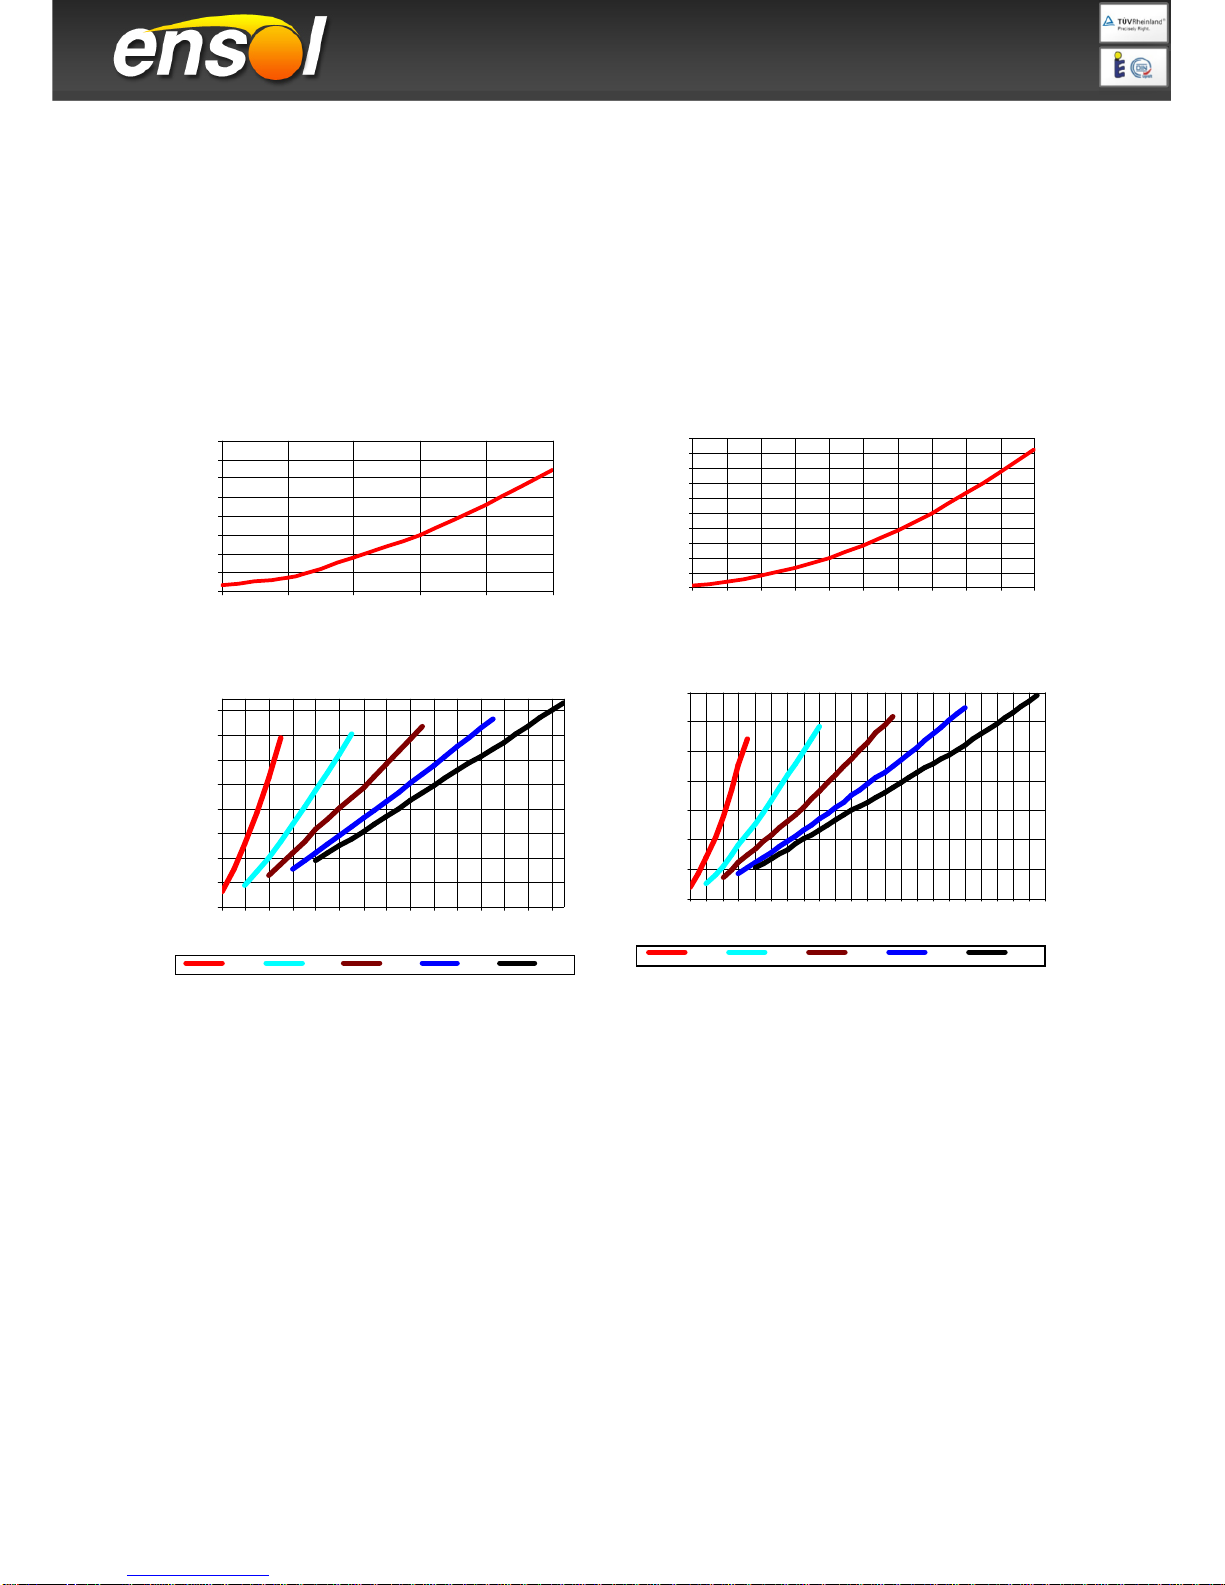
3.7 Flow resistance for collectors
3.8 Warranty conditions of the installation and use of the collectors ES2V/2.0 AL
with aluminum absorber
It is allowed to use only solar fluids that is accepted and offered by the producer, e.g.
ENSOLICOL-AL -25,
It is allowed to wash the solar thermal system and perform the leak test only with solar fluid,
The solar thermal system must be closed (hermetic):
− the solar system can not contain automatic vents (potential place through the installation can
get into air),
− before the first start, the solar system must be completely deaerated, and be leakproofed by
the plumber,
− any leaks are associated with getting air into the solar thermal system with maximize the risk
of corrosion. Once air get into the solar system the solar fluid must be replaced.
It is allowed to use only connections systems that are offered by the producer,
It is recommended to do the solar system with flexible stainless steel tubes or steel tubes. It
is forbidden to connect directly the connector pipe of the collector witch any copper or brass
parts of the solar system witch increases the possibility of electrochemical corrosion.
1-10 x ES2V/2,0 AL
20
30
40
50
60
70
80
90
100
40 90 150 210 270 330 390 450 510 570 630 690 750 810 870
liquid flow [dm3/h]
pressure drop [mbar]
1-2 3-4 5-6 7-8 9-10
1-10 x ES2V/2,65 i ES2H/2,65
20
40
60
80
100
120
140
160
60
1
20
18
0
240
300
360
420
480
540
600
660
7
20
78
0
840
900
960
10
20
10801140
1200
1260
1320
1380
liquid flow [dm
3
/h]
pressure drop [mbar]
1-2 3-4 5-6 7-8 9-10
ES1V/2,0
0
5
10
15
20
25
30
35
40
50 100 150 200 250 300
liquid flow [dm3/h]
pressure drop [mbar]
ES1V/2,65
0
2
4
6
8
10
12
14
16
18
20
0 20 40 60 80 100 120 140 160 180 200
liquid flow [ dm3/h]
pressure drop [mbar]
Page 7

Installation instruction
of the flat solar collectors models ES1V2.0, ES1V2.65,
ES2V/2.0 AL, ES2V/2.65
integrated in the slate roof.
4. Installation and commissioning of the solar system:
4.1 Installation of the collectors on the roof
4.2 Installation of the connection system - hydraulic connection of the collector
4.3 Leak test and commissioning of the installation
4.4 Enclosure of the solar system
THE MONTER / INSTALLER MUST BE SURE OF A CORRECT
INSTALLATION AND LEAKPROOF OF THE COLLECTORS BEFORE
ENCLOSING THE SOLAR SYSTEM!
Attention: This flashing only can be used in the combination of “double-lap slating”!
The minimum roof pitch for the installation of this flashing is 30°!
Into consideration of mandatory safety measures uncover the roof for the assembly of the
roof integrated solar collectors (500mm broader as requested for the collectors).
4.1.1 Installation and positioning an additional batten
Attach an additional batten at the lower end
(with the
same dimensions as the existing
one) in a distance of 160mm along the total
width
of the installation. This is needed to
counteract the snow load!
Ho
ok in the left lower edge flashing at the
upper batten. Mount it together with a
collector bracket by the
help of a wood
screw (4 x 30mm) at the provided holes in
the sheet.
This connecting link must overlap the tile
10mm at least!
Please note: The lower frame
must have a roof pitch!
Page 8

Installation instruction
of the flat solar collectors models ES1V2.0, ES1V2.65,
ES2V/2.0 AL, ES2V/2.65
integrated in the slate roof.
4.1.2 connecting the lower edge flashing
4.1.3 connecting the lower edge flashing
4.1.4 montage of the solar panels
Connect the left edge with the lower extension
flashing. Push them together till the indicated
mark is reached. Fix it again together with a
collector bracket by the help of a wood screw
(4 x 30mm) at the provided hole.
Repeat this procedure with the right lower edge.
Place the left solar collector on the lower
flashing (exact on the indication mark).
Insert the collector in the collector bracket.
Indication mark
Indication mark
Page 9

Installation instruction
of the flat solar collectors models ES1V2.0, ES1V2.65,
ES2V/2.0 AL, ES2V/2.65
integrated in the slate roof.
4.1.5 montage of the collector clampings
4.2 Installation of the connection system - hydraulic connection of the collector
4.2.1. Hydraulic connection of the harp collectors ES1V/2.0 and ES1V/2.65
Directions!
Hydraulic conduits and fixtures can be connected at the left or right side of
the collector battery. The instruction presents the connection at the right side,
as an example.
One-sided connection of maximum 5 collectors.
When forming a battery you can connect maximum 5 collectors.
elbow Expansion joint cross-fitting
Fix the left collector
at the upper and lower
left side by the help of the collector clamping
(40 x 40mm) and wood screws (5 x 40mm).
Afterwards place the right collector. Set both
linear collector clamping bars (114 x 30mm)
bet
ween the collectors, push the collectors
together and screw the clamping bars down
by wood screws (5 x 40mm). Fix the right
collector also at the upper and lower side by
the help of collector clamping (40 x 40mm)
and wood screws (5 x 40mm).
Collector clamping
Page 10

Installation instruction
of the flat solar collectors models ES1V2.0, ES1V2.65,
ES2V/2.0 AL, ES2V/2.65
integrated in the slate roof.
4.2.2. Hydraulic connection of the meander collectors ES2V/2.0 AL. ES2V/2,65
Directions!
The power supply and return must be connected to the diagonal of the
collector or the battery. The power supply should be connected to the lower
connection and the return to the top connector. The Connection for power
supply/return is arbitrary – in can be from the left or right sight. In the two
other connections should be clamps. The instruction presents the connection
at the right side, as an example.
One-sided connection of maximum 10 collectors.
When forming a battery you can connect maximum 10 collectors.
clamp expansion joint cross-fitting
elbow expansion joint clamp
4.2.3 Connecting the collectors with a clamping pipe union.
Collectors ES1V/2.0 and ES1V/2.65 – connecting upper connectors pipe
Collectors ES2V/2.0 AL, ES2V/2.65 – connecting upper and bottom
connector pipe
1 – connector pipe of
the collector
2 – strengthening sleeve
3 – pipe union nut
4 – clamping ring
5 – pipe union nipple
Mount the pipe union on the first collector, then move
the second collector closer and fasten the pipe union on both collectors.
−
place the strengthening sleeve (2) in the connector pipe of the collector (1),
−
pipe union nut (3) should be put on the connector pipe of the collector (1),
−
clamping ring (4) should be placed on the connector pipe of the collector,
−
screw the nut (3) onto the pipe union body,
−
place the strengthening sleeve in the connector pipe of the second collector,
−
put the nut on the connector pipe of the second collector,
−
place the clamping ring on the connector pipe of the second collector,
−
move the second collector closer to the pipe union,
−
screw the nut onto the pipe union nipple.
Page 11

Installation instruction
of the flat solar collectors models ES1V2.0, ES1V2.65,
ES2V/2.0 AL, ES2V/2.65
integrated in the slate roof.
Directions
The nut should be tightened up so as to secure the leak-tightness of the
connection, however, not too strong in order to avoid damage to the
connector pipe of the collector.
4.2.4 Connection of the collectors feeding
1 – connector pipe of the collector
2 – strengthening sleeve
3 – nut
4 – clamping ring
5 – elbow body
6 – insulated flexible conduit
−
place the strengthening sleeve (2) in the connector pipe of the collector (1),
−
elbow nut (3) should be put on the connector pipe of the collector (1),
−
clamping ring (4) should be placed on the connector pipe of the collector (1),
−
screw the nut (3) onto the elbow (5),
−
flexible cord nut (6) needs to be screwed on the elbow (5),
−
connect the flexible conduit to the solar system.
4.2.5 Connection of the collector return
1 – connector pipe of the collector,
2 – strengthening sleeve,
3 – clamp nut,
4 – clamping ring,
5 – complete pipe-cross with a manual air
escape and an immersion sleeve,
6 – insulated flexible conduit
−
place the strengthening sleeve (2) in
the connector pipe of the collector (1),
−
put the clamp nut (3) on the connector pipe of the collector (1),
−
place the clamping ring (4) on the connector pipe of the collector (1),
−
immersion sleeve with the complete pipe-cross (5) needs to be placed in the
connector pipe of the collector (1),
−
screw the clamp nut (3) onto the pipe-cross (5) at the left side,
−
screw the insulated flexible conduit (6) at the bottom of the pipe-cross (5),
−
connect the flexible conduit to the solar system.
4.2.6 Connection of the clamps - for collectors ES2V/2.0 AL, ES2V/2,65
Mount the clamps on the empty connectors (on the diagonal of the collector or the
battery).
1. Clamp
2. Solar collector
Page 12

Installation instruction
of the flat solar collectors models ES1V2.0, ES1V2.65,
ES2V/2.0 AL, ES2V/2.65
integrated in the slate roof.
4.2.7 Connection of the temperature sensor
Damage to the system
In case of wrong installation of a temperature sensor or damage to
the signal cable there is a risk of damage to the system.
- signal cable must be protected against damage (e.g. damage caused by
birds, rodents) using a protective coat.
Temperature sensor should be installed
in an immersion sleeve.
−
insert the temperature sensor into
the immersion sleeve,
−
protect with a clamping spring against
moving out.
4.2.8 Connection of collecting conduits
Hydraulic connection with collecting pipes should be executed by means of
an insulated flexible conduit. It is not allowed to connect stiff collective
pipes directly to the collector.
The connection of flexible conduits with the system must be done below the
level of the air escape.
Directions!
Universal roof ventilators and antenna penetration should be used to execute
the passage of conduits across the roof.
Directions!
A cable for the temperature sensor should be laid together with the flexible
return conduit.
4.3
Inspection of the installation
Upon completion of the installation work it is necessary to:
−
inspect the installation correctness of all elements of the system,
−
check the system by means of a pressure test,
−
flush the system with water,
−
fill in the system with the solar agent.
After the pressure test and water flushing of the system it must be immediately filled
up with the solar agent. Otherwise, the tightness test and flushing need to be carried
out directly before filling up the installation with the solar agent.
Page 13

Installation instruction
of the flat solar collectors models ES1V2.0, ES1V2.65,
ES2V/2.0 AL, ES2V/2.65
integrated in the slate roof.
4.3.1 Filling up the installation
Filling up the installation by using a filling station
1. Filling station (9): Connect the hose (1) with the upper valve (3), hose (2)
with the bottom valve (4).
2. Open the valve (3 and 4) and run the pump.
3. Closing the valve (5) will cause the flow through the solar collectors.
During filling and venting the system, you should several times open and
close the vent (5).
4. Do not turn off the pump until the installation will be completely vent -
until from the hose stop flowing air bubbles.
5. Open the vent (5) and close the vent (4) and still pump the fluid until the
installation will reach the required pressure, p = 2,5 bar - Pressure
measurement (12).
6. Close the valve (4) and pump until the installation will reach the required
pressure, p = 2,5 bar - Pressure measurement (6).
7. Turn on the controller plug (7) to the network and enable ~ 230V
circulation pump in manual mode.
8. Remnants of the air should be removed automatically by unscrewing the
valve manually
9. In case of decrease or absence of flow unscrew the central screw in the
circulating pump and let the air exhale. Do this exercise until full vent
installation.
10. In the case of pressure drop on the Pressure measurement (6) below 1,5
bar complete up to the to the required pressure p=2,5 bar
11. Disconnect the hose from the filling station from the valves (3, 4)
4.3.2 Venting of the solar installation
After venting the solar installation by means of a filling station and a manual
air escape you should close the air escape valve, in case of an automatic air
Page 14

Installation instruction
of the flat solar collectors models ES1V2.0, ES1V2.65,
ES2V/2.0 AL, ES2V/2.65
integrated in the slate roof.
escape it is necessary to close the ball valve.
4.3.3 Insulation work
Insulation work should be done after performing all inspection operations.
Directions!
−
High temperature and weather resistant insulation must be used to insulate
the conduits which are outside the building.
If necessary, protect the insulation against damage caused by birds.
−
High temperature resistant insulation must be used to insulate the conduits
inside the building.
4.4 Enclosure of the solar system
THE MONTER / INSTALLER MUST BE SURE OF A CORRECT
INSTALLATION AND LEAKPROOF OF THE COLLECTORS BEFORE
ENCLOSING THE SOLAR SYSTEM!
4.4.1 montage of the side flashing
4.4.2 Support frame for centre flashing
Affix both hook-in elements at the outer side of each
collector. Use four self-tapping screws (4,2 x 13mm)
for each element at the provided holes.
Clip in the support frame for the centre flashing
between the collectors (in the vertical centre).
Page 15

Installation instruction
of the flat solar collectors models ES1V2.0, ES1V2.65,
ES2V/2.0 AL, ES2V/2.65
integrated in the slate roof.
4.4.3 montage of the Cover flashing
4.4.4 montage of the cover flashing
Affix the cov
er flashings at the front side of both
collectors. The indication mark at the cover
flashing has to be positioned at the outer side of
each collector. Use the coloured and sealed self-
tapping screws (4,2 x 13mm) at the provided holes
in each cover flashing
. The overhang on the outer
sides is 110mm.
Betwee
n the collectors the overlap of the cover
flashings should be 23mm.
Clip the centre flashing between both
collectors.
Fix the centre flashing at the
provided holes with one
screw in the
middle and two screws at the lower end
(coloured and sealed self-
tapping screws
4,2 x 13mm).
Indication mark
Screws
110mm
Page 16

Installation instruction
of the flat solar collectors models ES1V2.0, ES1V2.65,
ES2V/2.0 AL, ES2V/2.65
integrated in the slate roof.
4.4.5 montage of the side flashings
4.4.6 montage of the seal strip
4.4.7 Fixng the wind protection rail
Clip in both side flashings in the hook-in elements of
each collector. Fix the side flashings at the battens (four
times on each side).
Additional attach the side flashings at the lower end by
the help of two coloured and sealed self-tapping screws
(4,2 x 13mm).
Stick the seal st
rip (20 x 20mm) across the total
width, including the centre and the side
flashings.
Fix the wind protection rail in the middle of
the
wood wedge by the help of four wood screws
(4 x 30mm)
Screws
Wood screw 4 x 30
Page 17

Installation instruction
of the flat solar collectors models ES1V2.0, ES1V2.65,
ES2V/2.0 AL, ES2V/2.65
integrated in the slate roof.
4.4.8 Fixng the wind protection rail
4.4.9 montage of the slate roofing
Mount the wood wedge at the batten
s and fix
them with three wood scr
ews (5 x 110 mm).
The wood wedge has to be in touch with the
side flashings on both outer sides.
Attention
: The wood wedge has to lie on two
battens!
Wood screw 5 x 110mm
Now start with the slates. Alternately use slates and
connection plates (double-lap slating). Insert the
short side of each connection plate into the side
flashing.
Do the same on the right side!
Page 18

Installation instruction
of the flat solar collectors models ES1V2.0, ES1V2.65,
ES2V/2.0 AL, ES2V/2.65
integrated in the slate roof.
4.4.10 montage of the left top edge flashing
4.4.11 montage of the top edge flashing
4.4.12 montage of the right top edge flashing
Push together the
top extension
flashing and the left top edge (approx.
40mm) and fix them outside the seam
with two wood screws (4 x 30mm).
Clip in the left top edge at the wind protectio
n rail and fix
it at the wood wedge with two wood screws (4 x 30mm),
as shown on the small pictures. This has to be done
outside of the seam!
Fix the upper edge at the wood wedge by the help of a
coloured and sealed screw (4,5 x 35mm).
Fix the right upper edge at the
wood wedge by the
help of a coloured and sealed screw (4,5 x 35mm).
Afterwards hook in four sheet strips along the upper
flashing and affix them with wood screws (4,5 x
35mm).
Stick the seal strip (20
x 20mm) across the total
width.
Wood screw 4 x 30mm
Wood screw 4 x 30mm
Coloured and sealed screw
The distance between the
flashing and the wind
protection rail should be
5mm!
Sheet strips
Page 19

Installation instruction
of the flat solar collectors models ES1V2.0, ES1V2.65,
ES2V/2.0 AL, ES2V/2.65
integrated in the slate roof.
4.4.13 Finishing works
A
t the end cover the roof completely up to the
flashing.
Stick the lead strip on the slates (e.g. with
polyurethane – foam).
Page 20

Installation instruction
of the flat solar collectors models ES1V2.0, ES1V2.65,
ES2V/2.0 AL, ES2V/2.65
integrated in the slate roof.
5. Maintenance and Service
4. During the maintenance and other kind of work a collector must be placed firmly
to exclude the danger of tripping over and falling down,
5. It is not allowed to perform any repair and maintenance work under a lifted
collector which has not been protected against casual falling down,
6. Repair and maintenance work should be done by means of suitable tools and the
servicing personnel should wear protective gloves and shoes,
7. Before the commencement of maintenance work it is necessary to wait till the
temperature of a collector lowers to such an extent that a risk of getting scalded
by hot elements is excluded,
8. Overhaul of the solar system needs to be done in accordance with warranty
recommendations for particular elements of the system.
In order to guarantee failure-free operation of the whole system it is
recommended to carry out the following maintenance work at least once a year:
1. Frost protection – check the solar fluid resistance to frost by means of a control
device (refractometer). In case of a significant fall in frost resistance of the solar
fluid it should be replaced and the system must be deaerated once again.
2. System pressure – working pressure in the solar system needs to be checked.
After the start-up period no drop of pressure is permissible.
3. Expansion vessel – input pressure of the expansion vessel should be checked.
To this end, disconnect the vessel from the system and measure the pressure. The
input pressure should be 2,5 bars.
The control and protection system should also be inspected along with the
structure for supporting and fixing a collector on the roof.
In order to guarantee the proper operation of the whole system, every time we
recommend you to enter into a contract for maintenance work with a specialist
installation firm.
Energetyka Solarna Ensol Sp. z
 Loading...