

Page 1
BrightEye and BrightEye NXT
Rack Mount Assembly Kit
Installation Guide
Models BERKMT-FULL and BERKMT-RR
Revision 1.3
Page 2

Mitto
TM
Pro 2
BrightEye Rack Mount User Guide
Contents
Overview 3
List of what is included in your BrightEye Rack Mount Kit (BERKMT-FULL or BERKMT-RR) 4
Illustrations and associated letters for components in the BrightEye Rack Mount Kit 4
Installing a BrightEye NXT in the Rack Mount, Overview 7
Installing a BrightEye NXT in the Rack Mount, Details 8
Installing a BrightEye in the Rack Mount 10
Using Blank Filler Panels in the Rack Mount 12
Additional Parts Order Info 13
BrightEye Rack Mount Retainer Kit – BERK-RET 13
BrightEye Rack Mount Filler Panel Kit – BERK-BPKit 13
BrightEye Single-High Blank Panel – BEBP 13
Troubleshooting 14
There’s a gap between the blank ller panel and the side of rack mount 14
My BrightEye NXT won’t complete its power up cycle 14
Factory Service 14
www.ensembledesigns.com BrightEye Rack Mount - Page 2
Page 3
Mitto
TM
Pro 2
BrightEye Rack Mount User Guide
Overview
The BrightEye Rack Mount Kit is designed to accommodate any mixture of BrightEyes and
BrightEye NXTs. The rack tray occupies 1RU and can hold 3 BrightEye NXTs, or any combination of
BrightEye NXTs, single-high BrightEyes and double-high BrightEyes. Retainers fasten to the rack tray’s
right angle mounting block to hold the units securely in place. All installation can be done from the
front, so it’s easy to mount the BrightEye Rack Mount into your rack and then populate it. Blank filler
panels may be installed in unused spaces, if desired. See the illustrations below for a few examples of
how the rack can be populated.
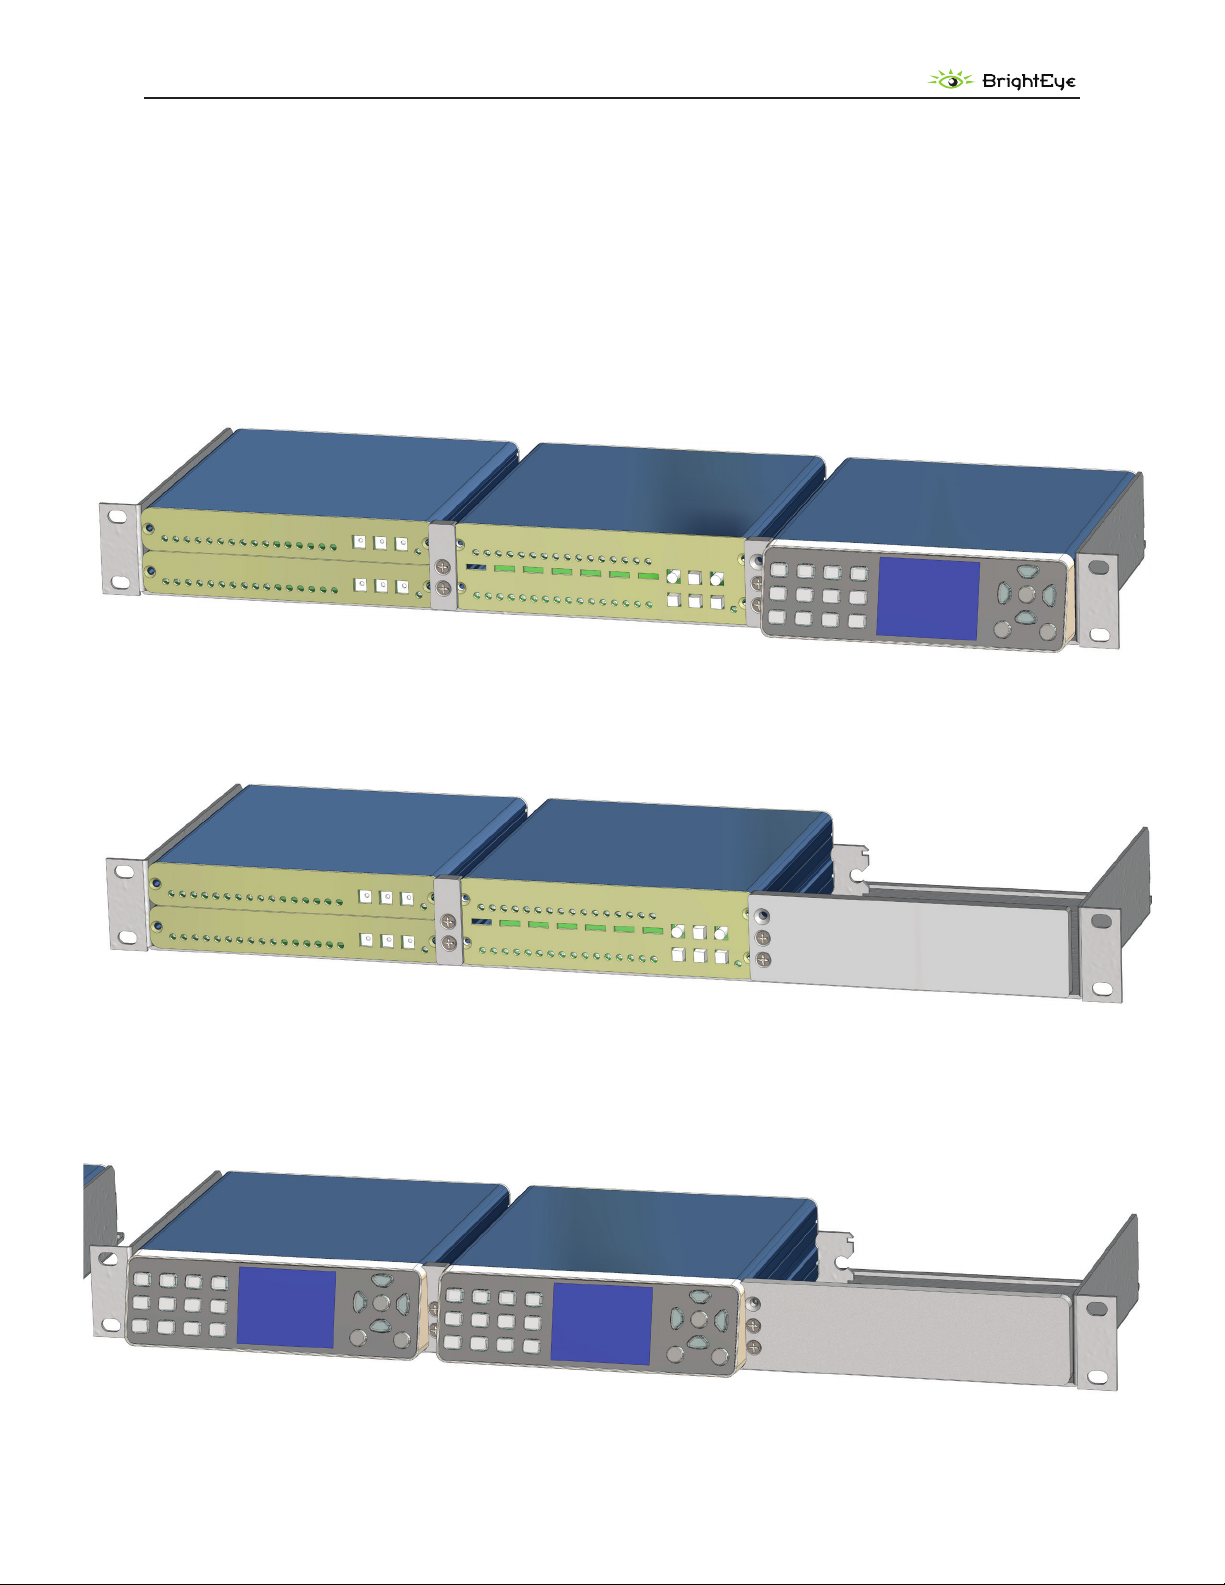
BrightEye Rack Tray populated with 2 single-high BrightEyes (left) 1 double-high BrightEye (center)
and 1 BrightEye NXT (right).
BrightEye Rack Tray populated with 2 single-high BrightEyes (left), 1 double-high BrightEye (center)
and 1 BrightEye Blank Filler Panel (right).
BrightEye Rack Tray populated with 2 BrightEye NXTs (left and center) and 1 NXT Blank Filler Panel (right).
www.ensembledesigns.com BrightEye Rack Mount - Page 3
Page 4
Mitto
TM
Pro 2
BrightEye Rack Mount User Guide
List of what is included in your BrightEye Rack Mount Kit
(BERKMT-FULL or BERKMT-RR)
Quantity Description Reference
Letter
Ensemble
Designs
Part Number
1 BrightEye Rack Tray, Black A 52002231
2 BrightEye to NXT Rack Mount Retainer B 52002232
2 BrightEye to BrightEye Rack Mount Retainer C 52002233
2 NXT to NXT Rack Mount Retainer D 52002234
4 NXT Retainer Washer E 52002236
4 6-32 x 1/2” Phillips Flat Black Z/P Machine Screw w/Nylock 30001147
4 4-40 x 7/16” Phillips Flat Machine Screw, Black Oxide 30001148
2 NXT Blank Filler Panel for the BrightEye Rack Tray (BERKMT-FULL only) F 52002238
2 BrightEye Blank Filler Panel for the BrightEye Rack Tray (BERKMT-FULL only) G 52002239
Note: Two BrightEye rack mount kits are available to meet your needs. The BERKMT-FULL kit includes blank filler
panels and the BERKMT-RR does not.
Illustrations and associated letters for components in the BrightEye Rack Mount Kit
The following pages show detailed illustrations of the components in the BrightEye Rack Mount Kit, and reference
the letter associated with each part. This document generally uses the letter as the reference for simplicity.
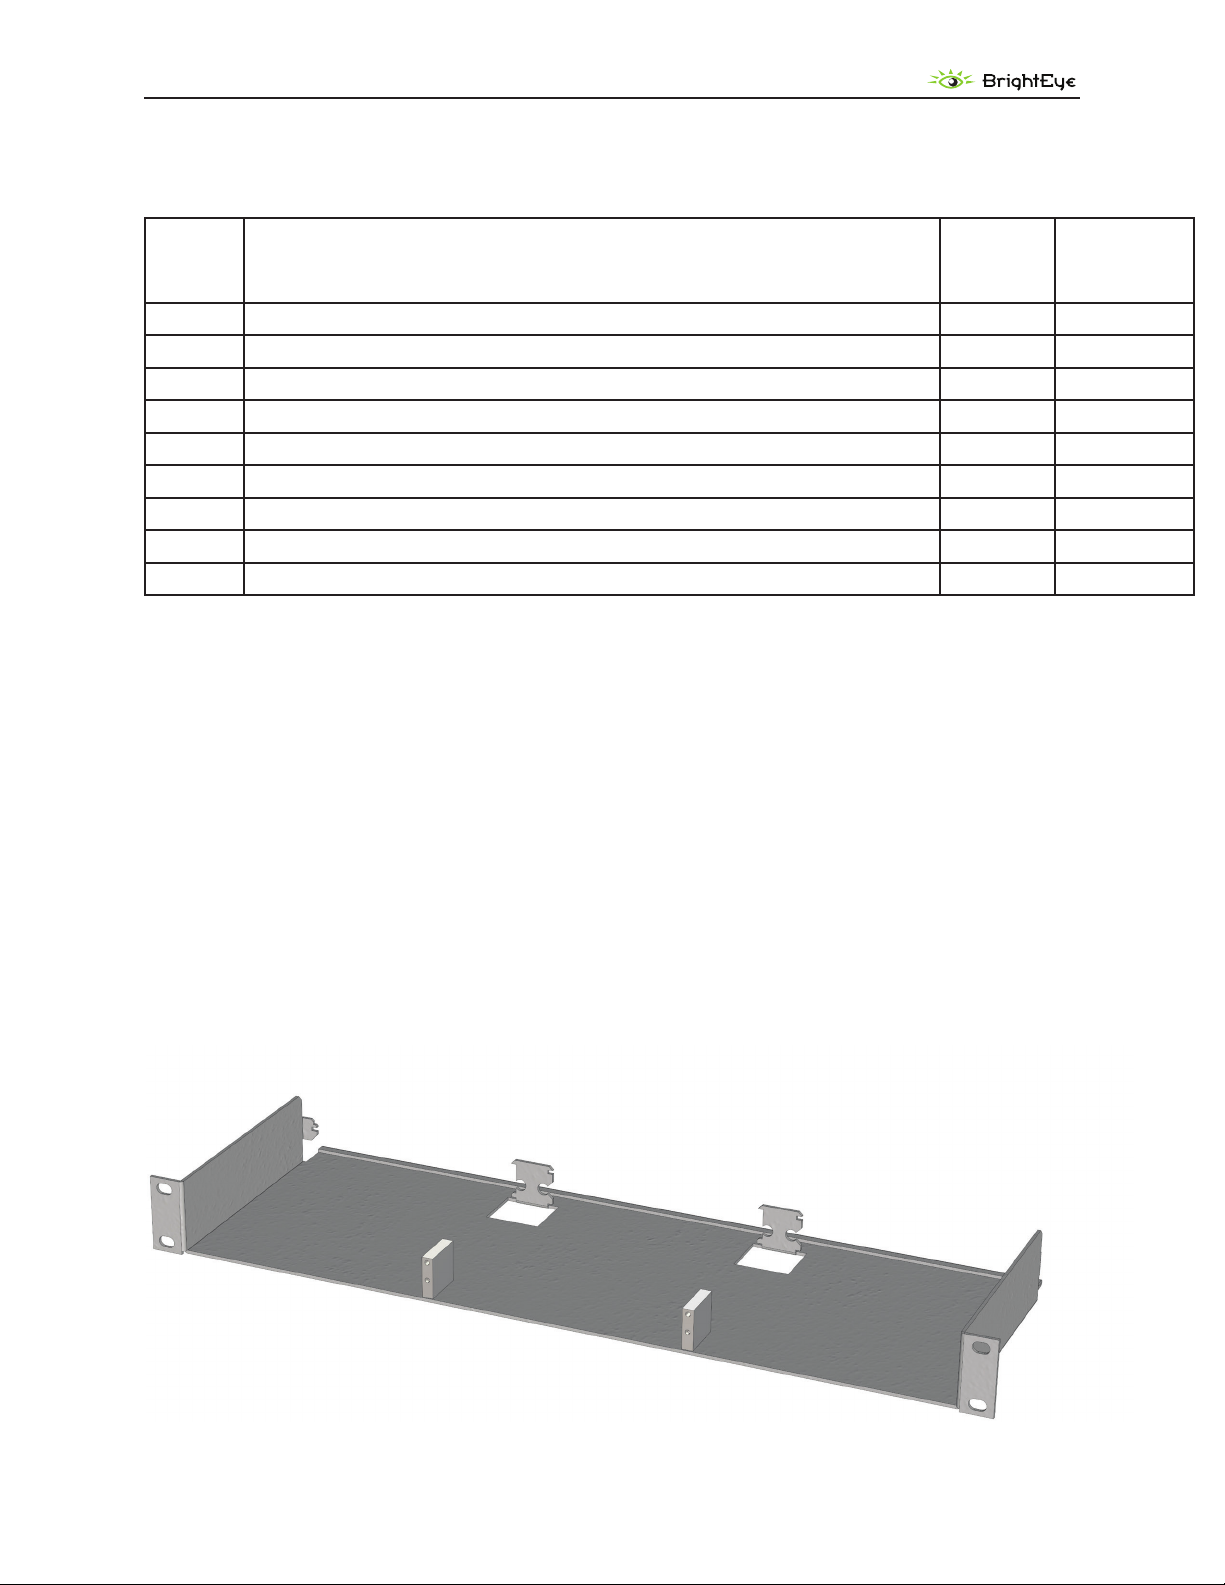
BrightEye Rack Tray, empty. Accepts any combination of BrightEye NXTs, single-high BrightEyes and
double-high BrightEyes.
Referred to in this document as part
A
A
www.ensembledesigns.com BrightEye Rack Mount - Page 4
Page 5

Mitto
TM
Pro 2
BrightEye Rack Mount User Guide
BrightEye to NXT Retainer, front and rear views
Referred to in this document as part
Note: This asymmetrical part intentionally has
three holes so that it can be flipped 180 degrees
to accommodate retaining a BrightEye/NXT
combination in any position. Only the bottom two
holes will be used to attach to the rack’s right angle
mounting block.
BrightEye to BrightEye Retainer, front and rear views
Referred to in this document as part
B
C
B front
C front
B rear
C rear
NXT to NXT Retainer, front and rear views
Referred to in this document as part
NXT Retainer Washer
Referred to in this document as part
D
E
D rearD front
E
www.ensembledesigns.com BrightEye Rack Mount - Page 5
Page 6

Mitto
TM
Pro 2
BrightEye Rack Mount User Guide
NXT Blank Filler Panel, front and rear views
(Two included in BERKMT-FULL kit)
Referred to in this document as part
F rear
F
F front
BrightEye Blank Filler Panel, front and rear views
(Two included in BERKMT-FULL kit)
Referred to in this document as part
G
G rear
www.ensembledesigns.com BrightEye Rack Mount - Page 6
G
front
Page 7

Mitto
TM
Pro 2
BrightEye Rack Mount User Guide
Installing a BrightEye NXT in the Rack Mount, Overview
To install a BrightEye NXT into the rack mount:
• Remove the rubber feet from the bottom of the BrightEye NXT
• Choose the position in the rack for installation
• Install the appropriate NXT Retainer Washer(s)
• Install the appropriate front retainer
See the below illustration for an overview, and the detailed instructions on the following pages.
D
E
Illustration for installing a BrightEye NXT, using a NXT to NXT front retainer (D), and a NXT Retainer
Washer (E), exploded view
www.ensembledesigns.com BrightEye Rack Mount - Page 7
Page 8

Mitto
TM
Pro 2
BrightEye Rack Mount User Guide
Installing a BrightEye NXT in the Rack Mount, Details
• Remove the four rubber feet from the bottom of the BrightEye NXT. To remove, apply side
pressure with your thumb, the feet are held on with adhesive and will pop off.
• Choose the position in the rack for installation of the BrightEye NXT. Depending on the
position, one or two NXT Retainer Washer(s) are needed to ensure proper retention in the rack.
To install a NXT in one of the end slots, remove the upper side screw on the side of the NXT
that will face the center of the rack. Install the NXT Retainer Washer (E) in its place using a
4-40 x 7/16” screw provided in the rack mount kit.
To install a NXT in the center position, remove the upper side screws on both sides of the
NXT and install NXT Retainer Washers (E) in both positions using the 4-40 x 7/16” screws
provided in the rack mount kit.
Detail of NXT to NXT Retainer (D),
D
E
and NXT Washer Assembly (E),
exploded view
E
D
www.ensembledesigns.com BrightEye Rack Mount - Page 8
Detail of NXT to NXT Retainer (D),
and NXT Washer Assembly (E),
assembled view
Page 9

Mitto
TM
Pro 2
BrightEye Rack Mount User Guide
Installing a BrightEye NXT in the Rack Mount Details (continued)
• From the front, slide the NXT into position. The rear flange of the NXT will slide into the slots in
the back of the rack mount.
• Choose the appropriate front retainer piece, and screw it into position with the 6-32 x 1/2”
screws provided.
Note: Two each of three different front retainers are included in your rack kit in order
to accommodate any combination of BrightEyes and NXTs. They are referred to by their
associated letter in this document for simplicity, and are listed below. Close up illustrations are
on page 5.
BrightEye to NXT Retainer (B)
BrightEye to BrightEye Retainer (C)
NXT to NXT Retainer (D), shown in below illustration
D
F
Illustration of two BrightEye NXTs installed in the rack mount, using a NXT to NXT front retainer (D),
and a NXT Blank Filler Panel (F), assembled view
www.ensembledesigns.com BrightEye Rack Mount - Page 9
Page 10

Mitto
TM
Pro 2
BrightEye Rack Mount User Guide
Installing a BrightEye in the Rack Mount
• From the front, slide the BrightEye into position. The rear flange of the BrightEye will slide into
the slots in the back of the rack mount.
Note: Some models of BrightEyes are single-high and some are double-high. The 1RU height
of the BrightEye Rack Mount accommodates double-high BrightEyes, or two single-high
BrightEyes stacked as shown in the far left position of the illustration below. If you are installing
just one single-high BrightEye in one of the positions and a fully dressed out rack is desired, a
BrightEye single-high blank panel (BEBP) may be ordered to fill the open space.
• Choose the appropriate front retainer piece, and screw it into position with the 6-32 x 1/2”
screws provided.
Note: Two each of three different front retainers are included in your rack kit in order
to accommodate any combination of BrightEyes and NXTs. They are referred to by their
associated letter in this document for simplicity, and are listed below. Close up illustrations are
on page 5.
BrightEye to NXT Retainer (B)
BrightEye to BrightEye Retainer (C), shown in below illustration
NXT to NXT Retainer (D)
Two single-high BrightEyes, stacked
One double-high BrightEye
C
G
Illustration of BrightEyes installed in the rack mount, using a BrightEye to BrightEye front retainer (C),
and a BrightEye Blank Filler Panel (G), assembled view
www.ensembledesigns.com BrightEye Rack Mount - Page 10
Page 11

Mitto
TM
Pro 2
BrightEye Rack Mount User Guide
The below illustration is an example for installing a combination of BrightEyes and a BrightEye NXT in a
rack mount.
Two single-high BrightEyes, stacked One double-high BrightEye One BrightEye NXT
E
C
B
Illustration of BrightEyes and a BrightEye NXT installed in the rack mount, using a BrightEye to BrightEye
front retainer (C), a BrightEye to NXT front retainer (B) and an NXT Retainer Washer (E), exploded view
www.ensembledesigns.com BrightEye Rack Mount - Page 11
Page 12

Mitto
TM
Pro 2
BrightEye Rack Mount User Guide
Using Blank Filler Panels in the Rack Mount
For a complete, dressed out look, blank filler panels may be installed to fill unused space in the rack
mount. Filler panels are purely cosmetic and are not required for rack stability or for proper retention of
the units in the rack. Each BERKMT-FULL kit comes with two NXT blank filler panels and two BrightEye
blank filler panels. BERKMT-RR kits do not include any blank filler panels.
The NXT blank filler panel and the BrightEye blank filler panel (both shown below) can be installed
in any of the three positions in the rack mount. If you are installing just one single-high BrightEye in
a position, a BrightEye single-high blank panel (BEBP) may be used to fill the remaining space (not
shown and not included in BrightEye Rack Mount Kits). Details for ordering blank panels are on the
following page.
NXT Blank Filler Panel (F)
BrightEye Blank Filler Panel (G)
www.ensembledesigns.com BrightEye Rack Mount - Page 12
Page 13

Mitto
TM
Pro 2
BrightEye Rack Mount User Guide
Additional Parts Order Info
BrightEye Rack Mount Retainer Kit – BERK-RET
Quantity Description Reference
Letter
2 BrightEye to NXT Rack Mount Retainer B 52002232
2 BrightEye to BrightEye Rack Mount Retainer C 52002233
2 NXT to NXT Rack Mount Retainer D 52002234
4 NXT Retainer Washer E 52002236
4 6-32 x 1/2” Phillips Flat Black Z/P Machine Screw w/Nylock 30001147
4 4-40 x 7/16” Phillips Flat Machine Screw, Black Oxide 30001148
BrightEye Rack Mount Filler Panel Kit – BERK-BPKit
Quantity Description Reference
Letter
2 NXT Blank Filler Panel for the BrightEye Rack Tray F 52002238
2 BrightEye Blank Filler Panel for the BrightEye Rack Tray G 52002239
4 6-32 x 1/2” Phillips Flat Black Z/P Machine Screw w/Nylock 30001147
BrightEye Single-High Blank Panel – BEBP
Ensemble Designs
Part Number
Ensemble Designs
Part Number
BrightEye single-high blank panel – Ensemble Designs order info: BEBP
www.ensembledesigns.com BrightEye Rack Mount - Page 13
Page 14

Mitto
TM
Pro 2
BrightEye Rack Mount User Guide
Troubleshooting
There’s a gap between the blank filler panel and the side of rack mount
When the BrightEye Blank Filler Panel is installed in either the left or right position, there is an intentional
gap between the Blank Filler Panel and the side of the rack mount.
My BrightEye NXT won’t complete its power up cycle
BrightEye NXTs must be powered by their own product specific power supply that comes with each unit.
This is a 5 amp single power supply, Ensemble Designs part number 23600106, order info: BEPS-NXT.
DO NOT use a BrightEye Spider power supply (BEPS6) or a BrightEye Individual power supply (BEPS,
ED part number 23118900) to power BrightEye NXTs.
Factory Service
If you return equipment for repair, please get a Return Material Authorization Number (RMA) from the
factory first.
Ship the product and a written description of the problem to:
Ensemble Designs, Inc.
Attention: Customer Service RMA #####
870 Gold Flat Rd.
Nevada City, CA 95959 USA
tel +1 530.478.1830
fax +1 530.478.1832
service@ensembledesigns.com
www.ensembledesigns.com
Be sure to put your RMA number on the outside of the box.
www.ensembledesigns.com BrightEye Rack Mount - Page 14
 Loading...