

28
1.
Unscrew 7 screws on the Rear Frame.
2.
Disassemble the Rear Frame.
3.
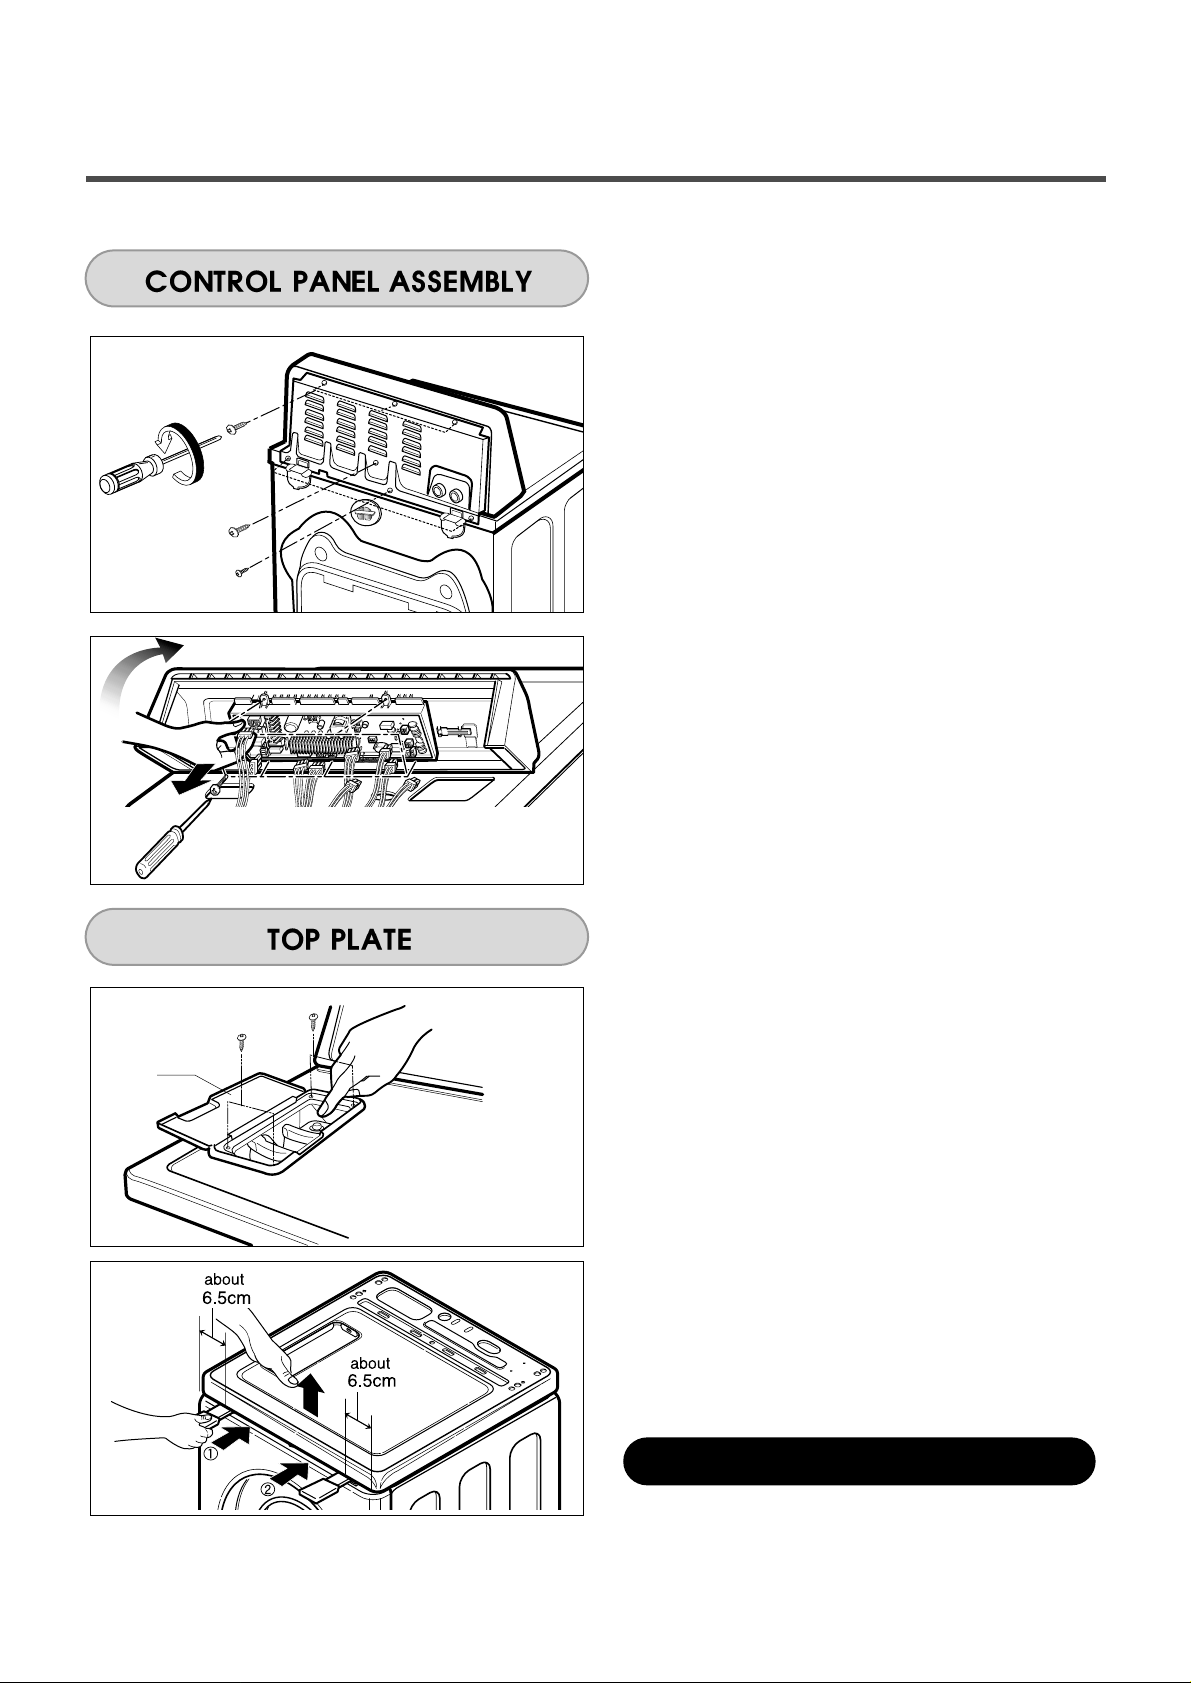
Pull the Control panel forward.
4.
Disconnect connectors.
5.
Unscrew 5 screws.
6.
Disassemble the controller assembly.
1.
Open the Lid.
2.
Unscrew 4 screws.
3.
Disassemble the Lid Assembly.
4.
Pull down the Dispenser by pushing hooks.
5.
Put a hand into the dispenser hole
and hold the top plate.
6.
Push backward using an opener
and lift the top plate.
9. DISASSEMBLY INSTRUCTIONS
ƒR
Disassemble and repair the unit only after pulling out power plug from the outlet.
¡
Do first left side (¥L).
LID
29
1.
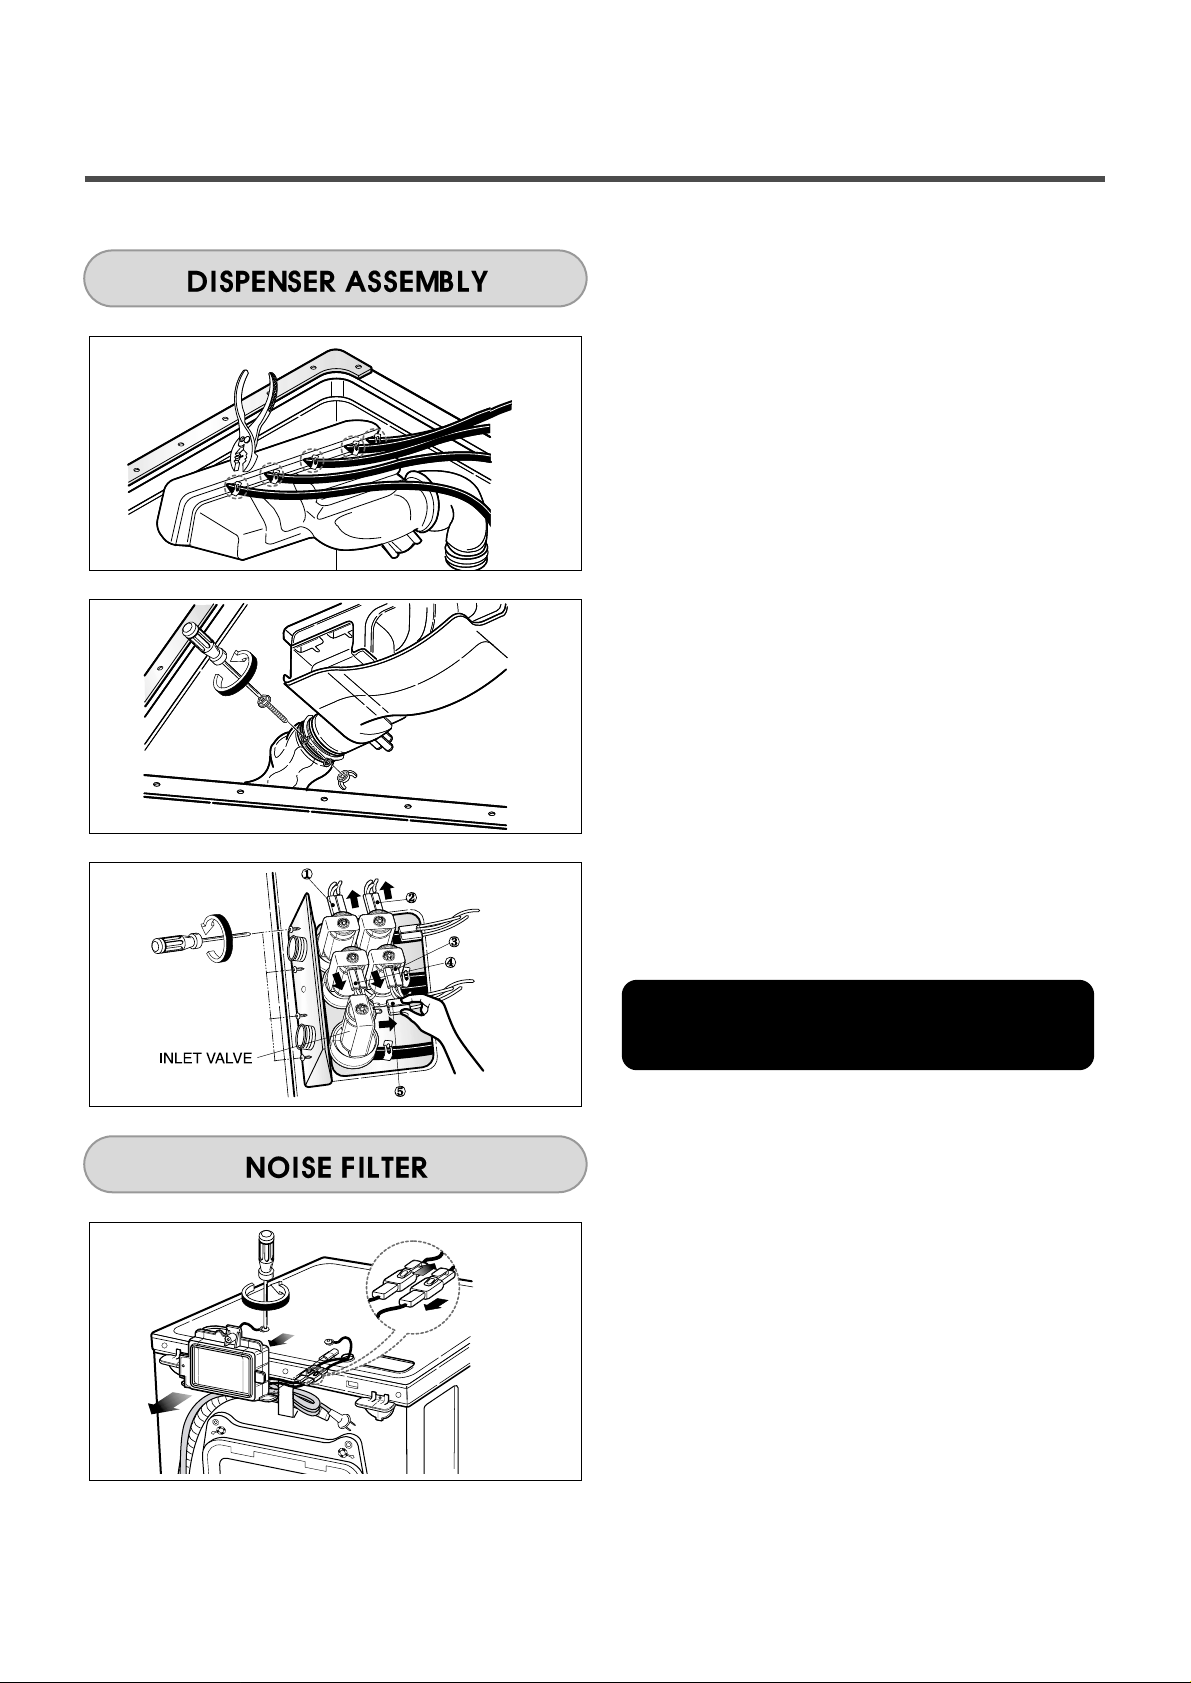
Disassemble the 5 hose clamps.
2.
Release the 5 hoses.
3.
Unscrew the nut at the lower
part of the dispenser.
4.
Unscrew the 4 screws on the holder.
5.
Disassemble the 5 connectors from the valves.
1.
Unscrew the screw from the top plate.
2.
Unplug the 2 connectors.
¡
Wire color : ¥LWH-BK ¥MOR-BK
¥N
WH-BK ¥OGY-BK
¥P
BL-BK
30
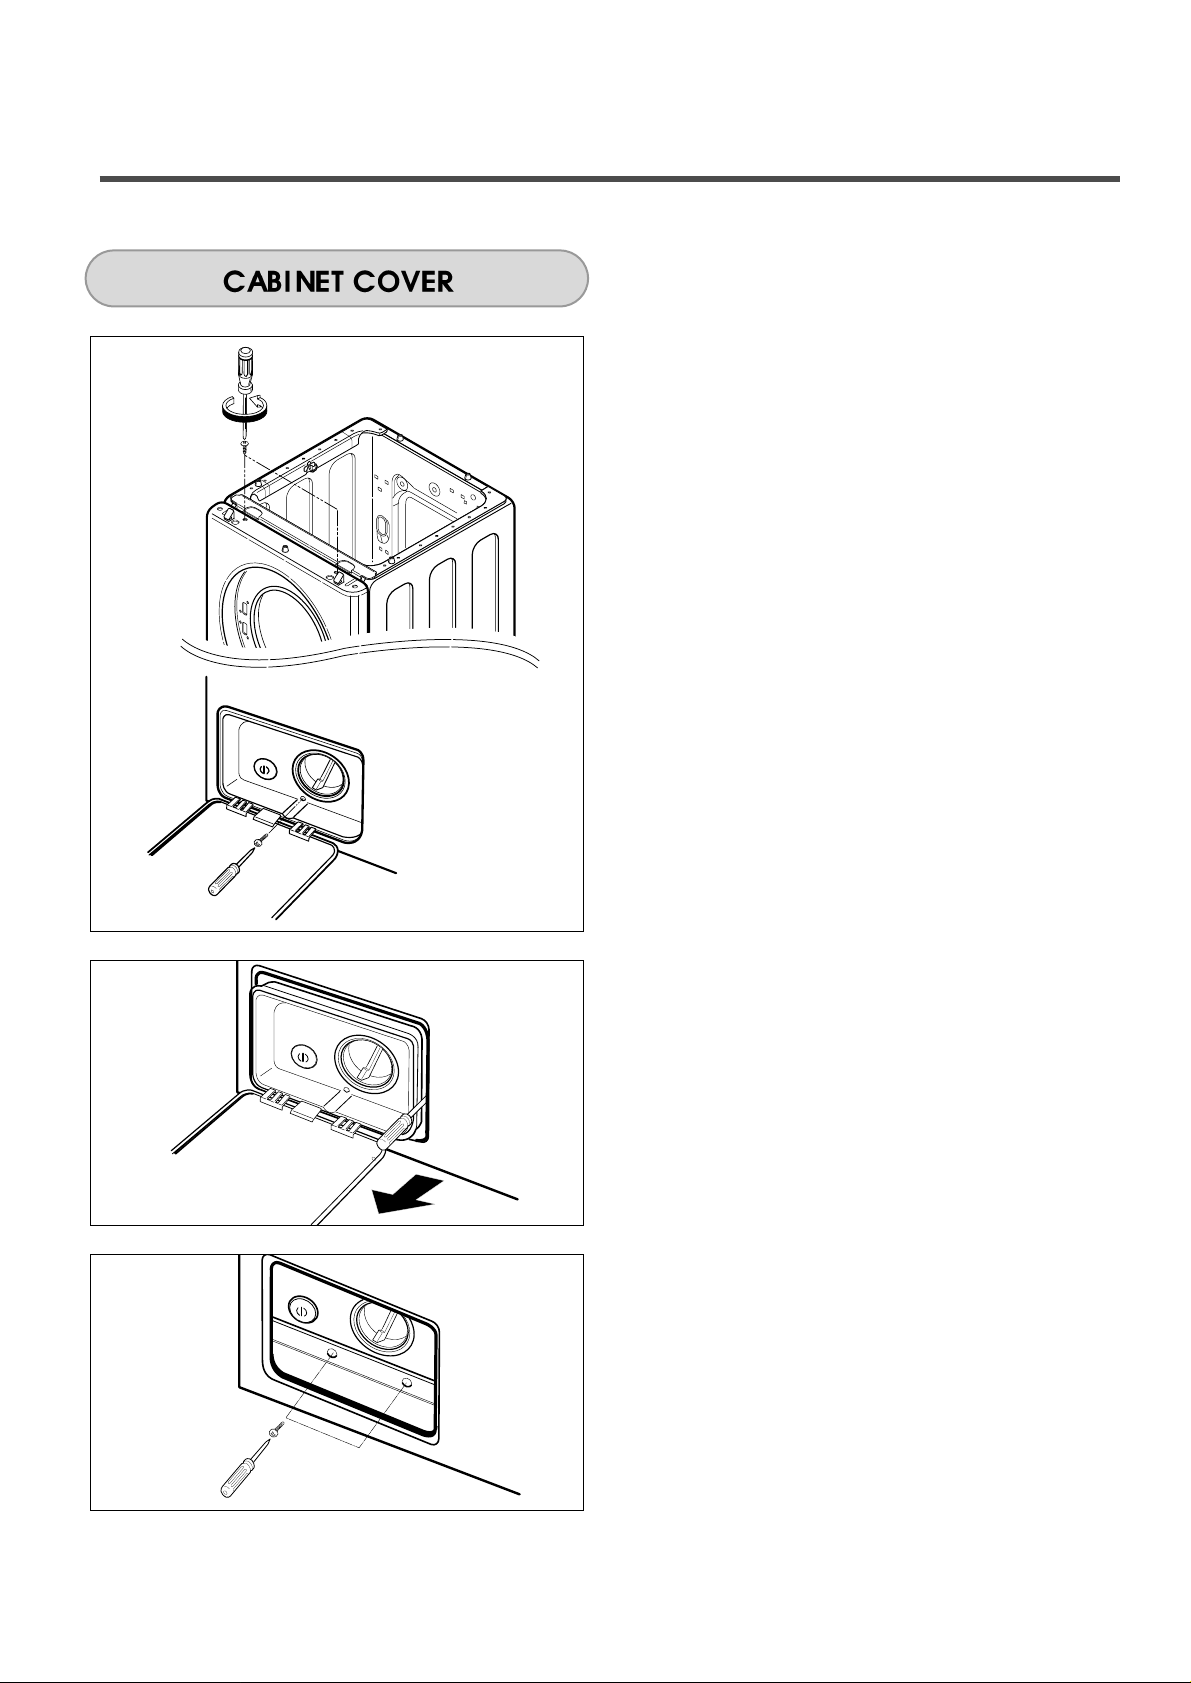
1.
Unscrew the 2 screws from upper side of the
cabinet cover.
2.
Unscrew the screw from filter cover.
3.
Put a flat (–) screwdriver into the both sides of
the filter cover, and pull it out.
4.
Unscrew the 2 screws from the lower side of the
cabinet cover.

31
Clamp Assembly
5.
Open the door.
6.
Disassemble the clamp assembly using
a flat (–) screwdriver.
7.
Separate the clamp assembly from cabinet
cover.
8.
Tilt the cabinet cover.
9.
Disconnect the door switch connector.
10.
Lift and separate the cabinet cover.
11.
Disassemble the clamp assembly using
a flat (–) screwdriver.
12.
Disasemble the Gasket.

32
1.
Open the door.
2.
Unscrew the 7 screws from the hinge cover.
3.
Put a flat (–) screwdriver into the opening of the
hinge, and pull out the hinge cover.
4.
Unscrew the screws from the door.
5.
Disassemble the door upward / downward.
1.
Open the door.
2.
Disassemble the clamp assembly.
3.
Unscrew the 2 screws from cabinet cover.
¡
Be careful ! The door is heavy.
33
1.
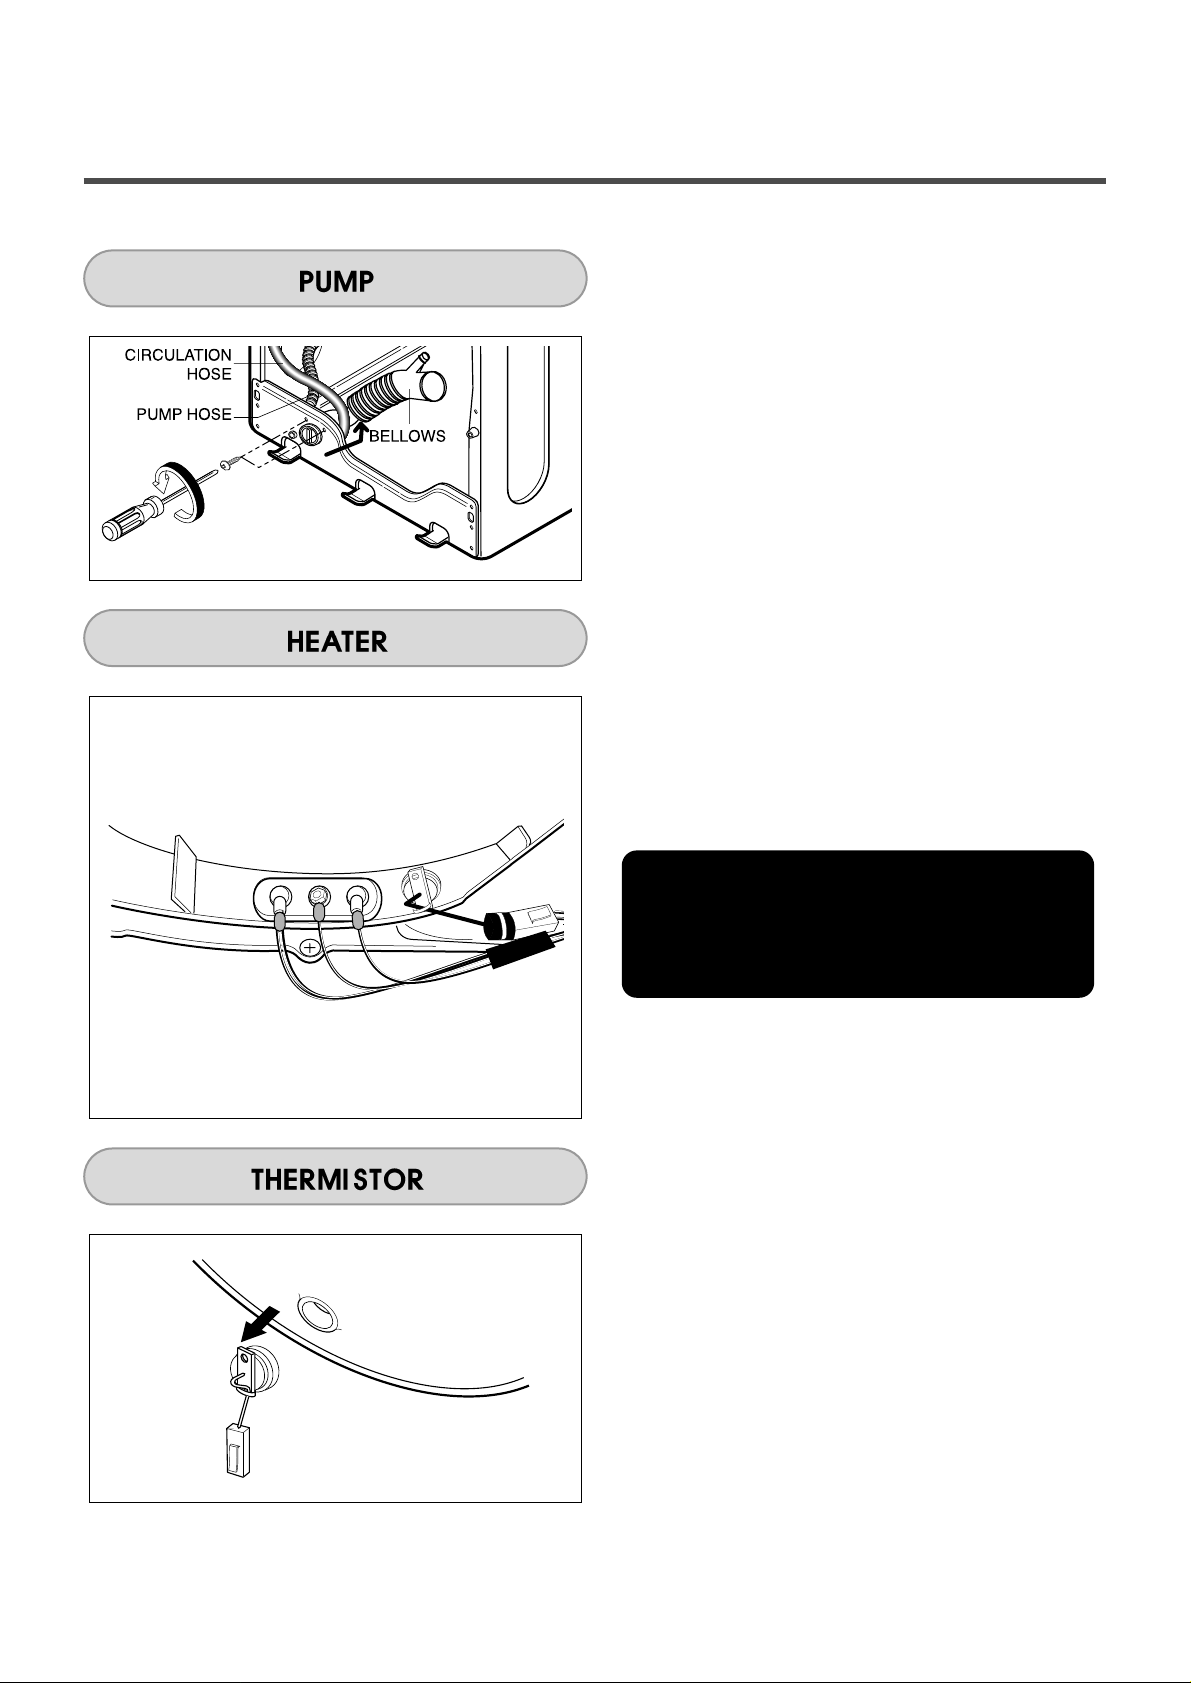
Disassemble the cabinet cover.
2.
Separate the pump hose, the bellows
and the circulation hose assembly from the
pump assembly.
3.
Disassemble the pump assembly in arrow
direction.
1.
Disassemble the cabinet cover.
2.
Separate 2 connectors from the heater.
3.
Loose the nut and pull out the heater.
1.
Disassemble the cabinet cover.
2.
Unplug the white connector from the thermistor.
3.
Pull it out by holding the bracket of thermistor.
¡
CAUTION
• When assembling the heater, insert the heater
into heater clip on the bottom of the tub.
• Tighten the fastening nut so the heater
is secure.

34
1.
Disassemble the cabinet cover.
2.
Separate the heater from the tub.
3.
Remove any foreign objects (wire, coin, etc.) by
inserting a long bar in the opening.
1.
Unscrew the 4 screws from the back cover.
2.
Unscrew the single screw from the lower-right
side of the cabinet.
3.
Disconnect the connector from PWB Harness.

35
1.
Disassemble the back cover.
2.
Loosen the bolt.
3.
Pull out the Rotor.
4.
Unscrew the 2 screws from the tub bracket.
5.
Loosen the 6 bolts on the stator.
6.
Unplug the 2 connectors from the stator.
1.
Disassemble the damper hinges from the tub
and base.
2.
Separate the dampers.
 Loading...