

Page 1
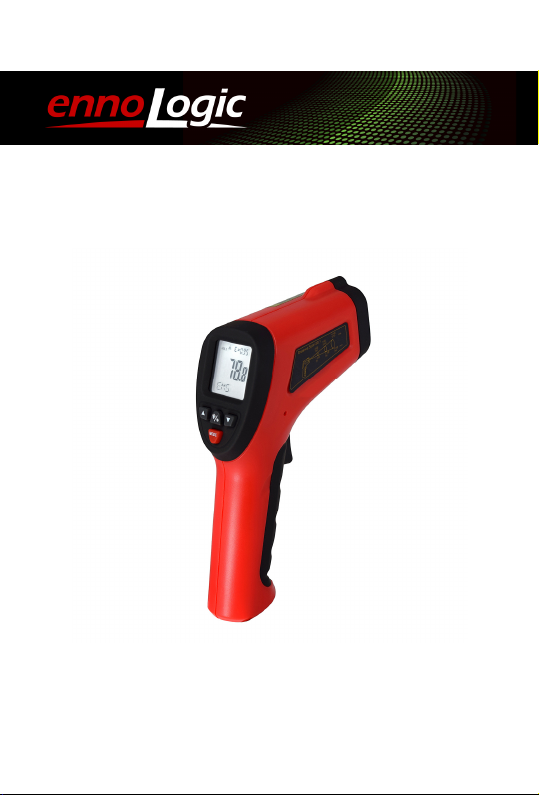
High Temperature Laser Infrared
Thermometer eT1600S
User Manual
Page 2

Version 1.4. Revised 4/3/2018.
© 2018 ennoLogic®. All rights reserved.
https://ennologic.com
Page 3

Table of Contents
Important Notes, Safety Considerations and
Disclaimer – Please Read ........................................ 1
Instrument Description .......................................... 3
LCD Display .................................................................. 4
Battery ............................................................................ 5
How to Use Your IR Thermometer ....................... 5
Switching Temperature Units ...................................... 6
Auto Shut Off and Lock ............................................... 6
Laser Pointer and Backlight ......................................... 6
Distance to Spot Size Ratio ........................................... 7
MODE Functions ..................................................... 8
Maximum, Minimum, and Average Temperature
(MAX, MIN, and AVG) and MAX-MIN Difference
(dIF) ................................................................................ 8
High and Low Alarms (HAL and LAL) ..................... 8
Emissivity (EMS) ........................................................... 9
Log Feature (LOG) ...................................................... 11
Measurements with Type K Thermocouple Probe
(TK) ............................................................................... 12
Specifications ......................................................... 13
Page 4

High-Temperature Laser Infrared Thermometer ennoLogic eT1600S
Thank you for purchasing the ennoLogic® High
Temperature Laser Infrared Thermometer eT1600S, a highquality instrument with many advanced features. The
thermometer accurately measures temperatures of surfaces
by sensing the emitted thermal radiation of the surface. It is
also capable of making contact temperature measurements
with the included Type K thermocouple. In this manual
you will find detailed operating instructions and
descriptions of each of the advanced features of the
ennoLogic infrared thermometer.
Important Notes, Safety Considerations and
Disclaimer – Please Read
This thermometer is equipped
with a Class 2 infrared laser. Use
extreme caution when the laser
pointer is on. Do not stare into
the beam. Never point the laser
beam at anyone’s eyes, it can cause permanent damage to
the eyes. Do not reflect the laser beam off a reflective
surface and into someone’s eyes. Do not allow children to
use the instrument as a toy. Do not use the instrument in
an environment with steam, dust, or explosive gases or
fumes. Do not expose the unit to temperatures above 122°F
(50°C) or less than -4°F (-20°C.) Keep the unit away from
electromagnetic fields from arc welders and induction
heaters. This thermometer is not suitable for medical
purposes. Note: This product complies with 21 CFR
1040.10 and 1040.11 except for deviations pursuant to
1
Page 5

High-Temperature Laser Infrared Thermometer ennoLogic eT1600S
Laser Notice No. 50, dated June 24, 2007. This device
complies with Part 15 of the FCC Rules. Operation is
subject to the following two conditions: (1) this device
may not cause harmful interference, and (2) this device
must accept any interference received, including
interference that may cause undesired operation.
Important Note: Limited Liability: Cascadia Innovations
is the exclusive distributor of all ennoLogic® products.
Except as explicitly stated, Cascadia Innovations is not
liable for direct, indirect, incidental, or other types of
damages arising out of, or resulting from the use of this
product. By using this product, you agree to hold
ennoLogic® and Cascadia Innovations harmless for any
and all consequences of the use of this product or
application of data from the use of this instrument.
2
Page 6

High-Temperature Laser Infrared Thermometer ennoLogic eT1600S
Instrument Description
Main User Elements
1. Laser Pointer (AVOID EXPOSURE - Laser radiation is
emitted from this aperture)
2. Infrared Sensor
3. Trigger Button
4. Battery Cover
5. LCD Display
6. Keypad
7. Type K Thermocouple Probe
3
Page 7
High-Temperature Laser Infrared Thermometer ennoLogic eT1600S
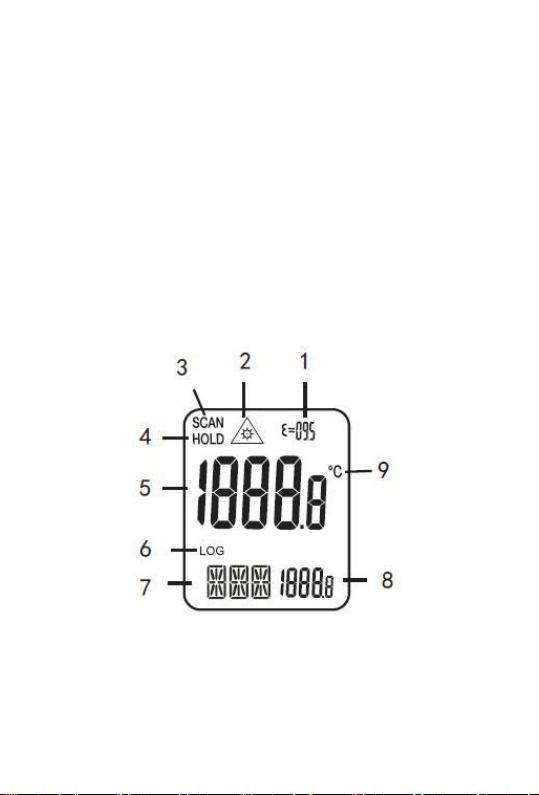
LCD Display
1. Selected Emissivity
2. Laser pointer ON indicator
3. SCAN: continuous measurement
4. HOLD: last value is displayed
5. Temperature display
6. LOG mode indicator
7. MODE indicator
8. Numeric display for mode functions and
Thermocouple temperature display
9. Celsius or Fahrenheit
4
Page 8
High-Temperature Laser Infrared Thermometer ennoLogic eT1600S
Battery
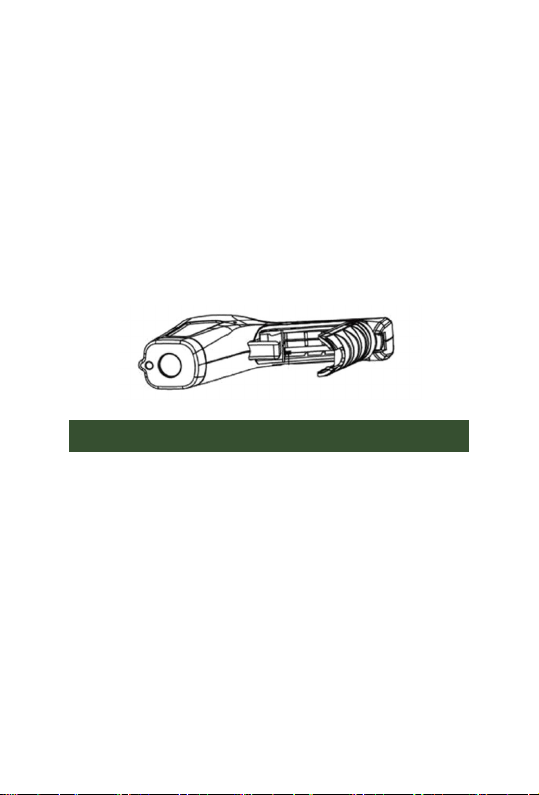
The unit is powered by a 9V battery (NEDA 1604A or IEC
6LR61, or equivalent). The battery compartment is located
inside the handle, covered by a black lid that is hinged at
the base of the unit. To open the lid, find the two indents
adjacent to the trigger button and slide a fingernail behind
the lid at the indent to pull it open. Attach the 9V battery to
the wired clip and slide the battery into the battery
compartment. (Tuck the wire in next to the battery;
otherwise the lid may not close properly.)
How to Use Your IR Thermometer
Aim the IR thermometer at the surface you want to
measure. Make sure there are no obstructions between the
unit and the target surface. Steam, dust, and smoke can
affect the measurement. Do not attempt to measure
through glass. Thermal shock can cause inaccurate
readings as well, make sure to let the unit warm up to
room temperature before using it. Press the trigger button
to turn the instrument on, the temperature reading will
appear. As long as the trigger button is pressed, the
temperature will continuously update, and the SCAN icon
will flash. The selected emissivity will be displayed above
the temperature reading. If the Mode is set to MIN, MAX,
5
Page 9

High-Temperature Laser Infrared Thermometer ennoLogic eT1600S
dIF or AVG, the small numeric display in the bottom right
corner will also update. See MODE Functions for more
detail. When you release the trigger button, the last
reading will remain on the display. The SCAN icon will
change to HOLD.
Switching Temperature Units
To switch between °F and °C, press and hold the red
MODE button until you hear a beep.
Auto Shut Off and Lock
After approximately 7 seconds of non-use the thermometer
will automatically turn off, unless the lock feature has been
enabled. To enable the lock feature, press and hold the
Laser/Backlight button until you hear a beep. To disable it,
press and hold the red MODE button until SCAN changes
to HOLD. The Lock feature can be used if hands-free
operation for long periods of time is desired.
Laser Pointer and Backlight
To turn the laser pointer and backlight on and off, first
press and release the trigger button to turn the
thermometer on. Then press the Laser/Backlight button to
cycle through combinations of laser and backlight settings:
1. Laser OFF, backlight OFF, 2. Laser OFF, backlight ON, 3.
Laser ON, backlight OFF, 4. Laser ON, backlight ON.
When the laser is enabled, the icon appears on the
LCD display. The last laser/backlight setting chosen will be
6
Page 10
High-Temperature Laser Infrared Thermometer ennoLogic eT1600S
remembered after the thermometer turns off. Both laser
and backlight reduce the battery lifetime.
Distance to Spot Size Ratio
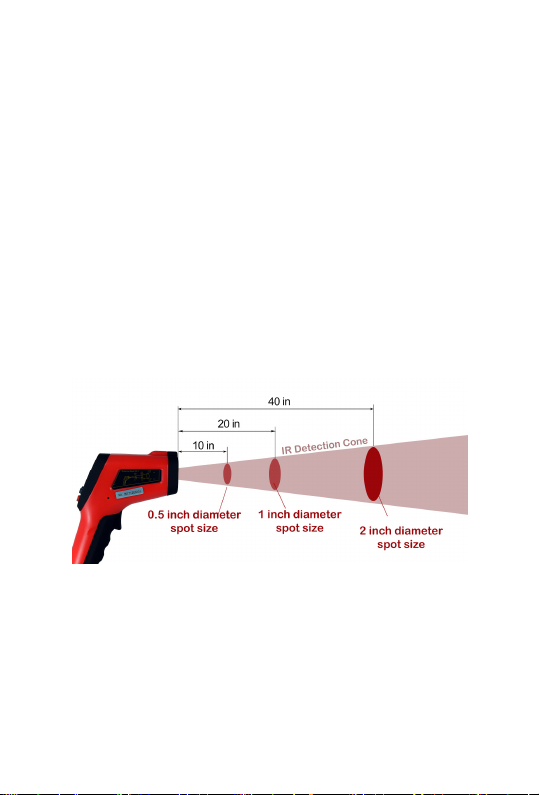
The distance-to-spot ratio of the infrared thermometer is
20:1. This means that the spot diameter at a distance of 20
inches is 1 inch (25.4 mm). To measure a smaller spot area,
move the thermometer closer to the target and use the
distance-to-spot ratio of 20:1 to estimate the spot size. For
instance, at a target distance of 10 inches, the spot size is
0.5 inch (12.7 mm). The further away the target, the greater
the spot size. Make sure the target area you want to
measure is larger than the spot size.
7
Page 11

High-Temperature Laser Infrared Thermometer ennoLogic eT1600S
MODE Functions
The red MODE button can be used to cycle through a
number of advanced features of the instrument. These
features are explained below.
Maximum, Minimum, and Average Temperature (MAX,
MIN, and AVG) and MAX-MIN Difference (dIF)
While the trigger button is held down for scanning the
temperature of various surfaces, the thermometer
continuously tracks and updates the maximum (MAX),
minimum (MIN), and average (AVG) temperatures, as well
as the difference between MAX and MIN (dIF). These
values can be recalled in HOLD mode by pressing the red
MODE button several times and are retained in memory
until a new measurement is taken.
High and Low Alarms (HAL and LAL)
Two temperature alarm set points can be programmed:
High Alarm (HAL) and Low Alarm (LAL). While
temperatures are being scanned (trigger button held
down), if the temperature is lower than the LAL value or
higher than the HAL value, the instrument will beep. The
alarm set points can be programmed by pressing the
MODE button until HAL or LAL appear on the LCD
display. Use the UP and DOWN buttons to select the
desired temperature for each set point. Holding the UP or
DOWN button pressed will change the displayed
temperature set point at increasing increments.
8
Page 12

High-Temperature Laser Infrared Thermometer ennoLogic eT1600S
Emissivity (EMS)
The emissivity ε is displayed in the top right corner of the
LCD display (e.g. ε=0.95). To change it, press the MODE
button until the mode indicator changes to EMS. Then use
the UP and DOWN buttons to select the desired emissivity
in 0.01 unit increments (range 0.10 to 1.00.)
Emissivity of a material is the ability of its surface to emit
thermal radiation. More accurately, it is the ratio of the
energy radiated from a material's surface to that radiated
from a perfect emitter (black body) at the same
temperature and under the same conditions. The
emissivity of a surface depends on the material and on the
nature of its surface. For instance, a polished metal surface
has a lower emissivity than an oxidized metal surface.
Since IR thermometers calculate the surface temperature of
an object by sensing its emitted thermal radiation it is
important to take emissivity into account. A polished metal
object will emit less thermal radiation than an object with a
flat black finish at the same temperature, and thus appear
colder. The temperature displayed by the IR thermometer
for the polished metal object would therefore be inaccurate,
unless the instrument’s emissivity setting is adjusted to
match the emissivity of the object.
Emissivity of a material surface is difficult to estimate since
it depends on its texture, color, and temperature. The table
provided here should only be used as a guideline. A good
default setting is ε=0.95, which is also used by IR
thermometers that do not allow the emissivity to be
adjusted. If you need to take accurate readings for a
specific material often, you can measure the material
9
Page 13

High-Temperature Laser Infrared Thermometer ennoLogic eT1600S
Material
Emissivity
surface with an accurate contact thermometer (or the
included Type K probe) and then adjust the emissivity
setting of your IR thermometer until its reading matches
the temperature reported by the contact thermometer. You
can then use the emissivity for subsequent measurements
of the same material. Alternatively, you can cover
materials with low emissivity with masking tape or flat
black paint. Make sure to allow the tape or paint to reach
the temperature of the material before taking a
measurement.
Aluminum Foil 0.04
Asphalt 0.93
Black Body, matte 1.00
Brick, red 0.75 - 0.93
Chrome, polished 0.05
Concrete 0.85 - 0.94
Copper, polished 0.02 - 0.05
Fabric 0.87 - 0.98
Galvanized Pipe 0.46
Glass 0.92 - 0.95
Granite 0.45
Gypsum 0.85
Ice 0.97
Iron, polished 0.14 - 0.38
Iron, rusted red 0.61
Marble, white 0.95
Paper, white 0.68
Plastic 0.84 - 0.95
10
Page 14

High-Temperature Laser Infrared Thermometer ennoLogic eT1600S
Quartz Glass 0.93
Rubber, black 0.95
Sand 0.90
Skin, human 0.98
Snow 0.80
Soil 0.92 - 0.95
Steel, oxidized 0.75
Steel, polished 0.07
Tape, electrical, black 0.97
Tile 0.97
Water 0.95 - 0.98
Wood 0.86 - 0.90
Log Feature (LOG)
The thermometer can store up to 20 readings in memory.
This feature is useful when multiple measurements are
taken that need to be recorded for future review.
To store a single reading, first make sure the thermometer
is in HOLD mode (not scanning.) Press the MODE button
multiple times until the LOG symbol appears in the bottom
left corner of the LCD display. Then use the UP and
DOWN buttons to select the memory location (01 to 20).
Press the Laser/Backlight button to store the currently
displayed temperature value in the selected memory
location. Pressing it again will clear the location. Press the
UP and DOWN buttons to access additional memory
locations to recall previously stored values or update them
with new values.
11
Page 15

High-Temperature Laser Infrared Thermometer ennoLogic eT1600S
Measurements with Type K Thermocouple Probe (TK)
Insert the Type K thermocouple probe into the socket at the
base of the instrument. Bring the thermocouple probe tip
into contact with the object to be measured. Turn on the
instrument by pressing the trigger button. Press the MODE
button until TK appears on the display. The temperature
measured by the thermocouple probe will be displayed in
the bottom right corner of the LCD display.
12
Page 16

High-Temperature Laser Infrared Thermometer ennoLogic eT1600S
Specifications
Temperature Range
Infrared
Measurements
Thermocouple
Measurements
Temp. Resolution 0.1°C (0.1°F)
Optical Resolution 20:1 Distance to Spot Size Ratio
Accuracy of IR
Temperature
Measurements
Accuracy of Type K
Thermocouple
Measurements
Emissivity Adjustable 0.10 to 1.00
Spectral Response 8 to 14 µm
Response Time < 1 second
Laser Power Class 2 (<1mW)
Laser Wavelength 675 nm
Power 9V battery (included), auto
Battery Lifetime ~40 hours without backlight,
-50°C to 1600°C (-58°F to 2912°F)
-50°C to 800℃ (-58°F to 1472℉)
<0℃: ±3℃/5.5°F
0℃ .. 600°C: ± 2% of reading or ±
2°C/3.5°F (whichever is greater)
>600°C: ±3%
±1% or ±1℃/2°F
power off after 7sec., lock feature
~15 hours with backlight
13
Page 17

High-Temperature Laser Infrared Thermometer ennoLogic eT1600S
Advanced Features Hi/Lo audible alarms
(adjustable), Min/Max/Average
display, stores last settings in
between uses, 20-value log, Type
K Thermocouple Probe
Operating
Conditions
Storage Conditions Temp. -20°C to 50°C, RH 10% to
Size 179 x 91 x 42 mm (7.0 x 3.6 x 1.6
Weight 162g (5.7oz.)
Temp. 0°C to 50°C, RH 10% to
90%
90%
in.)
14
Page 18

Page 19

Page 20

ennoLogic.com
PO Box 25207
Eugene, OR 97402
 Loading...