

Page 1

User’s GUide
Tikee &Tikee
PrO
V1
Page 2

2
Table of contents
Table of contents..........................................................................2
Beginning.....................................................................................3
First steps with Tikee...................................................................6
Getting started with the mobile application...........................12
Visualization of your timelapse in My Enlaps..........................22
Maintenance...............................................................................36
Battery information...................................................................37
Troubleshooting.........................................................................39
Trademarks.................................................................................40
Page 3

3
1
Beginning
. Overview of your Tikee/TikeePRO
Here are the main components of the box :
The box of your Tikee contains:
1 Tikee
1 Quick start guide
1 Hexagon wrench
1 Microber cloth
. Package contents
Power button
A long press (3 seconds) to
turn on/off your Tikee.
Micro SIM slot
Slot to insert a micro SIM (only
for TikeePRO).
MicroSD card slot
Slot to insert a memory card
Micro USB port
To recharge your Tikee
(Micro USB cable not supplied).
Trigger button
To start or to stop a pre-set
timelapse sequence.
The back side of Tikee has many functions.
Each function is explained below with its corresponding icon.
Power LED and Trigger LED
To indicate status, battery
level and in-progress
sequence.
Page 4

Getting started with the mobile application
4
1
Beginning
. Prerequisites
Some elements are needed to ensure the optimal functioning of your Tikee:
- A microSD card (not supplied) is needed to use your Tikee (see dedicated section)
TikeePRO users: a micro SIM card (not supplied) is needed for the upload of data with 3G/4G network.
- A smartphone (supported versions: Android 5.0 and up/iOS 10.0 and up)
- A tablet or a computer with an Internet connection (to edit and publish your time lapses)
. Creating a user account on the web
application MyEnlaps
Previously you have to create an account on MyEnlaps web app to then use web and mobile
applications.
If you have not yet created an account, connect from a mobile phone, a computer or a tablet to
https://my.enlaps.io .
Follow the steps below:
Step 1: Click on ‘‘Get started’’.
Page 5

First steps with your Tikee
Getting started with the mobile application
5
1
Tikee Remote is the essential mobile application for your Tikee. You can control it and
set timelapses with your personal settings.
This mobile application is required for your Tikee to work properly.
Beginning
Once the general terms of use of the web application read, please check the box ‘‘I agree to the
terms of use’’.
Your login IDs are the same on the web application and on the mobile application.
Step 2: Fill in your personal information.
. First charge of the device
Caution! For an optimal use of your Tikee/TikeePRO, you have to fully charge the battery
before the rst use.
Plug a USB cable (not supplied) into your Tikee into the dedicated USB slot.
Make sure that the logo is facing down to avoid damaging the USB slot.
Plug the other end of the USB cable into your computer or into a power adapter (not supplied),
and then into a power outlet.
Note : the sealing of your Tikee is not guaranteed when the USB cable is plugged into the USB
slot.
. Downloading the mobile app
Page 6

6
2
. MicroSD card (not supplied)
Insert the microSD card into the slot on the back side of your Tikee.
Technical information about microSD cards compatible with Tikee :
- microSDHC, microSDXC,
- 8GB to 128GB capactity,
- U3 class recommanded (Minimum : Class 10 or UHS-I, adequate for Tikee or TikeePRO taking
photos only in jpeg).
Note: Before use, we strongly recommend to format the microSD card (see corresponding chapter). This can be done directly from the mobile application.
Caution! Although both cards have the same format and t into the slot of each other, the
slots are not interchangeable and the Tikee will not work if you interchange it.
. Micro SIM card
To use the 4G network with your TikeePRO you have to previously subscribe to a 4G subscription
with the telecommunication provider of your choice.
Page 7
First steps with your Tikee
7
2
2
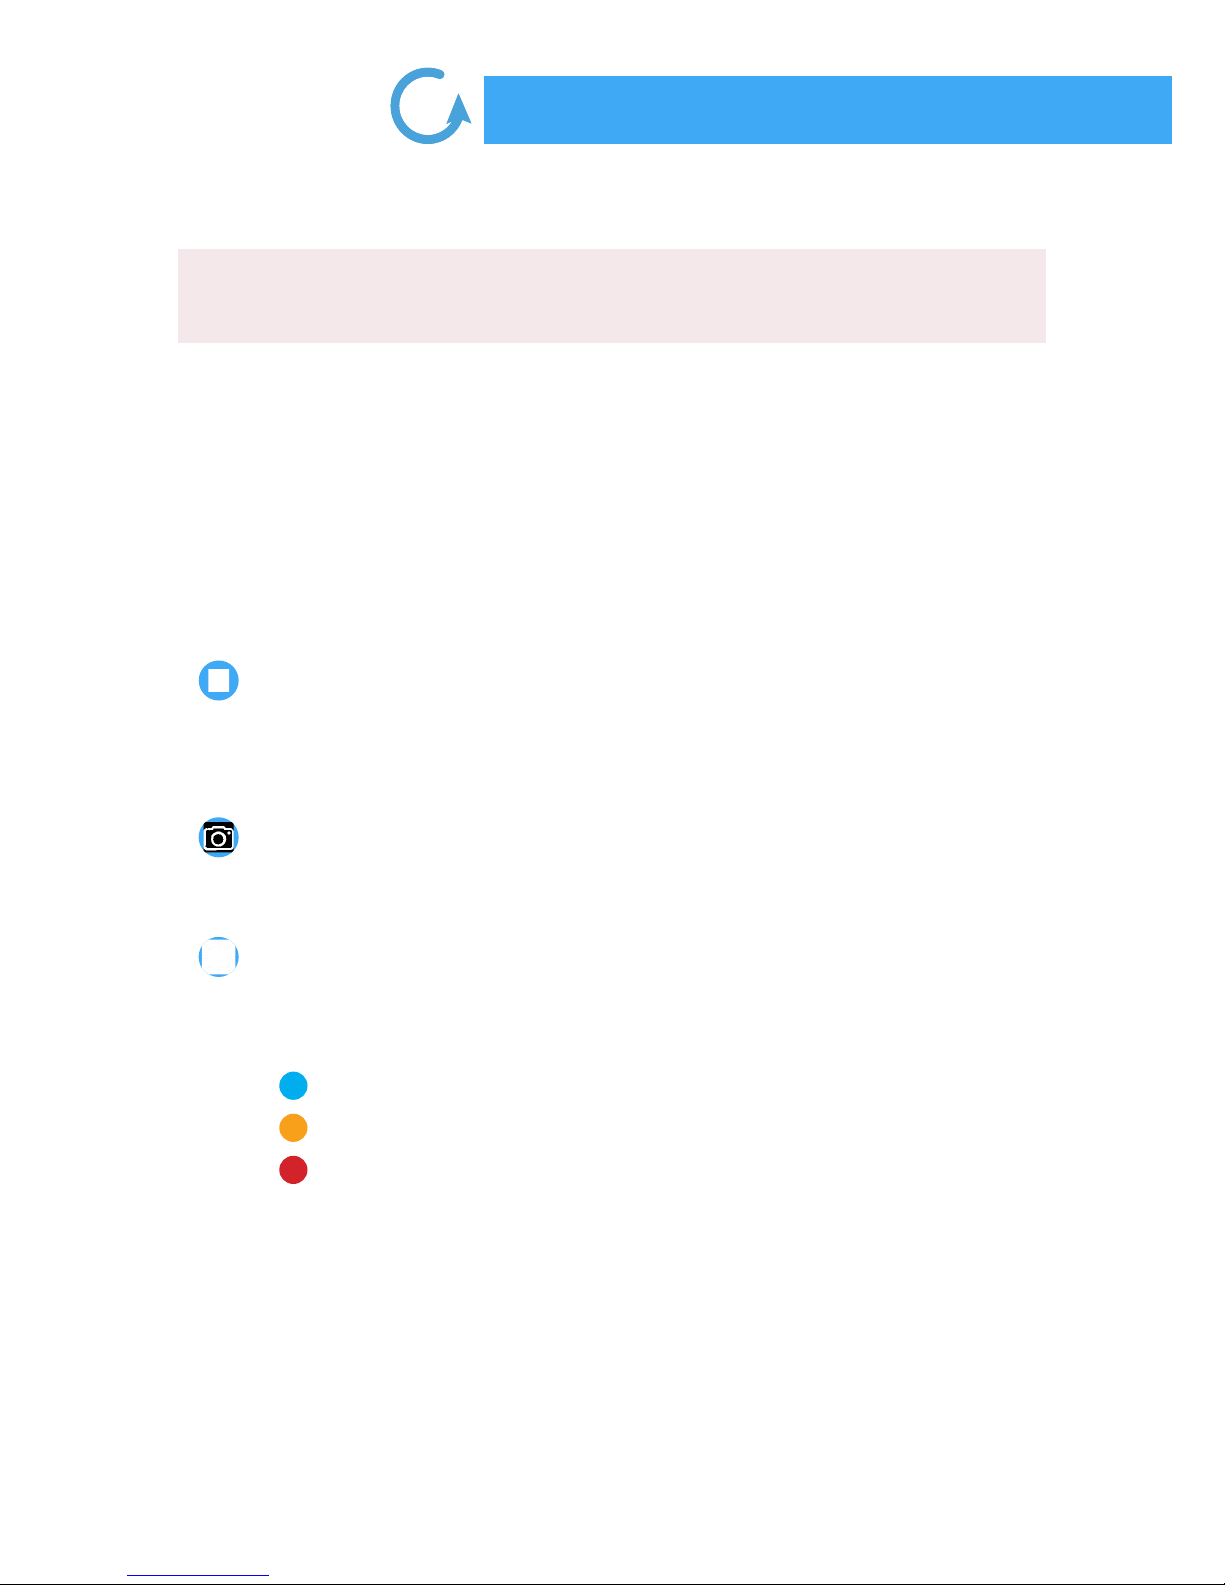
What volume of monthly data to choose?
Few exemples :
- 1 photo every 15 minutes, 24/24 : about 7,2 GB/month
- 1 photo every hour, 10h a day : about 0,75 GB/month
- 1 photo every minute for 5 hours a day : about 22,5 Go/month
. Buttons and LEDs
Power button
• Press 3 seconds : power on your Tikee
• One press when the Tikee is on : display the battery level
• Press 3 seconds : power o your Tikee
Trigger button
• Press once : start a time lapse sequence
• Press 3 seconds : stop shooting
Power LED
• O : Your Tikee is turned o or in standby
• On : Your Tikee is powered on and active
The color is related to the battery level:
: Full battery
: Low battery
: Empty battery (two ashs before turning o)
LED de séquence
• O : no in progress sequence
• Slow ash every 10 seconds : in progress sequence
• 0.5 second red ash : bug (microSD card)
Size of the package (in GB/month) =
_ hours of shot per day x _ photos per hour x 2.5 MB per pair of images x 30 days
Page 8

8
2
2
. Recommendations for installing and for
framing with your Tikee
For a period of a few hours shooting, your Tikee can be installed on its rubber sole on a suciently at and not tilted surface or on a camera tripod.
For a period of several days/months shooting, we recommend to use a rigid support which
ensure a same framing over time and secure the position of your Tikee. If you want you will nd a
set of accessories for your Tikee on our store at: https://enlaps.io/products-accessories/?lang=en.
To avoid the theft and/or acts of vandalism, place your Tikee in a discreet location, high up and
use an anti-theft system (your Tikee has a dedicated anti-theft insert).
Caution! Be sure to respect the safety instructions related to work at heights and every
recommandation of security and installation of the site where your place your Tikee.
Be sure that the proper installation of the xing support and of the Tikee are correct to prevent
any risk of falling. The Tikee should not be installed in balanced or tilted/movable surface that
could lead to its fall.
We cannot be held responsible for any damages that may result from improper use of our
solution.
Page 9

First steps with your Tikee
9
2
2
Your Tikee has wide angle optics. When photos are uploaded to the web application, it makes
the fusion of the left image and the right image. The images are rst put at and then
combined to get a single panoramic image.
Therefore we recommend to keep your Tikee the more at possible during the installation
to minimize distortion of the image (you can use a bubble level or your smartphone with a
dedicated mobile application).
Once you have chosen the framing, lock the position of your Tikee so that there is no change in
the framing over the time.
Be sure to use a hard mounting bracket to ensure a same framing of the shooting over the time.
We recommend to use the stainless steel arm designed by Enlaps for Tikee.
. Settings of the solar panel
The autonomy of your Tikee through the solar resource is directly related to the installation
location.
It depends on:
- the shade on the photovoltaic panel during the day (roof, pole, tree,...), the more shade the less
energy is produced;
- the orientation of the solar panel (South in the Northern Hemisphere, North in the Southern
Hemisphere);
- the inclination of the solar panel (at close to the equator, about 30° in France);
- outside temperature (warmer and more performance degrades).
After the desired framing chosen (cf. page 8-9), you have to adjust the position of the solar panel.
Page 10

10
2
2
1. Setting the orientation of the solar panel:
Start with the orientation of the panel to full south if
you are in the Northern Hemisphere, or full north in the
Southern Hemisphere. You can use a compass, a watch
with a compass function or a mobile application on
your smartphone.
(Example below with the PV Optimizer application (iOS
only) which allows you to adjust the rotation and incli-
nation of the panel).
2. Setting the inclination of the solar panel:
Tilt the panel according to the latitude of your position (approximately 30° in France for example).
Once the panel has been tilted at the desired angle,
lock it with the 2 screws located on either side of the
photovoltaic panel.
Page 11
Getting started with the mobile application
First steps with your Tikee
11
2
2
3. Orientation and tilt settings using the PV Optimizer mobile application (iOS only):
Open the application and scroll to the screen called ‘’PV Alignment’’. Place your smartphone at on
the photovoltaic panel of your Tikee and orientate/tilt the panel until you overlap the 2 crosses in
the app (see below).
Don’t forget to lock the rotation and the inclination of the solar panel once done.
In a windy area, we recommended to keep the panel at or with a low inclination to avoid
vibrations.
Misalignment
Correct alignment
Page 12

12
3
Before you keep reading, make sure you have followed the instructions of Chapter 1 - Beginning.
1. Connect your Tikee to mobile app
1. Once your Tikee is powered on and nearby:
launch the mobile app Tikee remote and
log in with your IDs - same as the web app.
2. Select your Tikee in the
nearby Tikee list.
Your Tikee is then associated with your user account. The association prevents any other user
account to use your Tikee. For more information, please refer to the corresponding chapter.
Page 13
Getting started with the mobile application
13
3
2. Setting up a timelapse sequence
4. Accessing the wireless settings:
Click on the WiFi (Tikee/TikeePRO) or 4G (TikeePRO) icon and set up the connection.
It allows the data upload from your Tikee to the web application.
To create your rst sequence, click on
3. You access directly to the status
screen of your Tikee:
Page 14
14
3
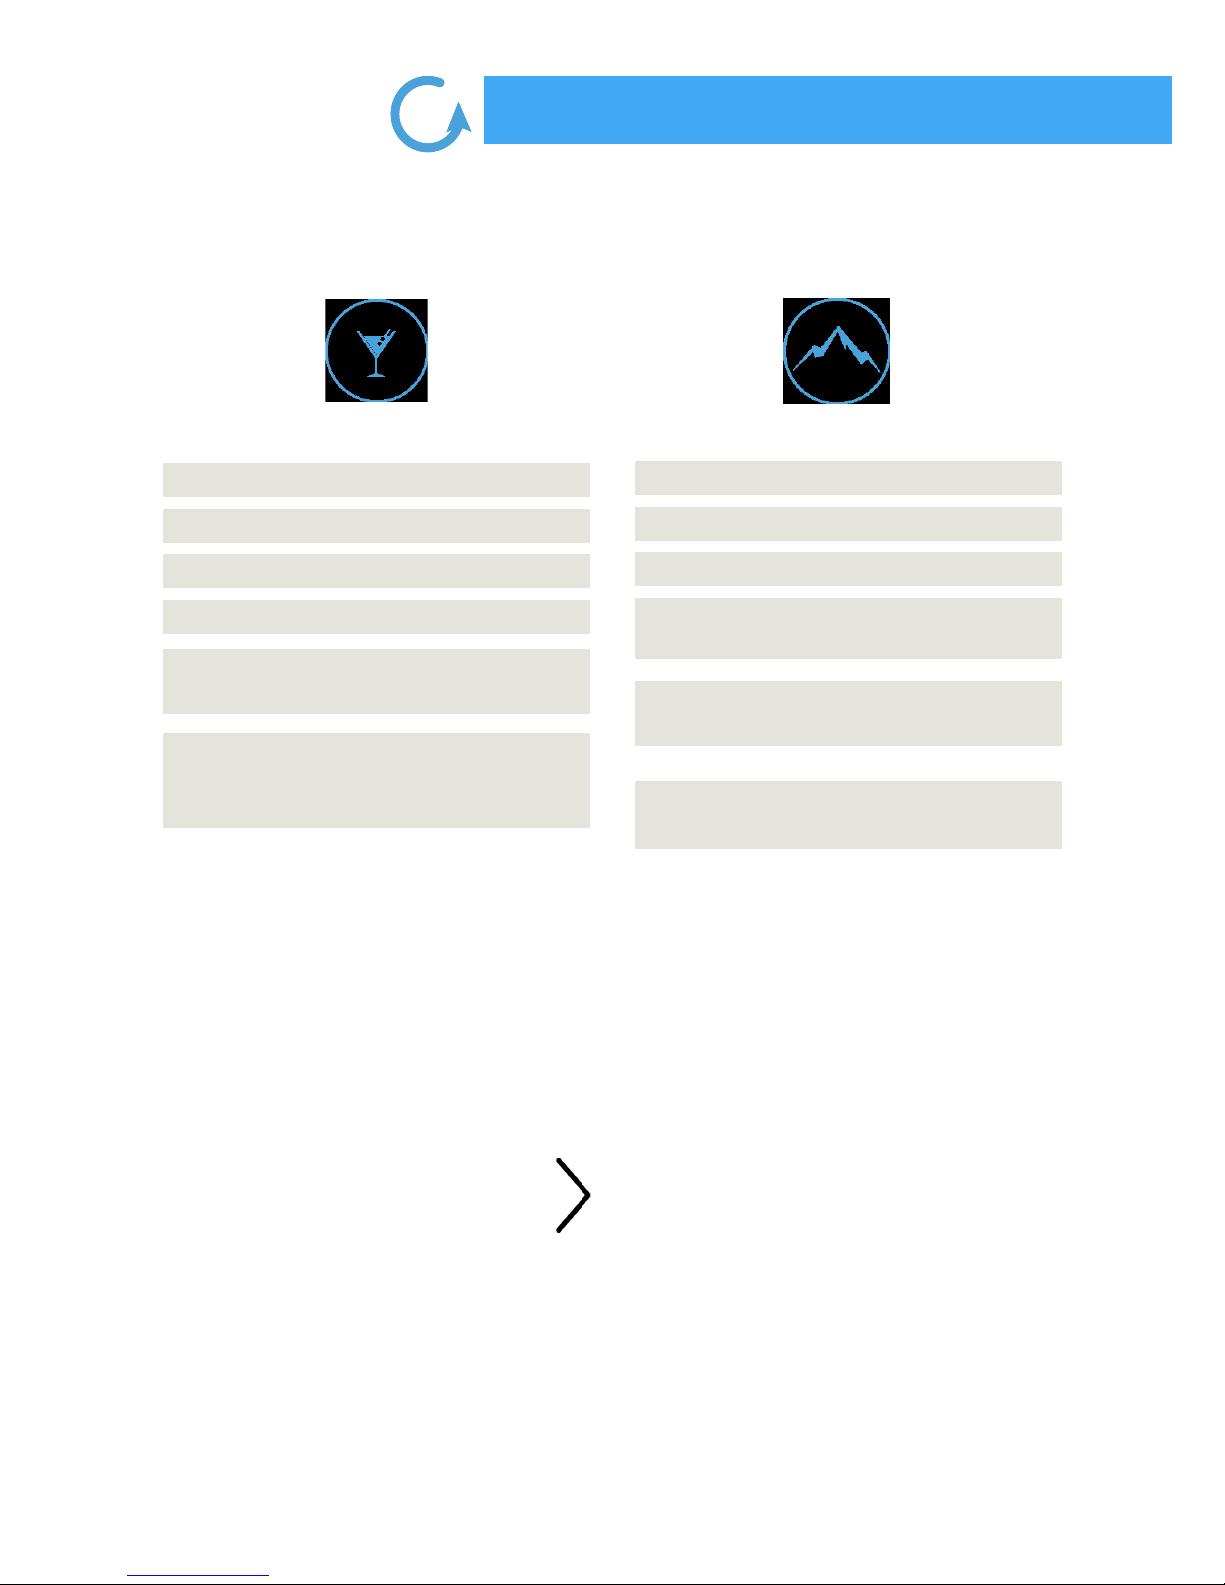
SHORT TERM
Minimum interval
Maximum interval
DNG format
Max. duration
Shooting during
a period of the day
Upload of photos
on the web app
6s
45s
No
2.500 photos
No
Yes once timelpase
ended
MEDIUM AND LONG TERM
Minimum interval
Maximum interval
DNG format
Max. duration
Shooting during
a period of the day
Upload of photos
on the web app
1 min
24h
Yes (TikeePRO)
Innite (depends on
the interval and the sunshine)
Yes *
Yes **
* Set 00h00 for shooting 24/24
** Every 25 images and at least once a day
Once your timelapse sequence is congured, launch it from the mobile application by clicking
on ‘’Start recording’’ or by pressing the button ‘’Trigger’’ on your Tikee (see corresponding
chapter).
Choose the type of sequence and set it up.
The timelapse will start at the time you set.
You can put an end to an ongoing sequence by pressing again the ‘’Trigger’’ button.
You can check the status of your Tikee at any time by clicking on:
Page 15
Getting started with the mobile application
15
3
3
3. Rules of configuration of the sequences-
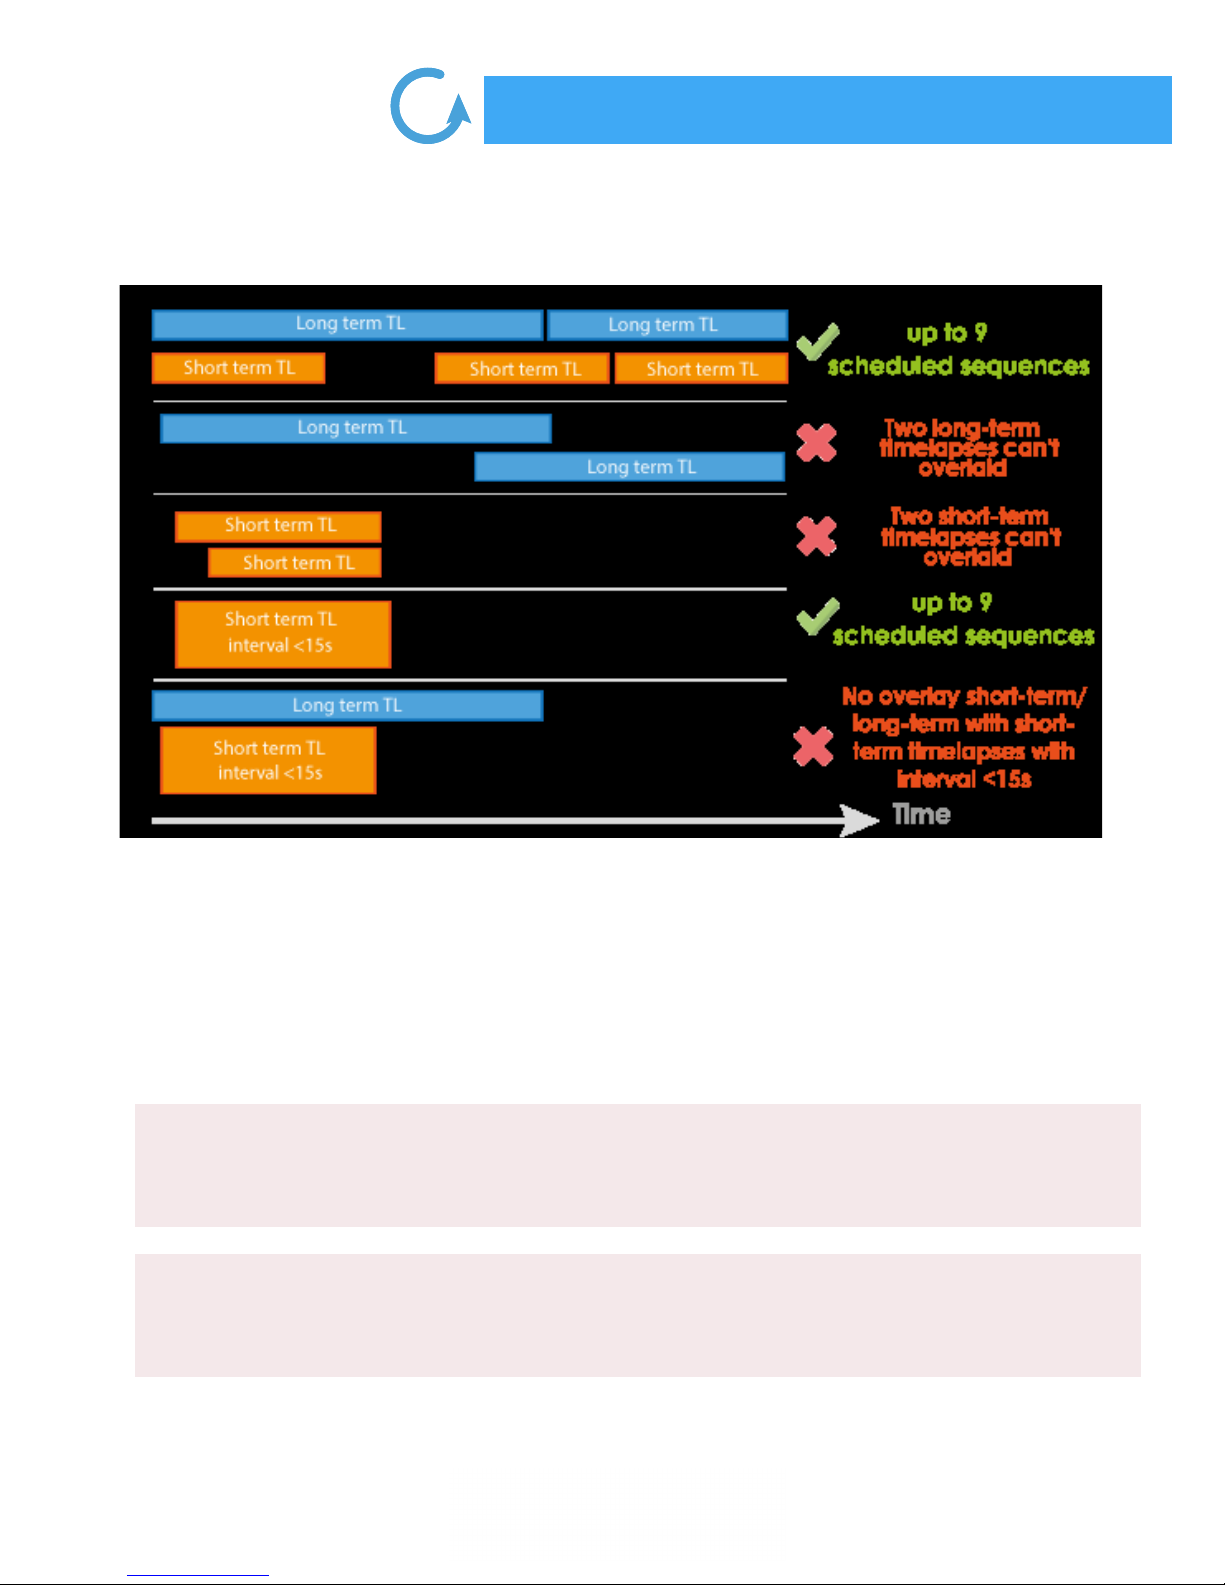
Up to 9 sequences can be scheduled.
The rule is that two short-term sequences or two long-term sequences cannot be realized at the
same time.
However a short-term sequence can start while a long-term sequence is in progress.
Restrictions exist in the case of a short-term timelapse which interval between each picture is less
than 15 seconds.
. Format and size of the images
JPEG
DNG
Left and right image stored on the SD card: 4608 x 3456 each, approx. 4 MB (8 MB per pair)
Left and right images sent on the web app: 2664 x 1998, approx. 2.5 MB per pair
Panoramic image resolution after fusion: 4000 x 1400, approx. 2 MB per panoramic image
TikeePRO only.
The DNG format images are not uploaded, nor usable on the web app.
Left and right image stored on the SD card: 4608 x 3456, approx. 37.5 MB (75 MB per pair)
Page 16

16
3
3
The autonomy of your Tikee depends on several factors:
• the sunshine and the exposure of the solar panel;
• the type of time lapse (short or long term) and the shooting interval;
• the upload of photos on the cloud (or no) and the quality of the connection.
Here are estimates of autonomy using only tbattery energy (these numbers may be signicantly
revised upwards depending on the sunshine) and with an ambient temperature of 20°C:
Without upload
With upload (125KB/s)
Short-term
timelapse
Long-term
timelapse
Maximum
12 hours
Maximum
10 hours
1 photo every 5 minutes:
8 d (24/24) / 14 d (12 h/24)
1 photo every 15 minutes:
20 d (24/24) / 30 d (12 h/24)
1 photo every 30 minutes:
30 d (24/24) / 41 d (12 h/24)
1 photo every hour:
41 d (24/24) / 50 d (12 h/24)
2 photos per day: 60 days
1 photo every 5 minutes:
2.6 d (24h/24) / 5 d (12h/24)
1 photo every 15 minutes:
7 d (24h/24) / 13 d (12h/24)
1 photo every 30 minutes:
13 d (24h/24) / 21 d (12h/24)
1 photo every hour:
21 d (24h/24) / 31 d (12h/24)
2 photos per day : 52 days
Once the time lapse sequence(s) are set up, you can start the time lapse(s) from the status menu on the
mobile app by clicking on ‘Starting recording’, or by pressing the ‘Trigger’ button ( ) at the rear side
of your Tikee.
The sequence(s) is/are started when the ‘’sequence LED’’ ashes :
• 3 seconds of slow blue ashing light : ongoing sequence (standby between two shots)
• 2 seconds of xed blue light : ongoing sequence (active and ongoing shooting)
Note: If you create new time lapses sequences and that your Tikee is still in timelapse capture mode, you don’t
need to start again the new time lapses sequences.
. Autonomy
. Starting a timelapse
Page 17

Getting started with the mobile application
17
3
3
. Checking the progress of a time lapse
You can check the status of each scheduled timelapse sequences by clicking on it from the mosaic
sequences menu.
‘’Medium and long-term’’ sequences can be searched, edited and removed.
‘’Short-term’’ sequences can be searched and removed, but not edited.
When a sequence is in progress you can know how much images have been shot and if you have set
up the connection.
. Checking the status of your Tikee
You can check the status of your Tikee by clicking on: on the left top of the mobile app.
Indicates the remaining battery percentage
Indicates the available space on the memory card
Click on this button after setting up a timelapse sequence to start
recording
Allows uploading of photos from the microSD card to web app.
This function may not be available (during a in progress timelapse
sequence for example) and could appear shaded.
Indicates the status of your Tikee.
The dierent status are: idle, waiting, timelapse in progress and time
lapse done.
In the same way, you cannot start recording a time lapse
sequence when the mobile app is uploading images.
. Setting up the connection of your Tikee to
My Enlaps web app
If you want use your Tikee’s WiFi modem or 4G LTE modem (TikeePRO only) to regularly upload photos
to My Enlaps web application, you have to complete the following settings.
Active connectivity mode is displayed on the mobile application screen.
Page 18

18
3
3
To view the active connectivity mode, follow this path on the mobile application:
Connecting to WiFi (Tikee and TikeePRO)
Note: The WiFi connection is not possible on WiFis that require a connection to a web portal (which
is often the case on an industrial site or on free networks WiFis).
SSID: name of the WiFi to which you want to be
connected to
Password or security key: enter the password/se-
curity key of the wireless network
Security type: choose from the drop-down menu
the type of wireless network security
Once the parameters lled to save them
click on: Save
We recommand to test the connection of your
Tikee once the parameters are set up.
For that click on ‘’Test connection’’.
This step may take several minutes because the
Tikee will check all of the steps to be connected to
My Enlaps web application server.
At the end of the test you will receive a notication
about the success or not of the test.
In case of failure: check if the quality of the wireless network is sucient (for example you can test the
connection on your smartphone beforehand).
Page 19

Getting started with the mobile application
19
3
3
Connecting to a 3G/4G telecom network (TikeePRO)
Previously you have to insert a microSIM into the dedicated slot of your Tikee.
Username: this eld is optional
Password: this eld is optional
APN : this eld is required - most of the time you
can nd it on the website of your telecom service
provider
PIN 1 : mandatory - this is the PIN code of the SIM
card
PIN 2 : this eld is optional
Once the parameters lled to save them
click on: Save
We recommand to test the connection of your Tikee
once the parameters are set up.
For that click on ‘’Test connection’’.
This step may take several minutes because the Tikee
will check all of the steps to be connected to My
Enlaps web application server.
At the end of the test you will receive a notication
about the success or not of the test.
Click here for additional information.
Not connecting your Tikee
If no network is in range or if you do not want the photos being automatically uploaded to My Enlaps
web application, you can select the WiFi or 3G/4G icon, then clear the elds and save the settings.
. Advanced settings
Formatting the microSD card
We recommend to format the microSD card before rst use.
You can format it directly from the mobile application.
Page 20
20
3
3
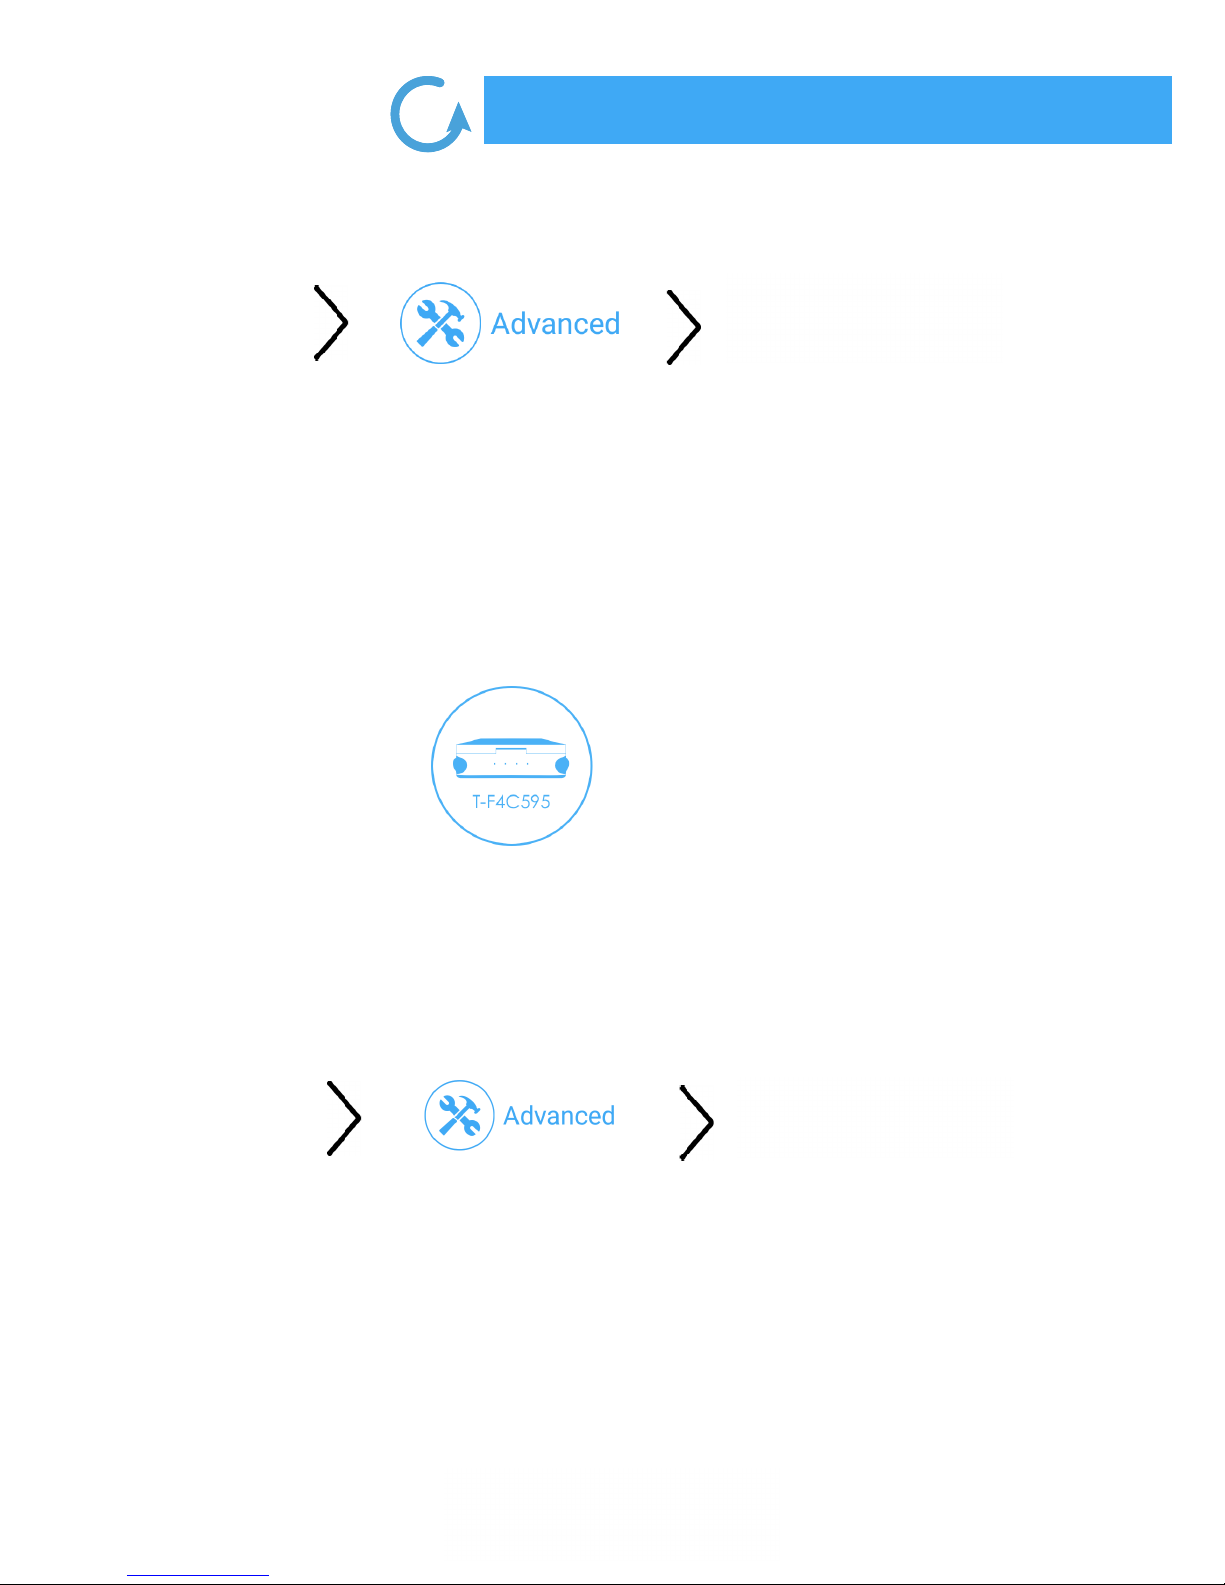
Here is the path on the mobile application to format the microSD card.
You cannot format the microSD card when a timelapse sequence is in progress.
Unlinking your Tikee from your user account
The association of a Tikee with a user account is automatic and occurs during the rst linking (connection of your Tikee to the mobile app). During the following connections, the Tikee linked to your
account are marked with 2 chains:
A Tikee can only be associated with a single user account.
It is possible to connect several smartphones with the same user account.
If you want another user to use your Tikee (when you sell your Tikee or loan it for example), you can
unlink it from your account. This unlink can also be done on the web app.
You will not be able to link with a Tikee associated with another account than yours. You have to unlink
it rst.
Caution! Once unlinked, any user who has downloaded the Enlaps mobile application can be linked
to your Tikee.
Linked TikeeUnlinked Tikee
Page 21
Visualization of your timelapse in My Enlaps
Getting started with the mobile application
21
3
3
Updating your Tikee
Check at enlaps.io/update if a new version of the rmware of your Tikee is available. You can also
ll in your email address on this page to get an email when a new version of rmware is available.
If an update is available, download it from a computer and then copy it on the microSD card previously formated (see chapter about formating) of your Tikee. The update may take several minutes.
Insert the microSD card into the dedicated slot.
Turn on your Tikee and go to:
The update may take several minutes. Once completed, you will receive a notication on the
mobile app.
Your Tikee will then restart automatically (the Power LED will turn o and then will ash before
being steady again).
After the update is complete, you can reconnect to the mobile application.
The update le is automatically deleted from the micro SD card once it is done.
We recommended to connect your Tikee to a USB plug. The update is only done if the battery level
is higher than 50%.
1
2
. User account
Version of the mobile app
You can check the version of the mobile app installed on
your smartphone by clicking on:
Disconnecting from the mobile app
The mobile app will keep your user’s ID from the rst
connection.
If you want to log o from the mobile application, go to
My Account (opposite image).
Page 22

22
4
Visualization of your timelapse in My Enlaps
Photo set: database of all of the shot photos during an in progress or ended time lapse sequence.
Project: a project uses a photo set to create a time lapse video. You can create an innite number of
projects based on the same photo set.
Example: For a long-term time lapse (several months) you can create a time lapse video based on
a specic week or on of all the period of shooting from the same photo set. These 2 time lapses are
from 2 separate projects but based on the same photo set.
Upload of photos on the web app: From the mobile app or the web app you have to select ‘’Ye s’’
when creating a new time lapse sequence for ‘’Upload of photos on the web application’’ to directly or later make the most of all the features of the web app: combined images, edition, view and
sharing.
Before beginning:
All photos of a
timelapse sequence
Timelapse using all or
part of the photoset
Photoset Project
Page 23

Visualization of your timelapse in My Enlaps
23
4
. Editing a timelapse project
Caution! The calculation of the fusion of left and right images of your Tikee requires between 25
and 100 images. Prior to this calculation, the project would not appear in your account and so the
nal pictures won’t be visible. You can check the status of your Tikee on the web app to conrm its
proper functioning.
The calculation of fusion is done only once for all new time lapse sequences. Once done (when you
see your project in your account) the following pictures are generated much faster (a few minutes
after being uploaded in the web application).
Note : All photos of a short-term timelapse are uploaded to the web app once the sequence is
ended.
Photos from a long-term time lapse are sent every 25 pictures or at least once a day.
To edit a project, click on the top right of the thumbnail project:
Then click on
Filters
When you modify the lters, the photo mosaic will update automatically with the photos that t
within the lters. These are the photos that will be used to create the timelapse video.
Page 24
24
4
Visualization of your timelapse in My Enlaps
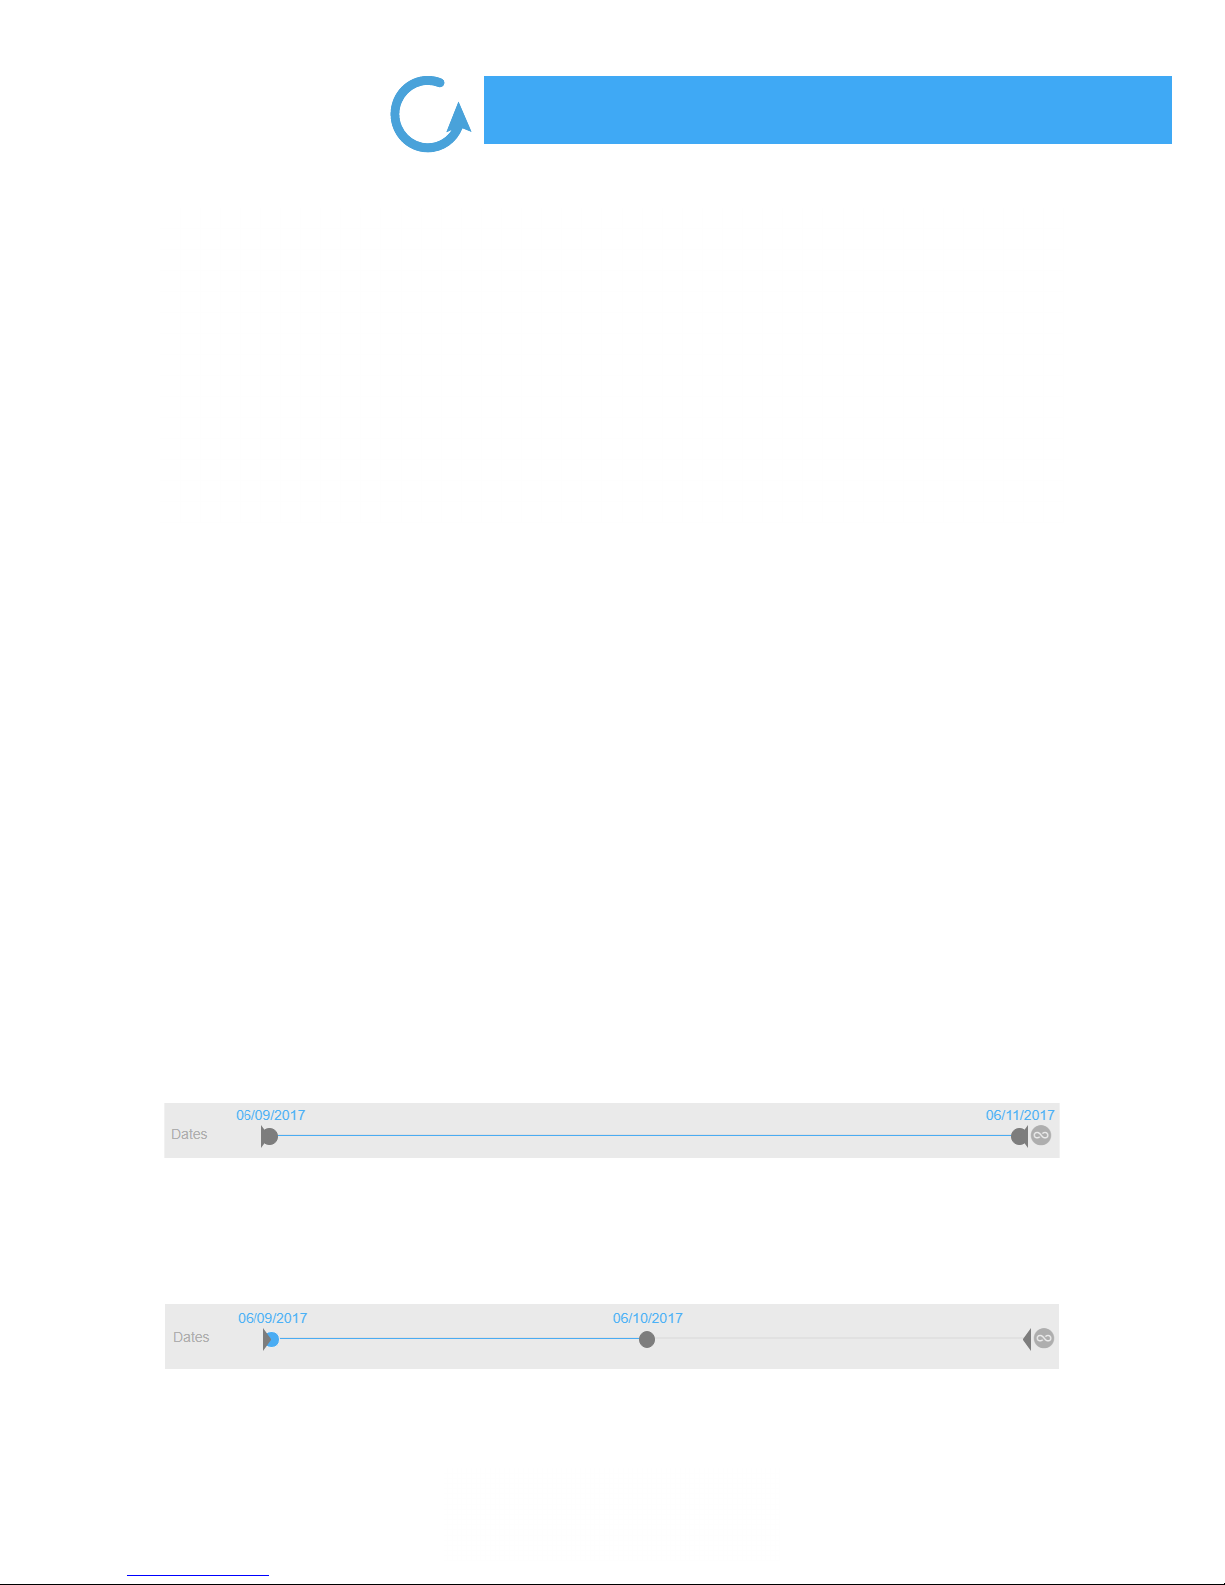
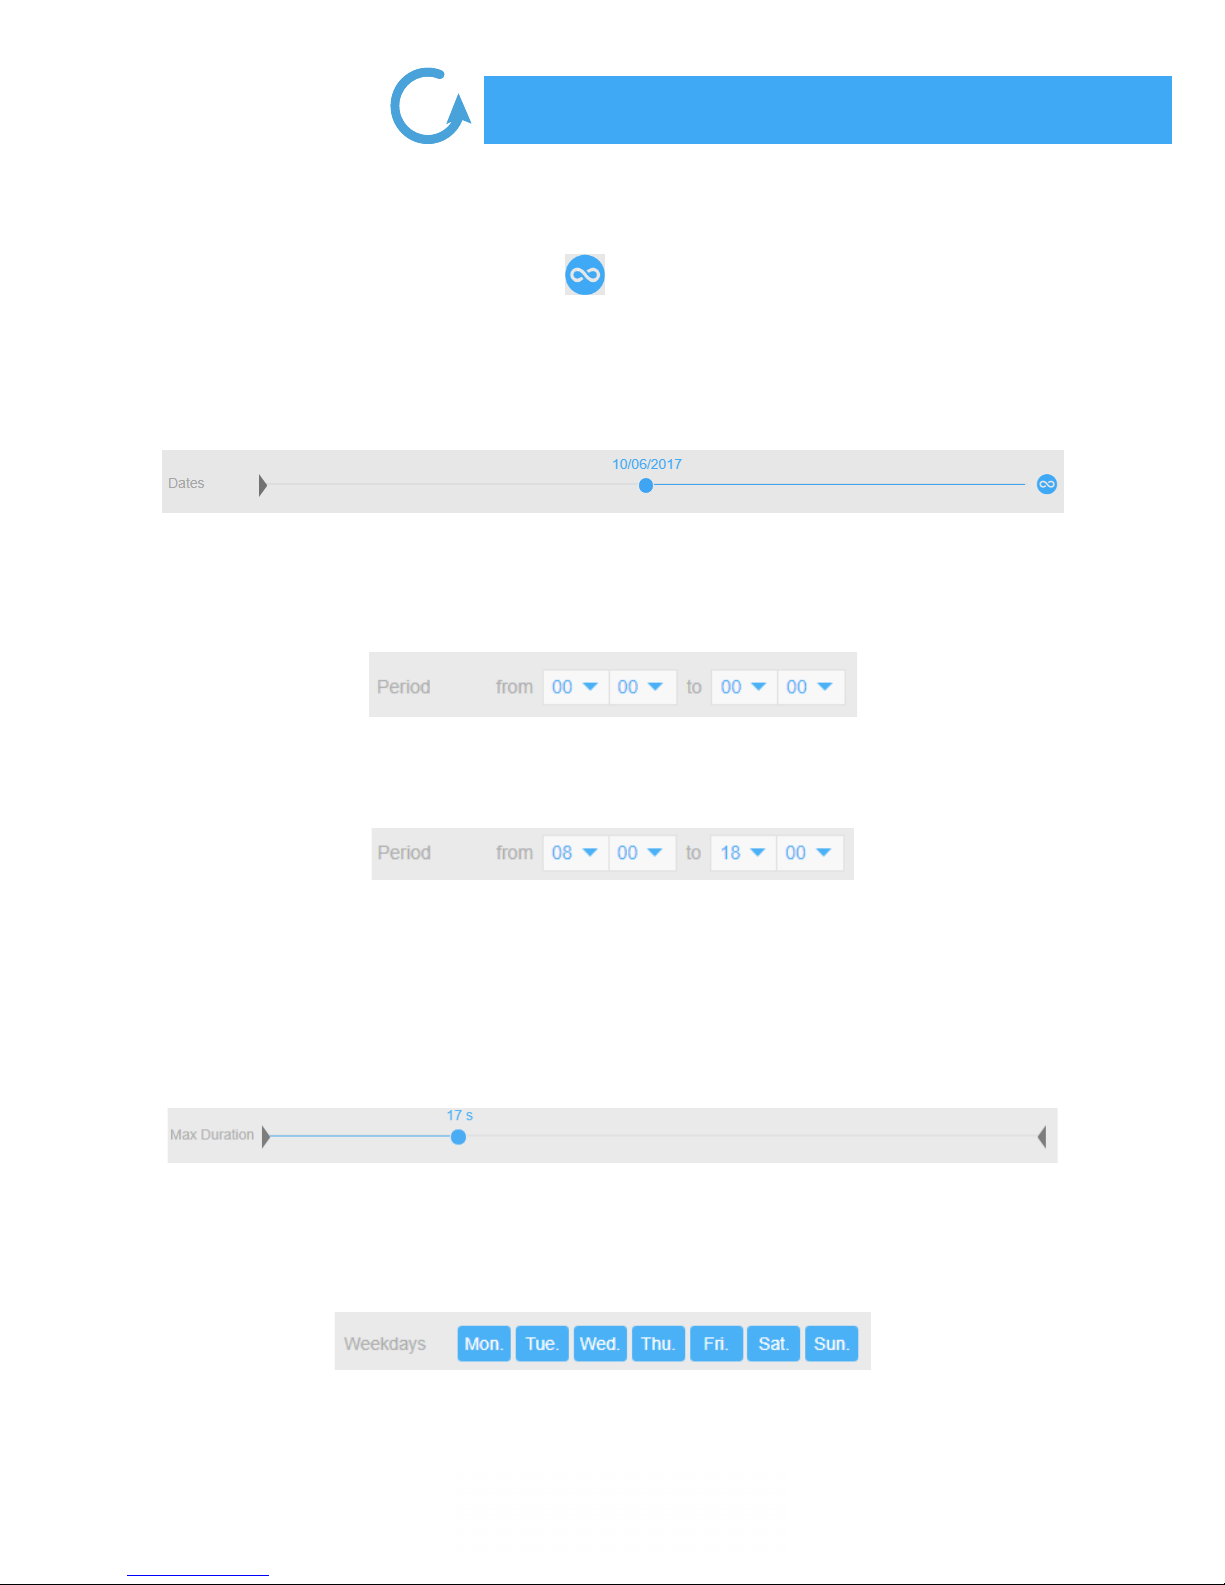
About the settings of lters area : there are currently 4 lters: dates, period, maximum duration and
days. Below is how to use them.
Period lter
On below example: selection of a given period: photos taken from 2017, 9th June to 2017, 11th
June:
On below example: selection of a given period: photos taken from 2017, 9th June to 2017, 10th
June:
Page 25
Visualization of your timelapse in My Enlaps
25
4
Automatic update of the timelapse with the latest pictures uploaded by your Tikee on the web
application:
To activate or deactivate this mode, click on
When the mode is on, you can select a start date without an end date. As soon as new photos are
uploaded on the web app, the timelapse will be automatically updated (only for the long-term time
lapses - otherwise the app set the date of last uploaded photos).
Time lter
You can select all photos of the day by applying the selection below:
You can also select the photos taken during a given period.
In the example below: from 8:00 a.m. to 6:00 pm:
Duration of the timelapse
The timelapses duration is voluntarily limited to 1 minute and/or the number of photos available (if
less than 1 minute).
To make a one-minute time lapse, it is necessary to have at least 1500 ltered images.
Filter ‘’days of the week’’
You can select the days of the week from the menu below:
Page 26

26
4
Visualization of your timelapse in My Enlaps
You can also select photos shot only some days of the week.
In the example below: Monday, Tuesday, Thursday, Saturday and Sunday:
Mosaic
Total number of images of the project vs Filtered photos
In the example below, with the selected lters in previous examples, 169 photos meet the
ltering criteria on a total of 1143 photos included in the photo set.
Deleting an image and a selection of images
To delete a photo:
• Select the photo by clicking on it; it will then open it in full screen;
• Click on at the bottom right of the screen. A conrmation message is displayed, indicating
the projects that will be aected by the removal of the photo;
• Click on ‘’OK’’ to conrm the deletion or ‘’Cancel’’ to return to the selected photo in full-screen.
Page 27

Visualization of your timelapse in My Enlaps
27
4
To delete multiple photos:
1. Click on the button ‘’Select’’ at the bottom right of the mosaic
2. Click on the photo (s) you want to delete.
3. A photo is selected when it appears in gray.
To deselect a photo click on it again.
Once your selection is made, click on the trash at the bottom right of the mosaic. A
conrmation message is displayed, indicating the projects that will be aected by the
removal of the photo(s).
4. Click on ‘’OK’’ to conrm the deletion or ‘’Cancel’’ to return to the selected photo in full-
screen. You can cancel the process at any time by clicking on ‘’Cancel’’.
Caution! The removal of an image of the mosaic deletes this image from all the projects that use it.
The removal is nal and irreversible.
Manually adding photos to a photoset
To add photos to an existing photo set, click on ‘’Add photos’’ in the bottom left of the mosaic.
The addition is done then or by a ‘’Drag&Drop’’, either by clicking on the
upload icon and then by selecting the photos on your computer.
Caution! To create your timelapse, uploaded photos must be in the same format as the existing
photos in the mosaic of the set.
The fusion of left and right images is automatically done with the drag&drop of the photoset
if left images names contain ‘_LEFT’ and if right images names contain ‘_RIGHT’.
Page 28

28
4
Visualization of your timelapse in My Enlaps
Pan&Zoom
You can select two types of framing using the slider centered at the bottom of the tile ‘’Pan &
Zoom’’. You can choose : Full size or Pan&Zoom
Full size framing
Switch the cursor on ‘’Full frame’’. The video uses panoramic photos taken by your Tikee.
Pan&Zoom framing
Switch the cursor to ‘’Pan & Zoom’’. The time lapse video will then move in the panoramic image
from the ‘Start’ area to get to the ‘End’ area.
You can freely select the position of the start and end area.
The size of the areas can also be changed to zoom.
Note that the minimum size has been blocked in order to always get a FullHD video.
Page 29
Visualization of your timelapse in My Enlaps
29
4
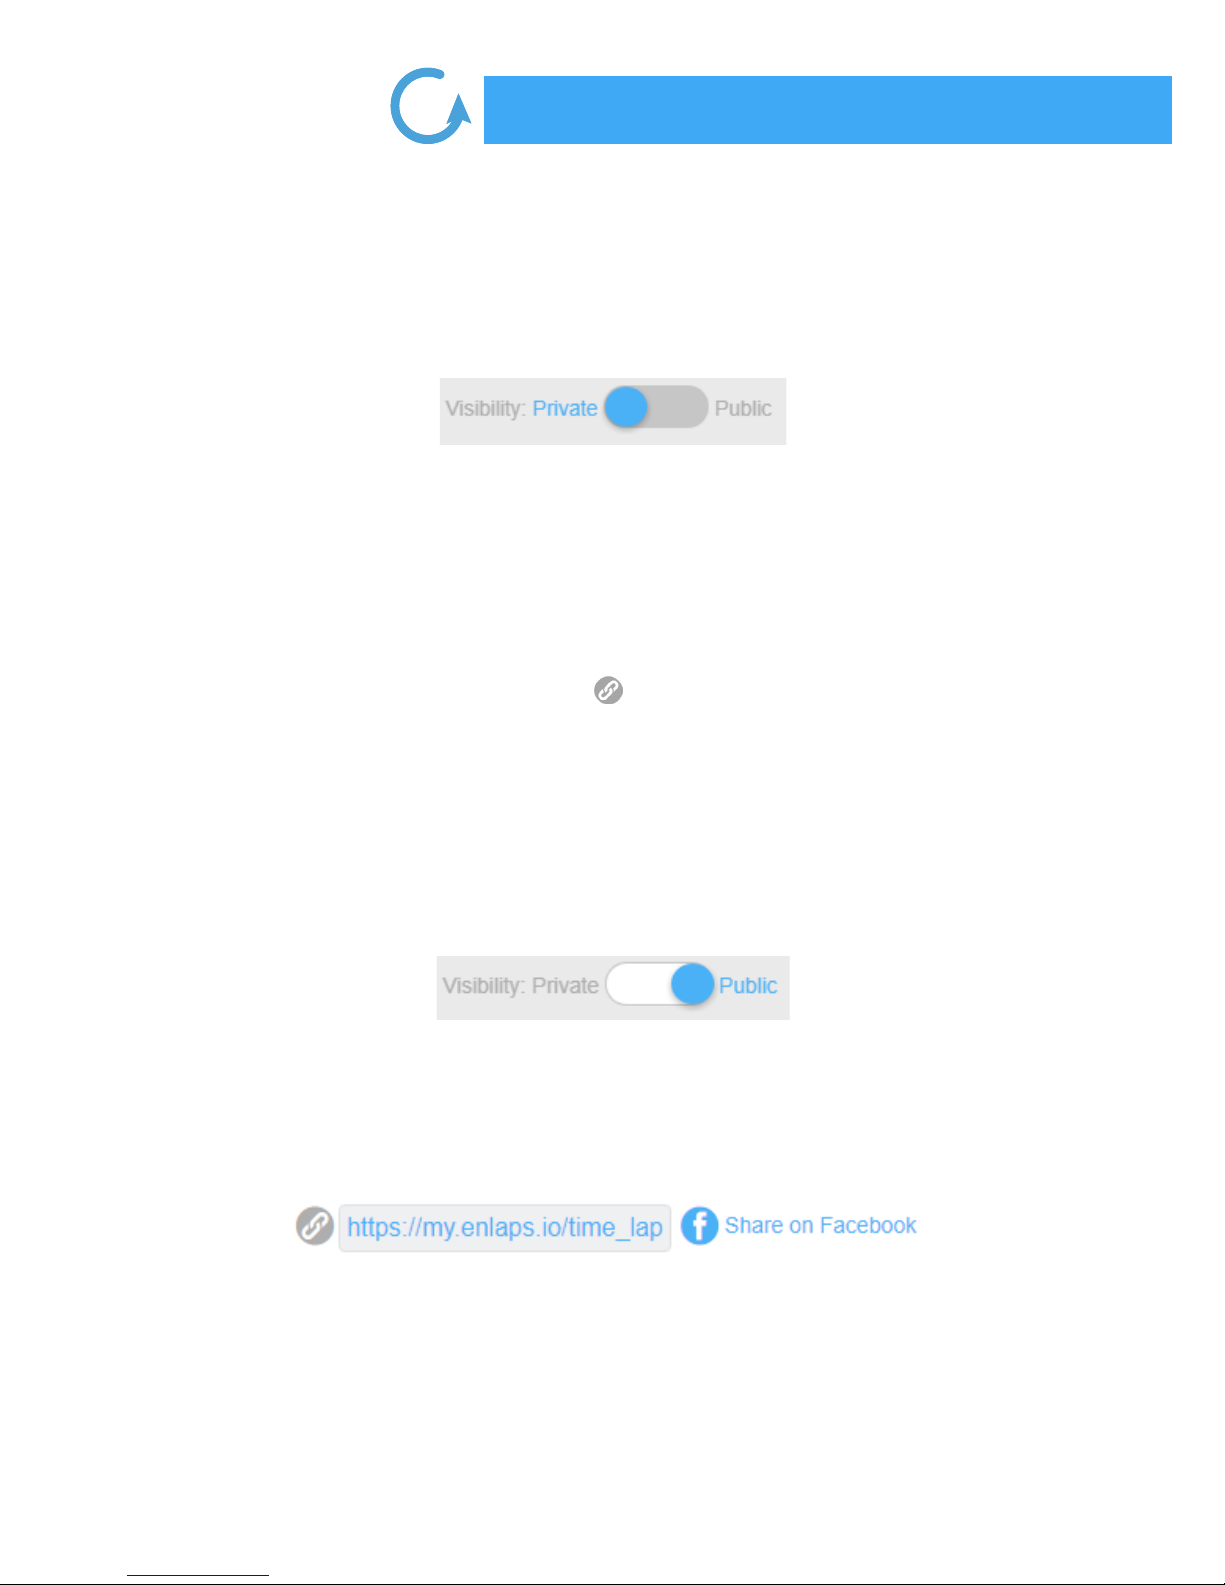
Viewing the timelapse and sharing mode
Private mode
By default your timelapse is in ‘’Private’’ mode which means that only the owner of the account can
view the timelapse.
Private mode with sharing link (PREMIUM)
If you have a PREMIUM account, you can share your timelapse with Enlaps users only (or not) with a
private link non discoverable.
To get the link: go to the page where you can view your timelapse. Under the viewing screen you
can manage sharing parameters. By clicking on you copy the link.
Public mode
When your timelapse sharing mode is ‘’Public’’ , everybody with the link (Enlaps users or not) can
view and share your timelapse.
It can also be watched in the ‘Community’ timelapses section.
Page 30
30
4
Visualization of your timelapse in My Enlaps
To get the sharing link: go to the page where you can view your timelapse.
Under the viewing screen you can manage sharing parameters.
By clicking on you copy the link.
By clicking on ‘’Share on Facebook’’, the Facebook post is automatically formatted and directly
shareable on your Facebook account.
Watermark
Enlaps watermark
When creating your timelapse, a watermark with the logo Enlaps will appear highlighted on your
video. This watermark can be disabled in the case of a PREMIUM membership.
No Enlaps watermark and/or custom logo (PREMIUM)
With a PREMIUM account, you can choose to not watermark when creating your timelapse or to
ax your custom logo.
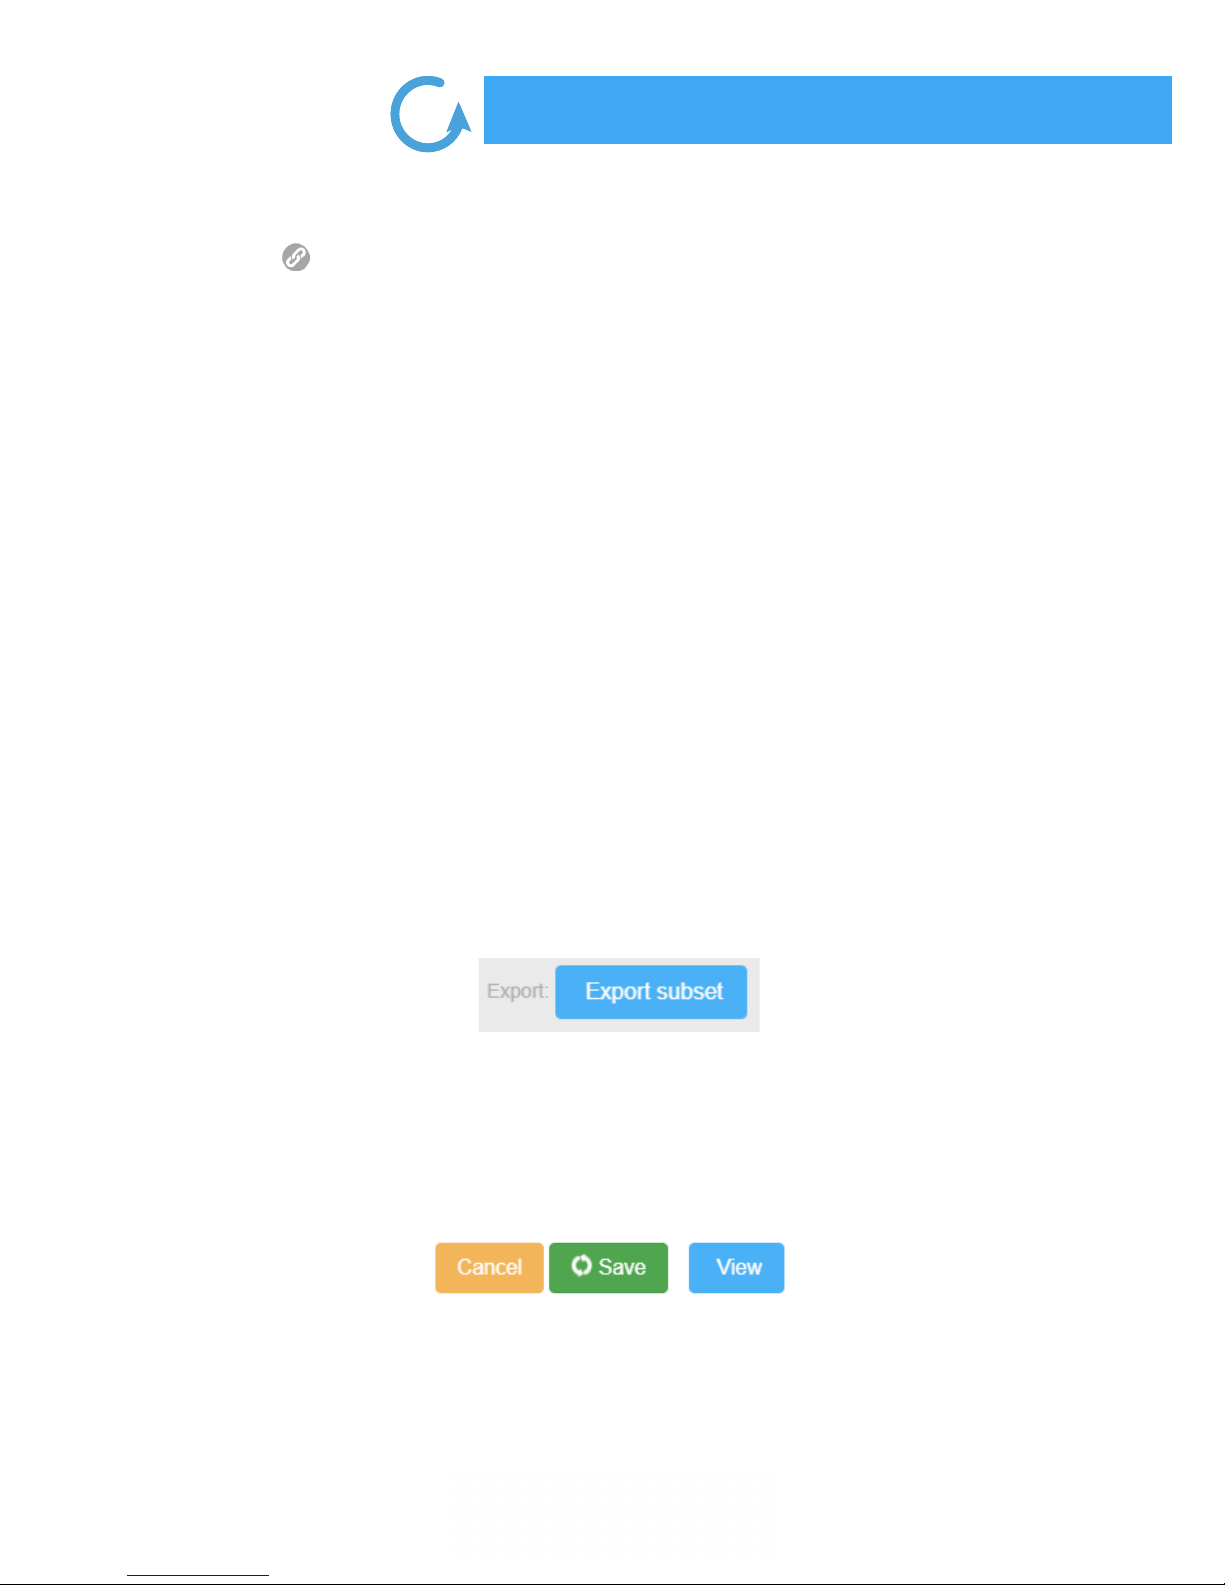
Downloading the ltered photoset (PREMIUM)
With a PREMIUM account, you can select your ltered photoset and download it by selecting
‘Export subset’ in the ‘Extra‘ menu.
After a few minutes, you will receive an email with the download link of the archive containing all
of the ltered photos.
Saving your timelapse
Once your timelapse is edited, you can save it by clicking on ‘’Save’’.
It will then start the generation of your Full HD video which will be available in the display screen or
by clicking on ‘View’, either from the mosaic of the projects.
Page 31

Visualization of your timelapse in My Enlaps
31
4
You can edit, delete or even duplicate a project by clicking on
Editing a project
After you have selected your project, you can edit it by clicking on
Deleting a project
After you have selected your project, you can remove it by clicking on
Caution! If you delete the last project based on your photoset, your project and photos of this
photoset will be lost.
Duplicating a project
You can duplicate an existing project by clicking on
It will be automatically named as the duplicated project.
Once it has been duplicated, you are free to edit it.
. Visualizing a timelapse
Your timelapses
Choice of the resolution
You have the choice between two dierent resolutions:
- Standard quality
- Premium or High Denition quality
By default, the HD video on a computer is 1080p while on a mobile it is 720p.
You can switch from 720p to 1080p (and vice versa) on your computer.
Page 32
32
4
Visualization of your timelapse in My Enlaps
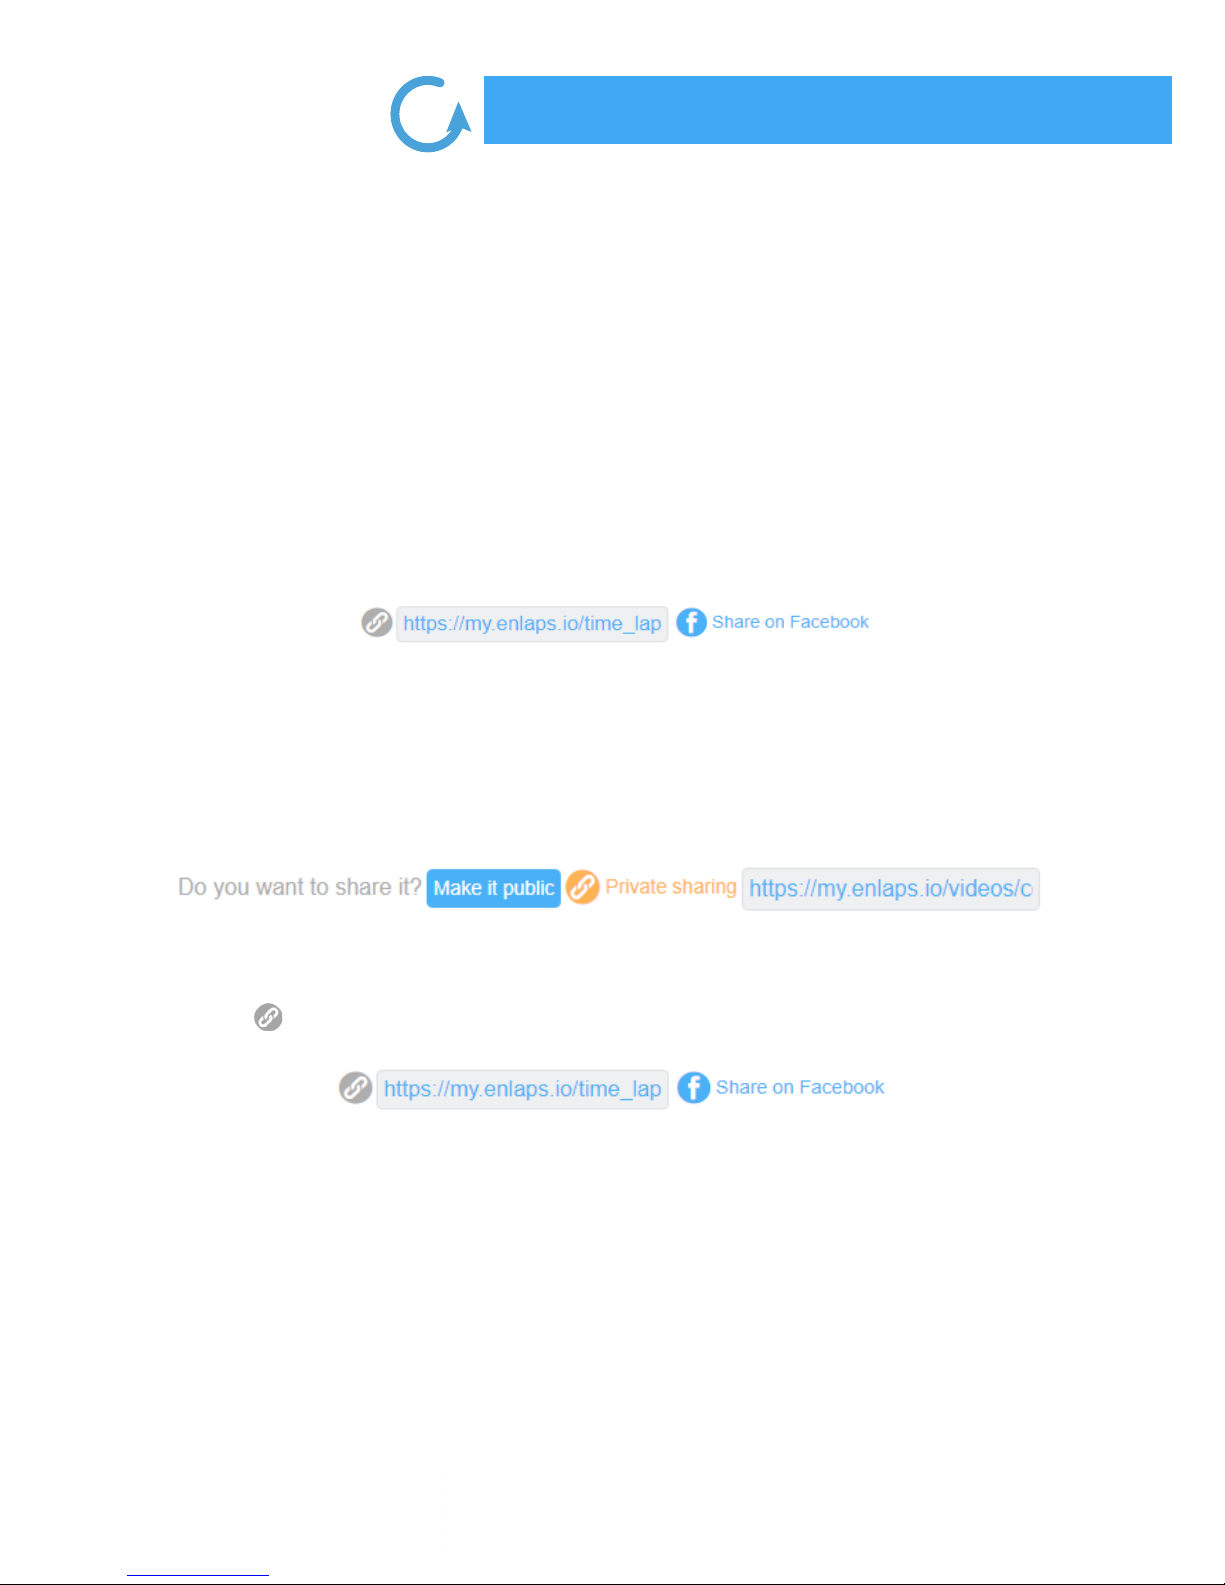
Sharing the timelapse
If your timelapse is private, you can share it by making it public or by copying the sharing link by
clicking on .
If your timelapse is public, you can share it by making it public or by copying the sharing link by
clicking on or by clicking on ‘’Share on Facebook’’
Viewing last shot photo
You can view the last shot photo by your Tikee by clicking on the project.
It appears under your timelapse.
Downloading the full HD video (except PREMIUM)
With a standard account, you can download the video in full HD with a bitrate of 8 Mbs/s.
Downloading the full HD video (PREMIUM)
With a PREMIUM account, you can download the video in full HD with a bitrate of 16 Mbs/s.
Sharing a timelapse of the community
To view the timelapses of Enlaps community from My Enlaps app home page, click on
You can then share a timelapse of the community by clicking on it and selecting the sharing mode:
Page 33
Visualization of your timelapse in My Enlaps
33
4
Associating your Facebook account
To associate your Facebook account:
1. Click on your account at the top right :
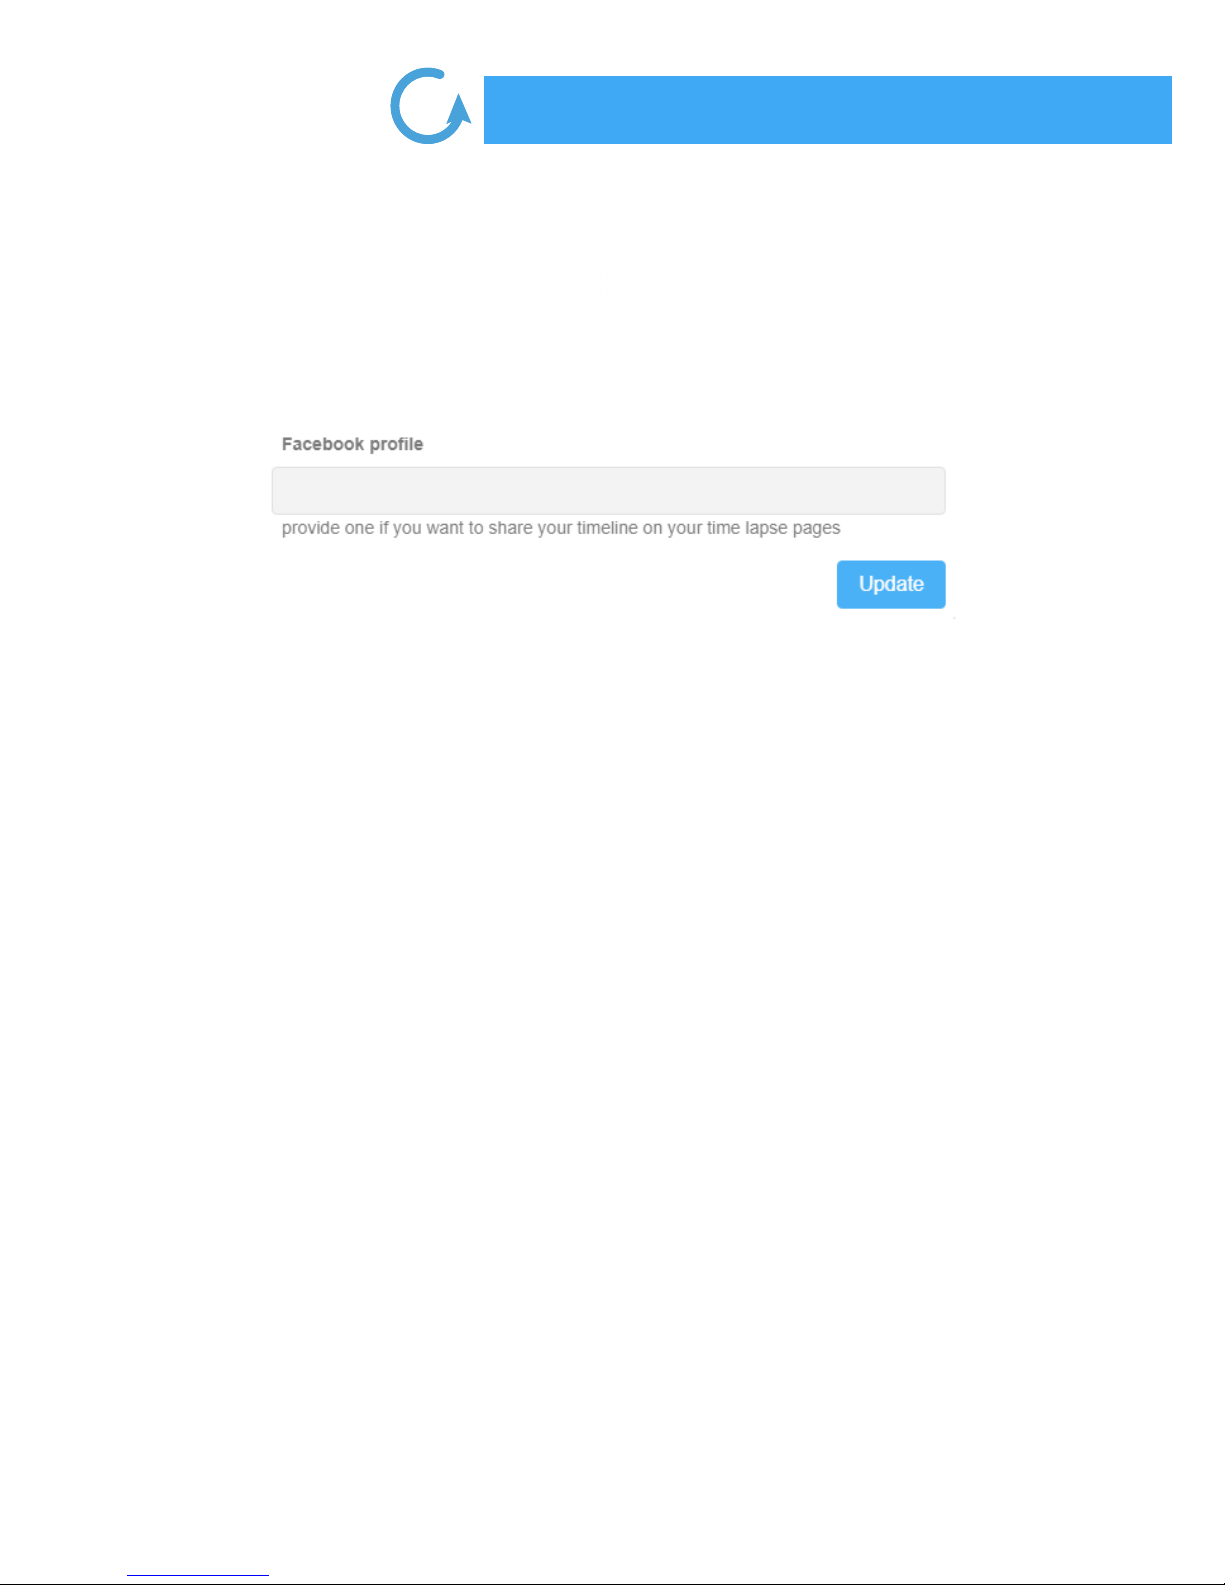
2. Once in the menu ‘’Edit my account’’, scroll to the ‘’Facebook prole’’
3. Enter the URL of your Facebook account like:
https://www.facebook.com/MYACCOUNT
4. Once the eld completed, click on ‘’Update’’
. Setting up your Tikee
You can manage all of your Tikee settings by clicking at the bottom of the screen on
Choice of the Tikee
Select the Tikee you want to set up by clicking on it.
Page 34

34
4
Visualization of your timelapse in My Enlaps
Checking the status of your Tikee
Once you have selected your Tikee, you can access to all of its status information: battery, autonomy trend (incoming), quality of the network, status of shooting (for example in progress timelapse), available space on the SD card and date of last connection.
Viewing and deleting timelapses sequences (‘’Editing’’ incoming)
You can view information about your timelapses sequences by clicking on the chosen sequence.
You can also delete a timelapse sequence from your Tikee by selecting it and then clicking on
Page 35

Visualization of your timelapse in My Enlaps
35
4
For questions relating to your Tikee camera or mobile & web applications, you can read our FAQ:
enlaps.io/faq/?lang=en
You can also contact us at [email protected] or directly by private message on Facebook.
. Enlaps support
Unlinking a Tikee
You can unpair a Tikee by logging into the web application My Enlaps.
1. Log in
2. Click on
3. Select the Tikee you want to unlink and click at the top right of it on
4. The selected Tikee is now disassociated from your user account
Page 36

Maintenance
36
5
A microber cloth is included in the package. You can use it to ensure the maintenance of the
camera.
Follow the instructions below to get the best performance from your Tikee.
The camera is guaranteed IP54. If the cap protecting the micro USB slot is opened, the waterproong of the Tikee is not guaranteed.
Make sure that all of the caps are closed before use to ensure water-resistance.
Operating temperature: -10° C / + 50° C
Storage Temperature: -25° C / + 60° C
Before closing the covers, make sure that no debris is on the seal. If necessary, clean it with a cloth.
Before opening the covers, make sure that the camera is free of water and debris.
If the camera is dirty, you can clean it with a damp soft cloth.
To clean the lenses, wipe them with a soft cloth. Don’t insert any foreign object around the lenses.
If necessary, clean the solar panel. To do this, use clear water with a soft cloth.
Page 37

Battery information
37
6
Optimization of the battery
The LED turns orange when the battery charge is low. If the battery charge reaches 0% while
shooting, the Tikee saves the le and turns o.
Shooting while charging
You can shoot a timelapse while your Tikee is connected to a USB micro cable (not supplied).
Even if battery does not charge while shooting, this method let empower the camera to record on
more important periods of time.
Note: as the cap of micro USB port is open while loading, the tightness of the Tikee is no longer
guaranteed.
WARNING: Use only chargers labelled: output 5 V 1a.
Storage and handling of the battery
The camera contains delicate parts, including the battery. Do not expose your camera at too low or
too high temperatures. Too low or too high temperatures could temporarily reduce the battery life
or adversely aect the correct functionning of the camera. Avoid sudden changes in temperature
or humidity to avoid the risk of misting inside and outside the camera.
Do not dry the camera with the help of an external source of heat such as a microwave oven or
hairdryer. Any deterioration of the camera or battery due to contact with liquids is not covered by
the warranty.
Do not store the battery with metal objects like coins, keys or jewellery pieces. The battery
terminals may cause a re if it comes into contact with metal objects.
Make no unauthorised changes on the camera. You might compromise your security and the
performance of the camera, breaking the regulations in force and void the warranty.
Warning: Never let fall, disassemble, open, crush, bend, deform, pierce, lacerate, expose to the microwave, incinerate or paint the camera. Do not insert foreign bodies in the camera battery
compartment. Do not use the camera or battery if these have been damaged, for example if they
are cracked, breakthroughs, or if they took the water. Disassembly or drilling of the battery can
cause an explosion or re.
Page 38

38
6
Treatment of electrical and electronic equipment at end of life
This symbol indicates that this product should not be disposed with unsorted household waste. A
system of elimination and treatment specic to electrical and electronic equipment used, whose
use is mandatory, has been implemented including a free right of recovery of used equipment on
the occasion of the purchase of equipment new and separate collection by an accredited body. For
more information, you can contact your local Council. A correct disposal of electronic and electrical
equipment used ensures treatment and an appropriate value to avoid damage to the environment
and human health and conserve natural resources.
Page 39

Troubleshooting
39
7
My Tikee does not turn on
Make sure that your Tikee battery is charged. To charge it, use a USB cable.
My Tikee is not operating
Press and hold the Power button for about 10 seconds. The camera turns on again.
One (or more) LED no longer lights
Contact us by sending an email to [email protected].
The microSD card no longer works
Reformat the microSD via the mobile application: tab ‘’Main menu’’ and then ‘’Advanced settings’’.
Caution! Back up the data stored on the microSD card rst and foremost.
I can’t pair my Tikee
1. Turn o your Tikee
2. Close Enlaps mobile app
3. Turn o the Bluetooth connection on your mobile
4. Turn on your Tikee
5. Activate the Bluetooth connection on your mobile
6. Open Enlaps mobile app
7. Pair your Tikee with the mobile app
To view other answers to the most frequently asked questions, go to enlaps.io/faq/?lang=en.
To join the Enlaps customer service, contact us on [email protected] or on Facebook.
Page 40

Trademarks
40
8
Enlaps™ and Tikee™ are registered trademarks or trademarks of Enlaps SAS in France and at the
international level.
Other names and brands are the property of their respective owners.
TIKEE
Follow us on :
 Loading...