


MVS02 0

Mini Video Speaker
Model: MVS01
User’s Manual
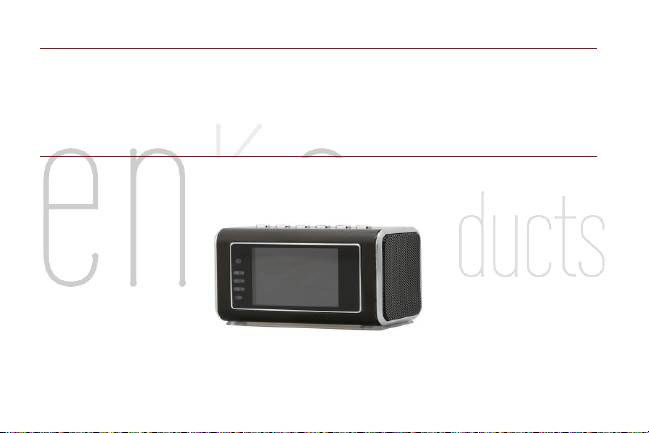
Mini Video Speaker
Model: MVS02
User’s Manual

Thank you for purchasing our MVS series mini video speakers!
The MVS mini video speaker is a state-of-the-art product that can be operated with ease, and contains many
multi-functional features. It has the ability to function as an MP3/MP4 player, provides extended video
recording and playback, contains infrared night-vision, performs continuous loop recording, takes pictures,
and serves as a webcam. Suggested usages include personal entertainment, home security, office spy, store
or stockroom monitor, and classroom record. This mini video speaker is the perfect combination of an
entertainment center, as well as a security monitor.

Table Of Content
Mini Video Speaker MVS01 ...................................................................................... 1
1. Accessories............................................................................................................... 2
1.1 Accessory Pictures................................................................................................. 3
2. Appearance .............................................................................................................. 4
3. Features .................................................................................................................... 5
3.1 Rich Entertainment Functions .......................................................................... 5
3.2 Powerful Security Monitor Functions ............................................................. 5
4. Functions .................................................................................................................. 6

4.1 Automatic Recording ........................................................................................... 7
4.2 Infrared Light Enhanced ..................................................................................... 7
4.3 Night-Vision Recording ....................................................................................... 8
4.4 Loop Recording ...................................................................................................... 8
4.5 Continuous Video Recording ............................................................................. 9
4.6 Hidden Recording .................................................................................................. 9
4.7 File Directory Structure ................................................................................... 10
5. Operations............................................................................................................. 11
5.1 Enter Security Interface ................................................................................... 12
5.2 Hidden Files List .................................................................................................. 12

5.3 Operation of File List ......................................................................................... 13
5.4 Music/ Video Play ............................................................................................... 13
5.5 Radio Operation .................................................................................................. 15
5.6 Audio Input ........................................................................................................... 17
5.7 Video ....................................................................................................................... 17
5.8 Webcam Operation ............................................................................................ 19
5.9 Operation of Connect Computer .................................................................... 19
5.10 Charge .................................................................................................................. 20
5.11 Clock Display ..................................................................................................... 20
5.12 Turn off Screen Display .................................................................................. 21

5.13 Key Lock .............................................................................................................. 22
6. Parameters ........................................................................................................... 23
7. Troubleshooting .................................................................................................. 25
8. Precautions ........................................................................................................... 26
Mini Video Speaker MVS01 ................................................................................... 28
9. Accessories............................................................................................................ 29
9.1 Accessory Pictures.............................................................................................. 30
10. Appearance ........................................................................................................ 31
11. Features ............................................................................................................... 32
11.1 Rich Entertainment Functions .................................................................... 32

11.2 Powerful Security Monitor Functions ....................................................... 32
12. Functions ............................................................................................................. 33
12.1 Automatic Recording ...................................................................................... 34
12.2 Motion detection .............................................................................................. 34
12.3 Infrared Light Enhanced ............................................................................... 35
12.4 Night-Vision Recording .................................................................................. 35
12.5 Loop Recording ................................................................................................. 35
12.6 Continuous Video Recording ........................................................................ 36
12.7 Hidden Recording ............................................................................................ 36
12.8 File Directory Structure ................................................................................. 37

13. Operations .......................................................................................................... 38
13.1 Enter Security Interface ................................................................................. 39
13.2 Hidden Files List ............................................................................................... 39
13.3 Operation of File List ...................................................................................... 39
13.4 Music/ Video Play ............................................................................................ 40
13.5 Radio Operation ............................................................................................... 42
13.6 Audio Input ........................................................................................................ 44
13.7 Video ..................................................................................................................... 44
13.8 Webcam Operation ......................................................................................... 46
13.9 Operation of Connect Computer ................................................................. 46

13.10 Charge ............................................................................................................... 47
13.11 Clock Display ................................................................................................... 47
13.12 Turn off Screen Display ............................................................................... 48
13.13 Key Lock ............................................................................................................ 49
14. Parameters ......................................................................................................... 50
15. Troubleshooting ............................................................................................... 52
16. Precautions ........................................................................................................ 53

MINI VIDEO SPEAKER MVS01
MVSO1 1

1 . A C C ES S O RI E S
Power Adaptor
USB Cable
Audio Cable
Battery
Earphone
User’s Manual Disc
Portable Sack
MVSO1 2
1 .1 A CC E SS OR Y PI CT U RE S
MVSO1 3

2 . A P PE A R AN C E
Button Details:
A. "MENU" : Menu/Mute
B. "MODE" : Mode switch
C. "VOL-/|<<" : Volume decrease/ Previous/Fast backward, etc.
D. "VOL+/>>|" : Volume increase/Next/Fast forward, etc.
E. "OK" : Confirm
F. "ESC" : Go back/Turn off the display
G. "VOL-/|<<" and "VOL+/>>|": This combination can initiate the hidden function menu, such
as video recording.
MVSO1 4

3 . F E AT U R ES
The Mini Video Speaker is a state-of-the-art, multi-functional product. It is small in size, supports a Micro-
SD card, is portable and can be placed just about anywhere.
3 .1 R IC H E NT ER TA I NM EN T F UN CT I ON S
Serves as a music, video player, FM radio, picture browser, MP3/MP4.
3 .2 P OW E RF UL S EC U RI TY M O NI TO R F UN CT IO N S
Infrared night vision.
High-quality video compression, extended storage.
MVSO1 5

External power supply for continuous recording, which will help you avoid the limitation of battery
capacity.
Nonstop loop recording.
Automatic and manual record modes, both of which are very easy to use.
A hidden HD camera, with a secret menu that will not be spotted by onlookers.
Built-in LCD screen to conveniently play video content without connecting to your computer.
Webcam functionality.
4 . F U NC T I ON S
The entertainment portion of the mini video speaker includes a video player, picture browser, FM radio,
and much more.
MVSO1 6

4 .1 A UT O MA TI C RE C OR DI NG
To activate this function, press select manual or automatic mode located in the Settings menu.
Automatic recording means that if you play MP3/MP4 (and video playback) by pressing buttons
while recording video, the video recording pauses until MP3 / MP4 play is over, then the
video recording will go on automatically. On the contrary, manual recording means no
continuous video recording after the completion of MP3 / MP4 playing.
4.2 I NF RA RE D L IG HT EN HA NC E D
The infrared LED will automatically turn on when the environment brightness is low. The setting for this
function is located in the Security function’s Settings menu.
MVSO1 7

4.3 N IG HT -V I SI ON R E CO RD IN G
Night vision mode will enhance the brightness of a video so that you can get a clearer vision of the night
time recording. This function is located in the Security function’s Settings menu.
4.4 L OO P RE CO R DI NG
Video files are saved and divided into sections automatically. When the Micro-SD card is full, the
oldest file, or several files, are automatically deleted to free up space for continued video
recording. At the same time, the system will automatically analyze the availability and the
effective space on the flash card. If the availability or the effective space is too small, then the
video recording stops.
MVSO1 8

Considering the convenience of file retrieval, the file name contains recording time information,
format is: VidYYMMDD_hhmmss.mp4
4.5 C ON TI NU O US V ID EO RE CO RD I NG
Video recording can happen continuously because there is an external power source.
4.6 H ID DE N R EC OR DI N G
This function must be set in the Security function’s Settings menu.
Hidden camera: After 10 seconds of video recording, the display will automatically change to a
clock while the recording continues to take place. There will be a “blue dot” that indicates this
function is happening. The dot will appear in the top-right corner of the screen.
MVSO1 9

4.7 F IL E DI R EC TO RY ST RU CT UR E
\\VIDEO Video directory
\\MUSIC Music directory
\\PICTURE Image directory
\\REC\VIDEO Video record directory
\\REC\PICTURE Photo record directory
Files must be stored in the correct directory, otherwise they will not function correctly. For example, an
MP3 File must be saved in the “\\MUSIC” directory to play. In order to use the video function, you must
have Micro-SD card that is greater than 512mb. That contains enough memory to complete the recording.
MVSO1 10

Otherwise, the recording function can not take place. In this instance, an error message will display on the
screen.
5 . O P ER A T IO N S
Routine operation: follow the steps that are displayed on the screen.. Start by pressing the “VOL-/|<<“ and
“VOL+/>>|” buttons s and select a function. Once the function is selected, press the "OK" button to
confirm, or the "ESC” button to go back. Almost all th e functions can be accessed through this routine
operation.
MVSO1 11

5 .1 E NT ER SE CU RI T Y IN TE R FA CE
From the main interface, hold the"VOL-/|<<" and "VOL+/>>|" buttons at down together for 5seconds.
This will give you access to the security interface. You can perform this same action to return to the main
interface.
5 .2 H ID DE N F IL ES L I ST
Once in the file list section, you can access the hidden files list interface by pressing the “VOL-/|<<“ and
“VOL+/>>|” buttons at the same time for more than 3 seconds. There will be a list of the camera’s
recording and pictures. Press the “ESC” key to exit and return to the common file list interface.
MVSO1 12

5 .3 O PE RA TI O N OF F I LE L IS T
Music, video and picture browsing function can be accessed from the main interface. From there you can
view more options by pressing the "MENU" button, which will display a pop-up menu.
5 .4 M US IC / V ID EO PL AY
To access the Music/Video Play function, start by pressing the "MODE" button. To know this function is
activated, there will be an indicator light on the volume bar that will turn blue. This places the unit in the
Video Play mode. To switch back to Music, press "MODE" again.
Normal Mode:
Short Press the “VOL-/|<<“ and “VOL+/>>|” buttons to choose the previous song or next song.
Long Hold “VOL-/|<<“ and “VOL+/>>|” buttons to go backward or forward quickly
MVSO1 13

(The music player has 4 speeds of play. Speeds will change as you continue pressing the
buttons for long periods of time.)
Second Function Mode:
Short press "VOL-/|<<" and "VOL+/>>|" buttons to adjust the volume.
Long press "VOL-/ | < <" key to choose the play mode.
Long press "/ > > | VOL +" key to choose the EQ mode.
General Operation:
Short press "OK" to play/pause.
Short press "ESC" to exit playing and go back to the previous interface.
Short press “MENU” to mute.
MVSO1 14

5 .5 R AD IO OP ER AT I ON
To start the radio, insert earphones or an audio line into the “LINE IN” port. The earphones serves
as an antenna to help receive reception.
The radio has two modes. Press the "MODE" button once, the indicator on the volume bar will turn
blue to show the function is activated. To access the second function, press the "MODE"
button a second time. To return to normal mode, press the "MODE" button a third time.
Normal Mode:
Short press “MENU” to access the FM mode options, such as channel, automatic and manual search.
MVSO1 15

In channel search mode, you can select a radio station. Short press the "VOL-/|<<" and "VOL+/>>|"
buttons to choose a radio station, and then short press the "OK" button to save the current radio
station.
In automatic search mode, short press the "OK" button to search for a radio station automatically.
During this search, not all buttons will be active.
In manual search mode, you can set frequency manually. Short press the “VOL-/|<<“ and
“VOL+/>>|” buttons to decrease or increase frequency. Short press the "OK" button to save the
current radio frequency setting.
Second Function Mode:
Short press the “VOL-/|<<“ and “VOL+/>>|” buttons to adjust the volume.
MVSO1 16

Short press the “OK” button to mute.
General Operation:
Short press "ESC" to exit the radio function and return to the main interface
5 .6 A UD IO IN PU T
Insert an audio line into “LINE-IN” port, and it can be used as an external speaker.
Short press the “VOL-/|<<“ and “VOL+/>>|” buttons to adjust the volume.
Short press the “OK” button to mute.
5 .7 V ID EO
After entering the recording mode, press the “OK” button. A message box will appear on the displayed
asking whether or not to stop recording.
MVSO1 17

After entering a recording mode, press the “ESC” button to enter the clock display interface; the
recording will not be stopped.
Within the clock display interface, press the “VOL-/|<<“ and “VOL+/>>|” buttons for 3 seconds.
This will return you to the video recording interface while recording continues.
Within the clock display interface, press the “ESC” button to save the recording and exit to the
main interface; recording is stopped.
Once the automatic record mode is selected, the system will enter the clock display interface. The
unit will begin recording automatically, as long as there is no operation taking place within
the main interface.
MVSO1 18

Upon activating the Hidden record mode, the clock will be displayed automatically and video
recording will start within 10 seconds.
The “dot” displayed on the top right of the screen, indicates that the video recording is on.
The “blue dot” indicates a video is being recorded.
5 .8 W EB C AM O PE RA T IO N
To activate the webcam function, connect the unit to your computer with a USB cable. Disconnecting the
USB cable causes the unit to return to the main interface.
5 .9 O PE RA TI O N OF C O NN EC T C OM PU TE R
When the unit is connected to a computer using a USB cable, the system will automatically access the MSDC
Mode, also known as USB Mode.
MVSO1 19

5 .10 CH AR GE
When the unit is connected to a computer with a USB port, charging will occur automatically.
5 .11 C LO CK DI SP LA Y
How to enter the clock display interface:
From the main interface or secure interface, the system will enter clock display mode automatically
if there is no active function being executed.
After video recording starts, press the “ESC” button.
When the hidden video recording mode is selected, there is no operation after video recording starts
in 10 seconds.
MVSO1 20

How to exit time show mode:
When video recording is on, press “VOL-/|<<” and “VOL+/>>|” for more than 3 seconds, the system
will return to the video recording interface.
When video recording is on, press the “ESC” button, the system will return to the main interface.
When video recording is off, press any button; the system will return to the main interface.
5 .12 T UR N OF F S CR EE N D IS PLAY
Press the “ESC” button for 3 seconds in order for the LCD display to be turned off.
Press any key to turn the screen display back on.
MVSO1 21

5 .13 K EY L OC K
The Key Lock function has no effect on the “Screen Display Close” function.
Press the “MODE” button for 3 seconds to lock the keys.
Press “MODE” again for 3 seconds to unlock the keys.
MVSO1 22

Video decode
MP4/3GP/AVI/ASF
Audio decode
MP3/WMA/WAV/AAC
Video encode
MPEG4
Video resolution
320*240/640*464
Video frame rate
Up to 30fps
Audio encode
AAC
Image format
JPG
Image resolution
Up to 2M Pixel
6 . P A RA M E TE R S
MVSO1 23

Speaker power
3W
LCD resolution
320*240, TFT
Storage capacity
Micro-SD Card, Up to 32GB
Interface type
MINI 5 pins USB, USB 1.1/2.0
IR LED wavelength
940nm
Battery
1000mAH, Compatible with Nokia Li Battery BL-5C
Charging voltage
DC-5V
Working temperature
-10c-60c/50f-140f
Operating humidity
20-80%RH
Storage temperature
-10c-70c/50f-158f
MVSO1 24

Problem
Analysis
Solutions
*System Halted
* Power is not stable or possible
unexpected interference.
* Micro-SD card has a problem
*Reinstall batteries because the power
switch is not active when system halted.
*Format or install a new card
*Can not play, record, or stops
recording automatically
*Micro-SD card has a problem
*Format or install a new card
*Overlap display when recording or
playing back
*There is LCD screen characters, but
the video file has no problem
*Connect the unit to PC to watch the
video
7. T RO U B L ES H OO T I N G
MVSO1 25

8 . P R EC A U T IO N S
User limitations: Please observe all the relevant national and state laws; as this product cannot be
used for any illegal purposes, or you will be responsible for the consequences.
About the battery: The working time of the battery will decrease over time. The battery should be
charged before using if it has not been used for a prolonged period of time. Micro-SD card
capacity may be less than the stated value. If the capacity of usage of the card is significantly
abnormal, please format the card and then test again.
Document security: This unit is a non-professional storage device; we do not guarantee the
security and integrity of the data you obtain. Please back up your important files on your computer,
or other storage device.
MVSO1 26

Working temperature:-10c to 60c./ 50f-140f.
Working humidity: 20% - 80%. Do not put the product in damp environments, as it is not
waterproof.
Other Notices: This product is a precision electronic product. Do not subject it to strong shock and
continuous vibration. Not for use under strong magnetic or electric fields.
Disposal of the unit: Dispose of the unit in accordance with your local laws and regulations. Do not
discard this product freely. Throwing this product in a fire could cause an explosion.
MVSO1 27

MINI VIDEO SPEAKER MVS02
MVS02 28

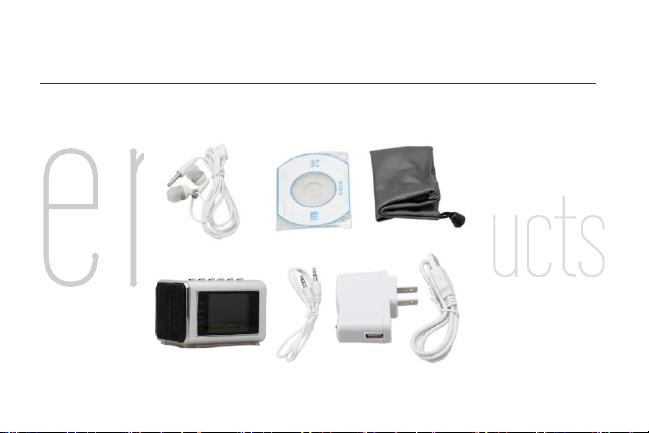
9 . A C C ES S OR I E S
Power Adaptor
USB Cable
Audio Cable
Battery
Earphone
User’s Manual Disc
Portable Sack
MVS02 29

9 .1 A CC E SS OR Y PI CT U RE S
MVS02 30

1 0 . A P PE A RA N C E
Button Details:
A. "MENU" : Menu/Mute
B. "MODE" : Mode switch
C. "VOL-/|<<" : Volume decrease/ Previous/Fast backward, etc.
D. "VOL+/>>|": Volume increase/Next/Fast forward, etc.
E. "OK": Confirm
F. "ESC": Go back/Turn off the display
G. "VOL-/|<<" and "VOL+/>>|": This combination can initiate the hidden function menu, such
as video recording.
MVS02 31

1 1 . F EA T U RE S
The MVS Mini Video Speaker is compact, supports Micro-SD card, portable and easy to use.
1 1. 1 RI CH EN TE RT A IN ME NT FU NC TI O NS
Serves as a music, video player, FM radio, picture browser, MP3/MP4.
1 1. 2 PO W ER FU L SE C UR IT Y M ON IT OR FU NC TI O NS
Infrared night vision.
High-quality video compression, extremely long-time storage.
Motion detection, catches image variation, easy to find files.
External power supply for continuous recording, which will help you avoid the limitation of battery
capacity.
MVS02 32

Nonstop loop recording.
Automatic and manual record modes, both of which are very easy to use.
A hidden HD camera, with a secret menu that will not be spotted by onlookers.
Built-in LCD screen to conveniently play video content without connecting to your computer.
Webcam functionality.
1 2 . F UN C T IO N S
The entertainment portion of the mini video speaker includes a video player, picture browser, FM radio,
and much more.
MVS02 33

12.1 A UT OM AT I C RE CO R DI NG
To activate this function, press select manual or automatic mode located in the Settings menu.
Automatic recording means that if you play MP3/MP4 (and video playback) by pressing buttons
while recording video, the video recording pauses until MP3 / MP4 play is over, then the
video recording will go on automatically. On the contrary, manual recording means no
continuous video recording after the completion of MP3 / MP4 playing.
12.2 M OT IO N D ET EC TI O N
To use this function, set the DV mode to motion detection within the setting menu.
Once the motion detection mode is set, the unit will begin recording. The camera can catch and
record video even if the image changes. The time is set for 5 minutes per file.
MVS02 34

12.3 I NF RA RE D L IG HT E N HA NC E D
The infrared LED will automatically turn on when the environment brightness is low. The setting for this
function is located in the Security function’s Settings menu.
12.4 N IG HT -V I SI ON R EC O RD IN G
Night vision mode will enhance the brightness of a video so that you can get a clearer vision of the night
time recording. This function is located in the Security function’s Settings menu.
12.5 L OO P RE C OR DI NG
Video files are saved and divided into sections automatically. When the Micro-SD card is full, the
oldest file, or several files, are automatically deleted to free up space for continued video
recording. At the same time, the system will automatically analyze the availability and the
MVS02 35

effective space on the flash card. If the availability or the effective space is too small, then the
video recording stops.
Considering the convenience of file retrieval, the file name contains recording time information,
format is: VidYYMMDD_hhmmss.mp4
12.6 C ON TI NU O US V ID E O RE CO R DI NG
Video recording can happen continuously because there is an external power source.
12.7 H ID DE N R EC OR DI N G
This function must be set in the Security function’s Settings menu.
MVS02 36

Hidden camera: After 10 seconds of video recording, the display will automatically change to a
clock while the recording continues to take place. There will be a “blue dot” that indicates this
function is happening. The dot will appear in the top-right corner of the screen.
12.8 F IL E DI R EC TO RY S T RU CT U RE
\\VIDEO Video directory
\\MUSIC Music directory
\\PICTURE Image directory
\\REC\VIDEO Video record directory
\\REC\PICTURE Photo record directory
MVS02 37

Files must be stored in the correct directory, otherwise they will not function correctly. For example, an
MP3 File must be saved in the “\\MUSIC” directory to play. In order to use the video function, you must
have Micro-SD card that is greater than 512mb. That contains enough memory to complete the recording.
Otherwise, the recording function can not take place. In this instance, an error message will display on the
screen.
1 3 . O PE R A T IO N S
Routine operation: follow the steps that are displayed on the screen.. Start by pressing the “VOL-/|<<“ and
“VOL+/>>|” buttons and select a function. Once the function is selected, press the "OK" button to confirm,
or the "ESC” button to go back. Almost all the functions can be accessed through this routine operation.
MVS02 38

1 3. 1 EN TE R S EC UR IT Y I NT E RF AC E
From the main interface, press the"VOL-/|<<" and "VOL+/>>|" buttons at the same time for more than 3
seconds. This will give you access to the security interface. You can perform this same action to return to
the main interface.
1 3. 2 HI DD E N FI LE S L IS T
Once in the file list section, you can access the hidden files list interface by pressing the “VOL-/|<<“ and
“VOL+/>>|” buttons at the same time for more than 3 seconds. There will be a list of the camera’s pictures.
Press the “ESC” key to exit and return to the common file list interface.
1 3. 3 OP E RA TI ON O F F IL E L IS T
MVS02 39

Music, video and picture browsing function can be accessed from the main interface. From there you can
view more options by pressing the "MENU" button, which will display a pop-up menu.
1 3. 4 MU SI C / VI DE O P LA Y
To access the Music/Video Play function, start by pressing the "MODE" button. To know this function is
activated, there will be an indicator light on the volume bar that will turn blue. This places the unit in the
Video Play mode. To switch back to Music, press "MODE" again.
Normal Mode:
Short Press the “VOL-/|<<“ and “VOL+/>>|” buttons to choose the previous song or next song.
Long Hold “VOL-/|<<“ and “VOL+/>>|” buttons to go backward or forward quickly
MVS02 40

(The music player has 4 speeds of play. Speeds will change as you continue pressing the
buttons for long periods of time.)
Second Function Mode:
Short press "VOL-/|<<" and "VOL+/>>|" buttons to adjust the volume.
Long press "VOL-/ | < <" key to choose the play mode.
Long press "/ > > | VOL +" key to choose the EQ mode.
General Operation:
Short press "OK" to play/pause.
Short press "ESC" to exit playing and go back to the previous interface.
MVS02 41

Short press “MENU” to mute.
1 3. 5 RA DI O O PE RA T IO N
To start the radio, insert earphones or an audio line into the “LINE IN” port. The earphones serves
as an antenna to help receive reception
The radio has two modes. Press the "MODE" button once, the indicator on the volume bar will turn
blue to show the function is activated. To access the second function, press the "MODE"
button a second time. To return to normal mode, press the "MODE" button a third time.
Normal Mode:
Short press “MENU” to access the FM mode options, such as channel, automatic and manual search.
In channel search mode, you can select a radio station. Short press the "VOL-/|<<" and "VOL+/>>|"
MVS02 42

buttons to choose a radio station, and then short press the "OK" button to save the current radio
station.
In automatic search mode, short press the "OK" button to search for a radio station automatically.
During this search, not all buttons will be active.
In manual search mode, you can set frequency manually. Short press the “VOL-/|<<“ and
“VOL+/>>|” buttons to decrease or increase frequency. Short press the "OK" button to save the
current radio frequency setting.
Second Function Mode:
Short press the “VOL-/|<<“ and “VOL+/>>|” buttons to adjust the volume.
Short press the “OK” button to mute.
MVS02 43

General Operation:
Short press "ESC" to exit the radio function and return to the main interface
13.6 AU DI O I NP UT
Insert an audio line into “LINE-IN” port, and it can be used as an external speaker.
Short press the “VOL-/|<<“ and “VOL+/>>|” buttons to adjust the volume.
Short press the “OK” button to mute.
1 3. 7 VI DE O
After entering the recording mode, press the “OK” button. A message box will appear on the display asking
whether or not to stop recording.
MVS02 44

After entering a recording mode, press the “ESC” button to enter the clock display interface; the
recording will not be stopped.
Within the clock display interface, press the “VOL-/|<<“ and “VOL+/>>|” buttons for 3 seconds.
This will return you to the video recording interface while recording continues.
Within the clock display interface, press the “ESC” button to save the recording and exit to the main
interface; recording is stopped.
Once the automatic record mode is selected, the system will enter the clock display interface. The
unit will begin recording automatically, as long as there is no operation taking place within
the main interface.
MVS02 45

Upon activating the Hidden record mode, the clock will be displayed automatically and video
recording will start within 10 seconds.
The “dot” displayed on the top right of the screen, indicates that the video recording is on.
The “blue dot” indicates a video is being recorded.
1 3. 8 WE B CA M OP ER A TI ON
To activate the webcam function, connect the unit to your computer with a USB cable. Disconnecting the
USB cable causes the unit to return to the main interface.
1 3. 9 OP E RA TI ON O F C ON NE C T CO MP U TE R
When the unit is connected to a computer using a USB cable, the system will automatically access the MSDC
Mode, also known as USB Mode.
MVS02 46

1 3. 10 C H AR GE
When the unit is connected to a computer with a USB port, charging will occur automatically.
1 3. 11 C L OC K DI SP L AY
How to enter the clock display interface:
From the main interface or secure interface, the system will enter clock display mode automatically
if there is no active function being executed.
After video recording starts, press the “ESC” button.
When the hidden video recording mode is selected, there is no operation after video recording starts
in 10 seconds.
MVS02 47

How to exit time show mode:
When video recording is on, press “VOL-/|<<” and “VOL+/>>|” for more than 3 seconds, the system
will return to the video recording interface.
When video recording is on, press the “ESC” button, the system will return to the main interface.
When video recording is off, press any button; the system will return to the main interface.
1 3. 12 T U RN O FF S C RE EN D I SP LA Y
Press the “ESC” button for 3 seconds in order for the LCD display to be turned off.
Press any key to turn the screen display back on.
MVS02 48

1 3. 13 K E Y LO CK
The Key Lock function has no effect on the “Screen Display Close” function.
Press the “MODE” button for 3 seconds to lock the keys.
Press “MODE” again for 3 seconds to unlock the keys.
MVS02 49

Video decode
MP4/3GP/AVI/ASF
Audio decode
MP3/WMA/WAV/AAC
Video encodes
MPEG4
Video resolution
320*240/640*464
Video frame rate
Up to 30fps
Audio encode
AAC
Image format
JPG
Resolution image
Up to 2M Pixel
1 4 . P A RA M ET E R S
MVS02 50

Speaker power
3W
LCD resolution
320*240, TFT
Storage capacity
Micro-SD Card, Up to 32GB
Interface type
MINI 5 pins USB, USB 1.1/2.0
IR LED wavelength
940nm
Battery
1000mAH, Compatible with Nokia Li Battery BL-5C
Charging voltage
DC-5V
Working temperature
-10c-60c/50f-140f
Operating humidity
20-80%RH
Storage temperature
-10c-70c/ 50f-158f
MVS02 51

Problem
Analysis
Solutions
*System Halted
* Power is not stable or possible
unexpected interference.
* Micro-SD card has a problem
*Reinstall batteries because the
power switch is not active when
system halted.
*Format or install a new card
*Can not play, record, or stops
recording automatically
*Micro-SD card has a problem
*Format or install a new card
*Overlap display when recording or
playing back
*There is LCD screen characters, but
the video file has no problem
*Connect the unit to PC to watch
the video
1 5 . T RO U B LE S H OO T I N G
MVS02 52

1 6 . P RE C A UT I O NS
User limitations: Please observe all the relevant national and state laws; as this product cannot be
used for any illegal purposes, or you will be responsible for the consequences.
About the battery: The working time of the battery will decrease over time. The battery should be
charged before using if it has not been used for a prolonged period of time. Micro-SD card
capacity may be less than the stated value. If the capacity of usage of the card is significantly
abnormal, please format the card and then test again.
Document security: This unit is a non-professional storage device; we do not guarantee the
security and integrity of the data you obtain. Please back up your important files on your computer,
or other storage device.
MVS02 53

Working temperature:- 10c-60c/50f-140f
Working humidity: 20% - 80%. Do not put the product in damp environments, as it is not
waterproof.
Other Notices: This product is a precision electronic product. Do not subject it to strong shock and
continuous vibration. Not for use under strong magnetic or electric fields.
Disposal of the unit: Dispose of the unit in accordance with your local laws and regulations. Do not
discard this product freely. Throwing this product in a fire could cause an explosion.
MVS02 54

MVS02 55

MVS02 56
 Loading...