

ENJI PRIME Enji MiniEye Quick Start Manual
FULL HD MINI DV SPORTS CAMERA
QUICK START GUIDE

Please read this user manual carefully before any
attempt to operate this product and keep it for
your future reference.
FEATURES:
MINI camera recorder
High definition full HD 1080P/720P
Compact design, portable handheld
Supports TV out, TV monitor video connection
Built-in lithium battery sustainable camera,
about 30 to 100 minutes recording time
Supports up to 32GB TF card maximum (not
included).
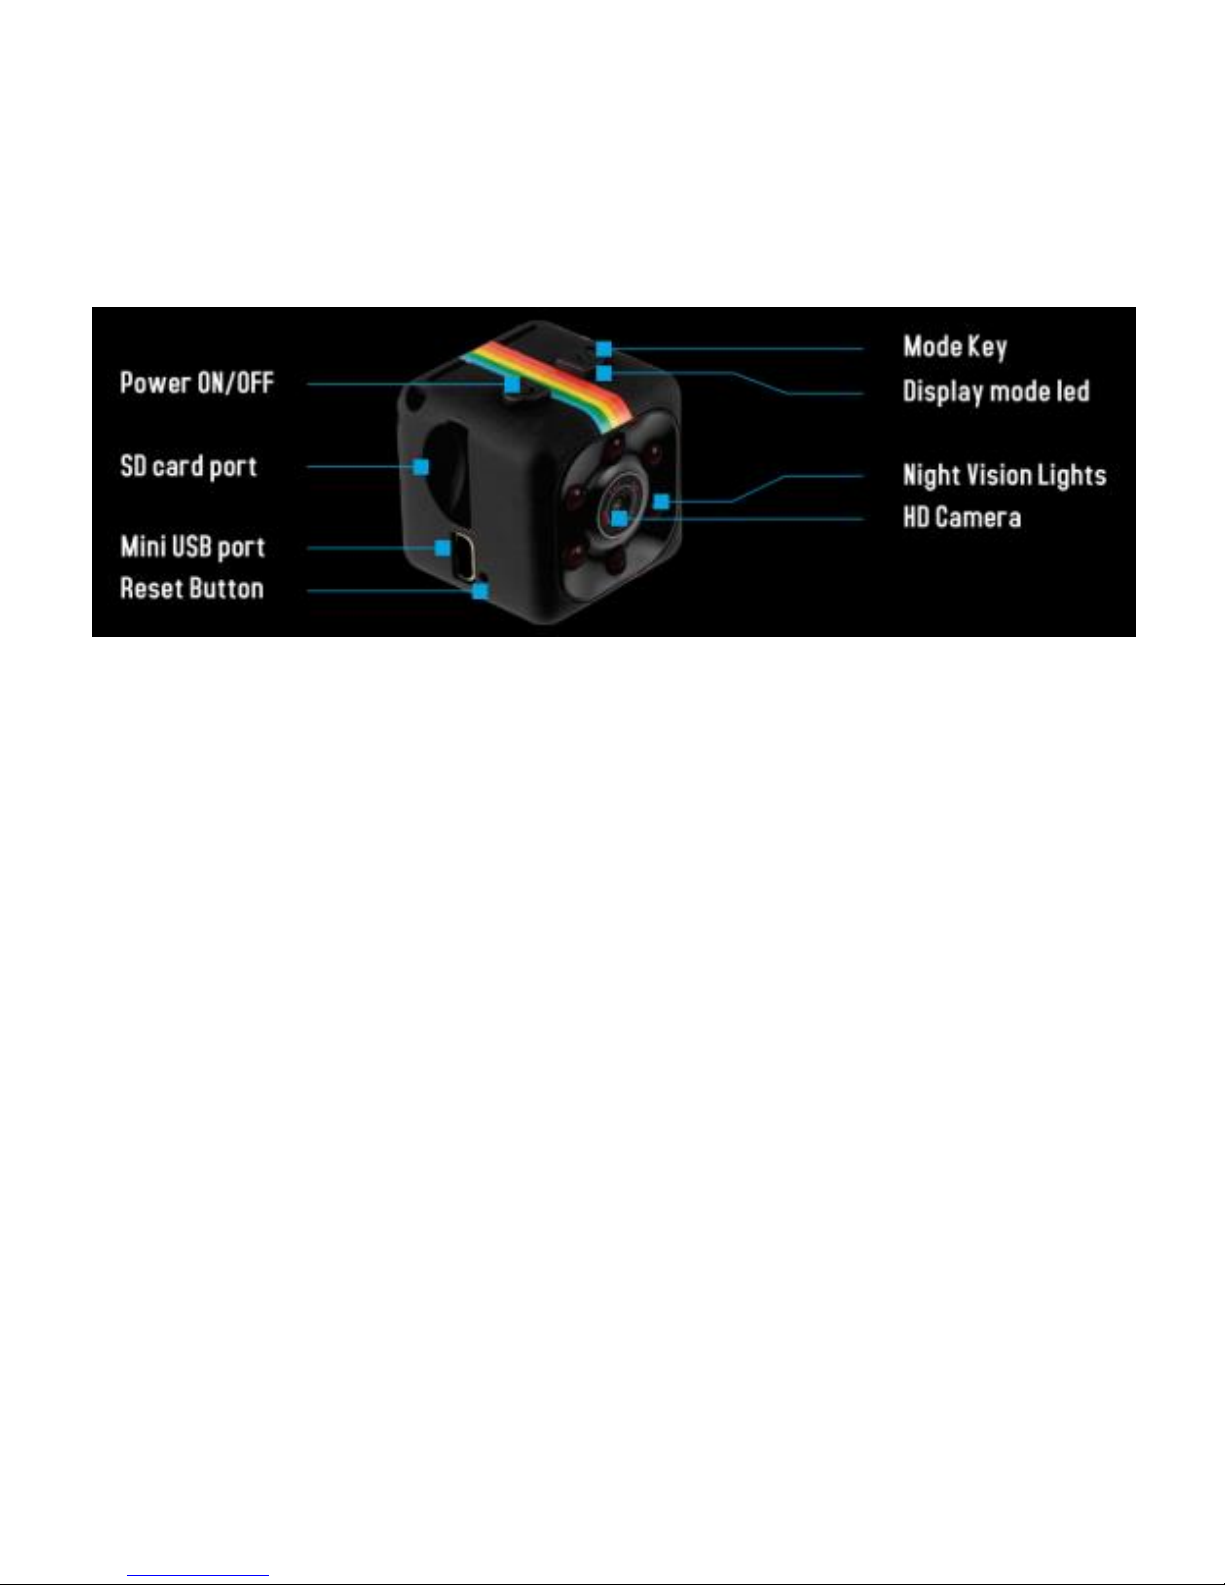
DETAILED IMAGE:
Note:This item is without waterproof.
OPEARTIONS:
OPERATIONS:
1. CHARGING:
When you receive your Enji MiniEye Camera,
use the provided cable to fully charge the
camera. Plug the mini-USB connector into
the camera and the normal USB plug into
your computer or use an external charger.
Charging time will take 2-3 hours. A flashing

red LED indicates the charging cycle. After
charging is completed, the LED turns into
solid red. Keep charging the camera for
additional 30 minutes. Battery life varies
from 30 to 100 minutes depending on the
use of the device. You can also connect the
camera to an external power source to
charge, while you are using the camera (in
case that an SD-card is inserted already) It
will start to record in the 720p mode. Then a
blue LED will flash 3 times to let you know
that the video is recording; push again the
on/off button to stop the recording.

2. POWERING THE CAMERA ON/OFF:
To POWER ON the camera, push the
ON/OFF button for 2 seconds to power the
camera on.
NOTE: If NO memory card is inserted, a blue LED
will light for a few seconds, after that a red LED
will flash and the camera turns off. When an SD
Card is inserted, a solid blue LED is visible when
turned on. Please use a high speed Class 10 FAT
formatted memory card. The camera supports up
to maximum of 32 GB (original SanDisk, Samsung
and Kingston brands are most preferred).

To POWER OFF the camera, push the
ON/OFF button for 6 seconds and the
camera will turn off.
3. 720P VIDEO RECORDING:
With a blue LED light, push on/off button
once to begin recording. The blue LED will
flash 3 times and recording starts. At this
time the LED light is off. To STOP recording,
push the on/off button. The LED light turns
blue.
Note: For long recordings, video streaming is
saved and divided into separate files every 5
minutes.

4. 1080P VIDEO RECORDING:
Change to 1080P by using the 'Mode' button.
Push the 'Mode' button once, and the LED
will turn from blue to blue/red. Push the
ON/OFF button once to begin recording. The
LED will flash blue and red three times and
the recording in 1080P begins. During
1080P recording, no LED is lit. Push the
ON/OFF button again to stop recording. The
state of the LED returns to blue/red.
Note: For long recordings, video streaming is
saved and divided into separate files every 5
minutes.

5. SHOOTING IMAGES:
Change to Photo Mode by using the 'Mode'
button. Push the 'Mode' button twice. The
LED will turn from blue to red. Press the
ON/OFF button to take photos. Press once,
the red light flashes and takes a photo.
6. NIGHT VISION:
To activate night vision mode, make sure
that the camera is on. Pressing the ON/OFF
button for 2-3 seconds. You can see the red
LED will flash 2 times then off. The Night
Vision IR LED is on.
Press the on/off button 2-3 seconds to turn
 Loading...