


Quick start guide
8 disks iSCSI for Energy Ecient Desktop Productivity RAID
www.enhance-tech.com
TS800 IP v.1.1
TS800 IP
© Copyright 2009. Enhance Technology, Inc. Proudly Assembled in the U.S.A.
EnhanceRAID Desktop Series
L
Linux
2
1
Thank you for choosing Enhance Technology
Carefully unpack your TS800 storage system, and inventory the
accessories according to your model type.
What is in the box?
3
Unpack all components including the HDD mounting screws, key sets and
cables. If you are missing any of the items mentioned above, please contact
your dealer or contact Enhance Technology at www.enhance-tech.com.
Unpack your TS800
Welcome
Thank you for buying Enhance Technology TS800 Series, a compact dual GbE
iSCSI RAID storage system with a slick T shaped tray design, built in next
generation hardware RAID controller, and a standard 300 watts 80+ green
power supply.
TS800 IP
Quick start guide
ENHANCE|TECHNOLOGY
Standard IEC Power Cable - Qty 2
HDD Mounting Hardware - Qty 32
Hot-swap Disk Trays - Qty 8
8 disks iSCSI for Energy Ecient Desktop Productivity RAID
User Guide and CD- Qty 1
ioStor
TM
Quick start guide
8 disks iSCSI for Energy Ecient Desktop Productivity RAID
www.enhance-tech.com
TS800 IP -UG v.1.1
TS800 IP
© Copyright 2009. Enhance Technology, Inc. Proudly Assembled in the U.S.A.
EnhanceRAID Desktop Series
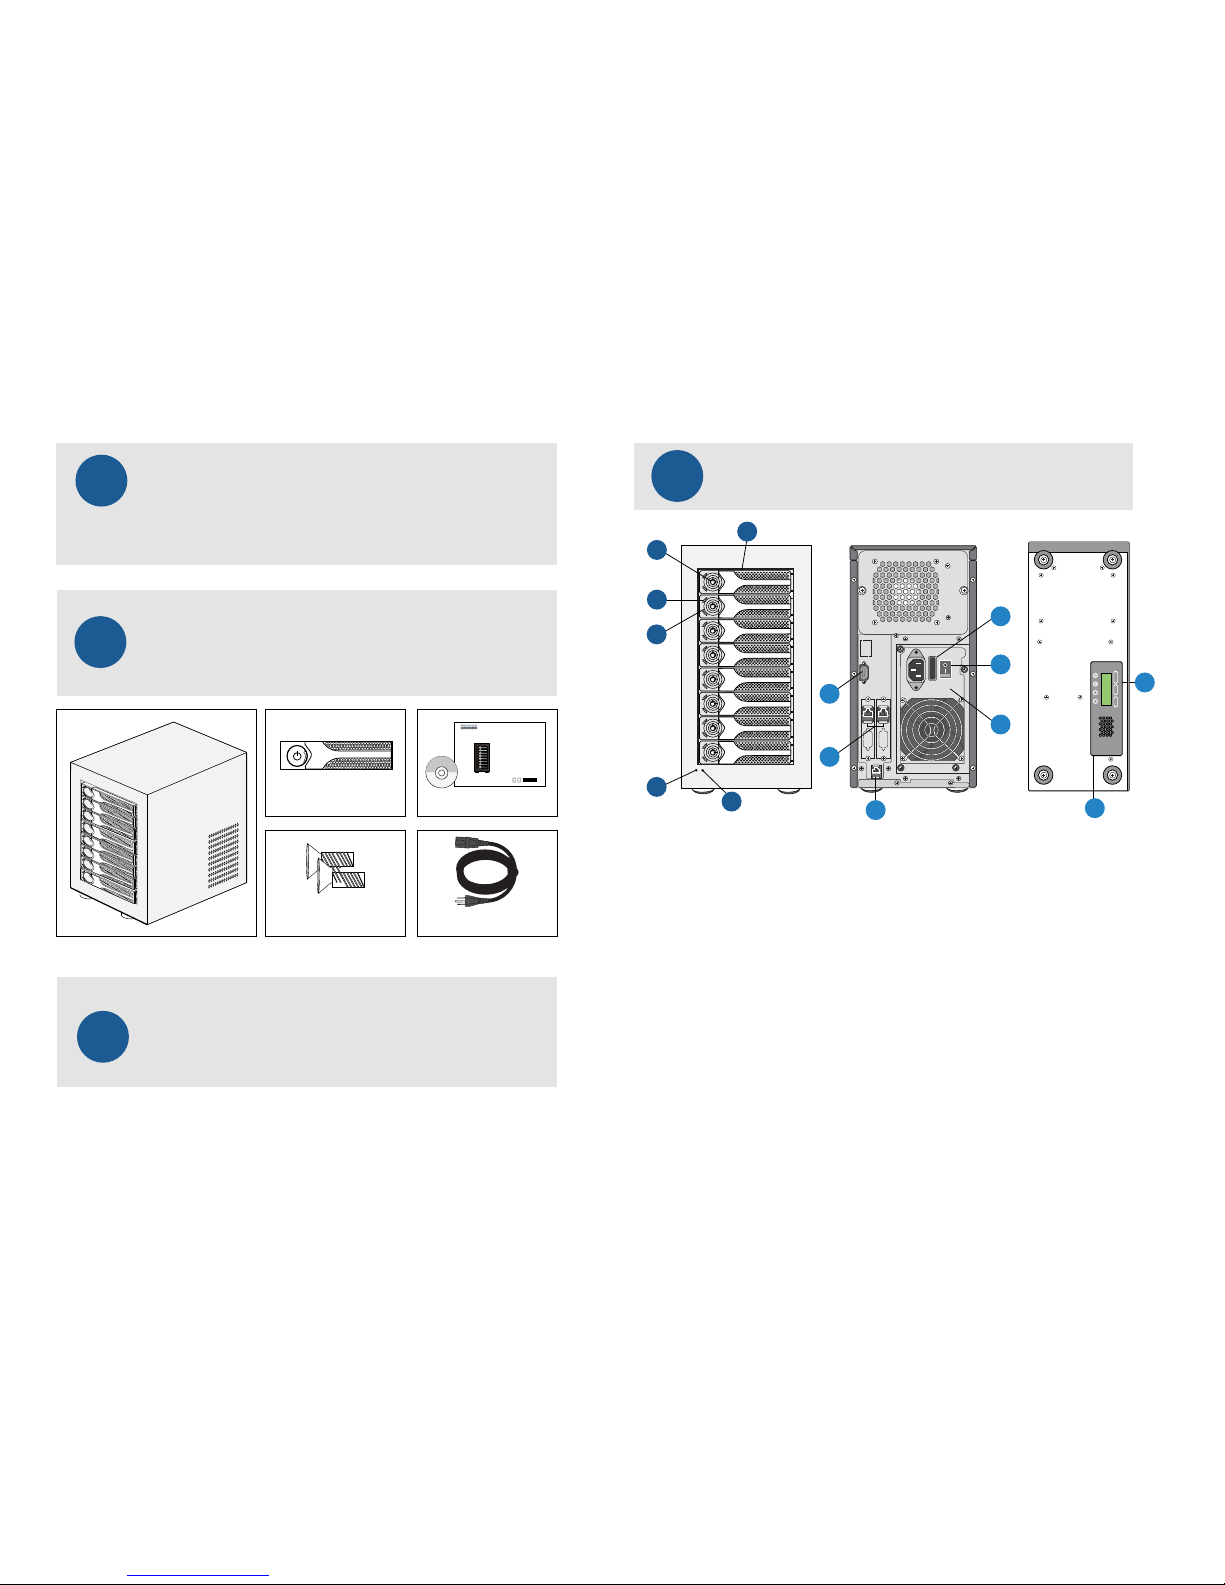
4
Understanding your TS800
Learn and identify each component of TS800
Front:
1. Security Key Lock
2. Hot-swap HDDs Tray
3. Power LED
4. HDD Active LED
5. Fan Error LED
6. Alarm Mute Button
Rear:
7. ATX PS2 Power Supply
8. Auto Power Switch
9. RS232 VT100 ANSI Terminal Emulation
10. Web GUI Management Console
11. Power Switch
12. Dual GbE iSCSI Ports
13. RAID Controller
14. RAID Controller LED
100-240VAC
1
3
4
2
5
6
8
10
11
12
9
7
13
14
POWER
BUSY
STAUS
ENT
ESC
Bottom
TS800 IP
5
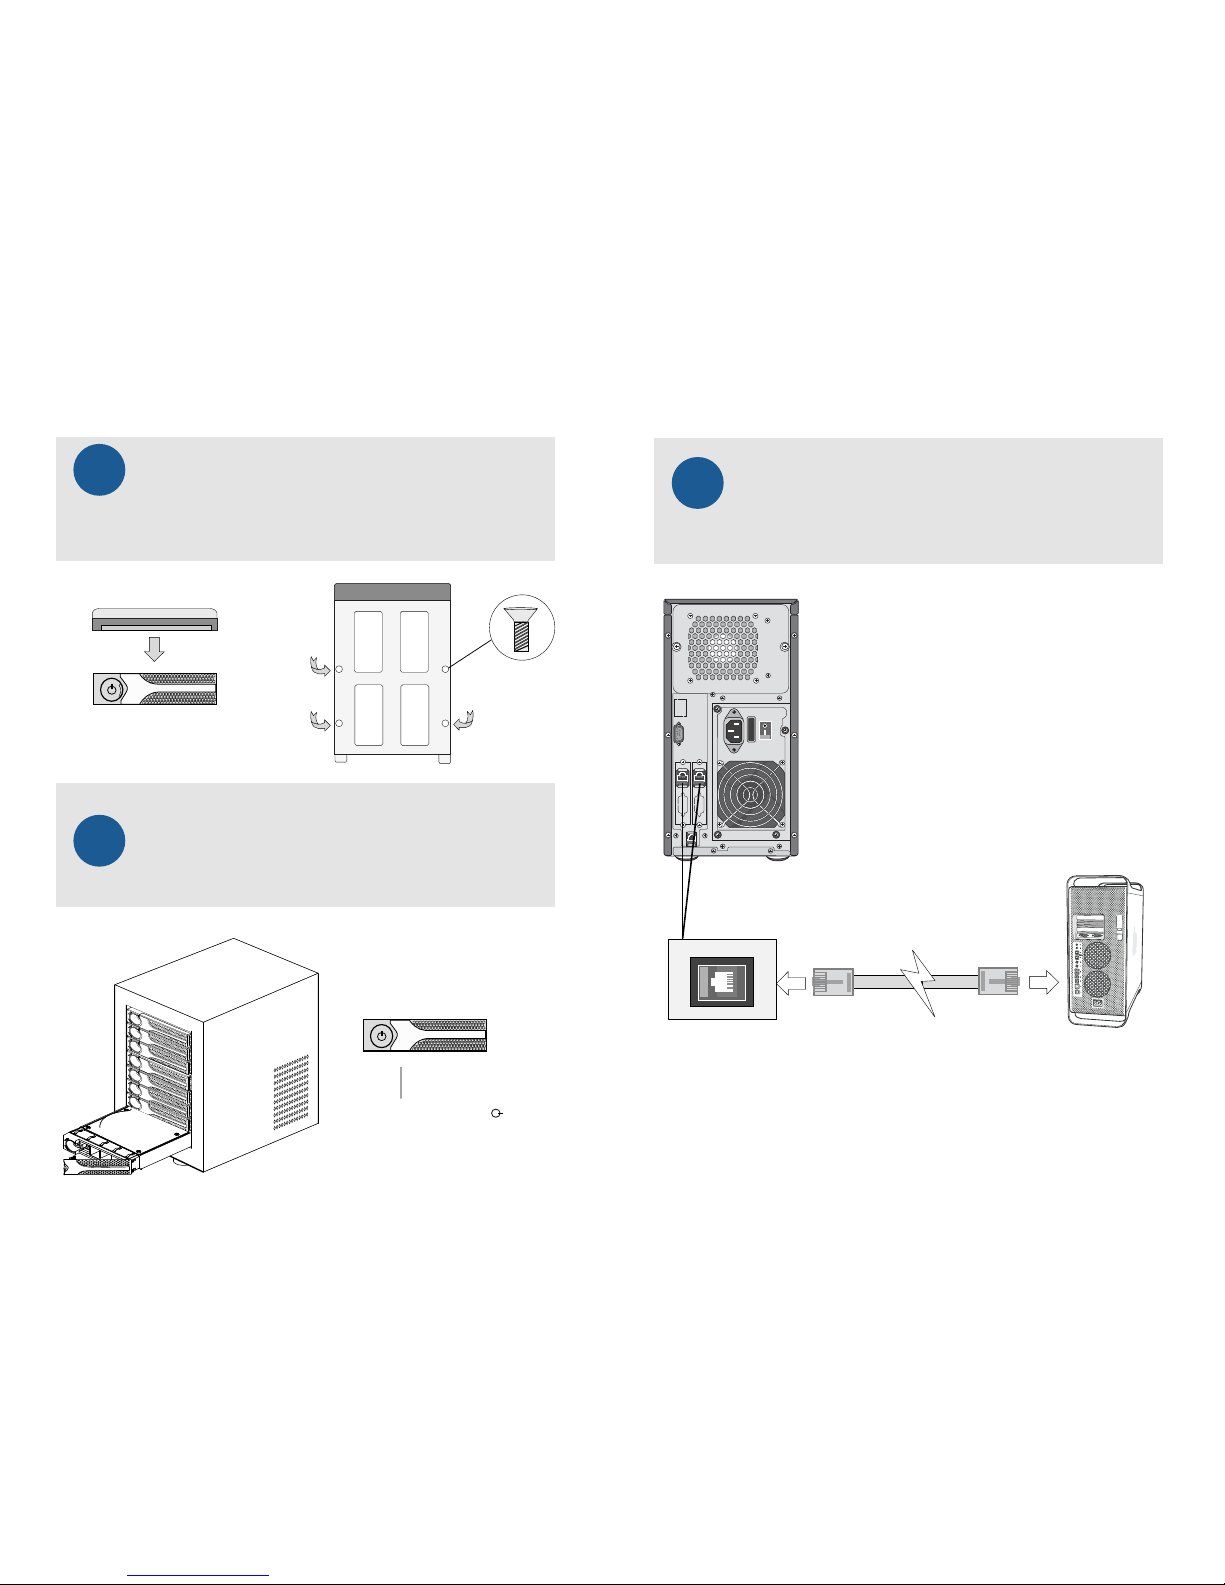
Disk Installation
If your system was purchased with capacity, please skip this section and
immediately go to next section. If your system was purchased without disks,
install each disk into the provided disk trays and fasten using the supplied
hdd screws. Do not use any other mounting screws other than the ones provided
with your system. System or disk damage may occur if using non-approved
mounting hardware.
Hard Disk
Disk Tray
+
+
+
+
Figure 1. Figure 2.
Disk tray - Bottom view
Gently “press” tray handle to insert HDD
Lock the tray by turning the key lock
6
Figure 7.
Insert Disk Module
After fastening each disk, insert the disk trays in the open disk bay on your
system. For added security, your system is equipped with locking
disk bays to prevent accidental or malicious disk removal.
Quick start guide
ENHANCE|TECHNOLOGY
8 disks iSCSI for Energy Ecient Desktop Productivity RAID
7
Connecting Your TS800 - Cable Connections
- Option 1
Direct connect to the host computer with iSCSI cables.
Ensure that all of the connectors are properly secured & fastne]d. Most commom
issues are related to poor cable connection. Do not force connector into place.
Figure 8.
Host Computer
GbE iSCSI Ports
GbE iSCSI Cables
100-240VAC
 Loading...