

Englaon 24M80, 32M10 User Manual

24’’ SMART FHD LED DVD Combo TV (24M80)
Please Read this manual carefully before operating the device
and retain it for future reference.

1 /55
Contents
Important Safety Precautions…………………………………...……….….2
Power Supply………………………………………………………………………..4
Installation…………………………………………………………………………...5
Use and Maintenance………………………………………………………………..7
Disposal……………………………………………………………………………...8
Assemble and Connections…………………………………………………...9
Overview…………………………………………………………………………….9
Installing the Stand…………………………………………………………………..9
Front Panel…………………………………………………………………………..9
Rear Panel…………………………………………………………………………..10
Connections………………………………………………………………………...11
Remote Control…………………………………………………………………….13
Quick Setup Guide……………………………………………………………..15
Main Menu………………………………………………………………………..17
Picture……………………………………………………….……………………..17
Sound………………………………………………………………………………18
Channel………………………………………………………………………….…19
Feature……………………………………………………………………………...23
Setup………………………………………………………………………………..29
Multi Media……………………………………………………………………….31
Photo………………………………………………..…..………………………….31
Music………………………………………………..…..………………………….32
Movie……………………………………………..…..……………………………35
eBook……………………………………………..…..……………………………37
PVR………………………………………………..…..…………………………...37
DVD………………………………………………..…..…………………………..44
Smart Android System Setup………………………………………………46
Trouble Shooting………………………………………………………………...50
Warranty Terms and Conditions………………………………….……...52

2 /55
Important Safety Instructions
Warnings and Precautions
To prevent any injuries, the following safety precautions should be observed in the
installation, use, servicing and maintenance of this equipment.
Before operating this equipment, please read this manual completely, and keep it nearby
for future reference.
1) Read these instructions.
2) Keep these instructions.
3) Heed all warnings.
4) Follow all instructions.
5) Do not use this apparatus near water.
6) Clean only with a dry cloth.
7) Do not block any of the ventilation openings. Install in accordance with the
manufacturer’s instructions.
8) Do not install near any heat sources such as radiators, heat registers, stoves, or other
apparatus (including amplifiers) that produce heat.
9) Do not defeat the safety purpose of the polarized or grounding type plug. A polarized
plug has two blades with one wider than the other. A grounding type plug has two
blades and a third grounding prong. The wide blade or the third prong is provided for
your safety. When the provided plug does not fit into your outlet, consult an
electrician for replacement of the obsolete outlet.
10) Protect the power cord from being walked on or pinched particularly at plugs,
convenience receptacles, and the point where they exit from the apparatus.
11) Only use the attachments/accessories specified by the manufacturer.
12) Use only with a cart, stand, tripod, bracket, or table specified by the manufacturer, or
sold with the apparatus. When a cart is used, use caution when moving the
cart/apparatus combination to avoid injury from tip-over.
13) Unplug this apparatus during lightning storms or when unused for long periods of
time.
14) Refer all servicing to qualified service personnel. Servicing is required when the
apparatus has been damaged in any way, such as power supply cord or plug is
damaged, the liquid has been spilled or objects have fallen into the apparatus, the
apparatus has been exposed to rain or moisture, does not operate normally, or has
been dropped.
• Apparatus shall not be exposed to dripping or splashing and no objects filled with
liquids, such as vases, shall be placed on the apparatus.
3 /55
• Apparatus with Class I construction shall be connected to a Mains Socket Outlet with
a protective earthing connection.
WARNING
TO PREVENT DAMAGE WHICH MAY RESULT IN FIRE OR ELECTRIC
SHOCK HAZARD, DO NOT EXPOSE THIS APPLIANCE TO RAIN OR
MOISTURE.
Caution:
• These servicing instructions are for use by qualified service personnel only.
To reduce the risk of electric shock, do not perform any servicing other than that
contained in the operating instructions unless you are qualified to do so.
• Any changes or modifications not expressly approved by the party responsible for
compliance could void the user’s authority to operate the equipment.
The Lightning flash with an arrowhead
symbol, within an equilateral tringle is
intended to alert the user to the presence
of uninsulated “dangerous voltage” within
the product’s enclosure that may be of
sufficient magnitude to constitute a risk of
electric shock to persons.
CAUTION: TO REDUCE THE RISK OF
ELECTRIC SHOCK, DO NOT REMOVE COVER
(OR BACK), NO USER-SERVICEABLE PARTS
INSIDE. REFER SERVICING TO QUALIFIED
SERVICE PERSONEL.
The exclamation point within an
equilateral triangle is intended to alert the
user to the presence of important operating
and maintenance (service) instructions in
the literature accompanying the appliance.
4 /55
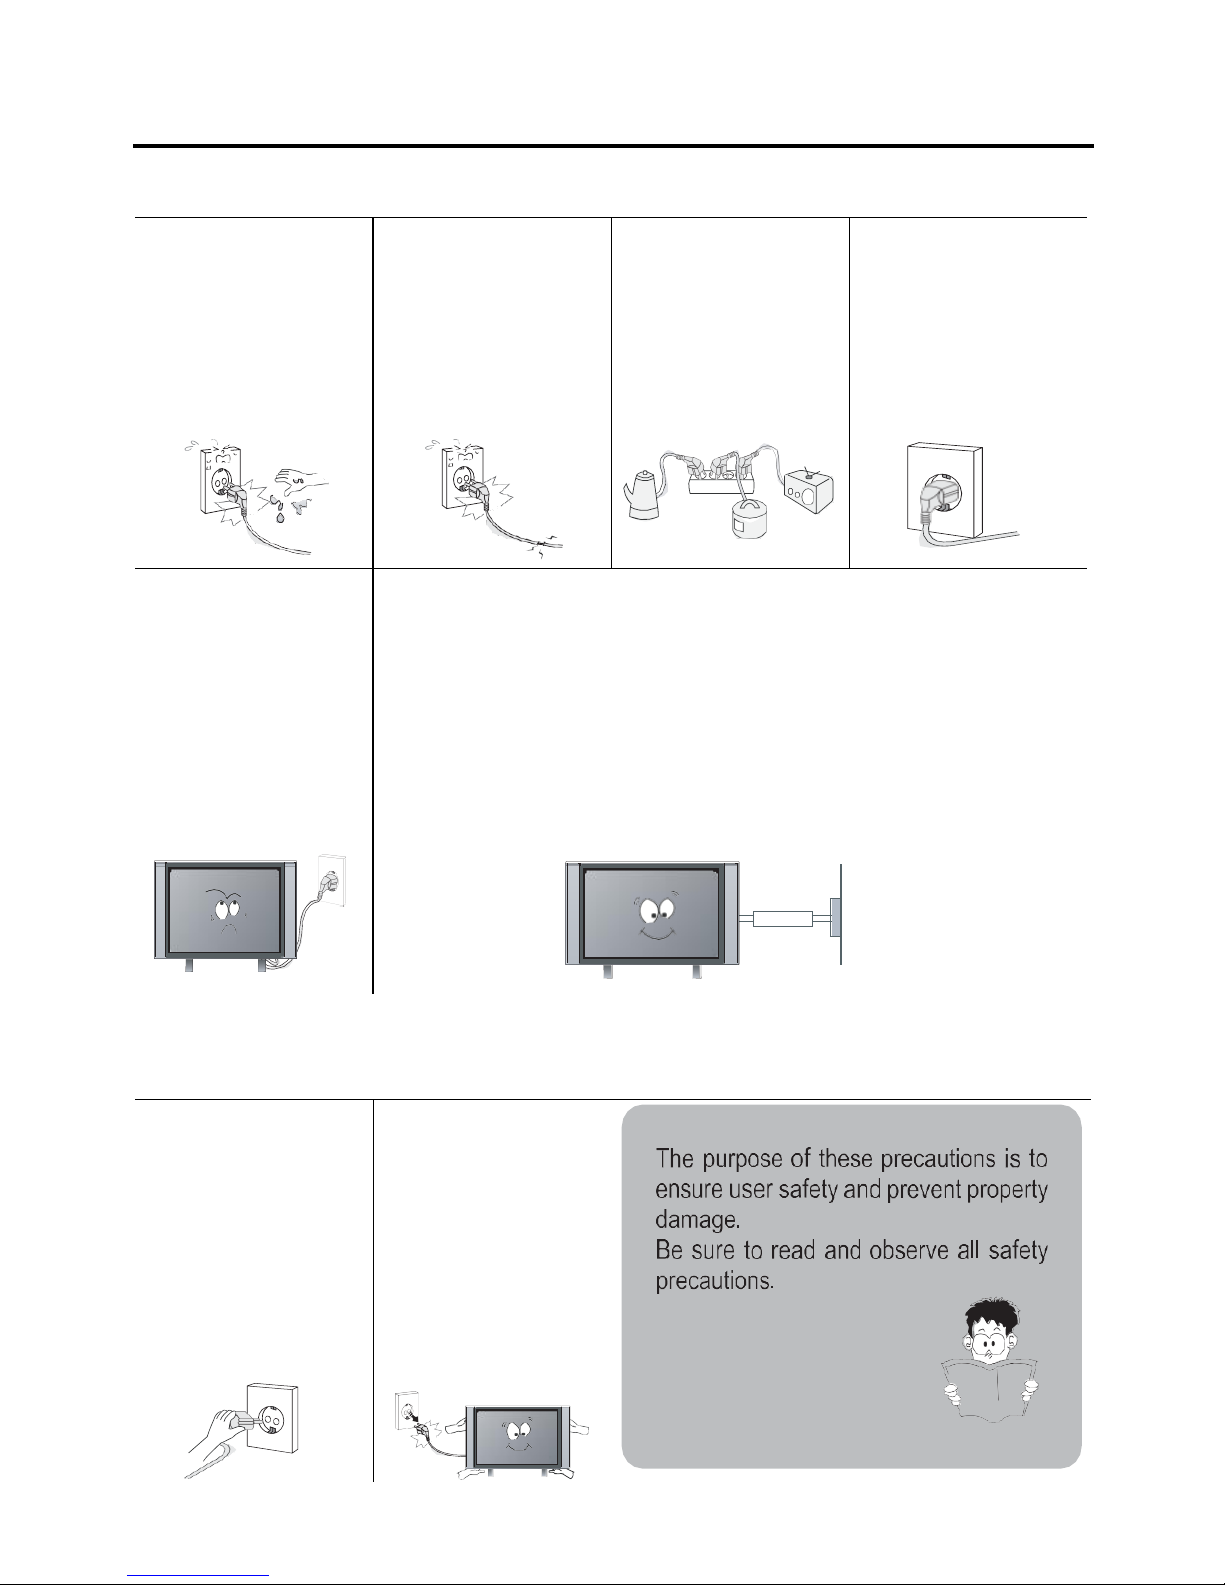
Power Supply
Warnings
Do not touch the power
plug wet hands.
Do not use a damaged
power cord or plug or a
loose outlet.
Do not plug several
devices into the same
outlet.
Insert the power plug
fully into the outlet.
Doing so may result in
electric shock.
Doing so may result in
fire or electric shock.
Doing so may cause
the outlet to overheat
and start a fire.
A loose or improperly
inserted power plug
may result in a fire.
Do not bend the power
cord excessively or
place heavy objects on
it.
Be sure to ground the unit.
Doing so may result in
fire or electric shock.
Failing to do so may lead to electric shock when a short circuit or overload
occurs. If necessary, install a ground fault circuit breaker. Never ground to a
telephone line, lightning rod, or metal gas pipe. (Doing so may result in fire,
electric shock, or other hazards.)
Cautions
When disconnecting
the power cord from an
AC outlet, always
grasp it by the plug.
Always unplug the unit
before cleaning.
Pulling on the cord can
damage the internal
wire and may result in
a fire.
Not doing so may
result in fire or electric
shock.
5 /55
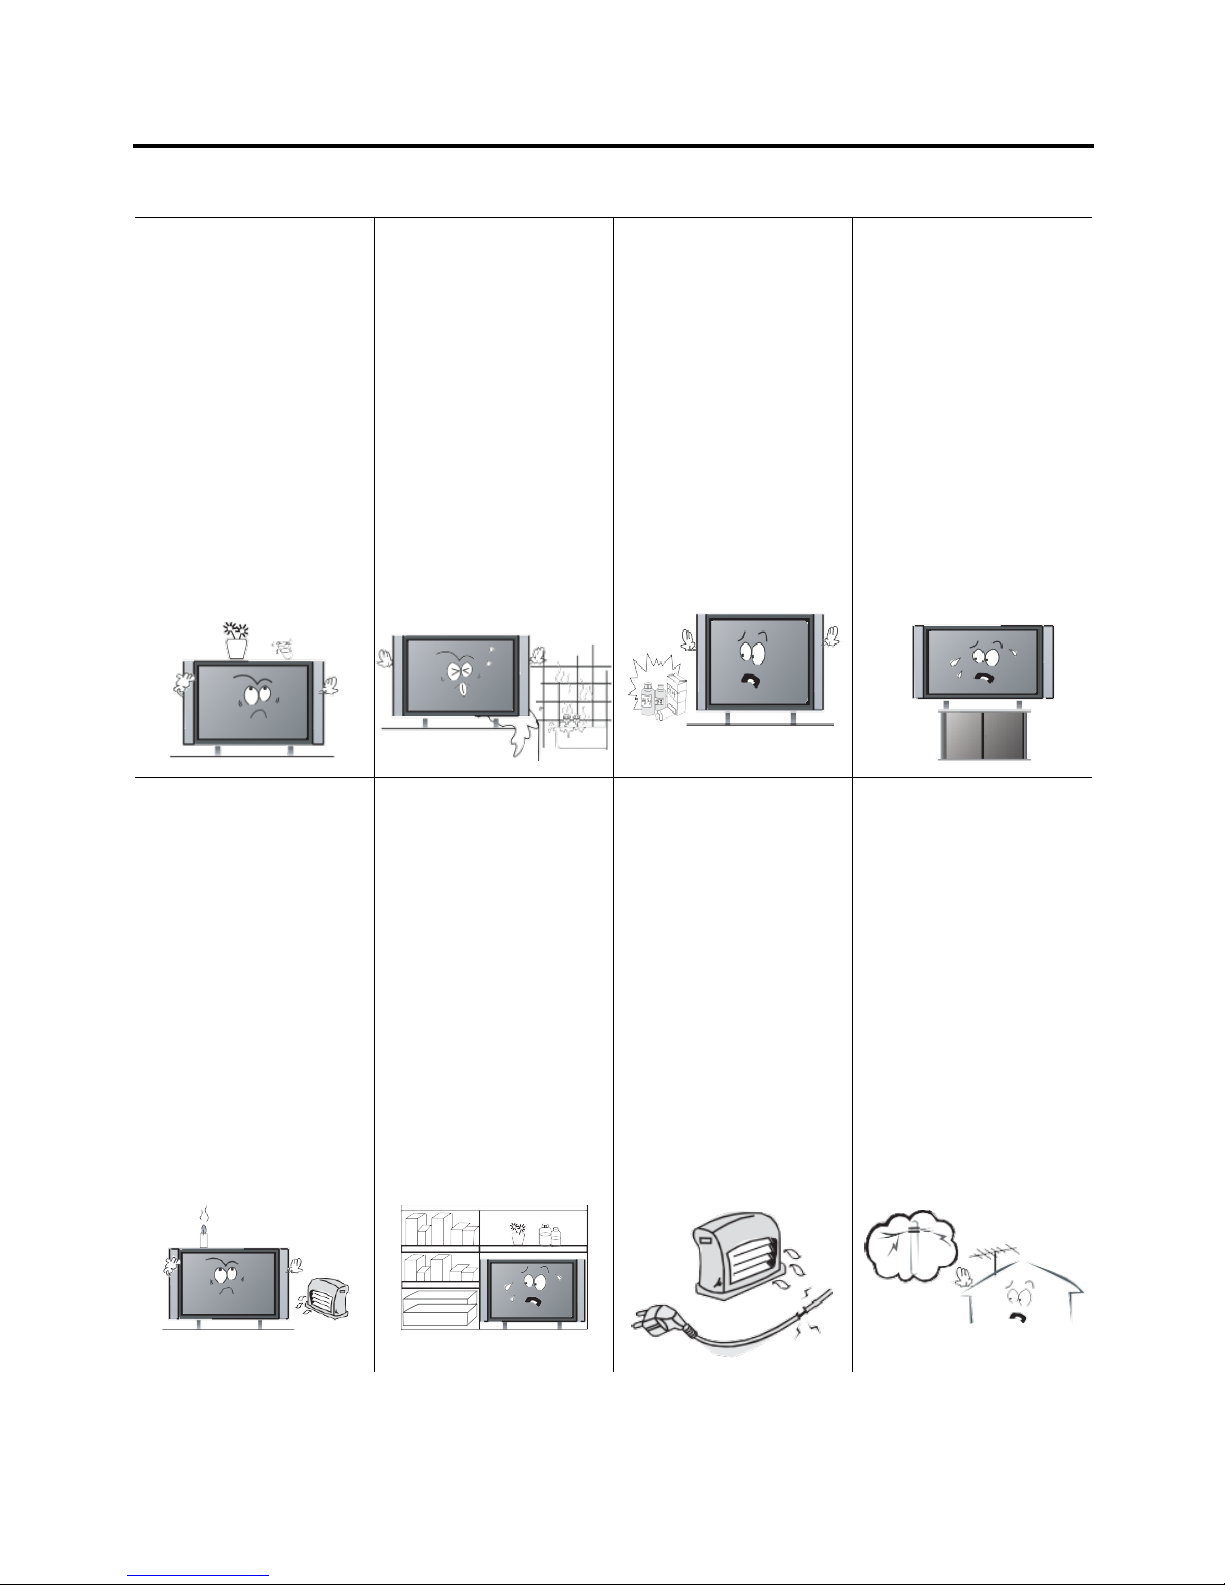
Installation
Warnings
Do not place containers
with liquids, or
medicine bottles or
small metallic objects
on top of the unit.
Do not place the unit
where it is exposed to
rain, excessive
moisture or grease.
Do not use or store
flammable or
combustible materials
near the unit.
Do not place the unit
on an unstable surface,
or any surface whose
area is smaller than the
bottom area of the unit.
If liquid enters the unit
or any metal object
falls into the unit, it
may result in short-
circuit, fire, or electric
shock.
Doing so may result in
fire or electric shock,
malfunction, or
deformation.
Doing so may result in
fire or explosion.
Doing so may damage
the unit or injury
people.
Do not place a burning
object on top of the
unit. Do not place the
unit near any heat
source.
Do not place the unit in
a poorly ventilated
enclosure, such as a
cabinet.
Do not run power cords
near heat-producing
appliances such as
radiators, stoves, or
irons.
Install the antenna
away from high-
voltage power lines and
communication cables
and make sure it is
installed securely.
Doing so poses a
serious risk of fire.
Doing so poses a
serious risk of fire.
The heat could melt the
insulation and expose
live wires, resulting in
fire or electric shock.
If the antenna touches a
power line, contact
with the antenna could
result in fire, electric
shock, serious injury, or
death.

6 /55
Cautions
Install the unit at an
adequate distance from
the wall to ensure
sufficient ventilation.
Do not cover the unit
with a tablecloth, curtain,
or other material.
WARNING
Form a drip loop where the coaxial antenna
cable enters your building to prevent rainwater
from traveling along the cable and contacting the
antenna input terminal.
Not doing so may raise
the temperature inside
and result in a fire.
Cover the unit may raise
the temperature inside
and result in a fire.
If rainwater finds its way inside the unit,
it may result in fire or electric shock.
Child Safe
Be sure to place the unit on a
level surface.
Do not allow children to climb
or hang on the unit.
WARNING
When removing the batteries
from the remote control, make
sure children do not swallow
them. Keep the batteries out of
the reach of infants and children.
Use the VESA mount holes at
the back of the TV to secure the
TV to a wall. (brackets, bolts
and ropes are not provided)
The unit could topple over onto
a child and result in serious
injury.
If a child has swallowed a
battery, seek medical attention
immediately.
7 /55
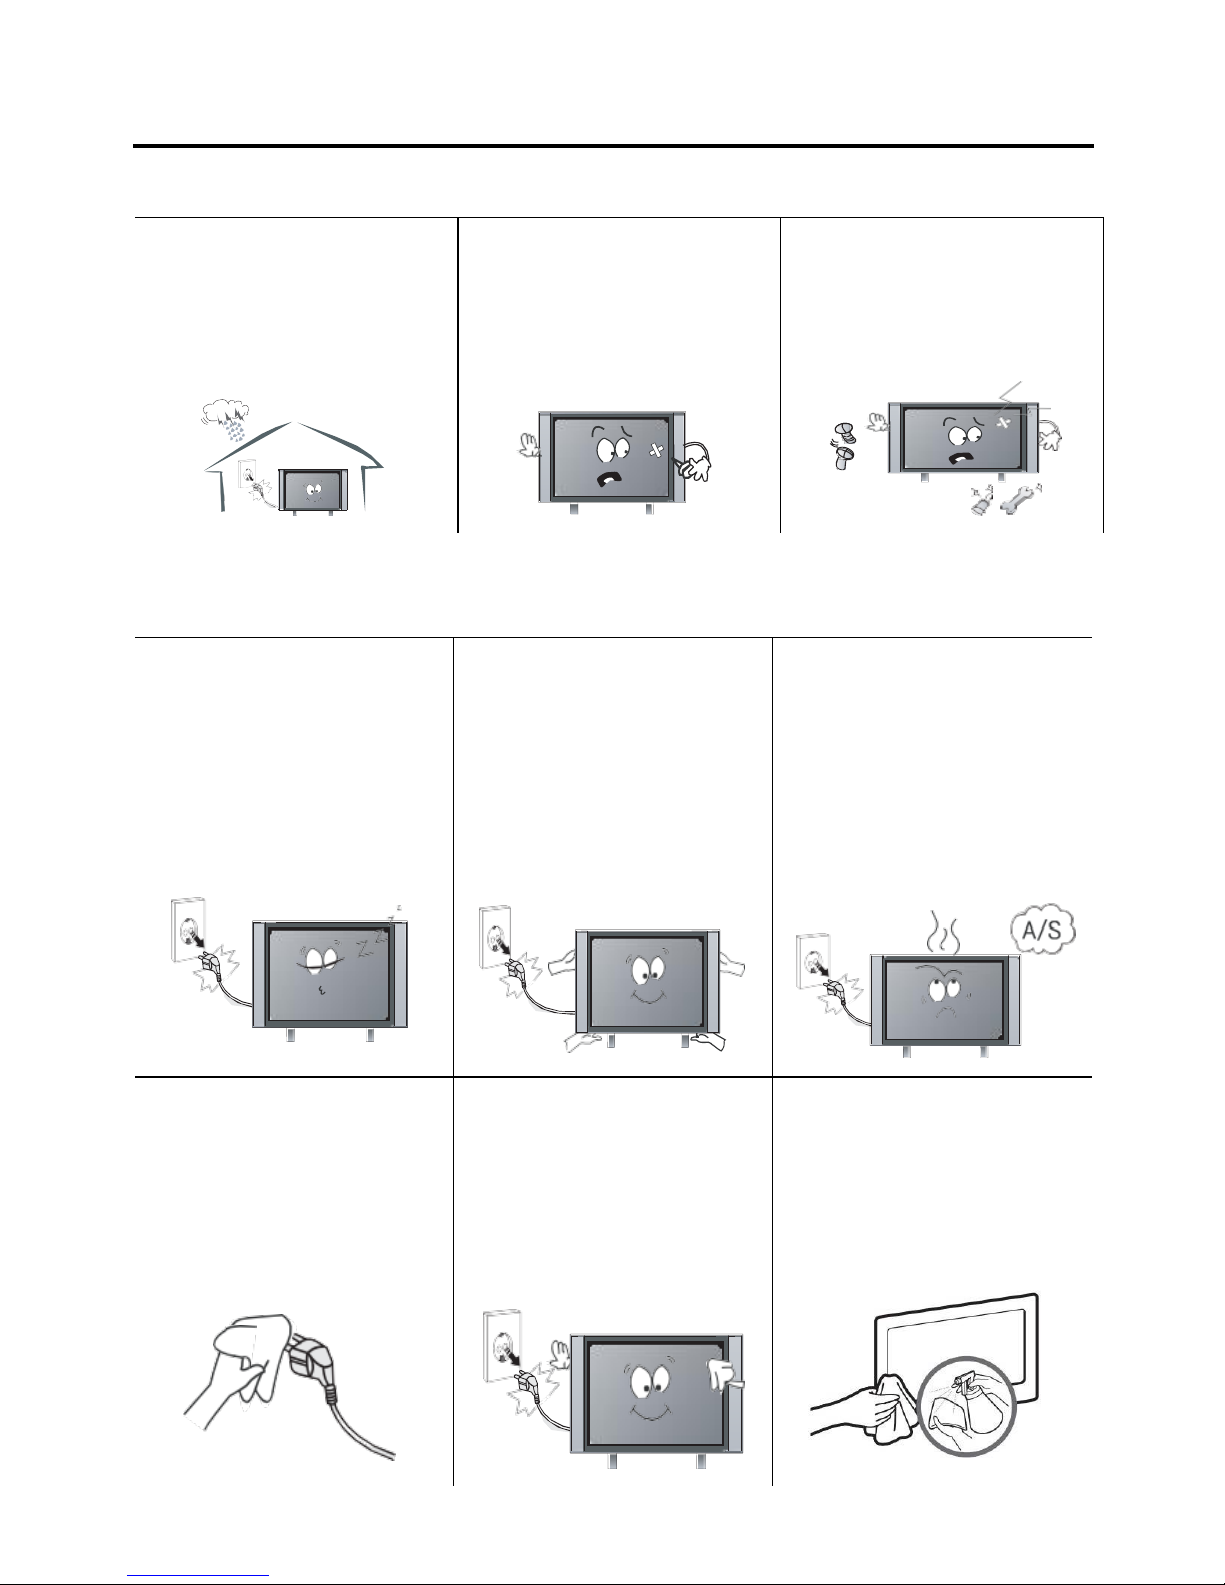
Use and Maintenance
Warnings
Disconnect the power cord from
the wall outlet during an
electrical storm.
Do not insert any metal objects
into the ventilation openings or
A/V terminals.
Never disassemble or modify the
unit in any way. Do not attempt
to service the unknit yourself.
Not doing so may result in fire
or electric shock.
Doing so poses a serious risk of
fire or electric shock
Doing so may result in fire or
electric shock.
Cautions
When not using the unit for long
periods of time, disconnect the
power cord from the wall outlet.
When moving the unit, be sure
to turn off the unit and unplug
the power cord. Always use two
or more people to move the unit.
If you notice any unusual odors
or smoke around the unit,
immediately disconnect the unit
and contact the service center.
Not doing so may cause damage
to the cord or the unit, resulting
in fire or electric shock.
Failure to do so may result in
fire or electric shock.
Wipe off any moisture, dirt or
dust on the power plug pins with
a clean dry cloth.
Always turn off the unit and
unplug the power cord when
cleaning the unit. Use a soft dry
cloth to clean the unit
Clean the screen with a soft
cloth dipped in a small amount
of screen cleaner.
Failure to do so may result in
fire or electric shock.
Do not use any liquid cleaners
or harsh chemicals.
Do not spray directly onto the
unit or use a flammable liquid.
8 /55
Disposal (used Electrical and Electronic Equipment)
Packing and electrical goods should be recycled appropriately, and
not treated as household waste. Please dispose of this equipment at
your applicable collection point for the recycling of electrical and
electronic equipment waste. By ensuring the correct disposal of this
product, you will help prevent potentially hazardous to the
environment and to human health, which could otherwise be caused
by unsuitable waste handling of this product. The recycling of materials will help conserve
natural resources. Please do not dispose of your old electrical and electronic equipment
with your household waste. There may be penalties in your state or territory for dumping
these products, including outside collection sites and charity bins.
For more detailed information about recycling of this product, please contact your local
city office, your household waste disposal service or the shop where you purchased the
product.
National Television and Computer Recycling Scheme
The National Television and Computer Recycling Scheme was established in 2011 to
provide Australian householders and small business with access to industry-funded
collection and recycling services for televisions and computers. To date, more than 1,800
collection services have been made available to the public and more than 130,000 tons of
TV and computer e-waste has been collected and recycled under the scheme. This has
diverted hazardous materials away from landfill and enabled the reuse of valuable
resources contained in e-waste. The scheme has also created employment opportunities
within the recycling sector and assisted local government manages e-waste by providing
alternative collection services.
Englaon has joined this Scheme for years, and we are doing our best to protect both
environment and human health. We encourage our users to do the right things to help us
protect our environment and human health by recycling our products.
Ways to safely dispose of unwanted televisions:
• Using recycling services such as those provided by local councils or other providers.
(a fee may apply)
• Passing them on to friends or family.
• Asking second-hand shops or a charity if they will take them if they are still in
working order.
• Storing them out of the weather until they can be disposed of appropriately.

9 /55
Assemble and Connections
Overview
Accessories List: TV Console, Base Stand, User Manual, Remote Control, Batteries x2,
Screws for Stand x2, Power Cord, Power Adapter, 12v Car Lead, (computer mouse ONLY
in Smart TV).
Installing the Stand
1. Carefully place your TV face up on a soft and flat surface to prevent damage to the
TV or scratching to the LED screen.
2. Remove the stand(s) from the box and then insert the stands into the bottom slot(s) of
the TV.
3. Secure the BASE STAND to the TV with the screws in a box tightly.
CAUTION:
⚫ Be sure to disconnect the power before installing stands or Wall-mount brackets.
⚫ The LED display is very fragile and must be protected at all times when installing the
base stand. Be sure that no hard or sharp object or anything that could scratch or
damage the LED display get in contact with it.
⚫ DO NOT exert pressure on the front of the TV at any time. It may crack the screen.
Front Panel
10 /55
Side Button
CH+/-
VOL+/-
MENU
SOURCE
POWER
TV Mode
Function
Scan through
channels
Adjust the
Volume
Display or
Exit the OSD
menu
Display the
input source
menu
Turn on or
Stand by the
TV set
Menu Mode
Function
/
→/
MENU
OK
Power
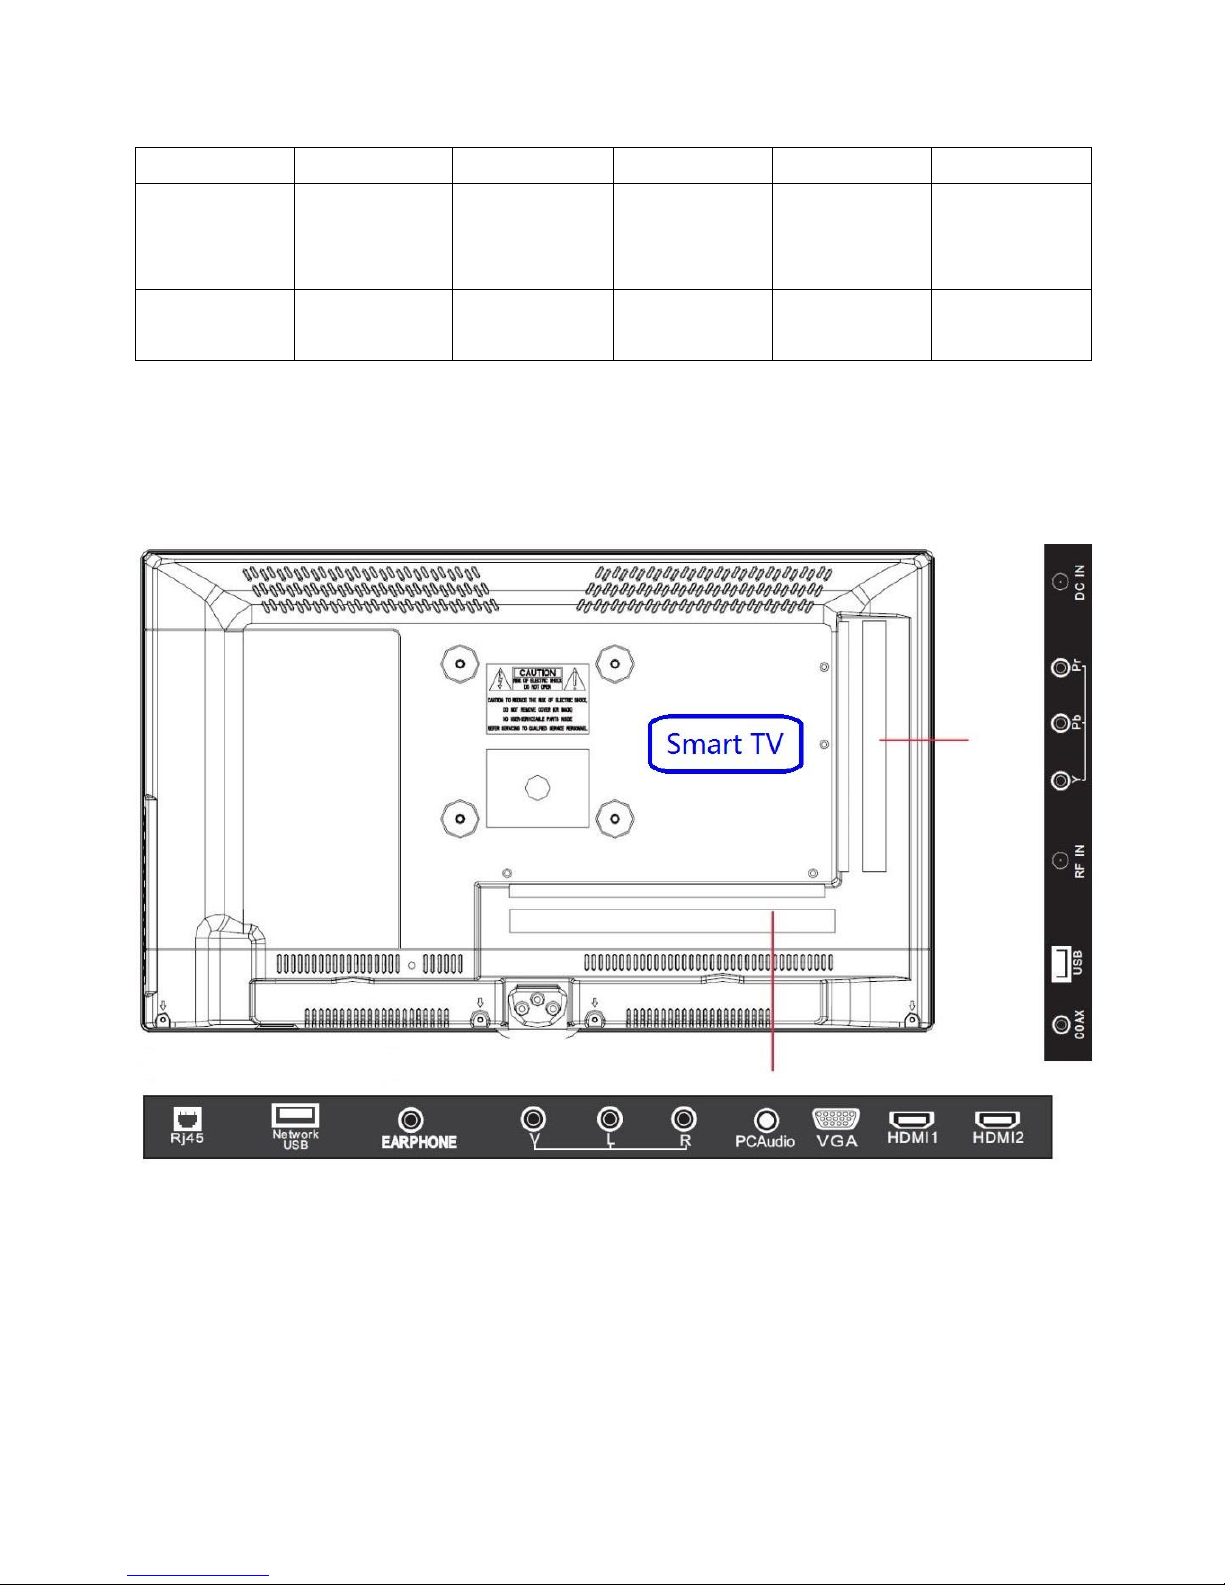
Rear Panel

11 /55
Connections
Cautions:
⚫ Check the jacks for position and type before making any connections. Loose
connections can result in image or voice problems.
⚫ Not all A/V devices can connect to a TV, please refer to the user’s manual of your
A/V device for compatibility and connections procedure.
⚫ Before connecting external equipment, remove the main plugs from the wall socket.
Not doing this might cause electric shock.
⚫ When connecting or disconnecting external equipment, please be gent and careful
with the cables. Inappropriate connecting or disconnecting might damage the jacks.
And this kind of damage is considered as physical damage under the warranty, and
physical damage is not covered under warranty.
Antenna Connections
Antenna input impedance of this unit is 75ohm. VHF/UHF 75ohm coaxial cables can be
connected to the antenna jack directly.
Cautions: The RF IN jack is very sensitive, inappropriate connecting might result in image
or voice problems. Please gently plug in and out cables with RF IN.
HDMI / YPbPr / AV
1. Connect a HDMI / YPbPr / AV cable from an external A/V equipment. No sound
connection is needed for HDMI to HDMI connection. If the signal resolution does
not match the specification table, you need to change the setting of the device
according to the table, please consult your device user manual for instruction.
2. To select the HDMI / YPbPr /AV. Press “SOURCE” button, when the list of input
source appears, use “/” to select the source “HDMI” / “HDMI 1” / “HDMI 2” /
“YPbPr” / “AV ”, then press “OK” to connect.
USB
Connect the USB devices such as hard drives, USB sticks, mouse and keyboard for using
smart functions, browsing photos, listening to music and watching recorded programs.
You can also record live TV program to a USB stick (refer to PVR Function).
⚫ Network USB (only in smart TV) is for connecting mouse and keyboard.
⚫ USB is for hard drives, USB sticks and digital cameras.
⚫ If a USB device requires more than 500mA or more than 5V, the USB device may not
be supported. Exceeding the max supporting may result in damage or data loss.

12 /55
⚫ If you want to use PVR function to record a DTV program, the transfer rate of the
USB storage device must not be less than 5MB/s. Approximately one-hour video
requires 8GB of storage.
Earphone
Connect headphone or speaker for audio out of the TV. Once it is connected, the built-in
speakers will be disabled.
PC Audio (Smart TV Only)
Connect PC audio to the TV. Input the audio from PC to TV, once it is connected the built-
in speakers will be playing the PC audio.
LAN (Wired Setup, Smart TV Only)
Connect TV to the network by connecting the LAN port on the back of your TV to an
external modem or router using a LAN (Ethernet / Cat 5) cable.
Caution: Please use a modem or router that support DHCP (Dynamic Host Configuration
Protocol). Otherwise, you might need to manually input the IP address, subnet mask,
gateway, and DNS.
Wireless Setup (Smart TV Only)
Connect TV to the network wirelessly to a wireless router or modem. The built-in wireless
LAN adapter supports the IEEE802.11b/g/n communication protocols. We recommend
using an IEEE802.11n router. Low transfer rates for b/g may have the influence on the
quality of streaming videos and other media.
Cautions:
⚫ You must use the built-in wireless LAN adapter to use a wireless network because it
does not support external network adapter.
⚫ The TV can only work in one of the security systems of WAP, WEP and WPA2.
⚫ Please keep the TV and the router close (no more than 10m) to get a smooth network.
13 /55
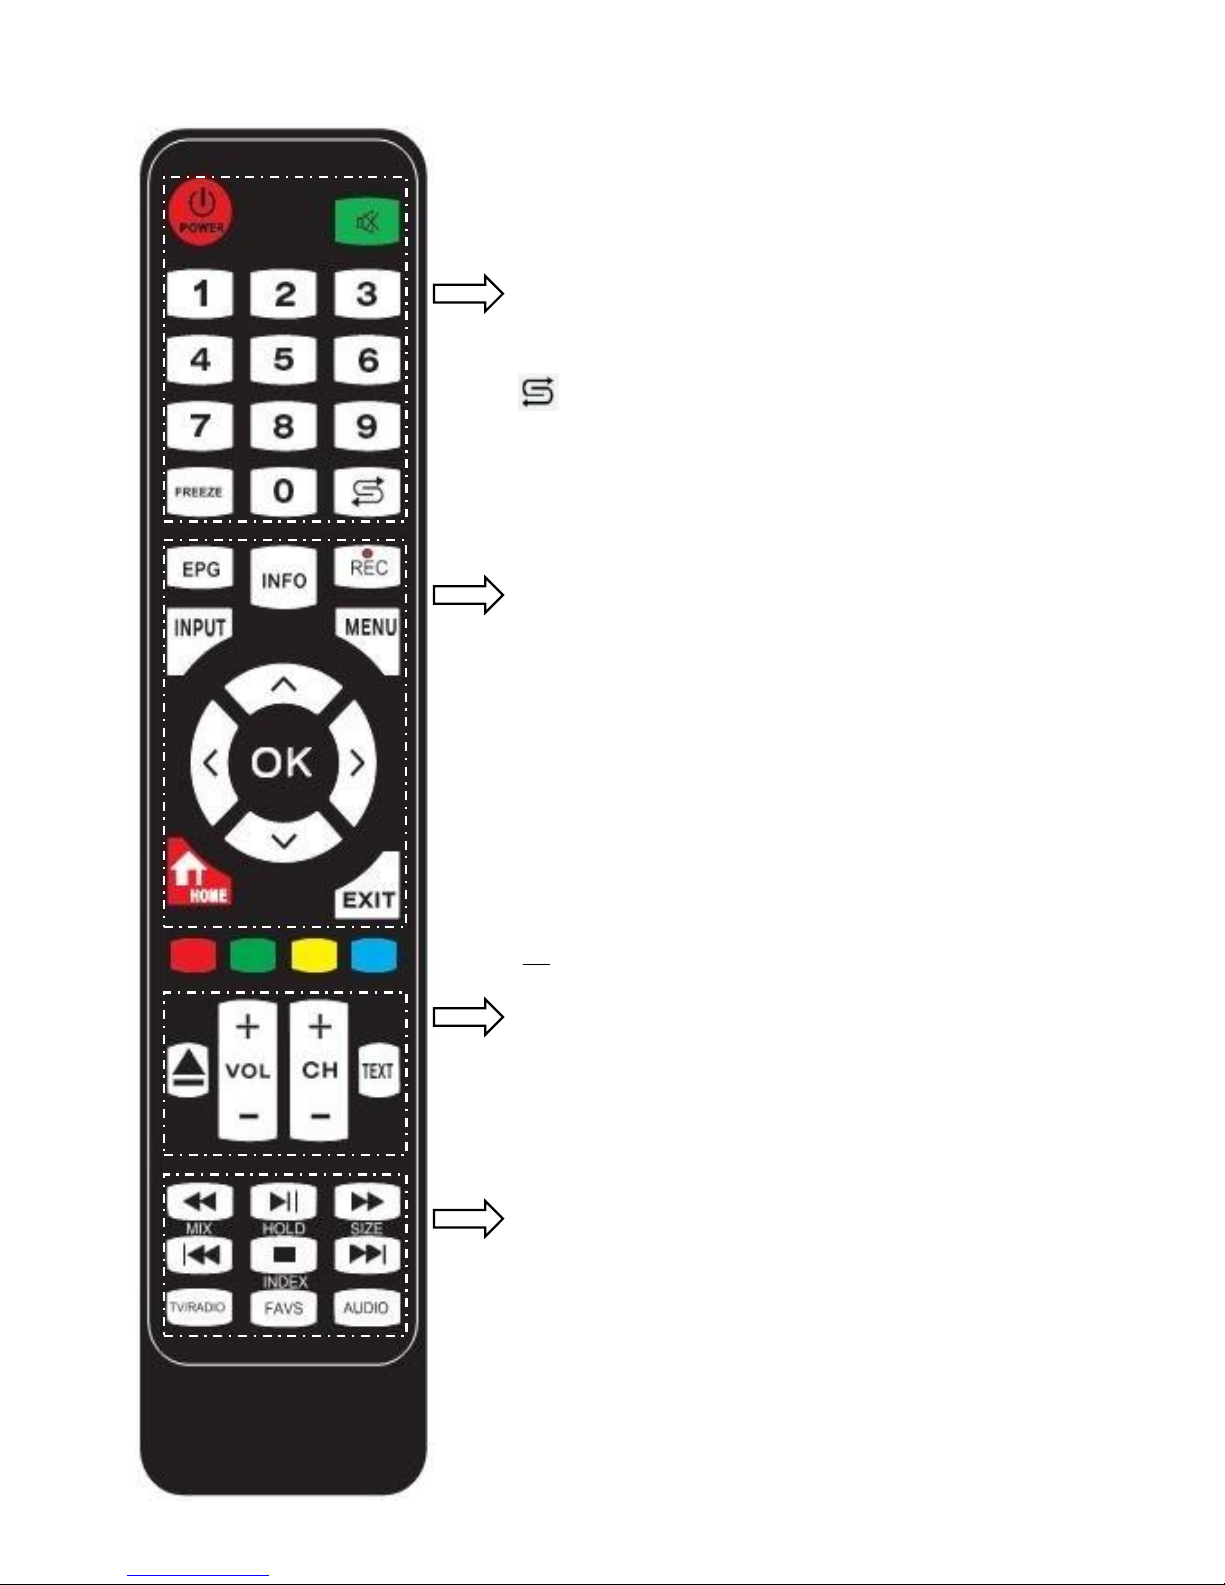
Remote Control
POWER: Turn the TV ON/Standby
MUTE: Mute the sound, press again or press VOL+
to unmute.
NUMBER BUTTONS: Press 0-9 to select a TV
channel.
FREEZE: Freeze picture, press again to unfreeze.
: Return to the previous channel viewed.
EPG: Electronic Program Guide during no-menu
state (only available in DTV mode).
INFO: Display the current model's information.
REC: Press to start recording in DTV mode.
INPUT: Display the input source menu.
MENU: System setup menu.
CURSOR KEYS (▲/▼/◄/►/OK): Allows you to
navigate the on-screen menus and adjust the system
settings to your preference.
HOME (SLEEP): Go to Android Home Page.
(Standby Timer)
EXIT: Exit current menu.
▲: Load or Eject DVD disc.
VOL-/+: Adjust the volume
CH-/+: Scan through channels.
TEXT: Turn on/off the teletext display
◄◄: Fast reverse.
►||: Play/pause program.
►►: Fast forward.
|◄◄ (MIX): Previous chapter. (Mix sound)
▉(HOLD):Stop (Hold/carry on the current subpage).
►►| (SIZE): Next chapter. (One press to see the top
half of page double size, again to see the bottom half
of page double size, again for normal)
TV/RADIO: Switch between TV and Radio in DTV.
FAV (INDEX): Display the favorite program list.
(Go to index)
AUDIO: Select Audio channels.
14 /55
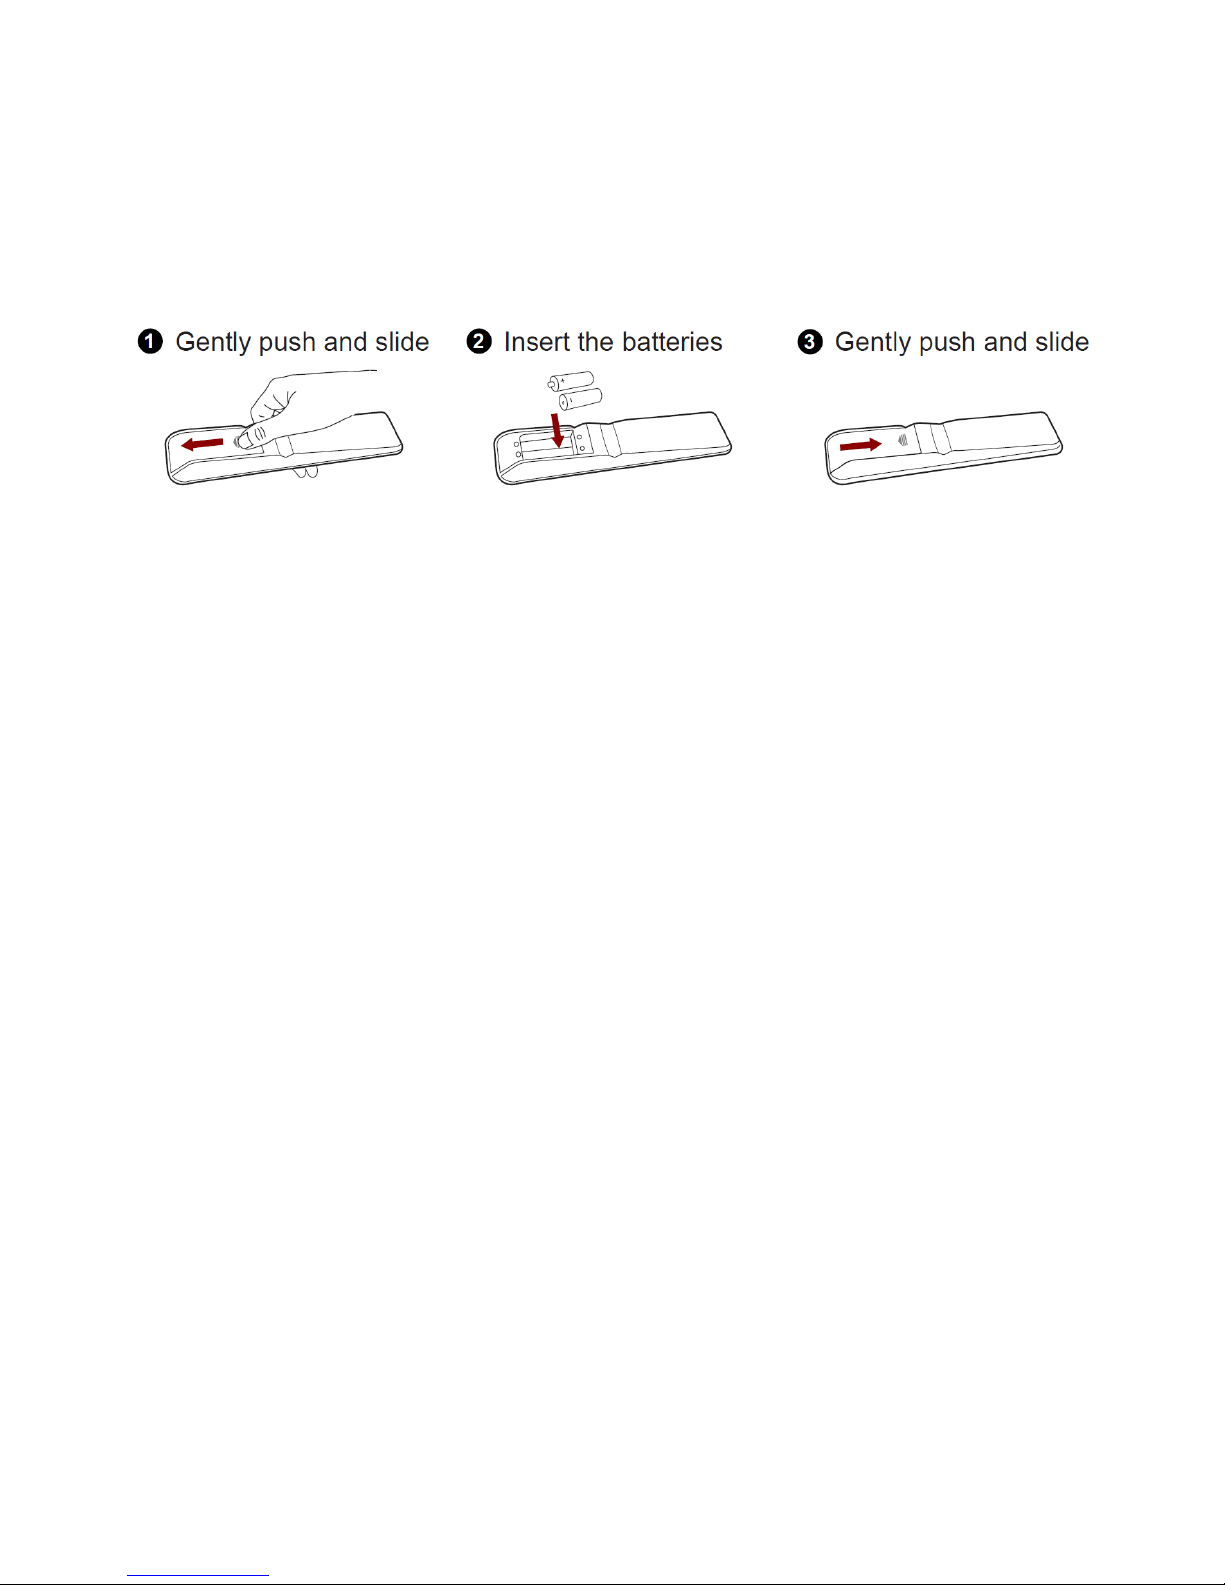
Installing Batteries in the Remote Control
1. Gently push and slide the battery cover to open the battery compartment.
2. Insert two batteries. Make sure to match the (+) and (-) ends of the batteries with the
(+) and (-) ends in the battery compartment.
3. Close the battery compartment cover.
Notes:
⚫ Product image is only for reference, actual product may vary in appearance.
⚫ Dispose of your batteries in a designated disposal area. Do not throw the batteries
into a fire.
⚫ Do not mix battery types or combine used batteries with new ones.
⚫ Remove depleted batteries immediately to prevent battery acid from leaking into the
battery compartment.
⚫ If you do not intend to use the remote control for a long time, remove the batteries.
⚫ Batteries should not be exposed to excessive heat.
⚫ Battery chemicals can cause a rash. If the batteries leak, clean it with a cloth. If
chemicals touch your skin use a copious amount of water to flush the affected burn
region and dilute the chemical reactivity of the acid immediately. Seek doctor advice
or contact your battery supplier for more help.
15 /55
Quick Set Up Guide
1. Connect the mains cable to the mains socket after you have completed all the
connections correctly.
2. Switch on the power switch at the side of the TV or use a remote control.
3. The first time you turn the TV on, it will go straight into the Auto Installation Guide.
It will assist you to specify the Home Mode, Country, Language, Auto Power off, TV
Connection and Auto Search.
4. Press the [///→] buttons to navigate the menu and change the settings. Press
the [OK] button to confirm.
Setup 1
Home Mode
Select the mode you prefer.
Setup 2
Country
Select the country where you will operate the TV
Setup 3
Language
Select your desired language to be displayed on the menu.
Setup 4
Auto Power Off
Select the hours that you want the TV to be powered off.
(“OFF” means the viewing is timeless)
Setup 5
TV Connection
Select the method of TV connection. (Air, Cable or
Satellite)
Setup 6
Auto Search
Auto search the channels in different or all connections.
Note: If you want to reboot the Installation Guide, you can start it in the Setup Menu.
Network Connection
Wired Network
1) Ensure you have:
i. An ethernet cable long enough to reach your TV.
ii. A router or modem with an available Ethernet port.
iii. A high-speed internet connection.
iv. An Ethernet (LAN) port on the back of the TV.
2) Connect your ethernet cable to router and to the Ethernet Port on the back of the TV.
3) Press “INPUT” on remote control, use “/” to select “Android” and press “OK”.
4) Use mouse or remote control to select “Setting” and left click mouse or press “OK”.
Wireless Network
1) Ensure you have:
i. A router or modem broadcasting a high-speed wireless signal.
ii. A high-speed internet connection.
2) Press “INPUT” on remote control, use “/” to select “Android” and press “OK”.
3) Using remote control to select “Setting” and press “OK”.

16 /55
4) Select “Network” and press “OK”.
5) Select “Wi-Fi” and press “OK”.
6) Set “Wi-Fi” to “ON” and wait for a few seconds, all available wireless network will
be displayed. (the hidden wireless network will not be displayed in here.)
7) Using “/” to select the network you want to connect and press “OK”.
8) Using the on-screen keyboard and the remote to enter your network’s password. Then
choice “Enter” on the on-screen keyboard and press “OK”.
9) Once connected, the wireless network will be saved in your TV. Next time it will
automatically connect to the same network.
10) Press “EXIT” to return to the Smart TV homepage.
Notes:
⚫ Once you are in the “Android” smart TV mode, you can use a mouse and keyboard
to control your TV.
⚫ Left key of the mouse is “OK”, the right key of the mouse is “EXIT”.
⚫ The Android system (Smart function) require an internet connection to operate.
⚫ Data usage charges may apply. Please refer to your Internet Service Provider.
⚫ These instructions are just the usual ways to connect your TV to the wired or wireless
network. The connection method may be different depending on your actual network
configuration. If you have any questions about your home network, please refer to
your Internet Service Provider.
⚫ The wireless network connection won’t work if your TV is already connected to a
wired network.
 Loading...