

Enghouse VidyoRoom Administrator's Manual
© 2019 Vidyo, Inc. all rights reserved. Vidyo’s technology is covered by one or more issued or pending United States patents, as more fully
detailed on the Patent Notice page of Vidyo's website http://www.vidyo.com/about/patent-notices/, as well as issued and pending
international patents. The VIDYO logotype is a registered trademark of Vidyo, Inc. in the United States and certain other countries, and is a
trademark of Vidyo, Inc. throughout the world. VIDYO and the Vidyo family of marks are trademarks of Vidyo, Inc. in the United States and
throughout the world.
Product Version 19.2.1
November, 2019
VidyoRoom™
Administrator Guide

TABLE OF CONTENTS
i
About This Guide .............................................................................................................................. 1
Understanding the Conventions Used in This Guide ....................................................................... 1
Getting More Information ................................................................................................................... 1
Contacting Customer Support .......................................................................................................... 1
1. Room Design Considerations ....................................................................................................... 2
VidyoRoom Room Design Considerations ....................................................................................... 2
Selecting and Preparing the Room .......................................................................................... 2
Installing the VidyoRoom Equipment ....................................................................................... 4
2. Configuring the System Using the Admin UI ................................................................................. 6
Logging In ................................................................................................................................. 6
Logging Out .............................................................................................................................. 6
Configuring the Settings .................................................................................................................... 7
Configuring the Account Settings ............................................................................................. 8
Configuring the Network Settings ............................................................................................. 8
Configuring the Audio Settings ............................................................................................... 11
Configuring the Advanced Phoenix Settings .......................................................................... 12
Configuring the Video Settings ............................................................................................... 15
Configuring the Content Capturer .......................................................................................... 16
Configuring Preferences ......................................................................................................... 17
Configuring the Language and Time Zone ............................................................................ 22
Configuring VidyoRoom Pairing (Preview Feature) ................................................................ 23
Configuring Calendar Integration ........................................................................................... 24
Configuring the Remote Control Interface .............................................................................. 28
Designing the Display Layout .......................................................................................................... 29
Obtaining Log Files .......................................................................................................................... 35
Setting the System Time ......................................................................................................... 36
Configuring the Reboot Maintenance Schedule .................................................................... 36
Setting the Log Levels and Accessing the Log Files ............................................................. 38
Enabling the Splunk Forwarder .............................................................................................. 41
Updating the Firmware .................................................................................................................... 45
Using Write Protection Mode .................................................................................................. 50
Uploading UI Backgrounds ............................................................................................................. 50
Viewing the Statistics ....................................................................................................................... 51
Resetting the Password ................................................................................................................... 52

TABLE OF CONTENTS
ii
Using the Network Tools ................................................................................................................. 53
Shutting Down .................................................................................................................................. 54
Viewing the About Information......................................................................................................... 54
3. Managing a VidyoRoom from the VidyoPortal ............................................................................. 56
4. Using the Recovery Console ....................................................................................................... 57
Accessing the Recovery Console ................................................................................................... 57
Upgrading the System ..................................................................................................................... 57
Upgrading the System Using an Image File from the Local Disk ......................................... 58
Upgrading the System Using a USB Flash Drive ................................................................... 59
Performing a Factory Restore ......................................................................................................... 60
Managing Restore Points ................................................................................................................ 62
Turning Remote Management On or Off ........................................................................................ 63
Upgrading the Recovery Console ................................................................................................... 64
Running the File System Check ...................................................................................................... 65
5. Appendix A: Guidelines for Retrieving VidyoRoom Logs ............................................................. 67
6. Appendix B. Reliability ................................................................................................................ 68
Limitations of Reliability Prediction Models ..................................................................................... 68
General Prediction Methodology ..................................................................................................... 68
Electronic Equipment Procedure ............................................................................................ 68
Component Parameters and Assumptions ............................................................................ 69
Supplier MTBF Data ................................................................................................................ 69
Subsystem MTBF Data Release Policy .................................................................................. 69
MTBF Reliability ............................................................................................................................... 69
Supplier Real-Time Clock Data ............................................................................................... 70

1
About This Guide
The
VidyoRoom™ Administrator Guide
provides information on how to select and prepare a room
for the VidyoRoom installation, as well as how to configure and manage the VidyoRoom using the
Admin UI.
This guide is intended for you if you are an administrator who is responsible for preparing the room
at your facility for the installation of the VidyoRoom, or if you are responsible for the configuration
and management of the VidyoRoom.
Understanding the Conventions Used in This Guide
◼ Items marked with Note indicate that the information deserves special attention.
◼ Text you type into an on-screen field or a browser address bar appears in bold Courier
font. Variables are shown in blue, surrounded by brackets:
http://[IP Address or FQDN]
◼ Cross-references to pages are shown in underlined blue.
Getting More Information
For more information about VidyoRoom, refer to:
◼ The Installing VidyoRoom and Using the VidyoRoom Admin UI section on the Vidyo Help
Center for user and administrator information.
◼ The Release Notes section on the Vidyo Help Center for release information.
◼ The
VidyoRoom Getting Started Guide
that was shipped with your VidyoRoom model.
Contacting Customer Support
If you are a Vidyo reseller or end user with PLUS support, please contact the Vidyo Customer
Support team via email or phone:
◼ Email: support@vidyo.com
◼ Phone: 1-866-99-Vidyo (International: +1 201-289-8597) - Option 3
If you are a Vidyo end user without PLUS support, please contact your Vidyo reseller for further
assistance.

2
1. Room Design Considerations
When designing the room in which you are going to install a VidyoRoom, you should take a
number of factors into consideration, such as the placement of the windows, the noise level in the
room, the lighting, and so on. This chapter describes these factors and provides
recommendations to assist you in this process.
If your VidyoRoom is already installed and you simply need to configure the system, skip this
chapter and continue with the next chapter, 2. Configuring the System Using the Admin UI.
VidyoRoom Room Design Considerations
This section describes the factors you should consider when designing a room for your
VidyoRoom installation.
Selecting and Preparing the Room
Windows
Because windows create audio reverberation, less than 20% of the room should have windows or
other vertical glass walls. Also, natural light coming from windows varies considerably, which can
affect the quality of the video. Therefore, if your room does have windows, you should install
acoustical window treatments or blackout curtains.

1. Room Design Considerations
3
Flooring, Walls, and Ceilings
A room where the floor is carpeted, the walls are composed of drywall, and the ceiling is
suspended typically provides the best acoustics. Of course, you can select a room with different
surfaces (such as tile floors or concrete walls), but these are often more reverberant, and therefore,
may affect the sound quality.
A cost effective way to improve acoustics is to add carpeting or rugs if your floor is not carpeted.
You may also want to consider adding acoustical sound panels to the walls.
Noise and Temperature
When selecting the room in which to install your VidyoRoom, keep these noise and temperature
considerations in mind:
◼ The room where the VidyoRoom is located must be equipped with Heating, Ventilation, and Air
Conditioning (HVAC) equipment. Remember, however, that HVAC equipment can raise the
noise level in the room.
◼ You should consider which rooms are nearby and try to select a room that is not adjacent to
frequently noisy areas, such as cafeterias or reception areas.
Acoustics
The quality of the sound is just as important as the quality of the video. You want the dialogue
between participants to sound like everyone is in the same location, which means that you need
quality microphones placed in the right spots. You may choose to hang microphones from the
ceiling, embed them in the table, or place them on the table.
Microphones pick up sound reverberating off hard and flat surfaces in the room. You can dampen
reverberations by installing noise-dampening ceiling tiles, fabric-wrapped acoustical panels on the
walls, or a combination of both.
Room Color
The color of the walls within the camera field of view can impact how the far-end participants
perceive the video quality. If you want the far-end participants to see higher quality video, ensure
that the wall at which the camera is pointing is non-textured, non-patterned, and not reflective.
Painting the wall a muted color, such as beige or blue-gray, looks better on video than bright white
or dark colors. As a general rule of thumb, the brighter the room is, the darker the walls should be.
For example, if your room has no windows, dark carpeting, and the overhead lights are not
extremely bright, you should consider painting your walls a lighter shade, such as pale blue or light
beige. If, on the other hand, your room gets a lot of natural sunlight, has light-colored carpeting,
and has bright overhead lights, you should consider painting your walls a slightly darker shade,
such as tan or medium gray or blue.
If you want to test colors before painting the walls, try hanging fabric of various colors on the back
wall to see which color looks best on video.

1. Room Design Considerations
4
Lighting
The room in which your VidyoRoom is located should have evenly dispersed, ambient lighting. For
the best lighting, use LED lights. Although the upfront cost for these is higher, the long-term cost is
lower. The direct fluorescent lighting that is common in offices is not recommended because it
causes harsh shadows on the faces of the participants. In addition, its brightness can vary
considerably at different parts of the room. If you cannot change the fluorescent fixtures, get full
spectrum bulbs designed for video.
The ideal color temperature should be between 3,000° and 3,500° Kelvin, and about 70 foot
candles of intensity at the subject.
Lighting for video can involve as many as four lighting positions (which are explained below), with
the Key Light being the most important. For most multi-purpose conference rooms, a strong colorbalanced Key Light supported by additional full spectrum lighting in the room will work well. Just
remember: you don't want meeting participants feeling like they're in a television studio.
Here is some additional information about the lighting positions:
◼ Key Light: Light shining on the participant from the front. These lights are generally placed high
and at the center, or to each side of the seating area if two are required. Aim them downward
at a 45° angle to light the participants’ faces without causing their eyebrows to cast a shadow
over their eye-sockets.
◼ Fill Light: Lights shining on the participant from the front, but placed at a low angle to soften
shadows under the eyes and chin.
◼ Hair Light: Lights at the rear of the room, above the participants and aimed downward to help
separate the participants from the background.
◼ Backdrop Lighting: Lights above and (if space allows) between the participants and the
background. Two lights are usually required, each aimed toward the opposite half of the
background to evenly light it.
In addition, always ensure that no lights are pointing in the camera lens, and avoid pointing any
lights directly at the displays. If possible, you may want to hire a lighting designer and have the
lighting professionally installed.
Vibration
Room or wall vibration can be caused by HVAC equipment, heavy machinery being used nearby,
trains passing by, and other factors. If the wall on which the camera and displays are located
vibrates excessively, the camera may also vibrate. This vibration may be noticeable by the far-end
participants. Therefore, if you have known vibration issues, consult the building manager or an
architect to determine the optimal placement for the camera.
Installing the VidyoRoom Equipment
Once you have selected and prepared your room, you can begin installing the VidyoRoom system.
For information about how to unpack and install the VidyoRoom, refer to the
VidyoRoom Getting

1. Room Design Considerations
5
Started Guide
that was shipped with your VidyoRoom system. This guide also describes how to
configure the account and network settings after your VidyoRoom powers up.
Controlling the VidyoRoom
You can control the VidyoRoom using the hand-held infrared remote control or the hand-held radio
frequency remote control.
Alternatively, you can control your system using VidyoRemote 3 for iOS. VidyoRemote 3 is a native
iPad application for controlling VidyoRoom version 3.3.10 and later. It is available on the Apple®
App Store.
For more information about how to use your remote control, refer to the
VidyoRoom Quick User
Guide
.

6
2. Configuring the System Using the
Admin UI
This chapter describes how to configure the VidyoRoom using the Admin user interface (Admin
UI).Logging Into and Out of the Admin UI
After you first boot up the VidyoRoom, the Home screen typically appears. If you have more than
one display, you will see the IP address of the system on one of the displays. You use this IP
address to access the Admin UI. Alternatively, you can go to the Settings screen of the On-Screen
UI to obtain the IP address.
Note If you need the IP address of the system once you are already logged into the Admin UI, click
the Identify button on the Display Layout page. You can also use the CTRL + I keyboard
command to get the IP address.
Logging In
To log in to the Admin UI:
1. Enter the IP address or FQDN of the VidyoRoom in the URL bar of your web browser:
[IP address or FQDN]
The Admin UI
Login
page appears.
2. Enter the default log in credentials:
◼ Username: admin
◼ Password: password
3. Click Login.
The rest of the Admin UI tabs display.
Logging Out
If you are already logged in, the Login tab enables you to log out of the VidyoRoom.
To log out of the Admin UI:
2. Configuring the System Using the Admin UI
7
1. Click the
Login
tab.
2. Click Logout.
All the tabs except for the
Login
tab disappear. You can then login again or exit your
browser.
Configuring the Settings
The
Settings
tab enables you to configure various VidyoRoom settings and options, including
VidyoPortal account settings, network settings, audio and video preferences, and other options.
You should configure these settings immediately after logging in to the Admin UI for the first time.
After you make changes to the settings on the
Settings
tab, click the Save button. Unless
otherwise stated, you do not have to reboot the VidyoRoom in order for the settings to be applied.
2. Configuring the System Using the Admin UI
8
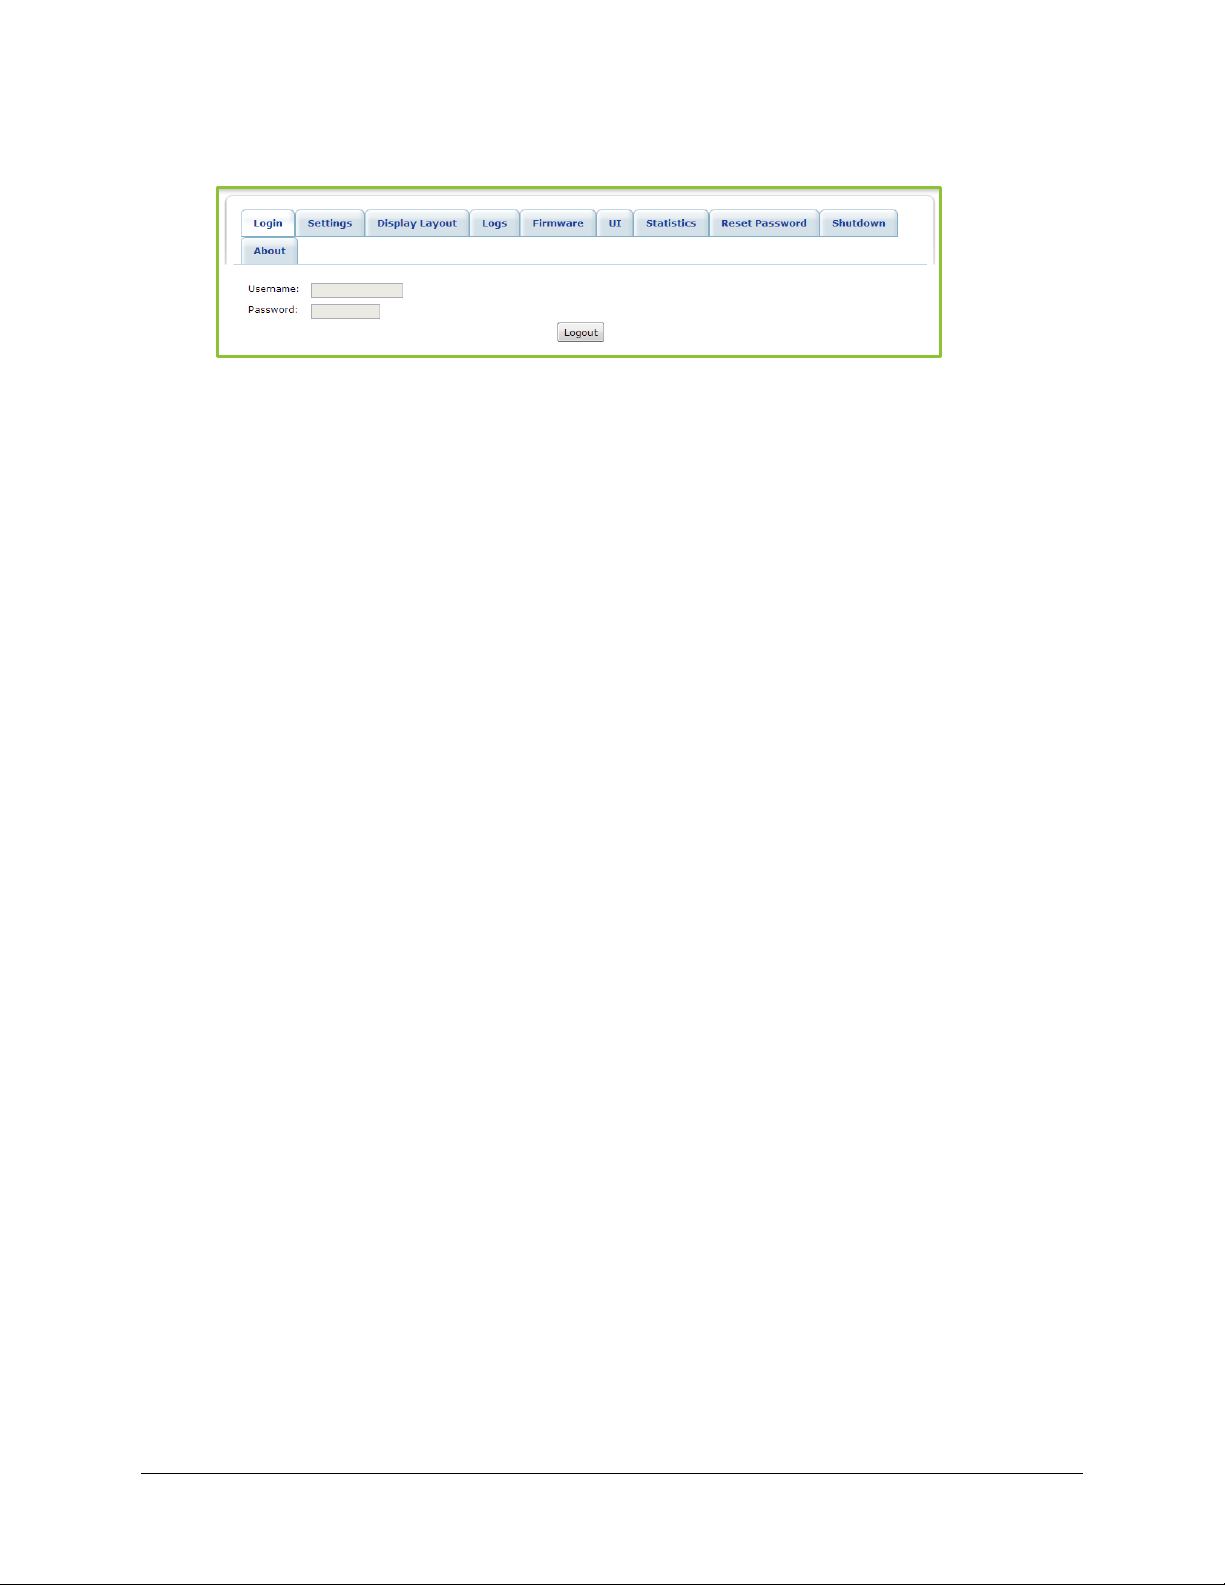
Configuring the Account Settings
To configure the account settings:
1. Click the
Settings
tab.
2. Click the blue triangle next to the word
Account
to view the account settings if necessary.
3. Enter the VidyoPortal FQDN in the VidyoPortal field.
Note If a secured VidyoPortal is being used and port 80 is not open, you must explicitly add
https:// to the VidyoPortal FQDN; otherwise, the VidyoRoom will be unable to log in to the
VidyoPortal.
4. Enter your VidyoPortal user name (as created on the VidyoPortal) in the Username field.
5. Enter your VidyoPortal password (as created on the VidyoPortal) in the Password field.
6. Click Apply.
Configuring the Network Settings
When configuring the network settings as described in this section, you should also consider the
following:
◼ VidyoRoom is automatically configured to respond to Wake-on-LAN (WoL) packet requests.
Review your current firewall settings and make sure they permit WoL requests over ports 7 and
9.

2. Configuring the System Using the Admin UI
9
To ensure proper functioning of the system and to support all of its features, the following ports are
opened on the VidyoRoom side: 8090, 60777, and 63459. Please ensure that no firewall or other
restriction is blocking these ports in your network. In addition, either port 80 or port 443 can be
blocked, but they cannot both be blocked at the same time.To configure the network settings:
1. Click the
Settings
tab.
2. Click the blue triangle next to the word
Network
to view the network settings if necessary.
3. Select the Enable IPv4 checkbox, the Enable IPv6 checkbox, or both if your network uses
IPv4 and/or IPv6.
4. Select the Use DHCP radio button or Use static IP radio button if you selected the Enable
IPv4 checkbox in the previous step.
The Use DHCP radio button is selected by default. If you select the Use static IP radio
button, you must enter the following information:
◼ IPv4 Address
◼ Subnet Mask
◼ Default Gateway
◼ Primary DNS Server
5. Select either the Stateless Auto Configuration radio button or Use static IPv6 radio button if
you selected the Enable IPv6 checkbox.
The Stateless Auto Configuration radio button is selected by default. With either selection,
you must enter the primary DNS Server. However, if you select the Use static IPv6
checkbox, you must also enter the following information:
◼ IPv6 Address

2. Configuring the System Using the Admin UI
10
◼ Subnet Prefix Length
◼ Default Gateway
6. Enter values in the UDP Start, UDP End, and MTU (Maximum Transmission Unit) fields if
needed.
The MAC Address and Link Speed fields are read only and cannot be changed.
7. Enter the machine’s hostname in the Hostname field.
You can change the hostname of the VidyoRoom machine if you prefer to monitor and
track the system by its hostname and not its IP. This field is disabled for VidyoRoom SE
models.
8. Select the Always Use VidyoProxy checkbox if you want the VidyoRoom to connect via the
assigned VidyoProxy.
A VidyoProxy routes all data signals through a single port in order to traverse a firewall.
9. Select the Use Web Proxy checkbox if you want the VidyoRoom to connect via the
assigned Web Proxy.
10. Select the Manual radio button or Auto radio button, and then enter the following
information as needed:
◼ Web Proxy Auto Config Script (only required when Auto has been selected)
◼ Web Proxy Address (only required when Manual has been selected)
◼ Web Proxy Port (only required when Manual has been selected)
◼ Web Proxy Username and Web Proxy Password must be entered if you enter a Web
Proxy address that requires authentication
11. Click Apply.
2. Configuring the System Using the Admin UI
11
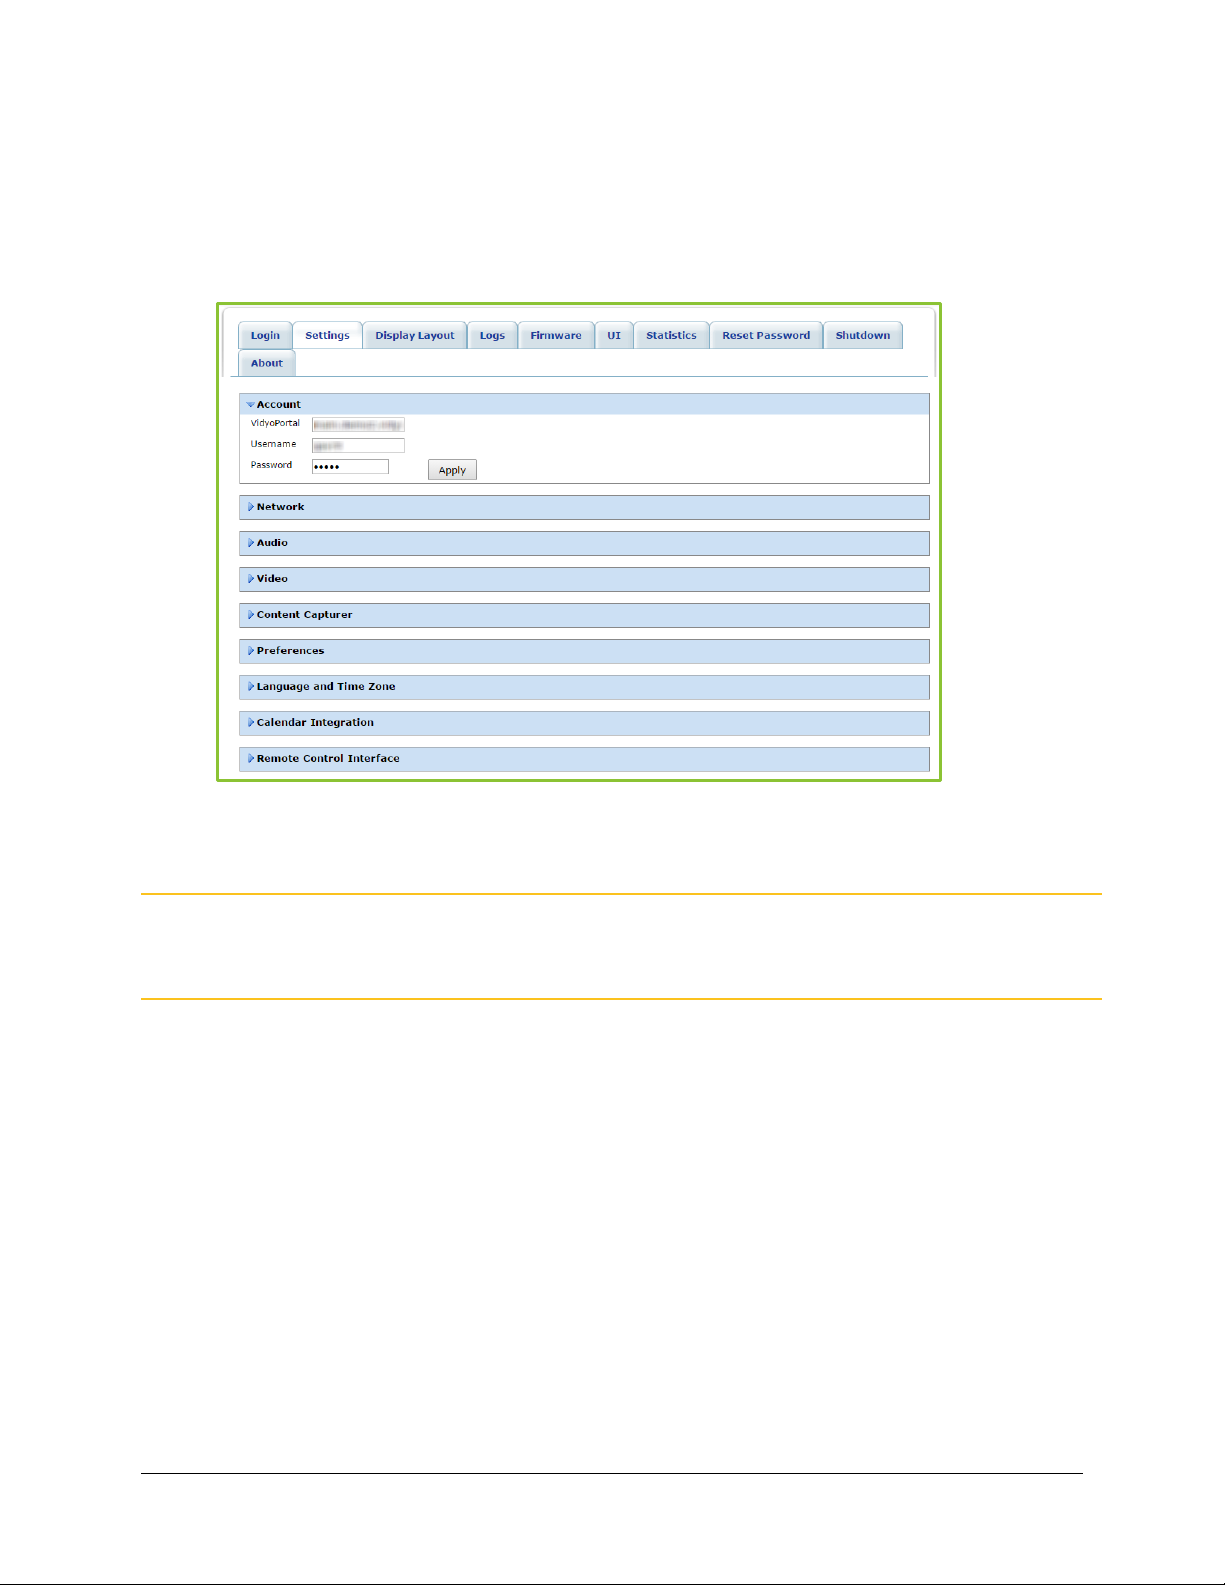
Configuring the Audio Settings
To configure the audio settings:
1. Click the
Settings
tab.
2. Click the blue triangle next to the word
Audio
to view the audio settings if necessary.
3. Select the microphone device that the VidyoRoom will use from the Microphones drop-
down.
4. Slide the Microphone slider bar left or right as needed to decrease or increase the
microphone volume.
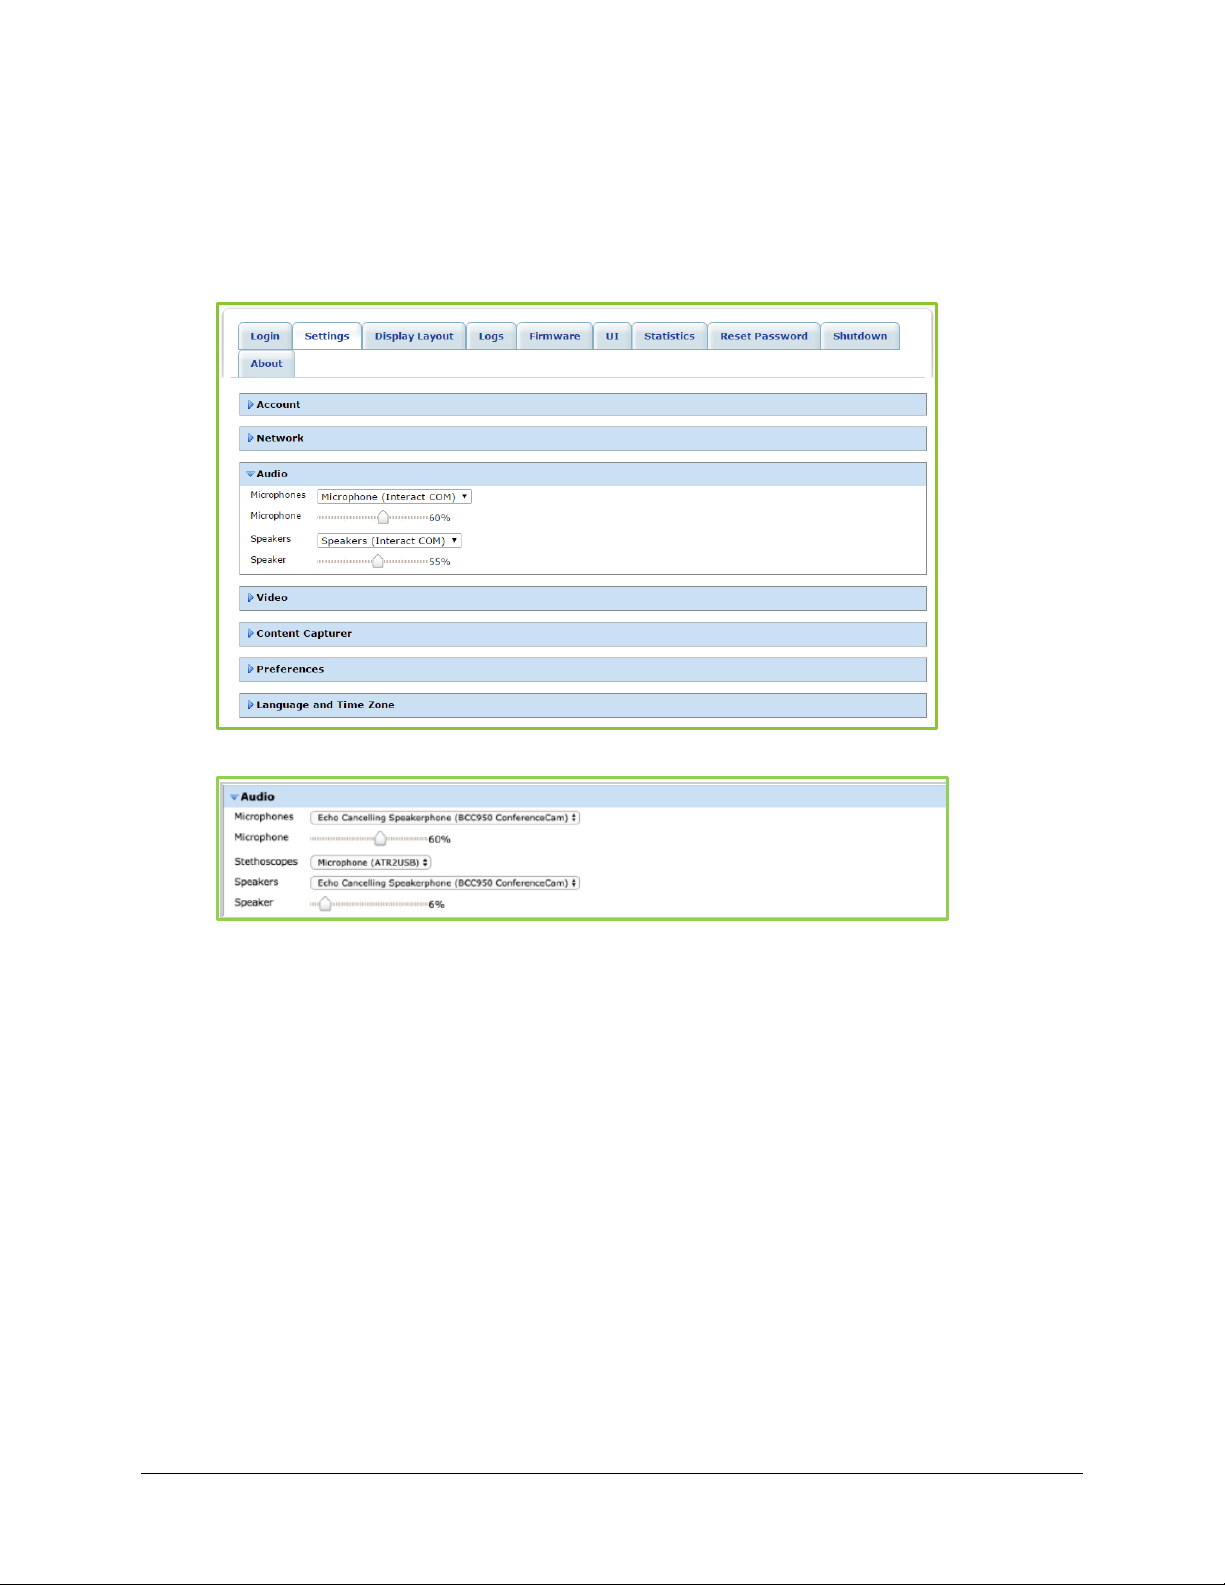
5. If you have a Stethoscope connected to the VidyoRoom, it will display in the Stethoscopes
drop-down. (This feature is only available in version 19.2.0 and later).
6. Select the speaker device that the VidyoRoom will use from the Speakers drop-down.
7. Slide the Speaker slider bar left or right as needed to decrease or increase the speaker
volume.
2. Configuring the System Using the Admin UI
12
Configuring the Advanced Phoenix Settings
New firmware for the Phoenix PowerHub and Quattro is needed to support this functionality. This
firmware will be included as part of the VidyoRoom installer for versions 3.3.21 and later. Phoenix
will provide the new firmware for the Phoenix Spider devices to support these controls in the near
future.
Note The settings described in this section are not applicable to VidyoRoom HD-230 Rev A and
Rev B or to VidyoRoom SE running on any hardware.
To configure the advanced Phoenix settings:
1. Click the
Settings
tab.
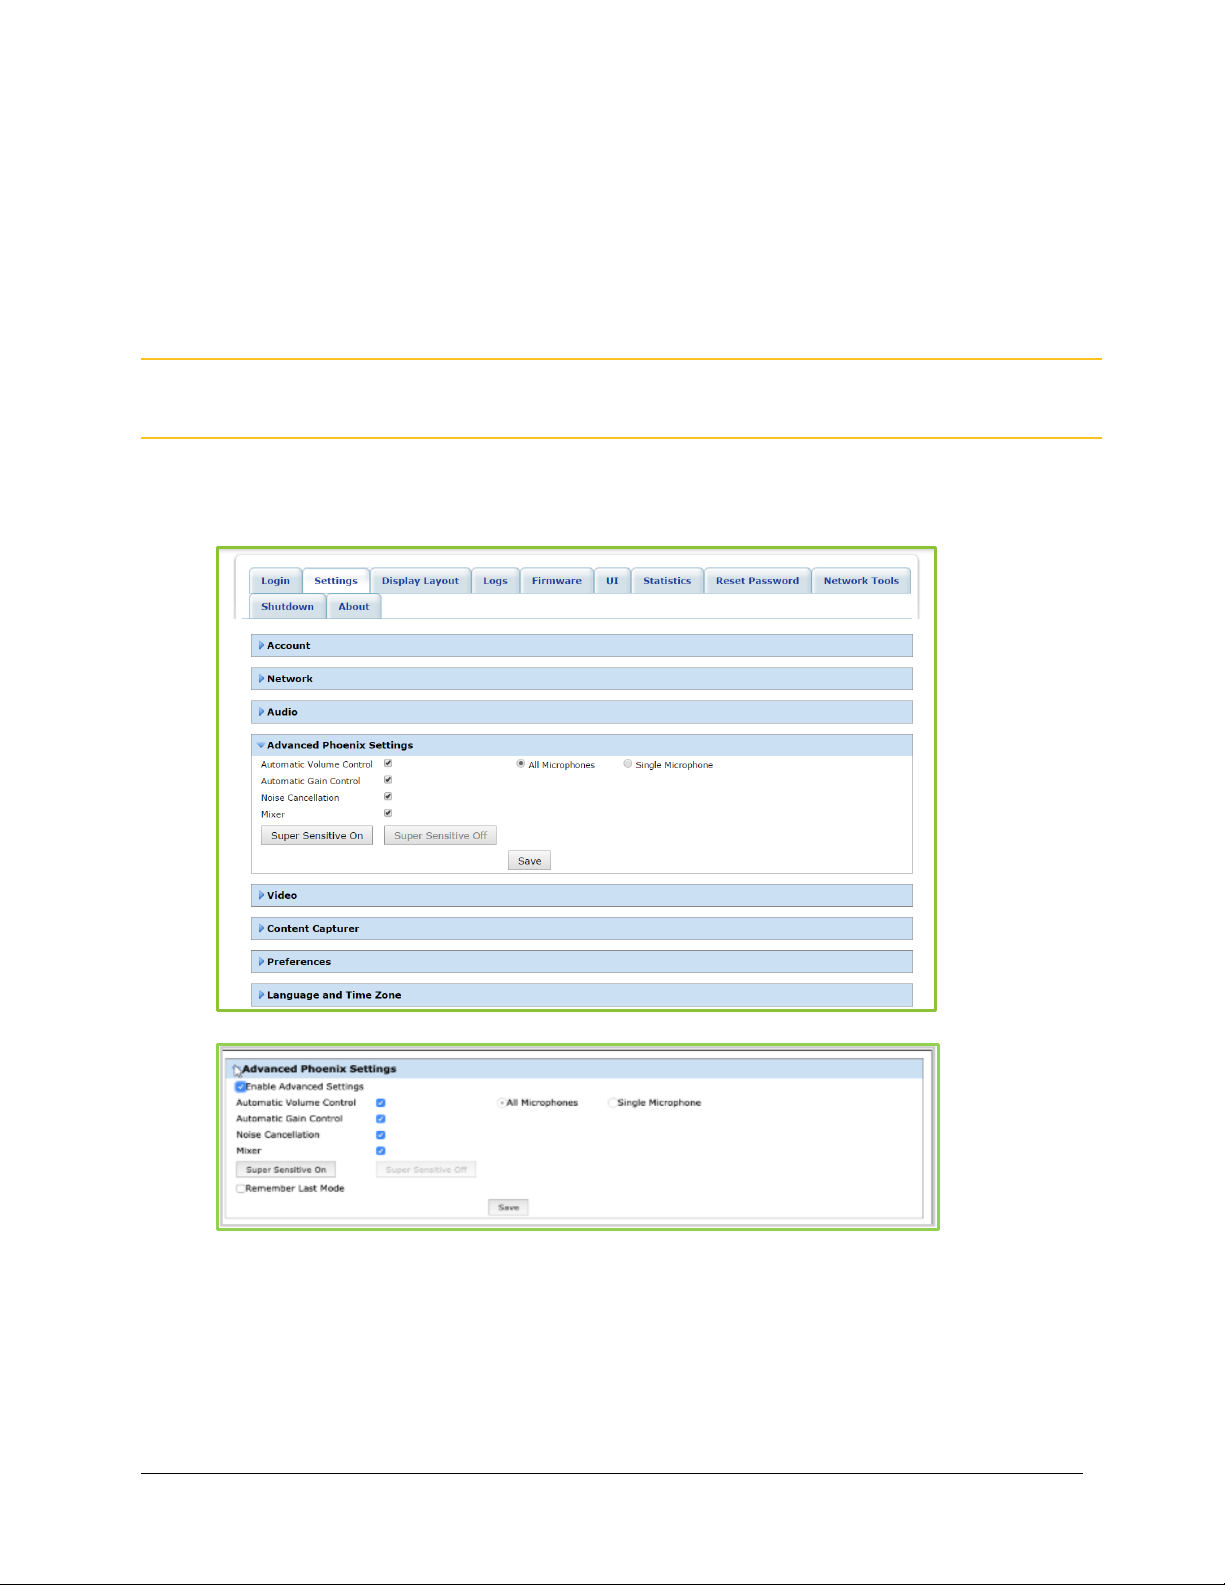
Version 19.2.0 and Later (Remember Last Mode)
2. Click the blue triangle next to the word
Advanced Phoenix Settings
to view the advanced
Phoenix settings if necessary.
By default, Phoenix Super Sensitive Mode is disabled, enabling the Automatic Volume
Control, Automatic Gain Control, Noise Cancellation, and Mixer settings.

2. Configuring the System Using the Admin UI
13
Deselecting the Automatic Gain Control, Noise Cancellation, and Mixer checkboxes
enables Phoenix Super Sensitive Mode. If you do not want to retain these default settings,
then you can always make configuration changes to meet your specific needs.
Caution You should only adjust the advanced Phoenix settings if you have the knowledge and
expertise to make configuration changes. Otherwise, consult an expert or retain the
default system configurations.
3. Deselect the Automatic Volume Control checkbox if you do not want to adjust the volume
or loudness of the audio signal.
4. Deselect the Automatic Gain Control checkbox if you do not want to automatically control
the gain of the audio signal.
5. Deselect the Noise Cancellation checkbox if you do not want to reduce background noise.
6. Deselect the Mixer checkbox if you do not want to route or change the volume level and
dynamics of the audio signal.
7. Click the Super Sensitive On button if you want the audio to be received in its native state if
not already enabled.
8. Click the Super Sensitive Off button if you want the audio to be processed by the Phoenix
Quattro device if not already enabled.
The remote control API can still be used to enable or disable Phoenix Super Sensitive
Mode. Phoenix Super Sensitive Mode remains in effect until the end of the call. Since
Phoenix Super Sensitive Mode is automatically disabled by default, it has to be re-enabled
at the beginning of each call.
Note If the Phoenix Quattro device is connected to a Phoenix PowerHub, then the All Microphones
and Single Microphone radio buttons will not display.
9. Select the All Microphones radio button if you want audio to be heard from all microphones
on the Phoenix Quattro device
10. Select the Single Microphone radio button if you want audio to be heard from only one
microphone on the Phoenix Quattro device.
The Admin UI does not allow you to select a specific microphone. The second microphone
inside the Phoenix Quattro device is selected as the single microphone by default when the
Single Microphone radio button is selected.
Note Selecting the Single Microphone radio button is only allowed when the Phoenix Quattro
device is plugged directly into the VidyoRoom system instead of being daisy chained via the
Power Hub.

2. Configuring the System Using the Admin UI
14
11. Select the Remember Last Mode checkbox if you would like the next call to start with the
last user setting. If "Remember Last Mode" is disabled, all new calls start with the supersensitive mode disabled. (This feature is only available in version 19.2.0 and later).
12. Click the Save button.
Note Changes made here are not applied to the Phoenix device until the Save button is clicked.
If Write Protection Mode is enabled, Phoenix Super Sensitive Mode will automatically be
disabled after clicking the Save button. After the VidyoRoom system is rebooted, Phoenix
Super Sensitive Mode will revert back to its previous state prior to Write Protection Mode
being enabled.

2. Configuring the System Using the Admin UI
15
Configuring the Video Settings
To configure the video settings:
1. Click the
Settings
tab.
2. Click the blue triangle next to the word
Video
to view the video settings if necessary.
3. Select the camera that the VidyoRoom will use from the Cameras drop-down.
4. Select one of the Transmit Bandwidth radio buttons to set the maximum video transmit
bandwidth.
The options available depend upon the VidyoRoom model.
5. Select one of the Transmit Resolution radio buttons to set the video transmit resolution.
The options available depend upon which Transmit Bandwidth you selected.
6. Select one of the Transmit Framerate radio buttons to set the frames per second of the
camera.
The options available depend upon which Transmit Bandwidth you selected.
7. Click Apply Transmit Settings.
8. Do any of the following for Camera Control if necessary:
◼ Click Reset Camera to reset the camera.
◼ Click Backlight On or Backlight Off as needed to compensate for backlighting.
9. Select one of the following Anti-Flicker Mode radio buttons:
◼ Select the 50Hz radio button if your VidyoRoom system is located in Europe
◼ Select the 60Hz radio button if your system is located in North America
◼ Select the Off radio button to turn Anti-Flicker Mode off
2. Configuring the System Using the Admin UI
16
10. Select the Auto-reboot if INOGENI is not detected checkbox if you have a VidyoRoom HD-
40 Revision B system with an INOGENI device.
11. Select an Infared IR Mode: either Daylight or Auto.
Configuring the Content Capturer
With VidyoPortal version 3.1 or later and either a VidyoRoom HD-230 version 3.2.2 or later, HD-100
Revision D, or HD-40 Revision B, you can use the Audio/Video Projection feature. This feature
enables you to play local audio and video content when not in a call at native resolution and frame
rate.
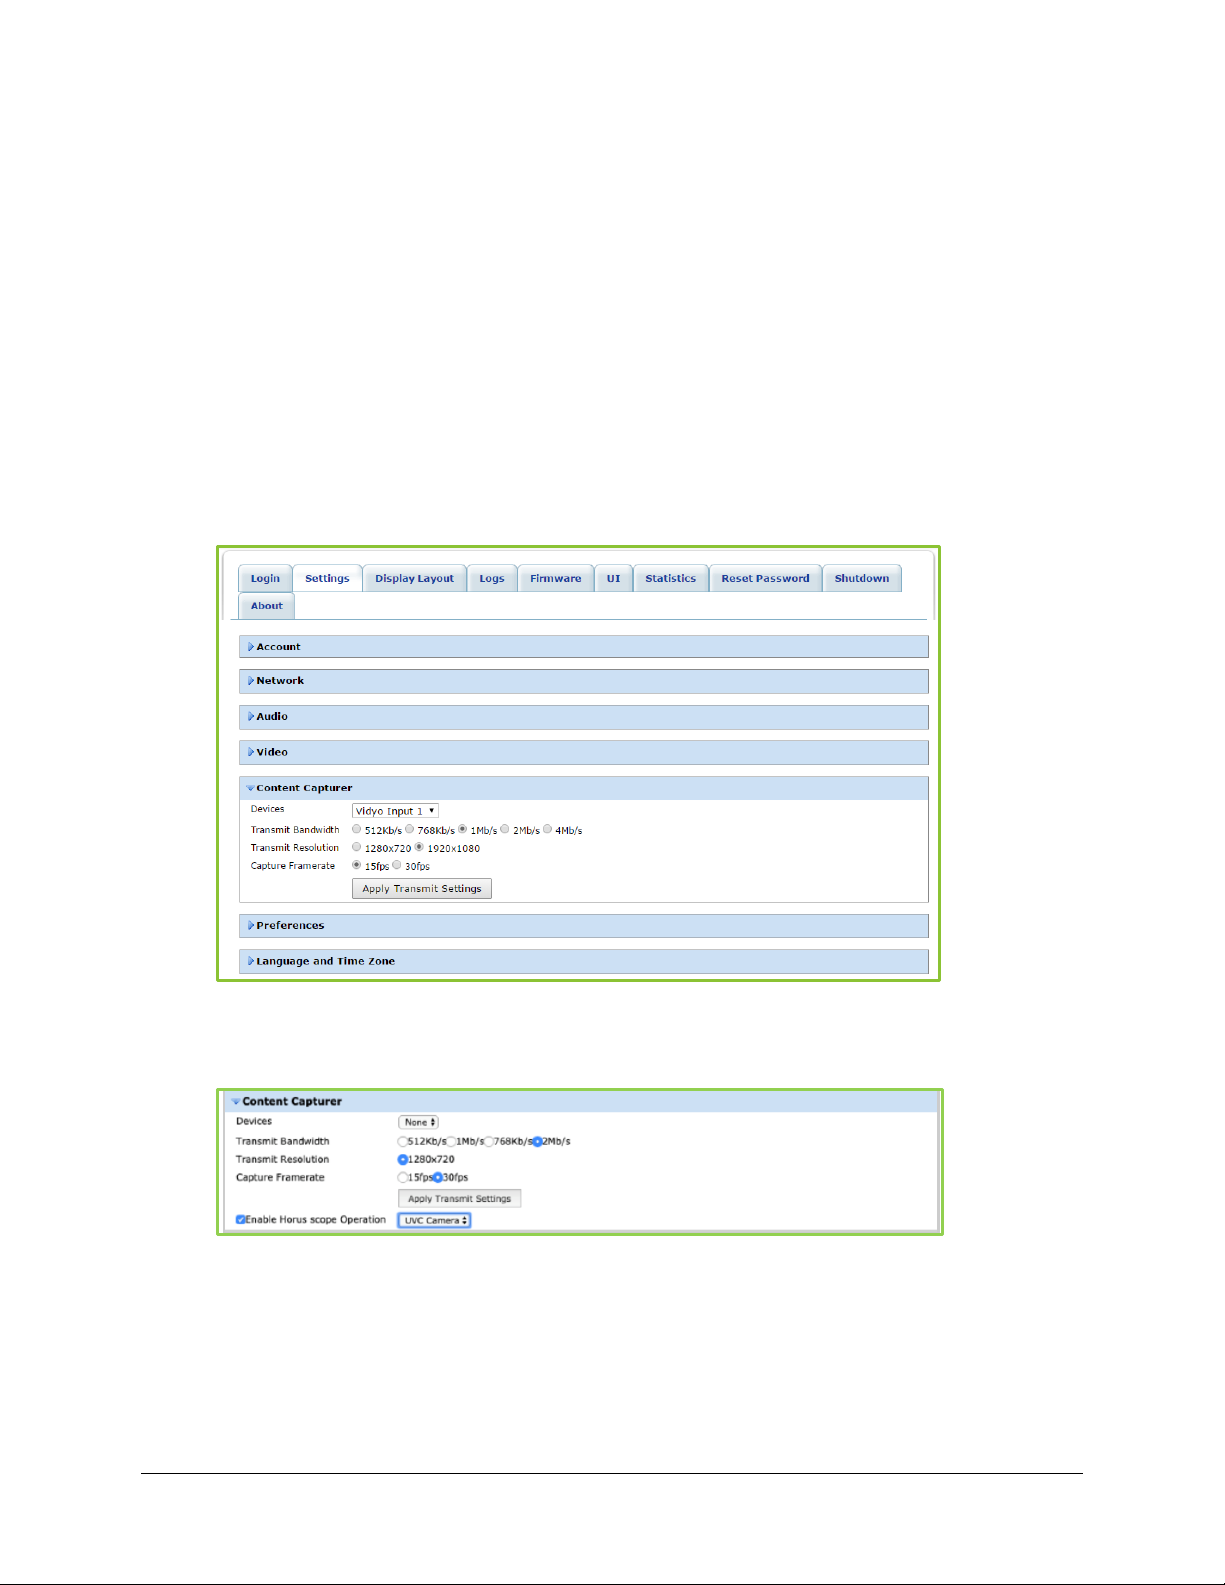
To configure the content capturer:
1. Click the
Settings
tab.
2. Click the blue triangle next to the words
Content Capturer
to view the content capturer
settings if needed. Note: Enable Horus scope operation checkbox is available only in
versions 19.2 and later.
3. Select the content capturing device from the Devices drop-down that the VidyoRoom will
use, or select None if no content capturing device will be used.
The options available depend upon which content capturing device you selected from the
Devices drop-down. In addition, depending upon which device you select, the other fields
in the Content Capturer section may or may not display.
2. Configuring the System Using the Admin UI
17
4. Select one of the Transmit Bandwidth radio buttons to set the maximum transmit
bandwidth of the device.
For the best audio/video projection experience, select 4Mb/s if available.
5. Select one of the Transmit Resolution radio buttons to set the transmit resolution of the
device.
The available options depend upon which Transmit Bandwidth you selected.
6. Select one of the Capture Framerate radio buttons to set the frames per second.
7. If applicable select the Enable Horus scope Operation checkbox and then select a camera
from the Enable Horus scope Operation drop-down. (This feature is only available in
version 19.2. and later).
8. Click Apply Transmit Settings.
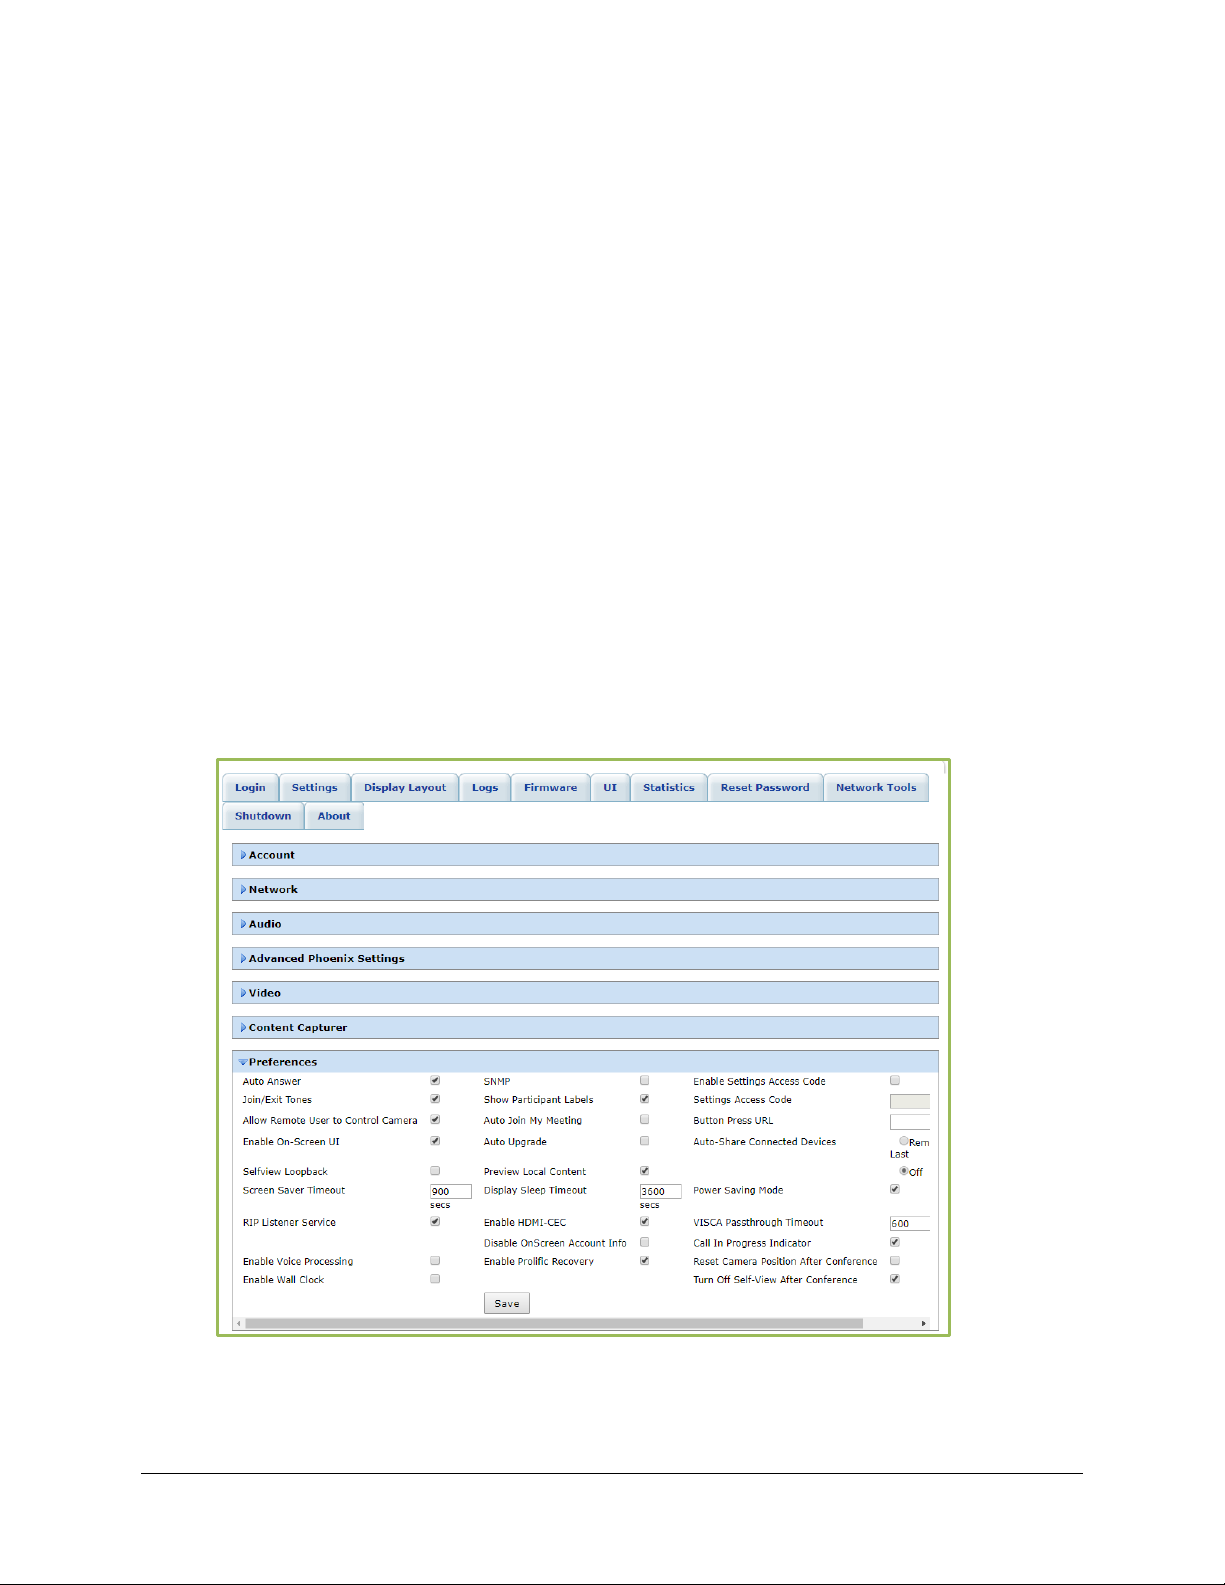
Configuring Preferences
To configure preferences:
1. Click the
Settings
tab.
Version 19.2.1 and Later with “Turn Off Self-View After Conference”
2. Configuring the System Using the Admin UI
18
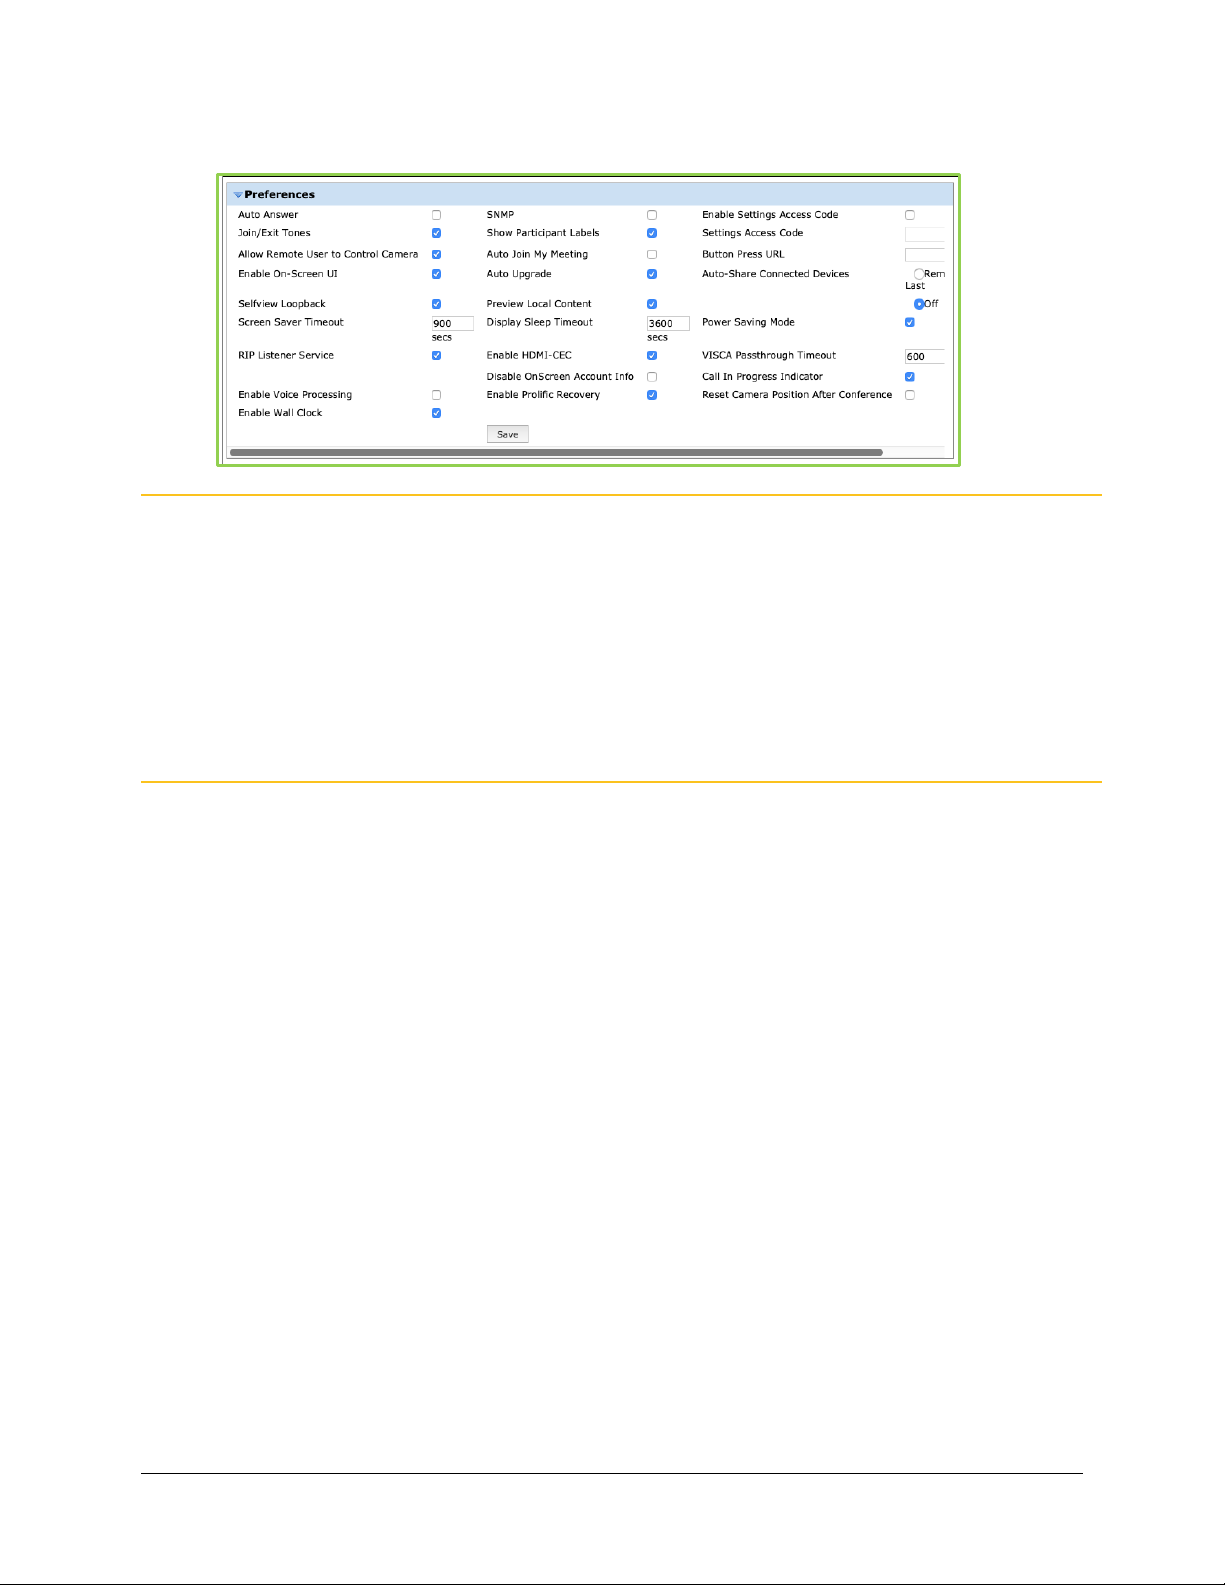
Version 19.2.0 and later (Enable Voice Processing)
Note Version 3.3x and prior will display “Enable Audio Processing” and version 19.2.0 and later will
display “Enable Voice Processing”. Version 19.2.1 and later will display, “Turn Off Self-View
After Conference.
Note When upgrading to version 19.2, you can select the 'Enable Voice Processing' checkbox in
the Preferences window if your VidyoRoom audio device has audio quality issues and
external voice processing is needed. First test your audio quality. Then, if you have an audio
quality issue, you can select this option. Next, determine the correct setting for "Enable Voice
Processing", and then test the audio device with this new setting. (If your audio is already
working well, you do not need to “Enable Voice Processing”).
2. Click the blue triangle next to the word
Preferences
to view the preference settings if
necessary.
3. Select the Auto Answer checkbox if you want the VidyoRoom to automatically answer
incoming calls.
4. Select the Join/Exit Tones checkbox if you want to hear a tone whenever someone joins or
exits a conference.
5. Select the Allow Remote User to Control Camera checkbox if you want to allow remote
users to control your camera.
For this option to work, the camera must be capable of pan, tilt, and zoom.
6. Select the Enable On-Screen UI checkbox if you want the VidyoRoom to display the on-
screen user interface.
7. Select the Selfview Loopback checkbox if you want to view the loopback of your self-view
from the VidyoRouter™ (as opposed to your local self-view) when you are the only one in
the conference.
8. Enter the number of seconds after which the screen saver will display in the Screen Saver
Timeout field, or enter 0 if you do not want the screen saver to display.
9. Select the RIP Listener Service checkbox if you want to enable the RIP listener service.

2. Configuring the System Using the Admin UI
19
Some corporate networks may have firewall rules that cause the VidyoRoom system to
scan for all available routes. As a result, the VidyoRooms can take up to five minutes to log
into the VidyoPortal after reboot. For such environments, you can disable the RIP Listener
Service to allow the VidyoRoom to log into the VidyoPortal as soon as it is up after reboot.
Note If you are running VidyoRoom version 19.2 and later, please proceed to step 11. If you are
running VidyoRoom version 3.3.x, proceed to step 10.
10. Configure the audio by doing the following: (Note: The 'Enable Audio Processing' will only
be visible for version 3.3.x and prior; otherwise, version 19.2.0 and later will only see the
'Enable Voice Processing' checkbox):
◼ Select the Enable AEC checkbox if you want to enable Acoustic Echo Cancellation
(AEC).
AEC removes echoes, which results in clearer audio.
◼ Selecting this checkbox improves the audio quality by removing echo (AEC), removing
unwanted background noise (noise suppression), and additional audio improvements.
Note Since the ability to configure AEC existed in the product before Audio Processing was added
to the
Settings
page, the two options remain configurable for the user via this page.
However, because AEC is a component of Audio Processing, Vidyo highly recommends
leaving both checkboxes in the same state (that is, either both selected or neither selected).
11. Select the Enable Voice Processing checkbox if your VidyoRoom audio device has audio
quality issues and external voice processing is needed. Then, determine the correct
setting for "Enable Voice Processing", and then test the audio device with this new setting.
(If your audio is already working well, you do not need to “Enable Voice Processing”).
NOTE: When upgrading to version 19.2.0, the system will not display the “Enable Audio
Processing” checkbox; however, the system will automatically save your last settings in the
configuration file as enabled (checkbox selected) or disabled (checkbox not selected).
12. Select the Enable Wall Clock checkbox if you want a clock to be displayed at the bottom
center of the screen during video calls.
13. Select the SNMP checkbox if you want to enable the SNMP interface.
When enabled, a third party can use the SNMP protocol to configure and control
VidyoRoom with their UI.
14. Select the Show Participant Labels checkbox if you want to display the participants’ names
on-screen during conferences.
 Loading...