

Page 1
EnGenius Quick Start Guide ESR-1221 Wireless Broadband Router
Quick Start Guide v.1.0 ESR-1221 Wireless Broadband Router 1
Please refer to the User’s Manual in the CD-ROM for complete instructions.
he ESR-1221 Wireless Broadband Router operates
seamlessly in the 2.4 GHz frequency spectrum supporting the
802.11b (2.4GHz, 11Mbps) and the newer, faster 802.11g
(2.4GHz, 54Mbpswireless standard. High output power and high
sensitivity can extend range and coverage to reduce the roaming
between APs to get more stability wireless connection. It also can
reduce the expense of equipment in the same environment. To
protect your wireless connectivity, this device can encrypt all
wireless transmissions through 64/128-bit WEP data encryption
and also supports WPA2/WPA/802.1x for powerful security
authentication. The MAC addresses filter let you select exactly
which stations should have access to your network.
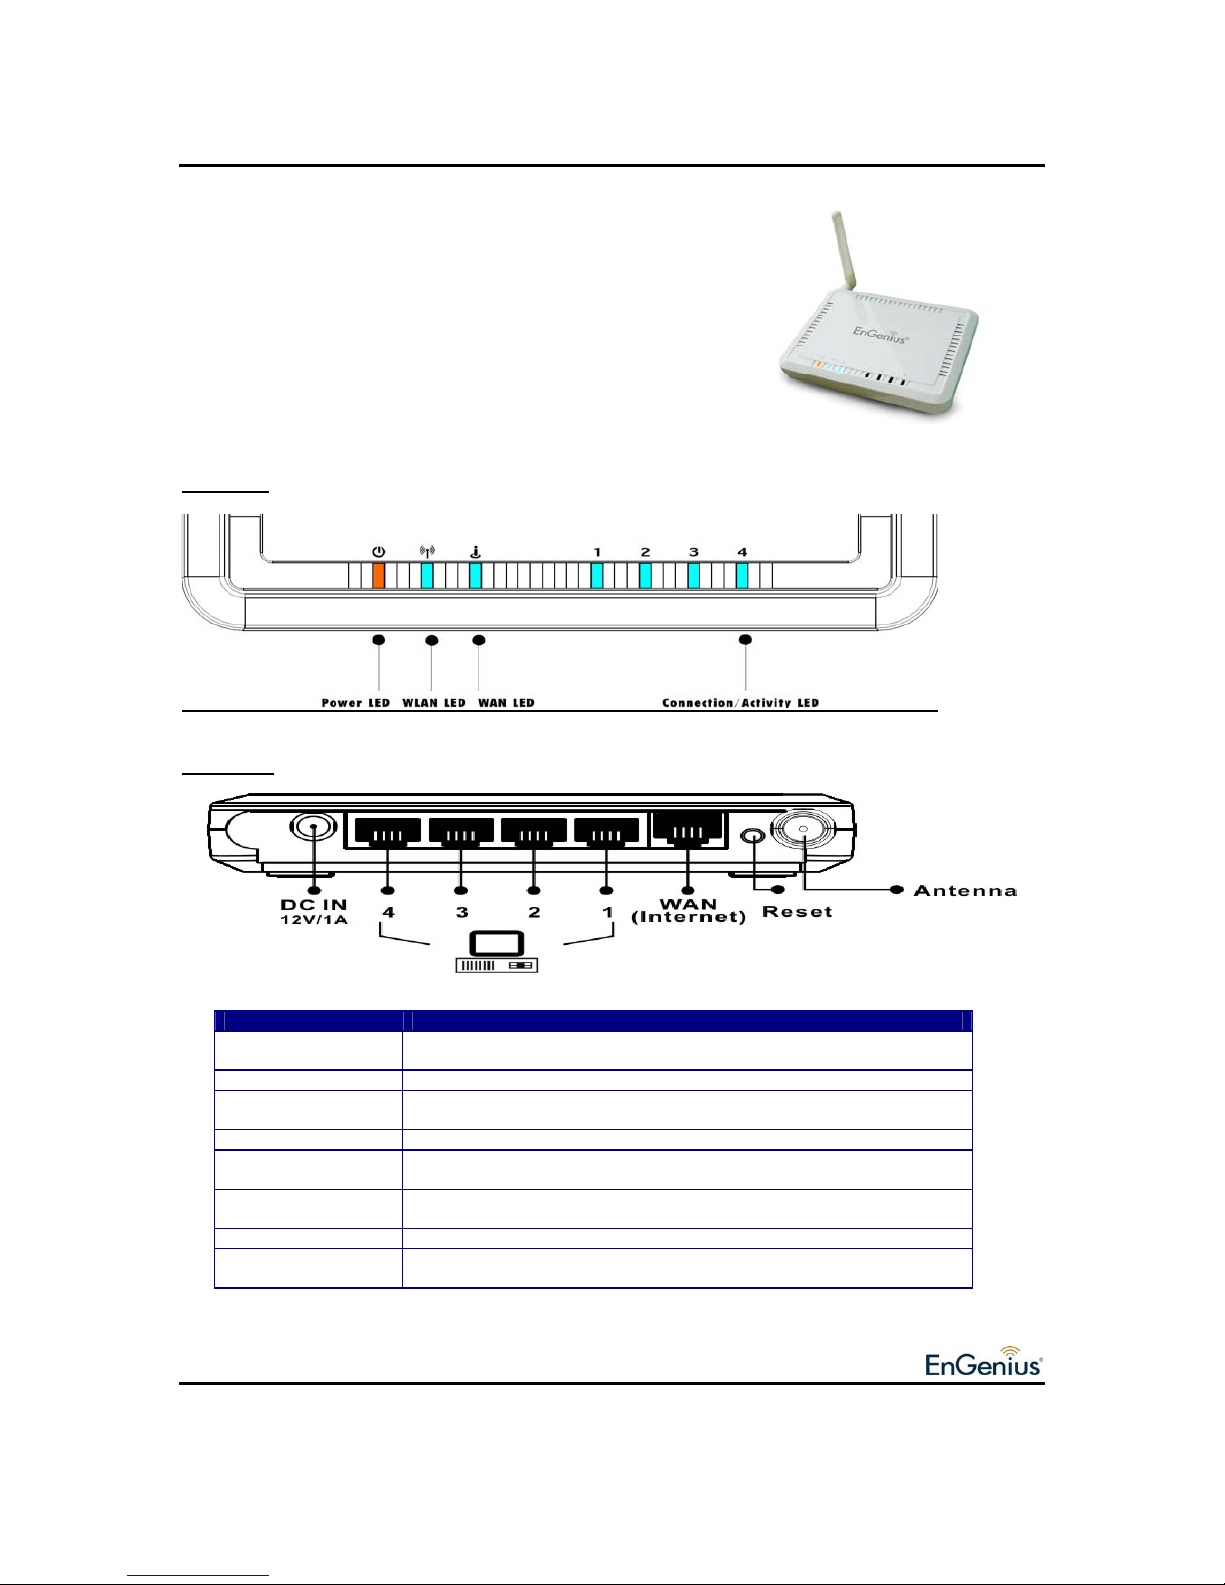
Top Panel
Real Panel
Label Description
LAN Ports (1 – 4) Use an Ethernet cable to connect each port to a computer on your Local
Area Network (LAN).
WAN Port Use an Ethernet cable to connect this port to your WAN router.
DC Connector Use the power cable and connect the adapter to the power socket on the
wall, and the DC inlet into the DC connector.
Antenna Connector Connect the omni-directional antenna to the SMA connector.
Connection / Activity
LED
This LED will light up once an Ethernet cable is connected to one of the
LAN ports.
WAN LED This LED will light up once an Ethernet cable is connected to WAN
(Internet) port.
WLAN LED This LED will light up once the RF (wireless LAN) feature is enabled
Power LED This LED will light up once the power cable is connected to the DC
connector.
T
Page 2
EnGenius Quick Start Guide ESR-1221 Wireless Broadband Router
Quick Start Guide v.1.0 ESR-1221 Wireless Broadband Router 2
Please refer to the User’s Manual in the CD-ROM for complete instructions.
Hardware Installation
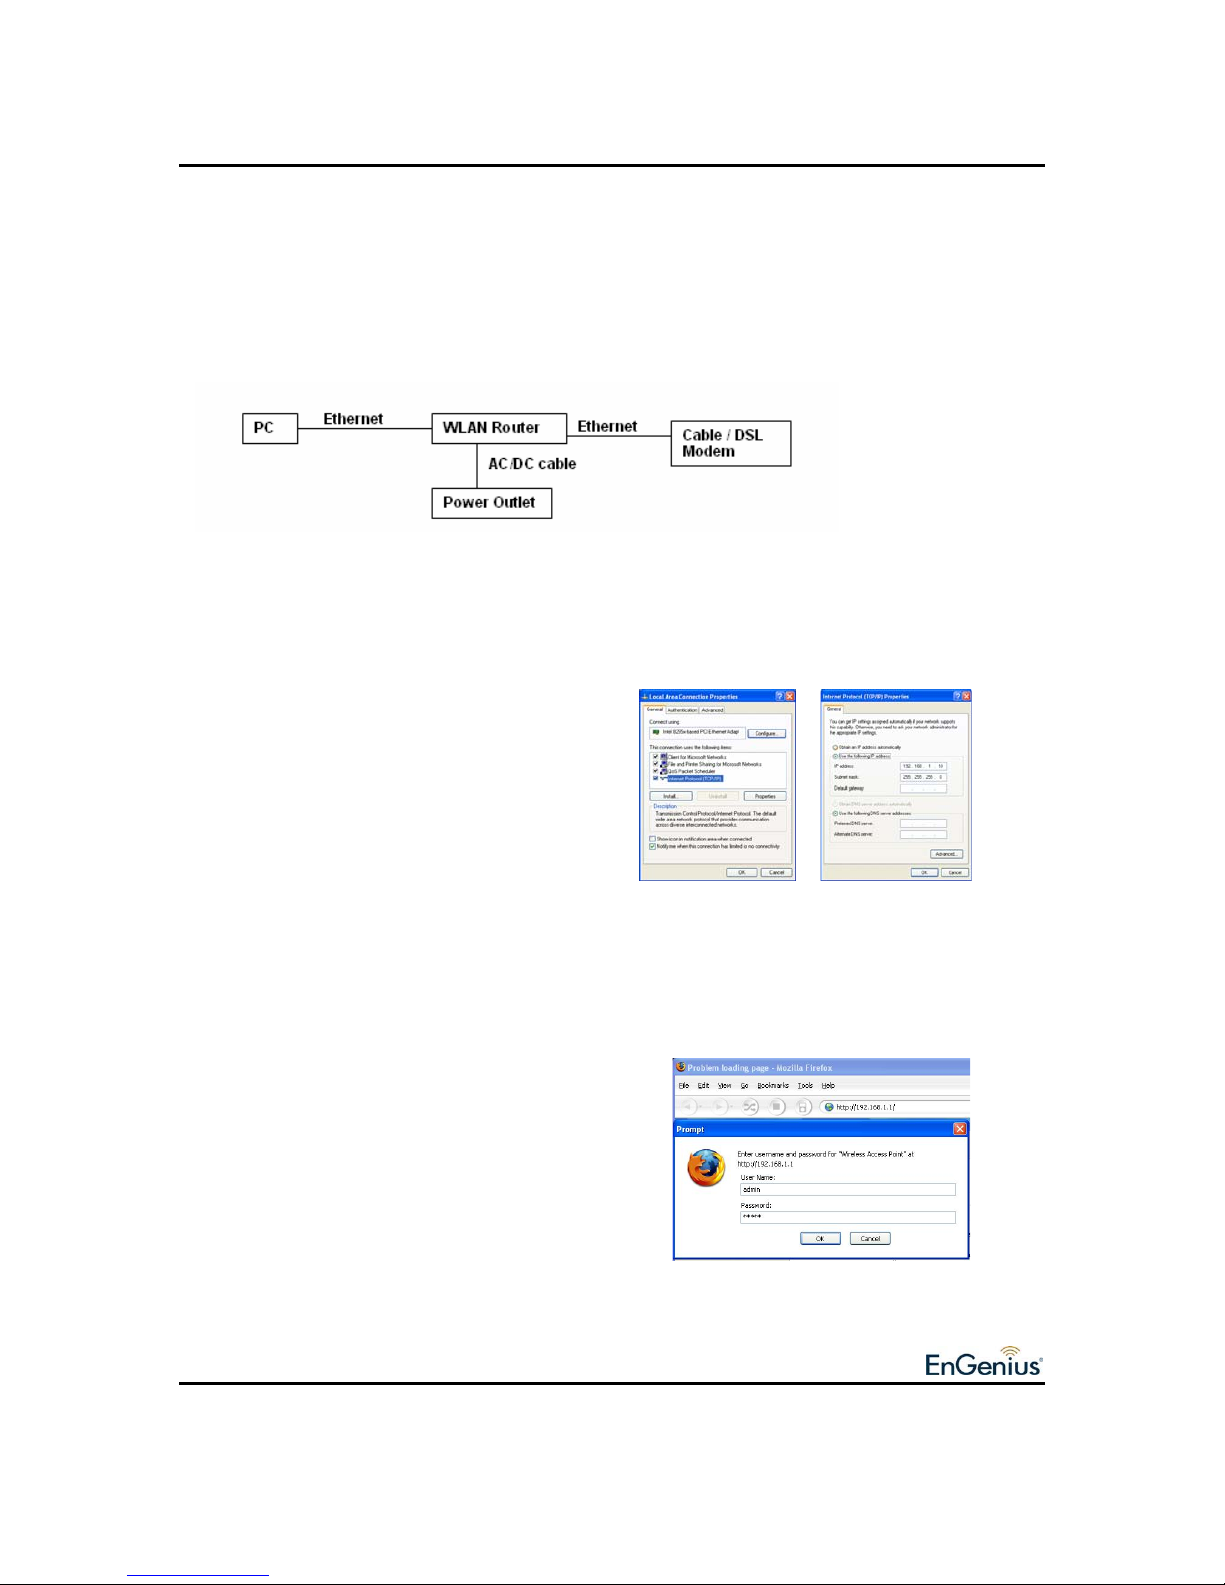
1. Place the unit in an appropriate place after conducting a site survey.
2. Plug one end of the Ethernet cable into the LAN port of the device and another end into your PC/Notebook.
3. Plug one end of another Ethernet cable to WAN port of the device and the other end into you cable/DSL
modem (Internet)
4. Insert the DC-inlet of the power adapter into the port labeled “DC-IN” and the other end into the power socket
on the wall.
IP Address Configuration
The default IP address of the device is 192.168.1.1 In order to log into this device, you must first configure the
TCP/IP settings of your PC/Notebook.
1. In the control panel, double click Network
Connections and then double click on the
connection of your Network Interface Card (NIC).
You will then see the following screen.
2. Select Internet Protocol (TCP/IP) and then click
on the Properties button. This will allow you to
configure the TCP/IP settings of your
PC/Notebook.
3. Select Use the following IP Address radio
button and then enter the IP address (192.168.1.21) and
subnet mask (255.255.255.0). Ensure that the IP address and subnet mask are on the same subnet as the
device.
4. Click on the OK button to close this window, and once again to close LAN properties window.
Logging In
1. To configure the device through the web-browser,
enter the IP address of the device (192.168.1.1) into
the address bar of the web-browser and press Enter.
2. After connecting to the IP address, the web-browser
will display the login page. Specify admin for both the
User Name and Password and then click on the
Login or OK button.
3. Once you have logged in, you man configure the
WAN, LAN and Wireless settings. Please refer to the
user’s manual in the CD-ROM to configure these
parameters.
 Loading...