

EnGenius 11a/b/g MESH Outdoor Router Quick Start Manual
Quick Start Guide 11a/b/g MESH Outdoor Router
Quick Start Guide v.1.0 11a/b/g MESH Outdoor Router 1
Please refer to the User’s Manual in the CD-ROM for complete instructions.
EnGenius Mesh Outdoor Router is designed with
IEEE802.11a/b/g standards and addressed on providing high
performance mesh network. The product encased in the IP-68
protection enclosure and delivers the maximum scalability, high
reliability at outdoor environment. Compared with expensive
T1/E1 leased lines, the Mesh network offers a cost-effective lastmile connection.
EnGenius Mesh Outdoor Router provides wireless connection
over self-adaptation mesh backhaul (5GHz). The mesh AP can
operate at both 2.4GHz for long range and 5GHz to reduce the
frequency interference. The detachable antenna design allows
users to use various antennas for different deployment.
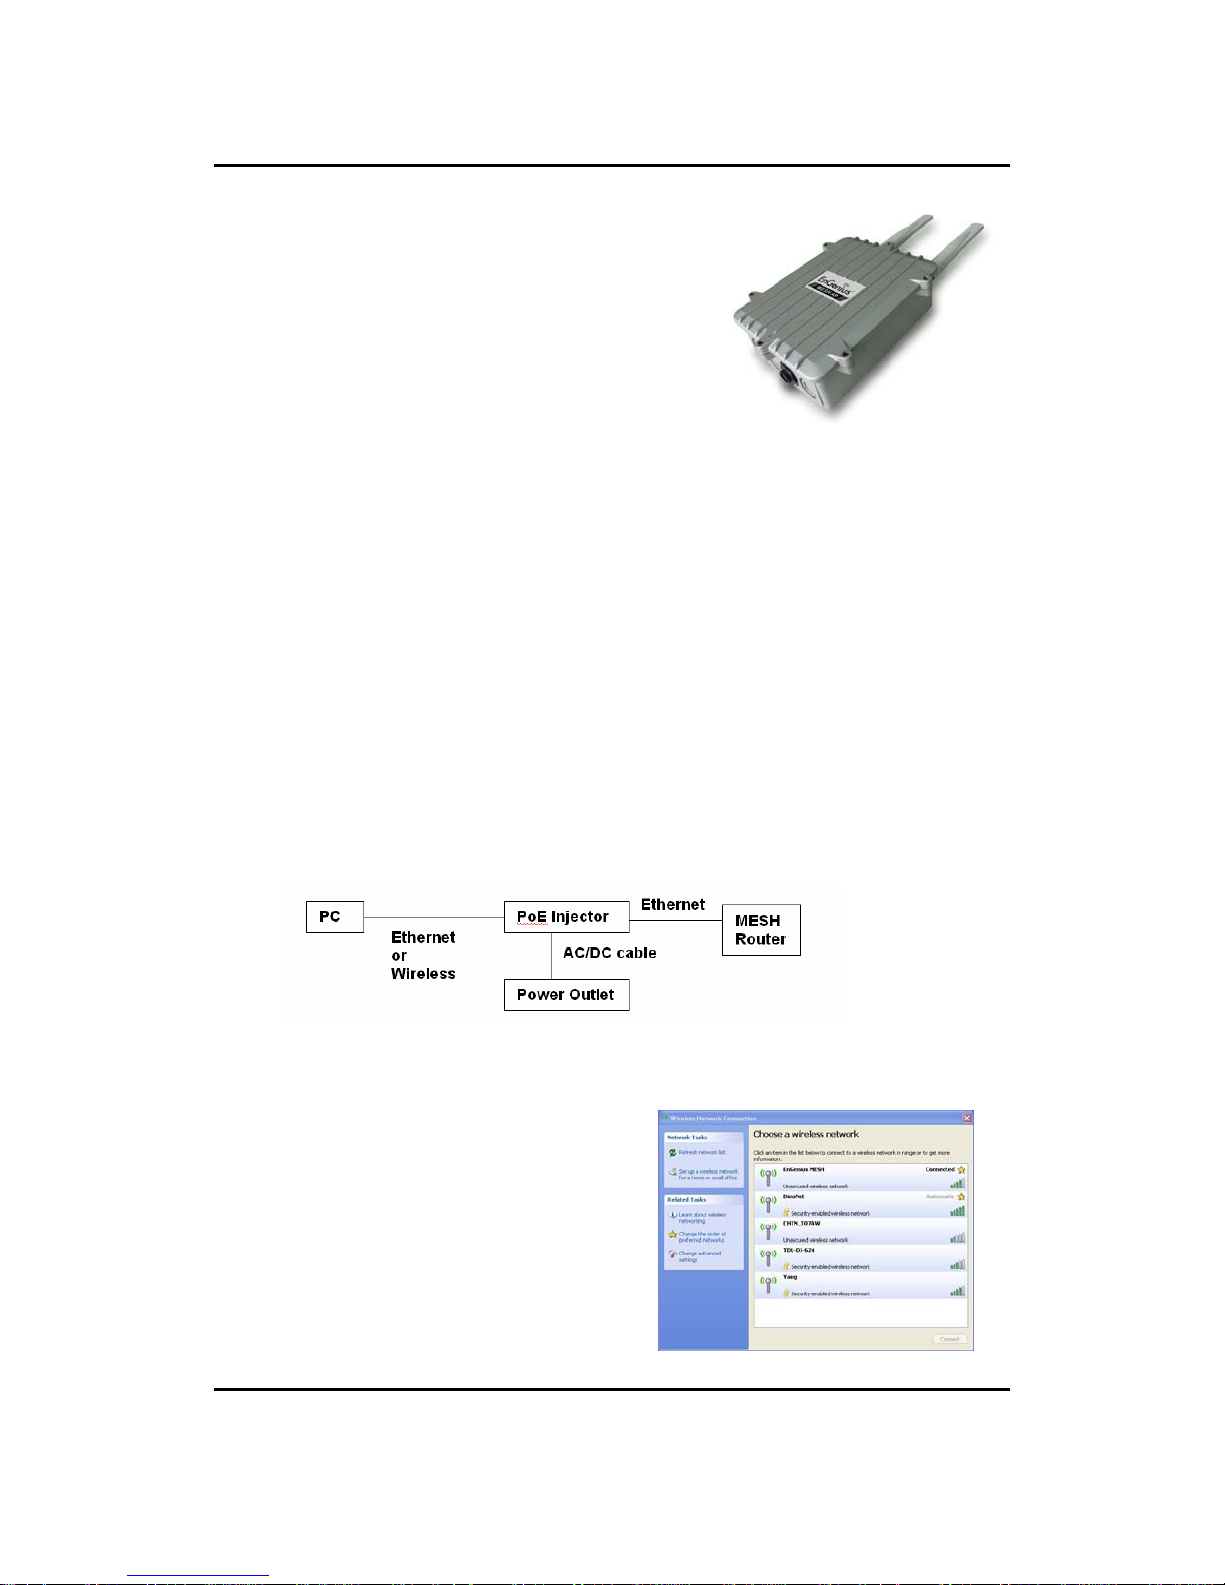
Hardware Installation
1. Tighten the two N-type Dual Band antennas onto the top of the device.
2. Plug one end of the Ethernet cable into the AP port of the PoE Injector and the other end into the
Bridge/AP.
3. Place one end of another Ethernet cable into the Network port of the PoE Injector and another end
into your PC/Notebook.
4. Insert the DC-inlet of the power adapter into the port labeled “DC-IN” and the other end into the
power socket on the wall.
5. The DHCP server function is enabled on the device, and your PC will receive an IP address from
the device. Ensure that the TCP/IP settings on your computers are configured as Obtain IP
address automatically.
6. Place the unit in an appropriate place after conducting a site survey. Refer to the mounting
instructions in the user’s manual.
This diagram depicts the hardware configuration
Logging In – Web Configuration
1. The MESH router must be configured through
the wireless interface. Associate your PC to the
MESH router by selecting EnGenius MESH
from the list. The MESH router will
automatically assign an IP address to the PC.
2. Once you have connected to the MESH router
through the wireless interface. Check the IP
address that has been assigned. In Microsoft
Windows, click Start, Run, and type cmd in the
address bar. This will launch the MS-DOS
window.
Quick Start Guide 11a/b/g MESH Outdoor Router
Quick Start Guide v.1.0 11a/b/g MESH Outdoor Router 2
Please refer to the User’s Manual in the CD-ROM for complete instructions.
3. In the MS-DOS window, type ipconfig. This will display the IP address, subnet mask, and default
gateway.
4. The IP address of the default gateway is the IP address of the
MESH router.
Ethernet Adapter Wireless Network Connection
Connection Specific DNS Suffix: EnGenius
IP Address: 172.20.215.254 (this is the IP address that
has been assigned to the PC)
Subnet Mask: 255.255.255.0
Default Gateway: 172.20.215.1 (This is the IP address
of the MESH Router)
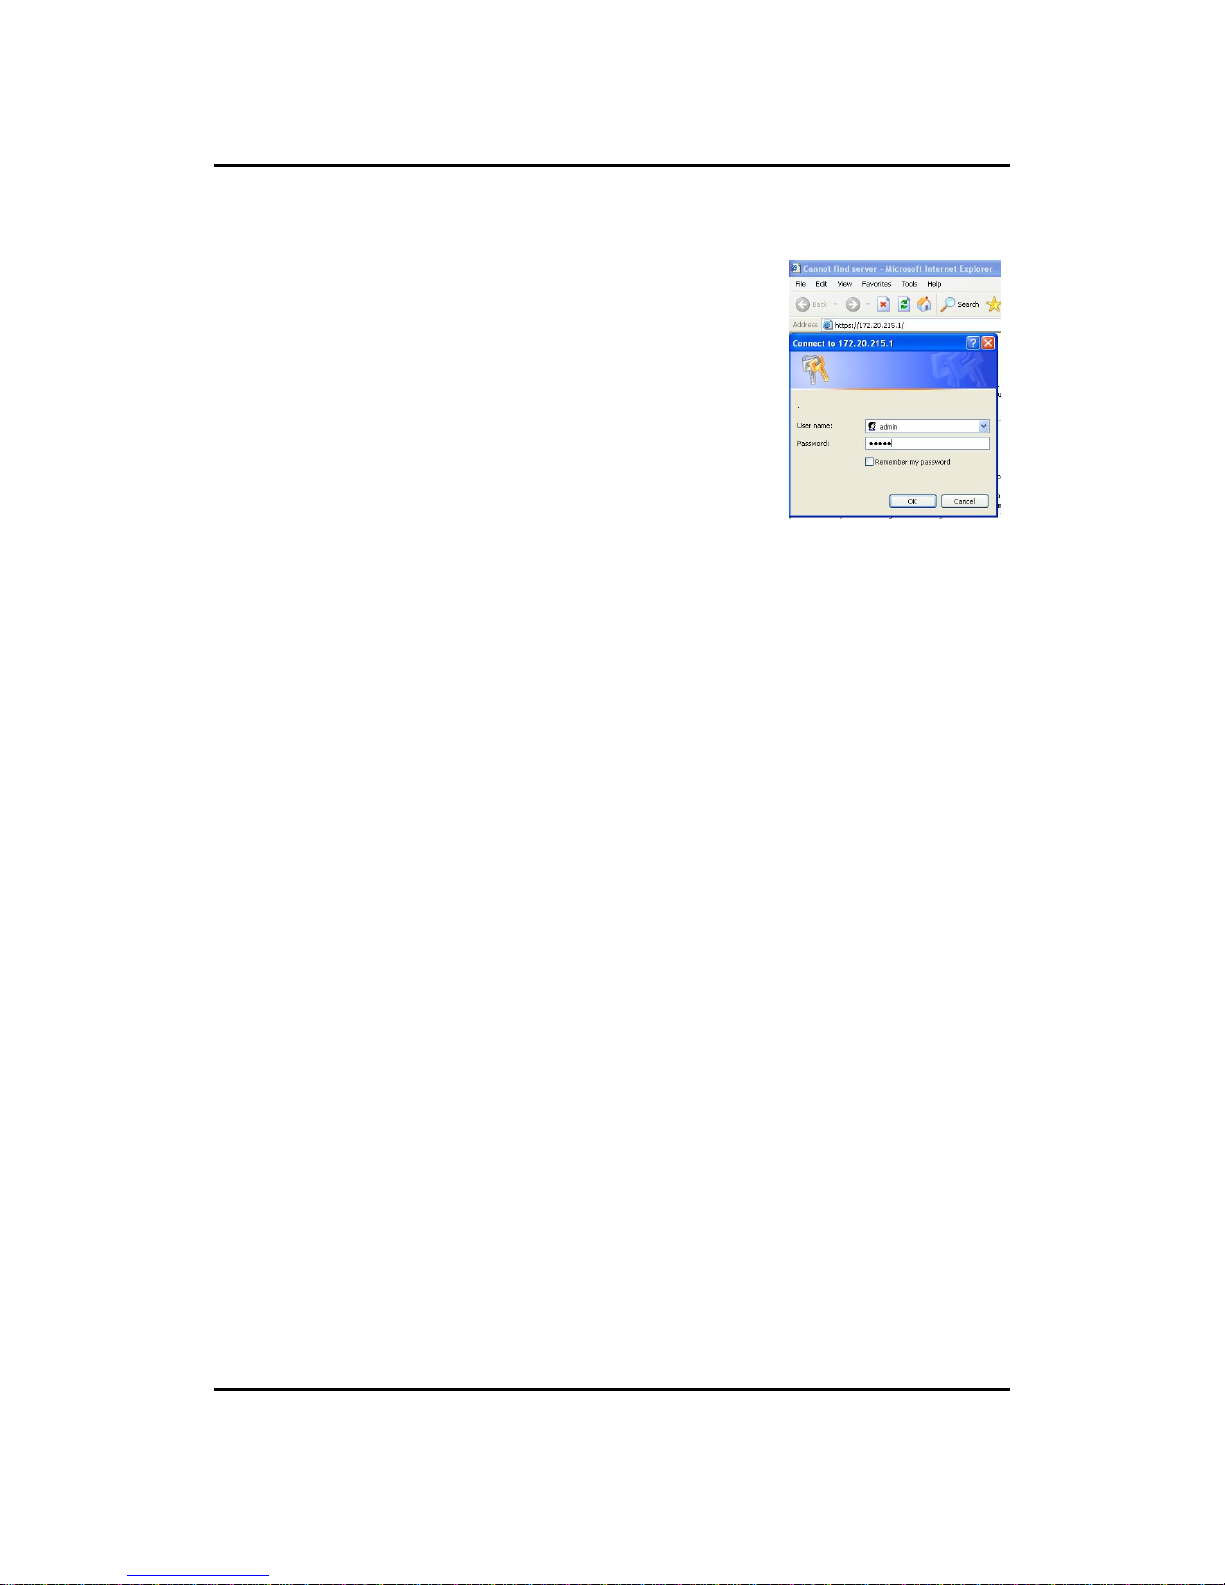
5. Launch the web-browser and specif y the IP address followed by
https://. For example, you would type https://172.20.215.1
6. After connecting to the IP address, specify the admin as the User
Name and admin as the password. Then click on the OK button.
WAN Settings
The device offers several types of WAN connections in order to connect to the Internet.
Static IP Address
Dynamic IP Address (DHCP Client)
PPPoE
Click on the WAN Type link under the Network drop-down menu.
WAN – Static IP
1. Select the Static radio button, and then click on the Save Changes button.
2. IP Address: Specify the IP address for this device, which is assigned by your ISP.
3. Subnet Mask: Specify the subnet mask for this IP address, which is assigned by your ISP.
4. Click on the Save Changes button to store and changes and then reboot the device in order for
the changes to take effect.
WAN – DHCP Client (Dynamic IP)
1. Select the DHCP radio button, and then click on the Save Changes button.
2. The configuration has been saved; please reboot the device in order for the changes to take effect.
WAN – PPPoE
1. Select the PPPoE radio button, and then click on the Save Changes button.
2. Active: Choose to enable or disable the WAN type.
3. User Name: Specify the user name which is provided by your ISP.
4. Password: Specify the password which is provided by your ISP, and then verify it once again in the
next field.
5. Click on the Save Changes button to store and changes and then reboot the device in order for
the changes to take effect.
Wireless Settings
Click on the WLAN1 link under the Network drop-down menu.
 Loading...