

Page 1

®
EV-Y6221-A3WQ
4-in-1 HD TVI, CVI, AHD, Analog
Covert PIR Camera
Manual
Features:
Select between multiple formats:
TVI, CVI, AHD, and Analog
Joystick OSD Control
1080p Resolution
Camera is hidden in a non-functioning
PIR sensor housing
1
/
2.9
" 2MP Sony CMOS
3.7mm Covert pinhole lens
18 Covert IR LEDs for discreet monitoring
D-WDR (Digital Wide Dynamic Range)
2DNR (2D Digital Noise Reduction)
3DNR (3D Digital Noise Reduction)
Page 2
ENFORCER 4-in-1 HD TVI, CVI, AHD, Analog Covert PIR Camera
2 SECO-LARM U.S.A., Inc.
1x Camera 2x Mounting screws 1x Mounting bracket 1x Manual
1x DC Plug with Terminal Block 2x Screw anchors 1x Mounting bracket ball
Parts List:
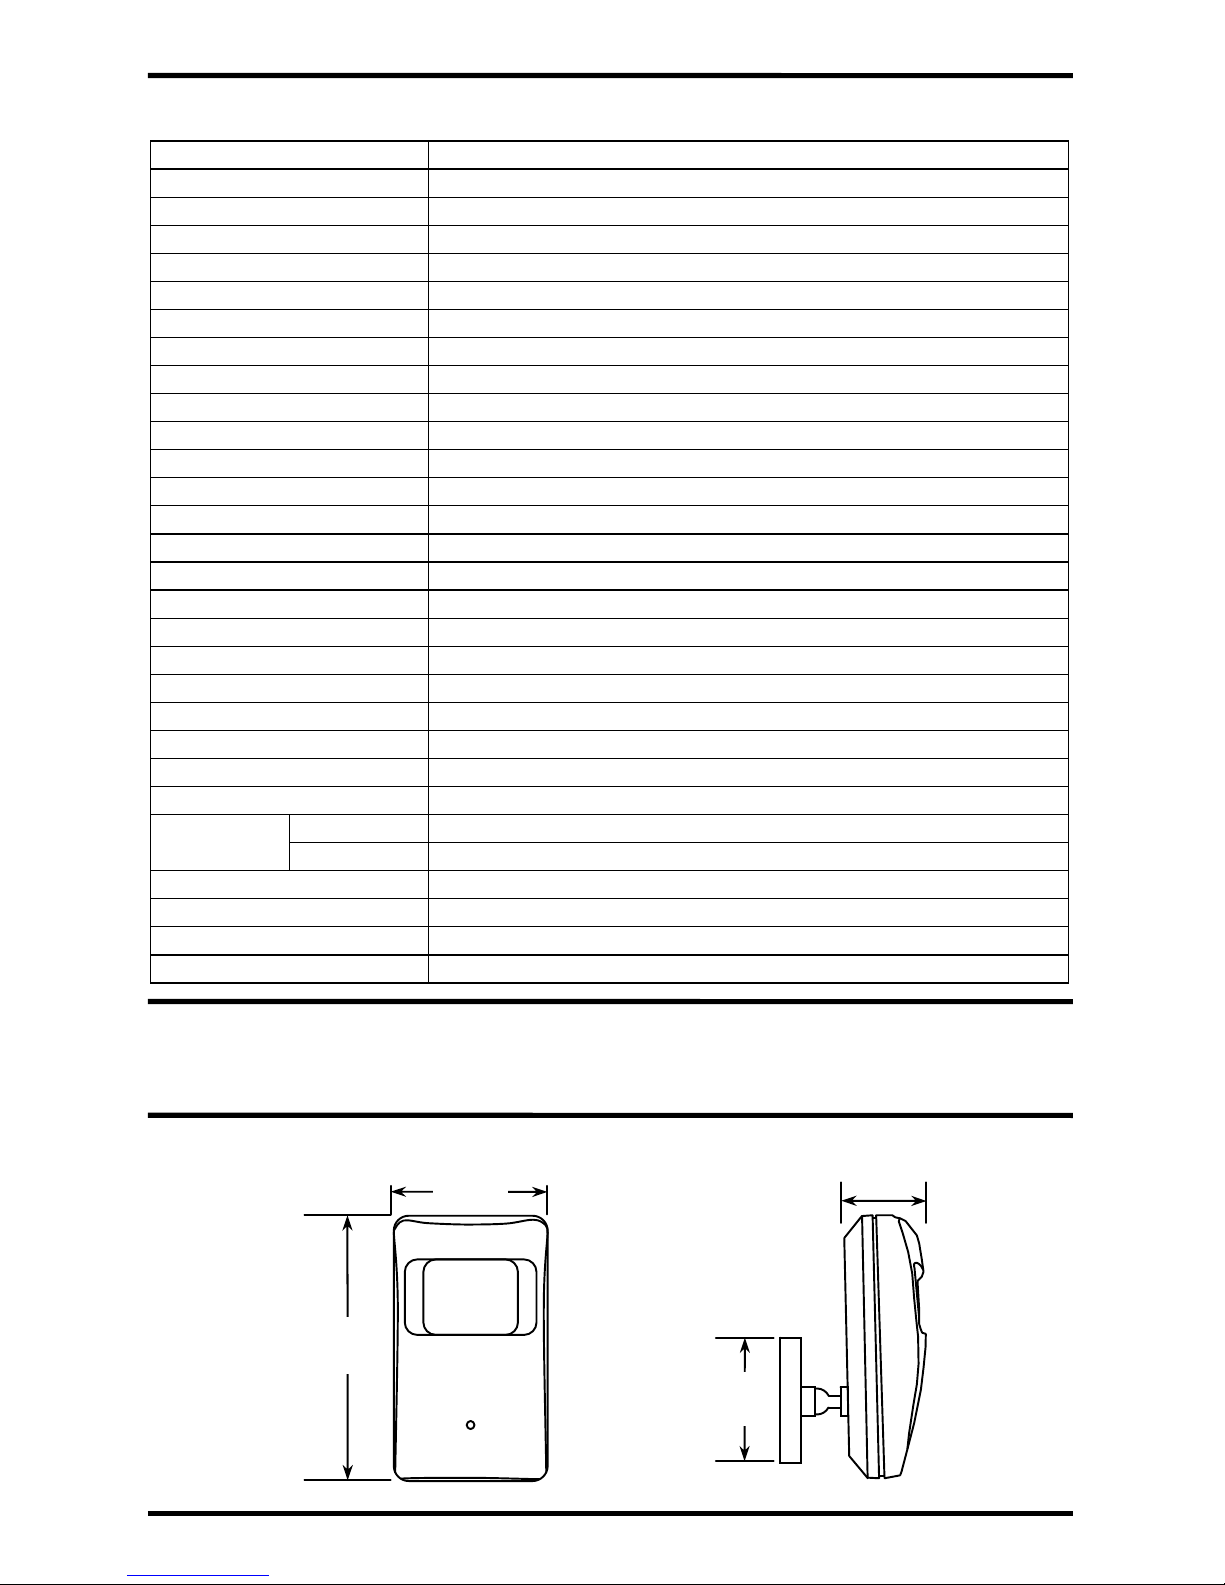
Dimensions:
Specifications:
Type Covert PIR Camera
Formats TVI (Default) / CVI / AHD / Analog
CMOS
1
/
2.9
" 2MP Sony CMOS
Resolution (HD) 1920x1080
TV Lines (Analog) 2000TVL
2DNR Yes
3DNR Yes
DWDR Yes
OSD (On-Screen Display) Yes
Cable OSD control Yes
Video output
1.0Vp-p Complex video output
Megapixels 2MP
Lens 3.7mm Pinhole lens
Viewing angle 85°
# of IR LEDs 18 Covert (940nm)
IR Range Up to 50ft (15m)
FPS 50-60
F Stop 1.8
Minimum illumination (IR On) 0 Lux
Gamma correction 0-1
S/N Ratio >46dB
Gain control Yes
White balance Auto, Day & Night
Shutter control AES (Auto Electric Shutter), 1/60~1/100,000 s
Current draw
(IR On)
350mA
(IR Off)
60mA
Operating voltage 12VDC
Operating temperature -20°~140° F (-28°~60° C)
Dimensions 41/16"x23/8" x15/16" (104x60x34 mm)
Weight 12.3-oz (350g)
15/16" (34mm)
23/8"
(
60mm)
2"
(
52mm)
41/16"
(104mm)
Page 3
ENFORCER 4-in-1 HD TVI, CVI, AHD, Analog Covert PIR Camera
SECO-LARM U.S.A., Inc. 3
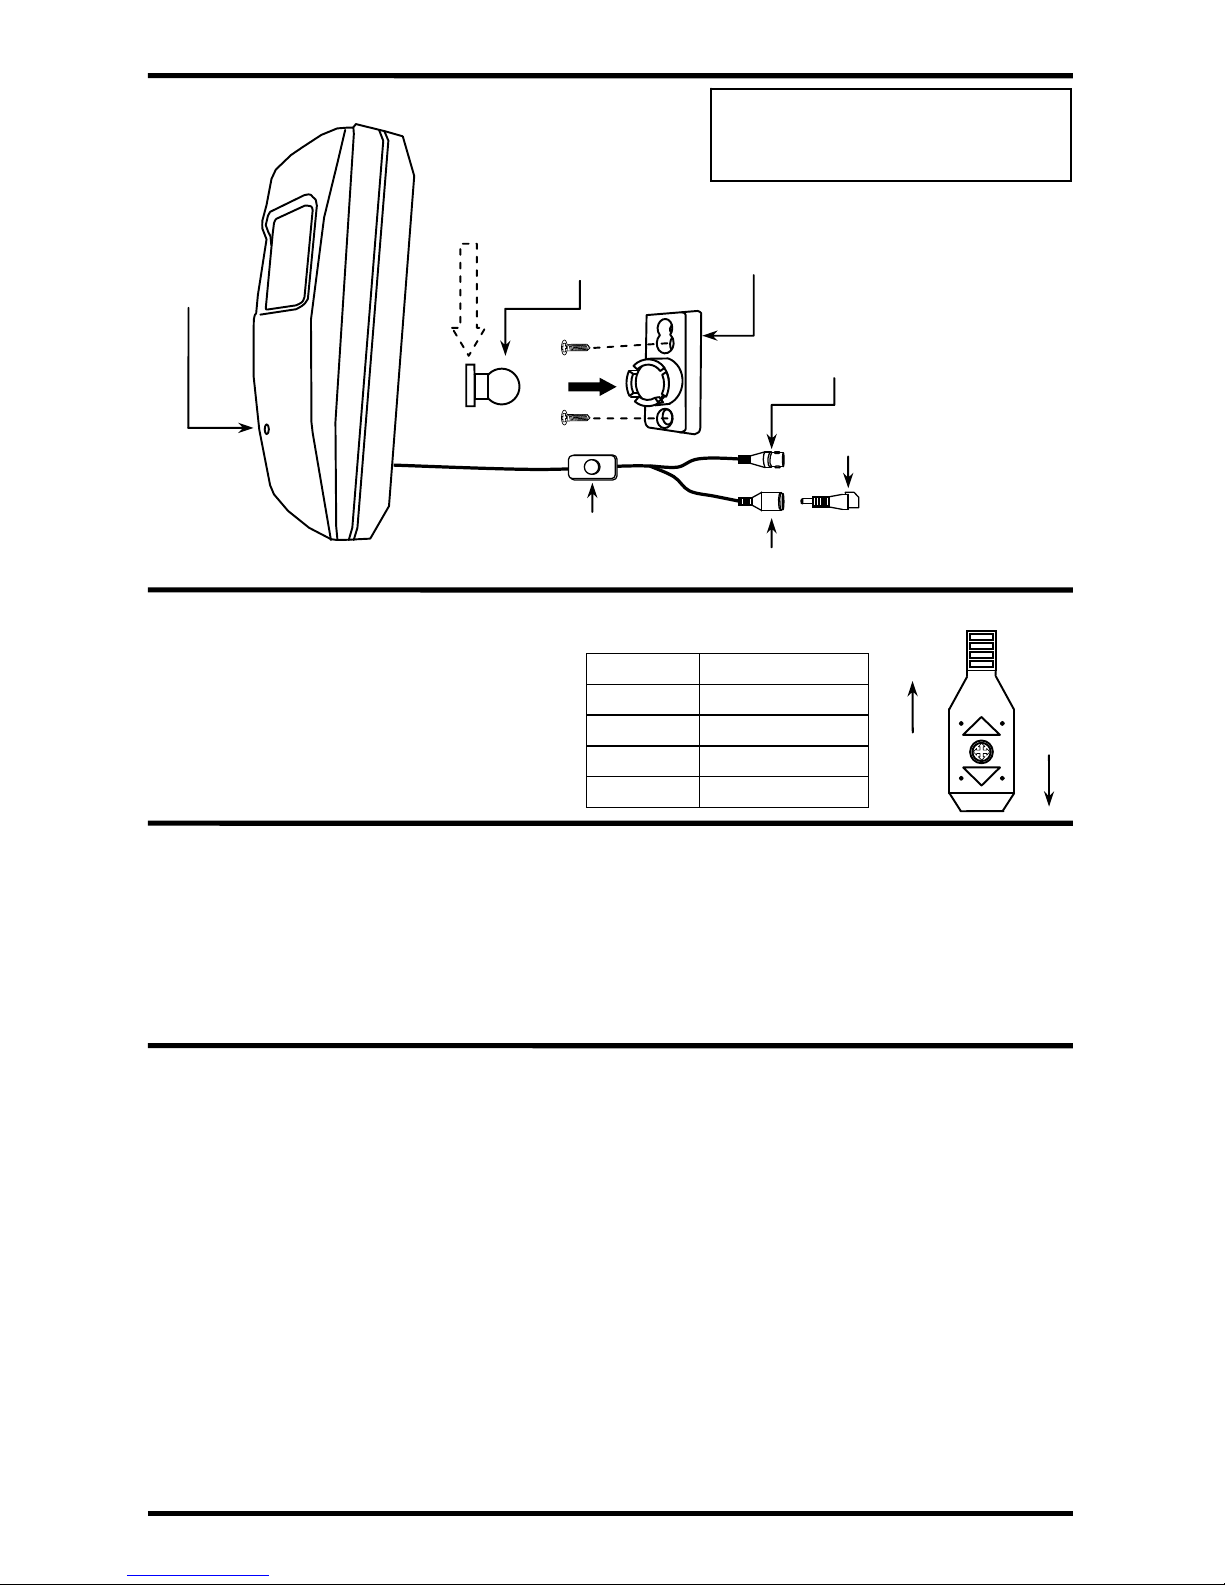
Overview:
DC Jack
OSD Controller Settings:
To set format via the OSD controller, press
the controller in the direction of the desired
setting, hold for 5 seconds, and release
when the camera restarts.
See chart to the right.
Direction Format Setting
Up CVI
Down TVI
Left CVBS
Right AHD
Camera
Power
UP
DN
Important:
Do not cut any wires as the warranty will
be voided.
Female BNC connector
DC Plug with terminal block
Camera
pinhole
Mounting bracket
Slide camera
downward onto
the mounting
bracket
OSD Controller
Mounting bracket ball
Before starting:
1. Use the camera within the given
temperature and voltage limits.
2. Do not point the camera at the sun. Heat
can damage the camera even when not
in use.
3. Do not subject the camera to strong
vibrations.
4. Do not mount the camera in areas exposed
to radiation, stron
g
magnetic fields, or strong
electrical signals.
Installation:
1. Run a 12VDC power supply wire and a
video cable with a male BNC connector
through the wall to where the camera will
be mounted.
2. Connect the camera’s video and power
cables.
3. Temporarily mount the camera to test its
function and display.
4. Do a preliminary test of the camera to
ensure it will work properly. Partially screw
a screw into the wall where the top of the
bracket should go. Slide the bracket onto
the screw. Finish securing the top of the
bracket to the wall.
5. Secure the bottom of the bracket to the wall.
6. Attach the mounting bracket ball to the
mounting bracket by gently pushing the ball
into the bracket.
7. Attach the camera to the assembled bracket
by sliding the camera downward.
8. Do a final test of the video camera and
monitor.
9. Program the camera if needed via the
attached OSD joystick.
NOTE: For the OSD manual, visit
www.seco-larm.com.
Page 4

ENFORCER 4-in-1 HD TVI, CVI, AHD, Analog Covert PIR Camera
4 SECO-LARM U.S.A., Inc.
IMPORTANT: Users and installers of this product are responsible for ensuring this product complies with all national,
state, and local laws and statutes related to monitoring and recording audio and video signals. SECO-LARM will not be
held res
p
onsible for the use of this product in violation of any current laws or statutes.
NOTICE: The SECO-LARM policy is one of continual development and improvement. For that reason, SECO-LARM
reserves the right to change specifications without notice. SECO-LARM is also not responsible for misprints. All trademarks
are the property of SECO-LARM U.S.A., Inc. or their respective owners. Copyright © 2017 SECO-LARM U.S.A., Inc.
A
ll
rights reserved.
WARRANTY:
This SECO-LARM product is warranted against defects in material and workmanship while used in normal
service for two (2) years from the date of sale to the original customer. SECO-LARM’s obligation is limited to the repair or
replacement of any defective part if the unit is returned, transportation prepaid, to SECO-LARM. This Warranty is void if
damage is caused by or attributed to acts of God, physical or electrical misuse or abuse, neglect, repair or alteration,
improper or abnormal usage, or faulty installation, or if for any other reason SECO-LARM determines that such equipment
is not operating properly as a result of causes other than defects in material and workmanship. The sole obligation of
SECO-LARM and the purchaser’s exclusive remedy, shall be limited to the replacement or repair only, at SECO-LARM’s
option. In no event shall SECO-LARM be liable for any special, collateral, incidental, or consequential personal or property
damage of any kind to the purchaser or anyone else.
SECO-LARM
®
U.S.A., Inc.
16842 Millikan Avenue, Irvine, CA 92606 Website: www.seco-larm.com
Phone:
(
949) 261-2999 | (800) 662-0800 Email: [email protected]
®
PICVN3
MI_EV-Y6221-A3WQ_170621.docx
The screen is black
Check that the camera is powered up
Check that the power supply’s polarity is correct
Check that the monitor is powered up
Check that the video cable connecting the camera to the
monitor is connected properly
The image is foggy or washed out
at night
Check that there are no objects very close to the camera
Check that there are no highly reflective objects in the scene
The screen image is dim
Clean the lens using a soft, clean cloth
Check that the light source is adequate
The screen image has poor contrast
Adjust the monitor’s contrast knob
Change the position of the camera
The screen image flickers
Change the position of the camera, check cables and
format setting
The screen image is distorted
Change the position of the camera, check cables and
format setting
The camera case is hot
Check that the correct power supply is in use
IR LEDs do not turn on
Check that the correct power supply is in use
WARNING: Stop using the camera if you see a malfunction such as smoke or unusual heat, as it could cause fire or electric
shock. Do not open the case of this device, as there are no user-serviceable components inside.
Do not cut any wires as the warranty will be voided.
FCC COMPLIANCE STATEMENT
This device complies with Part 15 of the FCC Rules. Operation is subject to the following two conditions: (1) this device
may not cause harmful interference, and (2) this device must accept any interference received, including interference that
may cause undesired operation.
Troubleshooting:
 Loading...