

Page 1
User Guide
Page 2

Contents
1. Copyrights........................................................................10
2. Getting started..................................................................11
Enfocus PitStop Pro
2.1 The PitStop Pro documentation set........................................................11
The PitStop Pro User Guide .............................................................11
The PitStop Pro Reference Guide.......................................................11
To access the PitStop Pro Documentation............................................11
2.2 System requirements.........................................................................11
To check the system requirements on the Enfocus Web site....................11
2.3 Installing PitStop Pro ........................................................................11
PitStop Pro and Adobe Acrobat ........................................................11
2.4 Starting PitStop Pro ..........................................................................12
To start PitStop Pro .......................................................................12
First use of PitStop Pro 09...............................................................12
Troubleshooting: PitStop Pro is not accessible in Adobe Acrobat .............13
2.5 Licensing........................................................................................13
Creating an activation account........................................................13
Starting a trial.............................................................................14
Activating licenses........................................................................15
Moving licenses between computers................................................16
2.6 Getting support...............................................................................16
Free technical support..................................................................16
To report a problem......................................................................17
3. Looking at the PitStop Pro work area......................................18
3.1 Looking at the PitStop Pro work area in Adobe Acrobat .............................18
Where to find the PitStop Pro menus................................................18
Where to find the PitStop Pro toolbars..............................................18
3.2 Specifying the language of the PitStop Pro interface.................................19
To specify the language of the PitStop Pro user interface.......................19
3.3 The PitStop Pro View settings..............................................................20
Viewing a PDF document in wireframe view.......................................20
Showing or hiding annotations.......................................................21
Speeding up image display using alternate images..............................21
3.4 Workspaces.....................................................................................22
The Enfocus Workspace Panel..........................................................22
Using Workspaces........................................................................23
3.5 The Enfocus Preset Manager...............................................................26
Preset Databases.........................................................................26
Managing Presets........................................................................28
2
Page 3

Contents
4. Working with PDF documents................................................31
4.1 Copying and pasting object attributes....................................................31
About copying object attributes.......................................................31
To copy and paste an object’s attributes............................................31
4.2 Undoing or redoing actions................................................................31
About undoing and redoing actions:................................................31
To undo or redo an action.............................................................32
4.3 Measuring the distance between two points..........................................32
To replace an object.....................................................................33
4.4 Viewing object attributes...................................................................33
Viewing object attributes using the Eyedropper tool............................33
Using the Enfocus Inspector ..........................................................34
4.5 Design Layouts................................................................................35
The Design Layout Toolbar..............................................................35
The Enfocus Design Layout Panel.....................................................37
Using Design Layouts....................................................................37
Defining a Design Layout...............................................................39
Page boxes.................................................................................40
Using guides...............................................................................43
Zones........................................................................................43
4.6 Working with Layers.........................................................................45
About Layers...............................................................................45
Change Layer settings in the Enfocus Inspector ..................................46
5. Working with Certified PDF documents....................................47
5.1 PDF workflow concept.......................................................................47
5.2 The Certified PDF workflow explained...................................................47
A conventional PDF workflow.........................................................47
The Certified PDF workflow: incremental save.....................................47
Roll-back mechanism..................................................................48
5.3 What is an Enfocus Certified PDF document?..........................................49
Acrobat metadata........................................................................49
Enfocus metadata........................................................................49
5.4 Checking the Certified PDF status of a PDF document ..............................49
To check the Certified PDF status of a PDF document ...........................49
The aspects of the Certified PDF Status..............................................50
5.5 Setting the Certified PDF user identification...........................................51
Two types of user identification.......................................................51
To set the personal identification.....................................................51
To view the system information.......................................................51
5.6 Starting a Certified PDF workflow for a PDF document..............................52
Stamping a PDF document ............................................................52
To start a Certified PDF workflow.....................................................52
5.7 Preflight and Verify...........................................................................52
3
Page 4

Enfocus PitStop Pro
5.8 Certified PDF Preflight.......................................................................53
5.9 Verifying the original source document................................................53
To verify the original source document.............................................54
5.10 Certified Preflight Profile Comparison..................................................54
The Enfocus Preflight Compare Panel................................................55
Setting a Preflight Profile Compare Configuration................................55
5.11 Providing a Certified PDF document with job information........................56
About job information..................................................................56
To provide a Certified PDF document with job information....................56
5.12 Adding a session comment...............................................................56
To add a session comment.............................................................57
5.13 Viewing the edit log file...................................................................57
About the edit log file...................................................................57
To view the Edit Log File................................................................57
5.14 Viewing the document history...........................................................57
To view the document history.........................................................57
Saving snapshots........................................................................58
Comparing sessions......................................................................59
5.15 Saving an optimized Certified PDF document........................................62
What is an “optimized” Certified PDF document?................................62
To save an optimized Certified PDF document.....................................62
5.16 Checking for updated Specifications on CertifiedPDF.net .........................63
CertifiedPDF.net: An Online Resource for PDF Specifications...................63
CertifiedPDF.net Community...........................................................63
Checking for updated Specifications.................................................64
To set the updating preference options............................................64
To check the status of your CertifiedPDF.net account............................65
6. Preflighting and checking PDF documents...............................66
6.1 Running a preflight check..................................................................66
Managing Preflight Profiles............................................................66
To run a preflight check................................................................66
Difference between a Certified and a regular preflight check.................67
6.2 Properties of PDF documents.............................................................68
Categories of properties................................................................68
6.3 Problem reporting...........................................................................68
Problem severity levels defined......................................................68
Problem severity levels: example....................................................69
6.4 To edit or create a Preflight Profile .....................................................69
6.5 Adding Action Lists to Preflight Profiles.................................................70
About adding Action Lists to Preflight Profiles.....................................70
To add Action Lists to a Preflight Profile ...........................................70
6.6 Locking a Preflight Profile ..................................................................71
About locking..............................................................................71
4
Page 5

Contents
To lock a Preflight Profile with a password.........................................71
6.7 Using the Enfocus Navigator ...............................................................72
Navigating through errors, warnings, fixes and failures........................72
To use the Enfocus Navigator .........................................................72
6.8 Viewing and interpreting reports........................................................74
Content of a report.......................................................................74
To view and interpret a report........................................................75
6.9 Annotated Reports...........................................................................75
About Annotated Reports...............................................................75
Creating Annotated Reports............................................................76
To view and interpret an Annotated Report.......................................76
Remove the Report information......................................................76
6.10 Automating preflighting...................................................................76
Enfocus PitStop Server ..................................................................76
Enfocus Switch............................................................................77
7. Editing objects..................................................................78
7.1 Selecting objects...............................................................................78
Object selection tools...................................................................78
Selecting one specific object..........................................................78
To select an object.......................................................................78
To select similar objects................................................................79
7.2 Hiding and showing selected objects....................................................80
Reasons for hiding objects............................................................80
To hide selected objects................................................................80
To make all hidden objects visible..................................................80
7.3 Changing the stacking order of objects..................................................81
Stacked objects...........................................................................81
To change the stacking order of objects.............................................81
7.4 Replacing an object..........................................................................81
About replacing objects.................................................................81
To replace an object.....................................................................82
7.5 Changing or removing the OPI information of objects...............................82
About OPI..................................................................................82
To change or remove the OPI information of objects............................82
7.6 Changing the transparency of objects...................................................83
To change the transparency of objects..............................................83
To remove transparency................................................................83
7.7 Changing the color of text or line-art objects.........................................84
Change the color, and specify the fill and stroke attributes...................84
Fill attributes.............................................................................84
Stroke attributes.........................................................................84
To change the color of text or line-art objects...................................85
Converting color using the Enfocus Convert Color panel........................86
5
Page 6

Enfocus PitStop Pro
7.8 Working with User Swatches...............................................................87
Using User Swatches.....................................................................87
To build User Swatches..................................................................87
To apply a color from the User Swatches to text or objects....................88
To remove colors from the User Swatches..........................................88
7.9 Rotating an object...........................................................................89
Rotation point of origin................................................................89
To rotate an object by dragging......................................................89
To rotate an object by specifying a rotation angle...............................90
7.10 Scaling an object............................................................................90
To scale an object by dragging........................................................91
7.11 Moving an object.............................................................................92
To move an object or a copy of an object by dragging..........................92
7.12 Shearing an object..........................................................................95
About shearing...........................................................................95
To shear an object.......................................................................95
7.13 Transforming an object by specifying exact values...................................97
To transform an object by specifying exact values...............................97
7.14 Creating new shapes........................................................................98
Drawing ellipses and rectangles......................................................98
To create a new shape..................................................................98
7.15 Creating a new path........................................................................99
To create a new path....................................................................99
7.16 Editing a path...............................................................................100
To edit a path............................................................................100
7.17 Adding or removing an anchor point...................................................101
Reasons for adding or removing anchor points..................................101
To add an anchor point................................................................101
To remove an anchor point...........................................................102
7.18 Masking objects.............................................................................103
To mask an object.......................................................................103
7.19 Viewing the properties of a pixel image..............................................103
Pixel image properties.................................................................103
To view the properties of a pixel image...........................................103
7.20 Resampling pixel images.................................................................104
About resampling.......................................................................104
Reasons for downsampling an image..............................................104
Interpolation methods................................................................104
Average Resampling....................................................................105
SubSampling.............................................................................105
Bicubic Resampling.....................................................................105
Bilinear Resampling....................................................................105
Bicubic B-Spline Resampling.........................................................105
6
Page 7

Contents
To resample a single image...........................................................105
To resample multiple images.........................................................105
7.21 Compressing pixel images................................................................106
About compression.....................................................................106
Compression methods.................................................................106
ASCII filters................................................................................106
To compress a single image..........................................................106
7.22 Viewing statistics of selected objects...................................................107
About statistics...........................................................................107
To view statistics of selected objects................................................107
7.23 Viewing the halftone information of an object......................................107
About halftone information..........................................................107
To view the halftone information of an object...................................107
7.24 Selecting text................................................................................108
Text or text segments?.................................................................108
To select a single text segment......................................................108
To select multiple adjacent text segments........................................109
To select multiple nonadjacent text segments...................................109
To select text segments with similar properties..................................110
To select text on a single text line...................................................110
To select text on multiple lines in a paragraph...................................111
7.25 Editing a single text line...................................................................111
To create or edit a single text line....................................................111
7.26 Editing a text paragraph...................................................................112
Paragraphs as logical text entities...................................................112
To edit a text paragraph................................................................112
7.27 Editing vertical text.........................................................................113
About vertical text.......................................................................113
To edit a vertical text line..............................................................113
7.28 Changing the font properties of text...................................................114
What are font properties?.............................................................114
To change the font properties of text...............................................114
7.29 Converting text to outlines...............................................................115
About converting text to outlines....................................................115
Reasons for converting text to outlines............................................115
Implications of converting text to outlines........................................115
To convert text to outlines.............................................................116
7.30 Splitting text segments....................................................................117
Splitting a text segment into words or characters................................117
To split a text segment..................................................................117
7.31 Placing PDF documents in PDF documents............................................117
About placing PDF documents in PDF documents................................117
To place a PDF document in a PDF document:....................................117
7
Page 8

Enfocus PitStop Pro
7.32 Editing forms.................................................................................118
About forms...............................................................................118
To edit forms.............................................................................119
To edit individual objects inside a form...........................................119
To edit the form itself and/or the complete content of a form...............119
7.33 Editing PDF2Go documents...............................................................120
Line-work (LW) and continuous-tone (CT) layers................................120
To edit PDF2Go documents.............................................................121
8. Global Changes................................................................124
8.1 Making Global Changes.....................................................................124
Managing Global Changes.............................................................124
To make a Global Change..............................................................124
8.2 Global Changes in practice................................................................125
Examples of Global Changes..........................................................125
8.3 Changing the size, position or orientation of the page content.................125
Manipulating page content...........................................................125
Move the page content................................................................126
Scale the page content.................................................................127
Scale the page content to fit..........................................................127
Scale the entire page...................................................................128
Flip the page content..................................................................128
Rotate the page content...............................................................129
8.4 Removing text or objects inside or outside a selected area......................130
About removing objects: example of usage.......................................130
To remove objects inside or outside a selected area............................130
8.5 Adding text...................................................................................131
About adding text.......................................................................131
Variables...................................................................................131
Structure of a variable..................................................................132
9. Automating tasks with Action Lists........................................133
9.1 About Action Lists............................................................................133
Automating repetitive tasks...........................................................133
Example: changing the properties of line-art objects..........................133
9.2 Action types..................................................................................135
About action types......................................................................135
Selections.................................................................................135
Changes....................................................................................135
Checks......................................................................................135
Informs....................................................................................135
9.3 Running an Action List.....................................................................135
Managing Action Lists..................................................................136
To run an Action List....................................................................136
9.4 Creating or editing an Action List .......................................................136
8
Page 9

Contents
Ways to create or edit an Action List ...............................................138
Guidelines for creating Action Lists.................................................138
To create or edit an Action List ......................................................139
To create an Action List by recording...............................................140
9.5 Locking an Action List ......................................................................141
About locking.............................................................................141
To lock an Action List with a password.............................................141
9.6 Action Lists in practice.....................................................................141
Example of an Action List .............................................................141
Example: Creating an Action List that changes the page layout..............142
9.7 Using QuickRuns.............................................................................144
About QuickRuns........................................................................144
When to use QuickRuns?..............................................................144
To create a QuickRun ..................................................................144
To use a QuickRun ......................................................................146
To manage your QuickRuns...........................................................146
9.8 Further automation........................................................................146
Enfocus PitStop Server ................................................................146
Enfocus Switch...........................................................................147
9
Page 10

Enfocus PitStop Pro
1. Copyrights
©
2009 Enfocus NV all rights reserved.Enfocus is an EskoArtwork company.
Certified PDF is a registered trademark of Enfocus NV; patent pending.
Enfocus PitStop Pro, Enfocus PitStop Server, Enfocus Instant PDF, Enfocus StatusCheck, Enfocus
CertifiedPDF.net, Enfocus Instant Barcode, Enfocus PitStop Extreme, Enfocus PDF Workflow Suite,
Enfocus LightSwitch, Enfocus FullSwitch, Enfocus PowerSwitch, Enfocus SwitchClient and Enfocus
SwitchScripter are product names of Enfocus NV.
Acrobat, Distiller, InDesign, Illustrator, Photoshop, FrameMaker, PDFWriter, PageMaker, the Adobe
logo, the Acrobat logo and PostScript are trademarks of Adobe Systems Incorporated.
Macintosh, Mac, Mac OS and ColorSync are trademarks of Apple Computer, Inc., registered in the
U.S. and other countries.
Windows, Windows 2000, Windows XP and Windows Vista are registered trademarks of Microsoft
Corporation.
PANTONE®Colors displayed here may not match PANTONE-identified standards. Consult current
PANTONE Color Publications for accurate color.
PANTONE®and other Pantone, Inc. trademarks are the property of Pantone, Inc.©Pantone, Inc.,
2006.
OPI is a trademark of Aldus Corporation.
Quark, QuarkXPress, QuarkXTensions, XTensions and the XTensions logo among others, are
trademarks of Quark, Inc. and all applicable affiliated companies, Reg. U.S. Pat. & Tm. Off. and
in many other countries.
This product and use of this product is under license from Markzware under U.S.Patent No.
5,963,641.
Other brand and product names may be trademarks or registered trademarks of their respective
holders. All specifications, terms and descriptions of products and services are subject to change
without notice or recourse.
10
Page 11

2. Getting started
2.1 The PitStop Pro documentation set
The PitStop Pro User Guide
The PitStop Pro User Guide explains the main PitStop Pro concepts and provides you with
step-by-step instructions on how to work with PitStop Pro. Moreover, you learn about other
Enfocus core technologies that are integrated into PitStop Pro, such as Preflight Profiles, Action
Lists and Certified PDF.
All the information in the PitStop Pro User Guide is also available as online Help.
Enfocus PitStop Pro
The PitStop Pro Reference Guide
The PitStop Pro Reference Guide gives detailed information on specific settings and options.
It is meant as a reference book, to look up specific settings.
To access the PitStop Pro Documentation
Choose Help > Plug-In Help > Enfocus PitStop Pro Help and select the appropriate
documentation.
2.2 System requirements
The system requirements are displayed in the installer and they are also listed on the product
pages on the Enfocus Web site.
To check the system requirements on the Enfocus Web site
1. Go to www.enfocus.com, and choose Products > PitStop Pro > Learn more .
2. Click System requirements in the Support section.
2.3 Installing PitStop Pro
PitStop Pro and Adobe Acrobat
PitStop Pro is a plug-in for Adobe Acrobat Professional, and therefore, Adobe Acrobat should be
closed before installing PitStop Pro.
To install PitStop Pro:
11
Page 12

Enfocus PitStop Pro
1. Do one of the following:
• Insert the Enfocus Software CD-ROM or DVD into your CD-ROM/DVD-ROM drive.
• Download PitStop Pro from the Enfocus Software Web site (www.enfocus.com)
Note: If you install PitStop Pro from a DVD or CD-ROM, check the Enfocus Web site to see
whether you have the latest version. Updates may be available.
2. Select the Enfocus product which you want to install.
3. If necessary, double-click the installer.
4. Follow the on-screen installation instructions.
2.4 Starting PitStop Pro
To start PitStop Pro
PitStop Pro is a plug-in for Adobe Acrobat, so you must start the program from within Adobe
Acrobat.
1. Start Adobe Acrobat.
2. Open a PDF document.
3. Click any button on one of the PitStop Pro toolbars.
First use of PitStop Pro 09
When using PitStop Pro 09 for the first time after installation, the About Enfocus PitStop Pro
window will open automatically. This window shows you information about the software, and
allows you to either start a trial or activate your copy of PitStop Pro 09.
About
The About tab shows the version of your software, contact information for Enfocus, and allows
you to view the copyright (by clicking the View Copyrights button).
Trial
The Trial tab allows you to start a trial or activate your software and will show your license
information after activation.
•
Click the Activate button to open the Activate License Wizard that will help you activate your
software.
12
See Activating licenses on page 15.
Note: You can also activate your license at any time using Help > Plug-In Help > Enfocus
PitStop Pro Help > License > Activate .
Page 13

•
Click the Start Trial button to open the Activate License Wizard that will help you start a trial
of your software.
Support info
The Support info tab shows information about your system, that you should communicate to
Enfocus support in case you encounter a problem with your software.
To copy and paste this information, use the Copy to Clipboard button first, then paste the
information in a text file or the body of an email.
Troubleshooting: PitStop Pro is not accessible in Adobe Acrobat
If you start Adobe Acrobat and you do not see the PitStop Pro toolbars or menus ( Plug-ins >
Enfocus ), check the following:
•
Make sure you did not hold down the SHIFT key immediately after you started Adobe Acrobat.
If you did, Adobe Acrobat will start without loading any plug-ins.
•
Choose Edit > Preferences > General > Startup and make sure that the option Use only
certified plug-ins in the Application Startup area is not selected.
Enfocus PitStop Pro
2.5 Licensing
From the About Enfocus PitStop Pro window, you can:
• start a 30-day trial (see Starting a trial on page 14),
• activate your license (see Activating licenses on page 15),
• deactivate your license (see the PitStop Pro Reference Guide for more information),
• repair your license (see the PitStop Pro Reference Guide for more information).
For easiest configuration, the machine running your copy of PitStop Pro should be online with
full Internet access while performing licensing tasks.
However, if the machine you are using does not have full Internet access, you can perform
licensing tasks off-line if you:
• have access to Internet e-mail and use of a Web browser on another machine,
• can copy a file received in an Internet e-mail message to the machine you are using (using
a USB flash memory drive, a diskette, an internal network...).
For more information on the off-line procedures, see the PitStop Pro Reference Guide.
Before you can activate or deactivate licenses, you should set up an activation account using
the Enfocus website (http://www.enfocus.com/CreateAccount).
Creating an activation account
1. Go to http://www.enfocus.com/CreateAccount.
2. Enter the appropriate information in the fields.
3. If you would like to receive news from Enfocus or be contacted by an Enfocus Certified Partner,
leave the two bottom checkboxes selected; otherwise, clear them.
13
Page 14

Enfocus PitStop Pro
4. Click Create my Account.
5. After a few minutes, check your e-mail program for a new message from Enfocus regarding
activating your new account.
Note:
If you do not receive this e-mail message, you might have to check any spam folders in your
e-mail program as well.
6. Once it arrives, open the message and click the link to confirm your e-mail address.
You should receive a message that your account was confirmed successfully in your default
web browser.
Starting a trial
Once you have created and confirmed your activation account (see Creating an activation account
on page 13), you can start a 30-day trial for your copy of PitStop Pro.
• If the computer running your copy of PitStop Pro is connected to the Internet, you can start
a 30-day trial from that machine.
See Starting a trial on-line on page 14.
• Otherwise, you must create a trial request file and use a computer that is connected to the
Internet to upload it to an activation server.
See the PitStop Pro Reference Guide for more information.
Starting a trial on-line
You can start a 30-day trial on-line if the computer where your copy of PitStop Pro is installed
is connected to the internet.
To start a 30-day trial on-line, do the following:
1. Go to the Trial tab of the About Enfocus PitStop Pro window and click Start Trial.
This opens the Activate License Wizard (on PC) or the Activate License Assistant (on Mac).
2. Click Next (on PC) or Continue (on Mac) in the first screen of the Activate License
Wizard/Assistant dialog box.
3. Select On-line activation and click Next / Continue.
4. Enter the name and password of your activation account and click Next / Continue.
Note:
14
You should have created this activation account in Creating an activation account on page
13.
If you haven’t created an activation account yet, click the Create a new Enfocus Account link
in the Wizard/Assistant and see Creating an activation account on page 13 for instructions.
Page 15

After you click Next / Continue, a status bar appears while the system communicates with the
activation server. Do not cancel or close the Wizard/Assistant.
A message will appear saying that the trial was completed successfully and that you can now
use the product(s) on your computer.
5. Click Finish / Done.
You will see the number of trial days remaining in the Trial tab of the About Enfocus PitStop
Pro window.
Activating licenses
Once you have created and confirmed your activation account (see Creating an activation account
on page 13), you can start activating the licenses using your software’s product keys.
Product keys come from online stores, from product key files you receive from Enfocus, or you
can find them inside product boxes.
Enfocus PitStop Pro
Note: Product key files are HTML files. You can double-click them to see what product keys they
contain.
• If the computer running your copy of PitStop Pro is connected to the Internet, you can get
licenses for the product keys and activate them from that machine.
See On-line activation on page 15.
• Otherwise, you must create an activation request file and use a computer that is connected
to the Internet to upload it to an activation server.
See the PitStop Pro Reference Guide for more information.
On-line activation
You can activate your product key(s) on-line if the computer where you will use your software
is connected to the internet.
To activate a product key on-line, do the following:
1. Open the Activate License Wizard (on PC) or the Activate License Assistant (on Mac) by either:
• going to the Trial tab of the About Enfocus PitStop Pro window and clicking Activate,
• going to Help > Plug-In Help > Enfocus PitStop Pro Help > License > Activate .
2. Click Next (on PC) or Continue (on Mac) in the first screen of the Activate License
Wizard/Assistant dialog box.
3. Select On-line activation and click Next / Continue.
4. In the Your product keys screen, choose the number of product keys you have to activate and
click Next / Continue.
5. Depending on what you chose in the previous step:
a) If you chose I have one product key, enter the product key in the fields provided. The
cursor automatically advances to the next field as you type.
15
Page 16

Enfocus PitStop Pro
b) If you chose I have more than one product key, enter each product key on a line, followed
c) Then click Next / Continue.
6. Enter the name and password of your activation account and click Next / Continue.
Note:
You should have created this activation account in Creating an activation account on page
13.
If you haven’t created an activation account yet, click the Create a new Enfocus Account link
in the Wizard/Assistant and see Creating an activation account on page 13 for instructions.
After you click Next / Continue, a status bar appears while the system communicates with the
activation server. Do not cancel or close the Wizard/Assistant.
A message will appear saying that the activation was completed successfully and that you
can now use the product(s) on your computer.
by a comma.
7. Click Finish / Done.
The product and its license will appear in the License tab of the About Enfocus PitStop Pro
window (previously called Trial tab).
Moving licenses between computers
To move licenses between computers, do the following:
1. Deactivate the licenses on the computer that will not use them anymore.
See the PitStop Pro Reference Guide for more information.
2. Copy the product keys file to the computer that will use the licenses.
3. On the computer acquiring the licenses, activate the licenses using the product keys file.
See Activating licenses on page 15.
2.6 Getting support
Free technical support
When you work with registered Enfocus products, you are entitled to free technical support to
assure the products work as they should work. When contacting Enfocus Support, it is important
that you can provide our support engineers with the necessary information about the configuration
of your computer system and the Enfocus product(s) you are using. To this end, we have included
this support information in the dialog box about PitStop Pro which you find in the Help menu.
You can easily copy this information and paste it in a text file or an e-mail message which you
can then send to Enfocus Support.
16
Page 17

Furthermore, you can also consult the Enfocus Knowledge Base or use the Support section on
the Enfocus Web site to report a problem.
You can also contact your local reseller or expert. A complete list of all Enfocus resellers and
experts can be found on the Enfocus website http://www.enfocus.com
To report a problem
1. Choose Help > About Third-Party Plug-Ins > About Enfocus PitStop Pro .
The About Enfocus PitStop Pro dialog box appears.
2. Click the Support Info tab.
You can now view all the details of the version of PitStop Pro installed on your system, and
of your system configuration.
3. Click Copy to Clipboard.
4. Paste the information in a text file or e-mail message and send it to: support@enfocus.com.
Enfocus PitStop Pro
17
Page 18

Enfocus PitStop Pro
3. Looking at the PitStop Pro work area
3.1 Looking at the PitStop Pro work area in Adobe Acrobat
Where to find the PitStop Pro menus
Integrated menus
As in previous versions, the PitStop Pro menus are integrated in the Adobe Acrobat menus, for
example in the Edit, Tools or Window menu. You can easily find the PitStop Pro menus because
they all start with the word “Enfocus”, for example Edit > Preferences > Enfocus PitStop Pro
Preferences .
Dedicated menus
PitStop Pro also has dedicated menus. You can find these in the Adobe Acrobat menu bar:
•
Certified PDF
•
Plug-Ins > Enfocus PitStop Pro
Context menus
If the Select Objects tool is active, the context menu, accessible by control-clicking or
right-clicking, will show PitStop Pro options and actions relevant to the current selection. For
example, if a text object is selected, you can select “text > convert to outlines” from the context
menu.
Where to find the PitStop Pro toolbars
You find the PitStop Pro toolbars next to or below the Adobe Acrobat toolbars. To show or hide
an Enfocus toolbar, choose View > Toolbars , and then select a toolbar preceded by the word
“Enfocus”, for example Enfocus Control Panels.
18
Page 19
A. Adobe Acrobat File toolbar
B. Enfocus Edit toolbar
C. Enfocus Workspace and View Settings
D. Enfocus Design Layout toolbar
E. Enfocus QuickRun toolbar
F. Enfocus Control Panels toolbar
G. Enfocus Undo & Redo toolbar
Enfocus PitStop Pro
You can select a tool by clicking the respective button. To the right of some of these buttons, you
see a black inverted triangle, which means that there are more tools available “behind” this
button.
To select one of the “underlying” editing tools, click the triangle and select the tool of your
choice.
If you will use some of these “underlying” tools frequently, you can click the triangle and select
the option Expand this button.
3.2 Specifying the language of the PitStop Pro interface
As in multiple-language versions of Adobe Acrobat, you can specify the language of the PitStop
Pro user interface. You can have all PitStop Pro menus and dialog boxes appear in your native
language.
To specify the language of the PitStop Pro user interface
You can set the language in Preferences > Enfocus PitStop Pro Preferences > Language
A restart of Adobe Acrobat is required to apply the newly selected language.
19
Page 20
Enfocus PitStop Pro
3.3 The PitStop Pro View settings
Viewing a PDF document in wireframe view
What is a wireframe view?
You can view a PDF document in either one of the following modes:
•
Preview mode. This is how you normally see PDF documents in Adobe Acrobat. You see the
pages, objects and text in the PDF documentas they will print.
•
Wireframe view mode
If you look at a PDF document in wireframe view mode, the document will be displayed as
follows:
• The objects will appear in outline form.
• Text can be shown in outline, with a black fill, or “greeked”, i.e. it can appear on-screen as
a gray bar, rather than displaying the individual characters. You can select this option in the
Enfocus PitStop Preferences.
Figure 1: Wireframe view of a PDF document: objects are outlined (A) and text can be greeked (B).
When to use wireframe view
You may want to look at a PDF document in wireframe view in order to:
• View and select objects which are (partly) covered by other objects. See also Changing the
stacking order of objects on page 81
• View and edit masks. See also Masking objects on page 103
• Make pages display more quickly if they contain many or large pixel images.
20
To view a PDF document in preview or wireframe view mode
1. Open a PDF document.
Page 21
2. Click the View Wireframe button to switch between preview mode and wireframe view
mode.
Showing or hiding annotations
Annotated PDF documents
A PDF document may contain annotations, which can be created with Adobe Acrobat or with
third-party plug-ins. You can look at a PDF document with annotations shown or hidden. You
can use the Hide Annotations button to show or hide all annotations in a single step.
Enfocus PitStop Pro
Figure 2: PDF document with annotations shown (A) or hidden (B).
To show or hide all annotations in a document
1. Make sure you don’t have any annotation selected using the Adobe Acrobat Hand tool .
2. Click the Hide Annotations button to show or hide annotations.
Speeding up image display using alternate images
Displaying alternate, low-resolution images
If you work with PDF documents which contain high-resolution images, you may want Adobe
Acrobat to display these images faster. You can do this by clicking the Speed Up Image Display
button , provided that the images in your PDF document have alternate images at a lower
resolution. If they don’t, you can easily add alternate images using an Action List.
Figure 3: Speed Up Image display off: the high-resolution image
is displayed
Figure 4: Speed Up Image display on: a lower-resolution
preview of the image is displayed.
To create alternate images in your PDF document
1. Open your PDF document which contains high-resolution images.
21
Page 22

Enfocus PitStop Pro
2. Choose Window > Show Enfocus Action List Panel .
3. In the Action List and Preflight Profile Control Panel, click Manage > New .
4. Fill in the General Information for the Action List.
5. Click the button to add a new action.
6. In the New Action Type dialog box select the change Add Alternate Images.
7. Click Add.
8. In the Enfocus Action List Editor, specify the attributes for this action:
• The resolution of the alternate images
• Whether or not the alternate images have to be in RGB colors
9. Click OK.
10. In the Action List and Preflight Profile Control Panel, select the option Document, and then
click Run.
To speed up image display
Click the Speed Up Image Display button in the Enfocus PitStop View Buttons toolbar to switch
between high-resolution and low-resolution image display.
3.4 Workspaces
A workspace allows you to customize PitStop Pro’s user interface (for example by showing or
hiding Enfocus panels), so you can see as much or as little of it as you want.
Workspaces also include other settings from Adobe Acrobat and Enfocus PitStop Pro, like windows’
positions, view and color settings, Design Layouts, etc.
You can use default workspaces, or create workspaces adapted to the different tasks you perform
with PitStop Pro. You can also quickly switch between workspaces as needed.
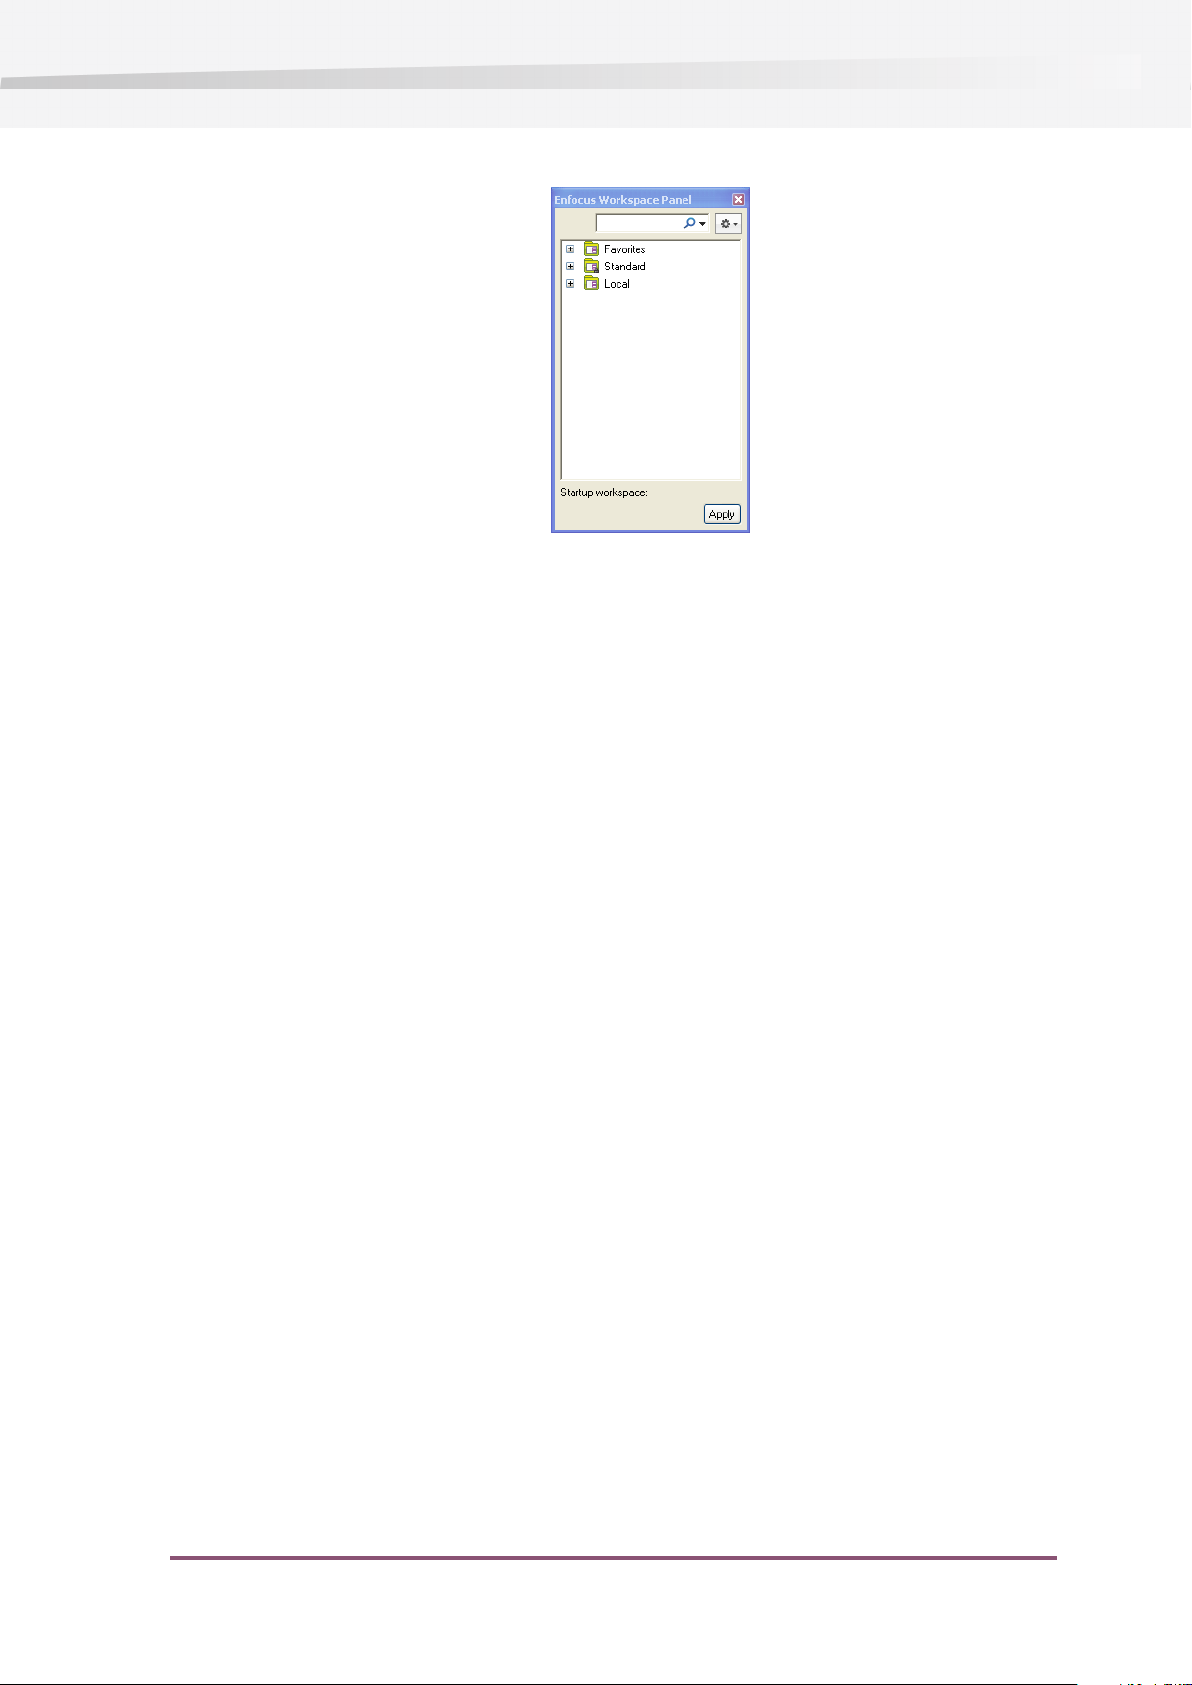
The Enfocus Workspace Panel
The Enfocus Workspace Panel allows you to manage your workspaces.
To open it:
•
Go to Window > Show Enfocus Workspace Panel...
•
Use the Alt + Ctrl + W shortcut (on Windows), or the Option + Command + W shortcut (on
Mac).
•
Click the Enfocus Workspace button in the toolbar.
22
Page 23
Enfocus PitStop Pro
Managing Workspaces
In the Workspaces panel, you can manage your workspaces using the Preset Manager: see The
Enfocus Preset Manager on page 26
This Preset Manager allows to organise, search, duplicate and manage your workspaces.
Default Workspaces
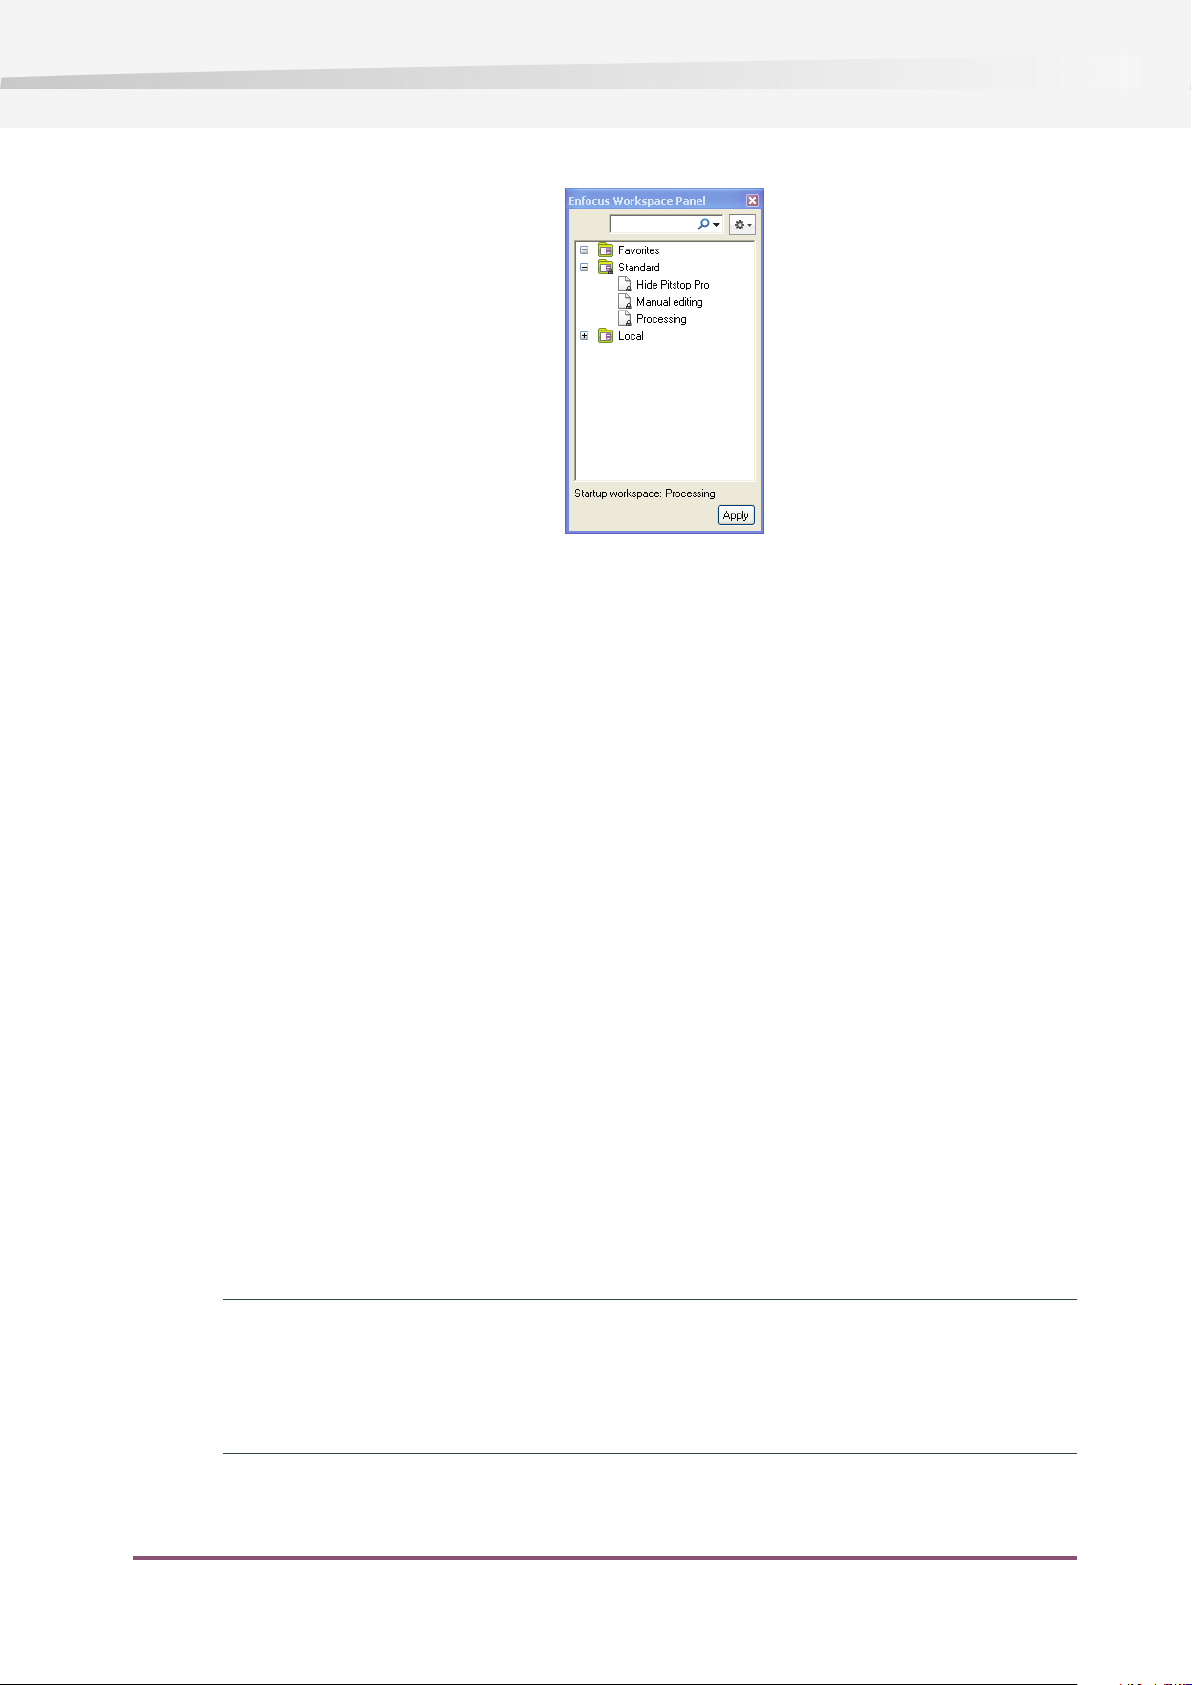
PitStop Pro contains three default workspaces, with which you can start working immediately.
Hide PitStop Pro
This workspace hides as much as possible from the PitStop Pro user interface. This allows you to
work with Adobe Acrobat without unnecessary interference from PitStop Pro.
Manual Editing
This workspace opens the control panels typically used to edit PDF files (such as the PitStop
Inspector).
Processing
This workspace opens the Enfocus Processing panel, and contains settings typically used when
performing semi-automated processing tasks (such as preflighting a document).
Using Workspaces
Creating a Workspace
To create a workspace from scratch, do the following:
1. Right-click in the Enfocus Workspace Panel and choose New > New...
This opens the Enfocus Workspace Editor.
23
Page 24
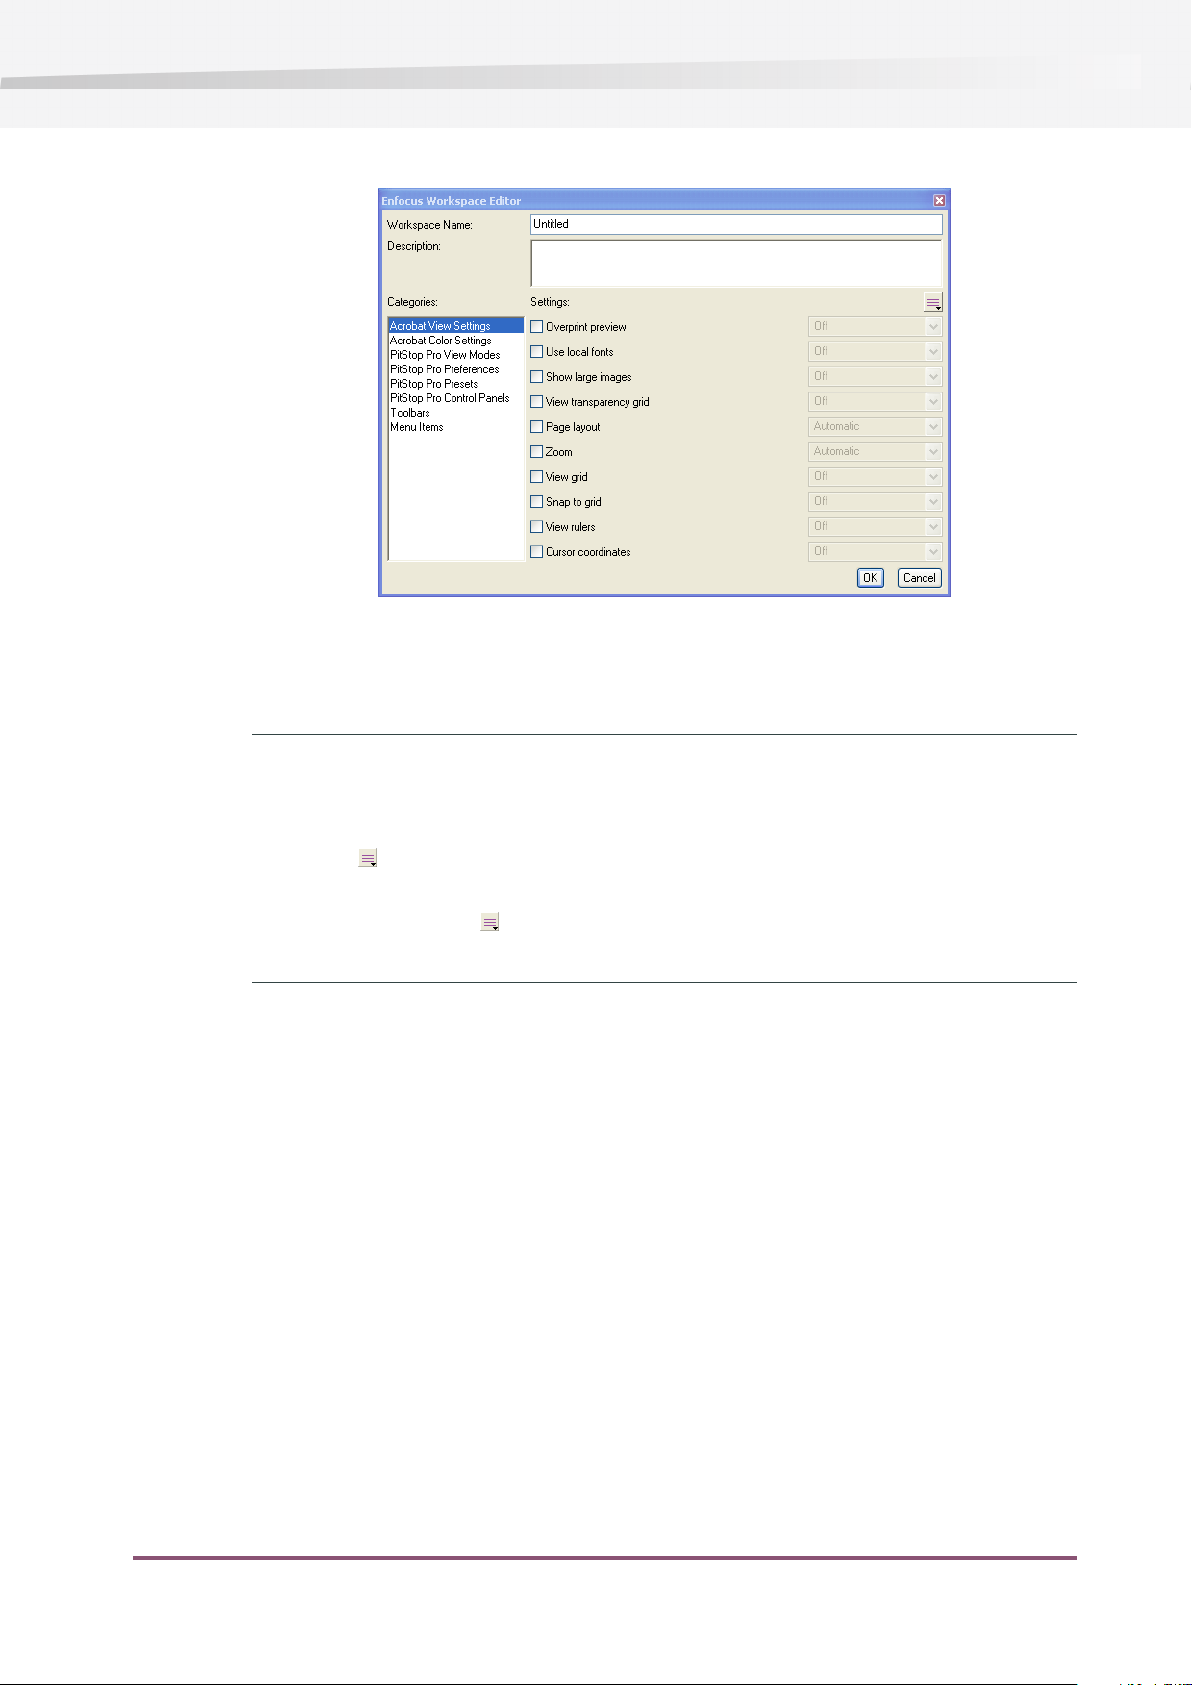
Enfocus PitStop Pro
2. Enter a Workspace Name.
3. For each of the Categories, choose the Settings you want to use and their values.
Note:
You can also grab settings from your current Acrobat / PitStop Pro interface and use them in
your workspace:
• click the button and select Grab All Categories to grab all the current settings for your
workspace.
• select a category, click and select Grab Current Category to grab the current settings
related to this category (for example, all Acrobat View settings).
4. When you are done, click OK.
Your new workspace is saved as a Local workspace.
Editing a Workspace
1. If the workspace you want to edit is a Standard workspace, you need to first drag it to the
Local database to duplicate it there.
2. In the Local database, double-click the workspace to edit.
24
This opens it in the Enfocus Workspace Editor.
Page 25
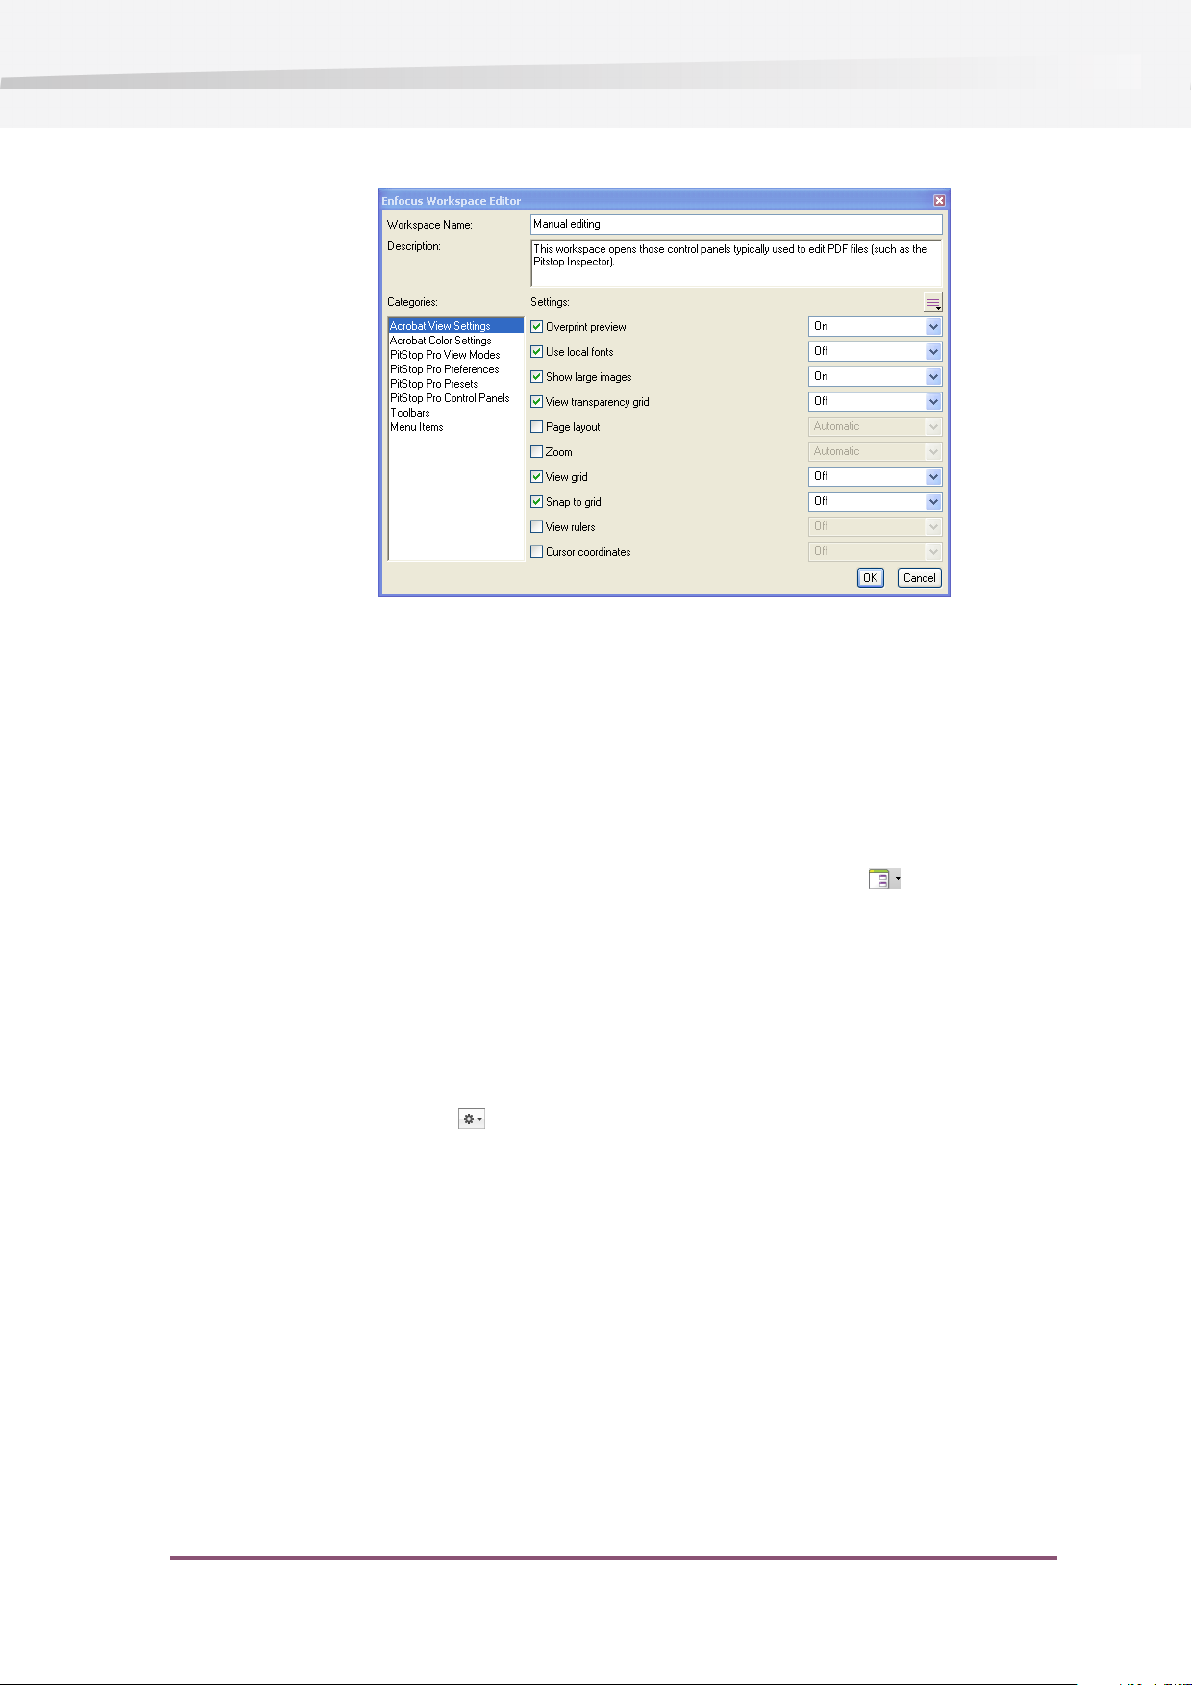
Enfocus PitStop Pro
3. Edit the workspace as needed.
4. When you are done, click OK to save it in the Local database.
Applying a Workspace
To use a workspace for your current work:
•
Select it in the Enfocus Workspace Panel and click the Apply button.
•
In your toolbar, click the arrow beside the Enfocus Workspace button and select the
workspace to use.
•
Select it in the Window > Enfocus Workspace menu.
Selecting a Startup Workspace
To use a workspace by default next time you start Acrobat Professional up:
1. Select the workspace in the Enfocus Workspace Panel.
2. Click the action button and choose Apply selected workspace at startup.
You can see the startup workspace you selected at the bottom of the panel.
25
Page 26
Enfocus PitStop Pro
3.5 The Enfocus Preset Manager
When settings in PitStop Pro can be saved, created, managed or selected, the Preset Manager is
used.
A Preset can be a Workspace, a Design Layout, an Action List, a Global Change or a Preflight Profile.
In all the corresponding panels, the Preset Manager is used. All of these are here referred to as
a "Preset".
Preset Databases
You can see three databases, Favorites, Standard and Local.
You can add categories / Databases in the Enfocus PitStop Pro Preferences or directly in the Preset
Manager. See Creating a Database on page 27 or the PitStop Pro Reference Guide for more
information.
Favorites
This database contains shortcuts to Presets in the Standard and / or Local database that you
added to your favorites.
To add a Preset to your favorites, see Adding a Preset to your Favorites on page 28.
Standard
This database contains the default Presets installed with PitStop Pro.
26
Note:
You can edit these Presets, but you cannot save an edited Preset to the Standard database.
If you want to save an edited Preset, duplicate it from the Standard to the Local database first,
then edit the duplicate.
Page 27
Enfocus PitStop Pro
Local
This database contains the Presets you edited or created, and that are only accessible to you.
You can edit and rename these Presets as you wish. You can also organize them into groups (see
Sorting and grouping Presets on page 28).
Creating a Database
You can import an existing folder on your hard disk or in a shared folder as a database in the
Preset Manager, either in the Enfocus PitStop Pro preferences. or directly from the Preset Manager.
1. Right-click in the Preset Manager and select New > New Database...
2. In the browser dialog that opens, select the folder that you want to import as a database and
click OK.
You can see that folder as a database in the Preset Manager.
If that folder contains any subfolder and / or workspaces, you will also be able to see them as
groups in the Preset Manager.
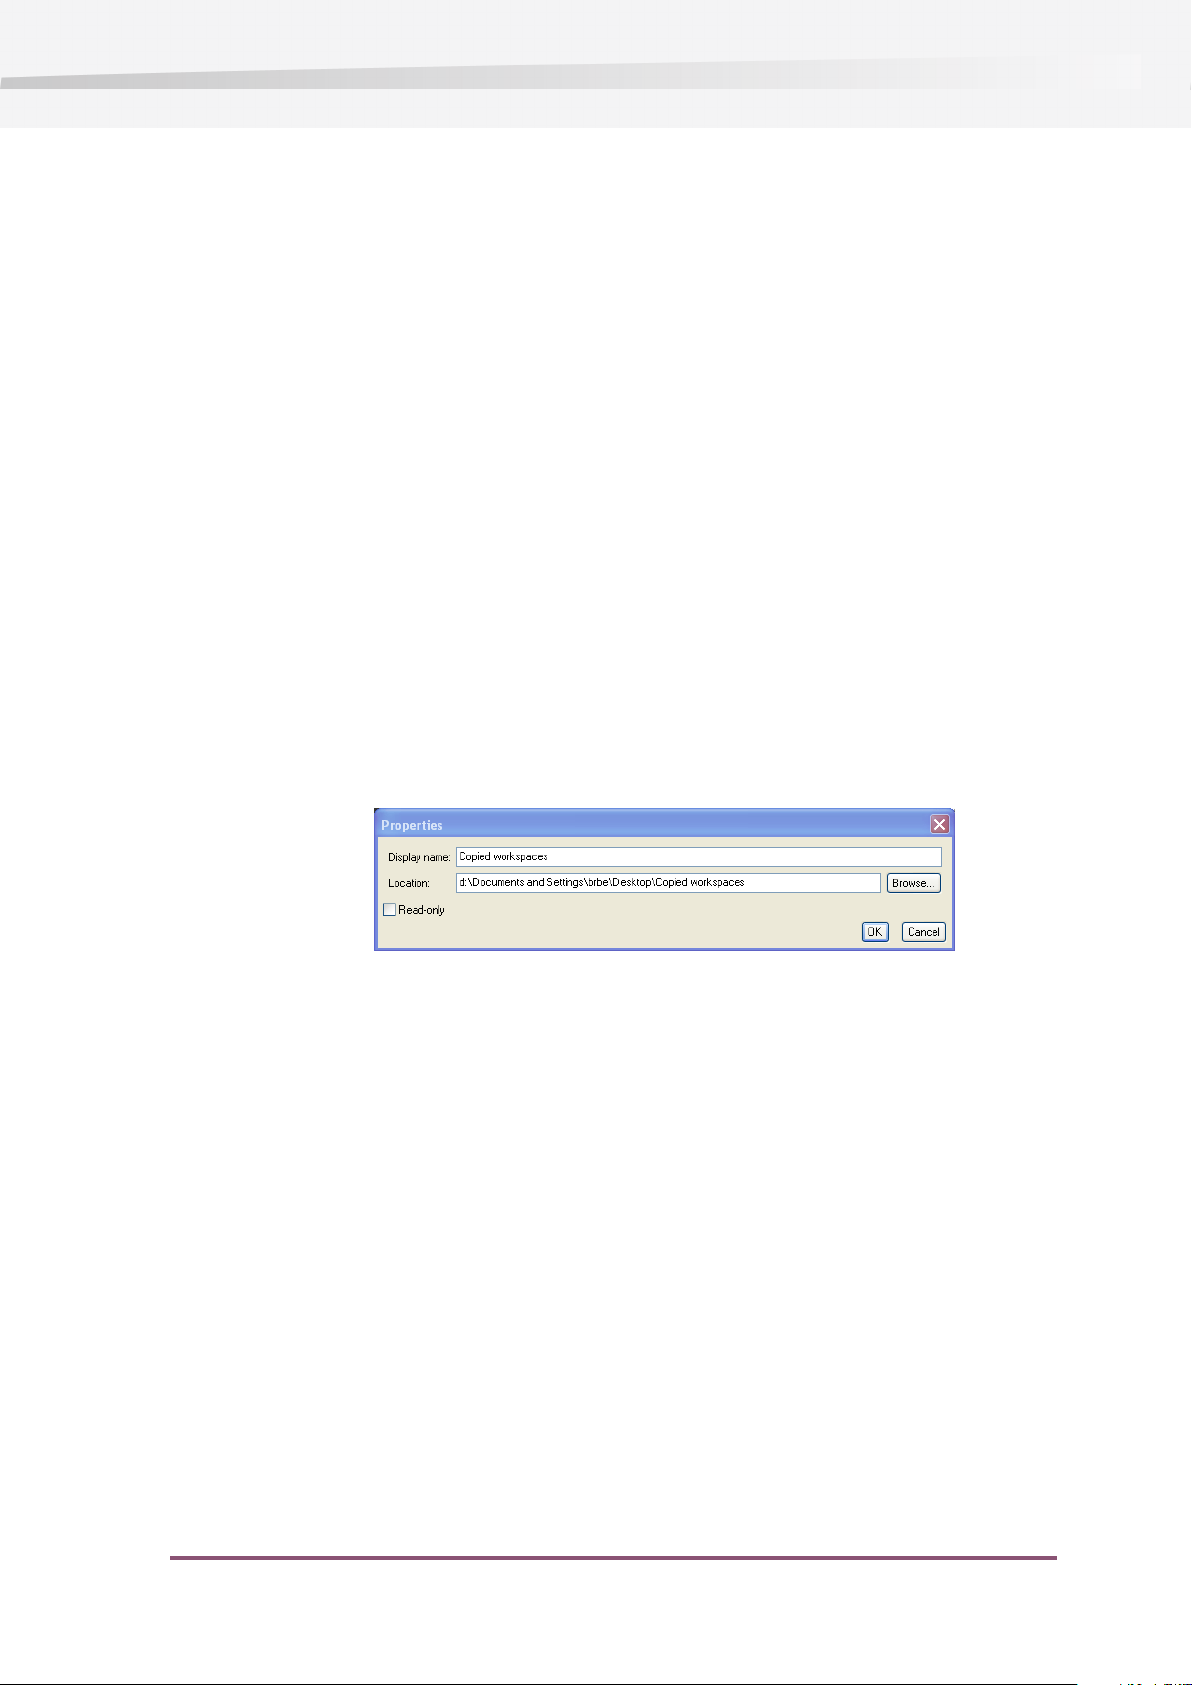
Showing the Properties of an Imported Database
1. After importing a database, right-click it in the Preset Manager and choose Show Properties...
This opens the Properties dialog.
2. If needed, use the Properties dialog to:
• change the database’s Display name (its name in the panel),
• browse to a different folder to use as database,
• make the database Read-only or editable again.
3. Click OK to save your changes.
Refreshing the panel
The Preset Manager panel auto-refreshes, but you may need to refresh it manually in some
specific cases (for example, if instructed to do so by Enfocus support).
27
Page 28
Enfocus PitStop Pro
•
Click the action button and choose Refresh.
Managing Presets
Creating a new Preset
To create a new Preset, you can
•
click the action button and choose New to create a new Preset from scratch
•
click the action button and choose New from ... to create a new Preset based on an existing
Preset.
A list of the existing Presets will appear, allowing you to select the Preset you want to use as
starting point for the new Preset.
•
click the action button and choose New from selected to create a new Preset based on
the selected Preset
•
click the action button and choose New from file to create a new Preset based on a Preset
file on disk.
Adding a Preset to your Favorites
To add a Preset to your favorites, you can either:
•
Drag it into the Favorites database.
•
Right-click it and select Add to Favorites.
•
Select it, click the action button and choose Add to Favorites.
Sorting and grouping Presets
You can only sort Favorites and Local Presets. Standard Presets have a fixed order.
• To move a Preset up or down in the tree structure, you can either:
• drag it up or down,
•
select it, click the action button and choose Move up or Move down.
•
To keep your Presets sorted alphabetically, click the filter arrow and select Keep Sorted.
28
• To create a group:
a) Select the database (or group) in which you want to create your group.
b)
Click the action button and choose New Group...
c) Give your group a name.
Page 29
Enfocus PitStop Pro
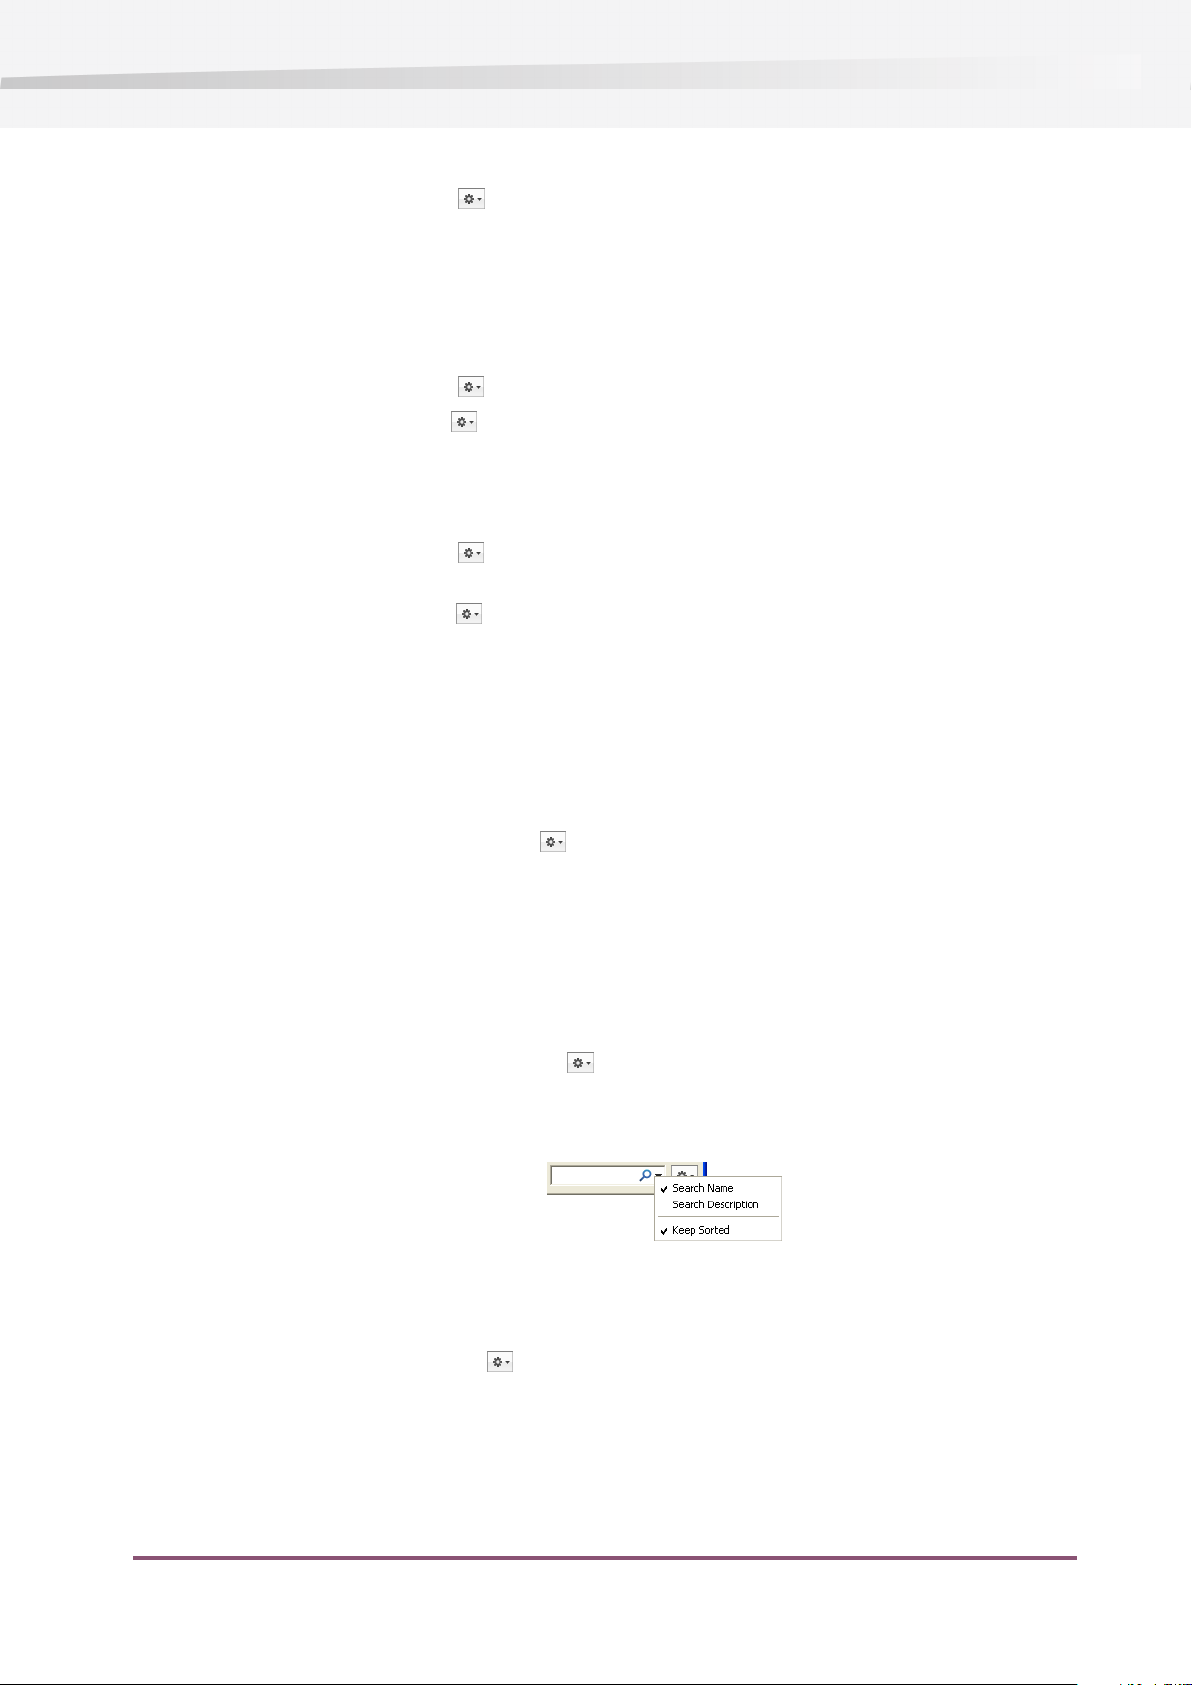
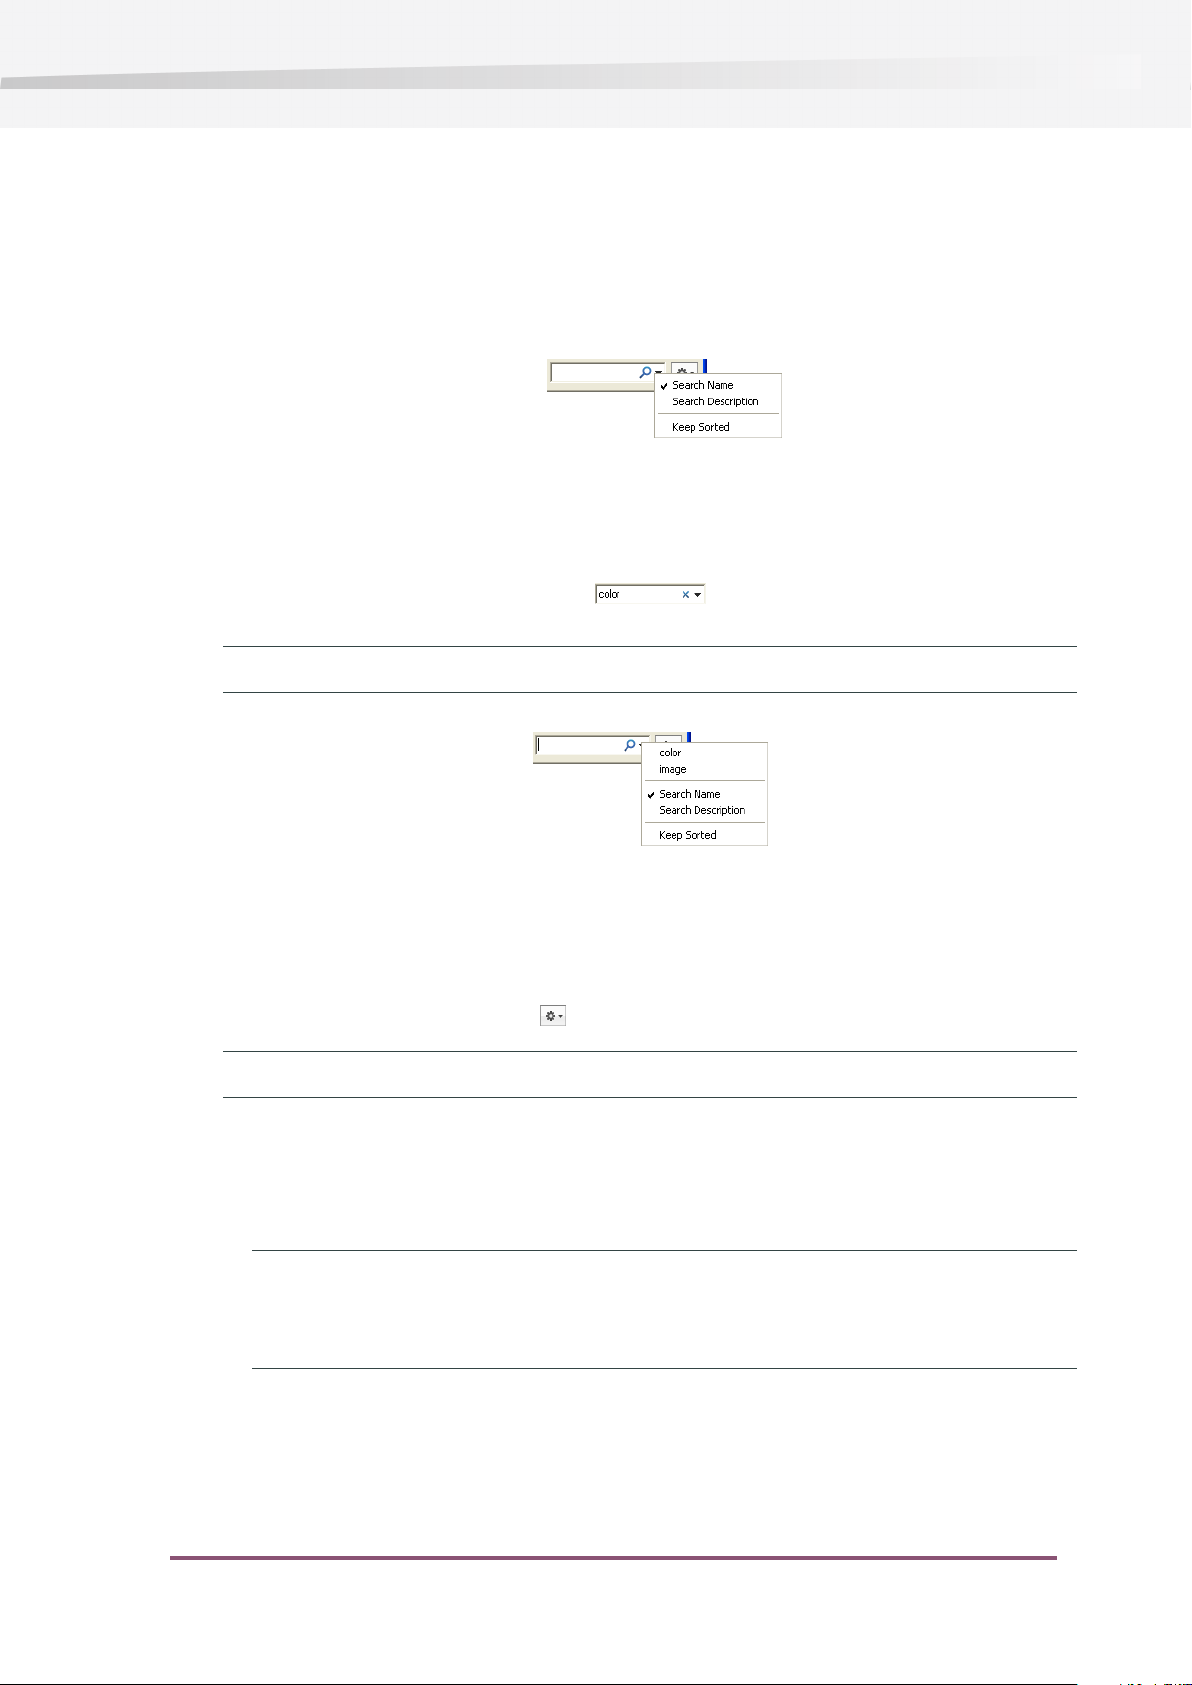
Finding a Preset
To search for a Preset, you can either browse through the databases, or use the filter at the top
of the panel.
1. Click the arrow in the filter to search either by Preset name or by Preset description.
2. Enter your search text in the filter.
You can use the blue cross to delete your search text after searching.
Note: Your past searches are saved in the filter.
Deleting a Preset
You can only delete Presets from the Local and Favorites databases.
•
Right-click the Preset and select Remove.
•
Select it, click the action button and choose Remove.
Note: You can also remove groups. This removes all Presets that were in this group.
Importing a Preset
1. Right-click in the Preset Manager and select Import/Export > Import...
2. In the browser dialog that opens, select the file you want to import.
Note:
The file to be selected depends on the panel in which you use the Preset Manager: .ppws for
Workspaces, .eal for Action Lists, etc.
This adds the Preset to your Local settings.
29
Page 30

Enfocus PitStop Pro
Importing a Preset Group
1. Right-click in the Preset Manager and select Import/Export > Import Hierarchy...
2. In the browser dialog that opens, select the folder containing the Preset files you want to
import.
This adds the imported Presets in a group (called after the folder you selected) into your Local
Presets.
Exporting a Preset
1. Right-click the Preset you want to export and select Import/Export > Export...
2. Save it in your desired location as a file.
Note:
The file type depends on the panel in which you use the Preset Manager: .ppws for Workspaces,
.eal for Action Lists, etc.
You can now distribute your Preset by making the file available to others.
Exporting a Preset Group
1. Right-click the Preset Group you want to export and select Import/Export > Export Hierarchy...
2. Save it in your desired location.
This creates a folder containing a file for each Preset from the group.
30
Page 31

4. Working with PDF documents
4.1 Copying and pasting object attributes
About copying object attributes
You can easily copy an object’s attributes and apply all or some of these attributes to another
object in your PDF document. These attributes can relate to stroke and fill, but also to text,
transparency and prepress.
Figure 5: Copying and pasting the fill attributes of part of an object
Enfocus PitStop Pro
To copy and paste an object’s attributes
1. Click the Copy and Paste Attributes tool .
The cursor changes into .
2. Hold down the CONTROL (CTRL) key (Windows) or Command ( ) key (Macintosh) and click an
object to copy its attributes.
The cursor changes into .
The copied attributes appear selected in the Enfocus Utilities window.
3. If necessary, click to clear the attributes that you do not wish to paste.
4. Click the object onto which you wish to paste the selected attributes.
4.2 Undoing or redoing actions
About undoing and redoing actions:
You can undo any unsaved actions which you have done with one of the PitStop Pro tools. An
“action” can mean changing something but also selecting one or more objects.
You have two buttons to undo your actions:
31
Page 32

Enfocus PitStop Pro
UsageUndoesButton
After undoing one or more actions, you can redo them again.
Note: If you are working with Certified PDF documents, you can even undo actions after you
have saved the file.
To undo or redo an action
Proceed as follows to undo or redo your last actions:
Changes only.
Changes and
selections.
In situations where you have done multiple changes
and maybe made some selections in between.
For example: select text, move it on the page, change
the font and color. Select an image, scale it and place
it below the text.
In situations where you have made a lot of selections,
and sometimes even very complex ones, for example
using the Enfocus wireframe view ( ). Or when you
were selecting a lot of objects and you lost your selection
due to a “slip of the mouse”.
1. Choose Edit > Undo [action] or click one of the Undo buttons or .
The name of your last action appears in the menu command. If you moved an object, for
example, the menu will read Undo Move.
2. To redo the action you have just undone, Edit > Redo [action] or click one of the Redo
buttons or .
4.3 Measuring the distance between two points
You can measure the distance between two points in the work area of your PDF document. You
can do this, for example, to align objects or to check the positioning or size of objects. You use
the Measure tool in combination with the Enfocus Inspector to measure a given distance.
32
Page 33

To replace an object
1. Using the Select Objects tool , select the “new” object, i.e. the object which you want to
use to replace the another one.
Enfocus PitStop Pro
2. Choose Edit > Copy .
3. Select the “old” object, i.e. the object which is to be replaced.
4. Choose Edit > Replace .
The copied object will replace the “old” object and will assume its exact size, proportions
and position.
4.4 Viewing object attributes
Viewing object attributes using the Eyedropper tool
Using the Eyedropper tool , you can view the following attributes of any object:
• Object type
• Color space
• Color settings
• Overprint settings
To view the attributes of an object
1. Click the Eyedropper tool .
2. Click any text or object in the PDF document.
33
Page 34

Enfocus PitStop Pro
The Utility dialog displays the attributes of the selected text or object.
Using the Enfocus Inspector
With the Enfocus Inspector, you can view and edit the following attributes of any objects:
• Fill and Stroke: color, overprint, stroke width, ...
• Text settings: font, size, ...
• Image properties: resolution, compression, ...
• Prepress: layers, output intent, OPI, ...
• Separations: used separations, remapping, varnish, ...
• Position: position, scaling, ...
• Summary
A. Enfocus Inspector categories
B. Enfocus Inspector subcategories
C. Attributes of the selected text or object
D. Collapse button
E. Fly-out button
View or change an attribute in the Enfocus Inspector
To view or change an attribute in the Enfocus Inspector:
1. Click the Select Objects tool
2. Choose Window > Show Enfocus Inspector to display the Enfocus Inspector.
3. Select any text or object in the PDF document.
4. Select the appropriate category and subcategory
5. If necessary, change the attribute or setting
34
Page 35

Enfocus PitStop Pro
Change objects using the Fly-out menu in the Enfocus Inspector
The Fly-out menu contains a number of generic actions, related to the selected category in the
Inspector. E.g. in the Fill category, the Fly-out menu contains “Convert to...” actions.
1. Click the Select Objects tool
2. Choose Window > Show Enfocus Inspector to display the Enfocus Inspector.
3. Select any text or object in the PDF document.
4. Select the appropriate category and subcategory
5. Click the Fly-out button
6. Select the action you want from the Fly-out menu.
Collapsing the Enfocus Inspector
The Enfocus Inspector can be collapsed, so that only the categories are visible, by clicking the
Collapse button. In that case the Collapse button will change into an Expand button.
Selecting a category or clicking the Expand button will expand the Enfocus Inspector.
4.5 Design Layouts
A Design Layout consists of page boxes, guides, and special zones on the page (such as the safe
type zone near the trim box or the location of punch holes at the central edge), that are drawn
on top of your document to guide your design.
They can also be applied to your design (for example to change the page boxes) if necessary.
The Design Layout Toolbar
The Design Layout toolbar consists of the Design Layout, the View Overlays and the View Page
Boxes buttons.
Design Layout button
The Design Layout button can:
• be grey when no document is open (whether a Design Layout is selected or not),
• have a red cross when a document is open but no Design Layout is selected,
35
Page 36

Enfocus PitStop Pro
• have a green check when a document is open and a Design Layout is selected.
Click the arrow beside the button to:
• choose a Design Layout,
• edit it (see Editing a Design Layout on page 38),
• apply it to the current page (see Applying a Design Layout to a Page on page 39),
• apply it to your whole document (see Applying a Design Layout to your Whole Document on
page 39),
• center it (see ),
•
show or hide the Enfocus Design Layout panel (see The Enfocus Design Layout Panel on page
37).
View Overlays button
The View Overlays button allows you to highlight all overlays (pages boxes, guides and special
zones) drawn over your document by the Design Layout you selected.
By default, the overlays are highlighted in the colors you chose in the Preferences (for guides
and zones), but you can change those colors for each Design Layout.
View Page Boxes button
36
The View Page Boxes button allows you to show all pages boxes drawn over your document
by the Design Layout you selected.
Page 37

The page boxes are shown in the colors you chose in the Preferences.
The Enfocus Design Layout Panel
Enfocus PitStop Pro
The Enfocus Design Layout Panel allows you to manage your Design Layouts.
To open it:
•
Go to Window > Show Enfocus Design Layout Panel...
•
Use the Alt + Ctrl + E shortcut (on Windows), or the Option + Command + E shortcut (on
Mac).
•
Click the Enfocus Design Layout button in the toolbar.
To manage your Design Layouts, the Preset Manager is used. For more information, see The
Enfocus Preset Manager on page 26
Default Design Layouts
PitStop Pro contains a number of default Design Layouts, with which you can start working
immediately.
• A4 ad template
• Brochure back template
• Brochure front template
• DVD label template
• US letter template
Using Design Layouts
Creating a Design Layout
To create a Design Layout from scratch, do the following:
1. Right-click in the Enfocus Design Layout Panel and choose New > New...
This opens the Enfocus Design Layout Editor.
2. Enter the name of your new Design Layout in Template Name.
37
Page 38

Enfocus PitStop Pro
3. For each of the Overlay types at right ( Page Boxes, Guides and Zones), choose the Settings
you want to use and their values. See Defining a Design Layout on page 39
4. Click Actions at right to add Action Lists and / or Global Changes to your Design Layout.
When applying a Design Layout, the Action Lists and Global Changes specified are executed
on the current page after the page boxes have been adjusted.
5. When you are done, click OK.
Your new Design Layout is saved as a Local Design Layout.
Editing a Design Layout
1. If the Design Layout you want to edit is a Standard Design Layout, you need to first drag it to
the Local database to duplicate it there.
2. In the Local database, double-click the Design Layout to edit.
This opens it in the Enfocus Design Layout Editor.
3. Edit the Design Layout as needed. See Defining a Design Layout on page 39
4. When you are done, click OK to save it in the Local database.
Activating a Design Layout
To see a Design Layout on top of your document, you need to activate it.
Note:
This doesn’t change your document.
To change your document according to what is specified in a Design Layout, you need to apply
that Design Layout. See Applying a Design Layout to a Page on page 39 or Applying a Design
Layout to your Whole Document on page 39.
To activate a Design Layout:
•
Select it in the Enfocus Design Layout Panel and click the Activate button.
• In your toolbar:
a)
click the arrow beside the Enfocus Design Layout button and select the Design Layout
to apply,
b)
click the View Overlays button.
38
Centering a Design Layout
If you want to center your Design Layout on your document:
1. Make sure you are in Edit mode.
2. Then either:
• select it in the Enfocus Design Layout Panel and click the Center button.
Page 39

Enfocus PitStop Pro
• click the arrow beside the Enfocus Design Layout button in your toolbar, and select
Center “Design Layout name”.
Applying a Design Layout to a Page
Applying a Design Layout is actually changing your document according to what is specified in
the Design Layout.
Note: To simply see a Design Layout on top of your document without changing your document,
activate that Design Layout (see Activating a Design Layout on page 38).
To apply a Design Layout to the current page:
•
Select it in the Enfocus Design Layout Panel and click the Apply to Page button.
•
In your toolbar, click the arrow beside the Enfocus Design Layout button and select Apply
“Design Layout name” to Page.
Applying a Design Layout to your Whole Document
Applying a Design Layout is actually changing your document according to what is specified in
the Design Layout.
Note: To simply see a Design Layout on top of your document without changing your document,
activate that Design Layout (see Activating a Design Layout on page 38).
To apply a Design Layout to your whole document:
•
Select it in the Enfocus Design Layout Panel and click the Apply to Document button.
•
In your toolbar, click the arrow beside the Enfocus Design Layout button and select Apply
“Design Layout name” to Document.
Defining a Design Layout
39
Page 40

Enfocus PitStop Pro
Page boxes
A Design Layout consists of:
• A name
• A description
• Page Boxes. See Page boxes on page 40
• Guides. See Using guides on page 43
• Zones. See Zones on page 43
• Actions. See Automating tasks with Action Lists on page 133
Page boxes defined
When you design a document and create a PDF document of it, it will contain a number of page
boxes. Page boxes are imaginary rectangles drawn around the various objects on a page and
around the page itself. They are a sort of description “behind the scenes” of the layout of your
PDF document.
Normally, you cannot see these page boxes if you look at a PDF document in Adobe Acrobat,
unless:
•
You select this option in the Adobe Acrobat Preferences (Page Display Category)
• You use PitStop Pro or another PDF editing tool.
40
Page 41

Enfocus PitStop Pro
Viewing information outside of the crop box
A new feature in PDF 1.3 was the ability to define a document that has information beyond its
final trim size. In the graphic industry, this information usually includes bleed, registration marks
and other print and color control strips. Using the View Page Boxestool , you can easily
preview the information outside of the final trim size of your document.
This information is defined in the application that was used to create the original PDF file, for
example, Adobe InDesign or Quark XPress. Once they are made visible using PitStop Pro, these
elements can be edited, added, or removed, just like any other graphic object.
Some PDF documents are generated without any bleed, registration marks or other print and
color strips. When you click the View Page Boxes button for these documents, the page will
appear the same (except for a thin trim line drawn at the edges of the image).
To view a PDF document’s trim and bleed
1. Open a PDF document.
Acrobat displays the PDF document in its full size.
2. Click the View Page Boxes button.
Acrobat displays the page on the complete media size and shows:
• The trim size
• The page’s trim marks, if any
• The page’s registration and printer marks, if any
• The page’s bleed, if any
• Color control strips, if any
A. Trim marks
B. Trim size
41
Page 42

Enfocus PitStop Pro
Setting up the page boxes
1. Select Prepress Layout.
Using this option, you can define all page boxes. When selecting Screen Viewing Layout you
have a limited set of options to define the media box, crop box and art box.
2. Define the trim box
• Use Snap to detected trim marks to detect trim marks and use these to define the trim
• Use Same as existing trim box to keep the trim box from the original PDF document
C. Registration marks
D. Bleed
E. Media box
box. By clicking the Edit button, you can define the color (100% in CMYK, Registration color,
a specific color) of the trim marks.
• Set the Trim box size to a predefined paper size, or select Custom to define the width and
height.
3. Define the bleed box
• Set the bleed box to Absent to have no bleed box defined. Otherwise, set it to Present
• Use Snap to detected bleed marks to detect bleed marks and use these to define the bleed
box. By clicking the Edit button, you can define the color (100% in CMYK, Registration color,
a specific color) of the bleed marks.
• Define the margin to be used based on the trim box, either using a left, right, top and
bottom margin, or the same distance on all sides, using the Margin to Trim buttons
• When using a left, right top and bottom margin, you can use Mirror for even pages to
swap the left and right margin on even pages.
4. Define the media box
• Define the margin to be used based on the trim box, either a left, right, top and bottom,
or the same distance on all sides, using the Margin to Trim buttons
• When using a left, right top and bottom margin, you can use Mirror for even pages to
swap the left and right margin on even pages.
42
5. Define the crop box and art box
• Absent: no crop box / art box
• Same as trim box
• Same as media box
Page 43

Using guides
Enfocus PitStop Pro
• Snap to visible (only for art box): sets the art box to the bounding box of the page content
that lies within the crop box, or if there is no crop box, within the media box
Managing Guides
•
Click the + button to add a new guide
•
Click the - button to remove the selected guide
•
Click the Color field to define the color for the selected guide
•
Change the name for a guide in the Name field
To define a guide
When selecting a guide in the list, you can change its settings underneath
•
Orientation: Vertical or Horizontal
•
Relative to: the page box used as reference
•
Anchor Point: The reference point on the page box. Top/Center/Bottom for Horizontal guides,
Left/Center/Right for Vertical guides.
•
Offset: Distance from the reference point. A positive value is to the top/right, a negative value
to the bottom/left.
•
Mirror on even pages (only for vertical guides): mirror the guide horizontally over the center
line of the crop box on even pages
•
Color: the representation color for the guide
Zones
Zones can be used to define a safety box and safe type zone, and for any other specific areas
(punch holes, etc.)
Safety box and safe type zone
The safety box is not really a page box in the strict sense of the word: it is not a page box type
which is stored in the PDF document. The safety box is a visual area which is a bit smaller than
the trim box. It contains all text, or other objects, which must always be visible on the printed
and finished document. The area between the safety box and the trim box is called the safe type
zone: this is the zone where you must not place any text or objects, unless these objects are
intended as bleed.
43
Page 44

Enfocus PitStop Pro
A. Media box
B. Trim box
C. Safe type zone
D. Safety box
The safety box is intended to compensate for incorrect finishing:
• The pages can be cut slightly off the trim marks and a bit more to the “inside” of the pages.
Text or objects would then be cut off by accident.
• The pages can be punched and the punching holes can perforate the text or objects which
are too close to the edge of the page.
Managing zones
•
Click the + button to add a new zone
•
Click the - button to remove the selected zone
•
Click the Color field to define the color for the selected zone
•
Change the name for a zone in the Name field
To define a zone
When selecting a zone in the list, you can change its settings underneath.
•
Shape: Border, Rectangle or Circle
•
Design Layout position: the position and size of the zone, based on its shape
•
Mirror on even pages: mirror the zones horizontally over the center line of the crop box on
even pages
•
Drawing mode: Show the zone as a transparent overlay, make it invisible or show it as an
opaque area.
•
Color: the representation color for the zone
•
Highlight: You can highlight text and non-text objects if they are completely in the zone, or
even if they are inside, overlapping or covering the selected zone.
44
Define a Border zone
A Border zone uses existing page boxes.
Page 45

Enfocus PitStop Pro
This can be used for example to define a safety zone based on the trim box.
•
Select Relative to and select a page box to base the zone on that page box. Select Between
page boxes and select two page boxes to set the zone the area in between.
•
When using Relative to, you can define the complete area outside or inside the page box as
zone, using Complete area inside box or Complete area outside box
•
To define a specific area, select Area
•
Set to Outside box and set the size to define a zone on the outside of the selected page
box, or
•
Set to Outside box and set the size to define a zone on the outside of the selected page
box, or
•
Set to Inside box and set the size to define a zone on the inside of the selected page box,
or
•
Set to Centered on box and set the size to define a border centered on the edge of the
selected page box
Define a rectangular zone
1. In Relative to, select a page box to base the position of the rectangle on.
2. Define the Corner of the page box to be used as reference point.
3. Enter the Offset distance and Size for the rectangle.
4. Enter a Safe Margin Distance
The safe margin is indicated as a dashed line to the outside of the rectangle zone.
Define a circular zone
Circular zones can be used for example to indicate punch holes.
1. In Relative to, select a page box to base the position of the circle on.
2. Define the Corner of the page box to be used as reference point.
3. Enter the Center Point offset and Radius for the circle.
4. Enter a Safe Margin Distance
The safe margin is indicated as a dashed line to the outside of the circle zone.
4.6 Working with Layers
About Layers
In PDF 1.5, objects can be assigned to one or more layers. A Layer can be set to visible or unvisible,
and to printing or non printing.
45
Page 46

Enfocus PitStop Pro
Layer settings can be changed using an Action List, or in the Enfocus Inspector.
Change Layer settings in the Enfocus Inspector
The Enfocus Inspector allows to view and change the layer settings for an object.
To view the Layer settings
1. Click the Select Objects tool
2. Choose Window > Show Enfocus Inspector to display the Enfocus Inspector.
3. Select any text or object in the PDF document.
4. Select the Prepress category and the Layers subcategory
The Visibility Expression will now show to what layers the selected object belongs.
To remove the Layer settings for the selected object
1. Choose Window > Show Enfocus Inspector to display the Enfocus Inspector.
2. Select the Prepress category and the Layers subcategory, and click the Fly-out button to open
the Fly-out menu
3. Select Make always visible to remove the object from all layers
To change the Layer settings of the selected object
1. Choose Window > Show Enfocus Inspector to display the Enfocus Inspector.
2. Select the Prepress category and the Layers subcategory, and click the Fly-out button to open
the Fly-out menu
3. Select Assign to layer to assign the object to the selected layer, removing it from all others
4. Select a layer from the list, or select New Layer to create a new layer.
46
Page 47

5. Working with Certified PDF documents
5.1 PDF workflow concept
Certified PDF is a PDF workflow concept developed by Enfocus Software based on customer requests
and feedback from industry experts. The Certified PDF concept has been designed to address
three fundamental issues faced by the majority of users implementing a PDF workflow:
• How to guarantee that a PDF document was successfully preflighted with a specific Preflight
Profile.
• How to maintain consistency between the source document(s) and the PDF document when
(minor) changes can be applied to the PDF document throughout the workflow.
• How to minimize risk and responsability when changing a customer’s PDF document before
final output.
Enfocus PitStop Pro
More elaborate information on the Certified PDF concept and workflow can be found in the
PitStop Pro Reference Guide.
5.2 The Certified PDF workflow explained
A conventional PDF workflow
In a conventional PDF workflow, the PDF document goes through the hands of different parties
who can each edit it, if necessary. The original PDF document is replaced by the edited one.
The Certified PDF workflow: incremental save
47
Page 48

Enfocus PitStop Pro
In the Certified PDF workflow, all the modifications done in a PDF document are logged per
session and saved in an edit log file. Also, the edited PDF documents can be saved incrementally.
This means that the changes done in version 3, for example, can be saved “on top of” the changes
done in version 2 but you keep one physical PDF file.
The incremental save principle does not necessarily increase the file size of your PDF document
drastically because Adobe Acrobat only saves the changes made during the different sessions.
The difference in file size may become apparent if you delete a large number of objects, because
these objects are maintained in one or more versions. You can, however, at any stage in the
workflow, “optimize” your Certified PDF document, i.e. reduce its file size, simply by using the
Save As function of Adobe Acrobat and clicking the Certified Full Save button. You will still have
a Certified PDF document with history information about previous editing sessions, but you will
no longer be able to save snapshots of these sessions or use the roll-back mechanism to revert
to a previous state of your Certified PDF document.
Roll-back mechanism
The Certified PDF workflow can also offer you a robust roll-back mechanism. Each time you save
your Certified PDF document by choosing File > Save (or pressing CTRL+s) , a “snapshot” will
be included in the file. You may think of a snapshot as an “image” of the state of the PDF
document at the time it was saved. This allows you to revert to any previous stage in the Certified
PDF workflow and to compare different versions of your PDF document, even though you maintain
one physical PDF file.
48
Note: You cannot save snapshots or use the roll-back mechanism in “optimized” Certified PDF
documents. See also Saving an optimized Certified PDF document on page 62 and Saving snapshots
on page 58.
Page 49

5.3 What is an Enfocus Certified PDF document?
Acrobat metadata
Any regular PDF document contains metadata, i.e. information about the document itself. The
Document Properties dialog box of Adobe Acrobat, for example, includes the following metadata:
• Creation and modification date of the PDF document
• The application with which the PDF document was created
• The PDF version
• File size
• The name and path of the PDF file
• Number of pages
• Page size
Enfocus metadata
Enfocus PitStop Pro
An Enfocus Certified PDF document can be enriched with the following metadata:
• A reference to one or more source documents on which the PDF document was based
• A Preflight Profile
• A preflight report
• User and system identification
• An edit log, listing all the changes done in the PDF document per editing session (the time
in which the PDF document was opened, edited and saved)
• Session comments
5.4 Checking the Certified PDF status of a PDF document
To check the Certified PDF status of a PDF document
1. Open a PDF document.
2. Check the dedicated Certified PDF Status button on the Adobe Acrobat File toolbar.
The button indicates the Certified PDF status of your PDF document as follows:
ActionMeaningButton
The current PDF document is not a
Certified PDF document (yet).
The current PDF document is in a
Certified PDF workflow, but was not
successfully preflighted and
verified. The possible causes are:
Click this button to start the
Certified PDF workflow.
Click this button to open the
Enfocus Certified PDF Panel.
49
Page 50

Enfocus PitStop Pro
ActionMeaningButton
• The PDF document has been
preflighted with errors.
• The Preflight Profile doesn’t
match the Preflight Profile
Comparison.
• The PDF document or the
selected Preflight Profile has
been changed since it was last
preflighted.
• The original document has been
changed
The current PDF document is a
Certified PDF document which was
successfully preflighted and
verified:
• The Certified Preflight Profile
• The PDF document has been
The aspects of the Certified PDF Status
The Certified PDF Status is determined by different aspects. As soon as one aspect has a "not OK"
status, the overall Certified PDF status will be not OK as well (red). If all aspects have an "OK"
status or an "undetermined" status (for example if no Original Documents are defined), the
Certified PDF status will be "OK"
•
Preflight: Checking the document based on a Preflight Profile. See Certified PDF Preflight on
page 53
•
Original Documents: a reference to the original documents, to monitor any changes made to
the originals. See Verifying the original source document on page 53
•
Certified Preflight Profile Comparison: The Profile Compare Configuration allows to set a
number of Preflight Profiles that are allowed. The Certified Preflight Profile Comparison allows
to check if the Preflight Profile used for the Certified PDF document matches a Preflight Profile
from this list. See Certified Preflight Profile Comparison on page 54
Click this button to open the
Enfocus Certified PDF Panel.
matches the Preflight Profile
Comparison.
preflighted without any errors.
50
Page 51

5.5 Setting the Certified PDF user identification
Note: The Personal Info can not be changed if a PDF document is in a Certified PDF Workflow.
Therefore the Personal Info has to be set before starting a Certified PDF workflow.
Two types of user identification
An Enfocus Certified PDF document can contain two types of user identification: personal
information and system information. Each of these serves its own purpose:
•
The personal information is your name and company contact details, together with a message,
if any. You can fill this in so that people know how to reach you if they should have any
questions about edit or preflight actions done in the PDF document.
•
The system information consists of the details of the person who registered PitStop Pro and
information taken from your operating system, network and computer. This information
cannot be changed and is therefore a reliable source to pinpoint responsibility, for example.
If people claim or disclaim responsibility for a given change made in the PDF document, the
system information will provide incontestable proof. This information will be used in the edit
log to show who made which changes in a given session.
Enfocus PitStop Pro
To set the personal identification
1. Choose Certified PDF > Show Enfocus Certified PDF Panel .
2. Open the Certified PDF Info category by clicking the + button
3. Click the Edit button.
4. Fill in your personal information.
Fill in as much information as possible. A message is optional.
5. Click OK.
To view the system information
1. Choose Certified PDF > Show Enfocus Certified PDF Panel .
2. Open the Certified PDF Info category by clicking the + button
3. Click the Edit button.
4. Click the System tab.
5. If you have more than one Enfocus product installed, select Enfocus PitStop Pro in the Program
list.
6. Click OK.
51
Page 52

Enfocus PitStop Pro
5.6 Starting a Certified PDF workflow for a PDF document
Stamping a PDF document
Starting a Certified PDF workflow for a PDF document means that you ‘stamp’ the document: You
provide it with the information necessary to enjoy the benefits of the Certified PDF workflow for
that particular PDF document. As soon as you have started a Certified PDF workflow for a document,
any change made to the document will be “recorded” per editing session and can be traced in
the edit log.
Figure 6: Starting a Certified PDF workflow for a PDF document
To start a Certified PDF workflow
1. Open the PDF document for which you want to start a Certified PDF workflow.
2. Choose Certified PDF > Start Edit Log , click the Start Edit Log button in the Enfocus Certified
PDF Panel, or click the button.
Note: If you have made any changes to your PDF document, you should save it before you
start the Certified PDF workflow. If you did not save it, a warning will appear prompting you
to do so.
The Certified PDF workflow has now been started for this PDF document.
3. Click OK.
5.7 Preflight and Verify
The Preflight and Verify button in the Certified PDF Panel will check all aspects of the Certified
PDF Workflow:
•
The PDF document will be preflighted using the selected Preflight Profile.
•
The defined Original Documents will be checked
•
The selected Preflight Profile is checked in the Certified Preflight Profile Comparison
•
The Certificates are checked for Certified PDF 2 compliancy
52
Page 53

5.8 Certified PDF Preflight
In the Preflight category in the Certified PDF Panel, you can define the Preflight Profile to be
used, view the result of the preflight, preflight the document, etc.
In the top right corner of the Preflight category, the status is shown of the Preflight only (without
the other Certified PDF aspects such as Original Documents and Preflight Profile Comparison).
For more information on Preflighting, see Preflighting and checking PDF documents on page 66
Enfocus PitStop Pro
Preflight
If the document hasn’t been preflighted yet, or if the document or the Preflight Profile has
changed, you can use the Preflight button to run a Preflight, without checking all other aspects
of the Certified PDF workflow
Show Result
If the PDF document is preflighted, you can view the Preflight Report by clicking the Show Result
button.
Preflight Profile
The Preflight Profile field shows the selected Preflight Profile. You can remove it by clicking the
Clear button. You can select a Preflight Profile by clicking the Select button.
•
You can select a Preflight Profile From Database, showing the same databases as in the
Preflight Profile Panel
• If you have the Preflight Profile on your computer as a file (for example if you received it by
mail), you can select From File and Browse to the file.
5.9 Verifying the original source document
You can add references in your Certified PDF document to one or more source files on which the
PDF file was based. This does not only offer you or the PDF recipient a convenient way to find
the respective source files, it also enables you to check whether these source files have changed
since the time at which the Certified PDF workflow was started for this PDF document. Indeed,
if you wish to “synchronize” the source file with the edited PDF document, you will use the edit
log report to apply the changes from the PDF document in the source document. It is then crucial
to know that you are working in the correct version of the source file.
53
Page 54

Enfocus PitStop Pro
In the top right corner of the Preflight category, the status is shown of the Preflight only (without
the other Certified PDF aspects such as Original Documents and Preflight Profile Comparison).
To verify the original source document
In the Original Documents category in the Certified PDF Panel, you can define the original
documents and, view the their status.
•
Click the + button and browse to add a reference to an original document.
•
Select a reference and click the - button to remove it
• Select an original document in the list to see details on the creation date, modification date
and type.
•
Check the status of an original document in the Status column.
• If the source document status is “Identical”, it means that the source document has not
changed since the Certified PDF workflow was started. You can apply the changes listed
in the edit log file to the source document.
• If the source document status is “Different”, it means that the source document has
changed since the time when a Certified PDF workflow was started for the PDF document.
If possible, check the various versions of the source document first before you synchronize
any of these source documents with the PDF document.
• If the source document status is “Missing”, it means that the source document is moved,
renamed or deleted. Select the missing source document and click Browse. Locate the
corresponding source document at its new location or with its new name and click Open.
The source document will reappear in the list with the status “Identical” or “Different”.
5.10 Certified Preflight Profile Comparison
54
In the Certified Preflight Profile Comparison category in the Certified PDF Panel, you can define
the profile compare configuration to be used, and view the result of this comparison.
Page 55

In the top right corner of the Preflight category, the status is shown of the Preflight only (without
the other Certified PDF aspects such as Original Documents and Preflight Profile Comparison).
Clicking the Edit button opens the Enfocus Preflight Profile Compare Panel
The Enfocus Preflight Compare Panel
The Enfocus Preflight Compare Panel allows you to manage your Preflight Profile Compare
configurations, using the Enfocus Preset Manager. See The Enfocus Preset Manager on page 26
•
Select a Preflight Profile Compare configuration and click Select to compare the Certified PDF
Preflight Profile to this configuration
•
Click Clear to remove the selection
• Double-click a configuration to open the Preflight Profile Compare Configuration panel to
change it. See Setting a Preflight Profile Compare Configuration on page 55
•
click the action button and choose New to create a new configuration in the Preflight
Profile Compare Configuration panel. See Setting a Preflight Profile Compare Configuration
on page 55
Enfocus PitStop Pro
Setting a Preflight Profile Compare Configuration
•
Change the name for the Configuration in the Name field.
•
Click the + button to select a Preflight Profile from the Preset Manager and add it to the current
configuration
Note:
For a Preflight Profile to match the Preflight Profile Compare Configuration, the Preflight
Profile names must be identical. The Preflight Profile name is the name stored in the Preflight
Profile, not the file name (*.ppp) of the Preflight Profile.
•
Click the - button to remove the selected Preflight Profile from the configuration
•
If the Stricter Preflight Profiles are allowed option is set, the Preflight Profile will also match
if it is more strict than one of the Preflight Profiles in the Configuration.
55
Page 56

Enfocus PitStop Pro
Note:
More Strict means that more criteria are set, or that the criteria have a higher reporting level
(for example Error instead of Warning).
5.11 Providing a Certified PDF document with job information
About job information
Certified PDF documents can be provided with job information. Job information can be any kind
of information about the PDF document which you would like to share with the person who will
receive the PDF document. This can include, for example:
• The name, company address and contact details for whom the PDF document is (ultimately)
intended.
• Any additional remarks which the recipient of the PDF document has to know. This can be,
for example, details about how the PDF document should be printed or what should happen
next with the PDF document.
To provide a Certified PDF document with job information
1. In the Enfocus Certified PDF Panel, open the Certified PDF Info category.
2. Click the Edit button to open the Enfocus Certified PDF Info
3. Select the Job Info tab.
Note:
The Personal Info in the Enfocus Certified PDF Info panel can only be changed before starting
the Certified PDF workflow. See Setting the Certified PDF user identification on page 51
4. Fill in the name, company address and contact details of the recipient of the PDF document.
5. In the Message text box, type additional comments or remarks for the recipient of the PDF
document.
6. Click OK.
5.12 Adding a session comment
56
The Certified PDFmechanism in PitStop Proenables you to enhance the quality of your PDF workflow
by adding comments to the edit log. Before sending your PDF document to the publisher for
example, you may want to explain why given changes have been made.
Page 57

You can add comments per editing session. A session is the time in which you edit and save a
PDF document.
To add a session comment
1. Choose File > Enfocus Sign and Save .
2. Add a new session comment
3. Click OK.
5.13 Viewing the edit log file
About the edit log file
The Certified PDF mechanism in PitStop Pro keeps a record of every editing session of a Certified
PDF document. Thus, all the changes made to the PDF document are logged chronologically in
the PDF document. The changes can be logged in two different ways, depending on the tool they
were made with:
• If you edit your PDF document with any of the Enfocus Certified PDF-compliant plug-ins, such
as Enfocus PitStop Professional or Enfocus Instant PDF, the changes are immediately saved in
the edit log file. The edit log file will contain a detailed entry for each of the changes.
• If you edit your PDF document with non-compliant third-party PDF editing tools, PitStop Pro
will intercept and log them. However, the edit log file will contain no details on the changes
nor on the product with which the changes were made.
Enfocus PitStop Pro
To view the Edit Log File
Choose Certified PDF > Show Edit Log .
The edit log report appears. The edit log is a PDF file showing all changes per session.
5.14 Viewing the document history
The Certified PDF mechanism in PitStop Pro allows you to consult the history of your PDF document.
This means that you can view a chronological list of all the sessions that your Certified PDF
document has run through.
The chronological list of sessions contains the following information:
• The Certified PDF product that “stamped” the session
• The person or company responsible for the session
• The end date and time of the session
To view the document history
1. Choose Certified PDF > Show History .
57
Page 58

Enfocus PitStop Pro
2. Double-click any of the sessions to see all available details about that session.
3. Click the User or System tab to view the corresponding information for this particular session.
4. Click Close.
Saving snapshots
Snapshots and roll-back mechanism explained
In a Certified PDF workflow, a PDF document can go through various editing sessions, done by
various users. A Certified PDF document can “remember” all the changes that were made during
a given session and can store the information about these changes per session (“incrementally”)
as you save your PDF document.
This way of managing and saving changes has a big advantage: You know exactly which changes
have been made in which session and by whom. Moreover, these changes can be presented to
you in the form of a “snapshot”: a view of the status of the PDF document at the time it was
saved at the end of a session.
And you can do even more: You cannot only view the state of the PDF document in a given
previous editing session, you can also save this snapshot as a separate PDF document. This is
called the roll-back mechanism. When editing PDF documents, you may have experienced
“one-change-too-far” situations, in which you made a change, got an undesired result but also
saved the PDF document. No problem in a Certified PDF workflow: you can revert to any previously
saved state of a PDF document, provided that you save your Certified PDF document using File
> Enfocus Sign and Save (or CTRL+Shift+s).
Note: You cannot save snapshots or use the roll-back mechanism in “optimized” Certified PDF
documents. See Saving an optimized Certified PDF document on page 62.
Viewing a snapshot
You can view snapshots of a Certified PDF document in the following ways:
• By Saving a snapshot on page 58 with a different name and opening it as a regular PDF
document
• By Comparing sessions on page 59
Saving a snapshot
A snapshot is a visual representation of the state of a PDF document at the time it was saved
after an editing session. You save a snapshot to revert to a previous version of your PDF document.
However, you do not necessarily have to save this snapshot at the end of each session. You can
simply select any session from a list and save its snapshot at any stage in your workflow.
58
Consider the following example. You have created a Certified PDF document in which you use
only black text and one spot color. The document has been designed to be printed on an offset
press. At some point in the workflow, however, you also want to print this PDF document on a
digital four-color press and therefore, you change the spot color into its CMYK counterpart
throughout your entire PDF document. You may use Enfocus PitStop Pro, for example, to do this.
This means that the latest version of your PDF document contains only CMYK colors. But, you also
need to reprint this PDF document on an offset press using the spot color. You can then simply
Page 59

Enfocus PitStop Pro
select a version which still has the spot colors, save its snapshot as a separate PDF document
and send this PDF file to your offset printer.
To save a snapshot
1. Open a Certified PDF document.
2. Choose Certified PDF > Show History .
3. Select a session in the list of which you want to save a snapshot.
4. Click Save Snapshot to save a snapshot of your PDF document as it was at the end of the
selected session.
5. Enter a descriptive name for your snapshot and click Save.
6. If necessary, repeat steps 2 through 4 to save any additional snapshots.
7. Click Close.
Comparing sessions
About comparing sessions
At some point in your PDF workflow, you may want to compare two versions of your Certified
PDF document. You may wish to do this, for example, to detect minor changes. You can do this
in two ways:
• By comparing snapshots of these versions visually (side by side), see To compare sessions
visually side by side on page 60
• By comparing their respective edit log reports. See To compare sessions using the edit log on
page 61
59
Page 60

Enfocus PitStop Pro
Note: You cannot compare sessions in “optimized” Certified PDF documents. See Saving an
optimized Certified PDF document on page 62.
To compare sessions visually side by side
Comparing two versions of your PDF document visually is useful to see visible changes “at a
glance”. The idea is that you select two sessions and click the Compare Visually button. PitStop
Pro will then generate two snapshots showing the state of the PDF document at the end of the
respective sessions and present these snapshots side by side on screen.
1. Choose Certified PDF > Show History.
2. Select two sessions from the session list.
The Visually (side-by-side) button is enabled.
3. Click Visually (side-by-side).
PitStop Pro compares the two versions and displays them next to each other on screen,
indicating the differences.
60
Page 61

Enfocus PitStop Pro
To compare sessions using the edit log
You can also use the edit log to compare two versions of your Certified PDF document. This is
recommended if you know that changes have been made that are hardly visible on screen, such
as overprint or trapping settings or changes in (hidden) layered objects.
1. Choose Certified PDF > Show History .
2. Select two session from the session list.
The Using the Edit Log button is enabled.
3. Click Using the Edit Log.
The first snapshot is opened and the Enfocus Certified PDF Edit Log Navigator appears.
4. Select one of the changes in the list.
The document will show where the changes occurred by adding a transparent overlay to the
object.
Note: You can change the color of the transparent overlay in the Preferences. Choose Edit >
Preferences > Enfocus StatusCheck and click the colored rectangle of the primary highlight
color.
5. Click the Toggle button to switch views between the first and the second snapshot.
The Edit Log Navigator displays only the changes for the current page in the document. If
you go to another page in your PDF document, the Edit Log Navigator adjusts the list of
changes to match the new page.
61
Page 62

Enfocus PitStop Pro
5.15 Saving an optimized Certified PDF document
What is an “optimized” Certified PDF document?
An “optimized” Certified PDF document is a Certified PDF with reduced file size.
If you edit and save a Certified PDF document, you may notice that its file size will increase. The
reason is obvious: all the changes done in an editing session are stored in the Certified PDF
document. So even if you perform actions which would normally reduce the size of your PDF file,
such as removing objects or downsampling images, saving the PDF document will increase its
file size. And this increase can become significant, depending on the types of actions and the
number of editing sessions you do.
If file size is or becomes an issue, you can “optimize” your Certified PDF by using the Save As
function of Adobe Acrobat to reduce its file size. You will then still have a Certified PDF document
with history information about previous editing sessions, but you will no longer be able to:
• Save snapshots of one or more previous sessions
• Use the roll-back mechanism to revert to a previous state of your Certified PDF document
• Compare sessions
See also:
• Roll-back mechanism on page 48
• Saving snapshots on page 58
• Comparing sessions on page 59
To save an optimized Certified PDF document
1. Open your Certified PDF document in Adobe Acrobat.
2. Choose File > Save As .
3. Click one of the following buttons:
• Copy and Save. Create a copy of the Certified PDF document. You can select this option to
save your Certified PDF document on a different location. The size of the PDF file will
increase slightly but you can still save snapshots and use the roll-back mechanism in this
copy.
• Certified Full Save. Creates an optimized Certified PDF document: the file size will be
reduced significantly but you can no longer save snapshots or revert to previous states of
the PDF document. The history information about previous editing sessions, however, will
be maintained.
• Save UnCertified Copy. Creates a regular, “unCertified” PDF document. The file size will be
reduced significantly but you lose all the benefits of working with Certified PDF documents.
62
Page 63

5.16 Checking for updated Specifications on CertifiedPDF.net
CertifiedPDF.net: An Online Resource for PDF Specifications
CertifiedPDF.net is an online resource for PDF Specifications. See Online resource on page 63 and
PDF Specifications on page 63.
Online resource
CertifiedPDF.net is a Web site for professional PDF users. The primary goal of CertifiedPDF.net is
to provide graphic arts professionals with a centralized hub to exchange PDF Specifications.
Through integration with Enfocus' desktop products you stay up-to-date with changes that
happen to these Specifications.
CertifiedPDF.net also provides a wealth of supporting resources such as white papers, tips and
tricks and a database of explanations and solutions on the feedback you get from your preflight
report.
Enfocus PitStop Pro
PDF Specifications
A PDF Specification is a collection of files which the document creator can use to deliver PDF
documents which are up to the document receiver’s expectations. A Specification can include:
• A PDF Queue
• A Preflight Profile
• Action Lists
• PostScript Printer Description (PPD) Files
• QuarkXPress print styles
• Adobe InDesign CS print presets or PDF presets (called printer styles and PDF styles respectively
in Adobe InDesign 2.x)
• Adobe PDF Settings (*.joboptions)
• ICC Profiles
• Documentation
The PDF document receiver creates and publishes Specifications on CertifiedPDF.net. The PDF
document creator uses Specifications from CertifiedPDF.net.
CertifiedPDF.net Community
CertifiedPDF.net is a public Web site and is accessible to anyone. You can freely visit the Web site
and browse through the list of Specifications. You can also see who is a contributing member of
CertifiedPDF.net or take a look at the available resources.
However, if you wish to use CertifiedPDF.net effectively, you can become a registered member
of the CertifiedPDF.net community. You can register:
• As a Subscribing member on page 63
• As a Contributing member on page 64
Subscribing member
Subscribing members, or “subscribers”, are typically people who create and deliver PDF documents.
Once registered as a subscribing member, you can download and subscribe to PDF Specifications.
63
Page 64

Enfocus PitStop Pro
You can manage your Specifications on CertifiedPDF.net and you will also be notified automatically
if one of these Specifications is updated.
Subscribing members can use CertifiedPDF.net free of charge.
Contributing member
Contributing members, or “contributors”, are those who create Specifications and publish them
on CertifiedPDF.net. These are typically:
• People who receive PDF documents such as printers and publishers
• Industry associations
Contributing members pay a yearly fee for the right to publish their Specifications on
CertifiedPDF.net.
Checking for updated Specifications
If you have subscribed to one or more Specifications on CertifiedPDF.net, you can have PitStop
Pro automatically check for updates. You will then be notified of changes to one or more of these
Specifications and can be sure that you are using the latest versions. You can also specify the
interval at which this check has to be done.
The status of a Specification you subscribed to is displayed in PitStop Pro through the
CertifiedPDF.net button in the Adobe Acrobat Toolbar. The button changes color depending
on the status:
MeaningStatusCertifiedPDF.net
button color
Up-to-date
Unregistered
Not confirmed
All the Specifications you have subscribed to on
CertifiedPDF.net are confirmed and haven’t changed since
the last time you installed the files of these Specifications.
You have not registered on CertifiedPDF.net yet. Make sure
you have a CertifiedPDF.net account and then choose Edit
> Preferences > Enfocus Certified PDF Preferences >
CertifiedPDF.net and fill in your CertifiedPDF.net User Name
and Password.
There are Specifications on CertifiedPDF.net to which you
have subscribed but which have been changed in the mean
time.
To set the updating preference options
1. Choose Edit > Preferences > Enfocus StatusCheck and click the CertifiedPDF.net category.
64
Go to CertifiedPDF.net and read the change note. If
necessary, install the updated files and documentation of
the Specification and click Confirm in the Actions column.
Page 65

2. Fill in your User Name and Password.
Your user name is the e-mail address you used when you registered on CertifiedPDF.net.
3. Select the interval at which you wish to check for updated Specifications.
4. Click OK.
To check the status of your CertifiedPDF.net account
•
Click the CertifiedPDF.net button .
PitStop Pro checks whether your CertifiedPDF.net account is up-to-date.
Enfocus PitStop Pro
65
Page 66

Enfocus PitStop Pro
6. Preflighting and checking PDF documents
6.1 Running a preflight check
Running a preflight check can be done from the Enfocus Processing - Preflight panel, or, in a
Certified PDF workflow, from the Certified PDF panel
You can open the Enfocus Processing - Preflight panel by
•
clicking the Enfocus Processing - Preflight button
•
choosing Plug-Ins > Enfocus PitStop Pro > Show Enfocus Processing panel and clicking the
Preflight button
•
using the Enfocus Processing Panel shortcut, Alt+Ctrl+P and clicking the Preflight button
Managing Preflight Profiles
In the Enfocus Processing - Preflight panel you can manage your Preflight Profiles using the
Enfocus Preset Manager. See The Enfocus Preset Manager on page 26
Editing or creating a Preflight Profile is done in the Preflight Profile Editor. See To edit or create
a Preflight Profile on page 69
To run a preflight check
1. Open the Enfocus Processing - Preflight panel by clicking the Enfocus Processing - Preflight
button
2. Select a Preflight Profile in the Preset Manager
3. Set the page range on which you want to perform the Preflight check
4. If you want the Preflight to be a part of the Certified PDF workflow, select Certified PDF
Preflight. See also Difference between a Certified and a regular preflight check on page 67
If the document is not yet in a Certified PDF workflow, choosing this option and running the
preflight will start the Certified PDF Workflow. See Working with Certified PDF documents on
page 47
Note:
66
A Certified PDF Preflight is always run on the complete document. When choosing Certified
PDF Preflight, the page selecting options will be unavailable.
5. Click the Run button
Page 67

Enfocus PitStop Pro will run the Preflight on the selected pages, using the selected Preflight
Profile.
After finishing, the Enfocus Navigator will show all errors, allow to restart the Preflight, suggest
solutions, etc. See Using the Enfocus Navigator on page 72
Difference between a Certified and a regular preflight check
If you are going to run a preflight check on your PDF document, you can choose to perform a
Certified PDF preflight on page 67 or not (Regular preflight on page 67).
Regular preflight
A regular preflight does not change the Certified PDF status of thePDF document:
ThenIf, at the time of preflighting,
Enfocus PitStop Pro
The PDF document is not a Certified PDF
The PDF document is a Certified PDF
Certified PDF preflight
A Certified PDF preflight checks and changes the Certified PDF status of the PDF document as
follows:
The PDF document is not a Certified PDF
The PDF document is a Certified PDF
The PDF documentwill remain “unCertified”.
The Preflight Profileembedded in the Certified
PDFdocument will not be removed, even if you
preflight the PDF document with a different Preflight
Profile in the Enfocus Processing Panel.
ThenIf, at the time of preflighting,
You will be asked whether you want to start a Certified
PDF workflow for this PDF document.
The PDF document will already have a Preflight Profile
embedded. PitStop Pro will check whether the Preflight
Profile you selected in the Enfocus Processing Panel is
the same as the embedded Preflight Profile:
If the Preflight Profiles match, the PDF document will
be preflighted.
If the Preflight Profiles do not match, you will be asked
whether you want use the Preflight Profile you just
selected in the Enfocus Processing Panel instead of
the embedded Certified Preflight Profile.
67
Page 68

Enfocus PitStop Pro
6.2 Properties of PDF documents
Categories of properties
The Enfocus Preflight Profile Editor gives you access to, and control over, a large number of
properties in PDF documents. These properties have been subdivided into a number of categories
and are represented as such in the Enfocus Preflight Profile Editor.
A preflight check verifies and fixes these properties of a PDF document. Categories of these
properties are, for example:
• The document’s digital format
• Security
• Pages
• Fonts
• Color
• Images
• OPI
• Text
• Line art
• Transparency
• Annotations
• Metadata
• PDF/X
6.3 Problem reporting
Problem severity levels defined
If any of the properties in a PDF document does not comply with the settings as specified in the
Preflight Profile, it will be logged in the preflight report and in the Enfocus Navigator. You can
select how these deviations should be reported:
• As “Warning”
• As “Sign-Off”
• As “Error”
These labels indicate severity levels of the detected “problem”. If a property does not comply,
you can define how severe the detected problem is:
•
You can label deviating properties as “Warning” if it is not a real problem in the strict sense
of the word, but just something you would like to be informed about.
•
You can label deviating properties as “Sign-off” if it could be a real problem (handled as an
Error), unless the user signs off the problem, stating that it is no real issue for this particular
document. In that case it will be handled as a Warning.
68
Page 69

•
You can label deviating properties as “Error” if you really want them to be as specified in the
Preflight Profile before you send them to output.
Problem severity levels: example
Suppose that some of the PDF documents you work with contain RGB colors. First, you want to
print them on a composite output device, such as a laser printer, for proofing purposes. In that
case, RGB colors are not really a problem. However, you would like to know which PDF documents
contain objects in RGB color, because at a later stage, you might want to print these documents
on an offset press. You could then use two different Preflight Profiles to preflight these PDF
documents:
•
A Preflight Profile for the laser printer, which reports RGB colors as “Warning”
•
A Preflight Profile for the offset press, which reports RGB colors as “Error”
6.4 To edit or create a Preflight Profile
Enfocus PitStop Pro
1. Open the Enfocus Preflight Profile Editor, either by creating a new Preflight Profile or by
editing an existing one.
2. In the General category, check and, if necessary, change the Preflight Profile Properties:
Name, Author, Company and Description of the Preflight Profile.
3. Click the Processing category.
The Processing Properties relate to fixes which have to be made or not, and to the information
that you would like to see in the preflight report. For example, you can choose to log fixes
and include the following information pages in the preflight report:
• Fonts
• Images
• Color
• OPI
• Page boxes
• Output intent
Furthermore, you can enable or disable all fixes in the Preflight Profile. Indeed, an Enfocus
Preflight Profile can do more than just a preflight check of PDF documents: it can also fix
detected problems. You can, however, also create a Preflight Profile in which you specify a
number of fixes and disable these fixes. You may want to do this if you just want to check
PDF documents but not change them now, maybe later.
4. In the Processing category, select or specify the following:
• If necessary, Disable and/or Log fixes.
• If necessary, Disable Sign-off
• The Pages to show in the preflight report.
• The source and target ICC profiles for the respective color spaces.
5. Click a problem category in the list.
69
Page 70

Enfocus PitStop Pro
6. Select the Enable check box for this category.
7. Select one or more properties or potential problems to check.
Note: The integrated Help at the bottom of the Enfocus Preflight Profile Editor provides
background information about each check or fix.
8. Specify how to fix the problem, if necessary.
9. Select how the detected problem should be listed in the preflight report: Warning, Sign-off
or Error.
10. Repeat steps 7 through 11 for each potential problem you wish to check and fix.
11. Click OK.
6.5 Adding Action Lists to Preflight Profiles
About adding Action Lists to Preflight Profiles
Before you perform a preflight check in your PDF document, you may want to edit your PDF
document first. And you may want to use Action Lists to perform a number of Global Changes.
For example, you may have a number of Action Lists to correct or change colors in your PDF
document. Instead of running these Action Lists separately and then performing the preflight
check, it may be a better idea to include these Action Lists to your Preflight Profile. You will then
kill two birds with one stone:
• The Action Lists in the Preflight Profile will be run first.
• The Preflight Profile will check the selected properties of your PDF document and fix problems,
if any.
To add Action Lists to a Preflight Profile
1. Open the Enfocus Processing - Preflight panel.
2. Double-click the Preflight Profile you want to change.
The Enfocus Preflight Profile Editor will open
3. Click the Action Lists category.
70
4. Select Enable Action Lists.
5. Click the button and select an Action Listto check properties or fix problems.
6. If you add several Action Lists, use the and buttons to specify the order in which the
Action Lists should be run.
Note: Running two or more Action Lists in a different order may produce a different result.
You may want to test this first.
Page 71

7. Click OK.
6.6 Locking a Preflight Profile
About locking
You can secure your Preflight Profile, or part of it, with a password to prevent others from changing
its settings. This may be convenient when the Preflight Profile is shared among multiple users.
You can lock a Preflight Profile with a password when you create the Preflight Profile or you can
add a password afterwards.
The password can include:
• Uppercase and lowercase letters
• Any character on the keyboard
• Spaces
Enfocus PitStop Pro
To lock a Preflight Profile with a password
1. Open the Enfocus Processing - Preflight panel.
2. Double-click the Preflight Profile you want to change.
The Enfocus Preflight Profile Editor will open
3. Click the Locking category in the Enfocus Preflight Profile Editor.
4. Select a restriction level:
MeaningRestriction level
Not locked
Partially locked
None of the settings of the Preflight Profile will be locked. Anyone
can change any setting.
Everything is locked, except for the actions you allow using the
options underneath
• Disable all fixes
• Disable Sign-off
• Other processing settings.
Locked
5. Fill in a password and confirm it.
6. Click Apply.
Nothing can be changed. You can only select the Preflight Profile and
run it in your PDF document.
71
Page 72

Enfocus PitStop Pro
6.7 Using the Enfocus Navigator
Navigating through errors, warnings, fixes and failures
When you run an Action List or Preflight Profile in your PDF document, a number of properties
of your PDF document will be checked and, if necessary, fixed. Of course, you want to know what
the result of this check is and what exactly has been fixed or changed. The Enfocus Navigator
can help you with this. Depending on your Enfocus Preferences, it can appear right after you
have run an Action List or Preflight Profile. The Enfocus Navigator:
•
Lists Errors and Warnings of a preflight check
•
Lists Fixes which have been made automatically while running an Action List or Preflight
Profile
•
Lists problems which could not be fixed (Failures)
• Enables you to browse through and highlight changed or potentially problematic objects
• Presents solutions to specific problems and ways to fix these problems interactively.
• Enables you to view the preflight or action report
To use the Enfocus Navigator
1. Run a Preflight Check or an Action List on your document.
The Enfocus Navigator appears.
2. To expand the section of your choice, click the plus sign (+):
• Results on page 73
• Object Browser on page 73
• Solutions on page 74
• Sign-off on page 74
• Report on page 74
72
Page 73

Enfocus PitStop Pro
Results
You can click the plus sign (+) to expand the Errors, Warnings, Fixes or Failures categories. Click
an error, warning, fix or failure to see more information and, if possible, see the problematic
object highlighted.
Figure 7: Highlighted object: image from which the alternate image has been removed.
Object Browser
You can use the Object Browser to view and highlight problems or potentially problematic objects
one by one. You can click the or button to view the next or last object or problem,
respectively. If necessary, you can also change the highlighting settings.
You may want to use the Object Browser in combination with the Enfocus Inspector to see more
details about a particular problem or to correct the problem immediately.
For example, suppose you get an error saying that the resolution of three images in your PDF
document is too high. You can proceed as follows:
1. Use the Object Browser to view and highlight the images in question.
2. Choose Window > Show Enfocus Inspector or click the Show Inspector button to display
the Enfocus Inspector.
3. In the Enfocus Inspector, click the Image > Properties category to see the actual resolution
of the selected image.
4. Click the Resample tab and decrease the resolution of the images to the required value.
5. Click Restart Preflight in the Enfocus Navigator to update the list of errors, warnings and
fixes.
73
Page 74

Enfocus PitStop Pro
Solutions
There may be problems in the PDF document which were not fixed automatically by the Preflight
Profile. You find the appropriate fix for most of these problems in the Solutions section, and you
can select to fix all or individual problem objects.
For example, your PDF document may contain annotations, and these annotations are reported
as a warning. You did not use a Preflight Profile which removed all annotations because you
want to keep some of them. You can then use the Object Browser to view and highlight the
annotations in your PDF document and you can remove the annotations of your choice.
Sign-off
If a property is set to Sign-off in the PDF Profile, the deviating property will result in an error in
the report. However, you can decide that the error is not a real problem for the job or workflow.
Such a property will then be handled as a warning.
1. In the Enfocus Navigator, open the Sign-off section by clicking the + button
2. You might enter a note on why you sign off the error
3. Do one of the following:
• Set the Apply to option to all problem objects to sign off all problems at once.
• Set the Apply to option to current object, and use the Object Browser to select the specific
object and error you want to sign off.
4. Click the Sign Off button
Report
You can view a detailed report of all the errors, warnings, fixes and failures. Select a report layout
and click Show report.
See also Viewing and interpreting reports on page 74
6.8 Viewing and interpreting reports
Content of a report
You can run an Action List or Preflight Profile to check and change your PDF document. If you do
so, you can view a report of these actions. The report generated by PitStop Pro is also a PDF
document. It can include the following sections:
74
Errors, Warnings & Fixes
General File Information
ContentSection
(potential) problems according to the selected Preflight Profile and
changes which have been made in the PDF document
properties of the PDF document, such as PDF version, title, author,
etc. and security information
Page 75

Enfocus PitStop Pro
ContentSection
Font Information
Image Information
Color Information
See also Editing PDF2Go documents on page 120
To view and interpret a report
1. Run a Preflight Check or an Action List on your document.
The Enfocus Navigator appears.
2. Click the plus sign (+) to expand the Report section.
all fonts used in the PDF document, along with their attributes (type
of font, embedded or subset, etc.)
all images in the PDF document, along with additional information
(for example physical and effective resolution, page, angle, custom
color functions, etc.)
OPI usage in the PDF documentOPI Information
all color spaces (RGB, CMYK, etc.) used in the PDF document, with
additional information where required
information about layers in PDF2Go documentsPDF2Go Information
3. Select a report layout and click Show report.
The report appears and the errors, warnings and fixes are listed on the first page.
4. Using the Adobe Acrobat Hand Tool , do one of the following:
• Click the magnifying glass next to an error, warning or fix to select and highlight the
corresponding object in the PDF document. You may want to use the Object Browser in
combination with the Enfocus Inspector to see more details about a particular problem or
to correct the problem immediately.
• Click the information icon next to an error, warning or fix to see the Help topic. A
dialog box may appear, asking you where you wish to view the Help topic (Open Weblink).
If so, select In Web Browser.
6.9 Annotated Reports
About Annotated Reports
An Annotated Report makes the combination of the report and the original document. It offers
the possibility to navigate through the Preflight Report in Acrobat Reader or in a browser, without
using any Enfocus software.
75
Page 76

Enfocus PitStop Pro
An Annotated Report is a combination of the original document and the Report Information. The
Report Information is integrated in the original document as a number of notes and bookmarks,
allowing to easily navigate to the errors and warnings.
Creating Annotated Reports
Annotated Reports are regular reports, created with Annotated Report as layout type.
This can be set either in the Enfocus PitStop Pro Preferences, or in the Enfocus Navigator. See
Using the Enfocus Navigator on page 72
To view and interpret an Annotated Report
1. Run a Preflight Check or an Action List on your document.
The Enfocus Navigator appears.
2. Click the plus sign (+) on Windows, or the triangle on Mac OS, to expand the Report section.
3. Select the Annotated Report layout and click Show report.
The Annotated Report appears. The Preflight Profile used, the number of warnings and errors,
the original file name, and date and time of preflighting is shown in a note on top of the
first page.
4. Use the plus and minus buttons in the Bookmarks to expand or collaps the bookmarks
5. Click a warning or error to highlight it in the document
6. Click the Stop Highlighting bookmark to turn off all highlighting
Remove the Report information
In an Annotated Report, you can remove the Report information, so you get the original processed
document again.
1. Open the Annotated Report
2. Choose File > Enfocus Remove Report Info
6.10 Automating preflighting
Enfocus PitStop Server
If you have a large number of PDF documents which you have to check against a specific Preflight
Profile, you may have the need to automate this process.
PitStop Server offers automated preflighting of PDF documents. You can create hot folders in
which you include a given Preflight Profile and, if necessary, Action Lists (see also on page 133).
PitStop Server will then monitor a user-definable input folder at regular intervals and
automatically check each PDF document which is put into this folder. Valid and invalid PDF
76
Page 77

documents will automatically be moved to a respective folder, together with a preflight report,
if required.
More information about PitStop Server is available on our Web site: www.enfocus.com.
Enfocus Switch
Using Enfocus Switch, you can easily integrate automated preflight, correction and certification
of PDF files into a larger automated workflow. Enfocus Switch is capable of automatically receiving
jobs through email or FTP, of sorting and routing jobs based on file type or naming conventions,
and of automating a complete range of key professional publishing applications. This allows a
smooth integration of the Enfocus preflight technology with PDF file creation, color conversion,
image optimization, imposition and proofing tools.
More information about Enfocus Switch is available on our Web site: www.enfocus.com .
Enfocus PitStop Pro
77
Page 78

Enfocus PitStop Pro
7. Editing objects
7.1 Selecting objects
Object selection tools
To select an object in your PDF document, you can use one of the two selection tools:
•
The Select Objects tool
•
The Select Similar Objects tool
Selecting one specific object
The Select Objects tool works almost completely the same in preview mode and in wireframe
view mode. The only difference is that, in wireframe view mode, you can only select line-art
and vector images on their outlines.
To select an object
Using the Select Objects tool , click the object or drag a dotted rectangle, also called a
marquee or bounding outline, around the object.
A. Selecting an object in preview mode can be done by clicking anywhere on the object.
B. Selecting an object in wireframe view mode is possible only by clicking on the object’s outlines.
Figure 8: Dragging a marquee around the object to select the entire graphic.
78
• If you select a line-art object or a pixel image you will see that the object’s outline is
drawn on top of it, together with the anchor points (for line art). If you enabled the center
Page 79

Enfocus PitStop Pro
selection handle in the PitStop Pro preferences, a point of origin on the center of the
object’s bounding box will appear as well, as in the above graphic.
• If you select text, you will see that an outline is drawn along its baseline with an extra
anchor at the left of the text line. These anchors are not active; they cannot be used to
resize the object. If you double-click a text segment, the entire logical text line is selected.
• Clicking on a compound path selects only the segment of the path that was clicked upon.
Double-clicking such a compound path selects the complete object.
• You can select an object that is masked by clicking on the (invisible) part of the object
outside of the mask. The order of objects is retained. This means that an overlaying invisible
(masked) rectangle will be selected instead of an underlying visible object when clicked.
The mask itself can be selected by clicking on its (invisible) outline. If you move the cursor
over an invisible mask, the pointer will be inverted. Double-clicking the mask selects the
entire mask group. If you double-click a masked image, the first mask belonging to the
image is selected.
To select similar objects
The Select Similar Objects tool lets you select multiple objects on the same page which have
the same attributes. This tool can be useful if you want to change objects in your PDF document
which are similar.
1. Click the Select Similar Objects tool .
2. Select an object in your PDF document. This can be either a (part of a) graphic or a text
segment.
A. Single click on a compound path.
B. Double-clicking a compound path to select the complete object.
3. The Enfocus Inspector will open and display the relevant attributes of the selected object.
79
Page 80

Enfocus PitStop Pro
4. If necessary, deselect one or more properties to expand your selection.
5. Do one of the following to select similar objects:
• Click the Select Similar Objects button.
• Double-click the selected object.
All similar objects, i.e. objects with the same selected attributes, will be selected.
7.2 Hiding and showing selected objects
Reasons for hiding objects
Once you have selected one or more objects, be it text or line-art or pixel images, you can hide
the selection. You may wish to do this, for example, if you wish to edit objects which are difficult
to select because they are in part or completely covered by other objects. Hidden objects will
not be visible in wireframe view.
You can hide one object at a time and make hidden objects all at once visible again.
See also Viewing a PDF document in wireframe view on page 20.
To hide selected objects
1. Using the Select Objects tool , select one or more objects.
2. Choose Edit > PitStop Hide Selection .
To make all hidden objects visible
Choose Edit > PitStop Show All , or select Show All from the context menu.
80
Page 81

7.3 Changing the stacking order of objects
Stacked objects
Sometimes, your PDF document may contain objects which are placed on top of each other. If
you wish to edit one of the underlying objects, you may have to bring this object to the front
first, to be able to do so. For situations like this, PitStop Pro enables you to change the order in
which the objects are stacked.
Figure 9: Changing the stacking order of objects: the red background of the top half of the page has been brought forward.
Enfocus PitStop Pro
To change the stacking order of objects
1. Select the object which you want to bring forward or send backwards.
2. Choose Edit > Enfocus Object Order and select one of the options:
• Bring Forward or Send Backward moves the selected object respectively one position
upwards or downwards in the stack.
• Bring to Front or Send to Back moves the selected object to the top or the bottom of the
stack.
7.4 Replacing an object
About replacing objects
PitStop Pro enables you to replace an object with another object in a single copy-and-paste
action. The new object will automatically adopt exactly the same size and position as the object
which it replaces. It will also adapt its proportions to the previous object. The result will be a
“distorted” rectangular object.
81
Page 82

Enfocus PitStop Pro
To replace an object
A. Copy an object
B. Select the object which is to be replaced
C. Paste the “new” object over the “old” one and resize in one single step
1. Using the Select Objects tool , select the “new” object, i.e. the object which you want to
use to replace the another one.
2. Choose Edit > Copy .
3. Select the “old” object, i.e. the object which is to be replaced.
4. Choose Edit > Replace .
The copied object will replace the “old” object and will assume its exact size, proportions
and position.
7.5 Changing or removing the OPI information of objects
About OPI
If your PDF document contains objects with OPI (Open Prepress Interface) information, you can
change or remove this information using the Enfocus Inspector.
To change or remove the OPI information of objects
82
1. Using the Select Objects tool , choose Window > Show Enfocus Inspector.
2. Select an object in your PDF document for which you want to change the OPI information.
3. Click Prepress > OPI to display the OPI information of the selected object.
4. Do one of the following:
• To change the OPI information, put your cursor in the File name box, make the required
changes and click Change. For example, you may wish to change the file name or path of
the image.
• Select Remove OPI Information from the fly-out menu.
Page 83

7.6 Changing the transparency of objects
You can make objects transparent or change their transparency settings. Furthermore, you can
remove transparency from a selected object or from an entire page.
To change the transparency of objects
1. Choose Window > Show Enfocus Inspector to display the Enfocus Inspector.
2. Click the Fill and Stroke > Transparency category.
3. Select the object of which you want to change the transparency.
4. Do any of the following:
• To change the transparency, move the Alpha Stroke or Alpha Fill slider.
• If you make text transparent, you may want to select the Text knockout option. The inks
of underlying objects, if any, will then be cut out on the other separations.
• To change the way in which the colors of the transparent object on top blend with the
colors of underlying objects, add the required blending modes. Select one or more blending
modes in the Available list and click the Add or Replace button to put them in the Selected
list. The RIP will apply the blending modes in the order as they appear in the Selected list:
If it cannot apply the blending mode which is on top of the list, it will try to apply the
second one, and so on.
Enfocus PitStop Pro
Note: For more information about blending modes, visit the Adobe Web site (www.adobe.com)
or refer to the Help or documentation of your design application (Adobe InDesign,
QuarkXPress...).
To remove transparency
1. Choose Window > Show Enfocus Inspector to display the Enfocus Inspector.
2. Click the Fill and Stroke > Transparency category.
3. Go to the page which contains transparent objects and, if necessary, select the transparent
object(s).
4. Select the option from the fly-out menu to remove transparency from the selected objects or
the page.
Note: You can also use an Action List or Preflight Profile to remove transparency.
83
Page 84

Enfocus PitStop Pro
7.7 Changing the color of text or line-art objects
Change the color, and specify the fill and stroke attributes
You can change the fill or stroke color of text or line-art objects in your s. You can select a color
from the same color space, from a different one or from the User Swatches. Once you have selected
a color, you can also specify the object’s fill or stroke. See Fill attributes on page 84 and Stroke
attributes on page 84.
Fill attributes
If you are going to specify the fill color of polygons or loops, you will be able to select the fill
attribute (regular) Fill or EOfill. Polygons and loops can be distinguished from other line-art
shapes in the sence that that they are compound paths with intersecting lines. To determine
whether a point is part of the shape or not, different rules can be applied: the standard rule or
the even-odd (EO) rule. These rules determine the filling method of the shape.
A. Polygon with EOFill
The even-odd rule supposes that you draw a line between a point inside the shape outline (x)
and a point (y) outside its outline. If that line crosses the line of the shape an odd number of
times, the shape area to which the point (x) belongs, is filled. If the number of crossings is even,
the area is not filled.
Stroke attributes
Line art, but also text, is basically made up of paths. The outline of a path is called a stroke and
a stroke can have the following attributes:
•
•
84
B. Polygon with standard fill
D. Loop with standard fillC. Loop with EOFill
Weight. The weight is the thickness of a stroke, usually expressed in points.
Color.
Page 85

•
Dash pattern. You use the dash pattern to create dashed lines. You can do this by specifying
the length of the line segments and the space (gaps) between them.
•
Cap style. The cap style determines the appearance of the stroke at the end of a path.
•
Join style. The join style determines the appearance of the stroke at the corner points of a
path.
•
Miter limit. The miter limit is the limit when a join switches from mitered (pointed) to beveled
(squared-off). You can calculate the miter limit by dividing the miter length by the stroke
weight. If the length of the miter equals a given number of times the stroke weight, the join
will be beveled. Suppose the stroke weight of a line is 2 pt. and the miter limit is 4. As soon
as the length of the miter is 8 pt., the tip of the angle will be squared off to a bevel join.
Logically, a miter limit of 1 will always be a bevel join because the miter length is always more
than the stroke weight. To allow “pointier” angles, you increase the miter limit. Obviously,
the miter limit does not apply to joins of which the style has already been set to round or
bevel.
To change the color of text or line-art objects
Enfocus PitStop Pro
1. Using the Select Objects or Select Similar Objects tool , click the text or line-art objects
of which you want to change the color.
You may want to use the Select Similar Objects tool to select all the text or line-art objects
on the page which have the same color.
2. Choose Window > Show Enfocus Inspector to display the .
3. Click the Fill and Stroke category and make sure Fill or Stroke are selected.
The Enfocus Inspector displays the current color settings of the selected objects.
4. To change the color of the selected text or line-art objects, click the Fill Color or Stroke Color
category and do one of the following:
• To change the color within the same color space (for example CMYK), move the slider of
the respective color to the left or to the right or type a percentage in the text box.
5. To change the color to another color space (Gray, RGB, CMYK, spot color), click the respective
option in the fly-out menu, and, if necessary, move the sliders to the left or to the right or
type the percentage in the text box.
Note: Converting a color in the Enfocus Inspector is done using the color profiles defined in
the Preferences. Converting a color based on specific color profiles can be done in the Color
Convert window. See the PitStop Pro Reference Guide for more information
• To change the color to a spot color, click Convert to Spot Color from the fly-out menu. In
the Color Picker, select a color library and a spot color, and then click OK.
• To use a color from the User Swatches, click Color Picker from the fly-out menu. Select a
color from the user swatches and click OK.
If necessary, you can now specify the fill and/or stroke attributes of the selected objects.
6. Click the Fill/Stroke category.
85
Page 86

Enfocus PitStop Pro
7. In the Stroke subcategory, specify the stroke attributes:
• Specify the Stroke weight.
• Select a Cap style and a Join style.
Join styleCap style
MeaningIconMeaningIcon
Miter joinButt cap
Round joinRound cap
Bevel joinProjecting cap
• If you selected a miter join style , set the Miter Limit.
• If you want to make the line dashed, click the Dashed Line button , and then specify
the length of the dashes in the On boxes and the gaps between them in the Off boxes. If
necessary, move the dashes by specifying a Phase.
8. If you have chosen to fill a polygon or loop, select Fill or EOfill.
Converting color using the Enfocus Convert Color panel
BA
86
Converting and changing a color can be done in the Enfocus Inspector, using the color profiles
defined in the Preferences. However, for a correct color conversion based on specific color profiles,
the Enfocus Convert Color panel can be used.
To convert a color using the Enfocus Convert Color Panel
1. Using the Select Objects or Select Similar Objects tool , click the text or line-art objects
of which you want to change the color.
Page 87

Enfocus PitStop Pro
You may want to use the Select Similar Objects tool to select all the text or line-art objects
on the page which have the same color.
2. Choose Window > Show Enfocus Convert Color panel to display the Enfocus Convert Color
panel.
3. Define if you want to convert the Fill, the Stroke or Both
4. Select the color space you want to convert the color to.
5. If necessary, change the Source ICC Profile. Only the profiles for the Source color space will
be available.
Note: For gray objects, you can also select CMYK profiles, in order to treat gray as CMYK black.
6. Set the Target ICC Profile. Only the profiles for the Target color space will be available.
7. Define the Rendering Intent to be used.
8. Click Convert
Using DeviceLink Profiles
In the Enfocus Convert Color panel, you can use DeviceLink Profiles instead of ICC Profiles.
DeviceLink Profiles are device specific profiles, converting colors from one color space to another,
without converting to LAB or any other device independent color space in between.
Since DeviceLink Profiles have a Source and Destination color space defined, you can only select
DeviceLink Profiles matching the source and destination color space in the “Source” field. The
Target profile field will be disabled if a DeviceLink profile is selected.
7.8 Working with User Swatches
Using User Swatches
PitStop Pro allows you to work with User Swatches. These User Swatches are a list or database of
colors which you use frequently. You can:
• Build User Swatches of new or existing colors
• Use colors from the User Swatches to apply to text or objects in your PDF documents
• Remove colors from the User Swatches
You can build User Swatches which you frequently reuse in your environment. You can even
create new colors and add these to your User Swatches. The User Swatches can contain any color
space defined in PDF 1.3, including spot colors and color spaces such as DeviceN and Patterns.
To build User Swatches
1. Using the Select Objects tool , click any text or object in the PDF document which has the
color which you want to add to your User Swatches.
87
Page 88

Enfocus PitStop Pro
2. Choose Window > Show Enfocus Inspector to display the Enfocus Inspector.
The Enfocus Inspector appears and shows the current color settings of the selected text or
object.
3. If necessary, change the color using the sliders or select another color model (Gray, RGB or
CMYK) or spot color.
4. In the fly-out menu, click Add color to user swatches.
5. Type a descriptive name for the color in the dialog box, and click OK.
The specified color is now saved in your User Swatches and can be reused later.
To apply a color from the User Swatches to text or objects
Once you have stored a color in your User Swatches, you can apply this color to objects or text
in your PDF document. Proceed as follows:
1. Using the Select Objects tool , click any text or line-art object in the PDF document to
which you want to apply a color from your User Swatches.
2. Choose Window > Show Enfocus Inspector to display the Enfocus Inspector.
3. Click the Fill and Stroke category, and select Color Picker from the fly-out menu.
4. Select User Swatches as Color Library
5. Select a color from the User Swatches and click OK.
6. If necessary, adjust the selected color using the sliders in the Enfocus Inspector.
To remove colors from the User Swatches
You can easily remove colors from the User Swatches, for example colors which you will no longer
use. Proceed as follows:
1. Using the Select Objects tool , select any text or object in the PDF document.
2. Choose Window > Show Enfocus Inspector to display the .
3. Click the Fill and Stroke category, and selectColor Picker from the fly-out menu.
4. Select User Swatches as Color Library
88
5. Select the color in the list which you want to remove.
6. Click Remove.
7. Click Cancel.
Page 89

7.9 Rotating an object
Rotation point of origin
If you rotate an object, it is important to know the position of the axis around which this object
will rotate. This axis is indicated by the point of origin .
You can rotate an object in two ways:
• By dragging, see To rotate an object by dragging on page 89
• By specifying a rotation angle in degrees, using the Enfocus Inspector. See To rotate an object
by specifying a rotation angle on page 90
To rotate an object by dragging
1. Choose Window > Show Enfocus Inspector to display the Enfocus Inspector.
Enfocus PitStop Pro
2. Using the Select Objects tool , select the object which you want to rotate.
3. Click the Rotate Selection tool .
The Enfocus Inspector changes accordingly.
4. If necessary, change the Constrain Angle (for SHIFT-rotate) or the Cross Hair Color in the
Enfocus Inspector. You can change the Cross Hair Color by clicking the color patch and selecting
a different color.
Note: In the Numeric Feedback area you can find exact information about the rotating action
you are about to perform.
5. Click the selected object.
The object’s point of origin around which it will be rotated is indicated.
Figure 10: The point of origin is in the center of the selected object.
6. Do one of the following:
89
Page 90

Enfocus PitStop Pro
• Double-click on another position to move the point of origin. Move the pointer away from
To rotate the object around its center point, drag the selected object in a circular motion.•
Figure 11: Rotating an object around its center point.
the center point and drag in a circular motion to rotate the object around its new point
of origin.
Figure 12: Rotating an object around its point of origin placed outside the object.
• Hold down the SHIFT key while dragging to rotate the object in fixed angles. You can set
this angle in the Numeric Feedback category of the Enfocus Inspector dialog box.
• Hold down the ALT key (Windows) or Option key (Macintosh) while dragging to create a
rotated copy of the selected object.
To rotate an object by specifying a rotation angle
See Transforming an object by specifying exact values on page 97.
7.10 Scaling an object
You can scale an object to enlarge or reduce it horizontally or vertically or in both directions
simultaneously. You can also use the scale selection tool to change the shape of an object or to
create a scaled copy of the selected object.
You can scale an object in two ways:
• By dragging
• By specifying a scaling factor using the Enfocus Inspector
90
Page 91

See also Transforming an object by specifying exact values on page 97.
To scale an object by dragging
1. Choose Window > Show Enfocus Inspector to display the Enfocus Inspector.
2. Using the Select Objects tool , select the object that you want to scale. Click the object or
drag a dotted rectangle, called a marquee, around the object.
Enfocus PitStop Pro
Figure 13: Dragging a marquee around the object to select the entire graphic.
3. Click the Scale Selection tool .
The Enfocus Inspectorchanges accordingly.
4. If necessary, change the Cross Hair Color in the Enfocus Inspector.
Note: In the Numeric Feedback area you can find exact information about the scaling action
you are about to perform.
5. Click the selected object.
The object’s point of origin towards which it will be scaled is indicated.
Figure 14: The point of origin is in the center of the selected object.
6. Do one of the following:
91
Page 92

Enfocus PitStop Pro
• Double-click on another position of the object to move the point of origin. Then drag to
To scale the object disproportionally, drag the selected object into a random direction.•
Figure 15: Scaling an object disproportionally changes the height-to-width ratio of the object.
scale the object using the object’s new point of origin. For example, you may want to
place the point of origin on one of the corners of a rectangular object, to keep two sides
of the object at a fixed position when scaling.
• Hold down the SHIFT key while dragging to scale the object proportionally, i.e., to keep
the height-to-width ratio of the scaled object identical to the original’s.
• Hold down the ALT key (Windows) or Option key (Macintosh) while dragging to create a
scaled copy of the selected object.
7.11 Moving an object
You can select any object in a PDF document and move this object to a new location.
You can move an object in two ways:
• By dragging
• By specifying a given distance and direction using the Enfocus Inspector.
Figure 16: Scaling an object towards a point of origin other than the object’s center point.
You can use magnetic guides to facilitate aligning objects which you move.
To move an object or a copy of an object by dragging
1. Choose Window > Show Enfocus Inspector to display the Enfocus Inspector.
2. Using the Select Objects tool , select the object which you want to move.
You can hold down the SHIFT key and click the left mouse button to select multiple objects.
92
Page 93

Enfocus PitStop Pro
3. Click the Move Selection tool or hold down the CONTROL (CTRL) key (Windows) or Command
( ) key (Macintosh).
The pointer changes from into .
The Enfocus Inspector changes accordingly.
4. If necessary, change the Measurement Units in the Enfocus PitStop Pro Preferences.
Note: In the Numeric Feedback area you can find exact information about the move you are
about to perform.
5. Do one of the following:
• Drag the selected object to a new location.
Figure 17: Moving the selected object to a new location by dragging.
• Hold down the SHIFT key and drag the selected object confined to a horizontal or vertical
direction.
Figure 18: Holding down the SHIFT key while dragging moves the object along a fixed vertical or horizontal axis.
93
Page 94

Enfocus PitStop Pro
• Hold down the ALT key (Windows) or Option key (Macintosh) while dragging to create a
Figure 19: Holding down the ALT key (Windows) or Option key (Macintosh) while dragging the object creates a copy of the object
copy of the object in the new location.
in its new location.
94
Page 95

7.12 Shearing an object
About shearing
Shearing an object sets the object askew, very much like you would push any of the corners of
a rectangular frame to turn it into a parallelogram.
Enfocus PitStop Pro
Figure 20: Shearing a rectangular object turns it into a parallelogram
To shear an object
1. Using the Select Objects tool , select the object which you want to shear. Click the object
or drag a dotted rectangle, called a marquee, around the object.
2. Click the Shear Selection tool .
The object’s point of origin from which it will be sheared is indicated.
Figure 21: Dragging a dotted rectangle around the object to select the entire graphic.
Figure 22: The point of origin is in the center of the selected object.
95
Page 96

Enfocus PitStop Pro
The Enfocus Inspector changes accordingly.
3. If necessary, change the Constraint Angle (for SHIFT-shear) or the Cross Hair Color in the
Numeric feedback area of the Enfocus Inspector.
Note: In the Numeric Feedback area you can find exact information about the shearing action
you are about to perform.
4. Do one of the following:
• To shear the object while keeping the center point as the point of origin, drag the object
• To move the point of origin, double-click on another position inside or outside the object.
into a random direction.
Then drag to shear the object using the object’s new point of origin. For example, to create
a parallelogram from a rectangular object, place the point of origin on any of the corners
of the object.
Figure 23: Placing the point of origin on the corners of an object to create a parallelogram from a rectangular object.
• Hold down the SHIFT key while dragging to limit the shear movement to a fixed angle of
constraint, for example 15°. You can set this angle in the Numeric Feedback category of
the Enfocus Inspector.
Figure 24: Shearing an object in fixed angles, as defined in the Preferences.
• Hold down the ALT key (Windows) or Option key (Macintosh) while dragging to shear a
copy of the selected object.
96
Page 97

7.13 Transforming an object by specifying exact values
If you want to transform an object more accurately than by dragging and using one of the
transform tools Move , Rotate , Shear or Scale , you should use the Enfocus
Inspector. The Enfocus Inspector allows you to transform any object in your PDF document by
specifying exact values.
Transforming an object can include one or more of the following actions:
• Moving
• Scaling
• Stretching
• Flipping
• Rotating
To transform an object by specifying exact values
Enfocus PitStop Pro
1. Using the Select Objects tool , select the object that you want to transform.
2. Choose Window > Show Enfocus Inspector to display the Enfocus Inspector.
3. Click the Position category.
4. Do any of the following:
• Move or scale the selected object by changing the values in the Position & Size area:
MeaningBox
Lower Left
Upper Right
• Stretch or rotate the selected object by changing the values in the Aspect Ratio & Angle
area:
distance between the lower left point of the object and the lower left corner
of the page
height and/or widthSize
distance between the upper right point of the object and the lower left
corner of the page
ResultValueBox
stretched vertically (h > w)> 1Aspect Ratio
stretched horizontally (h < w)< 1
rotated clockwisepositiveAngle
rotated counterclockwisenegative
97
Page 98

Enfocus PitStop Pro
• Scale, rotate or flip the selected object by changing the values and clicking the buttons in
the Numeric Transforms area:
Proceed as follows:To...
Do one of the following:Scale an object
Enter a value in the percentage box and click .
Select Scale 50% or Scale 200% from the Fly-out menu.
Do one of the following:Rotate an object
Enter a value in the degrees box and click .
Select Rotate 90° Counterclockwise or Rotate 90° Clockwise from the
Fly-out menu.
7.14 Creating new shapes
Drawing ellipses and rectangles
You can use PitStop Pro to edit existing objects, but also draw new basic shapes such as ellipses
or rectangles. For example, you might want to draw a rectangle or an ellipse around a text
fragment to highlight the text.
Note: If you have to create several new shapes with identical fill and stroke properties, you may
wish to set these properties as default first.
To create a new shape
Do one of the following:Flip an object
Click to flip the object left or right
Click to flip the object up or down.
98
1. Click the Create New Rectangle tool or the Create New Ellipse tool .
2. Position the pointer on a page of the PDF document and do one of the following:
• To draw a new rectangle or ellipse, drag diagonally.
• To draw a square or circle, hold down the SHIFT key while dragging.
• To draw a rectangle or ellipse, starting from its center and not from its side, hold down
the ALT key (Windows) or Option key (Macintosh) while dragging.
Page 99

Enfocus PitStop Pro
A. Drawing from side keeps the sides of the shape in a fixed position along the x and y axis
B. Drawing from center keeps the center point in a fixed position.
• To draw a square or circle, starting from its center, hold down both the SHIFT key and the
ALT key (Windows) or Option key (Macintosh) while dragging.
7.15 Creating a new path
You can create new paths from scratch in your PDF document, simply by selecting the Create New
Path tool tool and clicking in the document. New anchor points and segments will be added
upon each click. You can create an open or a closed path.
To create a new path
1. Click the Create New Path tool .
2. If necessary, choose Window > Show Enfocus Inspector to display the Enfocus Inspector.
3. Position the pointer in the PDF document where you want to create the first anchor point
and click.
4. Position where you want the first segment to end and click again.
You have now drawn a segment between the two anchor points.
99
Page 100

Enfocus PitStop Pro
5. Click at other positions to add new anchor points and thus create additional segments.
Note: To create a curved segment, click at a position, hold down the mouse button and drag.
6. To complete the path, do one of the following:
• Click any tool other than the Create New Path tool
• Press ESC.
• Click Close Path in the Enfocus Inspector.
A. A. First anchor point
B. B. Segment
C. C. Center point
D. D. Second anchor point and pointer
7.16 Editing a path
PitStop Pro enables you to change the shape of a path of a line-art object. You can do this by
selecting one or more anchor points of the path and moving these anchor points or their direction
points.
To edit a path
1. Click the Edit Path tool.
2. Click the line-art object of which you want to edit a path.
The anchor points of the path become visible, but are not selected yet.
Figure 25: Anchor points are visible, but not yet selected.
100
3. Do one of the following:
• Click a specific anchor point a second time.
• Hold down the SHIFT key and click a number of anchor points a second time.
• Drag a dotted rectangle (marquee) around one or more anchor points.
 Loading...