

Enerlites HET01 Installation Instructions Manual
WARRANTY INFORMATION
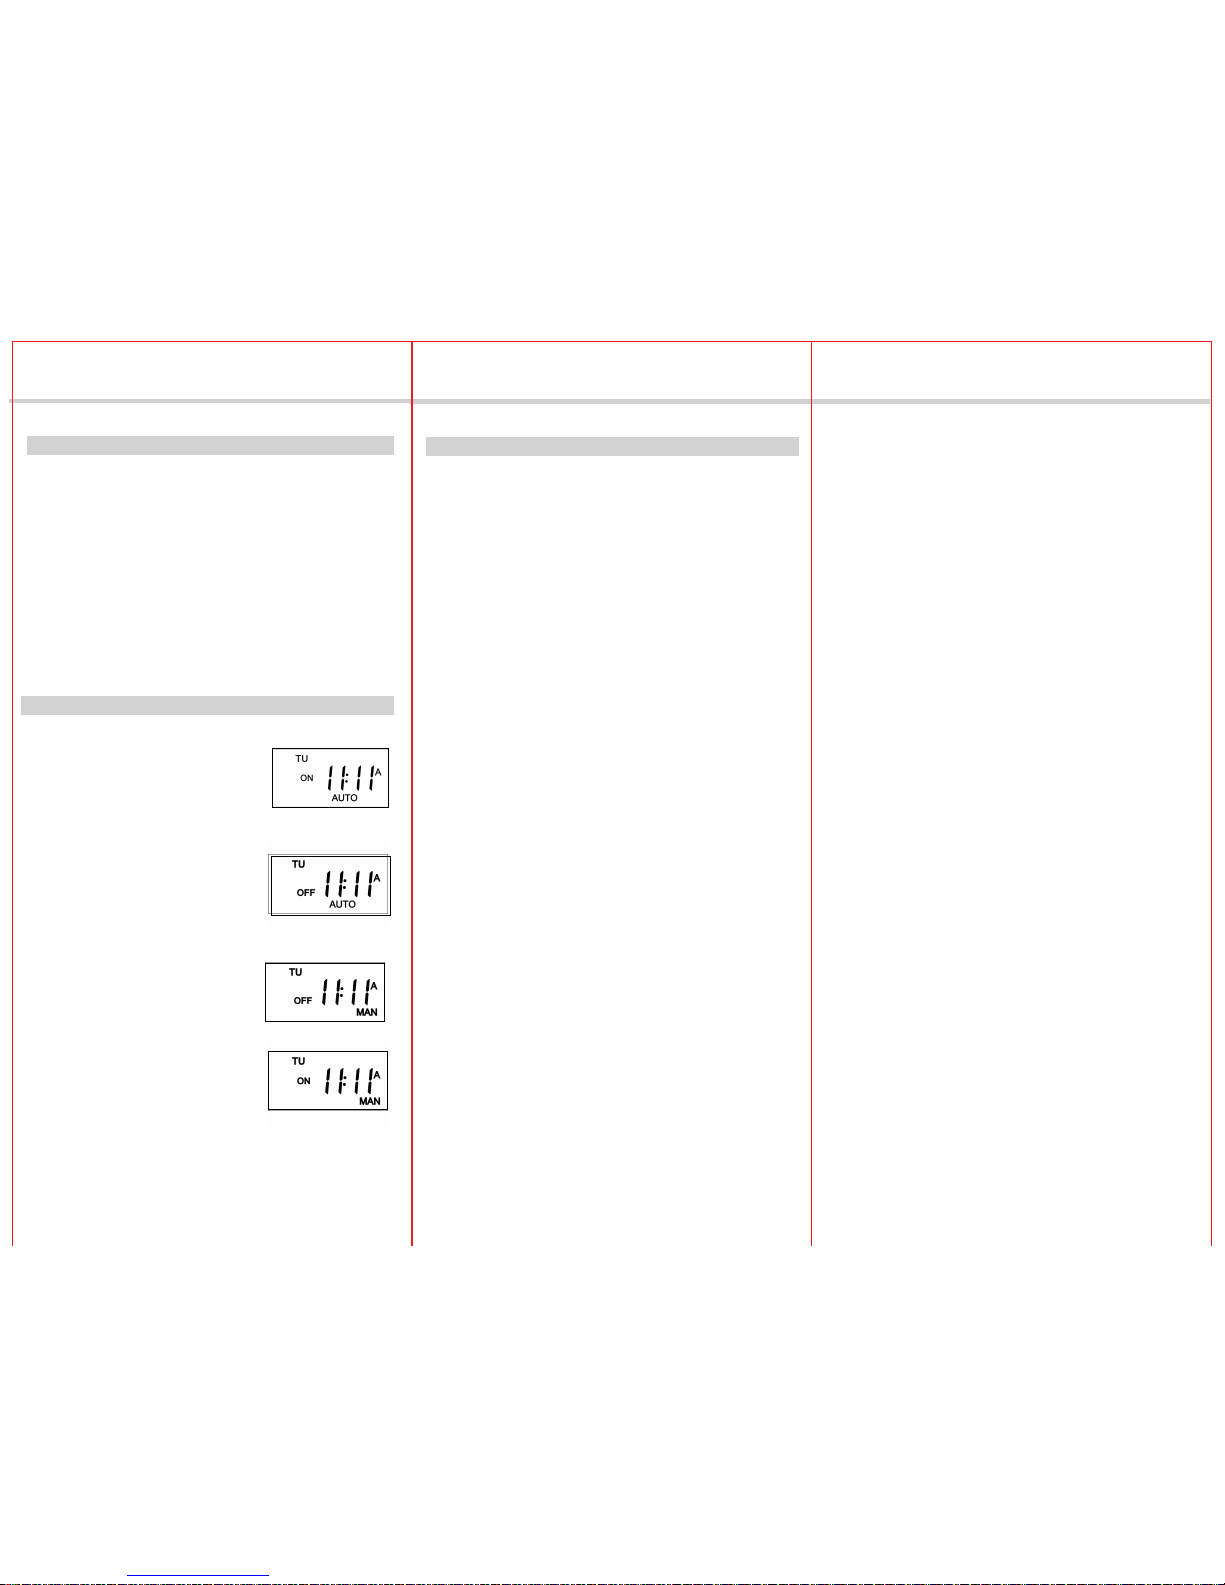
The programmable switch has 2 operating modes:
manual (MAN) and automatic (AUTO). To switch mode,
press any of the Man button.
*Automatic Mode
The programmable switch follows the programmed
schedule. The mode (AUTO), state (ON or OFF) and
current program number are displayed
To temporary override the programmed schedule, press
the switch door. The override remains in effect until you
press the switch door again or until the beginning of the
next program
*Manual Mode
The programmable switch operates as a regular switch.
Briefly press the switch door to turn the lights on or off.
The mode (MAN) and state (ON or OFF) are displayed
04
05
06
INSTALLATION INSTRUCTIONS
FUNCTION FOR" DST" "RND" " RCL"
Feb, 2016
10015B
1. DST (Daylight Saving Time) press and hold the HOUR button for 5 seconds,
entering into the Daylight
Saving Time (DST) mode and time on clock will
advance one hour. Press and hold for
another 5 seconds to cancel the "DST"
function and time on clock will fall back one hour
2.
RND (Random) press and hold the MIN button for 5 seconds, entering into
the Random
Vacation option for extra security by varying the ON/OFF times
within 30 minutes
of the program settings. Press and hold the MIN button for
another 5 seconds
to cancel the function
3.
RCL (Recall) it allows you to disable or enable the program ON/OFF
settings.
a. Press the PROG twice to view, press RCL one to clear the program.
Press RCL twice it will return the programmed to its original setting
Our company warranties this product to be free of defects in materials and
workmanship for a two years. There are no obligations or liabilities
on the part of
our company for consequential damages arising out of, or in connection
with, the
use or performance of this product or other indirect damages with
respect to
loss of property, revenue or
profit, or cost of removal, installation or
re-installation.
SELECTING THE OPERATING MODE
Motor…….....…..…….................…….........................……….………...........1/2HP
DESCRIPTION
-01-
-02- -03-
SPECIFICATIONS
Voltage ……………………………………...........……….................. 120VAC, 60Hz
Resistive………..........…...…….…………...................……………15Amp, 1800W
Tungsten.....................................................................................................1200W
The 7-day digital timer allows you to automate indoor or outdoor lights using
easy to program custom settings for each day of the week. It replaces a
standard single pole wall switch, and It can control
incandescent lights,
fluorescent lights, flood lights, stereos, or heavy-duty load.
Note:
a. Maximum of 5 seconds programming time out.
b.
This timer has a built-in rechargeable battery and the
programming is protected during power outage.
INSTALLATION INSTRUCTIONS
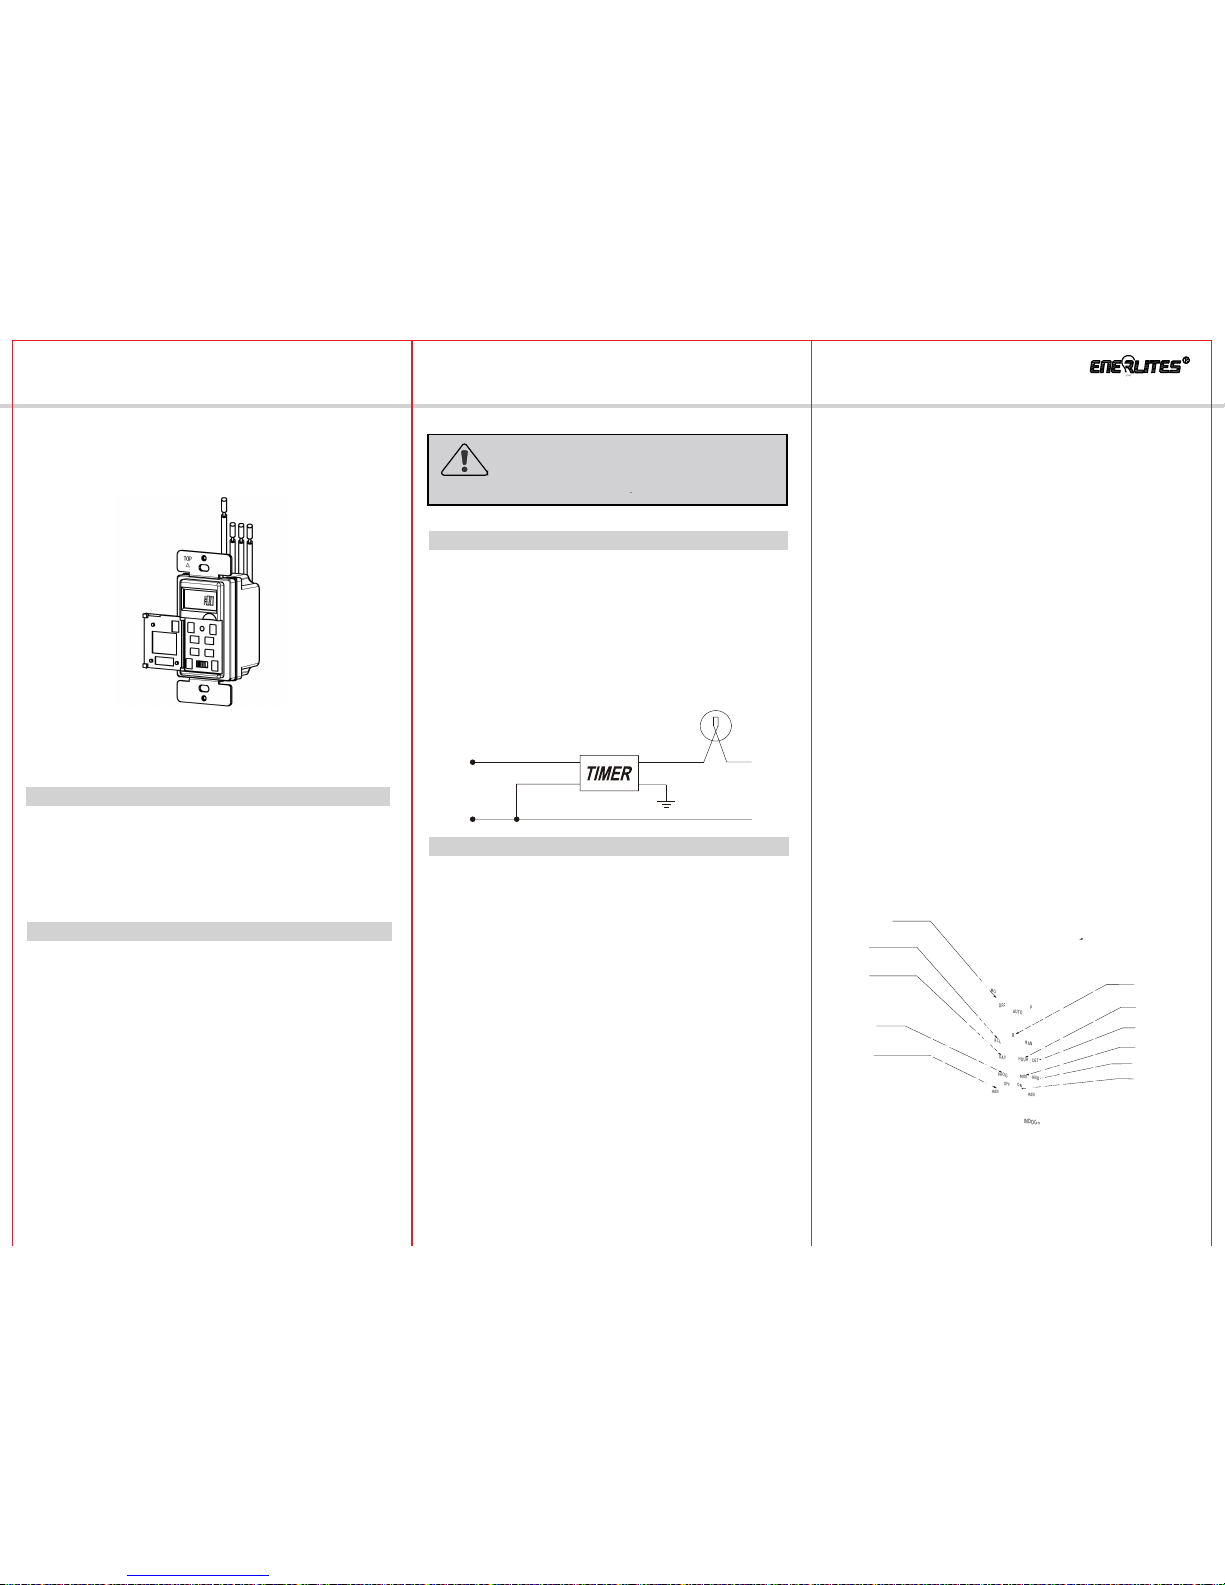
INSTALLATION
WARNING:
Turn off the circuit breaker to avoid
electric shock.
Ballast........................................................................................................1200VA
3. Programming
4. Press the PROG button twice to display a program and its On time. for
example, when you first press the PROG, program number 1 and its On time
will appear. 1ON PROG - -:- - will appear instead of the time if the program is
not set (inactive).
5. Press Day button to select the day to which you want to apply to the
program.
NOTE: if you want to apply the program to every day of the week, press DAY
until the days are displayed. (This still counts as 1 program, not 7)
6. Press the HOUR and MIN buttons to set the ON time (time when you want
the lights to turn on). Ensure that P appears on the screen when an
afternoon time is displayed.
7. After you have programmed the ON time, press the PROG button to
display the OFF time (time when you want the lights to turn off).
8. If the program ON time is set for every day of the week, the program OFF
time will have to be the same.
9. To set another program, repeat steps 4 through 7. Programs that are not
set will remain inactive.
10. Press one of the MAN buttons or close the switch door to return to normal
operation.
1. Power-On
*Open the switch door from the right.
*Ensure the ON/OFF selector is set to ON.
*Reset the switch using a paper clip and press R. The display will flashes
2. Setting the Clock
NOTE: The switch displays the time in 12-hour format.
*Press the PROG button twice and the CLK icon will appears on the bottom left
of the screen.
*Set the time using the HOUR and MIN buttons, Ensure that P appears on the
screen when an afternoon time is displayed.
*Set the day by using the DAY button.
*Press one of the MAN buttons or close the switch door to return to normal
operation.
1. Press any of the Man buttons or the switch door to switch from
automatic to manual or vice-versa.
2. Press any of the MAN buttons or the switch door to turn the
lights ON or OFF at anytime.
3. The timer is also a clock.
4. Program up to 18 ON/18 OFF settings.
5.
With random feature (RND), the timer added extra security by
varying
the ON/OFF times within 30 minutes of the program settings.
6. Large and easy-to-read LCD screen.
7. DST (Daylight Saving Time) feature.
HET01
7-day Digital In-Wall Timer
HET01
MIN
MAN
RCL
HOUR
PROG
MAN
MAN
DST
RND
OFF
ON
INDOOR
MO
OFF
AUTO
P
R
DAY
USE ONLY
MODE
HOT(BLACK)
NEUTRAL(WHITE)
LOAD(RED)
GROUND(GREEN)
PROGRAMMING
FEATURES
1. Remove the existing wall switch.
2. Connect the timer per wiring diagram below: black lead to hot wire,
red lead to load wire, white lead to neutral wire, and green lead to
ground wire.
3. Tuck the wires into the box and leave room for the timer.
4. Mount the timer to the wall box with the screws provided, and then
install the wall plate.
Wiring Diagram:
MIN
6.HOUR
3.MAN
4.PROG
1.DISPLAY
8.RCL
5.DAY
MAN
RCL
HOUR
PROG
MAN
MAN
DST
RND
OFF
ON
INDOOR
MO
OFF
AUTO
P
R
2.RESET
7.MIN
11.RND
POWER
DAY
10.DST
 Loading...