

Page 1
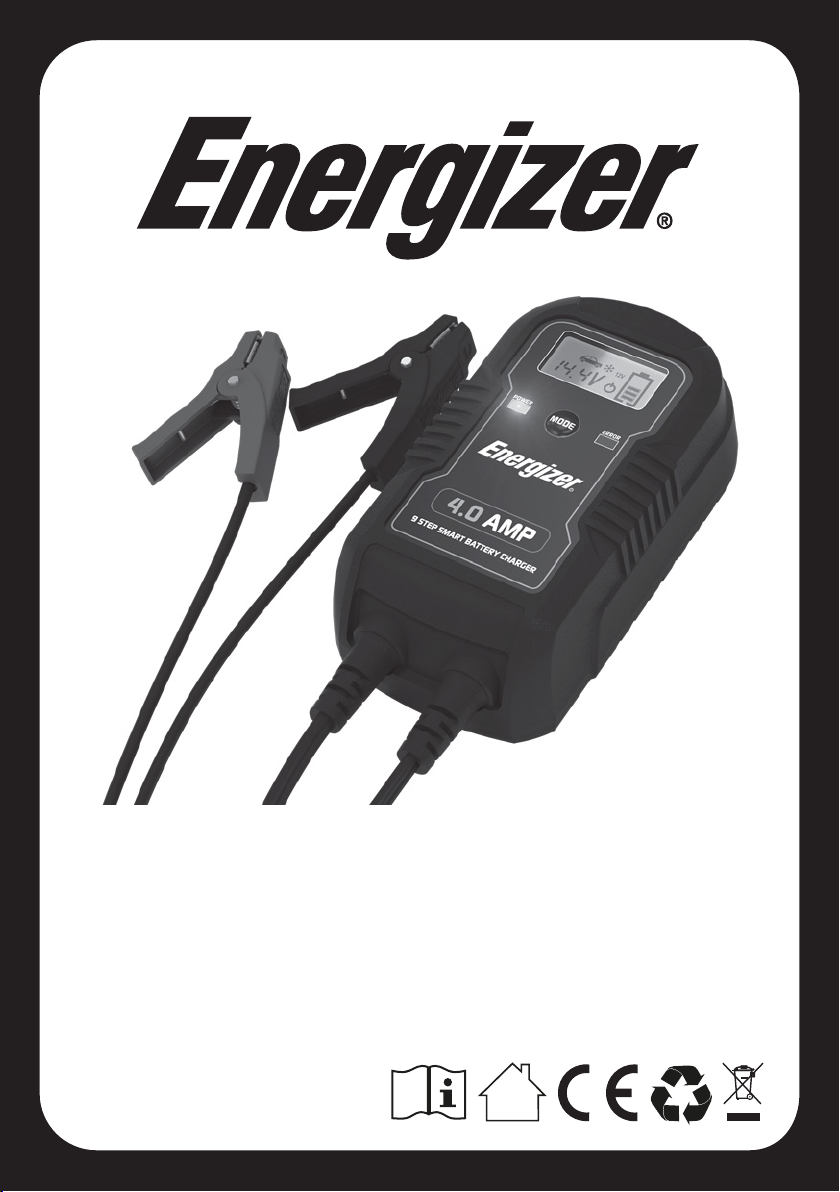
50904
4AMP
9 STEP SMART
CAR BATTERY CHARGER
CHARGES & MAINTAINS BATTERY
USER GUIDE
PLEASE SAVE THESE INSTRUCTIONS. THIS MANUAL CONTAINS IMPORTANT SAFETY AND
OPERATING INSTRUCTIONS. READ AND FOLLOW ALL INSTRUCTIONS BEFORE EACH USE.
Page 2

Page 3

CONTENTS
IMPORTANT SAFETY INSTRUCTIONS 1
PERSONAL SAFETY PRECAUTIONS 2
CONTROL PANEL 4
OPERATING INSTRUCTIONS 5
TROUBLESHOOTING ERROR CODES 9
MAINTENANCE INSTRUCTIONS 10
TECHNICAL DATA 10
WARRANTY & RETURNS 11
EGAP
3 SERUTAEF
Page 4

Thank you for purchasing the Energizer
follow basic safety precautions when using electrical appliances. Please read all instructions
4Amp 9 Step Smart Car Battery Charger. Always
®
carefully and keep this instruction manual safe for easy reference.
IMPORTANT SAFETY INSTRUCTIONS
1. SAVE THESE INSTRUCTIONS. This manual contains important safety and operating
instructions. You may need to refer to these instructions at a later date.
2. CAUTION. To reduce risk of injury, charge only wet cell, lead-acid, automotive type
rechargeable batteries. Other types of batteries may burst, causing personal injury and
damage to property.
3. Do not expose the charger to rain or snow.
4. Use of an attachment not recommended or sold by the battery charger manufacturer
may result in a risk of fire, electric shock, or personal injury.
5. To reduce the risk of damage to the electric plug and cord always pull by the plug rather
than the cord, when disconnecting the charger.
6. Make sure the cord is located so that it will not be stepped on, tripped over, or otherwise
damaged.
7. An extension cable should not be used unless absolutely necessary. Use of an improper
extension cable could result in a risk of fire and electric shock. If an extension cable
must be used, make sure that:
a. the pins on the plug of the extension cord are the same number, size, and shape as
those on the plug of the charger;
b. the extension cable is properly wired and in good condition;
c. you use a 0.75mm
cable if the extension cable is upto 30 metres & 1.5mm
upto 60 metres.
8. Do not operate the charger with a damaged cord or plug, replace the cord or plug
immediately.
9. Do not operate the charger if it has received a sharp blow, been dropped, or been
damaged in any way, instead take it to a qualified engineer for repair.
10. Do not disassemble the charger; take it to a qualified engineer when service or repair is
required. Incorrect reassembly may result in a risk of electric shock or fire.
11. To reduce the risk of electric shock, unplug the charger before attempting any
maintenance or cleaning. Just turning the charger off will not reduce the risk.
12. WARNING - RISK OF EXPLOSIVE GASES
a. WORKING IN THE VICINITY OF A LEAD-ACID BATTERY IS DANGEROUS.
BATTERIES GENERATE EXPLOSIVE GASES DURING NORMAL BATTERY
OPERATION. FOR THIS REASON IT IS OF UTMOST IMPORTANCE TO READ
THIS MANUAL AND FOLLOW THE INSTRUCTIONS EXACTLY, EVERY TIME THE
CHARGER IS USED.
b. To reduce risk of battery explosion, follow these instructions and those published
by the battery manufacturer and manufacturer of any equipment you intend to use
in vicinity of the battery. Review cautionary markings on these products and on
the engine.
2
cable, if the extension cable is upto 15 metres in length, a 1mm2
2
if the extension cable is
1
Page 5

PERSONAL SAFETY PRECAUTIONS
1. Someone should be able to come to your aid when you work near a lead-acid battery.
2. Have plenty of fresh water and soap nearby in case battery acid contacts your skin,
clothing, or eyes.
3. Wear complete eye and clothing protection. Avoid touching your eyes while working near
lead-acid batteries.
4. If battery acid contacts your skin or clothing, wash immediately with soap and water.
If you get acid in your eye, immediately wash your eye with cold running water for at
least 10 minutes and get seek medical attention.
5. NEVER smoke or allow a spark or flame in vicinity of the battery or engine.
6. Be very careful not to drop anything onto a battery. It might spark or short circuit the
battery or other electrical parts and cause an explosion.
7. Remove jewellery such as rings, bracelets, necklaces, and watches when working with a
lead-acid battery. A lead-acid battery can produce a short circuit current high enough to
weld jewellery to metal, causing a severe burn.
8. Only use the charger for charging AGM, GEL & WET batteries. It is not intended to
supply power to a low-voltage electrical system other than in a starter motor application.
Do not use the battery charger to charge dry-cell batteries that are commonly used in the
home. These batteries may burst, cause injury and damage property.
9. NEVER charge a frozen battery.
2
Page 6

FEATURES
1
3
1. AC mains lead
2. Battery charger unit
3. LCD display
4. Fully insulated clamps
2
4
3
Page 7

CONTROL PANEL
LCD DISPLAY
4
21 3
5
6
7 8
1. The icon will indicate 2A charge rate, which is used for charging the small capacity
batteries used in a motorcycle, ATV, snowmobile, personal watercraft, garden tractor and
golf car.
2. The icon will indicate 4A charge rate, which is used for faster charging of small-to-large
capacity automotive, marine, deep cycle and farm tractor batteries.
3. Illuminates when charging in cold conditions, with the max charging voltage being 0.2V
lower than usual.
4. “6V” appears when selecting the charge for 6V batteries.
5. “12V” appears when selecting the charge for 12V batteries.
6. Indicates that charging is in progress.
7. Indicates the battery’s voltage or an error code.
8. Indicates that the charger’s power is on. It stays on when in standby mode.
MODE SELECTION BUTTON
Press the Mode Selection Button to select one of the 6 charging modes.
Mode 1: 6V 2A (Icon ① + ④ will appear)
Mode 2: 6V 2A in the cold state (Icon ① + ③ + ④ will appear)
Mode 3: 12V 2A (Icon ① + ⑤ will appear)
Mode 4: 12V 2A in the cold state (Icon ① + ③ + ⑤ will appear)
Mode 5: 12V 4A (Icon ② + ⑤ will appear)
Mode 6: 12V 4A in the cold state (Icon ② + ③ + ⑤ will appear)
POWER INDICATOR LED
Indicates that the charger is on.
REVERSE POLARITY INDICATOR LED
Indicates that the battery clamps are incorrectly connected.
4
Page 8

OPERATING INSTRUCTIONS
PREPARING TO CHARGE
a. If it’s necessary to remove the battery from the vehicle to charge it, always remove
the earth terminal from the battery first. Make sure all accessories in the vehicle are off, so
as not to cause a spark.
b. Ensure that the area around the battery is well ventilated while charging.
c. Clean battery terminals; being careful to keep corrosion from coming in contact with eyes.
d. Add distilled water to each cell until the battery’s acid reaches level specified by the
battery’s manufacturer. This helps purge excessive gas from cells. Do not overfill.
For a battery without cell caps, carefully follow manufacturer's recharging instructions.
e. Study all the battery manufacturer's specific precautions such as removing or not
removing cell caps while charging and recommended rates of charge.
f. Determine the voltage of the battery by referring to the car owner's manual and make sure
that the output voltage is set to the correct voltage. If the charger has an adjustable charge
rate, charge the battery at the lowest rate initially.
CHARGER LOCATION
a. Locate the charger as far away from the battery as the cables will allow.
b. Never place the charger directly above the battery being charged; gases from battery will
corrode and damage the charger.
c. Never allow battery acid to drip on to the charger when reading the specific gravity or
filling the battery.
d. Do not operate the charger in an enclosed area, or restrict ventilation in any way.
e. Do not put a battery on top of the charger.
DC CONNECTION PRECAUTIONS
a. Only connect/disconnect DC output clamps when the charger is switched off and
unplugged. Never allow clamps to touch each other.
b. Attach clamps to battery posts and twist or rock back and forth several times to ensure a
good connection. This tends to keep the clamps from slipping off the terminals and helps
to reduce risk of sparking.
FOLLOW THESE STEPS WHEN THE BATTERY IS INSTALLED IN THE VEHICLE.
A SPARK NEAR THE BATTERY MAY CAUSE THE BATTERY TO EXPLODE. TO
REDUCE THE RISK OF A SPARK NEAR THE BATTERY:
a. Ensure that the AC and DC cords are positioned to avoid damage by the bonnet, door, or
moving engine parts.
b. Stay clear of fan blades, belts, pulleys, and other parts that could cause injury.
c. Check polarity of battery posts. The POSITIVE (POS, P, +) battery post usually has a
larger diameter than the NEGATIVE (NEG, N, -) post.
d. Determine which post of the battery is grounded (connected) to the chassis. If the negative
post is grounded to chassis (as in most vehicles), go to section "e". If the positive post is
grounded to the chassis, go to section "f".
5
Page 9

e. For negative-grounded vehicle, connect the POSITIVE (RED) clamp from the battery
charger to the POSITIVE (POS, P, +) ungrounded post of the battery. Connect the
NEGATIVE (BLACK) clamp to the vehicle’s chassis or engine block, away from the
battery. Do not connect the clamp to the carburettor, fuel lines, or sheet metal body parts.
Connect to a heavy gage metal part of the frame or engine block.
f. For positive-grounded vehicle, connect the NEGATIVE (BLACK) clamp from the battery
charger to the NEGATIVE (NEG, N, -) ungrounded post of the battery. Connect the
POSITIVE (RED) clamp to the vehicle’s chassis or engine block, away from the battery.
Do not connect the clamp to the carburettor, fuel lines, or sheet-metal body parts.
Connect to a heavy gage metal part of the frame or the engine block.
g. When disconnecting the charger, disconnect the AC cord, remove the clamp from the
vehicle’s chassis, and then remove the clamp from the battery terminal.
h. See the ‘Length of Charge’ section for additional guidance.
FOLLOW THESE STEPS WHEN THE BATTERY IS OUTSIDE THE VEHICLE. A SPARK
NEAR THE BATTERY MAY CAUSE THE BATTERY TO EXPLODE. TO REDUCE RISK
OF A SPARK NEAR THE BATTERY:
a. Only connect/disconnect DC output clamps when the charger is switched off and
unplugged. Never allow clamps to touch each other.
b. Connect the POSITIVE (RED) charger clamp to the POSITIVE (POS, P, +) post of
the battery.
c. Position yourself and free end of cable as far away from battery as possible - then
connect the NEGATIVE (BLACK) charger clamp to free end of cable.
d. Do not face the battery when making the final connection.
e. When disconnecting the charger, always do so in the reverse sequence of connecting it
and take off the first connection as far away from the battery as practical.
f. A marine (boat) battery must be removed and charged on shore, charging it on board
requires specially designed equipment, for marine use.
AC POWER CORD CONNECTION INSTRUCTIONS:
DANGER. Never alter the AC cord or plug provided - if it will not fit the outlet, seek
professional advice from a qualified electrician. Improper connection can result in a risk of
electric shock.
LENGTH OF CHARGE
The following instructions will allow you to determine how long it will take to bring your battery
to full charge.
a. Test the battery’s charge with a hydrometer or electronic tester.
b. Determine the size of the battery in Amp-Hour or Reserve Capacity. If the ratings are not
printed on the battery, contact your local battery dealer for this information. These are the
only ratings that can be used to determine charge time.
c. Use the battery’s rating and charge level, together with the amp setting to be used on the
charger in the formula below:
Amp Hour Rating of Battery × Percent of Charged Needed
Amp Setting Selected On Charger
NOTE: Charge times are approximate and vary from battery to battery. Always follow the
battery manufacturer’s specific charging instructions.
× 1.3 = Hours to Charge
6
Page 10

CHARGING
NOTE: Before using the charger, please review all safety and connection directions.
Failure to do so can damage the battery and cause serious injury or death.
• Connect the charger to the battery per the operating instructions.
• Connect the charger to an AC outlet.
• Select the appropriate charging mode for your battery.
• If the charger does not detect a properly connected battery, the Reverse Polarity Indicator
LED will light or an Error Code will appear on the LCD display until a properly connected
battery is detected. Charging will not begin while the Reverse Polarity Indicator LED is on
or an error code is displayed. When charging begins, the ‘Charging Progress’ icon on the
LCD display will be lit.
• When charging is complete, unplug the charger from the AC outlet first and then disconnect
the battery from the charger.
AUTOMATIC CHARGE MODE:
The charger uses a proprietary 9-stage charging process designed to optimally charge and
maintain batteries. (The below chart and illustration show the charging routine when charging
a 12V deeply discharged battery in mode 3).
Stage 1 — Diagnosis: The battery is analysed to ensure it can be charged, so as to prevent
charging a defective battery. If the battery voltage is 0V-0.5V, the charger assumes there is a
wrong connection; 0.5V-1.5V the battery is defective; 1.5V-12V, the pre-charge stage will
begin;12V-14V, Constant Current charging stage will begin;14V-15V the battery is fully
charged; If the battery is >15V, the charger assumes there is a bad connection.
Stage 2 — Desulphation:If the battery was sulfurized, the charger will clear the sulphide by
higher current and voltage to recover battery capacity.
Stage 3 — Pre-charge: If the battery voltage is less than 12V, charge it at the smaller current,
which will protect the battery better;
Stage 4 — Soft start: Charge the battery to the maximum current gradually and never
suddenly.
Stage 5 — CC1,CC2,CC3 (Constant current): The charger automatically adjusts the current
according to the battery status in constant current, which benefits the battery for a long life;
Stage 6 — Constant voltage (CV) absorption charging stage. The charging voltage remains at
14.6V, but the charging current reduces gradually until the battery is fully charged.
Stage 7 — Resting: When the battery is fully charged, the charger cuts off.
Stage 8 — Reconditioning:If the battery voltage falls fast after being fully charged, it indicates
7
Page 11

a reduction in battery capacity. The charger will then charge at a higher voltage to recover the
battery’s capacity.
Stage 9 — Restoring: Automatic on-off monitoring. The charger monitors a fully charged
battery. If the battery falls below 12.8V DC, the charger will restart and enter stage one
charging again.
ADDITIONAL FEATURES
a. Reverse Polarity Protection
The REVERSE POLARITY INDICATOR LED will light and the charger will cut out if a
reverse connection is detected.
b. Short Circuit Protection
If the charger detects less than 0.5V across the clamps it will cut out and display the
error code “Er1”. Please see TROUBLESHOOTING ERROR CODES.
c. Over-voltage Protection
If the charger is set to charge at a different voltage than the detected voltage of the
battery, ‘Over-Voltage Protection’ will be engaged. The error code “Er1” will be displayed.
Please see TROUBLESHOOTING ERROR CODES.
d. Battery Diagnostics Function
The charger continuously monitors the battery’s condition and may report certain
charging failures as fault codes.The error codes “Er1” or “Er2” will be displayed.
Please see TROUBLESHOOTING ERROR CODES.
Errors occur if: the battery voltage does not rise as expected during the charging process
(indicating a shorted cell) or if the maximum charge time has been exceeded, etc.
e. Battery Reconditioning Function
If a battery is discharged deeply, it may be sulphated and unable to accept a charge.
The reconditioning function may help restore a battery’s ability to accept a charge.
The charger will automatically diagnose this situation and if successful normal
recharging will resume, after the battery has been de-sulphated. If unsuccessful at
de-sulphating the battery error code “Er2” will be displayed. Please see
TROUBLESHOOTING ERROR CODES.
f. Overheat Protection
If it overheats the charger is designed to decrease the charging current or even shut
itself off. Once the charger cools down, it will resume charging automatically. Error code
“Er3” will be displayed. Please see TROUBLESHOOTING ERROR CODES.
g. Mode-setting Memory Function
With its mode-setting memory function the charger can enter the mode that it was last
set to. This function can reduce the worry about forgetting battery settings and reduce
set up time.
8
Page 12

TROUBLESHOOTING ERROR CODES
Code
Er1
Er2
Condition Possible Cause Solution
The battery voltage is less
than 0.5V before charging.
Charging does not begin.
The battery voltage is
0.5V - 1.5V before charging.
The battery voltage is less
than 11V after 4 minutes
of charging.
The battery is not fully
charged after 24-hours
of charging.
The battery voltage is less
than 12V in 2 minutes after
full charged.
The battery is
defective.
The battery clamps
are disconnected
from the battery.
The battery clamps
are connected to
each other.
The battery voltage
is not matched to the
selected mode.
The battery is defective. Replace the battery.
The battery is defective. Replace the battery.
A load may be
connected to the
battery.
The charge current
is too low.
The battery is
sulphated beyond
reconditioning.
Replace the battery.
Connect the battery
firmly and correctly.
Confirm that the battery
voltage is matched with
the mode.
Disconnect the load
and attempt to charge
again.
Select a higher
charge rate.
Replace the battery.
Er3
The temperature of the
charger is too high.
High ambient
temperature.
9
Ensure adequate
ventilation. The charger
will resume charging
after cooling.
Page 13

MAINTANENCE INSTRUCTIONS
This charger requires minimal maintenance, though a few common sense rules will prolong
the life of the battery charger.
ALWAYS BE SURE THE CHARGER IS UNPLUGGED BEFORE PERFORMING ANY
MAINTENANCE OR CLEANING.
1. Store in a clean, dry place.
2. Coil up the cords when not in use.
3. Clean the case and cords with a slightly damp cloth.
4. Clean any corrosion from the clamps with a solution of water and baking soda.
5. Examine the cords periodically for cracking or other damage and have them replaced
if necessary.
6. WARNING: All other service should be done by qualified personnel only.
TECHNICAL DATA
40905 ledoM
Input 220 - 240V AC 0.8A 50/60Hz
Output 6V 2A. 12V 2A/4A
Battery Voltage 6V/12V DC
Charging Current 2A/4A
Dimensions (L x W x H) 15.4 x 8.2 x 4.4 (cm)
Weight 0.5 kg
10
Page 14

WARRANTY AND RETURN
What does this warranty cover? This limited warranty is provided by Custom Accessories
Europe and covers defects in workmanship and materials in your model 50904 battery
charger. This warranty period lasts for 12 months from the date of purchase at the point of
sale to you, the original end user customer. Proof of purchase is required to make warranty
claims.
What will Custom Accessories Europe do? Custom Accessories Europe will, at its option,
repair or replace the defective product free of charge, provided that you notify Custom
Accessories Europe of the product defect within the Warranty Period, and provided that
Custom Accessories Europe, through inspection, establishes the existence of such a defect
and that it is covered by this limited warranty. Custom Accessories Europe will, at its option,
use new and / or reconditioned parts in performing warranty repairs and building replacement
products. Custom Accessories Europe reserves the right to use parts or products of original or
improved design in the repair or replacement. If Custom Accessories Europe repairs or
replaces a product, its warranty continues for the remaining portion of the original Warranty
Period or 90 days from the date of the return shipment to the customer, whichever is greater.
All replaced products and all parts removed from repaired products become the property of
Custom Accessories Europe. Custom Accessories Europe covers both parts and labour
necessary to repair the product, and return shipment to the customer via our Help-Line Centre
for all UK resident customers.
Please return with proof of purchase to Cobalt Innovations Ltd, Energizer Warranty Dept., Unit
30-31 Lagrange, Lichfield Road Industrial Estate, Tamworth, B79 7XD. This does not affect
your statutory rights.
How do you get service? If your product requires troubleshooting or warranty service, call
the CAE Help-Line number: 0800 5420825
What does this warranty not cover? This limited warranty does not cover normal wear and
tear of the product or costs related to the removal, installation, or troubleshooting of the
customer's electrical systems.
This warranty does not apply to, and Custom Accessories Europe will not be responsible for,
any defect in or damage to:
1. The product if it has been misused, neglected, improperly installed, physically damaged or
altered, either internally or externally, or damaged from improper use or use in an
unsuitable environment.
2. The product if it has been subjected to fire, water, generalised corrosion, biological
infestations, or input voltage that creates operating conditions beyond the maximum or
minimum limits listed in the Custom Accessories Europe product specifications including
high input voltage from generators and lightning strikes.
3. The product if repairs have been done to it other than by the CAE warranty department.
4. The product if it is used as a component part of a product expressly warranted by another
manufacturer.
5. The product if its original identification (trade-mark, serial number) markings have been
defaced, altered, or removed.
11
Page 15

Exclusions
This limited warranty gives you specific legal rights. This does not affect your statutory rights.
Warning: Limitations on use
Please read this product manual for limitations on use.
RETURN PROCEDURE
1. Package the unit safely, preferably using the original box and packing materials. Please
ensure that your product is shipped fully insured in the original packaging or equivalent.
This warranty will not apply where the product is damaged due to improper packaging.
2. Include the following:
• A return address where the unit can be shipped. Post office boxes
are not acceptable.
• A contact telephone number where you can be reached during
work hours.
• The serial number of your product.
• Information about the installation and use of the unit.
• Information about the failure and / or reason for the return.
• A copy of your dated proof of purchase.
3. Ship the unit prepaid to our CAE warranty department.
12
Page 16

Made in China for:
Custom Accessories Europe Ltd,
The Granary, Standen Manor, Hungerford, RG17 0RB, UK
© 2017 Energizer. Energizer and certain graphic designs are trademarks of
Energizer Brands, LLC and related subsidiaries and are used under license by
Custom Accessories Europe Ltd. All other brand names are trademarks of their
respective owners. Neither Custom Accessories Europe Ltd nor Energizer
Brands, LLC is affiliated with the respective owners of their trademarks.
Energizerautomotiveaccessories.eu
0800-5420825
All battery chargers have been tested and
approved to the following standards:
EN 60335
EN 55014
EN 61000
EBC101117
 Loading...