

Energate Pioneer Z100 Smart Thermostat Operating And Installation Manual
AW000286-D
Pioneer Z100 Smart Thermostat
Operating and
Installation Manual

Page 2

Operating and Installation Manual
Congratulations on the purchase of your new thermostat. It has been designed for easy
programming to save on energy costs and allow a comfortable living environment.
Features:
• Auto programming mode for your yearly heating and cooling needs
• Easy adjustment of temperature and schedule
• EnergyStar® compliant presets to help reduce heating and cooling costs
• Wirelessly communicates with your utility
• Notifies you and automatically responds to utility demand response events
• Provides you with the current price of energy
• Lets you select from a range of comfort and savings levels when energy prices increase
• Large, easy to read backlit display
• Silent operation
• Protection against short circuits during installation
Page 3

Table of Contents
OPERATING THE THERMOSTAT ....................................................................................... 7
Navigating the Controls ......................................................................................................... 7
Home Screen ......................................................................................................................... 8
HELP button .......................................................................................................................... 8
Title Bar ................................................................................................................................. 9
Setting the Date & Time ....................................................................................................... 10
Default Schedule ................................................................................................................. 11
Temporary Hold ................................................................................................................... 12
Heating and Cooling Modes ................................................................................................ 13
Fan Modes ........................................................................................................................... 14
Temperature Settings .......................................................................................................... 15
Schedule .............................................................................................................................. 16
Permanent, Timed, and Vacation Holds .............................................................................. 17
Energy Events ..................................................................................................................... 19
Load Control Event .......................................................................................................... 19
Voluntary Load Control Event .......................................................................................... 20
Mandatory Load Control Event ........................................................................................ 21
Price Conservation Event .................................................................................................... 21
Page 4

Energy Options Screen ........................................................................................................ 22
Comfort Screen .................................................................................................................... 23
Temporary Savings SETPOINT........................................................................................... 24
Indicators of Energy Events and Savings ............................................................................ 25
Utility Text Messages ........................................................................................................... 26
Temperature Units and Calibration ...................................................................................... 27
Service Information .............................................................................................................. 27
User Options ........................................................................................................................ 28
Languages ....................................................................................................................... 28
Schedule .......................................................................................................................... 28
Change Filter Reminder....................................................................................................... 29
Power Outages .................................................................................................................... 29
INSTALLATION AND MAINTENANCE .............................................................................. 30
Mounting the Thermostat ..................................................................................................... 30
Mounting the Outdoor Sensor.............................................................................................. 30
Cleaning the Thermostat ..................................................................................................... 30
Removing Thermostat Front Housing from Backplate ......................................................... 31
Replacing the Battery ....................................................................................................... 32
Wiring Configuration ......................................................................................................... 33
Setup Menu Options ............................................................................................................ 34
Page 5

Password ......................................................................................................................... 34
Setpoint Range ................................................................................................................ 35
Equipment Type ............................................................................................................... 35
Equipment Settings .......................................................................................................... 36
Conventional Systems .................................................................................................. 36
Heat Pump Systems ..................................................................................................... 37
Control Options ................................................................................................................ 38
Device Info Screen ........................................................................................................... 39
Link Info Screen ............................................................................................................... 40
Reset Screen ................................................................................................................... 42
Thermostat Reset ......................................................................................................... 43
User Configuration Reset ............................................................................................. 45
Reset Security Key ....................................................................................................... 45
Conventional System Test ................................................................................................... 46
Heat-Pump System Test...................................................................................................... 47
Product Conformity .............................................................................................................. 48
Note: .................................................................................................................................... 49
Page 6
OPERATING THE THERMOSTAT
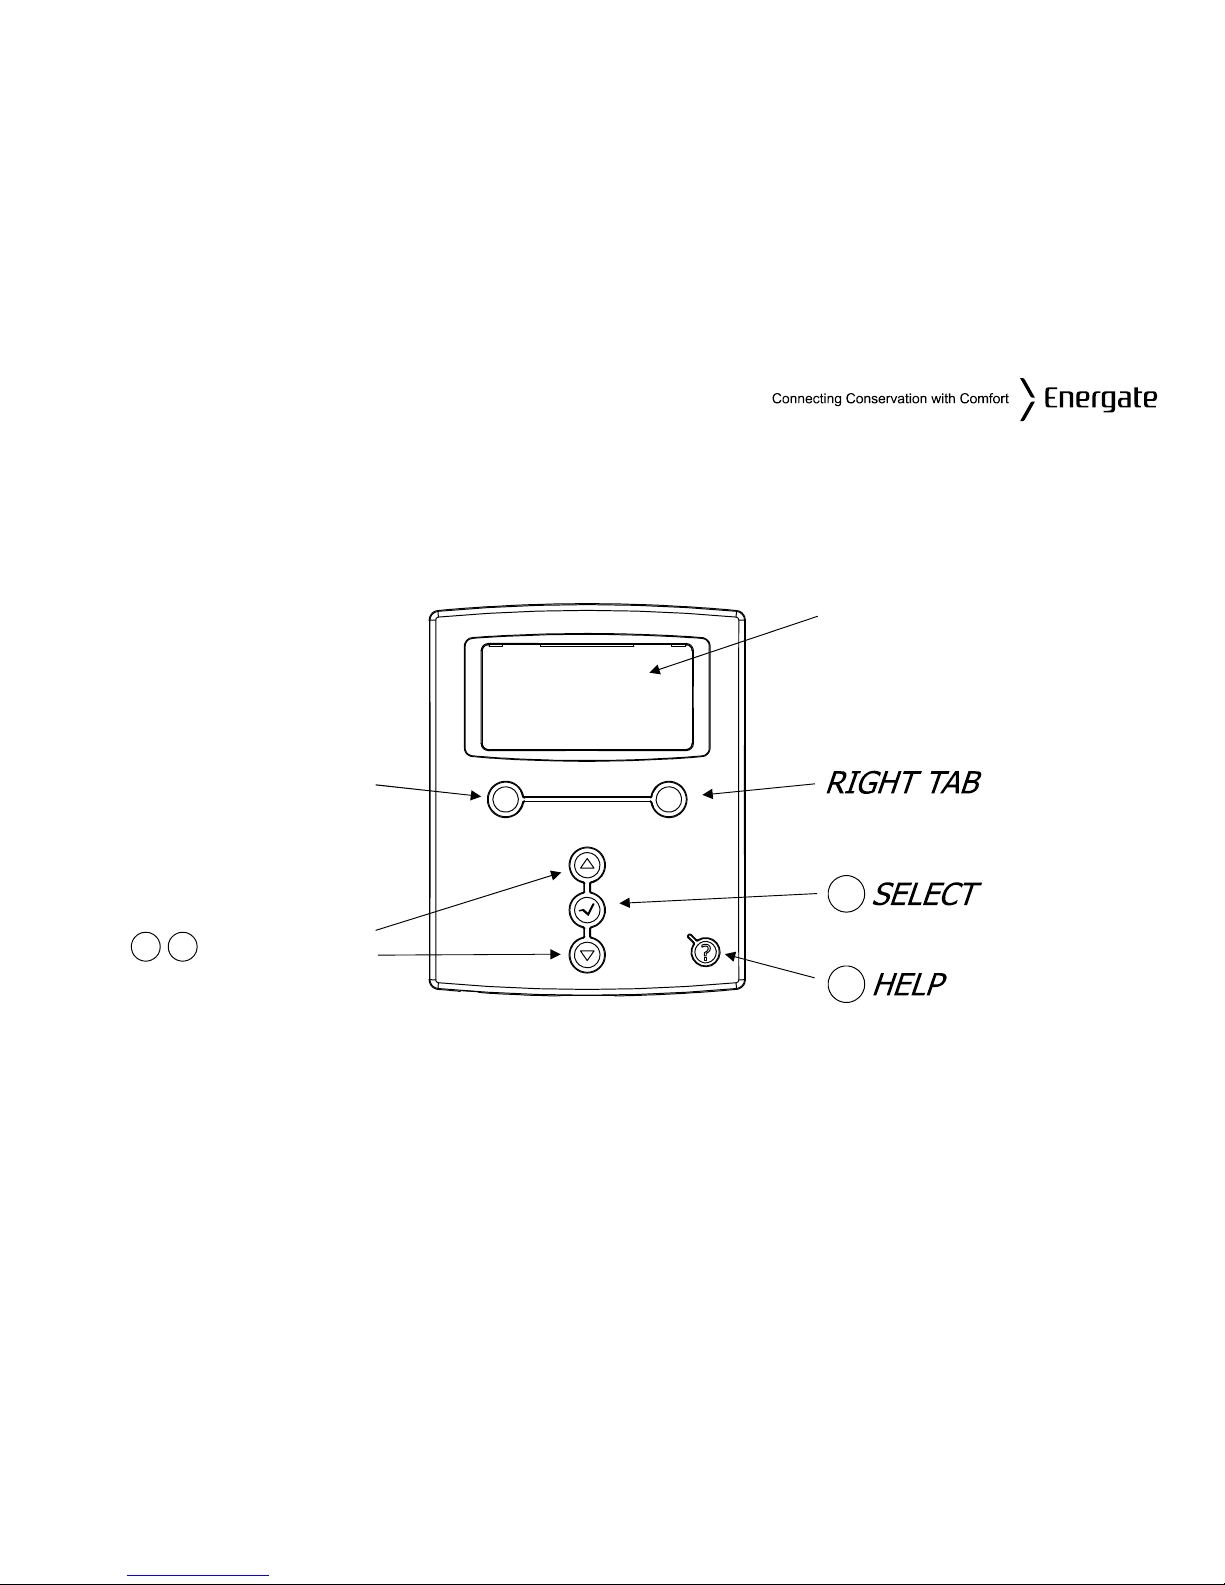
Navigating the Controls
Display
LEFT TAB
button
screen
button
button
SCROLLS
button
▼
▲
?
√
The function of the LEFT and RIGHT TAB buttons appears on the bottom of the display screen.
Use the SCROLL (▲ ▼) buttons to move through the menu items and options, and to change
highlighted values. Press the SELECT (√) button to select or accept highlighted menu items. You
can always go back or cancel prior to saving changes.
Page 7
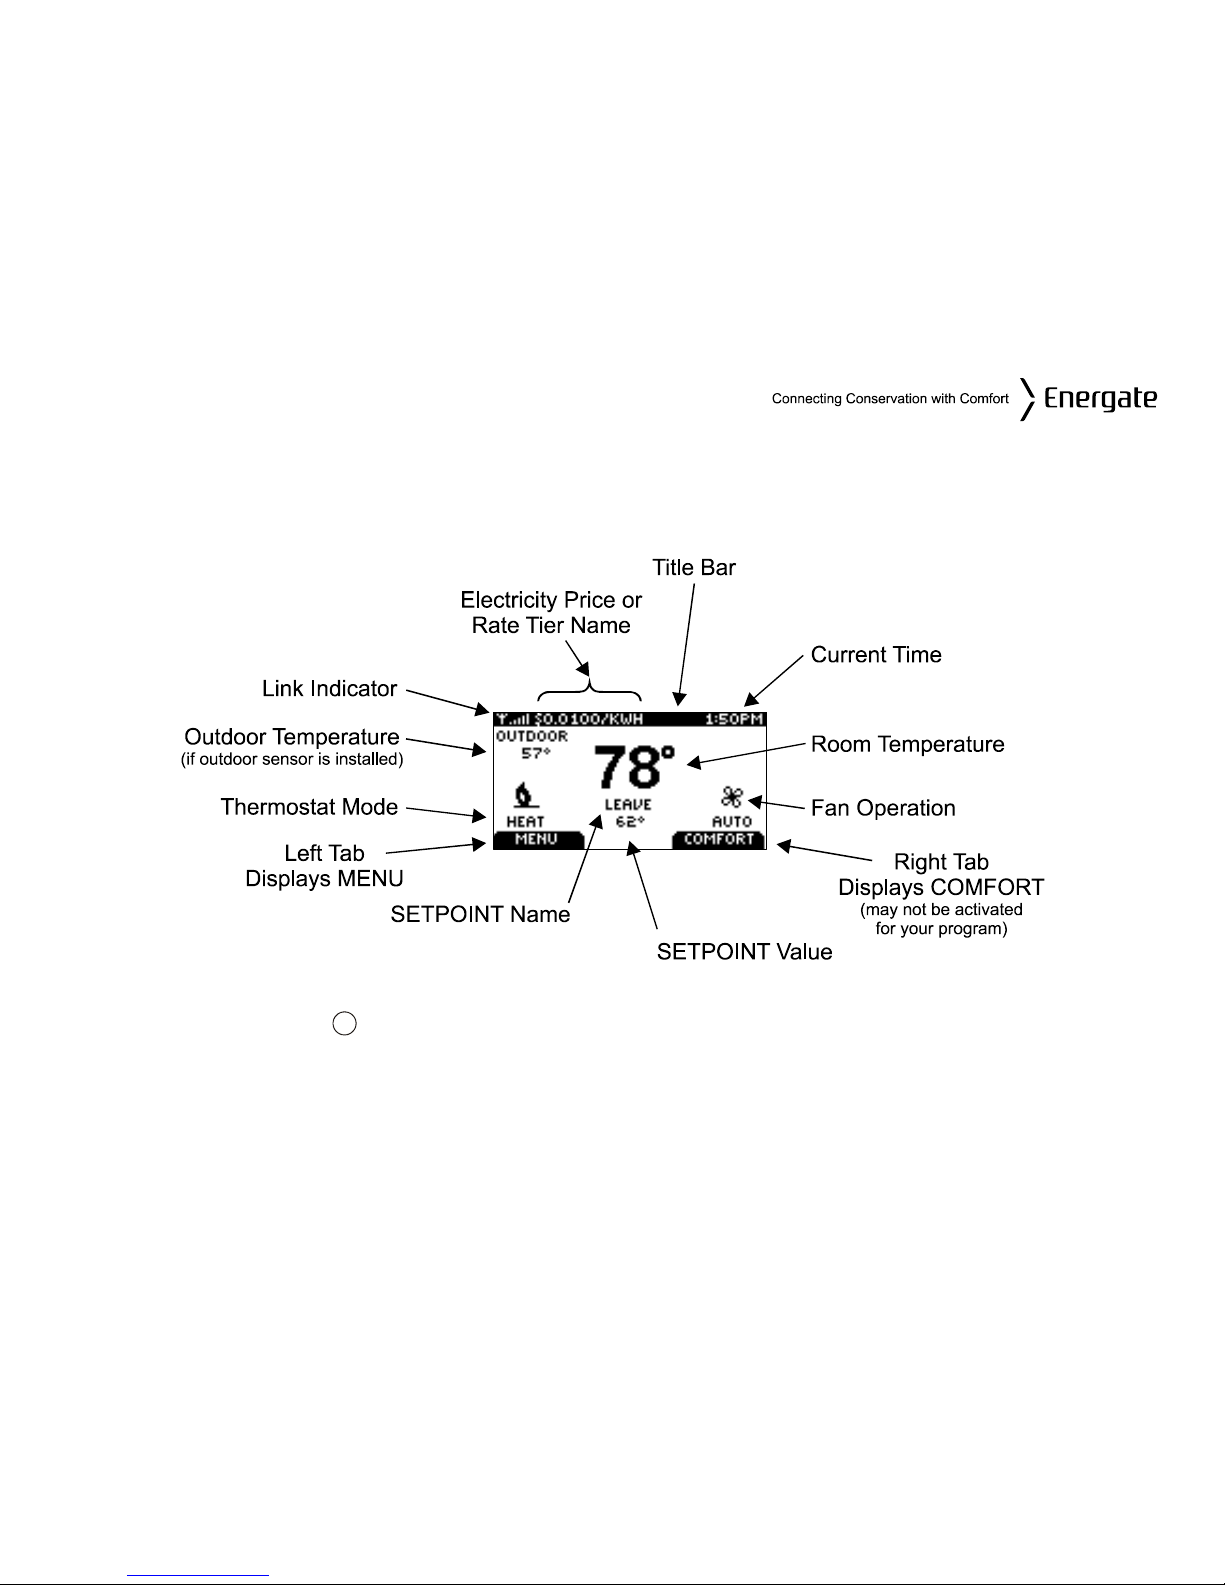
Home Screen
The Home screen displays current temperature and operation data. To view this screen when the
backlight is off, just press any of the buttons. Icons such as the heat or fan are animated when the
equipment is running.
HELP button
The thermostat’s HELP button provides you with information on how to navigate through the
individual menu screens. It will help you to quickly change settings without referring to this user
manual; however, it does not replace this manual so please keep this manual for future reference.
?
Page 8
Title Bar
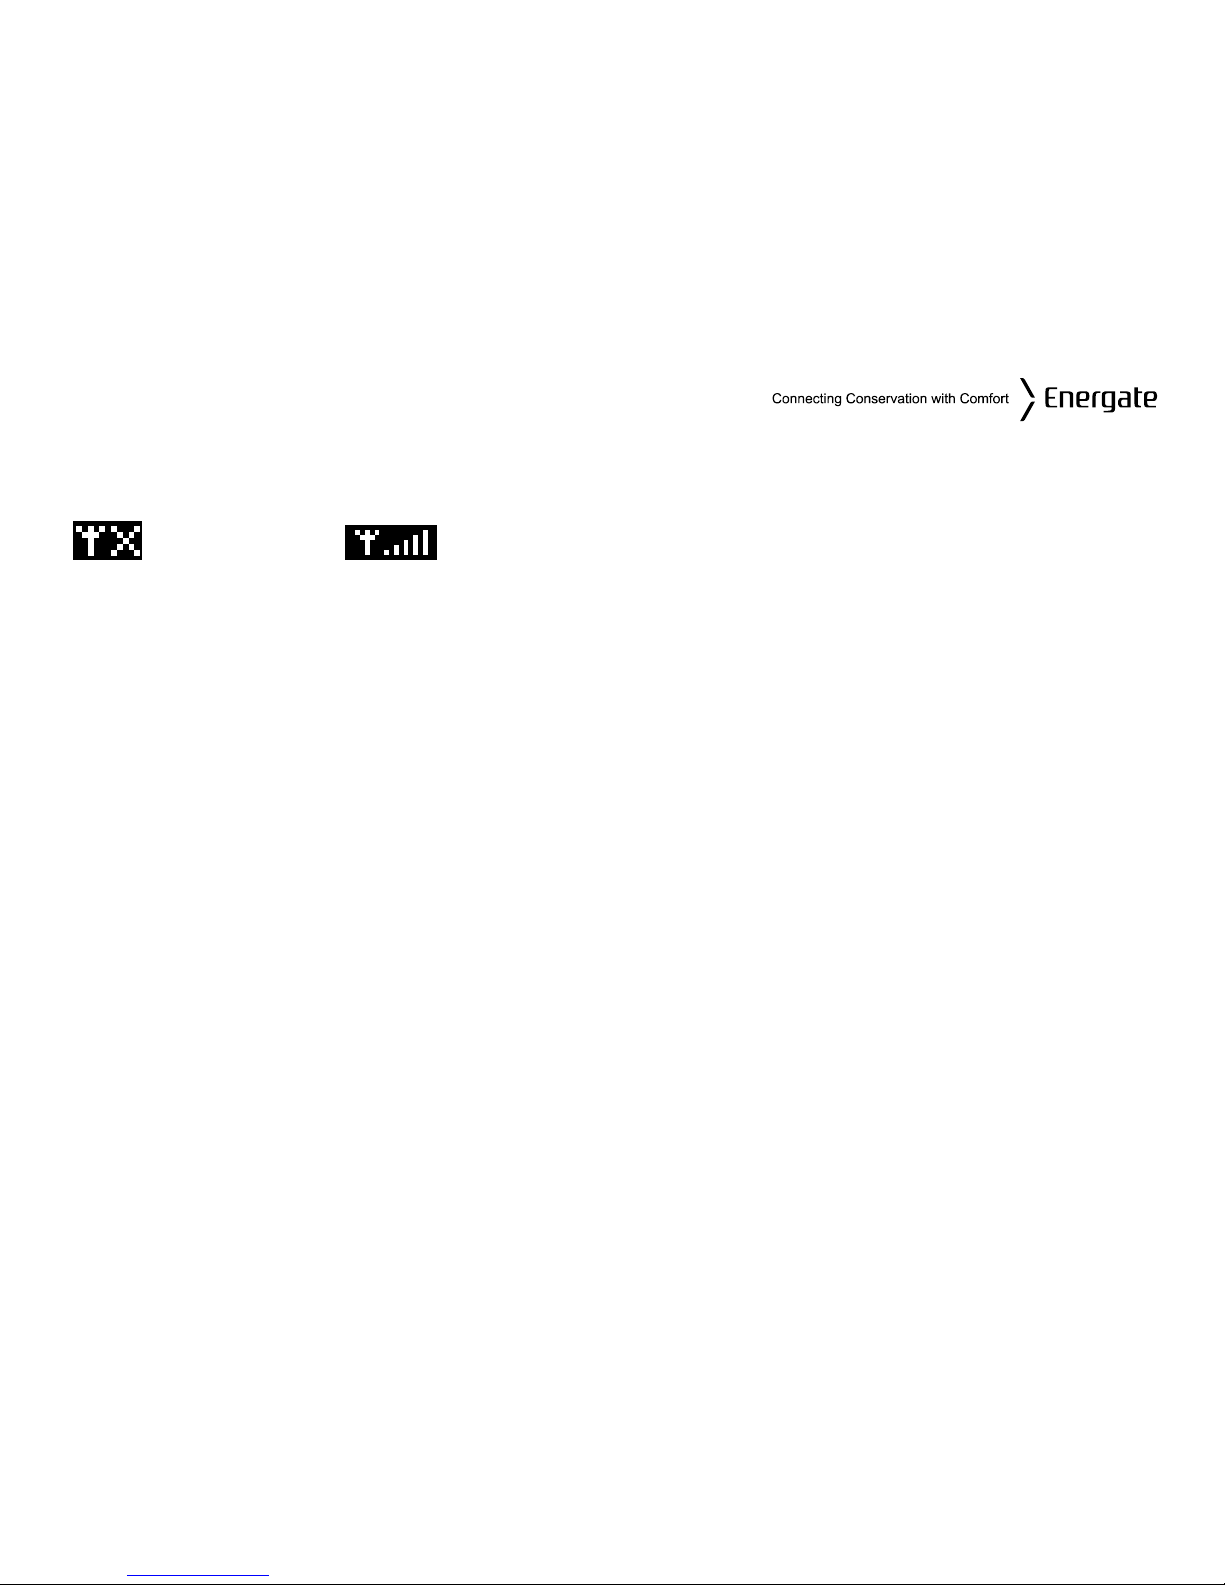
The left hand side of the Title Bar displays an icon showing the communications link status and
signal quality.
means Link OFF, means Link ON, and varies from lowest signal quality (1 bar) to
highest signal quality (5 bars).
The Title Bar also displays the current electricity rate if your utility company provides price
information over the communication link. The price is displayed either in $ value/KWH (default) or
by the price tier name. This is assigned by your utility to different rates (e.g. normal, low, medium,
high, critical peak). By pressing the MENU button and selecting the Energy Options menu item, you
can choose which of the two ways the current price is displayed.
Page 9
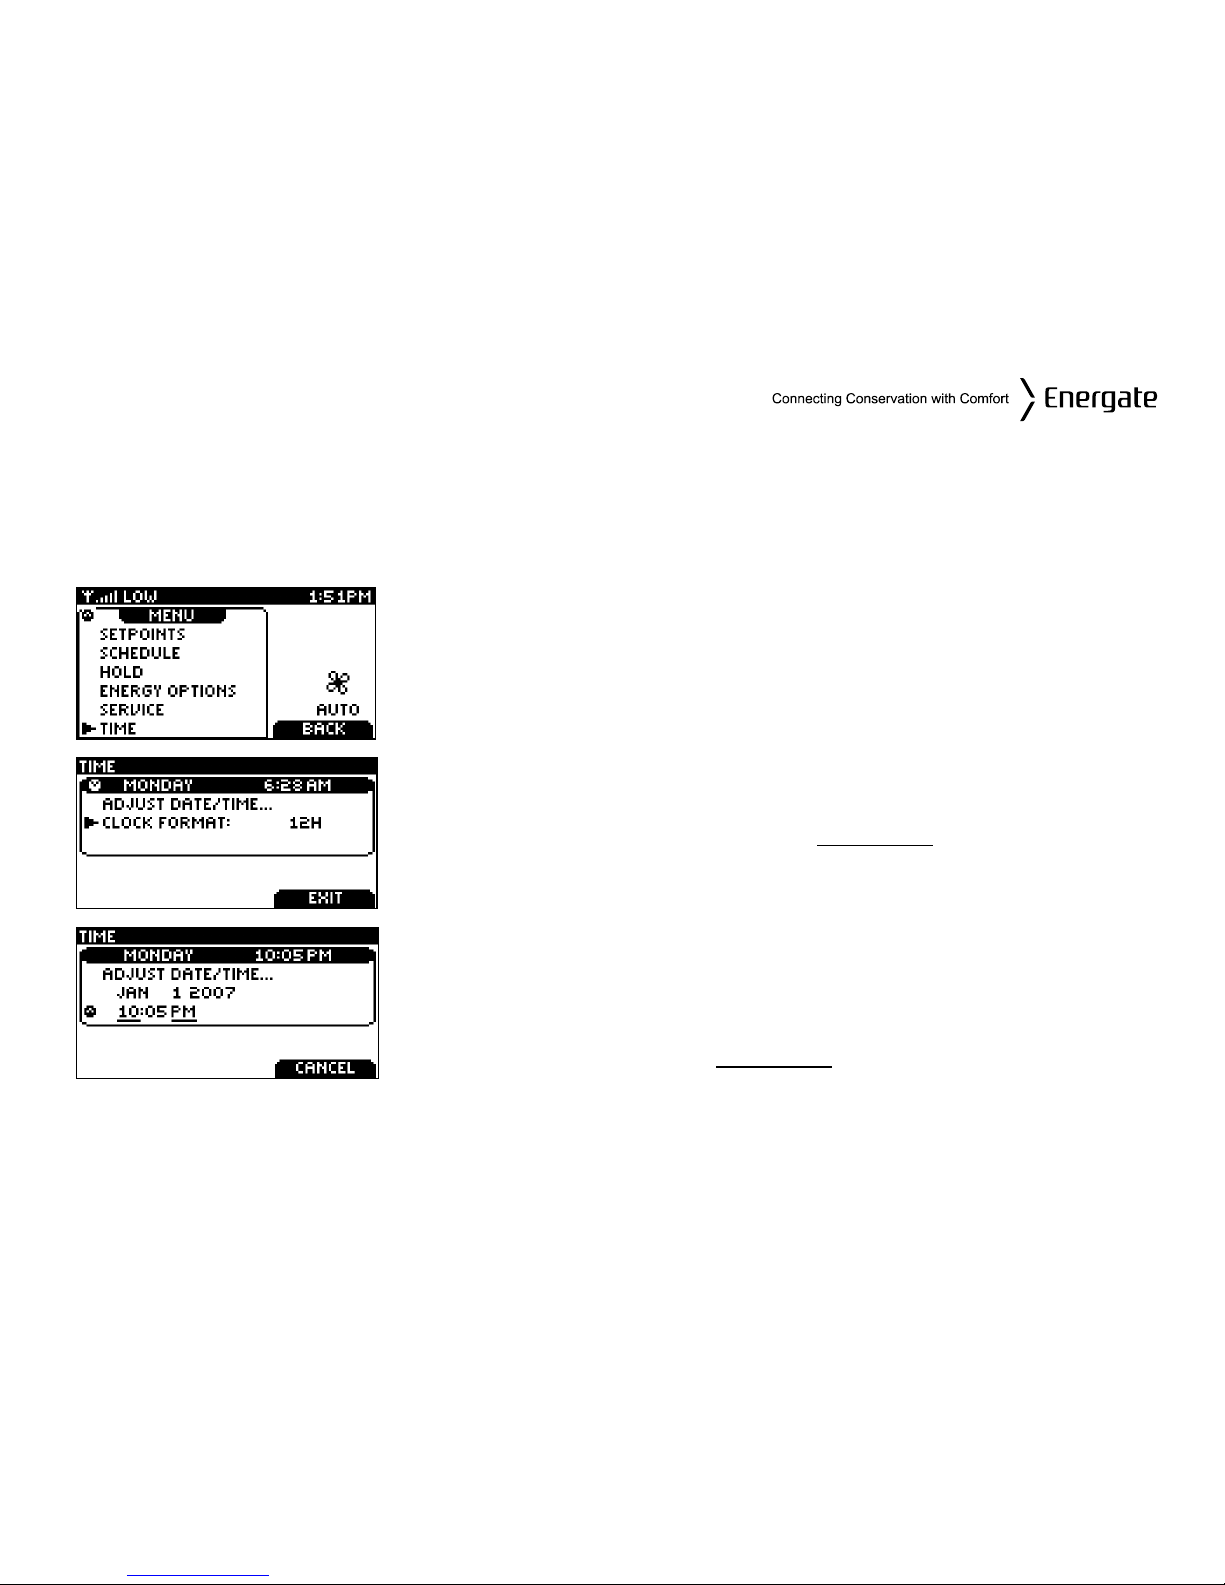
Setting the Date & Time
When the communications link is active, the network periodically updates the date and time and
you will be prevented from modifying this setting. If the communications link is off you can set the
current date and time by selecting TIME from the Main Menu. You can always change between a
12H or 24H clock format.
Press the Left Tab button on the home screen (MENU) to view
this screen
Use the SCROLL buttons to scroll to TIME menu.
Press SELECT to enter the TIME menu.
To change between 12 and 24 hour clock formats, scroll to the
CLOCK FORMAT menu item. Press SELECT to enter the CLOCK
FORMAT menu. The setting will be underlined
. You can change
the format using the SCROLL buttons and then pressing SAVE
CHANGES to accept the change.
To adjust the date and time, use the SCROLL buttons to scroll to
the ADJUST DATE/TIME menu item.
Press SELECT to enter the ADJUST DAY/TIME menu.
Press SELECT to move between fields. Use the SCROLL buttons
to change the value of the underlined
field. Press SELECT to
move between hour and minute adjustment.
Press SAVE CHANGES to accept the new settings and return to
the TIME menu.
Page 10

Default Schedule
The thermostat’s schedule is factory programmed in accordance with the EnergyStar guidelines for
START TIMES and SETPOINTS (listed below).
This default schedule may be modified as desired to meet your comfort and schedule requirements.
The thermostat anticipates the time required to reach a desired temperature prior to the start of the
SETPOINT time; therefore, you only need to set the desired time for the SETPOINT temperature.
SCHEDULE
Mon. to Fri. Sat. & Sun.
START
TIMES
SETPOINT
START
TIMES
SETPOINT
NAME HEAT COOL NAME HEAT COOL
6:00 am Wake 70°F (21°C) 78°F (26°C)
8:00 am
Wake 70°F (21°C) 78°F (26°C)
8:00 am Leave 62°F (17°C) 85°F (29°C)
6:00 pm Return 70°F (21°C) 78°F (26°C)
11:00 pm
Sleep 62°F (17°C) 82°F (28°C)
10:00 pm Sleep 62°F (17°C) 82°F (28°C)
Page 11
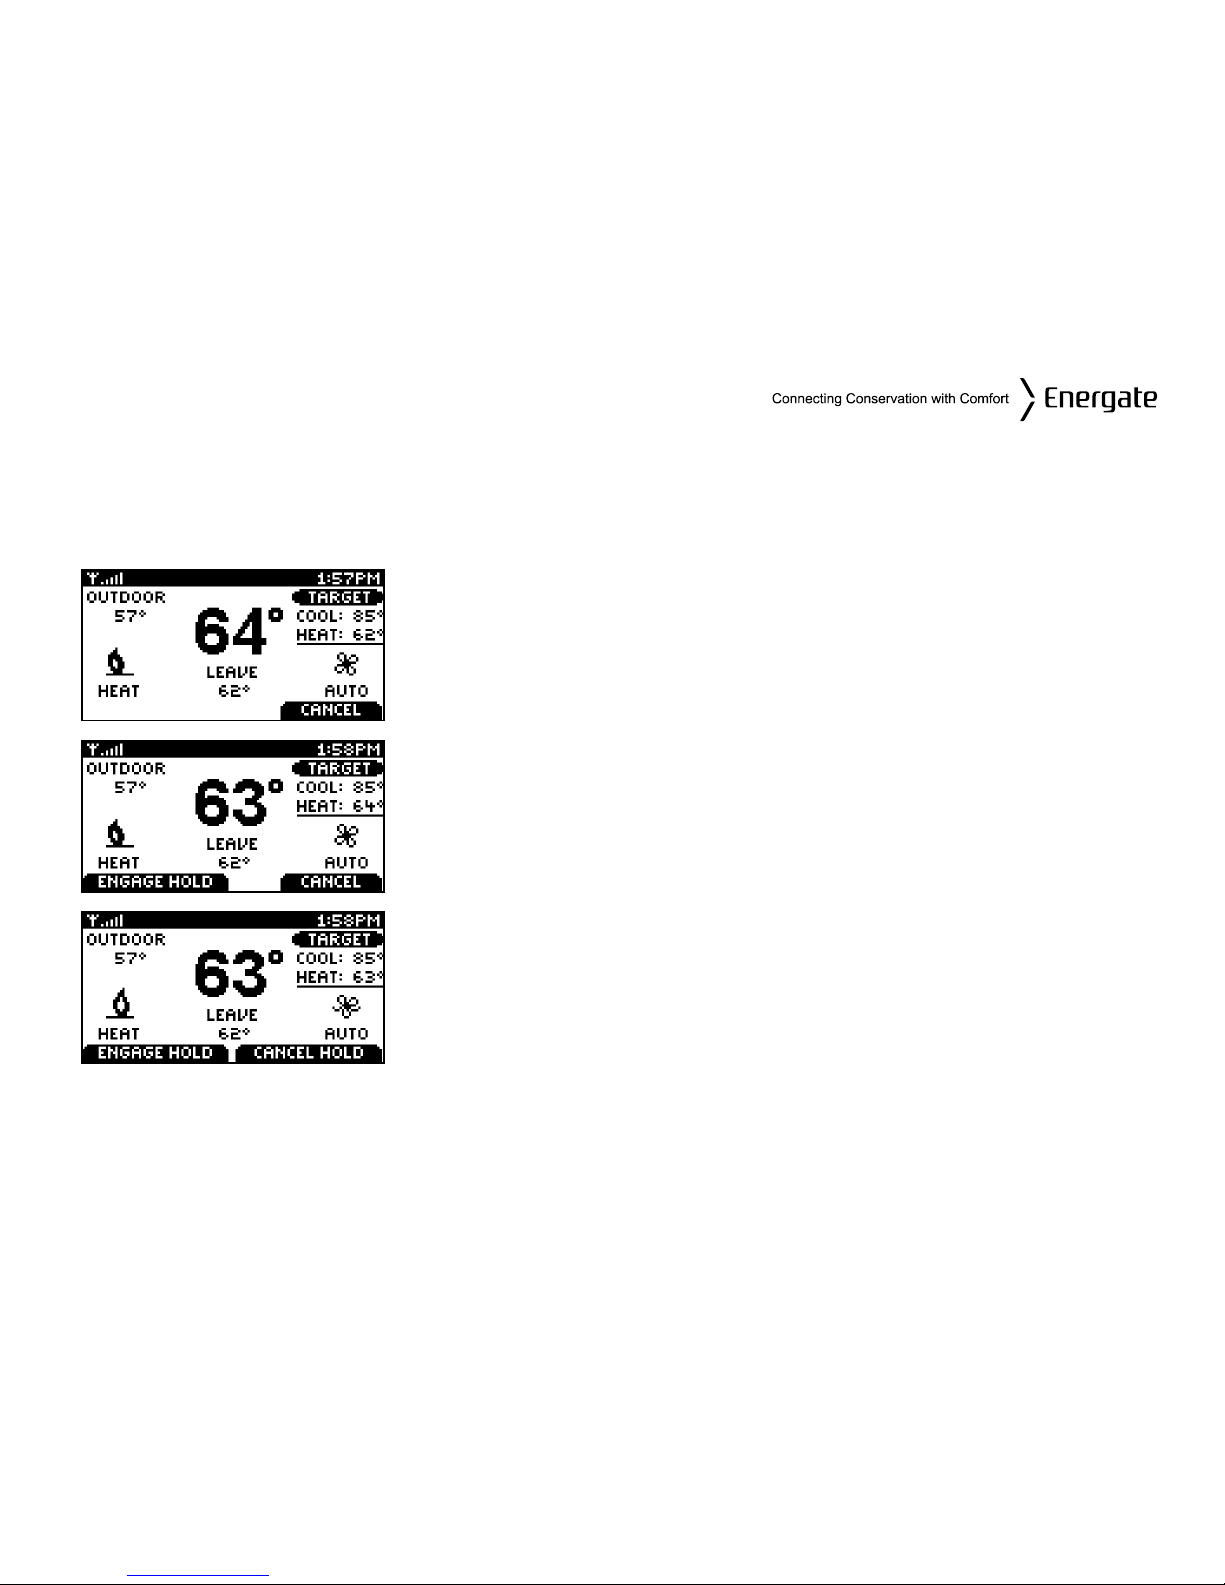
Temporary Hold
A Temporary Hold allows you to temporarily make the temperature warmer or cooler without
affecting the pre-set programming. The thermostat will remain at the Temporary Hold temperature
until the next scheduled SETPOINT.
From the Home screen, press either of the SCROLL buttons to
highlight the operating target SETPOINT (HEAT or COOL), which
will be underlined.
Press the SELECT button to toggle between the HEAT and COOL
temperatures.
Set the desired temperature using the SCROLL buttons
Press the LEFT TAB to ENGAGE HOLD, or RIGHT TAB to
CANCEL and return to the normal Home screen
To cancel a HOLD, press the SCROLL button to return to this
screen.
Press the RIGHT TAB to CANCEL HOLD, or LEFT TAB to
ENGAGE HOLD (continue the hold) and return to the normal
Home screen.
Page 12
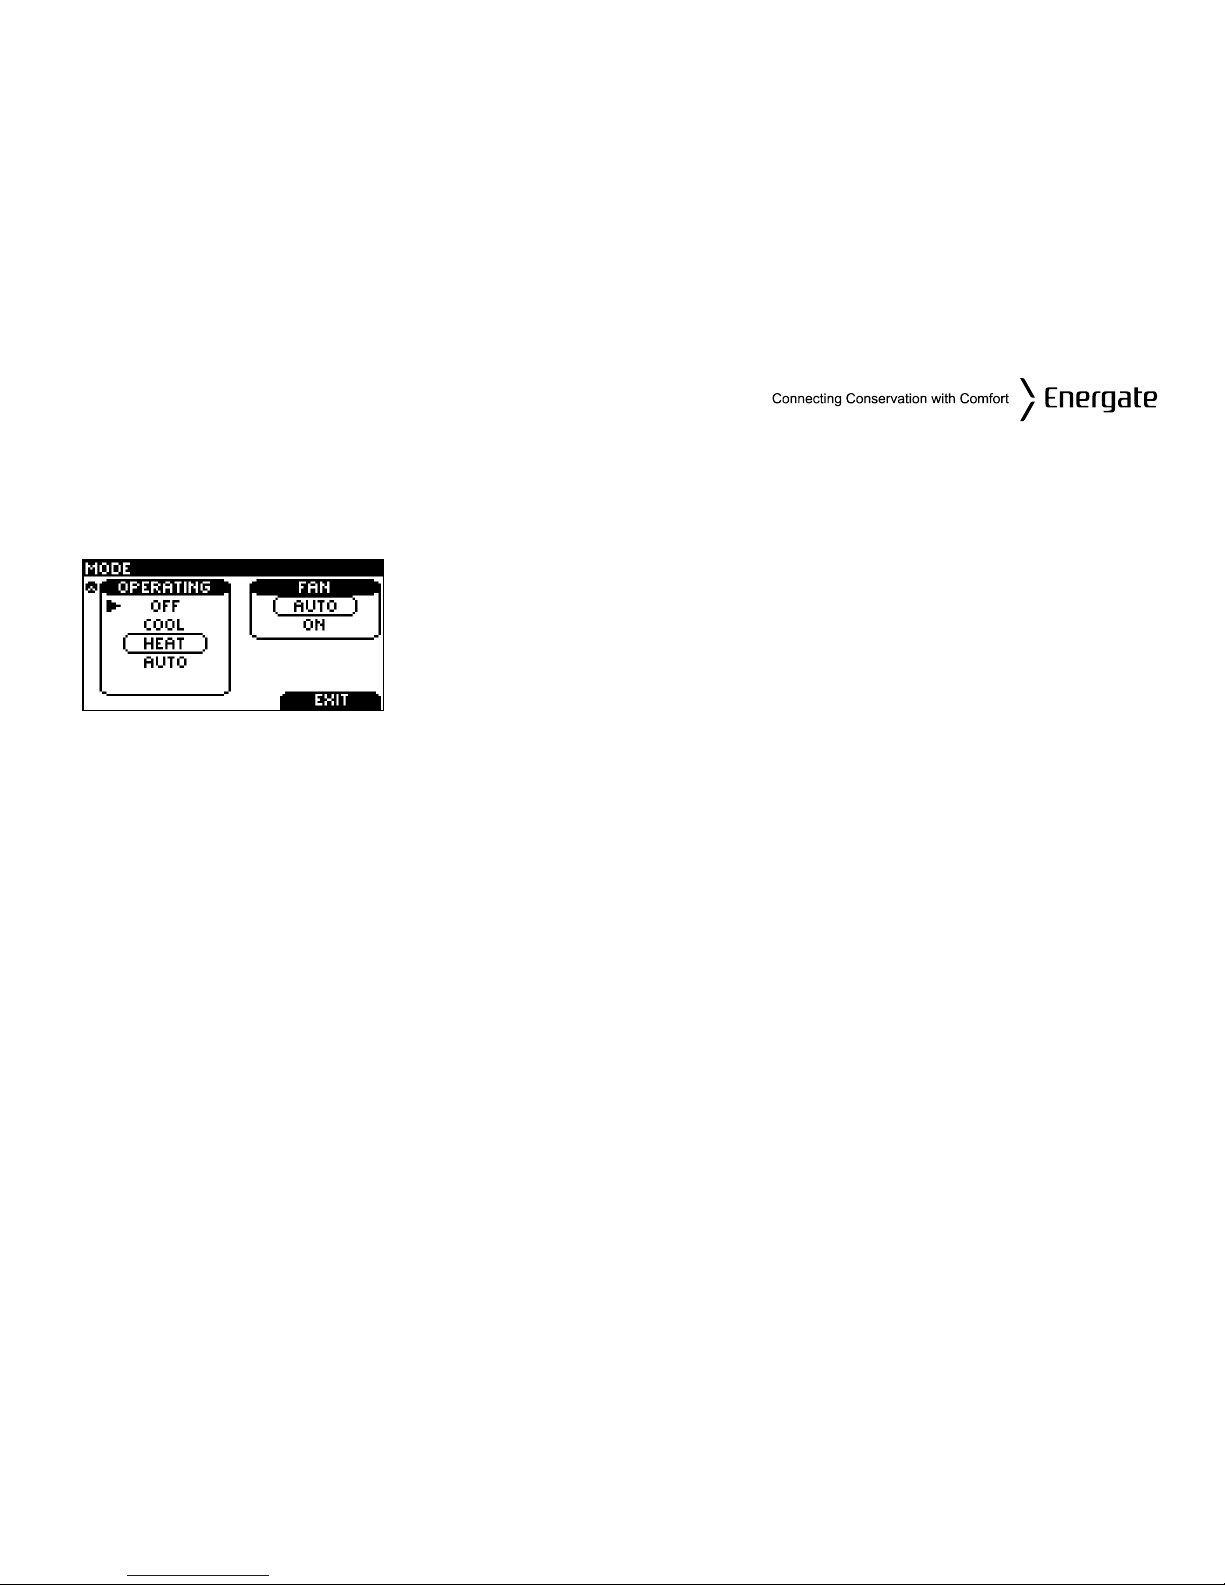
Heating and Cooling Modes
The thermostat is pre-set for heating operation (HEAT) but you can manually change the operating
mode between AUTO, HEAT, COOL, OFF, and EMERG.
Choose MODE from the Main Menu to view this screen.
Use the SCROLL buttons to select the desired operating mode.
Press SELECT and EXIT to engage the operating mode.
AUTO: The thermostat automatically selects heating or cooling based on the indoor
temperature.
HEAT: The thermostat controls only the heating system.
COOL: The thermostat controls only the cooling system.
OFF: Heating and cooling systems are off.
EMERG: This setting only applies to heat pumps with auxiliary heat. The thermostat only
controls the Emergency (Auxiliary) heat leaving the heat pump’s compressor
locked out. Use this setting only when you suspect the heat pump is out of service
or the outdoor conditions are inefficient for the operation of the heat pump.
Page 13
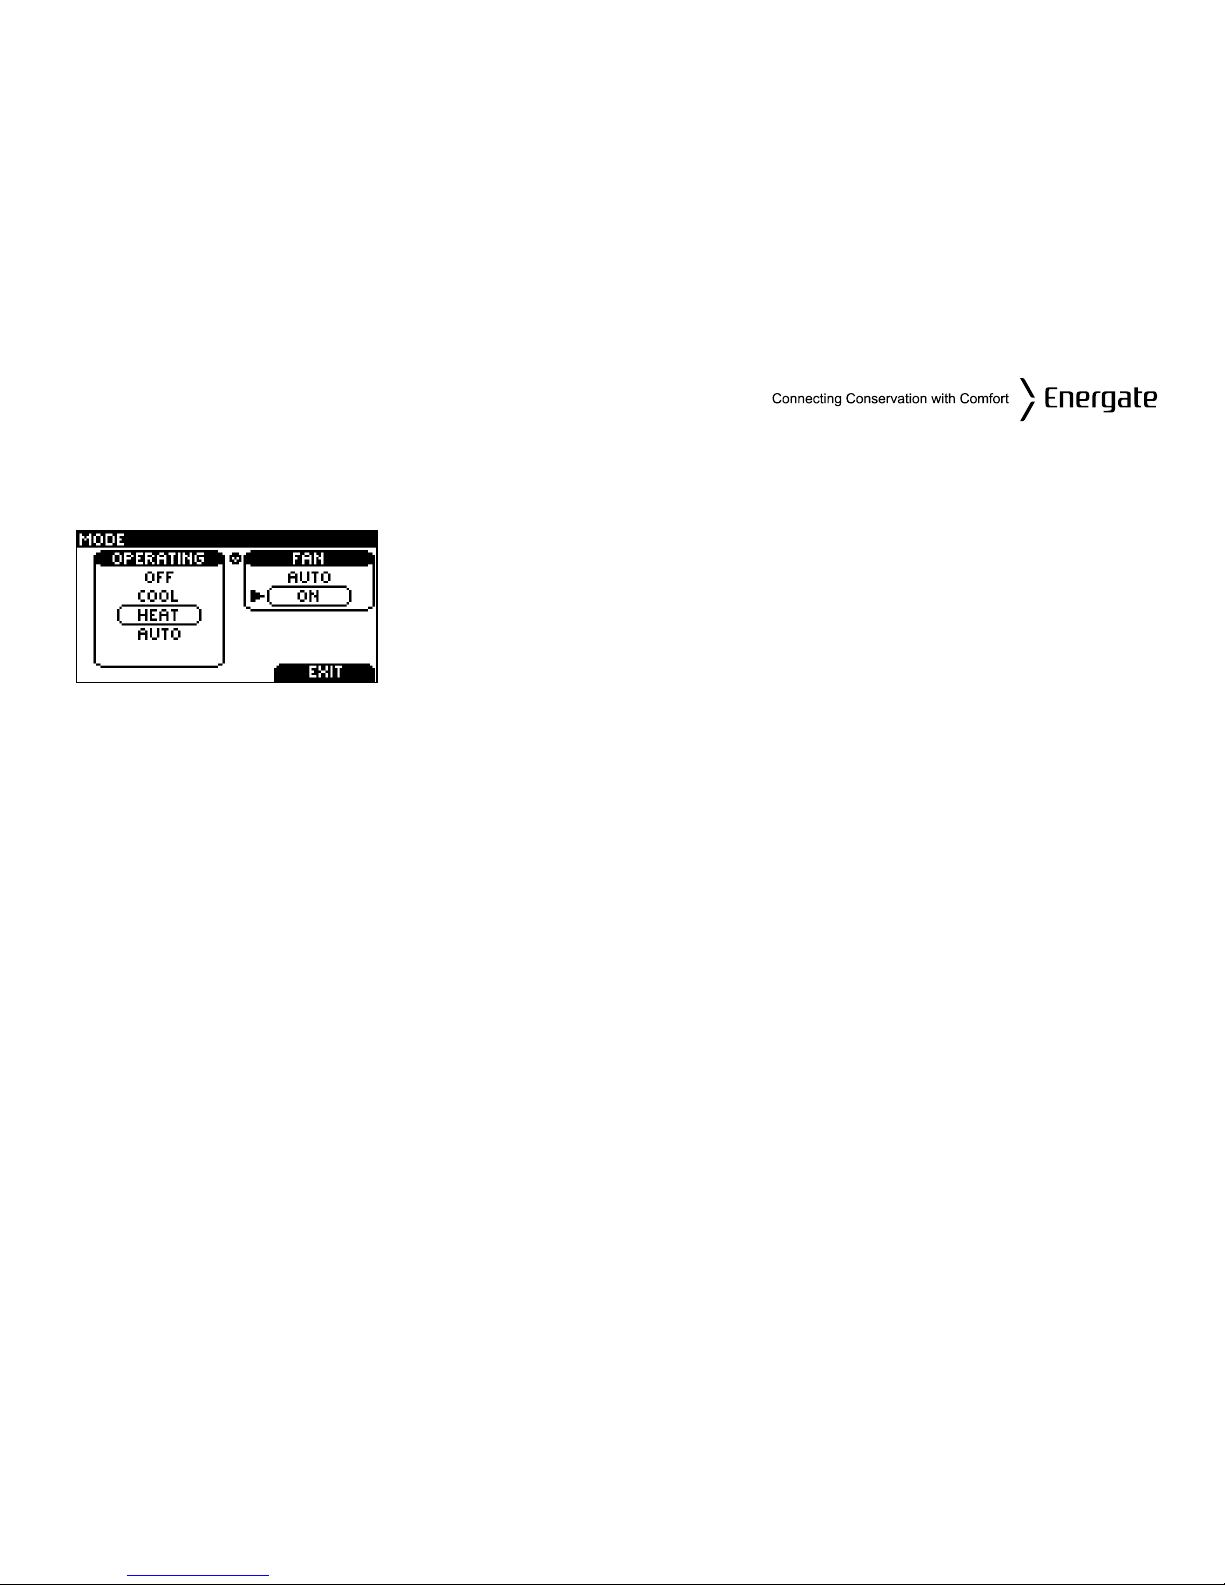
Fan Modes
You can manually change the fan mode between AUTO and ON.
Choose MODE from the Main Menu to view this screen.
SCROLL through the operating modes to get to the fan modes,
then press SELECT and EXIT to engage the desired fan mode.
AUTO: The fan runs only when the heating, cooling, or emergency systems are on. For
conventional systems, with the option FAN ON IN HEAT set to NO, the fan is not
controlled by the thermostat but by the furnace. Configuration of the FAN ON IN HEAT
setting is described in the Installation section of this manual.
ON: The fan runs continuously.
Page 14
Temperature Settings
A SETPOINT is identified by a NAME and specifies heating and cooling target temperatures.
Example: If the SETPOINT is set to WAKE, with COOL temperature of 78°F and HEAT temperature
of 70°F, a thermostat operating in AUTO mode will keep your dwelling’s temperature at the
predefined HEAT or COOL temperature. In the summer, the thermostat will COOL your dwelling
down to 78°F. In the fall, the thermostat will engage the HEAT mode, heating your dwelling up to
70°F throughout the winter. In the spring, when temperatures rise again, the thermostat will change
back to COOL mode.
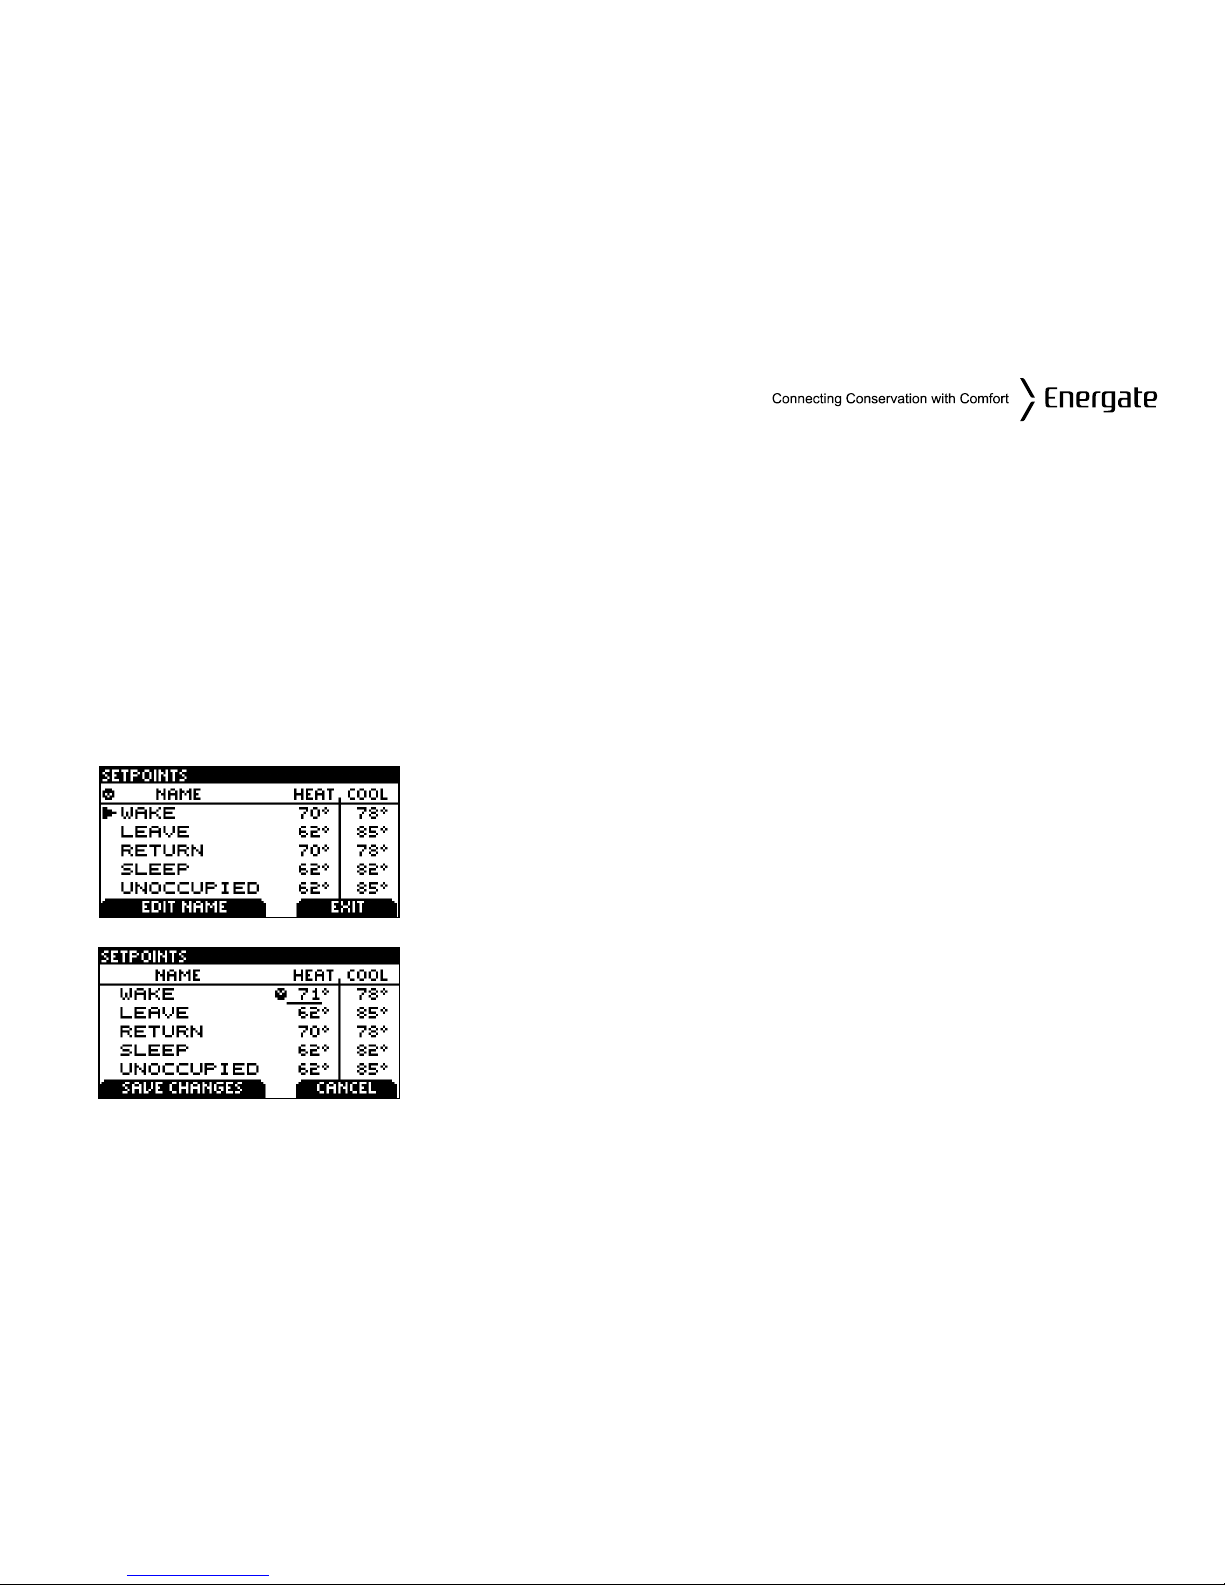
The SETPOINT’s HEAT and COOL temperature can be changed using the SETPOINTS menu.
Choose SETPOINTS from the Main Menu to view this screen.
To change the HEAT and COOL temperature settings, SCROLL
to the SETPOINT you want to change and press SELECT.
SCROLL to change the temperature, or press SELECT to move
between the HEAT and COOL settings.
Press the LEFT TAB to SAVE temperature changes.
Page 15
Schedule
The SCHEDULE determines when a SETPOINT such as WAKE begins. Only the start times are
defined; the SETPOINT ends at the start of the next SETPOINT. To delete a start time, SCROLL to
the start time, and select NOT USED as the SETPOINT.
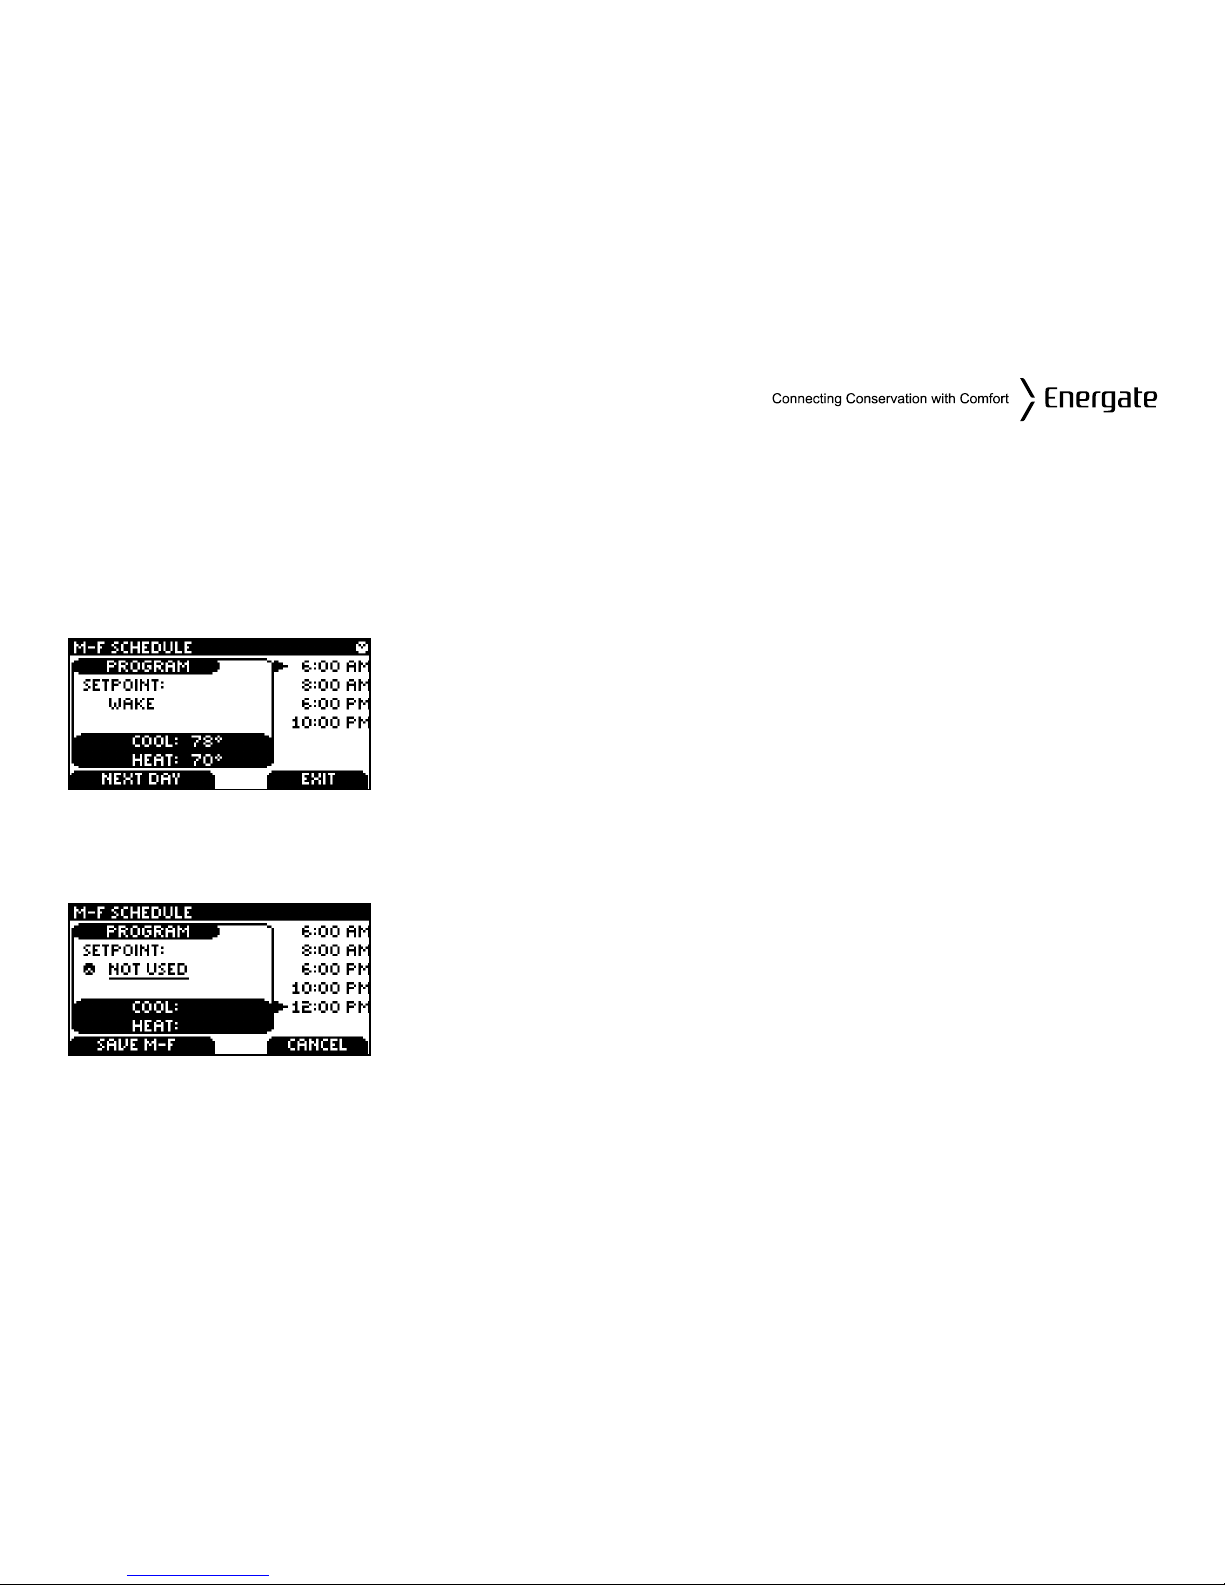
Choose SCHEDULE from the main MENU to view the Schedule
screen.
The PROGRAM window displays the SETPOINT associated with the
start time on the right.
Adjust the start time by pressing the SELECT button and
SCROLLING through the time.
Press SELECT to move inside the PROGRAM window. Here the
SETPOINT can be SCROLLED to choose the name of a different
SETPOINT.
Press SELECT to return to the start times on the right.
You can have up to 6 scheduled start times.
To add a start time, SCROLL to a blank row, SELECT it, and change
the start time.
Change the name NOT USED to an appropriate SETPOINT after
you have added the start time.
Page 16
 Loading...