

Endura Flap Thermo Sash IIIe Installation Instructions Manual
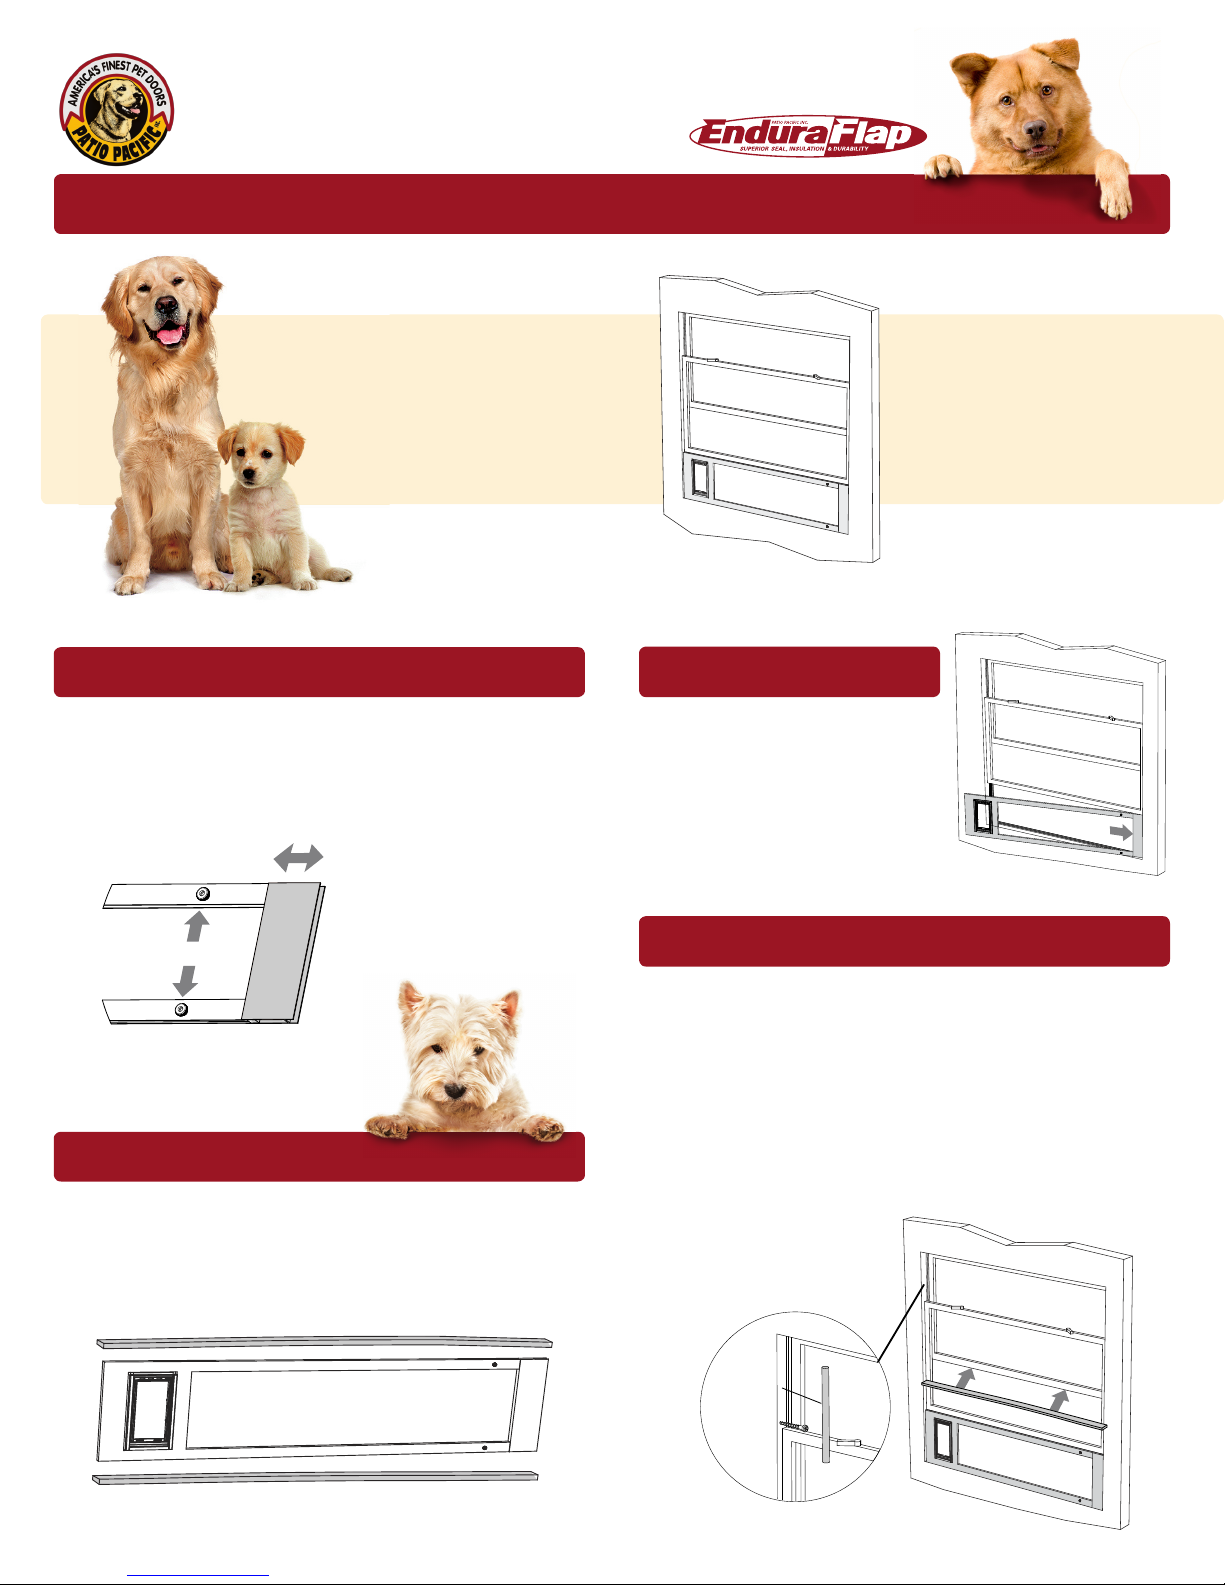
Thermo Sash IIIe
Thumb
Screw
Spring Mechanism
Adjusts side to side
Thumb
Screw
Spring Mechanism
Adjusts side to side
Foam Weather Strip
Foam Weather Strip
Thumb
Scre w
Spring Mechanis m
Adjusts s ide to side
Detail 1
FigureA
Foam Weather Strip
Foam Weather Strip
Thumb
Scre w
Spring Mechanism
Adjusts side to side
Detail 1
FigureA
Congratulations on your purchase of one of the finest
pet doors made, featuring the exclusive Endura Flap.
Installation Instructions
TM
Endura Flap TM | U.S. Pat. No. 7,814,956 | Pat. Pending
For expert installation help,
replacement flaps and parts or
other quality pet door products,
visit PetDoors.com
or call
800-826-2871
STEP ONE
1
1
Loosen the thumb screws at the end of the sash. This allows the
spring mechanism to move freely side to side.
Note: Re-tighten the thumb screws after step 3.
STEP THREE
3
3
Insert the sash into the window
track. Push against the spring
mechanism and swing the
opposite end into the opposite
window track. Gently release.
Tighten the thumb screws.
PARTS LIST
1 - Thermo Sash IIIe
1 - Foam Weather Strip
(top and bottom of pet door)
1 - Center Post Weather Seal Strip
(vinyl strip)
These images are representative.
Appearance of your pet door may
vary slightly depending on model.
2
2
Cut the foam weather strip with scissors to the length of the sash.
Peel back the paper on the foam to expose the adhesive. Install the
foam strip in the channels on both the top and the bottom of the sash.
STEP TWO
STEP FOUR
4
4
Mount the vinyl weather strip. This strip prevents air leaking between
the window frame. This vinyl weather strip seals the gap produced
between the two windows when raised to accommodate the sash.
(Figure A)
Note: Trim to fit as needed with scissors.
Window Locking options:
For a permanent lock, install a wood screw in the track immediately
above the window on both sides. For a temporary lock, place a
removable wooden dowel in both tracks above the window.
(Detail 1)
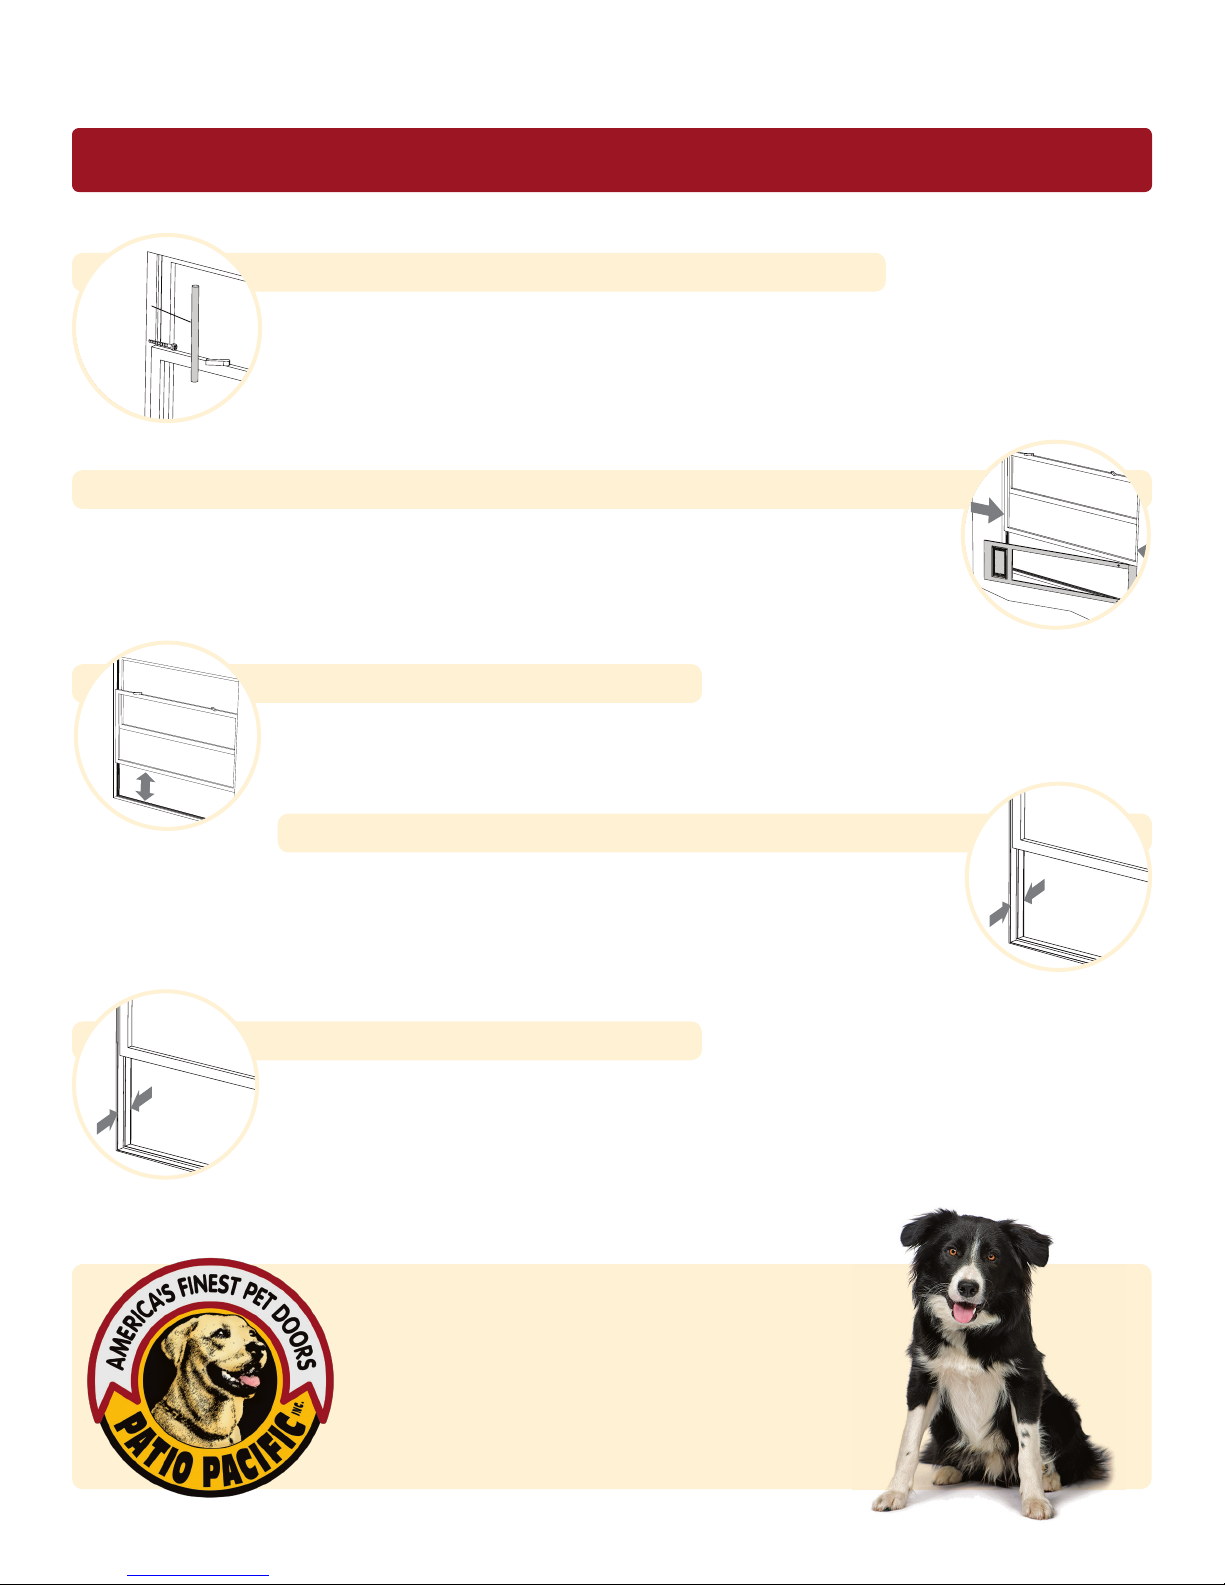
Thermo Sash IIIe
Installation Tips
Tricks and Work-a-Rounds
I didn’t get a window lock with my Thermo Sash IIIe.
Locking solutions for sash windows are simple: If you want to semi-permanently lock the window down
onto the pet door, insert a wood screw in each window track just above the window. Keep the screw
heads protruding far enough so that the window can not be opened past them. (shown) If you want to
keep the window locked but still want to occasionally open it, cut a wooden dowel to the proper length
and install in the window track just above the window. (shown)
The window turns out to be a little too wide /narrow.
My window turns out to be a little too wide/narrow for the Thermo Sash IIIe to fit in. The Thermo Sash IIIe
has a built in ‘anti-whoops’ to allow for small measurement errors. If your window is up to 3/4” too wide,
you can order an extension piece from Patio Pacific, Inc. If the window is up to 3/4” too narrow, you can
shorten the flanges at the spring end with a hacksaw.
My window does not open enough.
My window won’t raise high enough to accept the pet door. There’s no fix for this
except to exchange the pet door for a smaller one.
My window track is too narrow to accept the panel.
If your track is wide enough to accept one end but not the other (the spring
mechanism makes that end about 1/8” thicker than the other end) the solution
is simple: Just squeeze the flanges together until they fit. Use two 2”x4” boards to
press the ends together for a neat result. If the track is too narrow for this solution,
you’ll either have to figure out a way of bracketing the pet door in place or give up.
I want the pet door at the other end.
If you prefer that your pet opening be at the opposite end of the Thermo Sash IIIe, simply remove
the screws holding the flap/frame assembly, reverse the panel and reinstall the assembly.
For expert installation help, replacement flaps and
parts or other quality pet door products, visit
PetDoors.com or call
Monday – Friday • 8:00 a.m. – 4:30 p.m. PST
800-826-2871 (Press 2)
 Loading...