

Endura Flap Patio Pacific Installation Instructions Manual
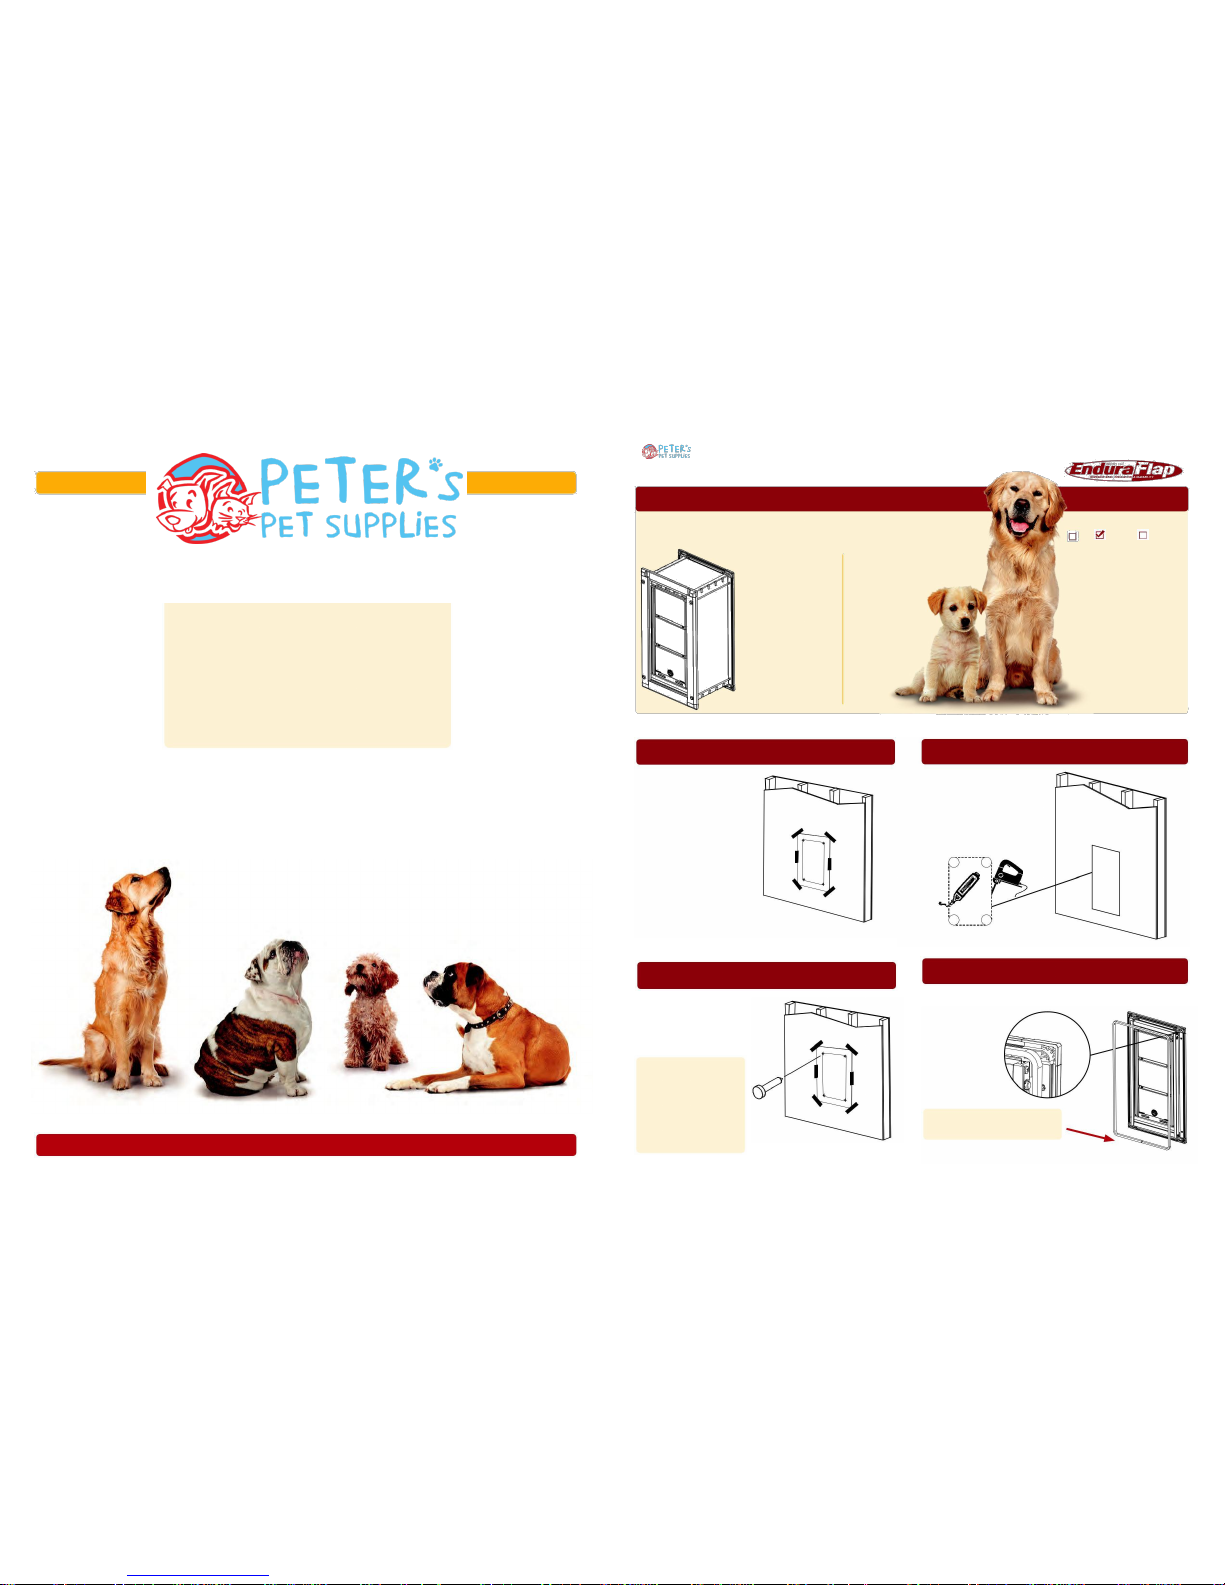
Endura Flap Wall Mount Pet Door
Congratulations on your purchase of the finest pet
door made, featuring the exclusive Endura Flap.TM
Installation Instructions
Instructions are for both the single and double flap models.
Please read instructions thoroughly before beginning installation.
Degree of difficulty:
Easy Moderate Difficult
For replacement fflaps and parts or other
quality pet products, visit
peterspetsupplies.com
PARTS LIST:
4 Threaded Rods
4 Open Barrel Nuts
1 Hex Nut
1 Tube of Silicone
4 Tunnel Pieces
2 Foam Weatherstrips
8 Hole Plugs
1 Jigsaw Blade
1 Template
1 4” Screw (used to
guide Threaded Rods)
1 STEP ONE
TOOLS REQUIRED:
Jigsaw • Level • Pencil
Tape • Nail or Awl
Rubber Mallet
Drill with extra
long 3/8” Bit
Philips Head
Screwdriver (#2)
Measuring Tape
3 STEP THREE
For replacement flaps
and parts or other quality
pet door products, visit
PetProSupplyCo.com
Tape the provided template
onto the wall in the desired
location. Use a level to level
the top edge of the template.
The top edge of the cut out
should be 1-1/4” (or more)
above the dog’s withers
(shoulders) for the single flap,
and 2” for the double flap.
IMPORTANT: Be careful to
avoid wall studs, electric
wires, or pipes.
2 STEP TWO
Mark the centers of the four
holes using an awl or nail.
Remove the template. Drill
four 3/8“ holes through
the interior and exterior walls.
Tip: The drill bit needs
to be long enough to go
through both interior and
exterior walls (6”–12”).
The holes must be drilled
very straight and level.
Professional help is
recommended.
Draw lines connecting the
outside part of the holes.
Cut out the opening along
the lines.
4 STEP FOUR
Install the weatherstip
into the groove in
both the interior
and exterior frame.
Tip: Install the weatherstripping
with the gap at the bottom.
Endura Flap TM | U.S. Pat. No. 7,814,956 | Pat. Pending
These images are representative. Appearance of your pet door may vary slightly depending on model. Endura Flap TM | U.S. Pat. No. 7,814,956 | Pat. Pending
5STEP FIVE
Trim the four sheet metal tunnel pieces so that they are
1/4 “ shorter than the thickness of the wall. Use a jigsaw,
nibblers, or a bandsaw. (A jigsaw blade is provided.)
Be careful to trim the correct side. Do not trim the side
of the tunnel pieces that attach to the flap frame.
8STEP EIGHT
Slide the larger tunnel pieces onto the finger tabs
on the top and bottom (smaller) tunnel pieces.
Bend the finger tabs down as shown below.
10 STEP TEN
Place the Interior Frame, with the tunnel attached, into
the opening in the wall from the inside of the building.
Place the Exterior Frame into the tunnel.
13 STEP THIRTEEN
Apply a bead of silicone sealant (provided) along the inside of the
tunnel where it mates with the frames and along the tunnel seams.
Be careful to seal all gaps and seams to minimize
the chance of water damage to the wall.
Tip: To reduce
Trim this
vibration, the
side only
pieces should
1/4”
be firmly
clamped to a
piece of wood.
6STEP SIX
Bend the frame attachment tabs on the two smaller tunnel
pieces 90 degrees upward along the perforations.
Be careful to bend the tabs in the right direction. The tabs will
break if bent more than once. Some tunnel pieces have a joggle
9STEP NINE
Tip: A screwdriver
handle works well for
bending the finger tabs.
Tip: For especially
heavy dogs, you
may wish to sup-
port the bottom of
the tunnel with a
piece of wood.
11 STEP ELEVEN
Loosely insert the 4-inch screw into the head of the barrel nut.
The screw can now be used to help guide the threaded rod through
the interior and exterior frame. The 4-inch screw will create a
(offset). Bend these tabs as shown with arrow. Tunnel pieces
that do not have a joggle can be bent in either direction.
WARNING:
The tabs may
break if bent
more than
once.
7 STEP SEVEN
Remove the two screws at the top of the Interior Frame (the
frame that has a locking cover). Attach one of the smaller tunnel
pieces to the top of the Interior Flap Frame using the two screws.
Repeat this using the other
small tunnel piece along the
bottom of the flap frame.
Cut the four threaded rods so that they are 3/4 “
longer than the thickness of the wall.
Tip: Thread a nut (provided) onto
the threaded rod before cutting.
When finished cutting, removing the
nut will straighten the cut threads.
Cut 3/4 “ longer than the thickness of the wall.
Screw the four threaded rods into the
four barrel nuts to form long screws.
temporary handle for threading the rods in the door (see below)
A B
A B
12 STEP TWELVE
Insert the threaded rods with the barrel nuts into the four holes in
the Interior Frame (the frame that has a locking cover), and
screw the threaded rods into the Exterior Frame finger tight.
Check that the pet door is level and tighten the threaded
rods until the weather stripping compresses fully.
Be careful not to overtighten
Use handle for each
14 STEP FOURTEEN
Tap the hole covers into the Interior and Exterior Frames.
Tip: The wooden handle of a hammer, or similar nonmetal tool, works well for tapping in the hole plugs.
4 Plugs
 Loading...