

Endura TRILENNIUM Series Installation Manual

TRILENNIUM STRIKE PLATE INSTALLATION - HAND ROUTING
OVERVIEW
Parts Included in Template System:
• Templaco Jamb Template Right
• Templaco Jamb Template Left
• Templaco Jamb Dust Box Through-Hole Template
All parts above available in Endura Part#: TC- TEMP-TEMPLACO
Dust Box
Reinforcing
Plate
5/8" OD Router
Template Guide and Nut
Strike Plate
Templaco Jamb
Template Right
Hand
Templaco Jamb Dust Box
Through-Hole Template
1/2" Router Bit
Additional Parts Required:
• Router 1/2" Router Bit
• 5/8" OD Router Template Guide and Nut
• Hammer
• Hand drill
• Pencil
• Measuring Tape/ Ruler
• Clamps
Templaco Jamb
Template Left
Hand
• Strike Plates
• Reinforcing Plates
• Dust Boxes
1 of 13
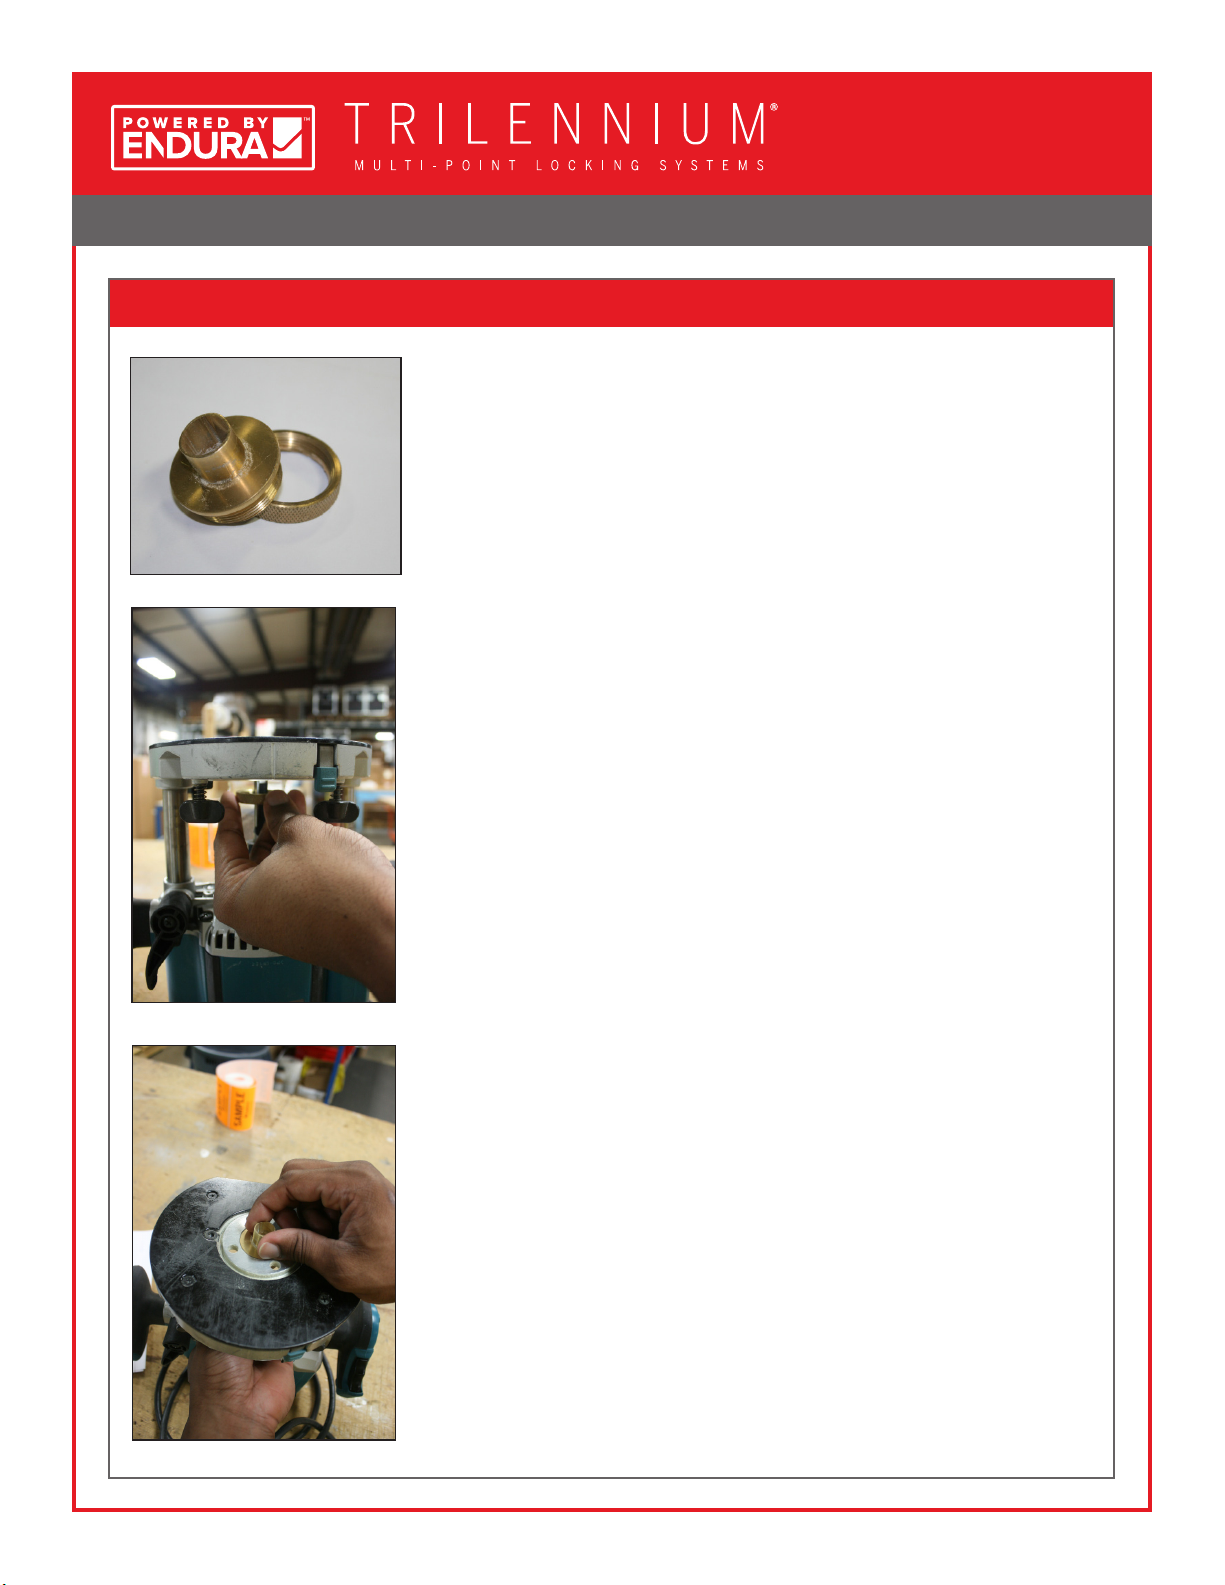
Router Setup
TRILENNIUM STRIKE PLATE INSTALLATION - HAND ROUTING
In order to make use of Templaco Template System and not damage them in the
process, a 5/8" OD Router Template Guide must be used.
To install 5/8" OD Router Template Guide, align nut with opening on router base.
Align and insert Template Guide into the nut, and tighten until secure.
2 of 13
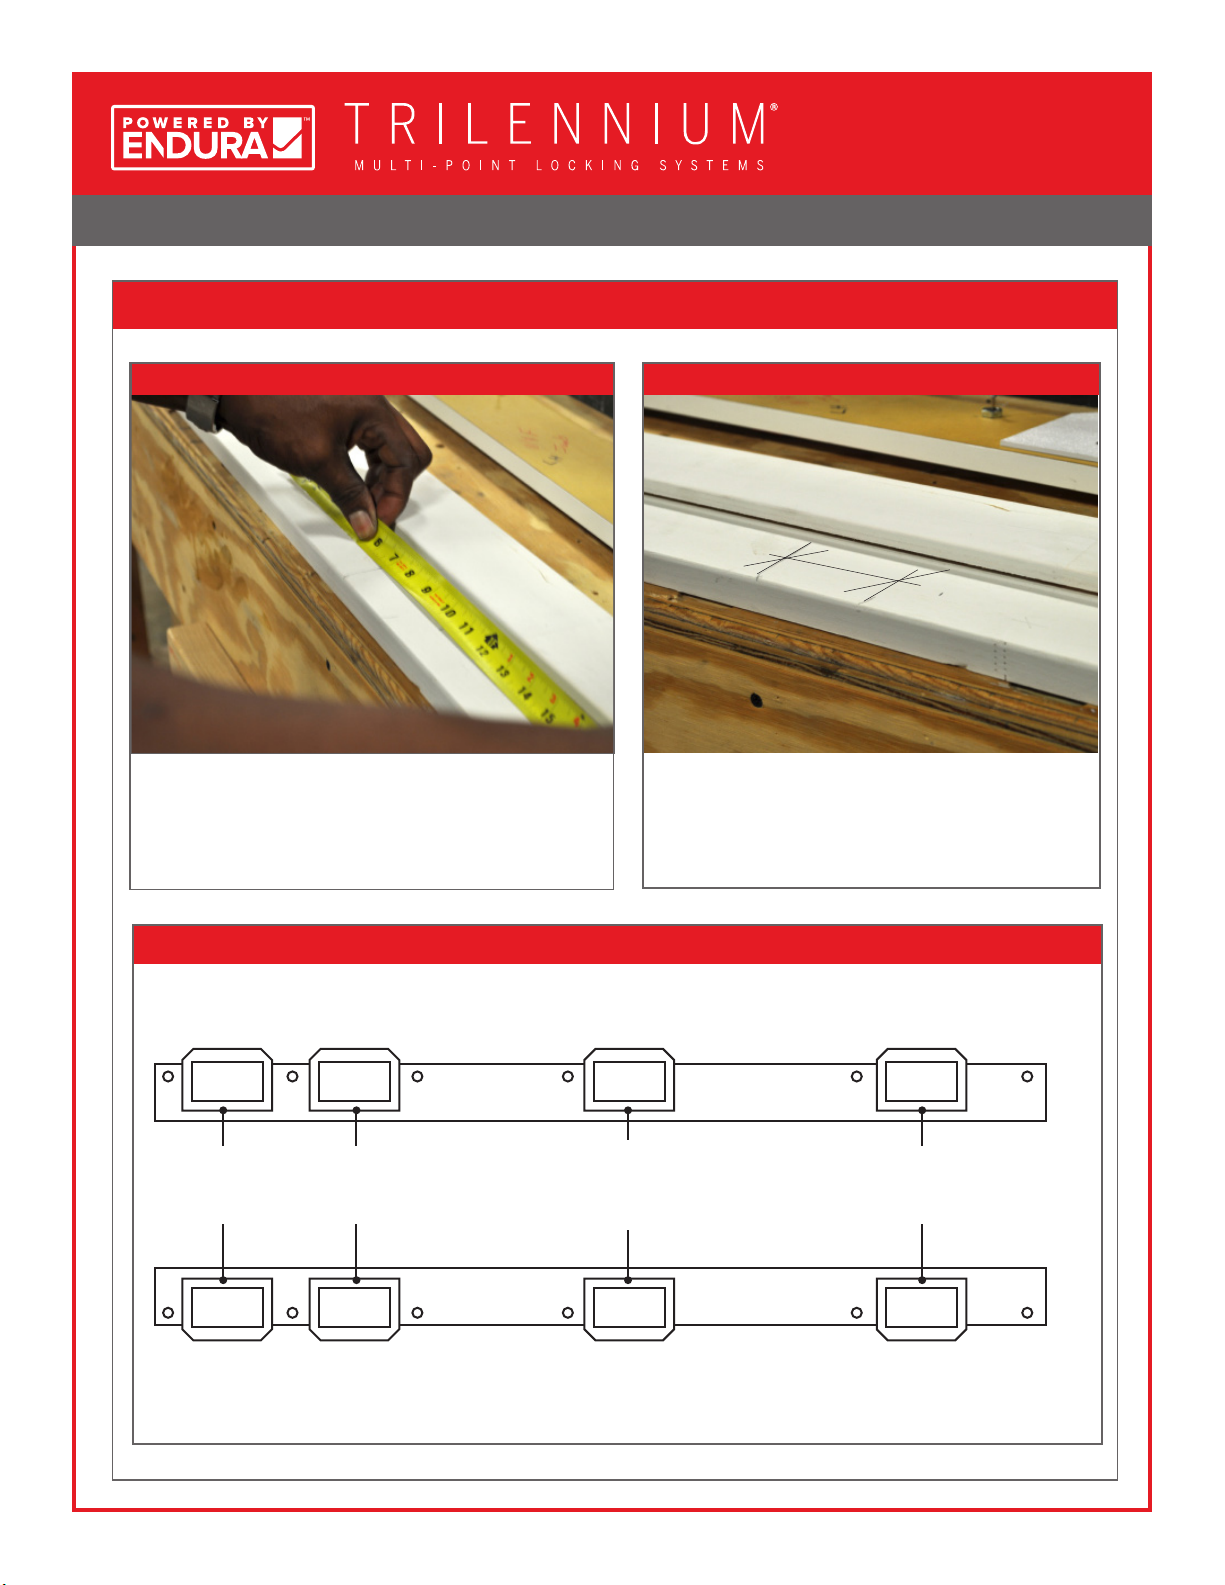
1. Aligning Template
TRILENNIUM STRIKE PLATE INSTALLATION - HAND ROUTING
A. Measure and Mark Lever Centerline.
• Locate the Leverbore centerline on the jamb.
Note Template Orientation
B. Located Strike Centerline
Leverbore
C/L
• Measure 3-5/8" toward the top of the jamb from
Lever Centerline and Mark.
• This is your Strike Plate Centerline.
Strike
C/L
3-5/8”
Left Hand Template
8/0 Top
Strike
Template
6/0 Top
Strike
Template
Right Hand Template
Center Strike
Template
Bottom Strike
Template
3 of 13

TRILENNIUM STRIKE PLATE INSTALLATION - HAND ROUTING
1. Aligning Template Cont.
C. Align Centerline of Template with the Center Strike Plate Centerline Mark.
D. Using a Hammer, Secure Locking Pins into Jamb.
Template Centerline
E. Secure Template with Claps at each End.
• Secure Template to the table to ensure no movement will occur.
4 of 13
 Loading...