

Endorphin 380-e2 Series, 370-e1 Series Instruction Manual
337700 &
& 338800 SSeerriieess PPllaattffoorr
IInnssttrruuccttiioonn M
Maannuuaall
m
m
Expandable Modular Technology
The only exercise equipment line with interchangeable & upgradeable
resistance systems that safeguard against obsolescence.
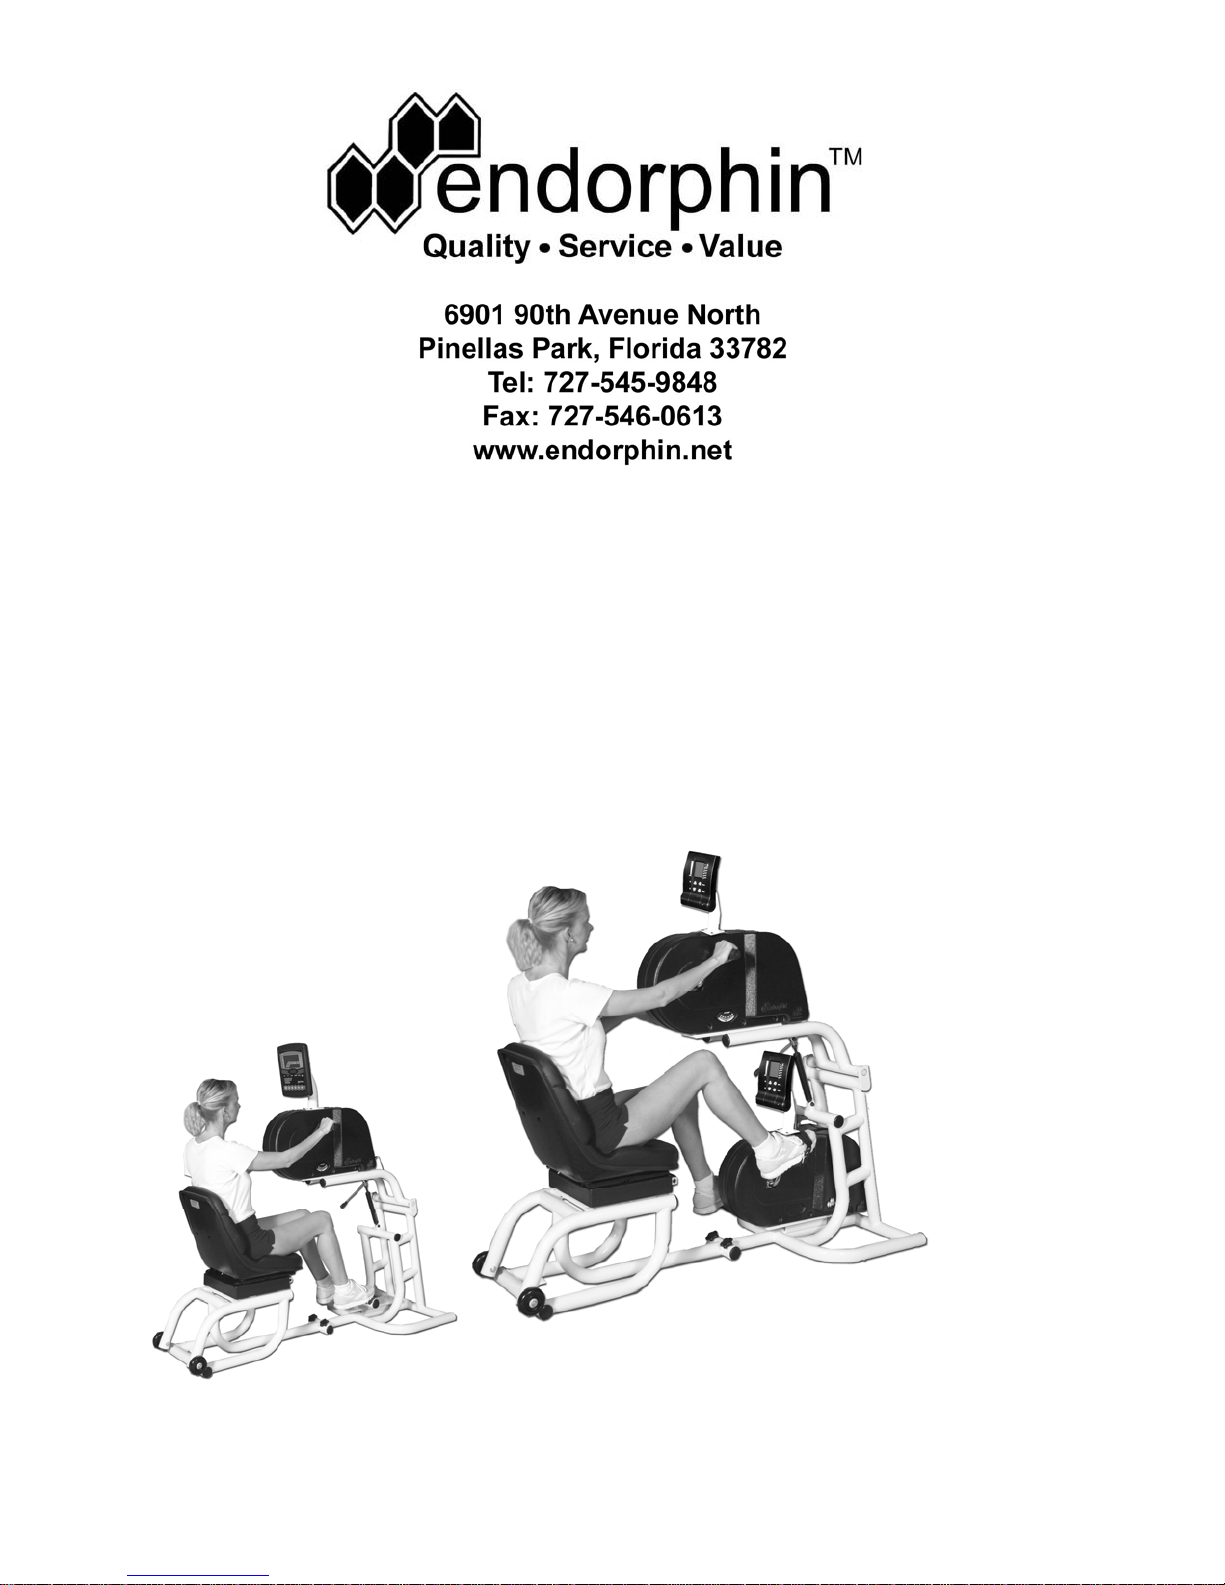
Pictured 380-e2 Pictured 370-e1
Copyright 2010
1

Dear Customer,
Endorphin Corporation has provided quality fitness and rehabilitation equipment for 20 years.
Our mission remains unchanged – to lead our industry with unparalleled products, warranties
and customer service. In keeping with our reputation for innovation, our new product line
delivers a fresh new look built on a foundation of quality, functionality and adaptability.
Our warranty is an industry best – every part is warranted for one full year – every moving part
is warranted for five years and our frame is warranted for 20 years.
We stand behind our products one hundred percent and are confident that our customers
receive the best quality, service and value!
Thank you for your purchase of an Endorphin product.
370 & 380 SERIES SYSTEM PLATFORM:
INTRODUCTION:
The Endorphin Corporation e-system platform is an ideal closed chain, low impact aerobic
upper and or upper and lower body muscle-conditioning platform. The e-system resistance
modules are operated and controlled independently and give the user flexibility in customizing
treatment for specific injuries or for a general exercise program. The e-system platform is the
only upper and lower body exercise platform that provides a height adjustable upper e-system
resistance module. The height of the resistance system crank adjusts from 36” to 50” from the
floor.
A semi-recumbent seat is orthopedically designed for even weight distribution. The seat adjusts
front to rear for proper user positioning and rotates 360 degrees to provide easy access. The
seat assembly may be quickly removed to allow for wheelchair accessibility. With the 4
available e-resistance systems
therapy, cardiac and orthopedic rehabilitation, health and fitness, senior programs, and home
use.
WARNING:
Before beginning workouts with this or any other exercise unit, please consult with your physician. This is
especially important for people over the age of 35 or individuals with pre-existing health problems.
Please read instructions in full before using this unit. The Endorphin Corporation assumes no
responsibility for personal injury or property damage sustained by or through the use of this product.
SAFETY PRECAUTIONS:
1. Consult your physician before using this exercise equipment.
2. Keep hands, feet, and head away from moving parts and adjustment tubes.
3. Minors should not workout - only with strict adult supervision. This equipment is not recommended
for unsupervised use by children under 15 years of age.
4. Ensure that all adjustment pins/knobs are fully secured before using the machine.
5. Report product defects to the facility owner and do not use until repairs are made.
6. Do not alter or add to this equipment.
PLEASE NOTE THAT THIS UNIT IS ONLY TO BE USED BY ONE INDIVIDUAL AT ANY ONE TIME.
ALL OTHERS MUST BE CLEAR OF THE UNIT WHILE IT IS IN OPERATION.
e1, e2 e3, e4, Endorphin has models appropriate for physical
2

INSTRUCTIONS:
ASSEMBLY:
1. Check the shipment for any visible shipping damages and report the damages to the driver.
Unreported damages cannot be addressed if they are not reported at the time of delivery.
2. Remove the unit from the shipping pallet and place it upon the floor. This unit is heavy (275 lbs.
approx.) so it may require several people to move the unit.
3. The e-system platform is shipped to you assembled in two parts, the mainframe and seat
assemblies which and can be moved on a dolly.
4. We would recommend that two persons move the unit so as to provide adequate support while
moving. The unit will pass through a standard 32" doorway. The unit should not be rolled up or
down any steps or stairs please lift the unit over any obstacles. Excessive vibration can cause an
electronic equipment failure.
5. The e-resistance module provided with the platform is secured to the platform with four bolts.
Please check the module is secured to the platform before moving or using.
OPERATION:
1. Seat should be adjusted to the back position and rotated to the side. Sit on the seat, while lifting
the adjustment handle rotate the seat until facing the unit. Pull the seat adjustment lever located
below and to the front left of the seat and slide towards the arm crank. The seat will adjust from
front to rear using the slide lever 6 inches.
2. The upper e-resistance system height is adjustable and lifting the adjustment lever can change
the position. Note: Always support the e-resistance module with your other hand and move the
head in the direction desired. The weight of the module is supported and it may not move in
either direction when the lever is moved.
3. Place hands on the arm crank handles (380 arms only) and feet on the foot crank. With back
supported by the seat, adjust the seat for correct arm and foot rotation (380 arms only). Arms
and legs should not be fully extended during the exercise rotation.
4. Consult your health or rehab specialist as to the duration and level of exercise you should be
completing.
5. To exit the unit. Stop exercising and remove pulse sensor, release and slide the seat to the rear
then lift the seat pivot handle and rotate the seat to either side.
WHEELCHAIR ACCESS:
1. Remove the seat assembly from the mainframe. Two tightening knobs at the base of the
mainframe and seat base.
2. Carefully remove the seat assembly to one side of the machine so that the wheelchair can access
the machine. Be careful, as the seat assembly is heavy.
3. Position the wheelchair in front of the unit and grasp the handles. Adjust the chair for correct arm
rotation. Arms should not fully extend. Using the wheelchair brake lock the chair into position.
4. The upper e-resistance system height is adjustable and can be positioned by lifting or depressing
the adjustment lever. Note: Always support the e-resistance module with your other hand and
move it in the direction desired. The weight of the module is supported and it may not move in
either direction when the lever is moved.
5. Place hands on the arm crank handles (380 arms only) and feet on the foot crank. With back
supported by the seat, adjust the seat for correct arm and foot rotation (380 arms only). Arms
and legs should not be fully extended during the exercise rotation.
6. To exit the unit. Stop exercising and remove pulse sensor, unlock the wheelchair, then carefully
back out of the machine.
3

The Endorphin e1-MAG resistance system is designed to be accessible, easy-to-use, and allows
the user to train independently. Tried, tested, and proven in rehab facilities and homes, the
Endorphin
improves cardiovascular capacity. A bi-directional magnetic resistance flywheel design means
less noise and a frictionless resistance versus traditional friction belt-type hand cycles. A multifunction electronic monitor which reads distance, time, speed, calories, and pulse. Comfort grip
handles are provided to allow the user to rotate his arms forward and reverse. The bi-
directional flywheel on the
and reverse directions. The adjustable magnetic resistance features 8 workload levels, which
allows the user to have smaller resistance changes.
INSTRUCTIONS:
1. Hand Grips: The handgrips are clearly marked at the threaded end of the grip, L for left
2. Electronic Exercise Monitor: Our flexible power system allows the unit to operate
3. Resistance Adjustment: Please follow the operating instructions provided with the
4. Power Supply: The AC adapter 6VDC monitor and servo power supply requires a 120V
5. Exercise: Adjust the resistance with the adjustment lever and start the electronic meter.
e1-MAG resistance system delivers excellent upper-extremity muscle conditioning and
e1-MAG allows the user to exercise with resistance in both the forward
and R for right. Install the L grip into the hand crank on the left-hand side of the cycle.
Turn it counter clockwise to tighten. Install the R grip into the hand crank on the right
side of the cycle. Turn it clockwise to tighten. A small adjustable wrench should be
used to securely tighten the grips into the hand crank. The handles should rotate freely
on the threaded rods. In the 370 Series platform format the handles may have been
attached at the factory.
using batteries or with a power adaptor provided. Secure the monitor on the monitor
bracket and connect the control and sensor cables.
Option 1: Install the batteries into the monitor as described in the monitor instructions
(located in the parts box with the monitor).
Option 2: The unit may also be powered with the adaptor provided. Note: Please
remove the batteries if installed then plug the adaptor cable into the back of the monitor
then plug the adaptor in to the wall (120V). Plug-in the Ear Clip into the front of the
meter if required. Ensure that the Ear Clip cable does not get caught in the hand crank
when it is rotated.
electronic monitor (located in the box covering the monitor)
60Hz 25W outlet. We recommend that you use a surge protector type plug and then
plug that into the outlet.
Take hold of the handles and begin to rotate them in a forward or reverse motion. The
resistance may feel harder at the start but will become less as the flywheel builds up
momentum.
4
 Loading...