

Endless Summer ES4000COMM Clean and Care Manual
Cleaning Instructions for
Burner, Pilot Assembly,
and Emitter Screen
Series: 220000 - 450000

For assistance call: 1.800.762.1142
Tools Required for Assembly:
10 mm open end wrench
12 mm open end wrench
9/16” open end wrench
5/8” open end wrench
Socket extension
# 2 Phillips screw driver
Pliers
Compressed air – canned or
compressor with a hose
Soft bristle brush
Brass brush
1. Installation and repairs
should be done by
a qualified service
person.
2. Use only Blue Rhino Global
Sourcing, Inc. factory
authorized parts. The use
of any other part that is not
factory authorized can be
dangerous and will void
your warranty.
3. Do not use flammable
solutions or material to
clean heater or heater
11/16” open end wrench
9/16” socket and ratchet
9/16"
Heavy-duty pipe cleaners
Non-abrasive Scouring Pad
Rubber gloves
Leak test solution: 1 part liquid soap
and 3 parts water
parts. Use only warm
soapy water to clean
outside of heater.
4. Do not submerge control
valve in water.
2Cleaning Instructions for Burner, Pilot Assembly, and Emitter Screen • Series: 220000-450000

For assistance call: 1.800.762.1142
Step 1 – 6
1. For assistance call 1.800.762.1142 toll free. Please have your owner’s manual and model number available
for reference.
For Easiest Assembly:
• To avoid losing any small components or hardware, assemble your product on a level surface that does
not have cracks or openings.
• Clear an area large enough to layout all components and hardware and that is soft to not scratch or
damage any surface finishes.
• When applicable, tighten all hardware connections by hand first. Once the step is completed go back and
fully tighten all hardware while being cautious not to over tighten to avoid damaging surfaces or stripping
hardware.
• Follow all steps in order to properly assemble your product.
2. Turn off heater per “Turning Off” instructions in owner’s manual.
3. Disconnect LP gas tank per “Disconnect LP Gas Tank” instructions in owner’s manual.
4. Make sure heater is completely cool (at least 45 minutes after use) before proceeding.
5. Remove dome per instructions in owner’s manual.
6. Remove engine from post per instructions in owner’s manual.
3Cleaning Instructions for Burner, Pilot Assembly, and Emitter Screen • Series: 220000-450000

For assistance call: 1.800.762.1142
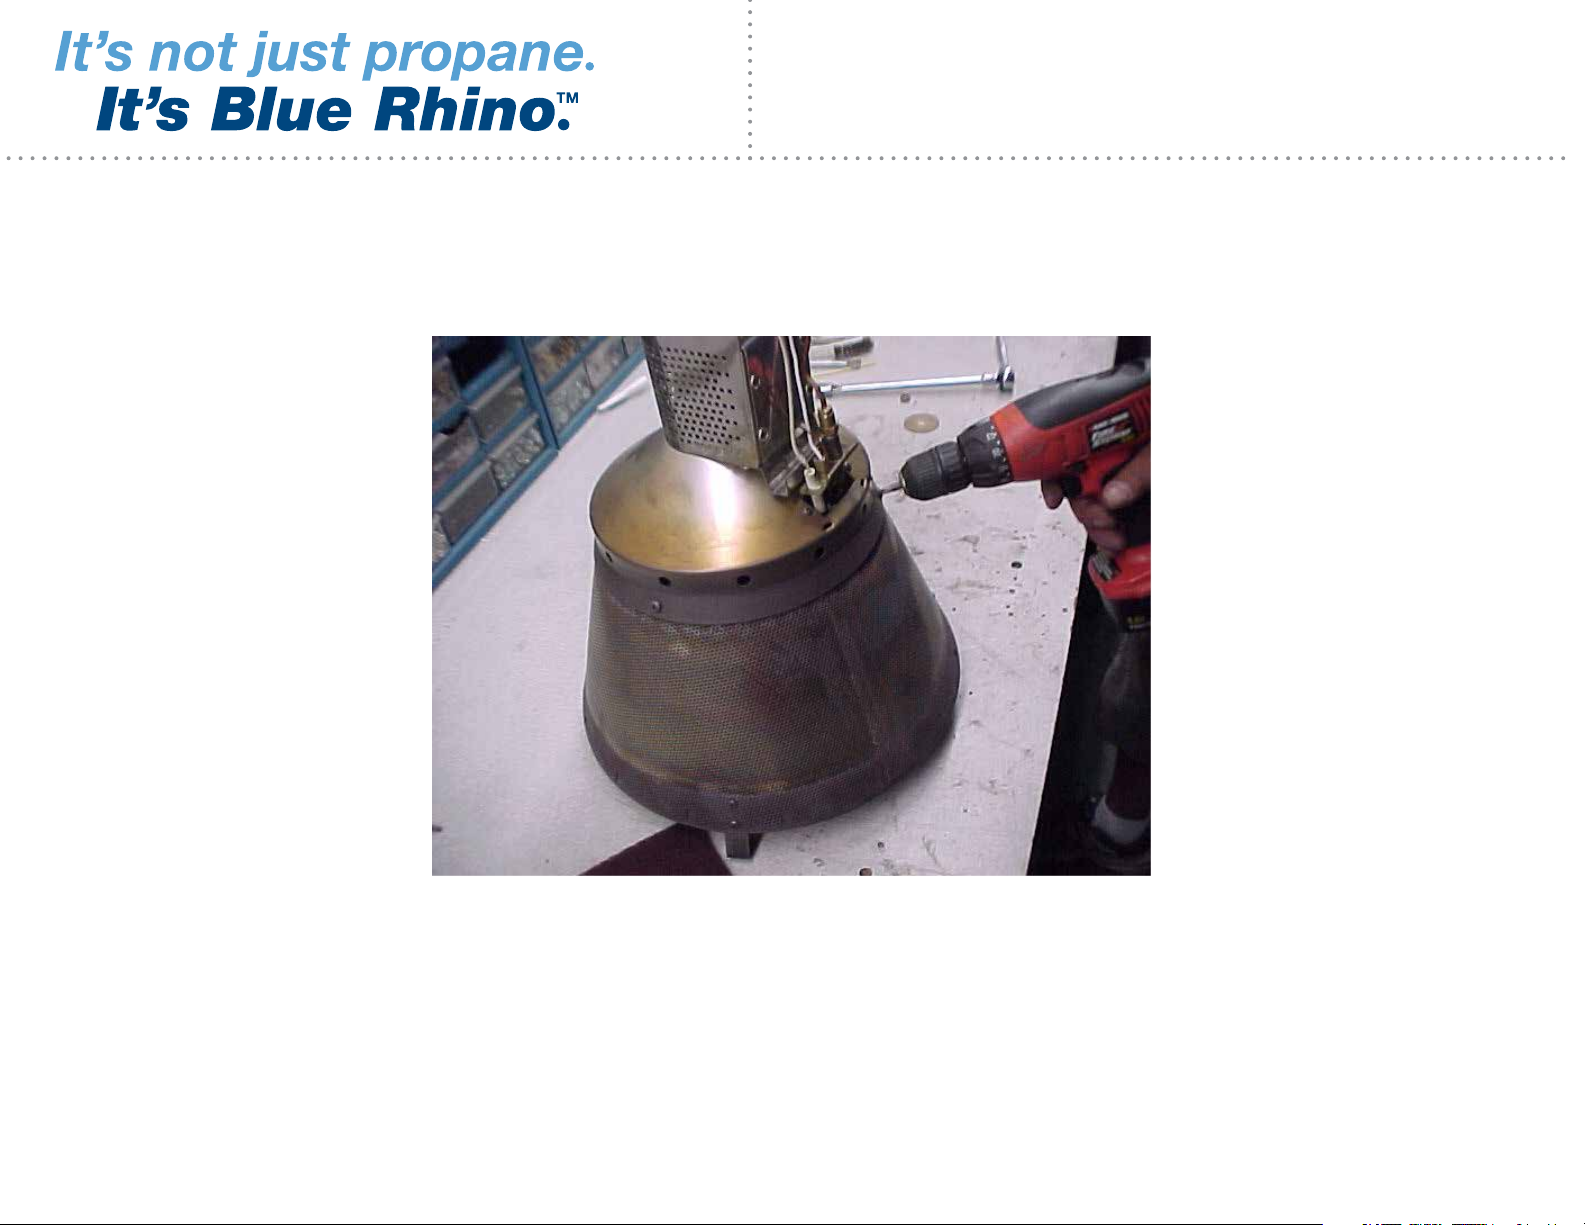
Step 7
Remove emitter from emitter bottom by removing the 9/16” nut and flat washer from inside cone.
4Cleaning Instructions for Burner, Pilot Assembly, and Emitter Screen • Series: 220000-450000
For assistance call: 1.800.762.1142
Step 8
Remove the three bolts which secure the emitter to the emitter bottom.
5Cleaning Instructions for Burner, Pilot Assembly, and Emitter Screen • Series: 220000-450000
For assistance call: 1.800.762.1142
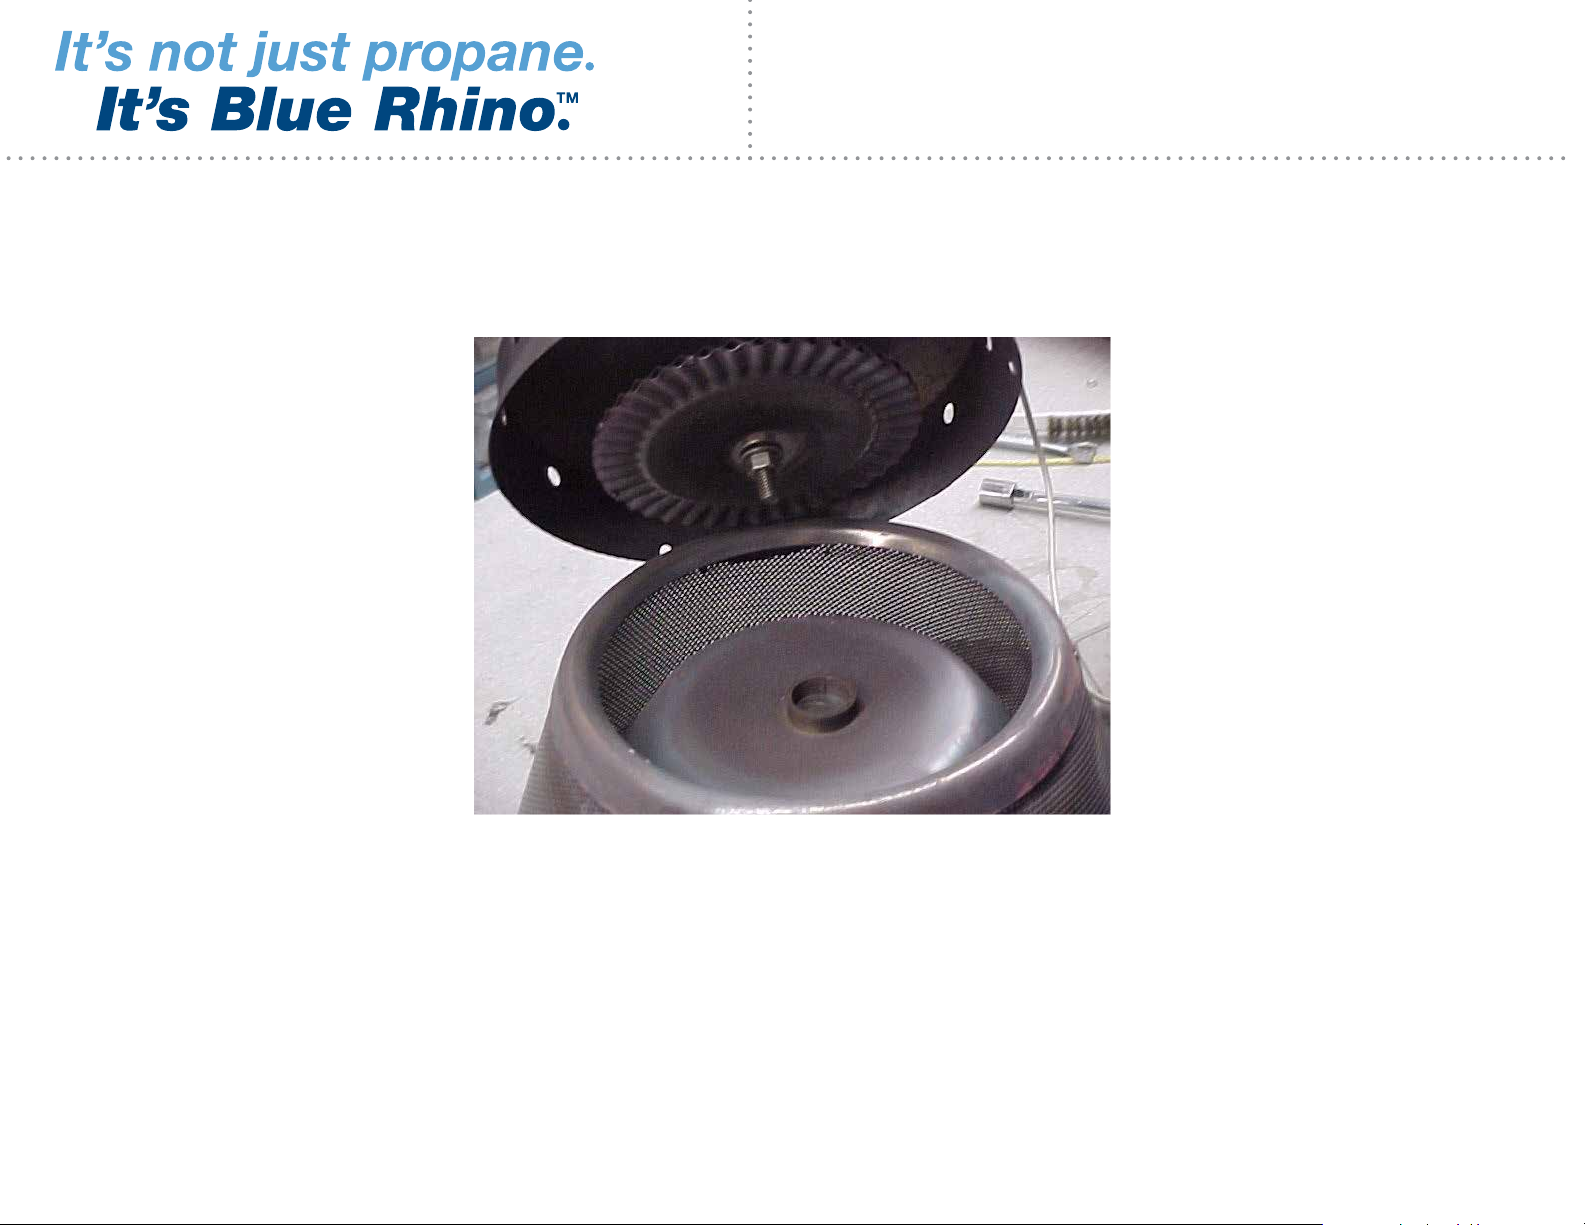
Step 9
Carefully separate the emitter from the emitter bottom.
Note: Use caution not to loosen the burner stud spacer when separating.
6Cleaning Instructions for Burner, Pilot Assembly, and Emitter Screen • Series: 220000-450000

For assistance call: 1.800.762.1142
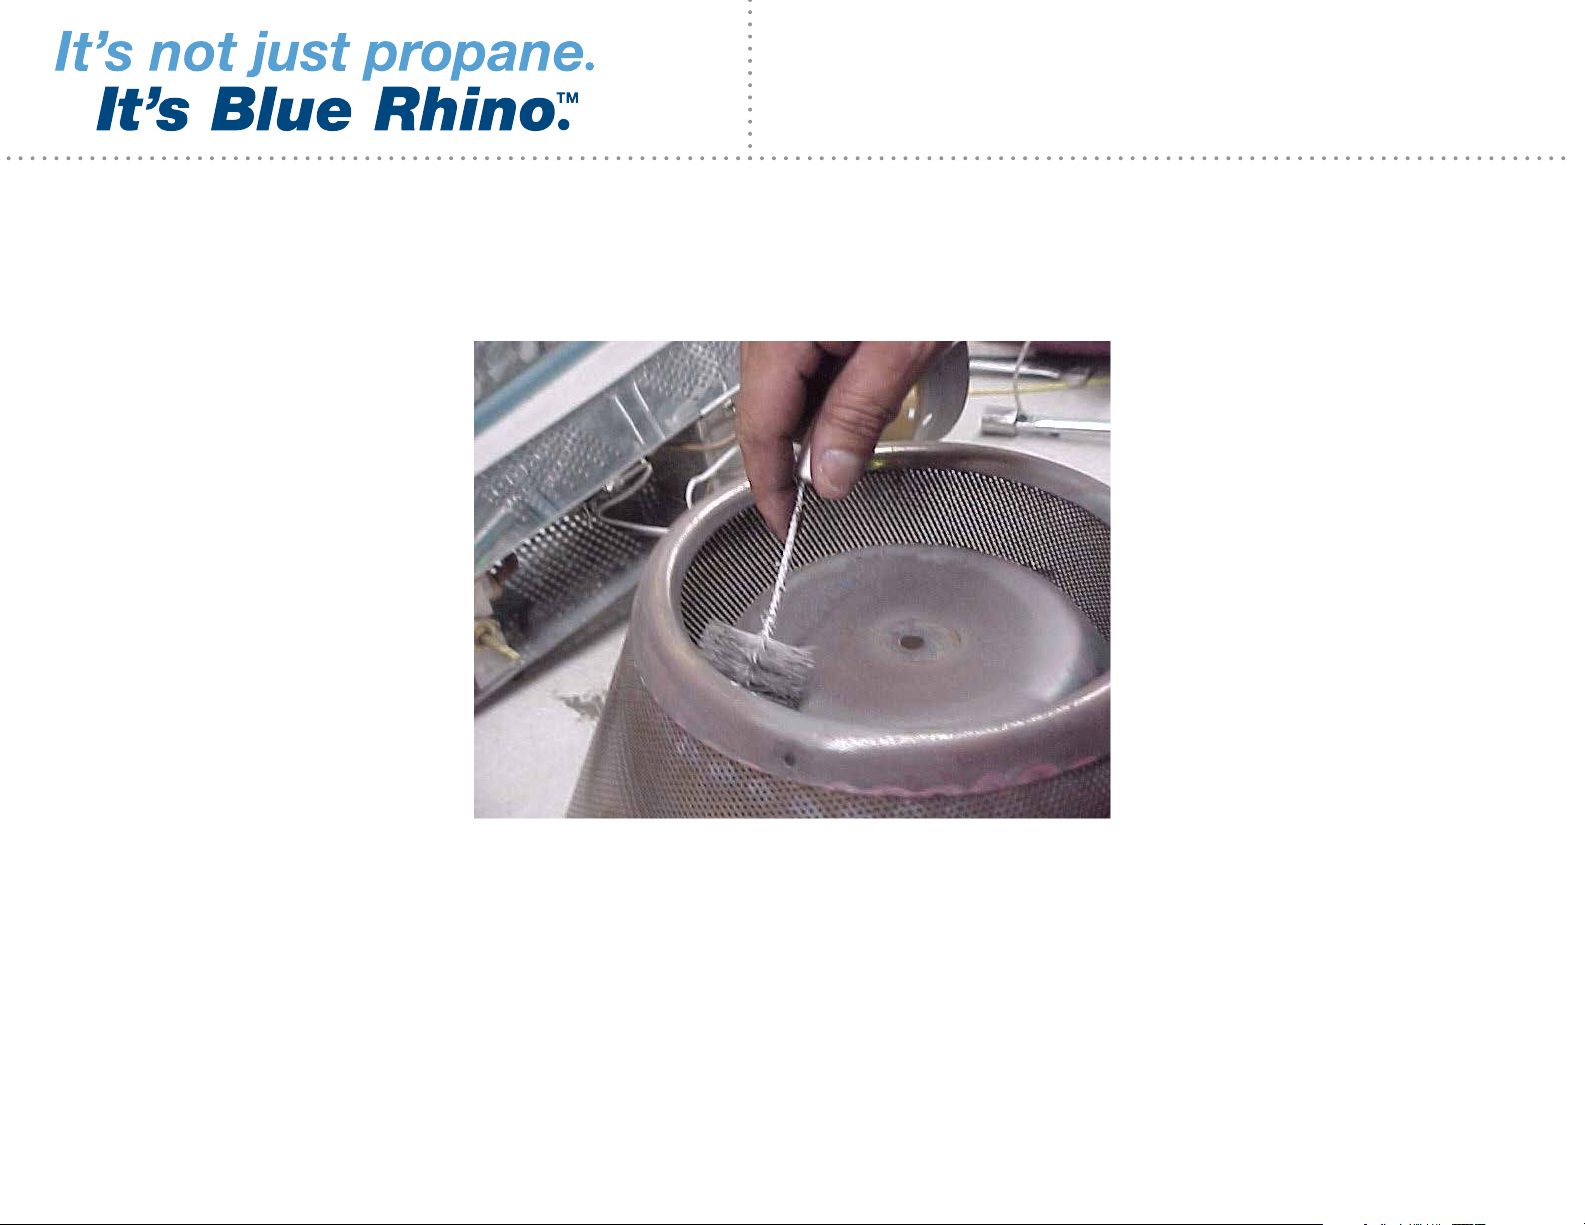
Step 10
Clean the carbon build-up off the inside of the emitter bottom with a non-abrasive scouring pad or bottle brush. Clean
the outside of the emitter bottom with the scouring pad.
DANGER: Never use any flammable solutions or material to clean heater or heater parts. Use only a mild soap
and water solution.
Do not to soak the valve.
7Cleaning Instructions for Burner, Pilot Assembly, and Emitter Screen • Series: 220000-450000
For assistance call: 1.800.762.1142
Step 11
Use a bottle brush to clean the inside of the emitter.
8Cleaning Instructions for Burner, Pilot Assembly, and Emitter Screen • Series: 220000-450000
 Loading...