

Endless Summer 153100 Owner's Manual
®
OWNER’S MANUAL
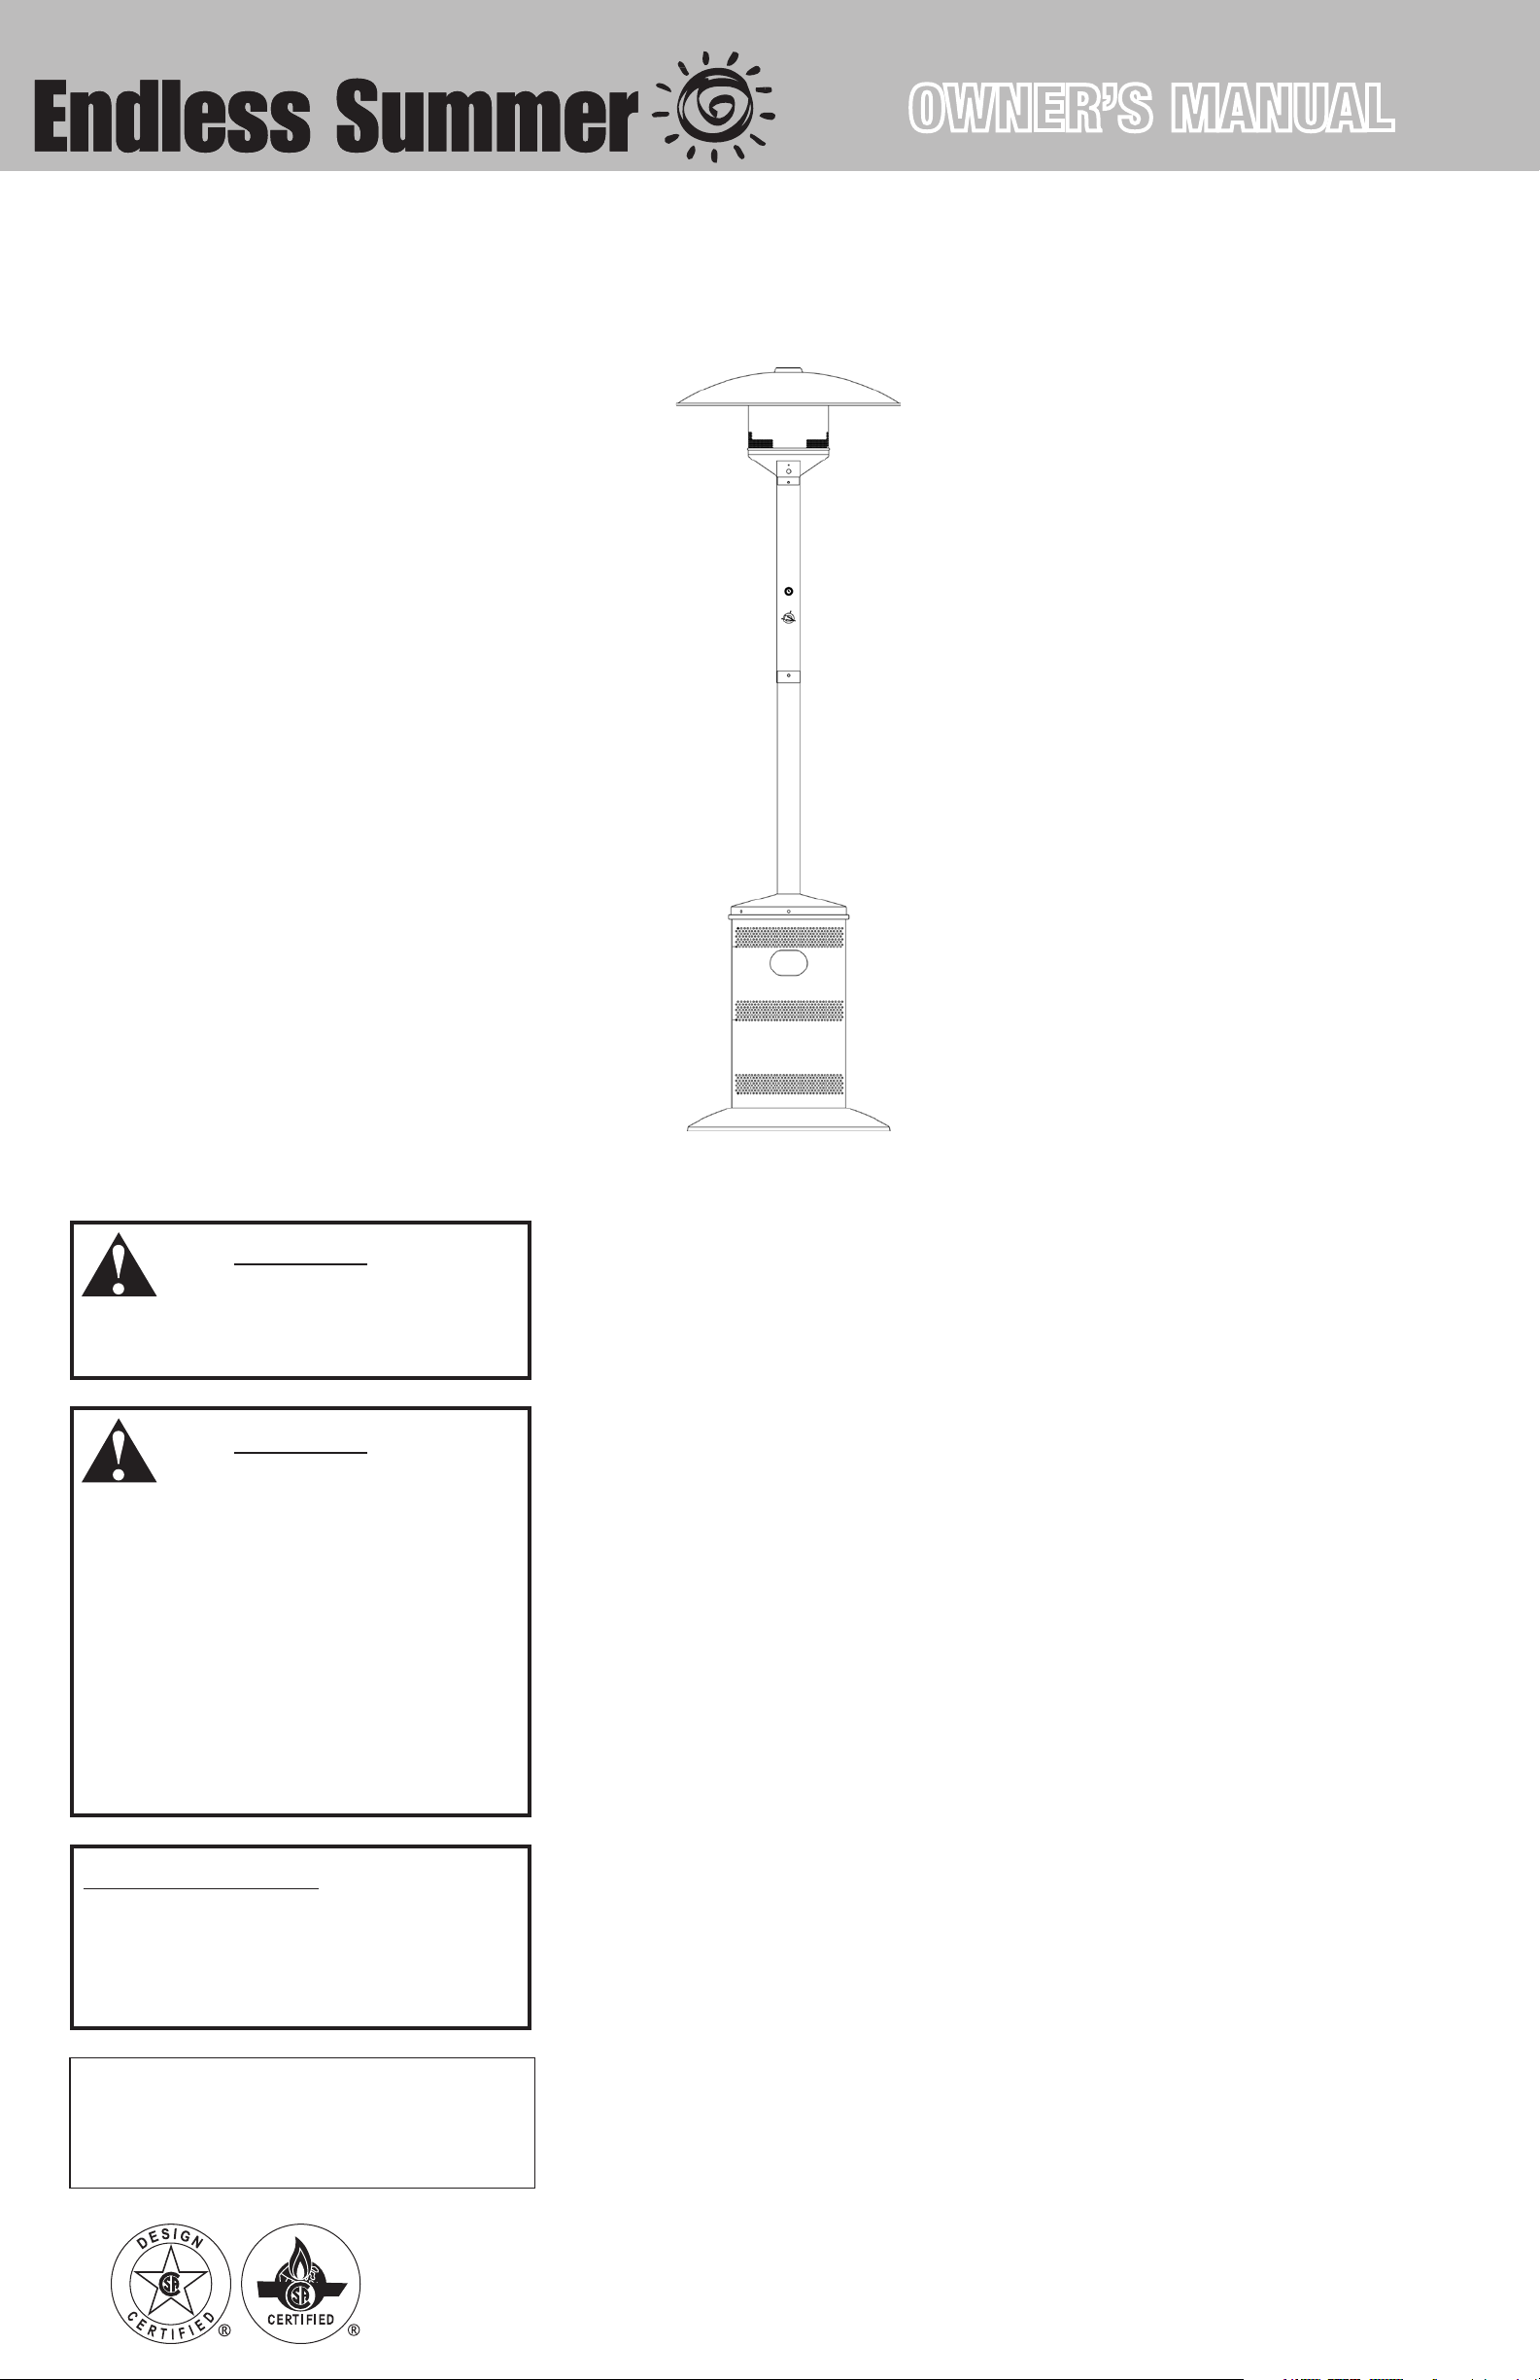
Outdoor Patio Heater
Model No. 153100
WARNING
FOR YOUR SAFETY:
For Outdoor Use Only
(outside any enclosure)
WARNING
FOR YOUR SAFETY:
1. Improper installation, adjustment, alteration,
service or maintenance can cause injury or
property damage.
2. Read the installation, operation, and
maintenance instructions thoroughly before
installing or servicing this equipment.
3. Failure to follow these instructions could
result in fire or explosion, which could
cause property damage, personal injury, or
death.
California Proposition 65:
Table of Contents
Important Safeguards . . . . . . . . . . . . . . . . . . . . . . . . . . . . . . . . . . . . . . . . . . . . . . . . . . . .2
Assembly Instructions . . . . . . . . . . . . . . . . . . . . . . . . . . . . . . . . . . . . . . . . . . . . . . . . . . . .3
Installing LP Gas Tank . . . . . . . . . . . . . . . . . . . . . . . . . . . . . . . . . . . . . . . . . . . . . . . . . . . .5
Operating Instructions . . . . . . . . . . . . . . . . . . . . . . . . . . . . . . . . . . . . . . . . . . . . . . . . . . . 6
Checking for Leaks. . . . . . . . . . . . . . . . . . . . . . . . . . . . . . . . . . . . . . . . . . . . . . . . . . . 6
Before Lighting. . . . . . . . . . . . . . . . . . . . . . . . . . . . . . . . . . . . . . . . . . . . . . . . . . . . . . . 6
Lighting . . . . . . . . . . . . . . . . . . . . . . . . . . . . . . . . . . . . . . . . . . . . . . . . . . . . . . . . . . . . 6
When heater is ON . . . . . . . . . . . . . . . . . . . . . . . . . . . . . . . . . . . . . . . . . . . . . . . . . . . .6
Re-Lighting. . . . . . . . . . . . . . . . . . . . . . . . . . . . . . . . . . . . . . . . . . . . . . . . . . . . . . . . . . 6
Shutdown. . . . . . . . . . . . . . . . . . . . . . . . . . . . . . . . . . . . . . . . . . . . . . . . . . . . . . . . . . . 6
Troubleshooting . . . . . . . . . . . . . . . . . . . . . . . . . . . . . . . . . . . . . . . . . . . . . . . . . . . . . . . . . 7
Cleaning and Care . . . . . . . . . . . . . . . . . . . . . . . . . . . . . . . . . . . . . . . . . . . . . . . . . . . . . . .7
Storage . . . . . . . . . . . . . . . . . . . . . . . . . . . . . . . . . . . . . . . . . . . . . . . . . . . . . . . . . . . . . . . 7
Between Uses . . . . . . . . . . . . . . . . . . . . . . . . . . . . . . . . . . . . . . . . . . . . . . . . . . . . . . . 7
During Periods of Extended Inactivity or When Transporting . . . . . . . . . . . . . . . . . . . . . 7
Product Registration . . . . . . . . . . . . . . . . . . . . . . . . . . . . . . . . . . . . . . . . . . . . . . . . . . . . .8
Limited Warranty . . . . . . . . . . . . . . . . . . . . . . . . . . . . . . . . . . . . . . . . . . . . . . . . . . . . . . . 8
Specifications . . . . . . . . . . . . . . . . . . . . . . . . . . . . . . . . . . . . . . . . . . . . . . . . . . . . . . . . . . 8
Exploded View and Hardware. . . . . . . . . . . . . . . . . . . . . . . . . . . . . . . . . . . . . . . Appendix A
Chemicals known to the State of California
to cause cancer, birth defects, or other
reproductive harm are created by the
combustion of propane.
Save these instructions for future reference.
If you are assembling this unit for someone else,
give this manual to him or her to read and save
for future reference.
The use and installation of this product must conform to local codes. In absence of local
codes, use the National Fuel Gas Code, ANSI Z223.1/NFPA 54, CAN/CGA-B149.1, Natural
Gas and Propane Installation Code.
Manufactured in China for:
Blue Rhino Global Sourcing, LLC
Winston-Salem, NC 27104 USA
1.800.762.1142, www.bluerhino.com
© 2006 Blue Rhino Global Sourcing, LLC. All Rights Reserved.
Endless Summer® is a Registered Trademark of Blue Rhino Global Sourcing, LLC. All Rights Reserved. 153100-OM-114 ES
®
Outdoor Patio Heater Model No. 153100 Contact 1.800.762.1142 for assistance. Do not return to place of purchase.
WARNING
FOR YOUR SAFETY
If you smell gas -
1. Shut off gas to appliance.
2. Extinguish any open flame.
3. If odor continues, immediately call your gas supplier or your fire
department.
1. Do not store spare LP cylinder within 10 feet (3.05 m) of this
appliance.
2. Do not store or use gasoline or other flammable vapors and liquids
within 25 feet (7.62 m) of this or any other appliance.
3. An LP cylinder not connected for use shall not be stored in the
vicinity of this or any other appliance.
Safety First
DANGERS and Cautions
1. This heater is for outdoor use only, and shall not be used in a building,
garage, or any other enclosed area.
2. Always maintain at least 36” clearance (top), and 24” clearance (side)
from combustible materials.
3. This heater is for use with liquid propane (LP) gas only. The conversion
to or attempted use of natural gas in this LP gas heater is dangerous
and will void your warranty.
4. LP gas Characteristics:
a. LP gas is flammable and hazardous if handled improperly. Become
aware of the characteristics before using any LP gas product.
b. LP gas is explosive under pressure, heavier than air, and settles and
pools in low areas.
c. LP gas in its natural state has no odor. For your safety, an odorant is
added that smells like rotten cabbage.
d. Contact with LP gas can cause freeze burns to skin.
5. LP gas tank needed to operate. Only tanks marked “propane” may be
used.
6. The LP gas supply tank must be constructed and marked in accordance
with the Specifications for LP gas Cylinders of the U.S. Department of
Transportation (DOT) or the National Standard of Canada, CAN/CSA-
B339, Cylinders, Spheres and Tubes for the Transportation of Dangerous
Goods; and Commission.
7. LP gas tank must be arranged for vapor withdrawal.
8. The LP gas tank must have a listed overfilling prevention device (OPD).
9. Only use 20-pound cylinders equipped with a cylinder connection
device compatible with the connection for outdoor cooking appliances.
10. The LP gas tank must have a tank collar to protect the tank valve.
11. Never use an LP gas tank with a damaged body, valve, collar, or
footing.
12. Dented or rusted LP gas tanks may be hazardous and should be
checked by your LP gas supplier prior to use.
13. The LP gas tank should not be dropped or handled roughly.
14. Tanks must be stored outdoors out of the reach of children and must
not be stored in a building, garage, or any other enclosed area. Your
tank must never be stored where temperatures can reach over 125°F.
15. Never keep a filled LP gas tank in a hot car or car trunk. Heat will
cause the gas pressure to increase, which may open the relief valve
and allow gas to escape.
16. Do not store a spare LP gas tank under or near this appliance.
17. Never fill the tank beyond 80 percent full.
18. Never attempt to attach this heater to the self-contained LP gas
system of a camper trailer, motor home, or house.
19. The use of alcohol, or prescription or non-prescription drugs may
impair the consumer’s ability to properly assemble or safely operate
the appliance.
20. Your heater has been checked at all factory connections for leaks.
Recheck all connections, as movement in shipping can loosen
connections.
21. Check for leaks even if your unit was assembled for you by someone
else.
22. Do not operate if gas leak is present. Gas leaks may cause a fire or
explosion.
23. You must follow all leak-checking procedures before operating. To
prevent fire or explosion hazard when testing for a leak:
a. Always perform leak test before lighting the heater and each time
the tank is connected for use.
b. No smoking. Do not use or permit sources of ignition in the area
while conducting a leak test.
c. Conduct the leak test outdoors in a well-ventilated area.
d. Do not use matches, lighters, or a flame to check for leaks.
e. Do not use heater until any and all leaks are corrected.
If you are unable to stop a leak, disconnect the LP gas supply. Call
a gas appliance serviceman or your local LP gas supplier.
24. Do not store or use gasoline or other flammable liquids or vapors
within 25 feet (7.62 m) of this appliance.
25. Do not use in an explosive atmosphere. Keep heater area clear and
free from combustible materials, gasoline and other flammable vapors
and liquids.
26. Keep all combustible items and surfaces away from the heater at all
times. DO NOT use this heater or any gas product under any overhead
or near any unprotected combustible constructions.
27. Combustion of propane creates carbon monoxide, which, when used
in enclosed areas, can kill you.
28. It is essential to keep the heater’s valve compartment, burners, and
circulating air passages clean. Inspect heater before each use.
29. Installation and repair should be done by a qualified service person.
30. Do not alter heater in any manner.
31. Do not use the heater unless it is COMPLETELY assembled and all
parts are securely fastened and tightened.
32. This heater should be thoroughly inspected before each use. Clean and
inspect the hose before each use of the appliance. If there is evidence
of abrasion, wear, cuts, or leaks, the hose must be replaced prior to
the appliance being put into operation.
33. Use only the regulator and hose assembly provided. The replacement
regulator and hose assembly shall be that specified by the
manufacturer.
34. Inspect heater before each use. If a damaged part is detected, do
not operate until an original equipment replacement part has been
properly installed.
35. Use only Blue Rhino Global Sourcing, LLC. factory authorized parts.
The use of any part that is not factory authorized can be dangerous.
This will also void your warranty. Contact 1.800.762.1142.
36. Dome and burner are extremely hot to the touch during operation.
Never touch the dome or burner while the heater is operating. Wait for
unit to cool down (approximately 45 minutes) after use.
37. During operation, do not touch burner assembly. The surface of
heater’s emitter can reach temperatures approaching 1600ºF.
38. Do not install or use in or on boats or recreational vehicles.
39. Do not use heater in winds that exceed 10 m.p.h..
40. Unit will operate at reduced efficiency below 40ºF (5ºC).
41. Do not leave a lit heater unattended, especially keep children and pets
away from heater at all times.
42. Always use extreme caution when near heater. Alert both children and
adults to the hazards of high temperatures, especially to avoid burns
or clothing catching fire.
43. Do not attempt to move heater when in use. Allow the heater to cool
before moving or storing.
44. Storage of heater indoors is permissible only if the tank is
disconnected, removed from the heater and properly stored outdoors.
45. Do not attempt to disconnect the gas regulator from the tank or any
gas fitting while the heater is in use.
46. Always place your heater on a hard, level surface.
47. Use extreme caution on wooden decks.
48. Move gas hoses as far away as possible from hot surfaces.
49. Keep all electrical cords away from a hot heater.
50. Do not use heater for indoor cooking or heating. TOXIC fumes can
accumulate and cause asphyxiation.
51. Keep sprinklers and other water sources away from burner and
controls.
52. Do not hang clothing or other flammable materials either on or near
heater.
53. Always allow heater to cool before attempting service.
54. Any guard or other protective device removed for servicing the heater
must be replaced prior to operating the heater.
55. Certain materials or items, when stored under heater, will be subjected
to radiant heat and could be seriously damaged.
56. After a period of storage and/or nonuse, check for leaks, burner
obstructions and inspect for any abrasion, wear, cuts to the hose.
57. If at any time you are unable to light burner and smell gas, wait 5
minutes to allow gas to dissipate before attempting to light heater.
58. Failure to not wait 5 minutes to allow the gas to clear if the heater
does not light, may result in an explosive flame-up.
59. Be careful when attempting to manually ignite this heater. Holding in
the control knob for more than 10 seconds before igniting the gas will
cause a ball of flame upon ignition.
60. Avoid inhaling fumes emitted from the heater’s first use. Smoke and
odor from the burning of oils used in manufacturing will appear. Both
smoke and odor will dissipate after approximately 30 minutes. The
heater should NOT produce thick black smoke.
61. If heater is not in use, the gas must be turned off at the supply tank.
62. Do not use this appliance without reading “Operating Instructions” in
this manual.
63. Young children and pets should be carefully supervised when they are
in the area of the heater.
64. Deaths, serious injury or damage to property may occur if the above is
not followed exactly.
page no.
3
Assembly Instructions
DO NOT RETURN PRODUCT TO STORE.
For assistance call 1.800.762.1142 toll free. Please have your owner’s manual and serial
number available for reference.
For Easiest Assembly:
• To avoid losing any small components or hardware, assemble your product on a hard level
surface that does not have cracks or openings.
• Clear an area large enough to layout all components and hardware.
• When applicable, tighten all hardware connections by hand first. Once the step is
completed go back and fully tighten all hardware.
• Follow all steps in order to properly assemble your product.
To complete assembly you will need:
• (1) Leak Detection Solution (Instructions on how to make solution are included in step
Operations Section)
• (1) Precision Filled LP Gas Grill Tank with Acme Type 1 external threaded valve connection
(4-5 gallon size)
Note: You must follow all steps to properly assemble heater.
Typical assembly: approximately 1 (one) hour.
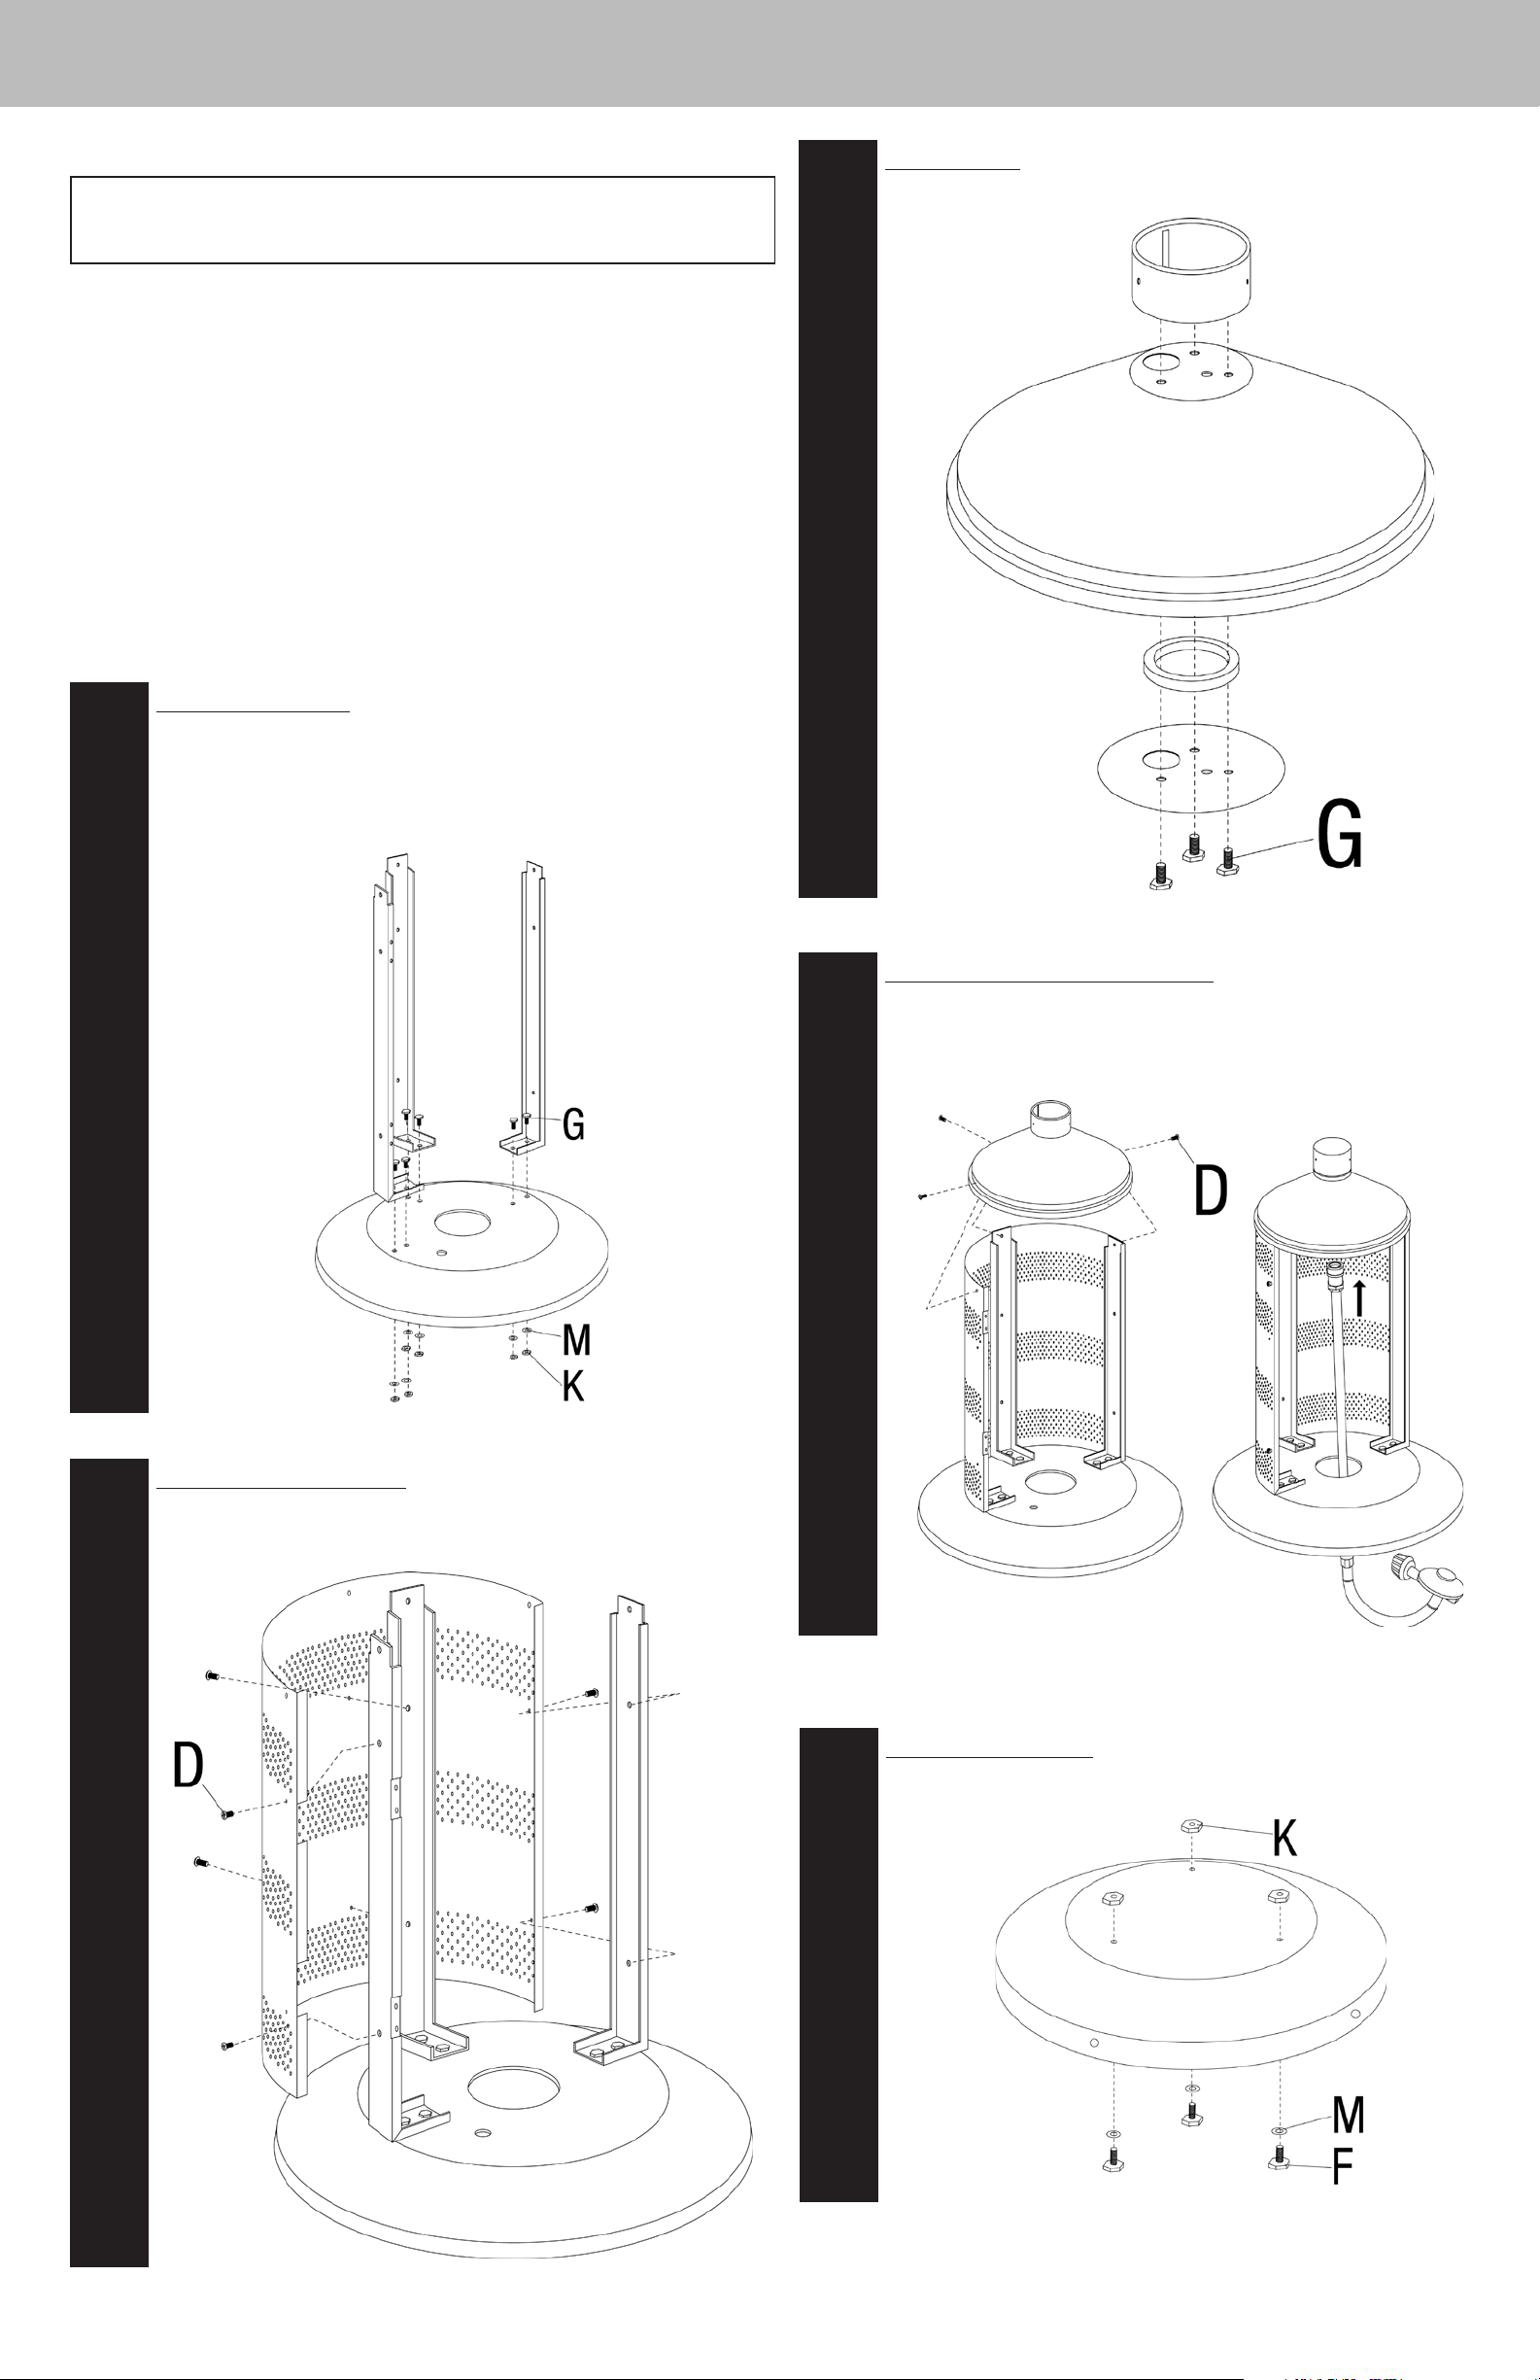
Step
Attach Legs to Base
Note: Attach Leg with notches for hinges as shown at left.
Step
3
Assemble cap
Attach cup, ring, brace, and gas line clip to shroud cover using 3 large bolts (G).
1
A. Attach legs to base using 6 sets of large bolt (G), lock washer (M), and large nut
(K). Finger tighten only.
Note: Do not fully tighten until Step 2.
Step
4
Attach cap assembly and gas line
Note: Do not fully tighen screws until all screws are in place.
A. Attach cap assembly to shroud and legs using 3 large screws (D).
B. Insert gas line through cap assembly.
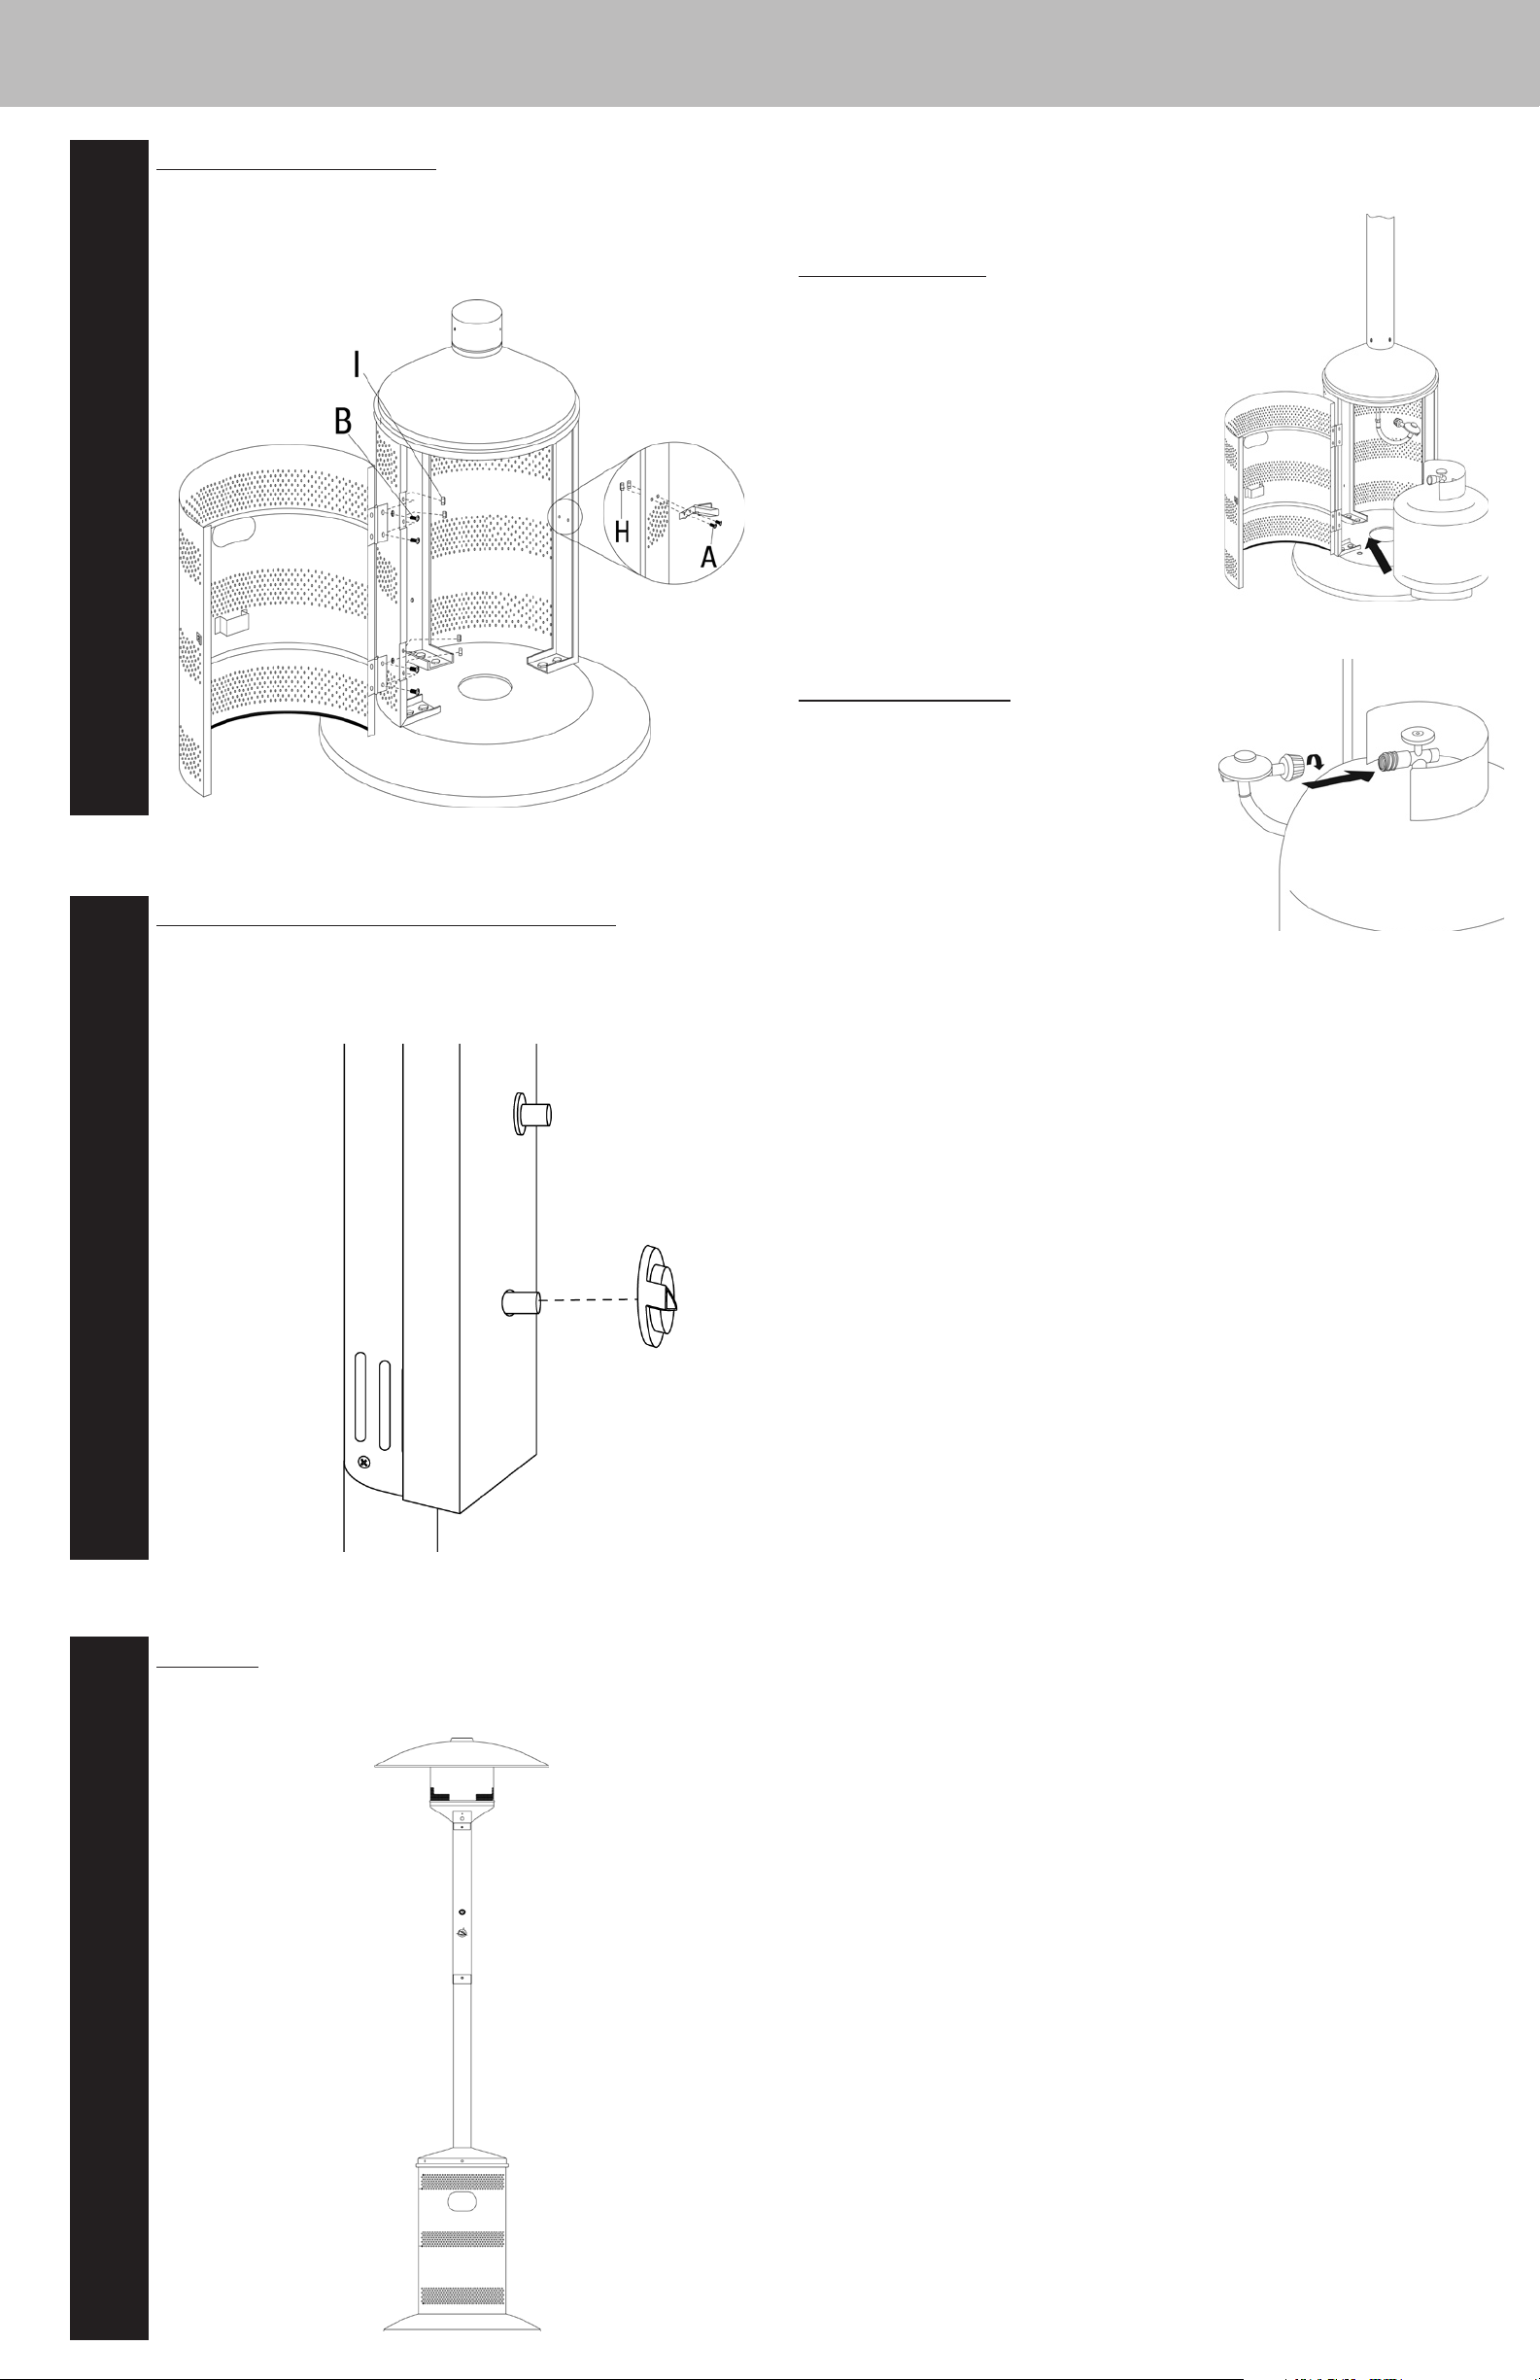
Step
2
Attach back shroud panel
A. Attach back shroud panel to legs using 6 large screws (D).
B. Tighten nuts and bolts from Step 1.
Step
5
Assemble emitter top
Attach 3 sets of small bolts (F), lock washer (M), and large nut (K).
®
Outdoor Patio Heater Model No. 153100 Contact 1.800.762.1142 for assistance. Do not return to place of purchase.
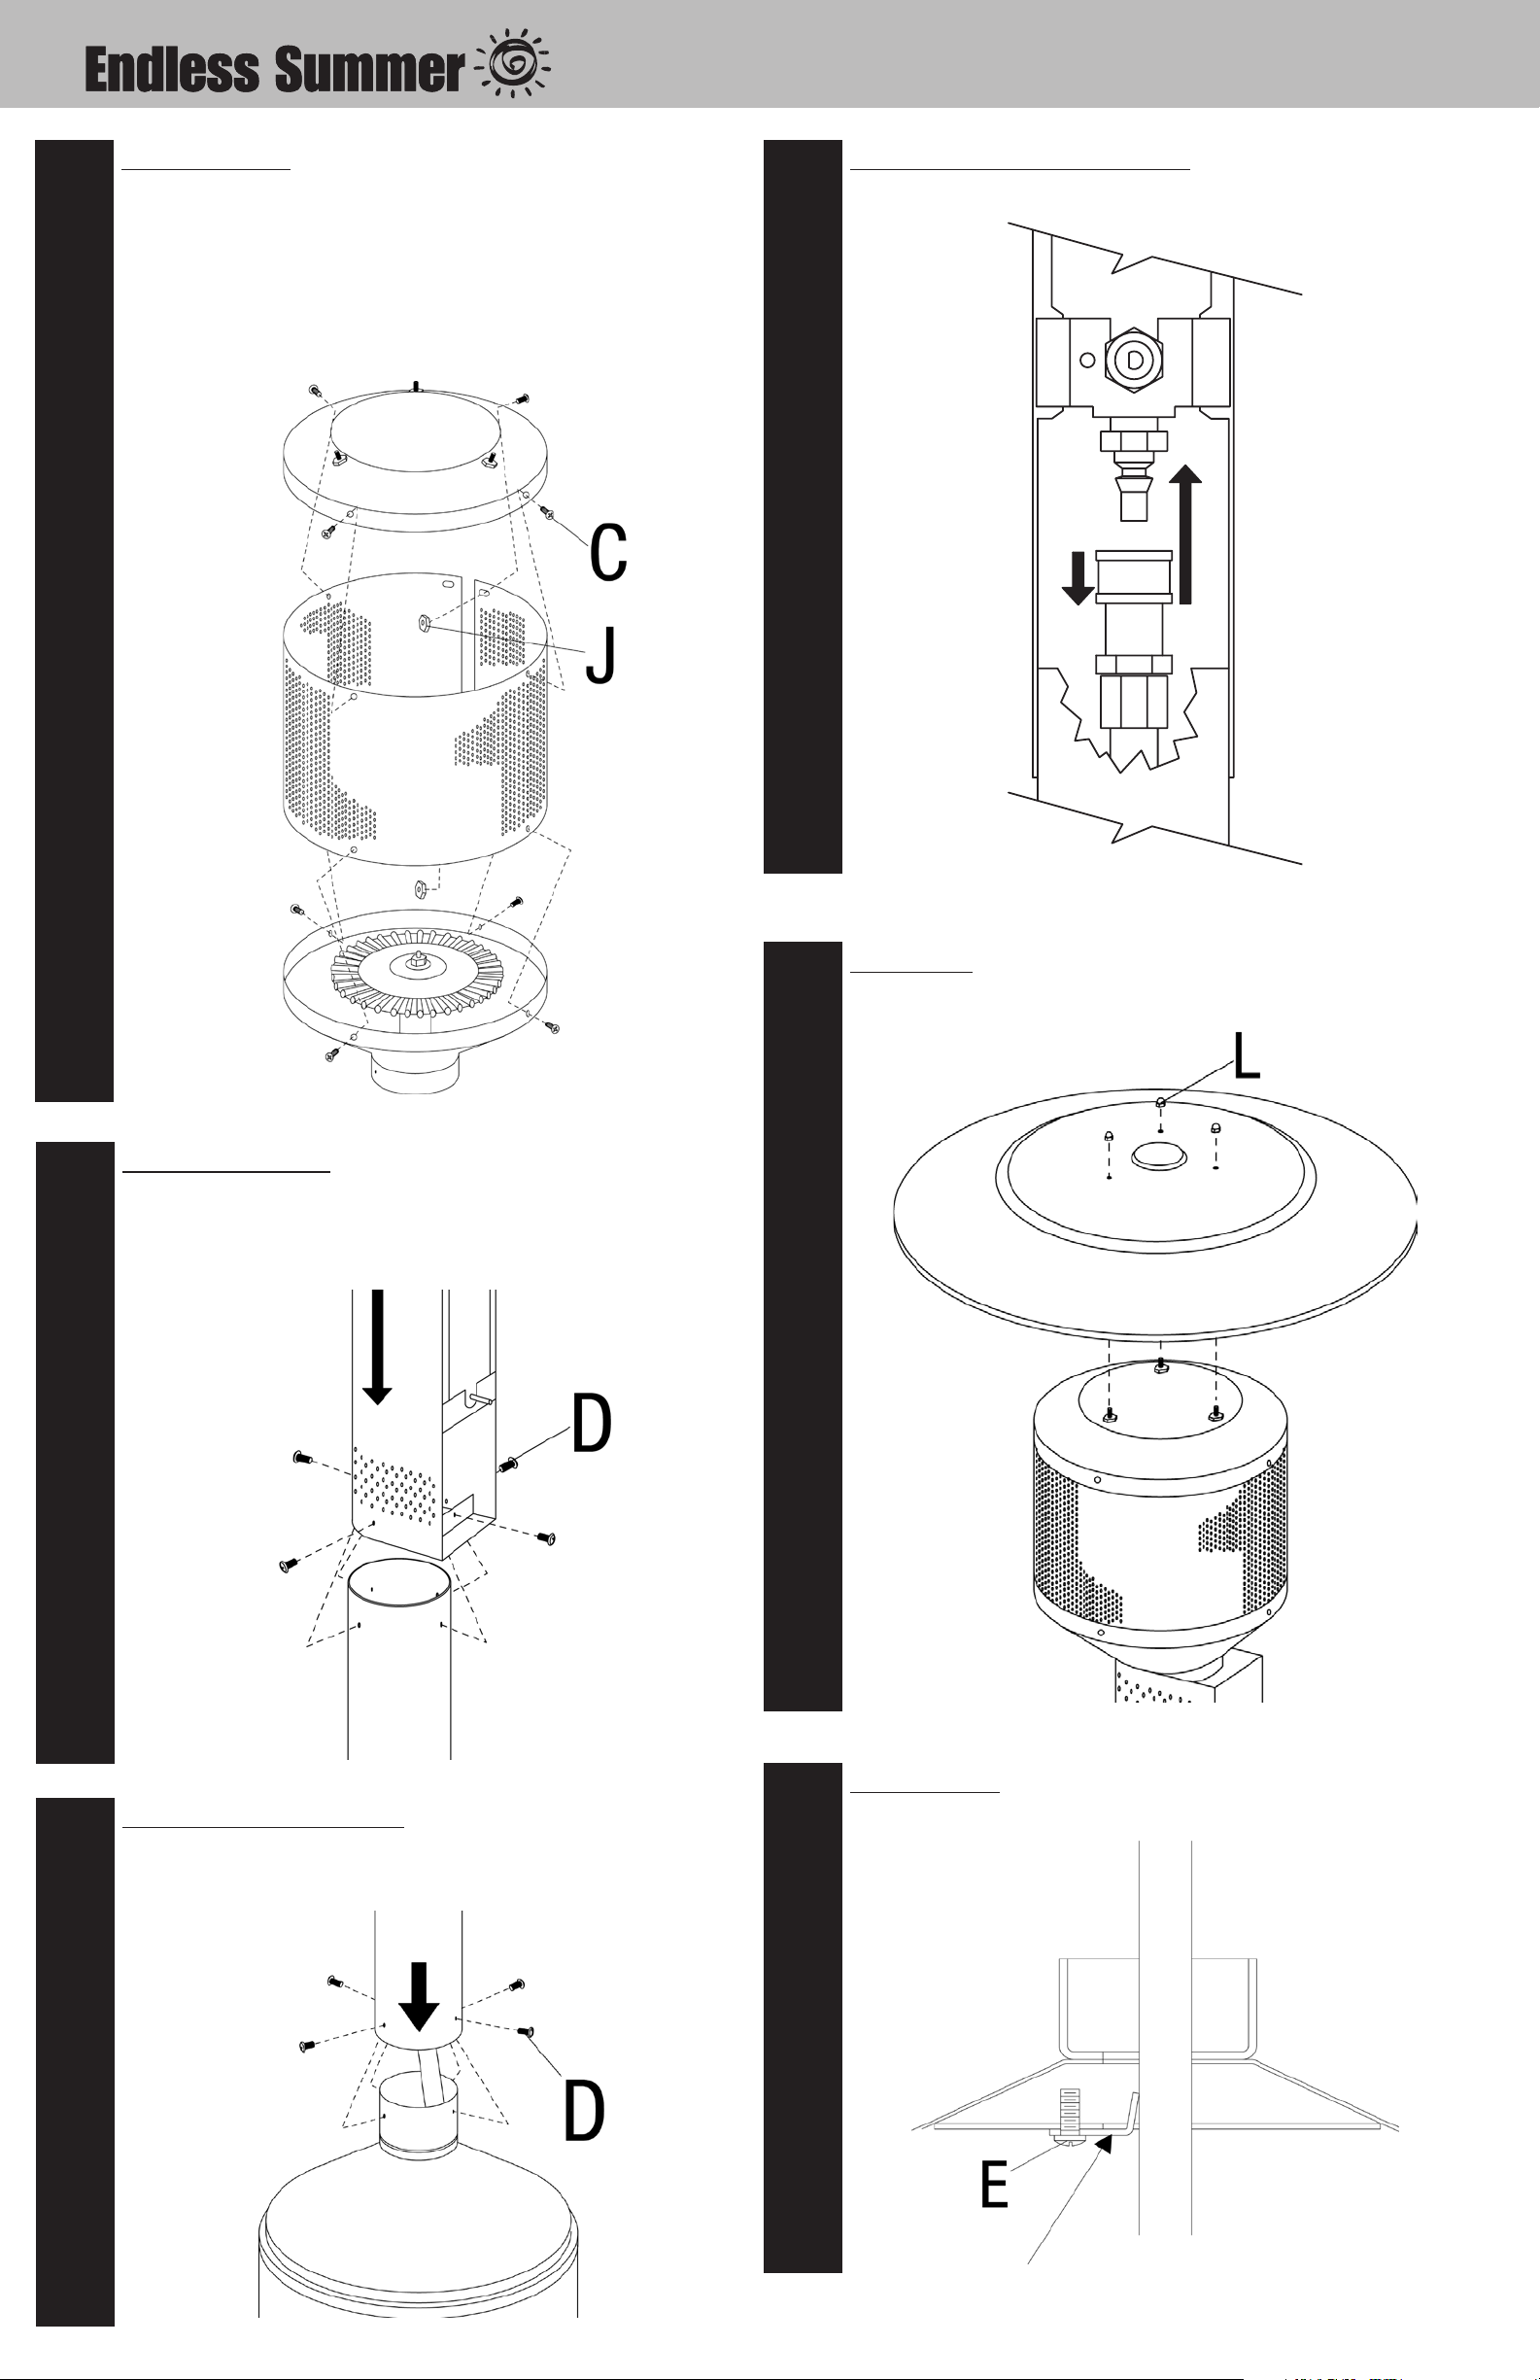
Step
6
Assemble emitter
A. Curl emitter screen into a circle. Overlap ends and line up holes. Secure using 2
medium screws (C) and 2 medium nuts (J).
B. Attach emitter screen to emitter top using 4 medium screws.
Note: Do not fully tighten screws until all screws are in place.
C. Attach emitter screen to engine using 4 medium screws (C).
Note: Do not fully tighten screws until all screws are in place.
Step
9
Attach gas line/regulator assembly
Attach gas line/regulator assembly to gas line.
Step
7
Attach enigne to post
A. Remove control knob and engine access panel.
B. Attach engine to post using 4 large screws (D).
Note: Do not fully tighten screws until all screws are in place.
Step
Attach dome
Attach dome to emitter using 3 cap nuts (L).
10
Step
8
Attach post/engine assembly
Attach post/engine assembly to base using 4 large screws (D).
Note: Do not fully tighten screws until all screws are in place.
Step
Secure gas line
Attach gas line clip to brace using extra large screw (E).
11
page no.
5
Step
12
Attach front shroud and lock
A. Attach hinge on front shroud to left leg using 4 sets of small screws (B) and small
nuts (I).
B. Attach lock to right leg/back shroud using 2 sets of extra small screws (A) and
extra small nuts (H).
Installing LP Gas Tank
To operate you will need (1) precision-filled standard grill LP gas tank (20#) with external valve
threads.
Insert LP Gas Tank
Place precision filled LP gas tank into heater base
upright so it is arranged for vapor withdrawal.
Connect LP Gas Tank
Step
13
Replace Engine access panel and control knob.
A. Attach ignitor wire onto ignitor post.
B. Pleace engine access panel onto engine assembly. Secure into place.
C. Place control knob onto control knob post.
Before connecting, be sure that there is no debris
caught in the head of the gas tank, head of the
regulator valve or in the head of the burner and
burner ports.
Connect gas line to tank by turning knob clockwise
until it stops.
Step
Completed
Congratulations your assembly is now complete. Read Operating Instructions
before proceeding.
14

®
Outdoor Patio Heater Model No. 153100 Contact 1.800.762.1142 for assistance. Do not return to place of purchase.
OFF
OFF
LOW
LOW
Pilot
Pilot
(Push in)
HIGH
HIGH
Pilot
Pilot
(Push in)
HIGH
HIGH
LOW
LOW
OFF
OFF
Operating Instructions
Inspect the visible portion of the hose before each use of the appliance. Inspect the entire hose
assembly at least annually.
Checking for Leaks
Burner Connections
Make sure the regulator valve and hose connections are securely fastened to the
burner and the tank.
If your unit was assembled for you, visually check the connection between the burner
pipe and orifice. Make sure the burner pipe fits over the orifice.
WARNING: Failure to inspect this connection or follow these
instructions could cause a fire or an explosion which can cause
death, serious bodily injury, or damage to property.
If the burner pipe does not rest flush to the orifice, please contact 1.800.762.1142 for
assistance.
Tank/Gas Line Connection
Make 2-3 oz. of leak solution by
mixing one part liquid dishwashing
soap with three parts water.
Make sure control knobs are off.
Turn LP gas tank ON at valve.
Spoon leak check solution at all
indicated locations
If any bubbles appear turn LP gas
tank OFF, reconnect and re-test.
If you continue to see bubbles
after several attempts, disconnect
LP gas source and contact
1.800.762.1142 for assistance.
If no bubbles appear after one
minute turn tank OFF, wipe away
solution and proceed.
Before Lighting
Heater should be thoroughly inspected
before each use, and by a qualified
service person at least annually.
If relighting a hot heater, always wait at
least 5 minutes.
Inspect the hose assembly for evidence
of excessive abrasion, cuts, or wear. Suspected areas should be leak tested. If the hose leaks,
it must be replaced prior to operation. Only use the replacement hose assembly specified by
manufacturer.
Lighting
Note: this heater is equipped with a pilot light that
allows for safer startups and shutdowns. Pilot must
be lit before main burner can be started.
1. Turn tank valve OFF.
2. Push control knob in and turn to OFF.
3. Wait 5 minutes for any gas to clear.
4. Turn tank valve ON.
5. Open viewing hole by sliding cover to either side.
6. Push control knob in and rotate to pilot position.
Note: for initial start or after any tank change, hold
control knob in for 2 minutes to purge air from gas
lines before proceeding.
7. Push igniter button once. Pilot light flame will
appear and be visible through viewing hole.
8. Release control knob after 30 seconds. Pilot light
will remain lit. If not, return to step 1.
9. Turn control knob to HIGH. Main burner will light
immediately. Flame is visible through viewing hole.
If not, return to step 1.
10. If for some reason your ignitor fails to deliver a spark, your heater can be started by
inserting a lit match through the pilot view hole while pushing the control knob in while
in the pilot position.
Have a question or are having problems visit www.bluerhino.com or call 1.800.762.1142.
Note: the burner may be noisy when initially turned on. To eliminate excessive noise from
the burner, turn the control knob to the pilot position. Then, turn the knob to the level of
heat desired.
When Heater is ON:
Emitter screen will become bright red due to intense
heat. The color is more visible at night.
Burner will display tongues of blue and yellow flame.
These flames should not be yellow or produce thick
black smoke, indicating an obstruction of airflow
through the burners. The flame should be blue with
straight yellow tops.
If excessive yellow flame is detected, turn off heater
and visit www.bluerhino.com or call 1.800.762.1142.
Re-lighting
Note: For your safety, control knob cannot be turned OFF without first depressing control
knob in PILOT position and then rotating it to OFF.
1. Turn control knob to OFF.
2. Wait at least 5 minutes, to let gas dissipate, before attempting to relight pilot.
3. Repeat the “Lighting” steps.
Shut Down
1. Turn control knob clockwise to pilot. (Normally, burner will make a slight popping sound
when extinguished.) Burner will extinguish but pilot will remain ON.
2. To extinguish pilot, depress control knob and continue to turn it clockwise to OFF.
3. Turn tank valve clockwise to OFF and disconnect regulator when heater is not in use.
Note: After use, some discoloration of the emitter screen is normal.
 Loading...