

Page 1
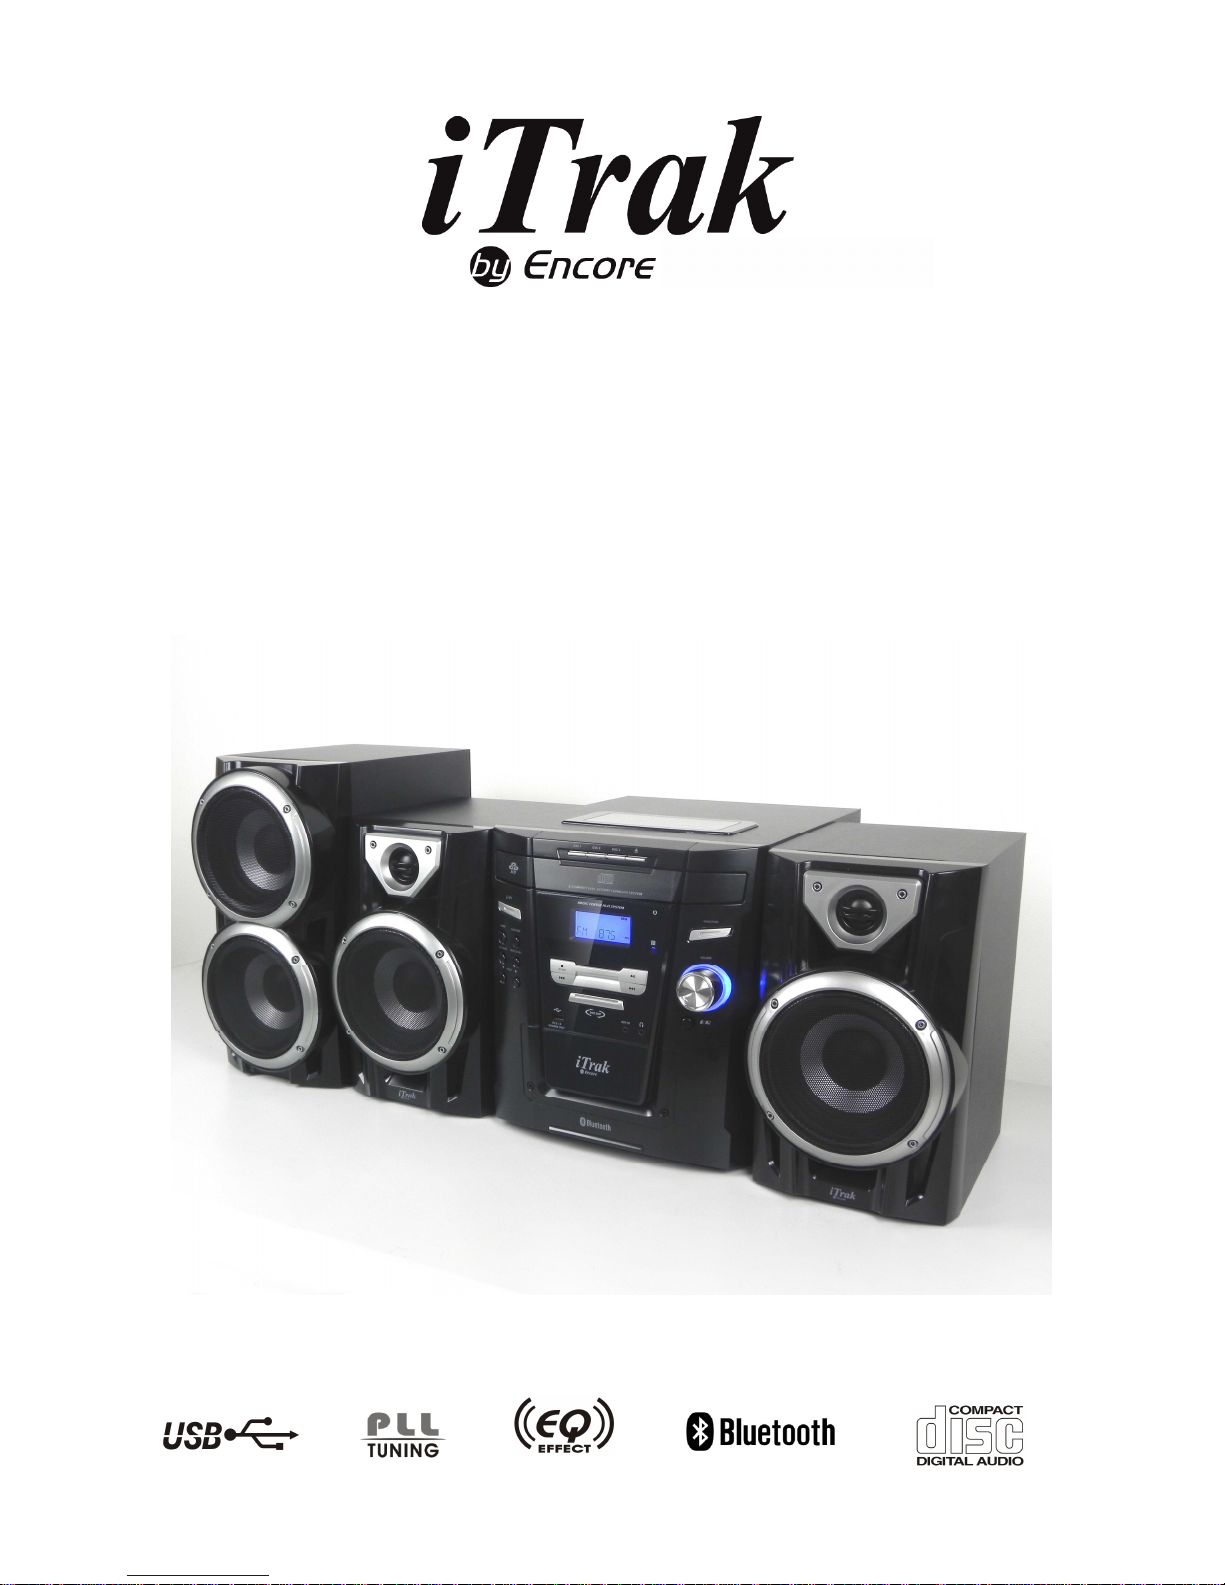
STEREO 3CD MINI HI-FI SYSTEM WITH
SUBWOOFER AND PLL RADIO BLUETOOTH
AND USB CHARGING
MODEL : BT9279MO
INSTRUCTION MANUAL
Page 2
IMPORTANT SAFETY INSTRUCTIONS
1. Read these instructions.
2. Keep these instructions.
3. Heed all warnings.
4. Follow all instructions.
5. Do not use this apparatus near water.
6. Clean only with dry cloth.
7. Do not block any ventilation openings. Install in accordance with the manufacturer’s
instructions.
8. Do not install near any heat sources such as radiators, heat registers, stoves, or other
apparatus (including amplifiers) that product heat.
9. Do not defeat the safety purpose of the polarized or grounding-type plug. A polarized
plug has two blades with one wider than the other. A grounding type plug has two
blades and a third grounding prong. The wide blade or the third prong is provided for
your safety. If the provided plug does not fit into your outlet, consult an electrician for
replacement of the obsolete outlet.
10. Protect the power cord from being walked on or pinched particularly at plugs,
convenience receptacles, and the point where they exit from the apparatus.
11. Only use attachments/accessories specified by the manufacturer.
12. Use only with a cart, stand, tripod, bracket, or table recommended by
the manufacturer, or sold with the product. When a cart is used, use
caution when moving the cart/apparatus combination to avoid injury
from tip-over.
13. Unplug this apparatus during lightning storms or when unused for a
long periods of time.
14. Refer all servicing to qualified service personnel. Servicing is required when the
apparatus has been damaged in any way, such as power-supply cord or plug is
damaged, liquid has been spilled or objects have fallen into the apparatus, the
apparatus has been exposed to rain or moisture, does not operate normally, or has
been dropped.
15. This appliance shall not be exposed to dripping or splashing water and that no object
filled with liquids such as vases shall be placed on the apparatus.
16. Do not overload wall outlet. Use only power source as indicated.
17. Use replacement part as specified by the manufacturer.
18. Upon completion of any service or repairs to this product, ask the service technician
to perform safety checks.
19. Power Sources - This product should be operated only from the type of power source
indicated on the marking label. If you are not sure of the type of power supply to your
home, consult your product dealer or local power company. For products intended to
operate from battery power, or other sources, refer to the operating instruction.
Page 3

20. Object and Liquid Entry - Never push objects of any kind into this product through
openings as they may touch dangerous voltage points or short-out parts that could
result in a fire or electric shock. Never spill liquid of any kind on the product.
21. Damage Requiring Service - Unplug this product from the wall outlet and refer
servicing to qualified service personnel under the following conditions:
a) When the power-supply cord or plug is damaged,
b) If liquid has been spilled, or objects have fallen into the product,
c) If the product has been exposed to rain or water,
d) If the product does not operate normally by following the operating instructions.
Adjust only those controls that are covered by the operating instructions as an
improper adjustment of other controls may result in damage and will often require
extensive work by a qualified technician to restore the product to its normal operation.
e) If the product has been dropped or damaged in any way, and
f) When the product exhibits a distinct change in performance - this indicates a need
for service.
22. Mains plug is used as disconnect device and it should remain readily operable during
intended use. In order to disconnect the apparatus from the mains completely, the
mains plug should be disconnected from the mains socket outlet completely.
23. Battery shall not be exposed to excessive heat such as sunshine, fire or the like.
24. Excessive sound pressure from earphones and headphone can cause hearing loss.
25. Minimum distances of 10 cm around the apparatus for sufficient ventilation.
26. The ventilation should not be impeded by covering the ventilation openings with
items, such as newspapers, table-cloths, curtains, etc.
27. No naked flame sources, such as lighted candles, should be placed on the
apparatus.
28. The use of apparatus in moderate climates.
29. Attention should be drawn to the environmental aspects of battery disposal
This symbol indicates that this product incorporates
doub
le
insulation
between hazardous mains voltage and
user
accessible parts.
CAUTION:
TO PREVENT ELECTRIC SHOCK, MATCH WIDE
BLADE OF AC PLUG TO WIDE SLOT. FULLY INSERT.
SAVE THESE INSTRUCTIONS
Page 4
COMPLIANCE WITH FCC REGULATIONS
FCC ID: RQU-HF630PB
This device complies with Part 15 of the FCC Rules. Operation is subject to the following
two conditions:
(1) This device may not cause harmful interference, and
(2) This device must accept any interference received, including interference that may
cause undesired operation.
This equipment has been tested and found to comply with the limits for a Class B Digital
Device, pursuant to Part
15 of the FCC Rules. These limits are designed to provide
reasonable protection against harmful
interference in a residential installation. This
equipment generates, uses and can radiate radio frequency energy
and, if not installed
and used in accordance with the instructions, may cause harmful interference to radio
communications. However, there is no guarantee that interference will not occur in a
particular installation. If this equipment does cause harmful interference to radio or
television reception, which can be determined by turning
the equipment off and on, the
user is encouraged to try to correct the interference by one or more of the
following
measures:
Reorient or relocate the receiving antenna.
Increase the separation between the equipment and receiver.
Connect the equipment into an outlet on a circuit different from that to which the
receiver is connected.
Consult the dealer or an experienced radio/TV technician for help.
WARNING
Changes or modifications to this unit not expressly approved by the party responsible for
compliance could void the user's authority to operate the equipment.
CAUTION
Follow the advice below for safe operations.
ON PROTECTION AGAINST LASER ENERGY EXPOSURE
As the laser beam used in this compact disc player is harmful to the eyes, do not
attempt to disassemble the casing.
Stop operation immediately if any liquid or solid object should fall into the cabinet.
Do not touch the lens or poke at it. If you do, you may damage the lens and the player
may not operate properly.
Do not put anything in the safety slot. If you do, the laser diode will be ON when the CD
door is still open.
If the unit is not to be used for a long period of time, make sure that all power sources
are disconnected from the unit. Remove all batteries from the battery compartment.
This unit employs a laser. The use of controls or adjustment or performance of
procedures other than those specified here may result in exposure to hazardous
radiation.
Page 5

Should any trouble occur, remove the power source and refer servicing to qualified
personnel.
BATTERY INSTALLATION
The battery compartment is located on the back of the remote
control.
1. Remove the battery compartment door by pressing in on
the tab and lifting it off.
2. Insert two (2) AAA size batteries (not included) into the
battery compartment as the polarity markings inside the
battery compartment.
3. Replace the battery compartment door.
BATTERY PRECAUTIONS
Follow these precautions when using a battery in this device:
1. Use only the size and type of battery specified.
2. Be sure to follow the correct polarity when installing the battery as indicated in
the battery compartment. A reversed battery may cause damage to the device.
3. Do not mix different types of batteries together (e.g. Alkaline and Carbon-zinc)
or old batteries with fresh ones.
4. If the batteries in the device are consumed or the device is not to be used for a
long period of time, remove the battery to prevent damage or injury from
possible battery leakage.
5. Do not try to recharge the battery not intended to be recharged; it can overheat
and rupture. (Follow battery manufacturer’s directions.)
6. Do not dispose of batteries in fire or sunshine. Battery may explodes or leak.
7. Clean the battery contacts and also those of the device prior to battery
installation.
Page 6

LOCATION OF CONTROLS
1-3) DISC 1,2,3 SELECTOR
4) CD OPEN BUTTON
5) STANDBY/ON BUTTON
6) SLEEP/TIMER BUTTON
7) X-BASS BUTTON
8) MEM/CLK-ADJ BUTTON
9) PLAY MODE BUTTON
10) PRESET UP/DOWN BUTTON
11) STOP/ST-MONO BUTTON
12) SKIP DOWN BUTTON
13) USB PORT
14) DISC SKIP BUTTON
15) STANDBY INDICATOR
16) LCD DISPLAY
17) FUNCTION BUTTON
18) REMOTE SENSOR
19) VOLUME KNOB
20) EQ BUTTON
21) PLAY/PAUSE BUTTON
22) SKIP UP BUTTON
23) HEADHONE JACK
24) AUX IN JACK
25) FM ANTENNA
26) SUB-WOOFER TERMINAL
27) SPEAKER/ TERMINAL
28) AC LINE CORD
CAUTION:
USAGE OF CONTROLS OR ADJUSTMENTS OR PERFORMANCE OF PROCEDURES OTHER THAN THOSE
SPECIFIED HEREIN MAY RESULT IN HAZARDOUS RADIATION EXPOSURE.
THIS UNIT SHOULD NOT BE ADJUSTED OR REPAIRED BY ANYONE EXCEPT QUALIFIED SERVICE
PERSONNEL.
IMPORTANT:
SINCE MOVEMENT OF THE CD MECHANISM AND THE SENSITIVE CIRCUITY MAY CAUSE INTERFERENCE TO
THE RADIO TUNER NEARBY, SWITCH THIS UNIT OFF WHILE OPERATING OTHER RADIO DEVICES.
PRECAUTIONS FOR USE
INSTALLATION
• UNPACK ALL PARTS AND REMOVE PROTECTIVE MATERIAL.
• DO NOT CONNECT THE UNIT TO THE MAINS BEFORE CHECKING THE MAINS VOLTAGE AND BEFORE
ALL OTHER CONNECTIONS HAVE BEEN MADE.
• DO NOT COVER ANY VENTS AND MAKE SURE THAT THERE IS A SPACE OF SEVERAL CENTIMETERS
AROUND THE UNIT FOR VENTILATION.
CONNECTION
1. CONNECT THE POWER CORD (28) TO AC OUTLET AND SWITCH ON THE MAIN POWER SWITCH AT THE
BACK OF UNIT.
2. WHEN YOU FIRST PLUG THE UNIT INTO THE MAINS, THE LCD DISPLAY (16) WILL LIGHT UP FOR FEW
SECONDS AND THEN ENTER STANDBY MODE.
3. CONNECT THE SPEAKER WIRE (RED TO RED/BLACK TO BLACK) TO THE SPEAKER TERMINAL (27)
LOCATED AT THE REAR SIDE OF THE UNIT. CONNECT THE SUB-WOOFER WIRE (PURPLE TO
PURPLE/BLACK TO BLACK) TO THE SUB-WOOFER TERMINAL (26) LOCATED AT THE REAR SIDE OF THE
UNIT.
4. TURN ON THE UNIT BY ON BUTTON (5). IF THE LCD DISPLAY (16) IS ON WITH BACKLIGHTING, IT MEANS
THE POWER SUPPLY IS NORMAL. NOW YOUR SYSTEM IS READY TO PLAY THE MUSIC.
SETTING THE CLOCK
1. SET UNIT IN STANDBY MODE.
2. PRESS THE “MEM/CLK-ADJ” BUTTON (8), THE FIRST DIGIT OF “00” IS FLASHING. PRESS SKIP UP
OR DOWN BUTTON (22,12) TO SET THE CORRECT HOUR (24 HOURS FORMAT).
PRESS ”MEM/CLK-ADJ” BUTTON (8) TO STORE THE CORRECT HOUR.
3. THE OTHER TWO DIGITS OF “00” IS FLASHING, PRESS THE SKIP UP
OR DOWN
BUTTON (22,12)
TO SET THE CORRECT MINUTES. PRESS “MEM/CLK-ADJ” (8) TO STORE THE CORRECT MINUTE.
THE PRE-SET TIME WILL BE RE-SET COMPLETELY IF SWITCHING OFF THE MAIN POWER
BUTTON ON SYSTEM. YOU ARE RECOMMENDED TO SWITCH THE SYSTEM INTO STANDBY
MODE FOR CONVENIENCE USAGE.
1
Page 7

LISTENING TO RADIO
MANUAL TUNING
1. PRESS “FUNCTION” BUTTON (17) TO SELECT TUNER.
2. TUNE TO THE REQUIRED STATION BY PRESSING THE TUNING UP OR DOWN BUTTON (22,12).
3. ADJUST VOLUME KNOB (19) TO THE DESIRED VOLUME LEVEL .
AUTO TUNING
1. PRESS “FUNCTION” BUTTON (17) TO SELECT TUNER.
2. PRESS AND HOLD THE TUNING UP OR DOWN BUTTON (22,12) FOR 1-2 SECONDS AND THEN RELEASE
3. THE UNIT WILL START SEEKING AUTOMATICALLY AND STOP UNTIL A RADIO STATION IS REACHED.
4. REPEAT STEP 2 & 3 UNTIL THE DESIRED RADIO STATION IS BEING REACHED.
5. ADJUST VOLUME KNOB (19) TO THE DESIRED VOLUME LEVEL.
PRESET STATIONS
YOU CAN STORE UP TO TOTAL OF 20 RADIO STATIONS IN THE MEMORY.
1. SET TO RADIO MODE
2. TURN TO THE DESIRED RADIO STATION BY “ MANUAL” OR “AUTO” TUNING METHOD.
3. PRESS “MEM/CLK-ADJ” BUTTON (8) TO ENABLE PROGRAM STATE AND MEMORY POSITION “00” IS
FLASHING.
4. PRESS “PRE-UP “ OR “ PRE-DN” BUTTON (10) TO SELECT MEMORY POSITION (FROM 1 – 20).
5. PRESS “MEM/CLK-ADJ” BUTTON (8) AGAIN TO CONFIRM THE SETTING.
6. REPEAT STEP 2 TO 5 TO STORE OTHER STATIONS.
7. PRESS “PRE-UP “ OR “ PRE-DN” BUTTON (10) TO SELECT THE PRESET STATIONS IN ORDER.
8. TO RETURN NORMAL TUNER MODE, LEAVE KEYS FREE.
THE PRE-SET MEMORIES WILL BE CANCELLED COMPLETELY IF AC POWER WAS DISCONNECTED.
YOU ARE RECOMMENDED TO SWITCH THE SYSTEM INTO STANDBY MODE FOR CONVENIENCE
USAGE.
THE PROGRAM MODE WILL RETURN TO NORMAL MODE IF THERE IS NO BUTTON BEING PRESSED IN
3 SECONDS.
YOU CAN OVERWRITE A PRESENT STATION BY STORING ANOTHER FREQUENCY IN ITS PLACE.
FM & FM-STEREO RECEPTION
PRESS THE “ MONO-ST/REPEAT ” BUTTON (11) REPEATEDLY, THE FM PROGRAMS ARE RECEIVING IN
MONO AND STEREO MODE REPEATEDLY. IN PARTICULAR WHEN STEREO SIGNALS ARE WEAK. IT IS
PREFERABLE TO RECEIVE THE PROGRAM IN MONO.
IF STEREO SIGNAL IS BEING RECEIVED, THE “ST” INDICATOR “ ” WILL APPEAR ON LCD (16) TO
SHOW FM STEREO PROGRAM IS NOW RECEIVING.
HINTS FOR BEST RECEPTION:-
- FM : THE RECEIVER HAS A BUILD-IN FM WIRE ANTENNA (25) HANGING AT THE REAR CABINET. THIS
WIRE SHOULD BE TOTALLY UNRAVELED AND EXTENDED FOR THE BEST RECEPTION.
PLAYING COMPACT DISC
GETTING START
1. PRESS FUNCTION BUTTON (17) TO SELECT CD MODE.
2. PRESS “OPEN/CLOSE” BUTTON (4) TO OPEN THE CD DOOR.
3. PLACE A CD WITH THE PRINTED SIDE FACING UP INSIDE THE TRAY.
4. PRESS THE “ “ BUTTON (14) OR “ DISC SKIP “ BUTTON ON REMOTE TO TURNING THE CD TRAY,
AND LOADING OUT THE OTHER DISC COMPARMENT.
5. PRESS THE “OPEN/CLOSE” BUTTON (4) TO CLOSE THE CD DOOR.
6. CD SEARCH IS PERFORMING, THE LCD DISPLAY (16) WILL SHOW THE TOTAL NUMBER OF DISC,
NUMBER OF TRACKS & PLAYING TIME OF DISC.
NOTED : CD SEARCHING WILL BE PERFORMAED EVERYTIME WHEN SWITCHING TO CD MODE OR
CLOSING THE CD DOOR. ALL CD FUNCTIONS WILL BE RESPONSED ONLY AFTER THE CD SEARCHING IS
COMPLETED. IT NEED ABOUT 1 MINUTES TO COMPLETE THE FOCUS SEARCH.
PLAY / PAUSE MODE
1. PRESS THE “PLAY/PAUSE” BUTTON (21) TO START PLAYBACK, THE FIRST TRACK OF THE FIRST DISC
WILL BE PLAYED AND THE PLAY INDICATOR WILL APPEAR ON THE LCD DISPLAY.
2. OR PRESS EITHER THE “ DISC 1 ” , “ DISC 2 ” , “ DISC 3 ” BUTTON (1-3), UNIT WILL PLAY THE DISC INSIDE
THE DESIRE TRAY DIRECTLY.
3. TO INTERRUPT, PRESS THE “PLAY/PAUSE” BUTTON (21) ONCE, AND THE DISPLAY WILL START
FLASHING. PRESS AGAIN TO RELEASE & RESUME PLAYBACK.
STOP MODE
1. IF “STOP” BUTTON (11) IS PRESSED DURING PLAY OR PAUSE MODE, SYSTEM WILL GO TO STOP MODE.
2
Page 8

SKIP MODE (SKIP UP /SKIP DOWN )
1. DURING PLAY OR PAUSE MODE, IF SKIP UP BUTTON (22) IS PRESSED IT WILL GO TO NEXT TRACK AND
DISPLAY THE TRACK NO. AND THEN REMAIN THE PLAY OR PAUSE MODE.
2. DURING PLAY OR PAUSE MODE, IF SKIP DOWN BUTTON (12) IS PRESSED. IT WILL GO BACK TO THE
BEGINNING OF THE TRACK, ORIGIANL TRACK NO. IS DISPLAY AND REMAIN THE PLAY OR PAUSE MODE.
3. AFTER STEP 2, PRESS SKIP DOWN BUTTON (12) AGAIN WILL GO TO THE PREVIOUS TRACK AND
REMAIN THE PLAY OR PAUSE MODE.
SEARCH MODE (SEARCH UP+/SEARCH DOWN-)
1. DURING PLAY MODE, IF SKIP UP BUTTON (22) IS PRESSED & HOLD FOR FEW SECONDS, IT WILL START
SEARCHING FORWARD.
2. DURING PLAY MODE, IF “ SKIP DOWN BUTTON (12) IS PRESSED & HOLD FOR FEW SECONDS. IT WILL
STAR SEARCHING BACKWARDS.
REPEAT MODE
PRESS THE “ PLAY MODE ” BUTTON (9) DURING PLAYBACK TO SELECT REPEAT AND RANDOM FUNCTION, A
SINGLE TRACK, ALL THE TRACKS REPEAT AND RANDOM CAN BE PLAYED IN DIFFERENCE MODE AS
FOLLOW:FOR CD
(1) REPEAT ALL DICS (2) REPEAT ONE DISC (3) REPEAT ONE (4) OFF MODE
INDICATOR
PLAY MODE ON LCD DISPLAY
REPEAT ALL DISC & ALL DISC
REPEAT ONE DISC & ONE DISC
REPEAT ONE & ONE
OFF MODE --------------
CD DISC PROGRAMMING
UP TO 60 TACKS CAN BE PROGRAMMED FOR DISC PLAY IN ANY ORDER. BEFORE USE, BE SURE TO PRESS
THE “ CD STOP ” BUTTON (11)
1. SET IN CD MODE & STOP THE CD PLAYBACK.
2. PRESS THE “MEM/CLK-ADJ” BUTTON (8) “ MEMMORY “ WILL APPEAR ON LCD DISPLAY (16) AND
FLASHING.
3. SELECT A DESIRED DISC AND TRACK BY PRESSING DISC 1,2,3 BUTTON (1-3) AND SKIP UP OR
DOWN BUTTONS (22,12) DIRECTLY. AND THE POSITION OF MEMORY “ P-01 “ WILL START
FLASHING.
4. PRESS THE “MEM/CLK-ADJ” BUTTON (8) TO STORE THE TRACE INTO MEMORY.
5. REPEAT STEPS 3 AND 4 TO ENTER ADDITIONAL TRACKS INTO THE MEMORY IF NECESSARY.
6. WHEN ALL THE DESIRED TRACKS HAVE BEEN PROGRAMMED, PRESS CD “ PLAY/PAUSE ” BUTTON (21)
TO START PLAYBACK IN ORDER.
7. PRESS “ CD STOP” BUTTON (11) TO STOP PLAYBACK & PRESS AGAIN TO CANCEL ALL STORED
PROGRM, AND “ MEMORY “ INDICATOR WILL DISAPPEAR ON LCD DISPLAY (16).
AFTER PROGRAM COMPLETE, PRESS “ MEM/CLK-ADJ ” BUTTON (8) REPEATEDLY TO REVIEW THE
TRACKS BEING PROGRAMMED.
BLUETOOTH CONNECTING AND PLAYBACK
1. PRESS THE FUNCTION BUTTON (17) TO SELECT “ BLUETOOTH (BT) ” MODE.
2. THE LCD DISPLAY WILL FLASHING “BT”, IT MEANS THE BLUETOOTH IN NON CONNECTION /
SEARCHING MODE.
3. SWITCH ON THE BLUETOOTH FEATURE OF YOUR BLUETOOTH DEVICE(SUCH AS MOBILE PHONE) AND
SELECT “BT9279” BLUETOOTH EQUIPMENT TO CONNECTING.
4. ONCE THE CONNECTING WAS FINISH AND CONNECT SUCCESSFULLY, THE LCD DISPLAY (16) WILL
CHANGE TO SHOW “BT”.
5. START TO PLAYBACK YOUR BLUETOOTH DEVICE AND ENJOY THE MUSIC BY THE MAIN UNIT.
6. TO CONNECT ANOTHER BT DEVICE, PRESS THE AND HOLD THE “ PLAY/PAUSE ” BUTTON (21) TO
DISCONNECT THE EXISTING CONNECTED BT DEVICE, LCD DISPLAY WILL FLASHING “PAIRING” AGAIN,
REPEAT STEP 3 & 4 TO CONNECT ANOTHER BT DEVICE.
USB CHARGING
1. THIS UNIT CAN PROVIDE DC5V/2.1A FOR ANOTHER ELECTRONIC DEVICE CHARGING (SUCH AS MOBILE
PHONE) THROUGH USB PORT (13).
2. USB CHARGING WAS AVAILABLE DURING UNIT IN STANDBY MODE.
REMARK : DUE TO FIRMWARE/SOFTWARE OF MOBILE PHONE WAS VARIOUS AND UPDATE TIME TO TIME,
MAYBE SOME OF MOBILE PHONE CANNOT COMPACTIBLE WITH CHARGING FUNCTION. THIS IS NOT THE
MALFUNCTION.
3
Page 9

MORE FEATURES
A. SLEEP SETTING
1. PRESS & HOLD THE “ SLEEP ” BUTTON ON REMOTE CONTROL, TO ACTIVE & ADJUST THE SLEEP TIMER
IN THE ORDER OF 90 > 80 >70….10 MINUTES AUTOMATICALLY.
2. SYSTEM WILL STOP AND GOTO STANDBY MODE AUTOMATICALLY AFTER THE SELECTED TIMING.
3. TO CANCEL THE SLEEP MODE, PRESS THE “ SLEEP ” BUTTON ONCE UNTIL “ SLEEP ” INDICATOR
DISAPPEAR.
B. TIMER SETTING
THIS FUNCTION ALLOWS THE SYSTEM TO TURN ON AUTOMATICALLY AND WAKE YOU UP BY MUSIC FROM
CD, TUNER.
* BEFORE SET THE TIMER, PLEASE ENSURE THE CURRENT CLOCK TIME WAS SETTED REFER THE
CLOCK SETTING SECTION
1) ENTER TIMER SET MODE : PRESS AND HOLD “ TIMER “ BUTTON (6) TO ENTER SETTING MODE, ON
WILL FLASH AT DISPLAY.
2) ON TIME SETTING : PRESS “ MEM/CLK-ADJ. ” (8) & THEN PRESS SKIP UP / DOWN “ BUTTON
(12/22) TO SET THE HOUR & THEN PRESS “ MEM/CLK-ADJ “ BUTTON (8) TO ENTER
THE HOURS. PRESS SKIP UP / DOWN “ BUTTON (12/22) TO SET MINUTES
AND PRESS “ MEM/CLK/ADJ “ BUTTON (8) TO STORE THE TIMER ON TIME.
3) OFF TIME SETTING : PRESS “TIMER” (6) THEN PRESS “ MEM/CLK-ADJ. (8) & THEN PRESS SKIP UP /
DOWN “ BUTTON (12/22) TO SET THE HOUR & THEN PRESS “ MEM/CLK-ADJ
“ BUTTON (8) TO ENTER THE HOURS. PRESS SKIP UP / DOWN “ BUTTON
(12/22) TO SET MINUTES AND PRESS “ MEM/CLK/ADJ “ BUTTON (8) TO STORE THE
TIMER OFF TIME.
4) MODE : PRESS “TIMER” (6) THEN PRESS “ MEM/CLK-ADJ. (8) & THEN PRESS SKIP UP /
DOWN “ BUTTON (12/22) TO SELECT THE TIMER ON MODE (CD/TUNER) THEN
“ MEM/CLK/ADJ “ BUTTON (8) TO STORE THE TIMER ON MODE.
REMARK
- IF THERE IS NO MUSIC SOURCE BEING DETECTED (FROM CD) WHEN THE PRESET TIME IS REACHED,
SYSTEM WILL SELECT TUNER MODE AUTOMATICALLY.
- FOR TUNER MODE, IT WILL BE PRESET AUTOMATICALLY AND FOLLOW THE LAST RADIO STATION
BEING LISTENED JUST BEFORE POWER OFF IN THE LAST TIME.
ACTIVE/DE-ACTIVE TIMER FUNCTION (BY REMOTE CONTROL)
1. PRESS THE “ SLEEP/TIMER ” BUTTON ON REMOTE CONTROL ONCE AT STANDBY MODE & THE TIMER
INDICATOR IS SHOWN ON LCD DISPLAY (1).
2. TO CANCEL ALARM FUNCTION BY PRESS AGAIN “SLEEP/TIMER” BUTTON UNTIL THE TIMER INDICATOR
“ ” DISAPPEAR
C. PRESETS EQ FUNCTION
THIS UNIT PROVIDES 5 DIFFERENCES SOUND MODE TO ENHANCE YOUR LISTENING EXPERIENCE. YOU
CAN SELECT THE DESIRED EFFECT BY PRESSING THE “EQ” BUTTON (17) REPEATEDLY AT FOLLOWING
SEQUENCE:-
FLAT JAZZ ROCK CLASSIC POP
D. X-BASS FUNCTION
PRESS THE X-BASS BUTTON (23) TO ACTIVE X-BASS FUNCTION, THE DISPLAY WILL SHOW “ XBAS ON “ AND
“ XBAS OFF “ TO REPRESENT X-BASS FUNCTION ON AND OFF RESPECTIVELY.
E. MUTE FUNCTION (ON REMOTE ONLY)
PRESS TO TERMINATE THE SOUND OUTPUT FROM SYSTEM TEMPORARILY AND PRESS AGAIN TO CANCEL
THIS MODE.
4
Page 10
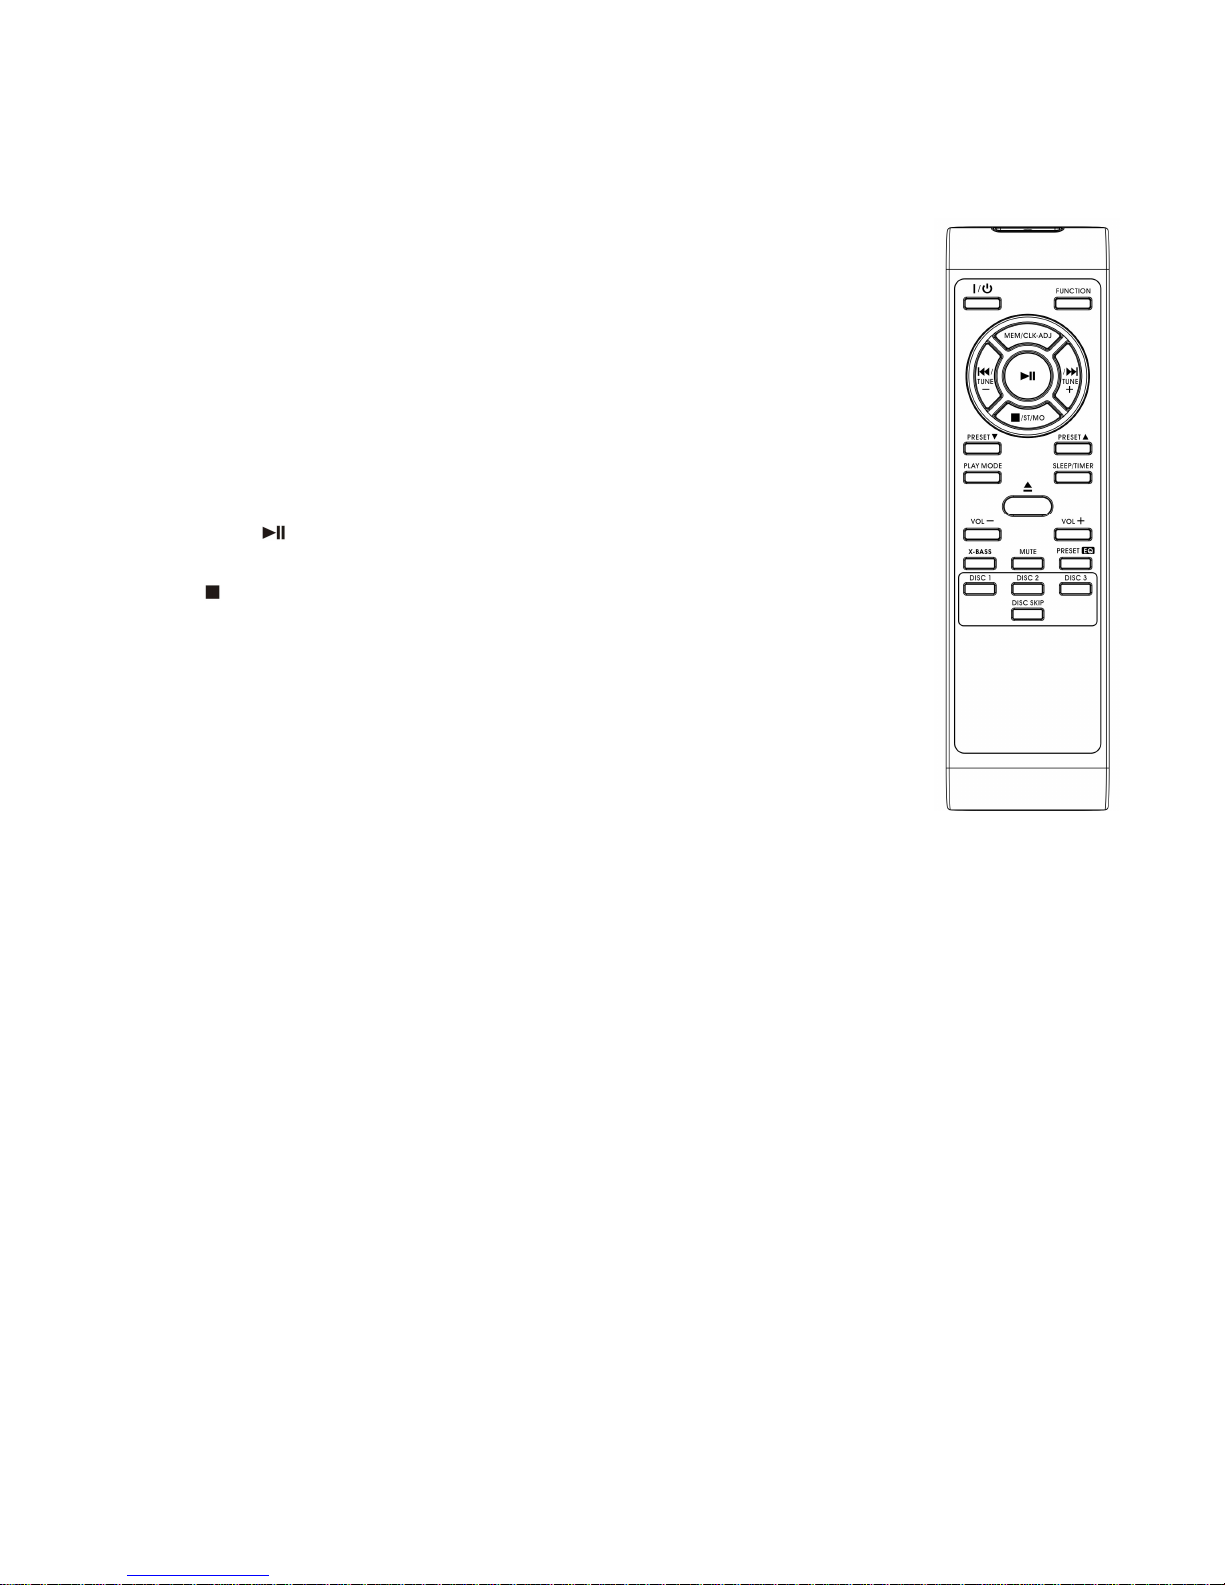
REMOTE CONTROL TRANSMITTER
CONTROL FUNCTIONS
BATTERY INSTALLATION (BATTERY NOT PROVIDED)
THE INFRA-RED TRANSMITTER REQUIRE 2 PCS “ AAA “ BATTERY FOR OPERATION
BUTTON DESCRIPTION
POWER PRESS TO SWITCH THE SYSTEM INTO STANDBY MODE
FUNCTION PRESS TO SELECT DIFFERENT FUNCTION MODE
CLK-ADJ/MEMORY IN STANDBY MODE : PRESS TO ACTIVE CLOCK SETTING
IN TUNER MODE : PRESS TO PRE-SET RADIO MEMORY
IN CD : PRESS TO ACTIVE PROGRAMMING FUNCTION
SKIP UP/DOWN IN CD/SD/USB MODE : TO SELECT PREVIOUS / NEXT TRACK
IN TUNER MODE : PRESS TO STEP UP/DOWN OF BAND
FREQUENCY
IN CLOCK SETTING : PRESS TO SELECT HOUR AND
MINUTES
PLAY/PAUSE IN CD MODE, PRESS ONCE TO START PLAYBACK. PRESS
ONCE AGAIN TO STOP PLAYBACK TEMPORARILY
STOP IN MODE, PRESS TO TERMINATE THE PLAYBACK
IN TUNER MODE, PRESS TO SELECT FM MONO/STEREO
PRE-UP / PRE-DN IN TUNER MODE : PRESS TO CALL OUT THE PRESET
MEMORY IN ORDER UP OR DOWN
PLAY MODE IN CD MODE : PRESS TO ACTIVE THE REPEAT FUNCTION
TIMER/SLEEP TIMER MODE : PRESS TO SET THE TIMER MODE ON OR
OFF
PLAYBACK MODE : PRESS TO SET THE SLEEP TIMER
OPEN/CLOSE IN CD MODE, OPEN/CLOSE THE CD TRAY
VOLUME -/+ PRESS TO CONTROL VOLUME UP OR DOWN
BASS PRESS TO ACTIVE OR DE-ACTIVE X-BASS FUNCTION
MUTE PRESS TO ACTIVE MUTE FUNCTION
EQ PRESS TO SELECT DIFFERENCE EQ MODE
DISC 1,2,3 PRESS TO SELECT THE DISC FOR PLAYBACK DIRECTLY, AFTER
CLOSING THE CD DOOR
DISC SKIP PRESS TO SELECT THE NEXT DESIRE DISC AND ROTATE THE DISC TRAY
5
Page 11

SPECIFICATION
Power Requirement
Main unit: AC120V~ 60Hz
Remote control 2 x 1.5V “AAA” size batteries
(not included)
Frequency Range
Radio Band FM 87.5 ~ 108 MHz
Output Power
Speaker (RMS): 2x40 Watts
Subwoofer (RMS): 2x50 Watts
Total P.M.PO: 800 Watts
USB Port
Charging Port: 5V/2.1A
iiiiii
6
CARB statement:
" The products indicated in this shipment were
produced with medium quality fiberboard. We hereby
certify that these products were produced in
compliance with the applicable California emission
standards specified in Section 93120.2(a) of the ATCM
to Reduce Formaldehyde from Composite Wood
Products. "
Page 12

 Loading...