

Page 1

G
o to Table
of Contents
EN-4000™ Reference Manual
Document 4
Configuring General Settings for
the EN-4000
he EN-4000 is the newest member of Encore Networks’ family of routers. It
provides wireless and cabled connections to a local area network (LAN) and to
peripheral devices and remote devices.
Follow the procedures in this discussion to configure the EN-4000:
• Using the EN-4000’s Management System
• Navigating the EN-4000’s Management System
• Basic Configuration
• Configuration for the Network
Also see the following documents:
• Configuring Chassis Ports in the EN-4000
• Configuring the EN-4000’s Serial Ports
• Configuring a MultiWAN for the EN-4000
4.1
See the following discussions in this document:
• Connecting to the EN-4000
• Logging In
• Ending the Session
Using the
EN-4000
’s Management System
4.1.1 Connecting to the EN-4000
The EN-4000’s management system displays in a browser window. A management
terminal (a computer) connects to the EN-4000. That management terminal can run
on any platform (for example, a Windows, Mac, or Linux platform) that supports a
web browser.
For information on trademarks, safety, limitations
of liability, and similar topics, see
http://www.encorenetworks.com/disclaimer.htm.
Version A.3, August 2014
© 2014 Encore Networks, Inc.
All rights reserved.
Page 2
Page 4-2 EN-4000™ Reference Manual, Document 4
G
Note: Y ou can also use a command line interface (CLI) to manage the EN-4000.
However, we recommend using the web interface to manage the EN-4000.
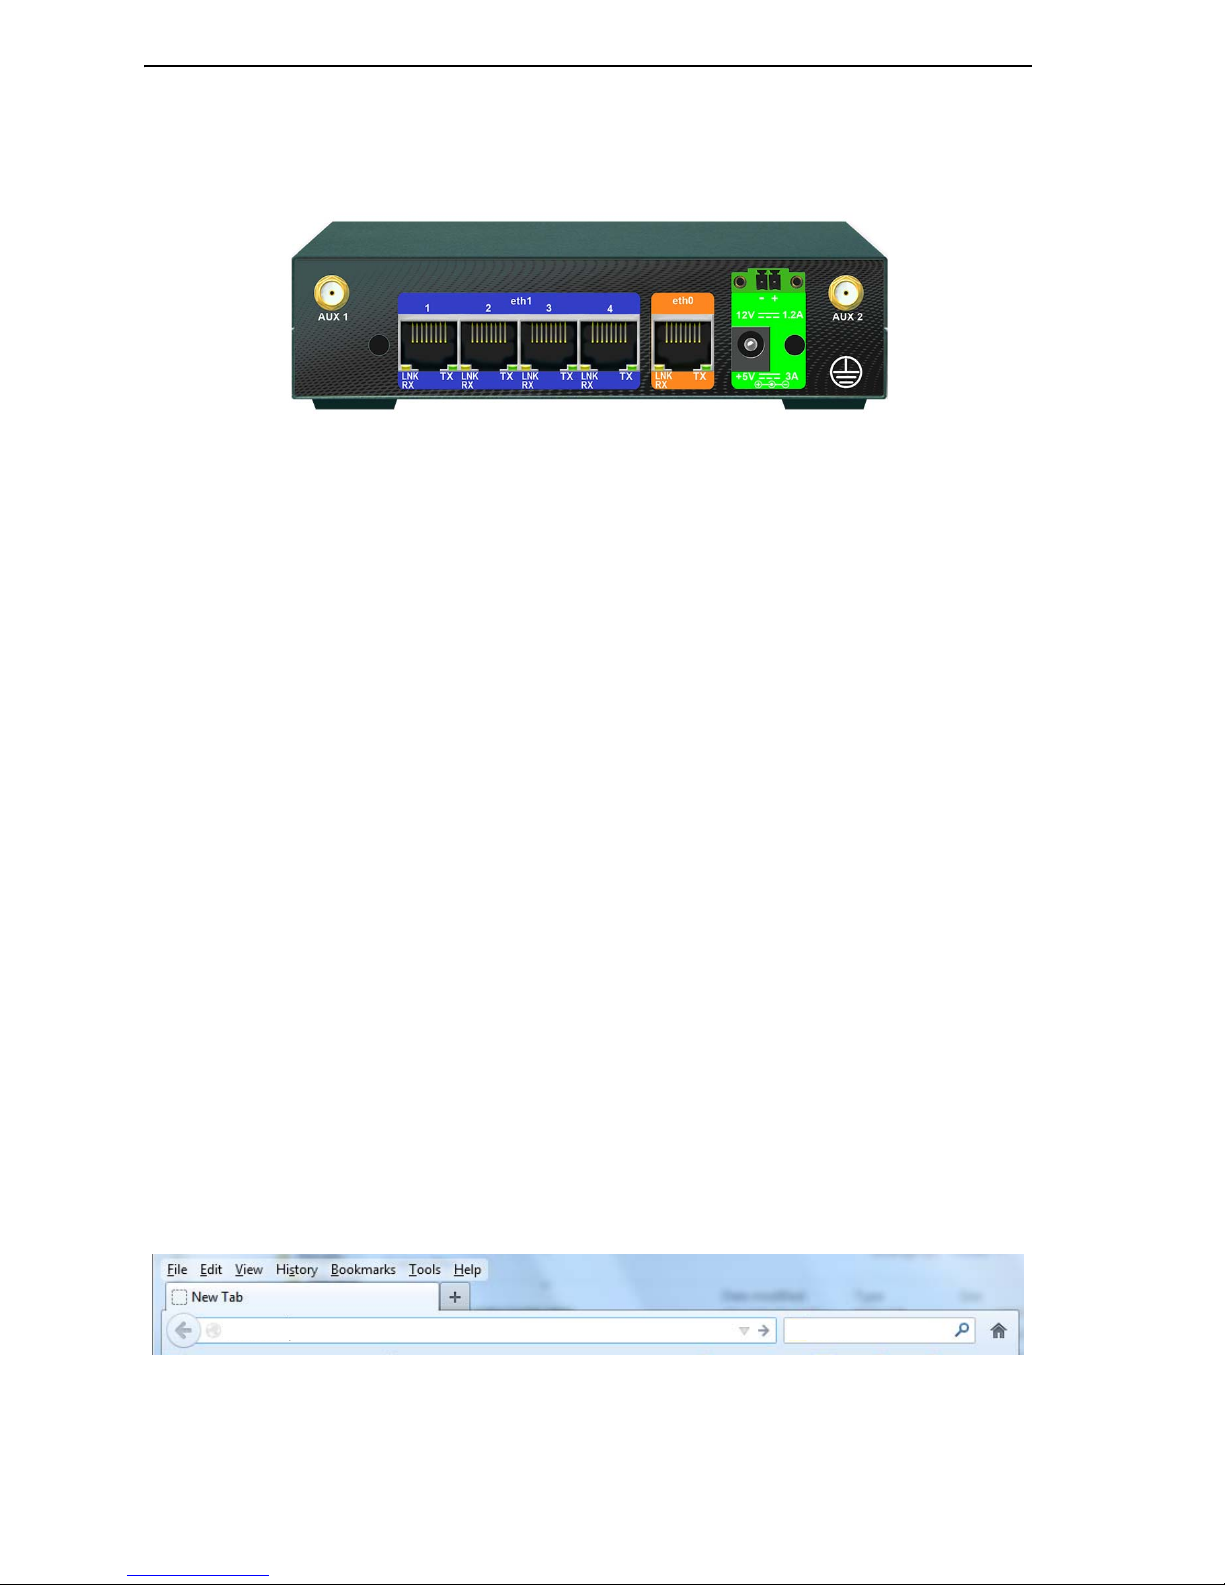
Figure 4-1. EN-4000 Rear Panel
The LAN ports on the EN-4000’s rear panel (Figure 4-1) are on a single private
network. The EN-4000 software includes a DHCP server that assigns IP addresses
to devices connected to those LAN ports. Devices co nnected to those LAN ports
see the gateway address 192.168.1.1 representing the EN-4000.
The EN-4000’s WAN port (also on the rear panel) is on a separate network from
its LAN ports. The EN-4000’s WAN port is a DHCP client, by default.
o to Table
of Contents
4.1.2 Logging In
1 Make sure you have a terminal available to manage the EN-4000, and make
sure the terminal’s power is on.
2 Connect the EN-4000 to an AC power adaptor or a DC power source.
❖ The EN-4000 powers on.
3 Use an Ethernet cable to connect y our management terminal to an Ethernet
LAN port (in the set labeled eth1) on the EN-4000’s rear panel.
Caution: Do not connect the management terminal to the EN-4000’s WAN
!
port (labeled eth0).
❖ The LAN port assigns an IP address to your management terminal.
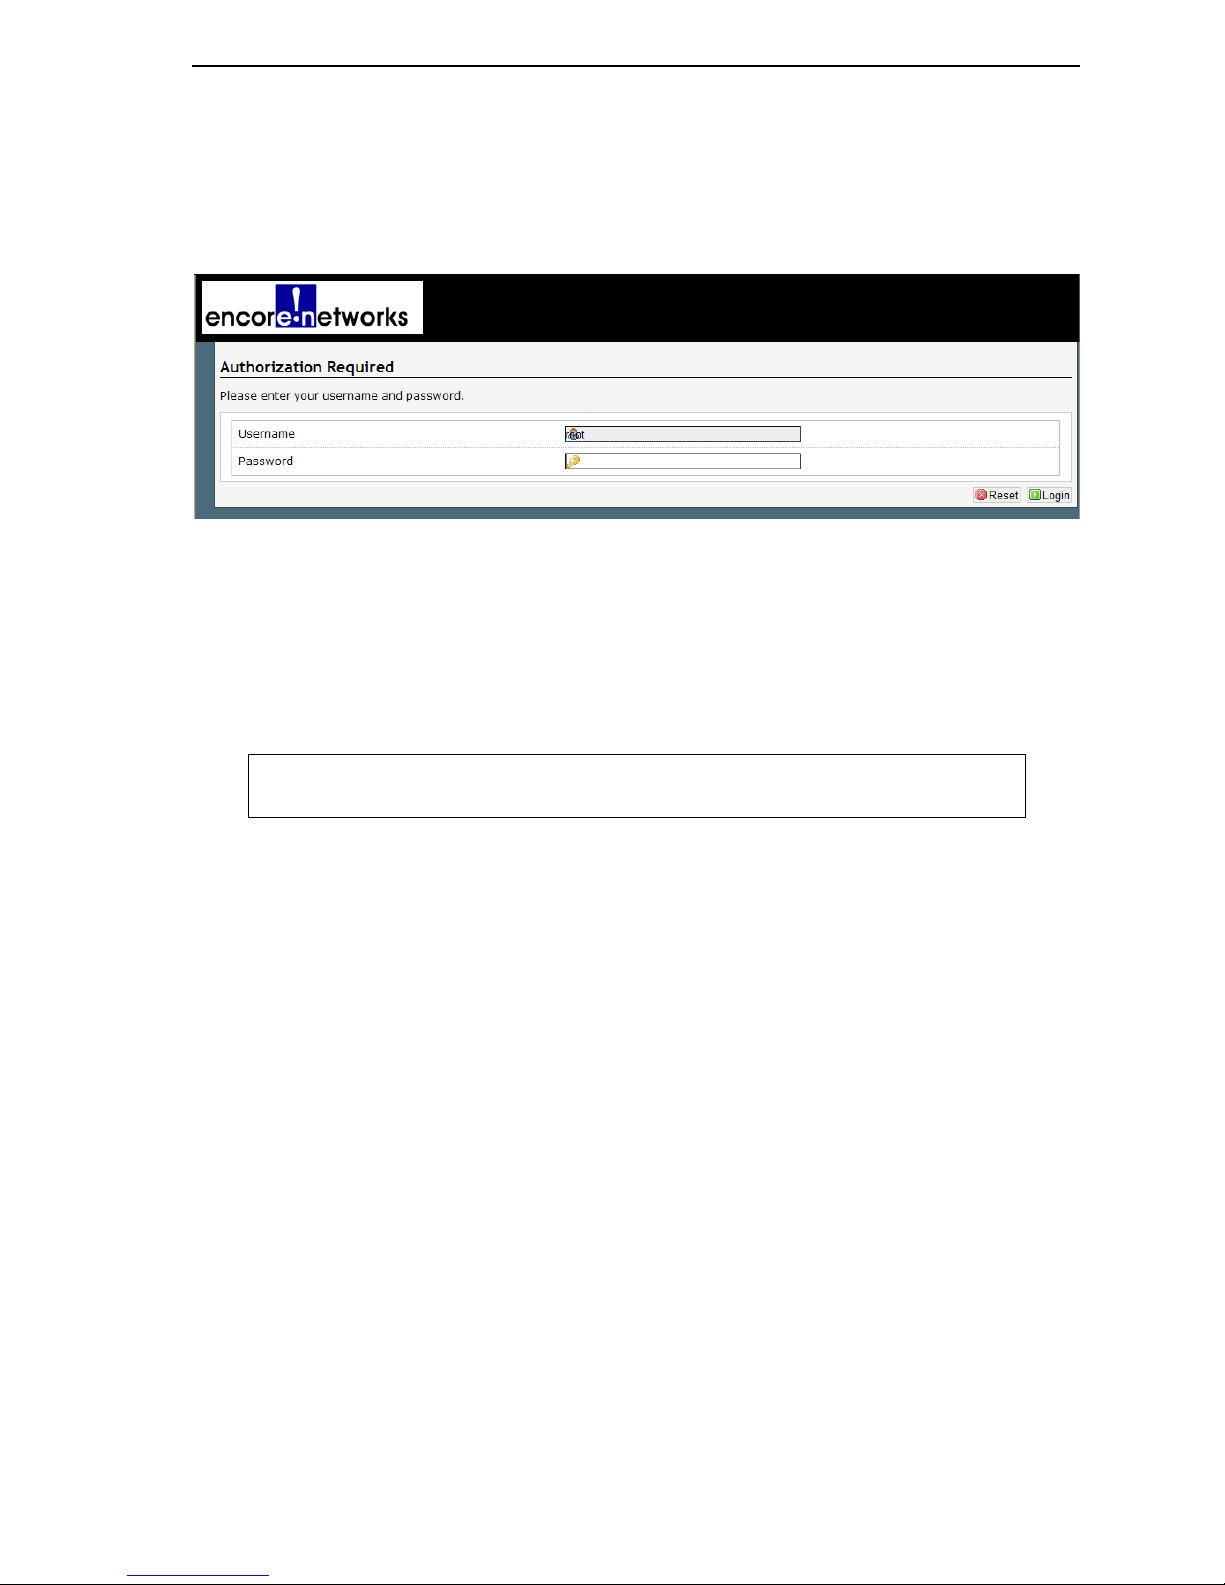
4 On the management terminal, open a web browser.
5 In the browser's address field, type the EN-4000’s gateway IP address
192.168.1.1 (or, if you prefer, type http://192.168.1.1), and press the
console’s Enter key (Figure 4-2).
Figure 4-2. Browser Address Field
http://192.168.1.1
Note: If the browser asks whether the EN-4000 router (19 2.168.1.1) may
set cookies, answer Yes, or Yes for the Session, or something similar.
Page 3
Configuring General Settings for the EN-4000 Page 4-3
G
Caution: Do not block coo kies for the EN-4000. Otherwise, you might not
be able to manage the EN-4000.
!
❖ The browser navigates to the specified IP address and displays the
EN-4000 Log-In Screen (Figure 4-3).
o to Table
of Contents
Note: The Username field might display the user name. (Figure 4-3 shows
the default user name root.)
Caution: The EN-4000 management system uses JavaScript in its
!
browser-based display. A message to enable JavaScript (similar to the
message in Figure 4-4) might display in your browser.
JavaScript required!
You must enable JavaScript in your browse r or the management syst em wil l no t wo rk pr op erly.
Figure 4- 3. EN-4000 Log- In Screen
Figure 4-4. Message to Enable JavaScript
If you see the message in Figure 4-4, do the following:
• On the browser menu, open Tools or Options (or an equivalent menu
item in your browser).
• In the browser’s menu system, Enable JavaScript, and Save that setting.
• Right-click on the browser screen, and select Refresh, Rewrite, or
Reload (or the equivalent for your browser).
❖ The EN-4000 Log-In Screen is redisplayed, without a message to enable
JavaScript.
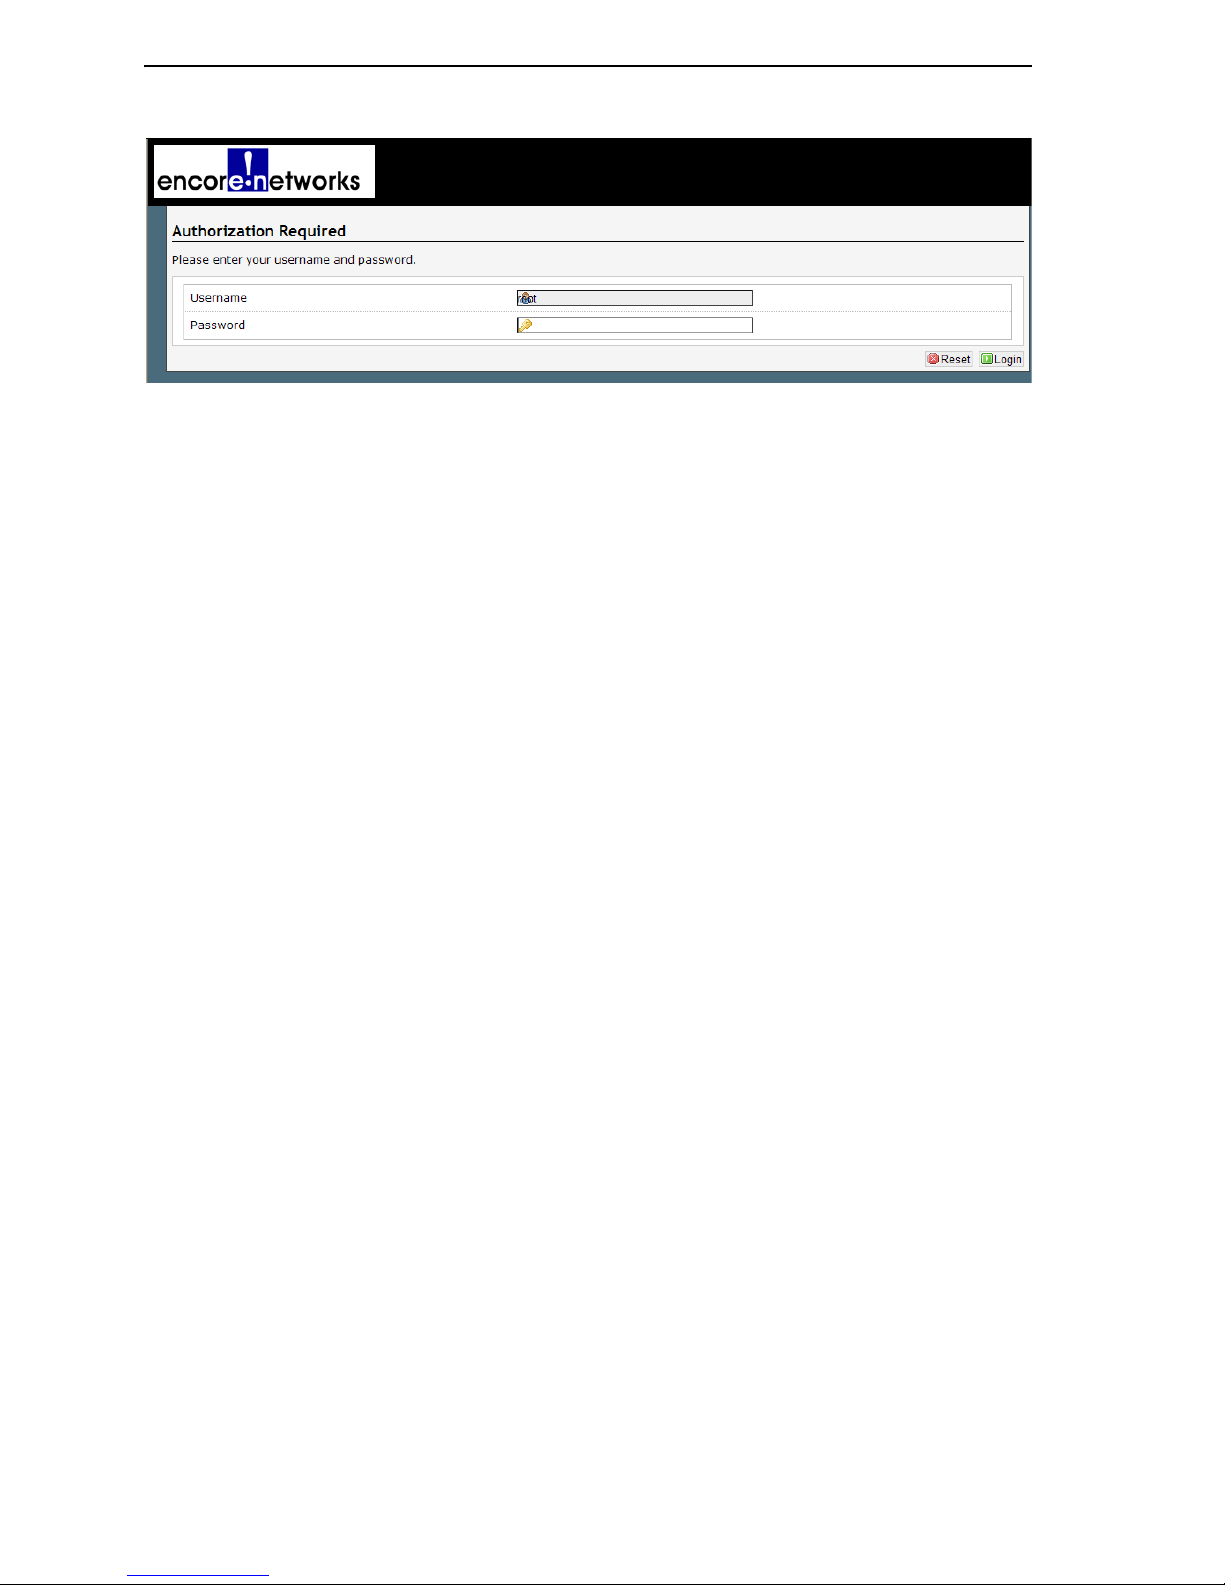
6 Type your user name and password in the appropriate fields of the EN-4000
Log-In Screen. Use the default log-in valu es:
• The default user name is root.
• Its associated default password is encore!1.
Note: You may wish to change the user name and password in the future.
Check with your network administrator for all names and passwords.
7 Then press the console’s Enter key or select the screen’s Login button (to
the lower right of the Log-In Fields).
Page 4
Page 4-4 EN-4000™ Reference Manual, Document 4
G
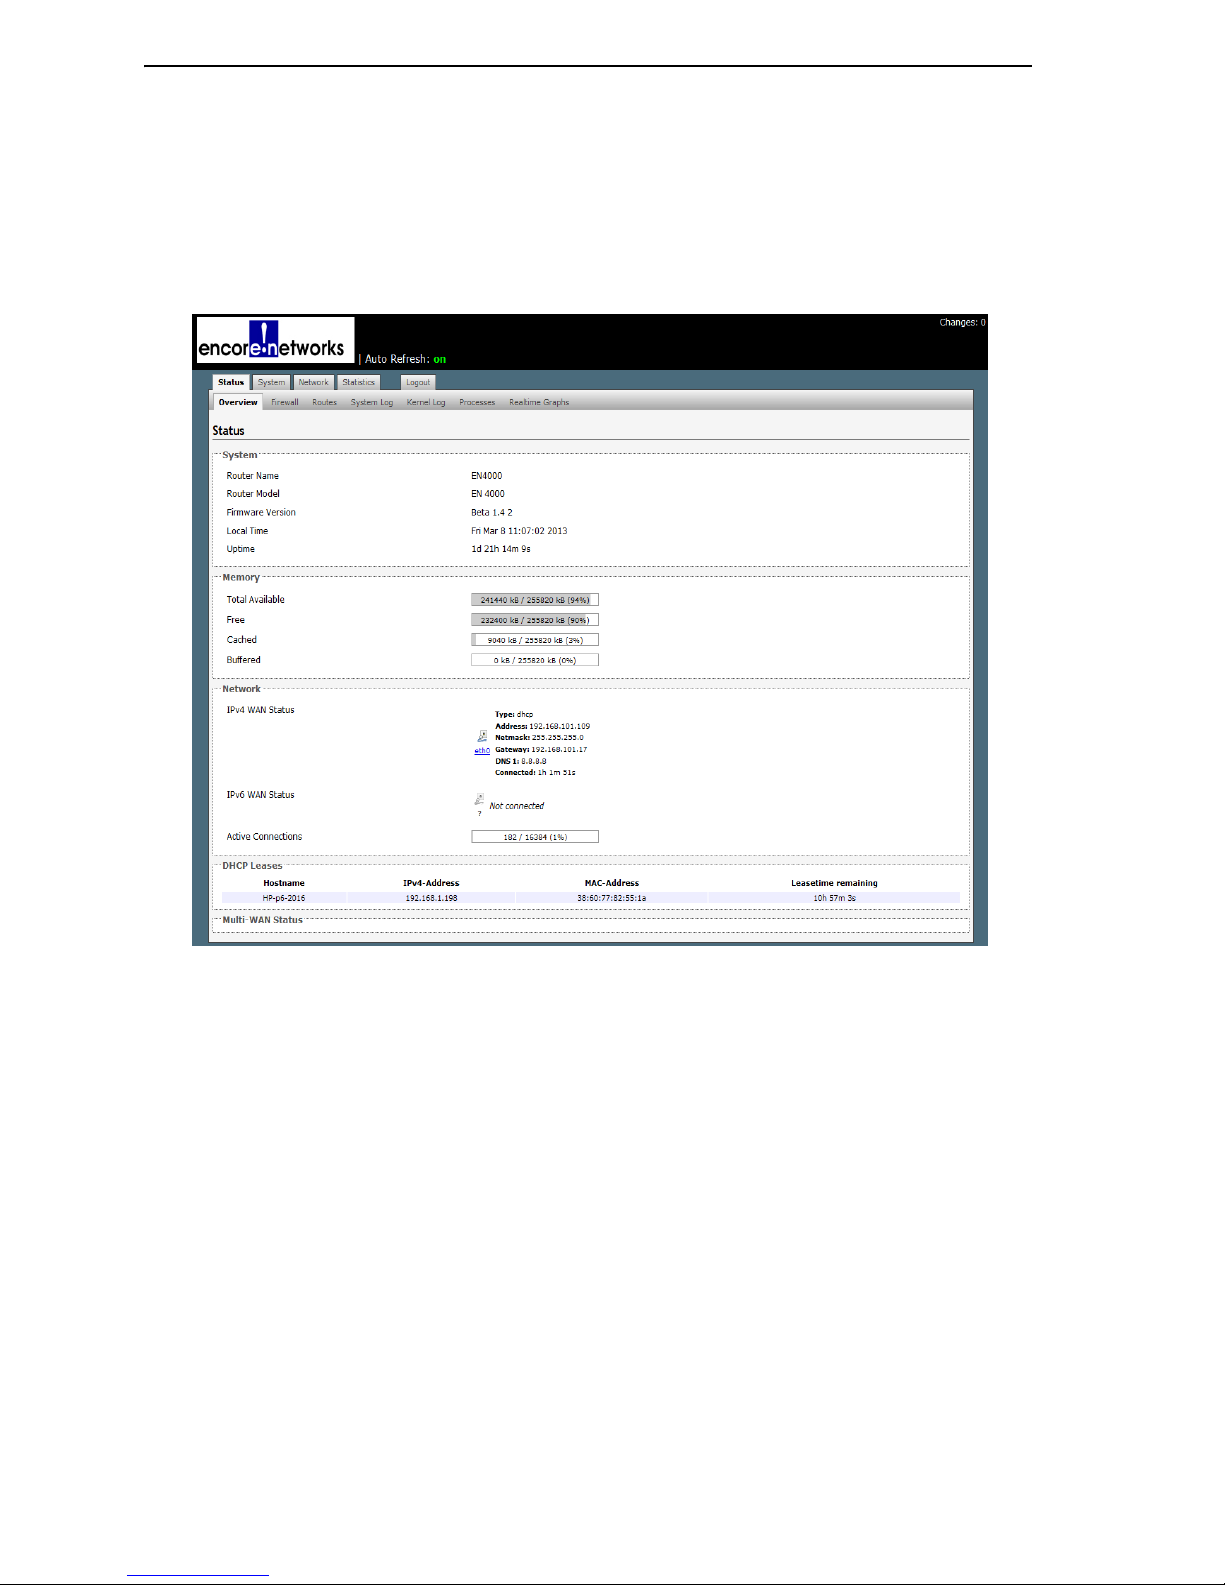
❖ The system accepts your log-in. Then the EN-4000 Status Overview
Screen is displayed (Figure 4-5). This screen provides an overview of the
EN-4000’s status.
Note: If the EN-4000’s WAN port is connected to a network, you may see
the WAN port’s assigned IP address. (The WAN port is a DHCP client.) In
Figure 4-5, the IP address assigned to the WAN port is 192.168.101.109.
Figure 4-5. EN-4000 Status Overview Scree n
o to Table
of Contents
On the EN-4000 management screens, the top row of tabs indicates the
management areas.
◆
Status
◆
System
◆
Network
There is a second row of tabs under each management area. The second row
provides detail for the selected management area. (The EN-4000 senses its
hardware configuration and displays tabs to represent that configur ation.) In
Figure 4-5, the Status management area shows the following detail tabs:
◆
Overview
◆
Firewall
◆
Routes
◆
System Log
◆
Statistics
◆
Logout
◆
Kernel Log
◆
Processes
◆
Realtime Graphs
Page 5
Configuring General Settings for the EN-4000 Page 4-5
G
An Auto Refresh button (to the right of the Encore Networks logo) is
displayed on several screens. You can select this button to turn automatic
screen refreshment on or off.
8 To manage your EN-4000, do the following:
a To set values for the EN-4000’s IP address and other parameters, see
Navigating the EN-4000’s Management System.
b To review the EN-4000’s settings and performance, see the document
Monitoring the EN-4000.
4.1.3 Managing the Browser Display
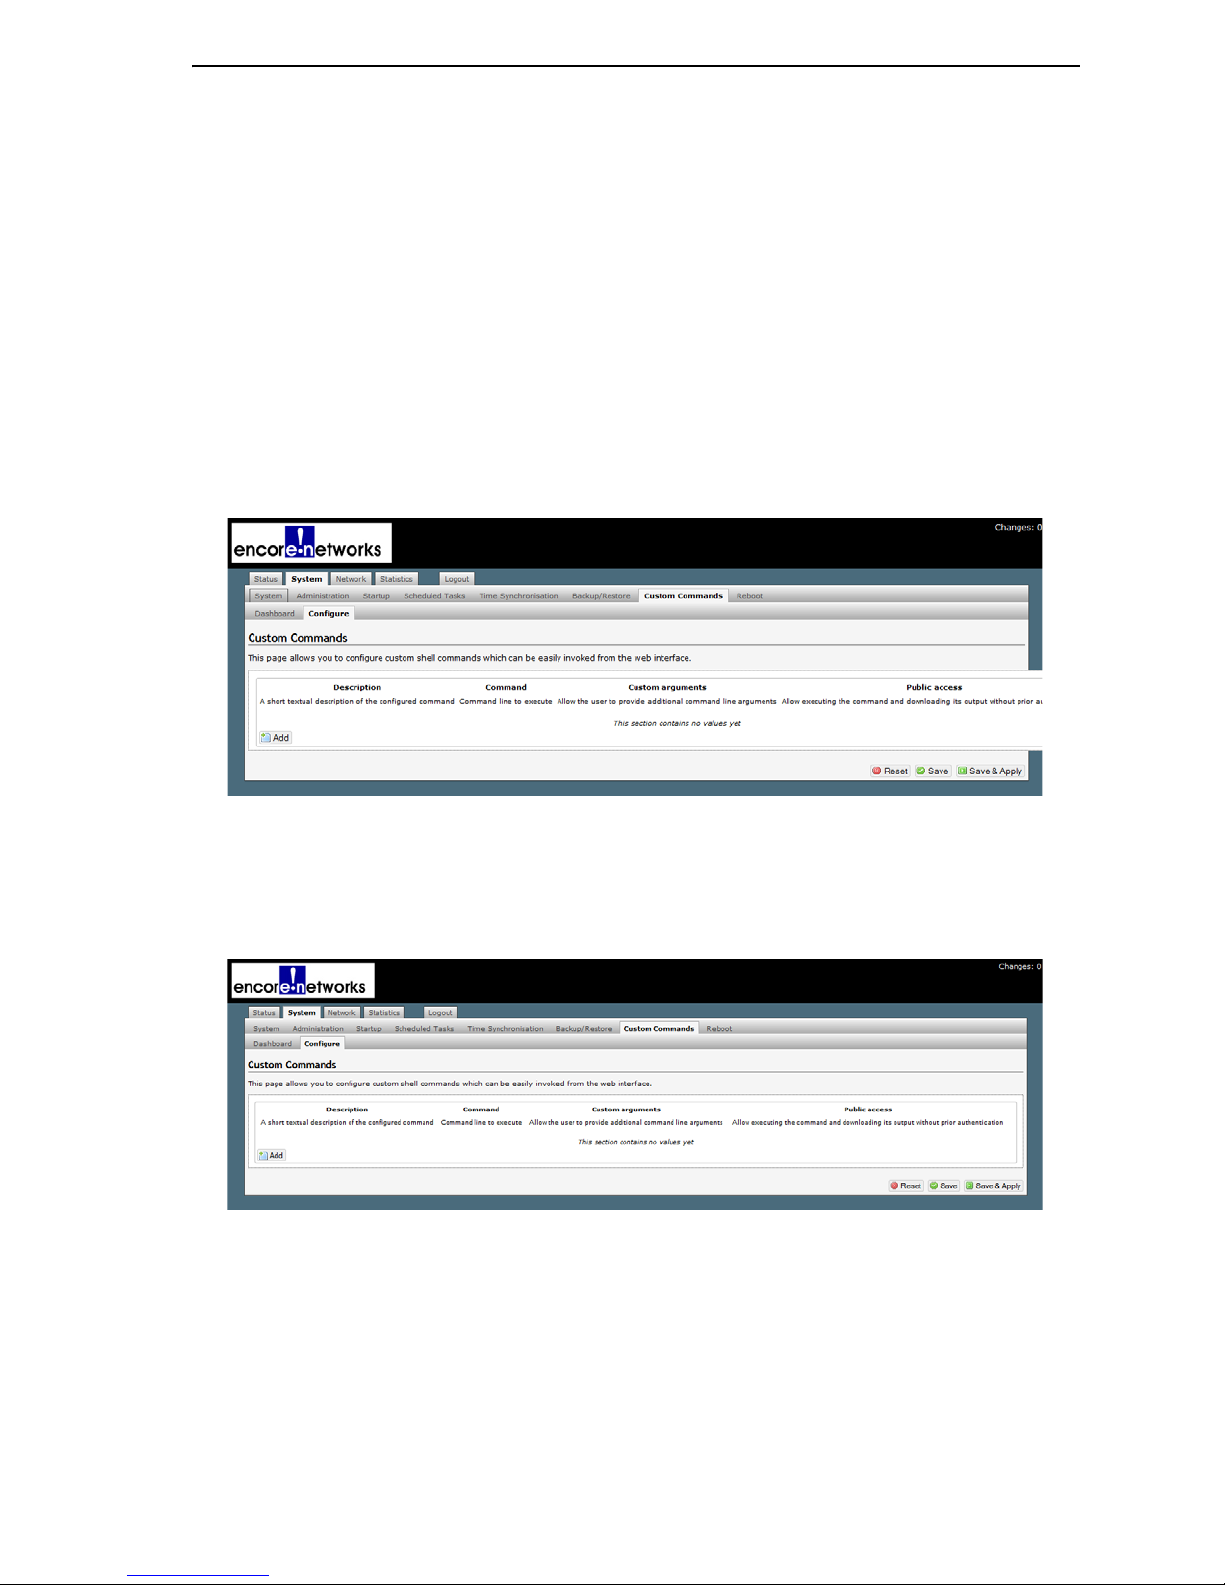
Sometimes a browser lets part of a display bleed off the screen (as in Figure 4-6).
Figure 4-6. Browser Screen Bl eeding (Configure Custom Commands Screen)
o to Table
of Contents
In that case, hold down the Control key (sometimes marked Ctrl) and press the
Minus key (-, also called the Hyphen key) until all the information displays
within the browser (Figure 4-7).
Figure 4-7. Browser Screen without Bleeding (Configure Custom Commands Screen)
Page 6
Page 4-6 EN-4000™ Reference Manual, Document 4
G
4.2 Navigating the EN-4000’s Management
System
4.2.1 Saving or Discarding Changes
Buttons to Reset, Save, or Save & Apply are displayed in the lower righthand
corner of EN-4000 configuration screens. You can use them as described below:
• Select the Save & Apply button to save changes that take effect immediately.
• Select the Save button to save changes that will take effect after the EN-4000
is rebooted.
• Select the Reset button to discard changes you have made but have not ye t
saved, and to see the screen with its values before you made those changes.
Note: The browser will display a message in the upper right corner of its
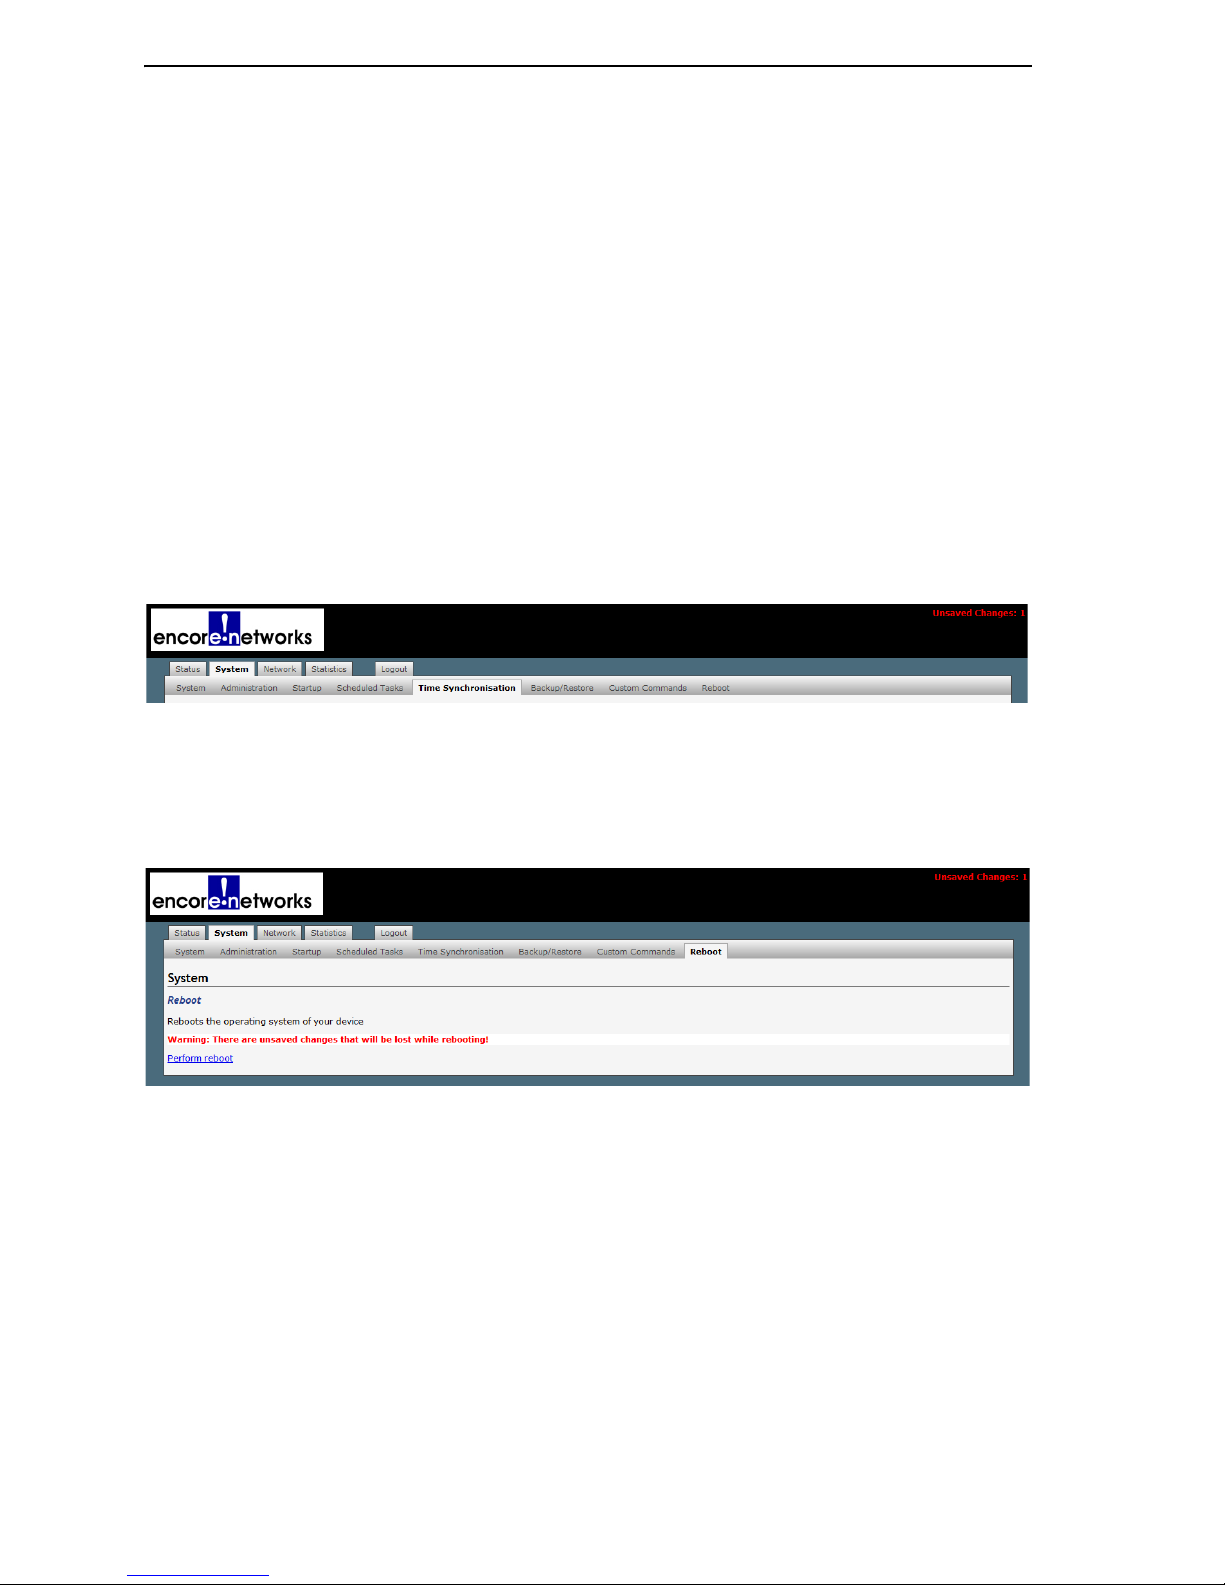
screen when there are unsaved changes in the configuration (Figure 4-8).
Figure 4-8. Message about Unsaved Changes
o to Table
of Contents
Note: The browser will also display a message if you use the EN-4000
screens to reboot the chassis before you ha ve saved changes in the
configuration (Figure 4-9).
Figure 4-9. Message to Save Configuration before Rebooting
Caution: If you use a rebooting process that is not under the control of the
!
EN-4000 management system’s screens—for example, if you close the
browser or if you manually reboot the chassis—you will not see a message
about unsaved changes in the configuration. If you wish to save changes,
make sure you select the Save button or the Save & Apply button before
you close the browser window, or manually reboot the chassis, or use the
screens to reboot.
Note: If you close the browser without saving changes in the configuration,
the previous configuration is used when you reopen the EN-4000
management system in the browser.
Page 7
Configuring General Settings for the EN-4000 Page 4-7
G
The most recently saved configuration will be used only after the EN-4000
chassis has been restarted (rebooted). For that reason, the message
“Unsaved Changes” will persist in the upper right corner of the EN-4000
management system screens until the EN-4000 chassis has been restarted.
4.2.2 Restarting (Rebooting) the EN-4000
There may be times when the EN-4000 needs to be restarted. We recommend
using the menu system to restart the EN-4000, because that provides a
controlled approach to restarting. Any processes that are running will be shut
down properly before the router restarts.
Caution: In general, do not manually restart the EN-4000 by disconnecting
!
it from its power source and then reconnecting it to power. That method of
rebooting might interrupt processes running on the EN-4000.
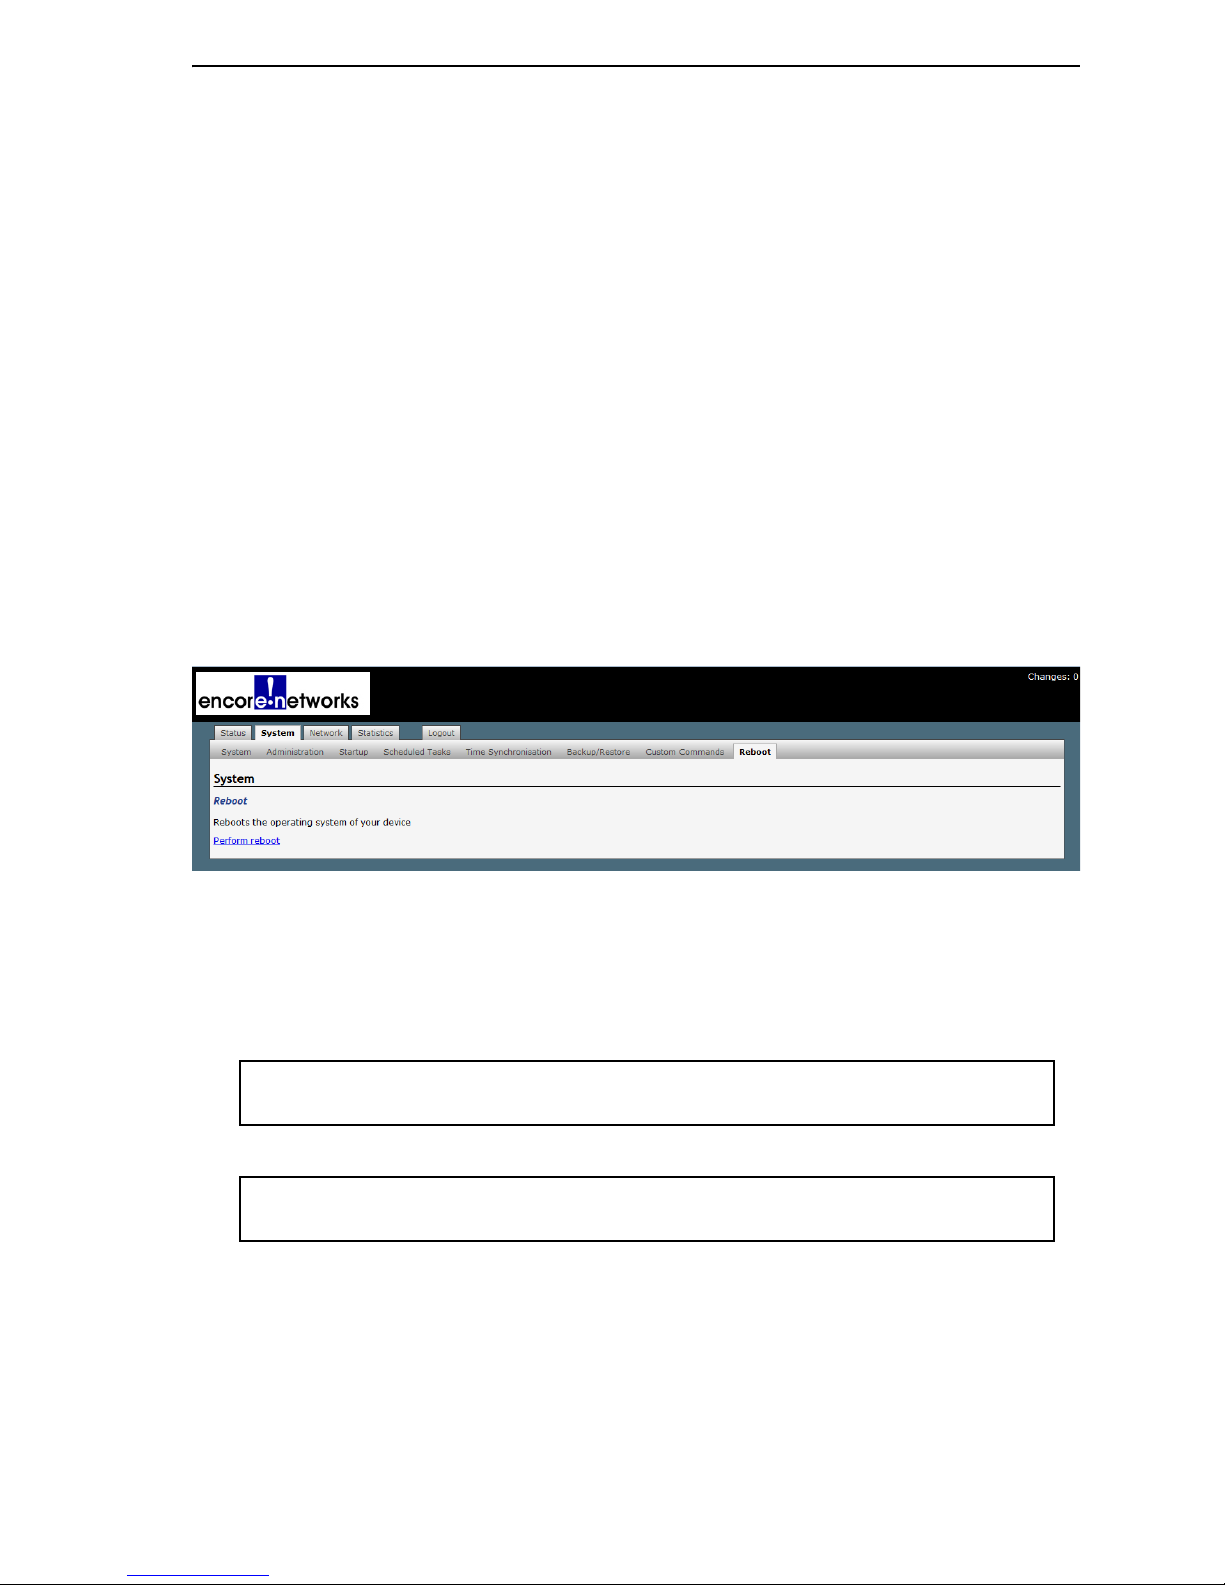
1 To restart the EN-4000, select the System management area.
2 Then select the Reboot tab.
❖ The System Reboot screen is displayed (Figure 4-10).
o to Table
of Contents
Figure 4-10. EN-4000 System Reboot
3 On this screen, select Perform Reboot.
❖ The menu system restarts the EN-4000. During the reboot, a message
similar to one of the messages in Figure 4-11 might be displayed.
Figure 4-11. Message while Rebooting
Waiting for 192.168.1.1...
or
Please wait. Device rebooting.
4 After a few seconds, select the tab for the Status management area.
❖ The EN-4000 Log-In Screen is displayed (Figure 4-12).
Page 8
Page 4-8 EN-4000™ Reference Manual, Document 4
G
Figure 4-12. EN-4000 Log-In Screen
4.2.3 Ending the Session
1 When you wish to log out, select the Logout tab.
❖ The system logs out, and the EN-4000 Log-In Screen is redisplayed (recall
Figure 4-12).
o to Table
of Contents
4.3 Basic Configuration
Basic configuration includes assigning the EN-4000 its IP address, device name,
and similar items. See the following:
• Revising Lists in the EN-4000’s Management System
• Configuring the Management System Language
• Configuring the Device Name and Time of Day
• Synchronizing the EN-4000’s Time of Day
• Configuring System Logging
• Overriding the MAC Information
4.3.1 Revising Lists in the EN-4000’s Management
System
For lists in the EN-4000 management system:
• To add an item to a list, click on [+] (the line-item add button).
• To delete an item from a list, highlight the item and press the Delete key on
your keyboard.
Note: Some items can be deleted by clicking on [x] (the line-item delete
button).
• When you have finished modifying items, click the Save & Apply button on
the screen.
Page 9

Configuring General Settings for the EN-4000 Page 4-9
G
4.3.2 Configuring the Management System Language
1 To set the language used for the EN-4000 management system, do the
following:
a Select the System management area tab.
b Then select the System configuration area tab.
c Then select the Language and Style detail tab.
❖ The Screen to Set the Management System Language is displayed
(Figure 4-13).
Figure 4-13. Screen to Set the Management System Language
o to Table
of Contents
2 On the Screen to Set the Management System Language, select the
Language pulldown menu and select your preferred language.
Note: Currently, the management system interface is available only in
English.
To set time-of-day synchronization, see Synchronizing the EN-4000’s Time
of Day.
4.3.3 Configuring the Device Name and Time of Day
1 T o configure the EN-4000’s identity within the network, and to configure time
zone and time-of-day synchronization source for the EN-4000, do the
following:
a Select the System management area tab.
b Then select the System configuration area tab.
c If necessary, select the General Settings detail tab.
❖ The System Screen for General Settings is displayed (Figure 4-14).
Page 10

Page 4-10 EN-4000™ Reference Manual, Document 4
G
On the System Screen for General Settings, you can set a unique name for
this EN-4000. Y o u can also set its lo cal time, an d yo u can se t a hierarchy of
network time pr otocol (NTP) ser vers for synchronizing the EN-4000’s time of
day.
Figure 4-14. System Screen for General Settings
o to Table
of Contents
2 In the Hostname field, type a name for the EN-4000, to identify it in the
network. Then click the Save & Apply button (in the lower right corner of
the screen).
Note: The name must be unique within the network. Get all names and IP
addresses from your network administrator.
❖ The EN-4000 saves its new name and uses the new name immediately.
Caution: If you type a non-permitted charac ter, the entire name displays
!
in red. If you try to save a name with non-permitted characters, a
message similar to the message in Figure 4-15 is displayed.
Figure 4 -15. Message about Inv alid Entry
In that case, click the OK button to close the message. Examine the name
and remove special characters until the name display returns to black. Then
save the name again.
Page 11

Configuring General Settings for the EN-4000 Page 4-11
G
Some quick guidelines for device names follow:
• Spaces are not permitted in a device name.
• The name cannot end with a hyphen (-), a period (.), or an underscore (_).
• Most other special characters are not permitted anywhere in the name.
3 To use the browser’s date and time settings, click the button to Sync with
browser.
❖ The EN-4000 management system adopts the browser’s time-of-day
settings.
4 Select the arrow on the right of the Timezone field to pull down a list of
major cities in each time zone. In the pulldown menu, select the time zone
the EN-4000 will use (usually the closest city in your time zone). Then select
the Save & Apply button.
❖ The EN-4000’s management system displays the selected city’s time.
Note: To get the time of day for the EN-4000 at regular intervals, see
Synchronizing the EN-4000’s Time of Day.
o to Table
of Contents
4.3.4 Configuring System Logging
1 To set logging of system activities for the EN-4000, do the following:
a Select the System management area tab.
b Select the System configuration area tab.
c Then select the Logging detail tab.
❖ The Screen to Set System Logging is displayed (Figure 4-16).
Figure 4-16. Screen to Set System Logging
2 On the Screen to Set System Logging, enter information into the following
fields:
Page 12

Page 4-12 EN-4000™ Reference Manual, Document 4
G
Note: Consult your network administrator to set values for these
parameters.
• System Log Buffer Size (kilobytes)
• External System Log Server (IP address)
• External System Log Server Port (port number)
• Log Output Level (select from pulldown menu):
◆
Debug
◆
Info
◆
Notice
◆
Warning
◆
Error
◆
Critical
◆
Alert
◆
Emergency
o to Table
of Contents
• Cron Log Level (select from pulldown menu):
◆
Debug
◆
Normal
◆
Warning
Note: To set time-of-day synchronization, see Synchronizing the EN-4000’s
Time of Day.
4.3.5 Synchronizing the EN-4000’s Time of Day
Do both of the following, in the order listed here:
• Configure the time-of-day options by Configuring Time-of-Day
Synchronization.
• Select one of the configured options by Selecting Time-of-Day
Synchronization.
Confer with your network administrator for values to use in the configuration.
4.3.5.1 Configuring Time-of-Day Synchronization
1 Select the System management area.
2 Select the Time Synchronization detail tab.
❖ The Time Synchronization Screen is displayed (Figure 4-17)
Page 13

Configuring General Settings for the EN-4000 Page 4-13
G
Figure 4-17 . Time Synchronization Scr een
o to Table
of Contents
Note: The value for Current System Time, displayed on this screen, is
configured in Configuring the Device Name and Time of Day.
3 In the Update Interval field, enter the number of seconds between time-
of-day synchronization requests.
4 Enter the value for the Count of Time Measurements.
5 Enter the value for the Offset Frequency
6 Under the heading Time Servers, do the following:
a For each NTP server that the EN-4000 might follow to synchronize time of
day, do the following:
i Under Hostname, type a name for an NTP server.
Note: This entry can be an IP address or a website URL.
ii Under Port, type the port number the EN-4000 will use to reach the NTP
server.
b If you need to add an NTP server, click on the Add button.
❖ A row is displayed for another NTP server.
c If you wish to delete an NTP server entry , click on the Delete button for that
row.
❖ The NTP server entry is del eted.
Page 14

Page 4-14 EN-4000™ Reference Manual, Document 4
G
7 When you have finished configuring the fields on this screen, do one of the
following:
a Select Save & Apply if you want the settings to take effect immediately.
b Select Save if you want the settings to take effect after the EN-4000 reboots.
c Select Reset if you want to discard the screen’s configuration and use the
previous settings.
8 Continue to Selecting Time-of-Day Synchronization.
4.3.5.2 Selecting Time-of-Day Synchronization
Note: To use this procedure, NTP servers must already be configured, as
described in Configuring Time-of-Day Synchronization.
9 Do the following to navigate to any of the screens for system management.
a Select the System management area.
b Then select the System configuration area.
o to Table
of Contents
❖ The System Screen for General Settings is displayed (Figure 4-18).
Figure 4-18. System Screen for General Settings
Note: Time-of-day Time Synchronization parameters are listed in the
lower half of the screen (detail in Figure 4-19). These parameters are listed
regardless of the heading (General Settings, Logging, or Language and
Style) in the upper portion of the System Screen.
Page 15

Configuring General Settings for the EN-4000 Page 4-15
G
Figure 4-19. System Screen, Time Synchr onization Set t ings
10 Consult your network administrator to determine whether the EN-4000 will
receive time-of-day synchro nization (substep b) or will provide that
synchronization (substep a).
a If the EN-4000 will provide the time of day, select the box to Provide NTP
Server.
b In most cases, the EN-4000 will receive the time of day. In those cases:
i Select the box to Enable NTP Client.
ii Then enter the name of the first NTP server the EN-4000 will look for.
o to Table
of Contents
iii In boxes below the principal NTP server field, enter names of additional
NTP servers, i n the order the EN-4000 will use.
iv Select the box to the right of each field for an NTP server to activate or
inactivate that NTP server.
11 When you have selected your preferences for the parameters in this
procedure, select the Save & Apply button.
❖ The changes are saved and are used immediately.
4.3.6 Overriding the MAC Information
You can override some MAC information.
1 Select Network, MAC Device Info Overrides.
❖ The MAC Device Overrides Initial Screen is displayed (Figure 4-20).
Figure 4-20. MAC Device Overrides Initial Screen
2 Click on the Add button.
Page 16

Page 4-16 EN-4000™ Reference Manual, Document 4
G
❖ Fields are opened for a MAC device, as shown in the MAC Device Overrides
Entry Screen (Figure 4-21).
Figure 4-21. MAC Device Overrides Entry Screen
o to Table
of Contents
3 Enter values in the fields shown to override MAC information sent by the
EN-4000.
4 Then do one of the following:
a If you wish to configure overrides for another MAC device, return to step 2.
b When you have finished configuring overrides, do one of the following:
i If you wish to save the configuration and use it immediately, select Save
and Apply.
ii If you wish to save the configuration, but not to use it until the EN-4000 is
restarted , select Save.
iii If you wish to discard the configuration, select Reset.
4.4 Configuration for the Network
4.4.1 DHCP and DNS
Y ou can configure the EN-4000’ s use of the Dynamic Host Configuration Protocol
(DHCP) and the Domain Name System (DNS). Confer with your network
administrator to determine values for fields in these configuration screens.
1 On any EN-4000 management system screen, sele ct the Network tab. Then
select the DHCP and DNS tab. (And, if necessary, select the General
Settings tab.)
❖ The browser displays the DHCP and DNS General Settings Screen
(Figure 4-22) for configuration.
Page 17

Configuring General Settings for the EN-4000 Page 4-17
G
Figure 4-22. DHCP and DNS General Sett ings Screen
o to Table
of Contents
2 When you have finished c onfiguring the fields on this screen, select the Save
button.
3 Then select the tab for Resolv and Hosts Files.
❖ The DHCP and DNS Resolv and Hosts Files Screen is displayed
(Figure 4-23) for configuration.
Page 18

Page 4-18 EN-4000™ Reference Manual, Document 4
G
Figure 4-23. DHCP and DNS Resolv and Hosts Files Screen
o to Table
of Contents
4 When you have finished c onfiguring the fields on this screen, select the Save
button.
5 Then select the tab for TFTP Settings.
❖ The DHCP and DNS TFTP Settings Screen is displayed (Figure 4-24) for
configuration.
Figure 4-24. DHCP and DNS TFTP Settings Screen
6 When you have finished c onfiguring the fields on this screen, select the Save
button.
Page 19

Configuring General Settings for the EN-4000 Page 4-19
G
7 Then select the tab for Advanced Settings.
❖ The DHCP and DNS Advanced Settings Screen is displayed (Figure 4-25)
for configuration.
Figure 4-25. DHCP and DNS Advanced Settings Screen
o to Table
of Contents
8 When you have finished configuring the fields on this screen, do one of the
following:
a If you wish to save the configuration and use it immediately, select Save and
Apply.
b If you wish to save the configuration, but not to use it until the EN-4000 is
restarted , select Save.
c If you wish to discard the configuration, select Reset.
4.4.2 Network Hosts
1 T o configure names for host device s (in the private network and in the public
network), select Network, Hostnames.
❖ The Network Host Names Screen is displayed (Figure 4-26).
Page 20

Page 4-20 EN-4000™ Reference Manual, Document 4
G
Figure 4-26. Network Host Names Screen
2 To add a host name, click on the Add button.
❖ An entry row is added to the screen, as shown in the Network Host Names
Add Screen (Figure 4-27).
Figure 4-27. Network Host Names Add Screen
o to Table
of Contents
3 In the Hostname field, type a name for the host device.
4 In the IP Address field, type the host device’s IP address.
5 Then do one of the following:
a If you want to add another host device to the list, return to step 2.
b If you have finished configuring host devices, do one of the following:
i If you wish to save the configuration and use it immediately, select Save
and Apply.
ii If you wish to save the configuration, but not to use it until the EN-4000 is
restarted , select Save.
iii If you wish to discard the configuration, select Reset.
4.4.3 Routing
Configure the routing screens with settings determined by your network
administrator.
1 To cre ate a static routing table, select Network, Static Routes.
❖ The Static Routes Configuration Screen is displayed (Figure 4-28).
Page 21

Configuring General Settings for the EN-4000 Page 4-21
G
Figure 4-28. Stat ic R outes Configurat ion Screen
2 Select the Add button under the Interface headings for IPv4 or for IPv6, as
appropriate for your network. (The example uses IP version 4.)
❖ The Static Routes Table is displayed (Figure 4-29).
o to Table
of Contents
Figure 4-29. Static Routes Table
3 When you have finished configuring this screen, select the Save & Apply
button.
❖ The Static Routes Configuration Screen is redisplayed (Figure 4-28).
4 On that screen, do one of the following :
a If you wish to save the configuration and use it immediately, select Save and
Apply.
b If you wish to save the configuration, but not to use it until the EN-4000 is
restarted , select Save.
c If you wish to discard the configuration, select Reset.
Page 22

Page 4-22 EN-4000™ Reference Manual, Document 4
G
4.4.4 Firewall Configuration
Get all firewall configuration settings from your network administrator.
1 Select the Network tab. Then select the Firewall tab. If necessary, select
the General Settings tab.
❖ The Firewall General Settings Screen is displayed (Figure 4-30).
Figure 4-30. Firewall General Settings Screen
o to Table
of Contents
2 After configuring the fields on the screen, select the Save & Apply button.
Then select the Add button.
❖ The Firewall General Settings Screen to Add Record is displayed
(Figure 4-31).
Page 23

Configuring General Settings for the EN-4000 Page 4-23
G
Figure 4-31. Firewall General Settings Screen to Add Record
o to Table
of Contents
3 After configuring the fields on the screen, select the Save & Apply button.
Then select the tab for Port Forwards.
❖ The Firewall Port Forwards Screen is displayed (Figure 4-32).
Figure 4-32. Firewall Port Forwards Screen
4 After configuring the fields on the screen, select the Save & Apply button.
Then select the tab for Traffic Rules.
❖ The Firewall Traffic Rules Screen is displayed (Figure 4-33).
Page 24

Page 4-24 EN-4000™ Reference Manual, Document 4
G
Figure 4-33. Firewall Traffic Rules Screen
o to Table
of Contents
5 After configuring the fields on the screen, select the Save & Apply button.
Then select the tab for Custom Rules.
❖ The Firewall Custom Rules Screen is displayed (Figure 4-34).
Page 25

Configuring General Settings for the EN-4000 Page 4-25
G
Figure 4-34. Firewall Custom Rules Screen
o to Table
of Contents
6 After listing custom rules for the firewall, do one of the following:
a If you wish to save the configuration and use it immediately, select Save and
Apply.
b If you wish to save the configuration, but not to use it until the EN-4000 is
restarted , select Save.
c If you wish to discard the configuration, select Reset.
Page 26

Page 4-26 EN-4000™ Reference Manual, Document 4
G
4.4.5 Configuring Traffic Priority
Use the fields in Figure 4-35 to configure Quality of Service (QoS) settings for
network traffic. Consult your network administrator for the settings to use.
Figure 4-35. Quality of Service Configuration Screen
o to Table
of Contents
After configurin g the fields on the screen, do one of the following:
a If you wish to save the configuration and use it immediately, select Save and
Apply.
b If you wish to save the configuration, but not to use it until the EN-4000 is
restarted, select Save.
c If you wish to discard the configuration, select Reset.
 Loading...