

Page 1
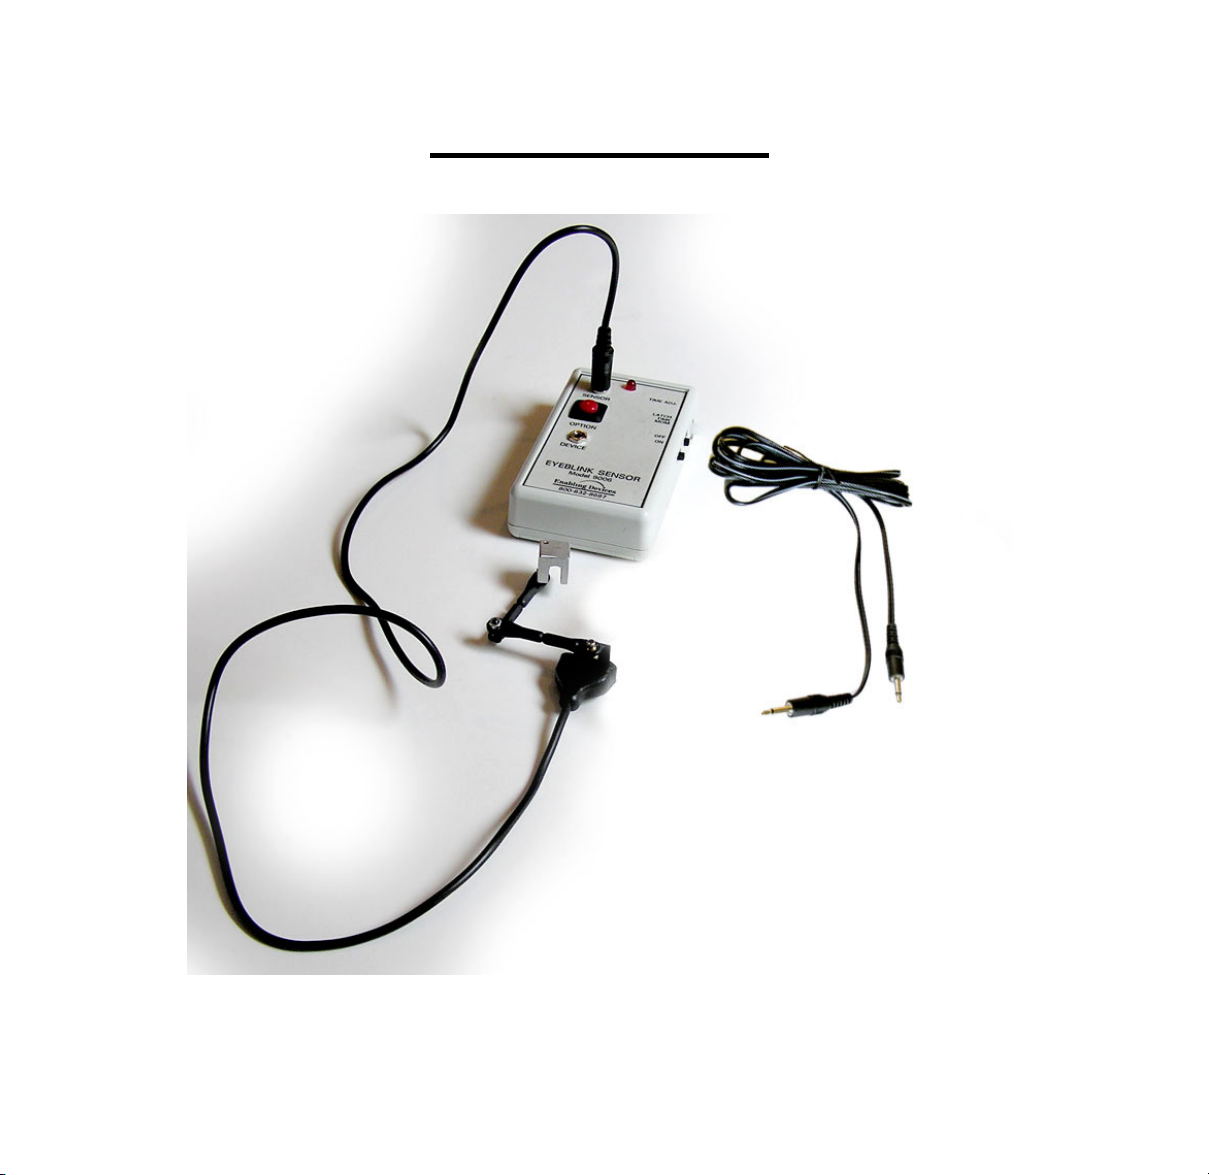
Eye Blink Switch
Catalog No. 9008
Page 2

Easy to position with unique mounting! Just aiming the sensor at the eye will allow the user to
control communication devices, toys, or computers. Special controls give momentary, timed, or
latched output. Special internal circuitry can be set to activate with each eye blink or with every
double eye blink to ignore normal eye blinking. An adjustable holder easily mounts to most
eyeglass frames or head bands. (Eyeglasses not included.)
Size: 4½" x 2½" x 1". Requires 1 9-V Battery.
Operation:
1. The Eye Blink switch requires one 9V battery. Alkaline batteries are recommended because they last
longer. Do not use rechargeable batteries because they supply lower voltage and the unit may not
perform as well.
2. To access the battery compartment, you will need to slide the cover off on the back of the unit. Install
the 9v battery into the compartment. Then simply slide the cover back on.
3. Next you will need to select the switch mode; there are three choices of operation. See the
descriptions below.
AVAILABLE MODES:
MOM:
In this mode, the unit operates as a momentary switch. The device connected activates each time the eye blinks. Each eye blink
will make single switch activation. (Only in standard eye blink mode, see two purposeful eye blink mode for more options).
TIME:
In this Mode, the unit operates as a timed switch. The device runs for a set amount of time (1-120 seconds) when the switch is
activated. Adjusting the timer knob clockwise increases the run time, counterclockwise decreases.
LATCH:
In this mode, the unit operates as an On/Off Switch. The connected device goes On with the first eye blink or two purposeful eye
blinks and stays On until the second eye blink or two purposeful eye blinks.
Important Notes:
For most uses the two purposeful eye blink mode setting will work best, this mode will help prevent any false activation of
you device. See below for setup directions.
4. Plug the end of the sensor’s cord into the jack labeled SENSOR Make sure you have a tight fit with
no gaps. Next plug one end of the included double ended male to male cord into the jack labeled
DEVICE. The other end will plug into your switch adapted device. (See photo No.1)
Page No.1
Page 3
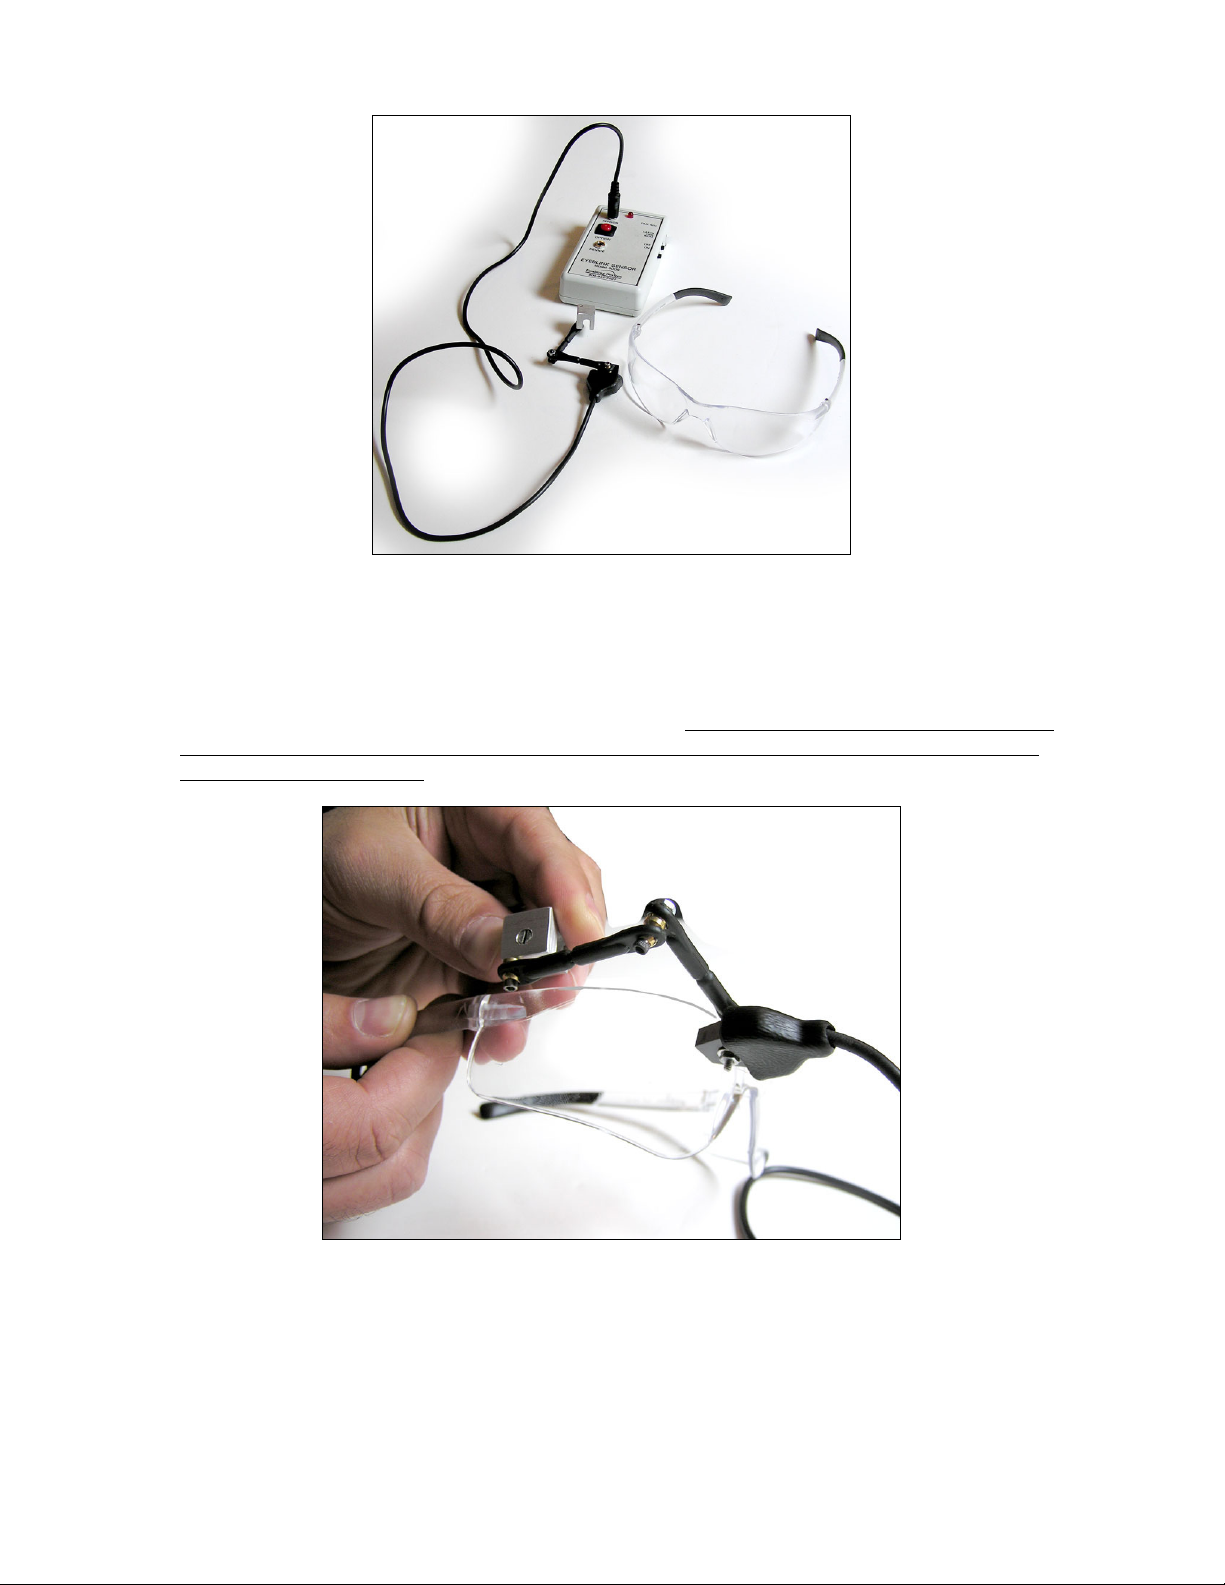
Photo No.1
5. Attach the sensor mount to your glasses with a small flathead screwdriver. (See photos No.2, 3, & 4).
Once the mount is attached, the sensor needs to be positioned so it is aiming straight inline with the
user’s eye. (See photos No.5 & 6.) If the user does not need the use of glasses, we recommend
removing the lens from the side where the sensor is mounted. This will give optimum performance
from the sensor and minimum adjustments of the sensor. (An Eyeglass lens reflects light which can
sometimes cause interference with the sensor; this is why we recommend removing the lens if the
glasses are not need to see).
Photo No.2
Page No.2
Page 4
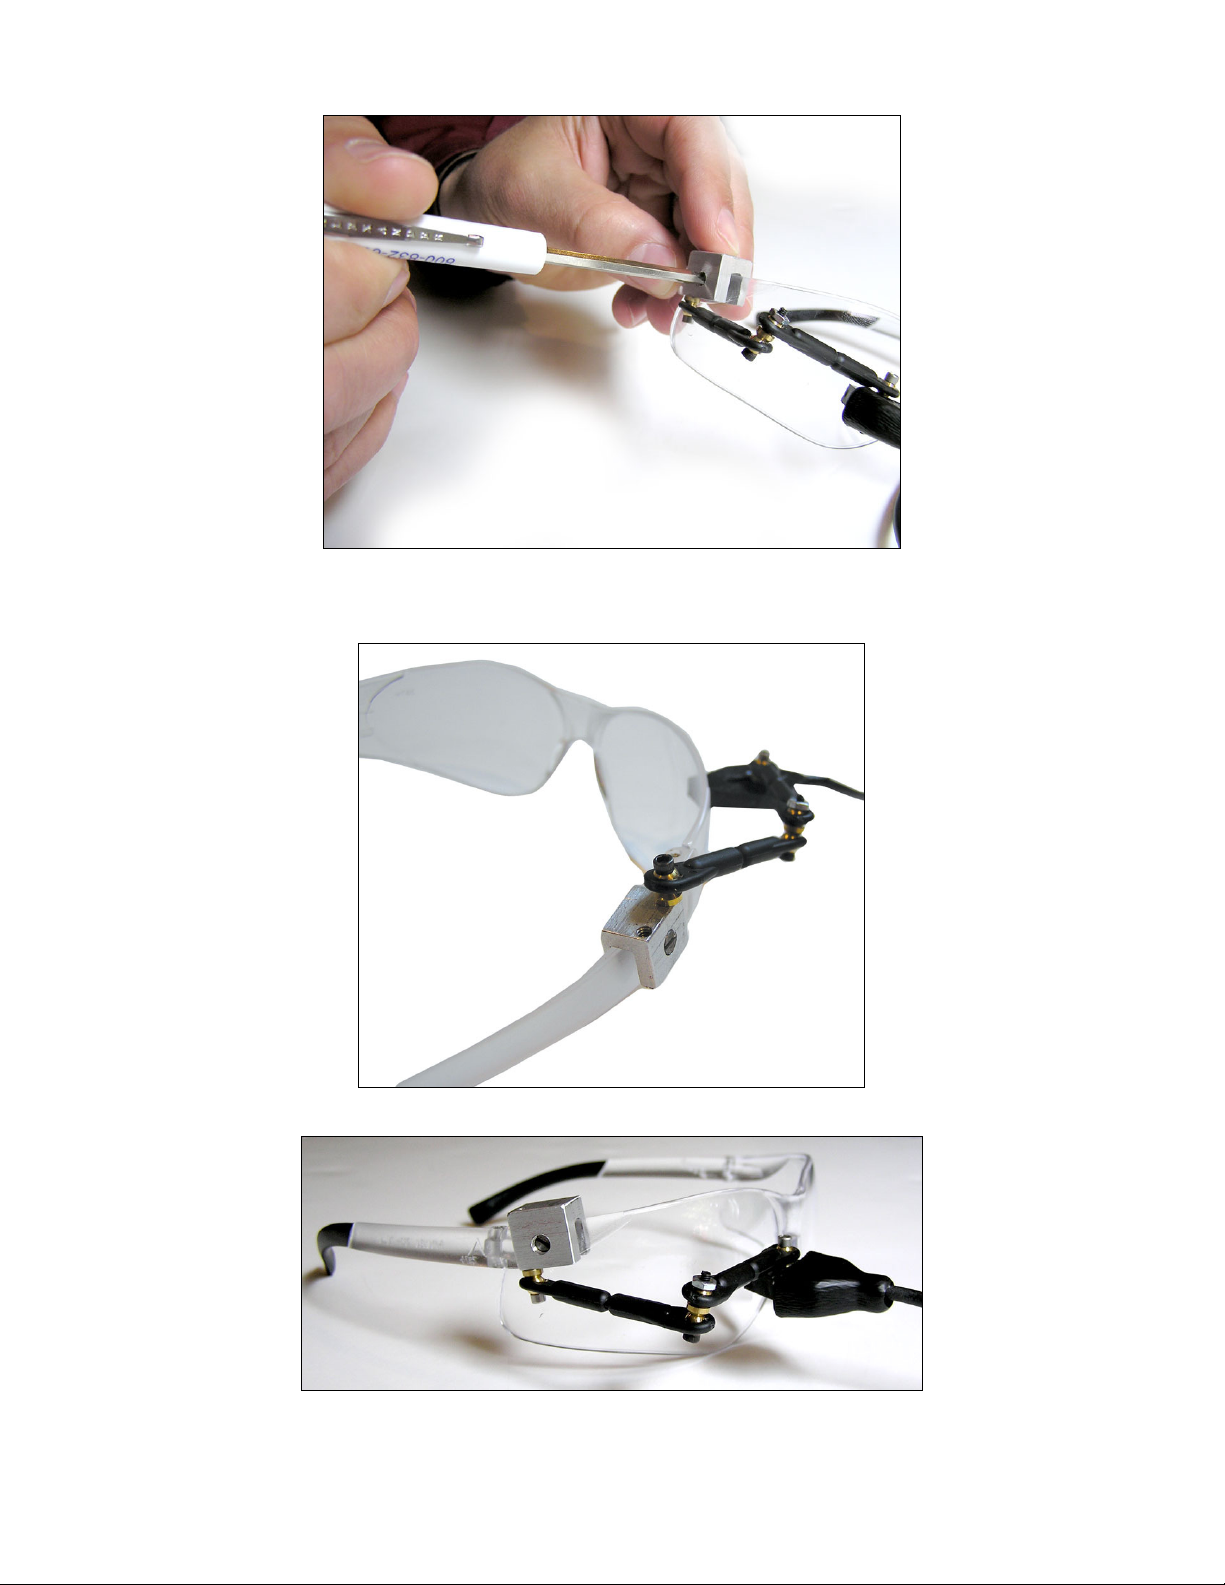
Photo No.3
Photo No.4
Photo No. 5
Page No.3
Page 5

Important Notes:
For most uses the two purposeful eye blink mode setting will work best, this mode will help prevent any false activation of
you device. See below for setup directions.
6. To turn the unit ON, set the ON/OFF switch to ON, this is the standard mode setting. Each time the user blinks it will make
switch activation.
Two purposeful eye blink mode option setup:
With the ON/OFF switch set to OFF, press and hold the OPTION button. Next turn the ON/OFF switch to ON while still holding
the OPTION button down. Wait until the RED LED light blinks twice, and then release the OPTION button. The unit is now set
for the two purposeful blink mode. In this mode the user must blink once, then pause for no more then a half second and then
blink again within three seconds to make switch activation. The blinks should be slow blinks. Two fast blinks will work
intermittently.
Please Note: Each time the Eye Blink is shut OFF; it re-sets to the default single blink activation. To use the two blink
setting you must follow the OPTION button each time the unit is first turned ON.
Cleaning Information:
• You can clean the SENSOR with a clean soft cloth “ONLY”, do not use any type of cleaner on the SENSOR, doing so will
damage the SENSOR and void your warrantee.
• The control box can be wiped clean with any household multi-purpose cleaner and disinfectant.
Do not submerge the unit, as it will damage the electrical components.
Do not use abrasive cleaners, as they will scratch the surface of the unit.
Troubleshooting:
If the unit is not functioning as it is supposed to:
• Check the 9V battery. Make sure it is fresh and installed according to proper polarity.
• Make sure that the sensor positioned inline with the user’s eye and that the eye glass lens and SENSOR are clean. If not,
you may get “false activations’’ or none at all.
• Try angling the sensor upward or downward.
• Make sure that the all connections are tight, with no gaps.
• Try your device with another switch to rule out the Eye Blink the source of the problem.
• If you have tried ALL of the above contact our Tech Support Department at ext. 20.
 Loading...