

Page 1

CRUX II/BTGPS
USER GUIDE
Model:D1598
0
Page 2

Federal Communication Commission Interference Statement
This equipment has been tested and found to comply with the limits for a Class B
digital device, pursuant to Part 15 of the FCC Rules. These limits are designed to
provide reasonable protection against harmful interference in a residential
installation. This equipment generates, uses and can radiate radio frequency
energy and, if not installed and used in accordance with the instructions, may cause
harmful interference to radio communications. However, there is no guarantee
that interference will not occur in a particular installation. If this equipment does
cause harmful interference to radio or television reception, which can be
determined by turning the equipment off and on, the user is encouraged to try to
correct the interference by one of the following measures:
-Reorient or relocate the receiving antenna.
- Increase the separation between the equipment and receiver.
- Connect the equipment into an outlet on a circuit different from that
to which the receiver is connected.
- Consult the dealer or an experienced radio/TV technician for help.
FCC Caution: To assure continued compliance, (example - use only shielded
interface cables when connecting to computer or peripheral devices). Any changes
or modifications not expressly approved by the party responsible for compliance
could void the user's authority to operate this equipment.
This device complies with Part 15 of the FCC Rules. Operation is subject to the
following two conditions: (1) This device may not cause harmful interference, and
(2) this device must accept any interference received, including interference that
may cause undesired operation.
IMPORTANT NOTE:
FCC Radiation Exposure Statement:
This equipment complies with FCC radiation exposure limits set forth for an
uncontrolled environment. This equipment should be installed and operated with
minimum distance 20cm between the radiator & your body.
This transmitter must not be co-located or operating in conjunction with any other
antenna or transmitter.
1
Page 3

Hardware Configuration
When your eyes one our BTGPS, you will find a
switch, an external antenna MCX connector,
3 LEDs and an AC plug-in.
Their functions are
z Switch
To turn on BTGPS.
To turn off BTGPS.
z External antenna MCX Connector
when you have an external GPS active antenna
with MCX male connector, you can plug it in.
Then, the BTGPS will receive GPS satellite signal
2
Page 4

from this external active antenna, not the built-in
antenna. Of course, if you don’t have an external
antenna, BTGPS will use the built-in one. Both
will be O.K.
z AC plug-in
when you want to charge BTGPS, you can use our
AC adapter or iPaq-compatible AC adapter. Be
aware that adapter rating is 5V, 1A.
z LEDs
Blue LED
If there is no other bluetooth device
connecting with it, it should be blinking.
Once there is a bluetooth connection, it will keep
led always on.
Green LED
If GPS does not fix your position yet, it
will be blinking. Once fixed, it will keep
led on.
3
Page 5

Yellow/Red LED
Red: means batter is critical low; you
should charge battery right away.
Yellow: means the batter still need charging, not
reaching full state yet.
LED off: means the battery is full.
4
Page 6
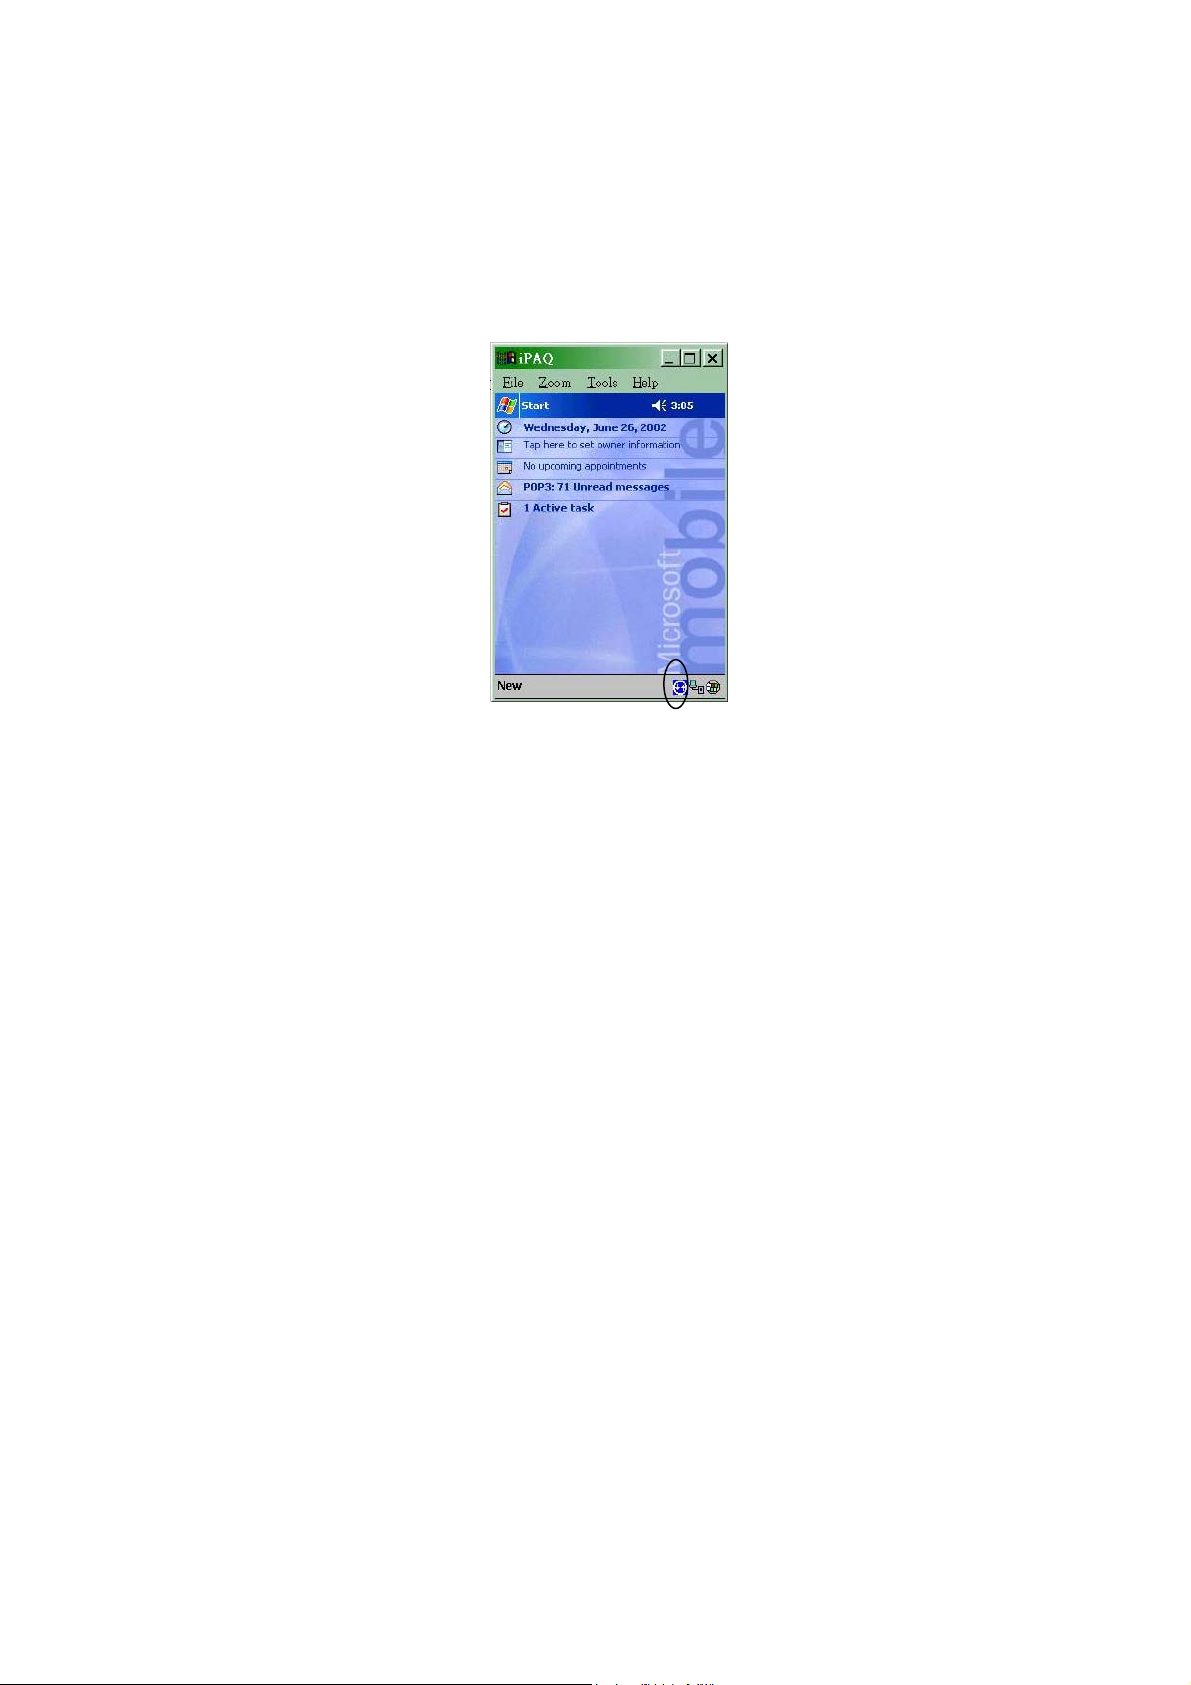
Installation Guide
Step1 – Turn on your iPaq 3870, and BTGPS.
Step2 – From your iPaq, in the “Start” Page, you will
see the BlueTooth icon shown at the tray. Click it; you
will see a menu pop-up.
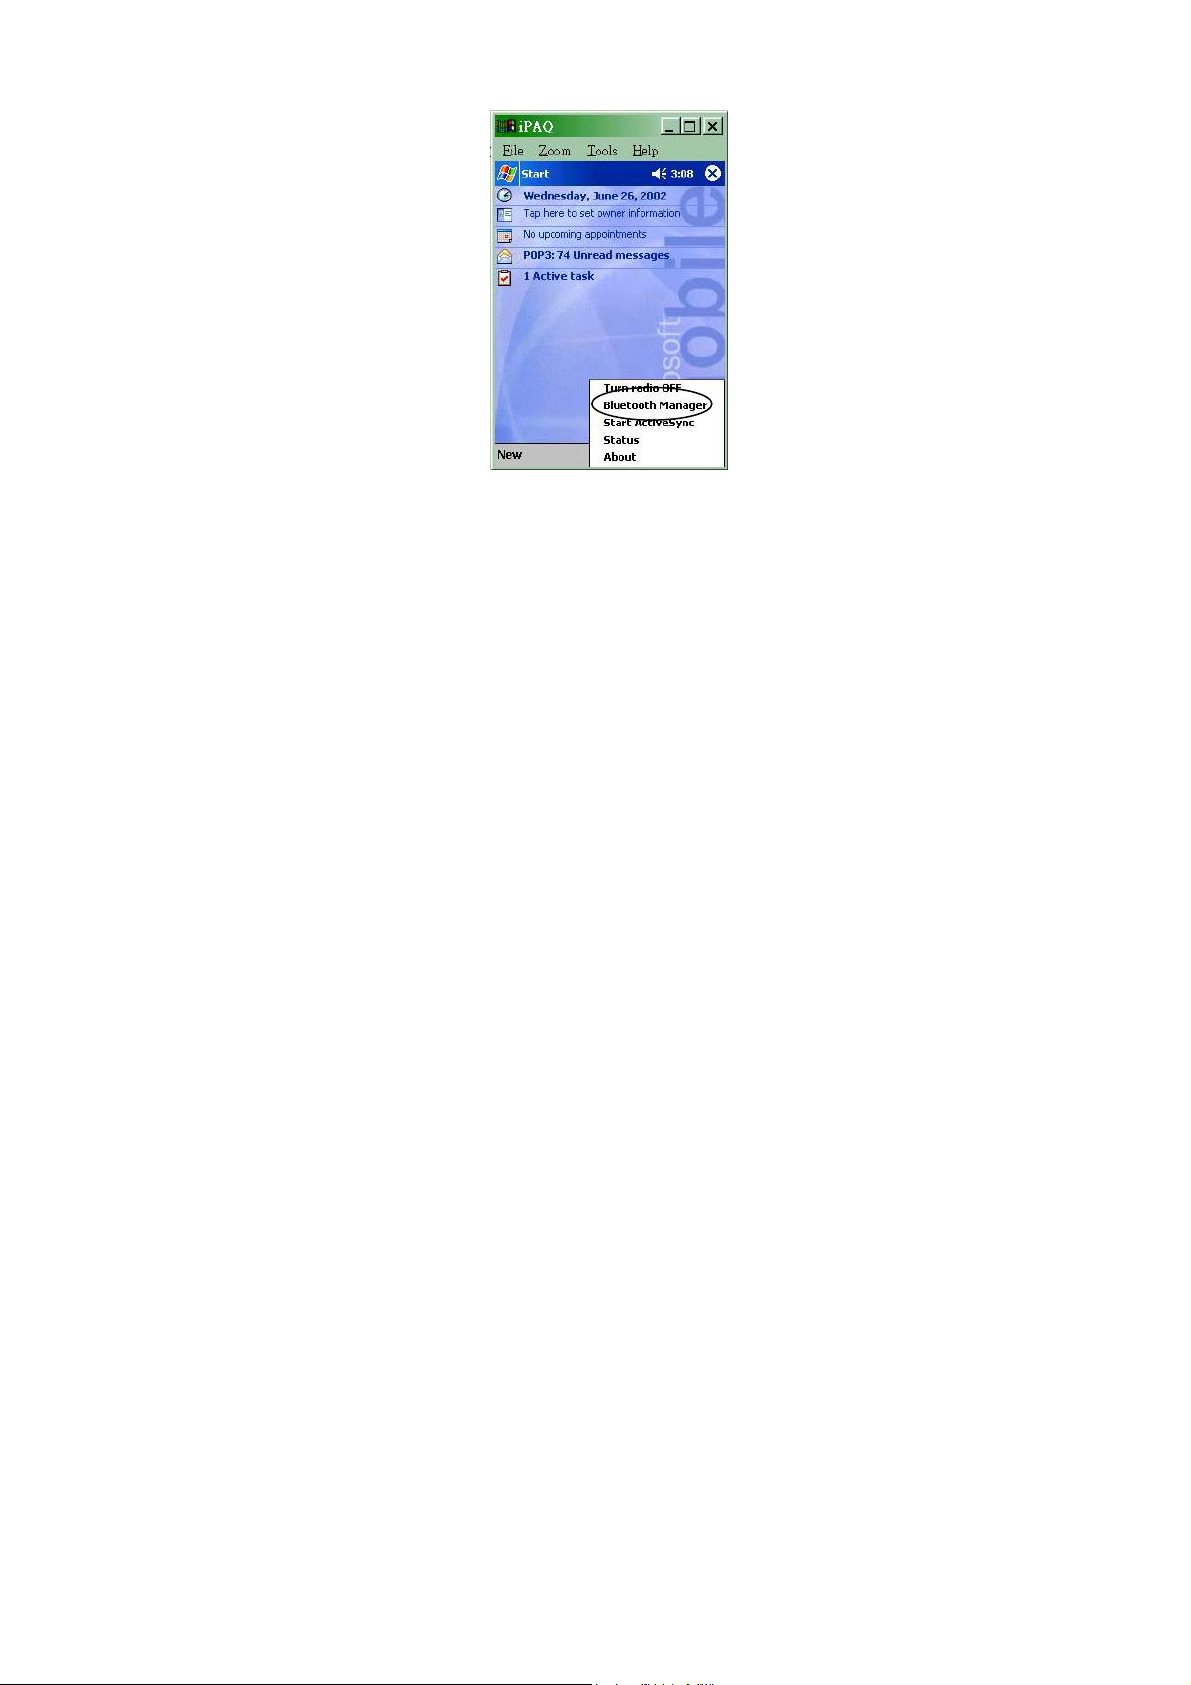
Step3 –Then clicks on the item of “Bluetooth
Manager”.
5
Page 7
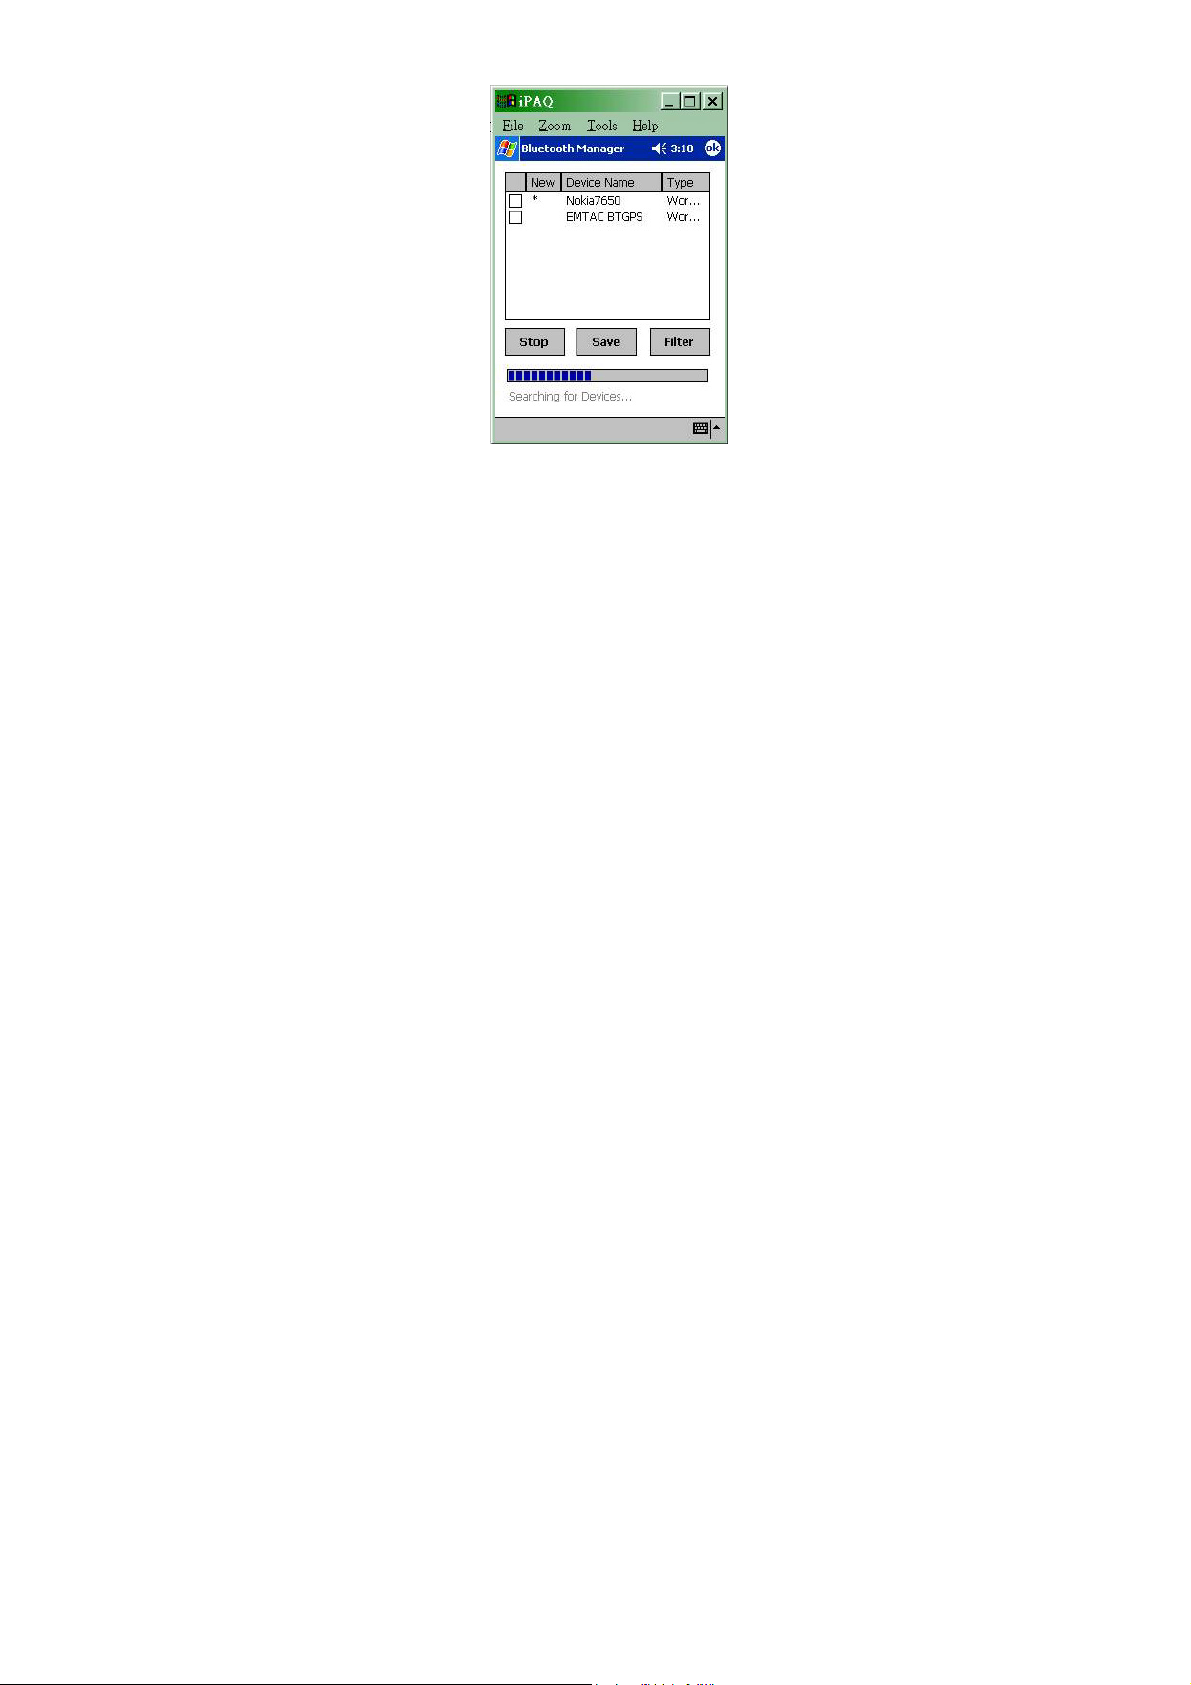
Step4 – You will see the window of "Bluetooth
Manager". Clicks on the item of “Search”, at the
bottom of window. Your iPaq will start to search all
bluetooth devices it can find.
6
Page 8
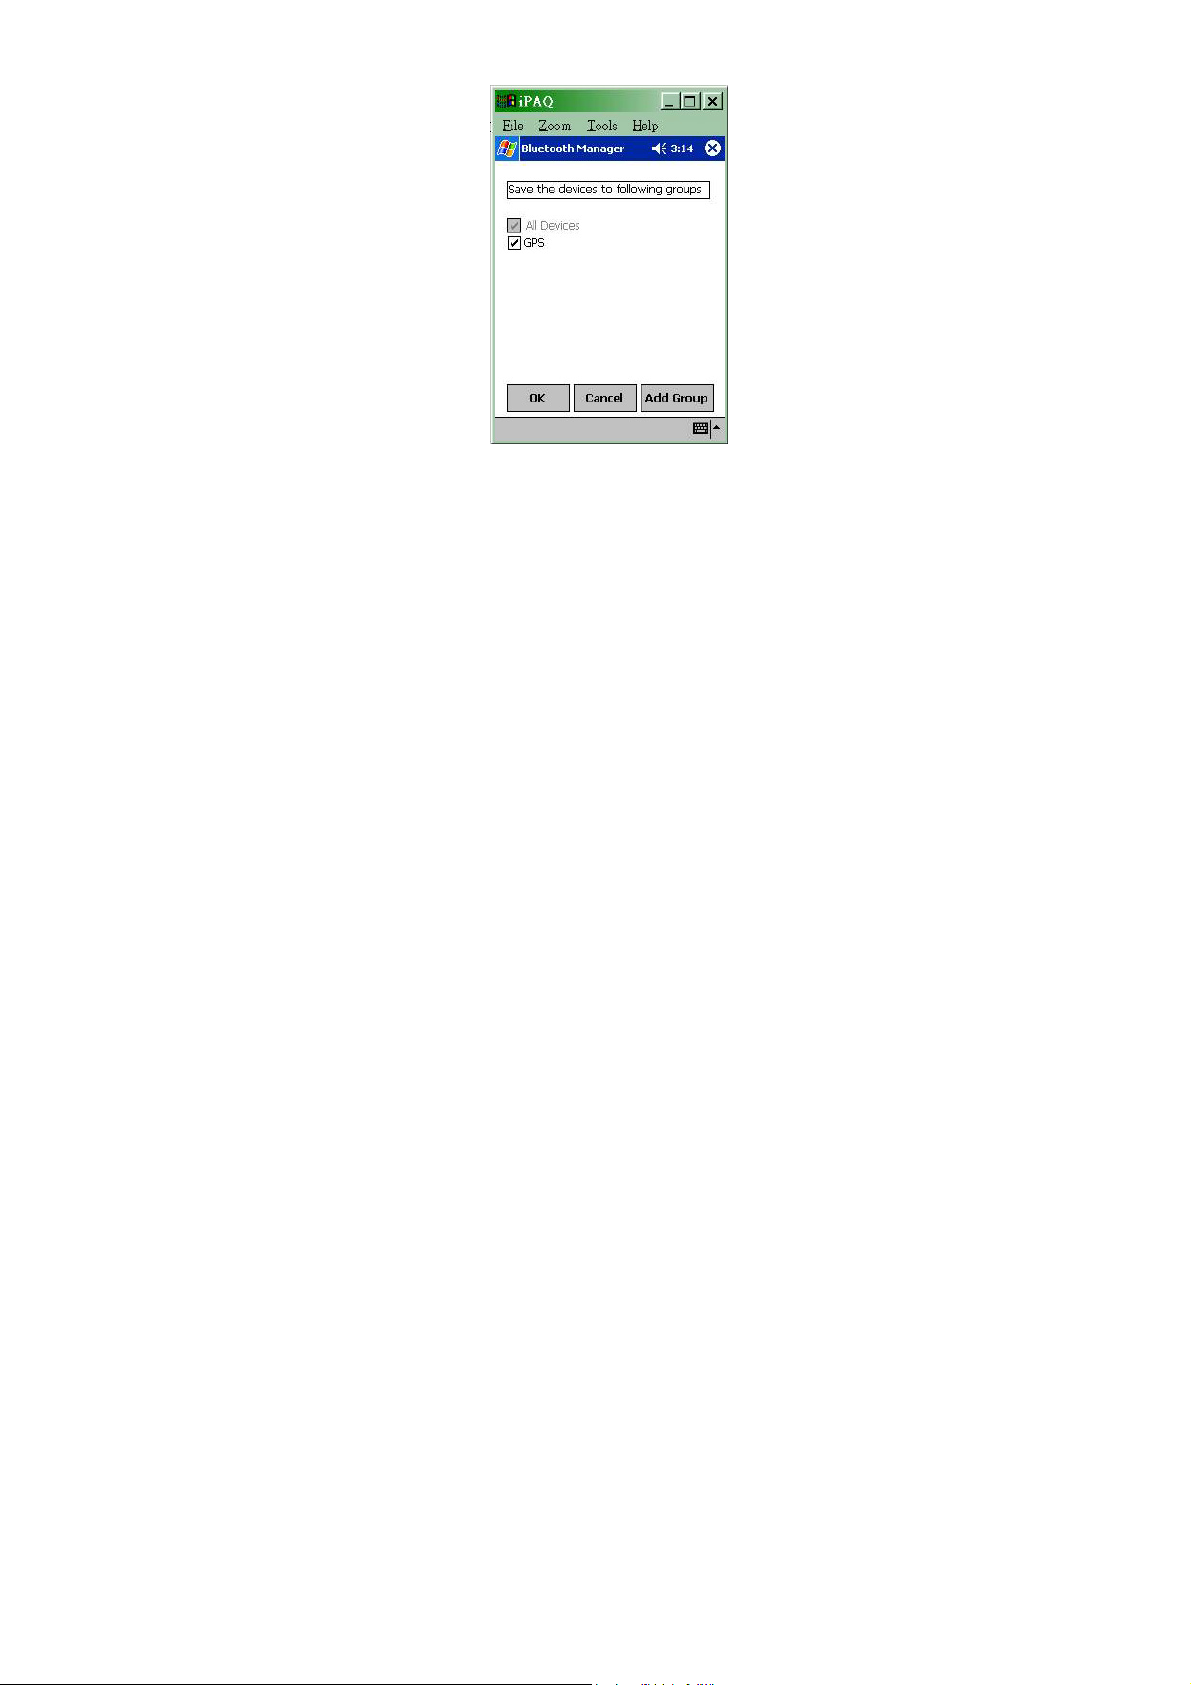
Step5 – The “EMTAC BTGPS” is what we want, check
it and save it.
Step6 – You can save it in the default folder, “All
Devices” or you can create a new folder your own. Like
here, we save it in the folder of “GPS”.
7
Page 9
Step7 – After you press “OK”, you will be back to the
windows of “Bluetooth Manager”, and you will find an
icon of “EMTAC BTGPS” shown there.
8
Page 10

Step8 – Clicks on the icon, you will some settings of it.
Then You should click on “Actions”->”Connect
to Serial Port”, to make your iPaq connect to
EMTAC BTGPS by serial profile.
Step9 – After few seconds, you can press “OK” to go
back to “Bluetooth Manager”, you will see the icon
with an extra sign,
9
Page 11

It means all set, then you can run you digital map
program. But do remember to change the COM port
setting of GPS source of your program to COM 8.
After that, your digital map can receive the GPS signal
from our BTGPS.
Even though, you may use another kind of machine,
but the basic configuration steps are almost all the
same. You must
1. Pair our BTGPS.
2.
Make a serial port connection.
3.
Open the right COM port for your application
10
 Loading...