

Page 1
Education Management Solutions, LLC
436 Creamery Way, Suite 300
Exton, PA 19341
Phone: 877.EMS.5050 (877.367.5050)
www.SIMULATIONiQ.com
SIMULATIONiQ
Portable
™
User Guide
Page 2

Contents
SIMULATIONiQ™ Portable Camera Startup, WiFi Access Connection, and Login Information ............. 4
Camera Startup .......................................................................................................................................... 4
Login for the Windows Account .................................................................................................................. 4
Login for SIMULATIONiQTM Portable Software ........................................................................................... 5
Camera Controls ........................................................................................................................................ 5
Matrox Integration ................................................................................................................................. 6
Sync SIMULATIONiQ Portable with SIMULATIONiQ Enterprise/Cloud or SimBROWSER .................. 7
Synchronization .................................................................................................................................... 8
Record a Session .................................................................................................................................. 9
Bookmark Video .................................................................................................................................. 10
Access Sessions ................................................................................................................................. 11
Playback Video ................................................................................................................................... 12
View Bookmarks ................................................................................................................................. 13
Manually Upload Videos ..................................................................................................................... 14
Export Video ....................................................................................................................................... 16
Search other SIMULATIONiQ Portable computers for Live/Recorded Video ...................................... 17
Locate Recorded and Uploaded Videos in SIMULATIONiQ Enterprise/Cloud .................................... 18
SIMULATIONiQ™ SimBrowser ............................................................................................................ 19
Introduction ...................................................................................................................................... 19
Recommended computer specifications to access SimBrowser: .................................................... 19
Initial Setup ...................................................................................................................................... 19
Welcome email ................................................................................................ ................................ 19
Login ............................................................................................................................................... 20
Future Login .................................................................................................................................... 20
Dashboard ....................................................................................................................................... 21
Live Video ........................................................................................................................................ 21
Playback & Bookmark Video ........................................................................................................... 21
Share ............................................................................................................................................... 22
New User ......................................................................................................................................... 22
Education Management Solutions, LLC ◊ www.SIMULATIONiQ.com
©2018 Confidential Information – Not for disclosure without authorization from Education Management Solutions, LLC
Page 2 of 22
Page 3

Copyright © 2018
Education Management Solutions, LLC
All rights reserved.
No part of this publication may be reproduced, stored in a retrieval system, or transmitted, in any form or by
any means, electronic, mechanical, photocopying, recording or otherwise, without the prior permission of the
copyright owners.
Disclaimer: The information is being provided on an “as is” basis and is subject to change. Education
Management Solutions (EMS) makes no warranties or guarantees about the accuracy, completeness, or
adequacy regarding the information provided and expressly disclaims all liability for any damages resulting
from its use.
SIMULATIONiQ™ Portable is a trademark of Education Management Solutions, LLC. All other trademarks
expressed or implied are property of their respective owners.
Education Management Solutions, LLC ◊ www.SIMULATIONiQ.com
©2018 Confidential Information – Not for disclosure without authorization from Education Management Solutions, LLC
Page 3 of 22
Page 4
Username: Portable
Password: Password1
SIMULATIONiQ
Portable User Guide
™
SIMULATIONiQ™ Portable Camera Startup, WiFi Access Connection, and Login
Information
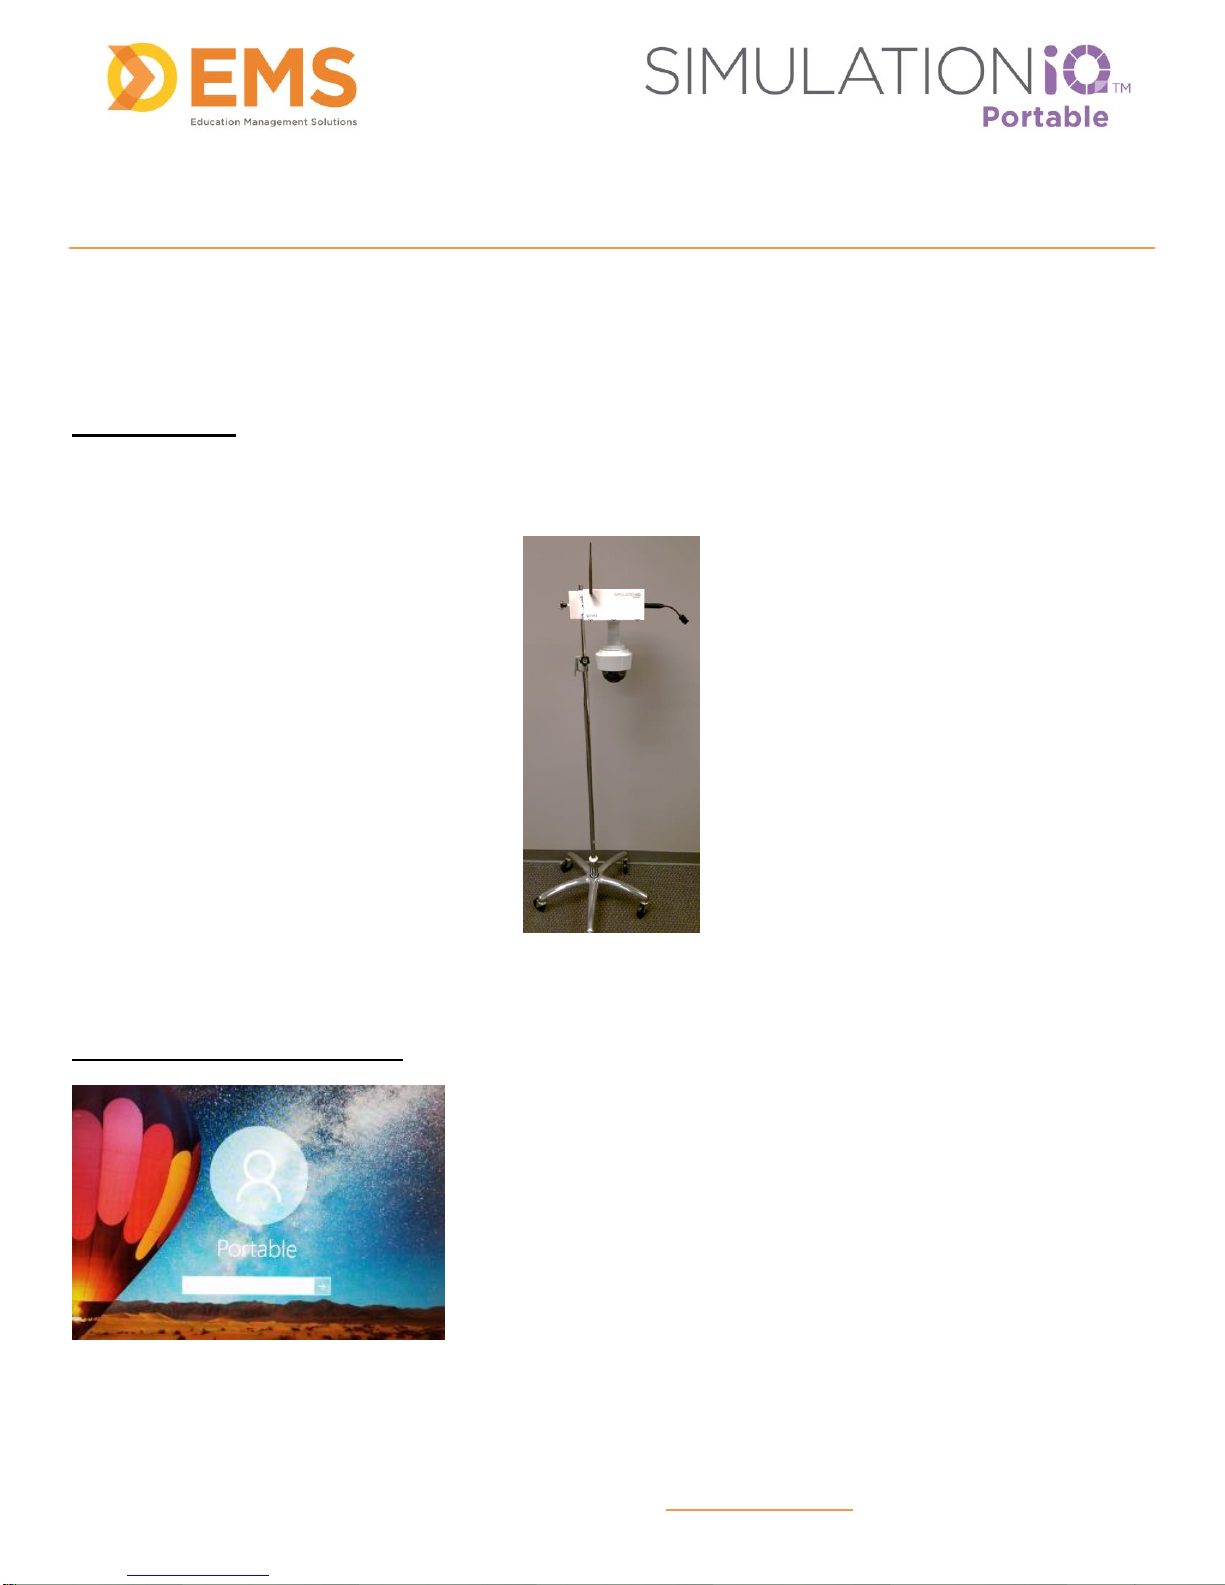
Camera Startup
1. Plug the cameras into a power outlet on the wall and position them as needed.
2. Press the power button on the SIMULATIONiQ Portable unit to turn on the computer.
Login for the Windows Account
©2018 Confidential Information – Not for disclosure without authorization from Education Management Solutions, LLC
Education Management Solutions, LLC ◊ www.SIMULATIONiQ.com
Page 4 of 22
Page 5
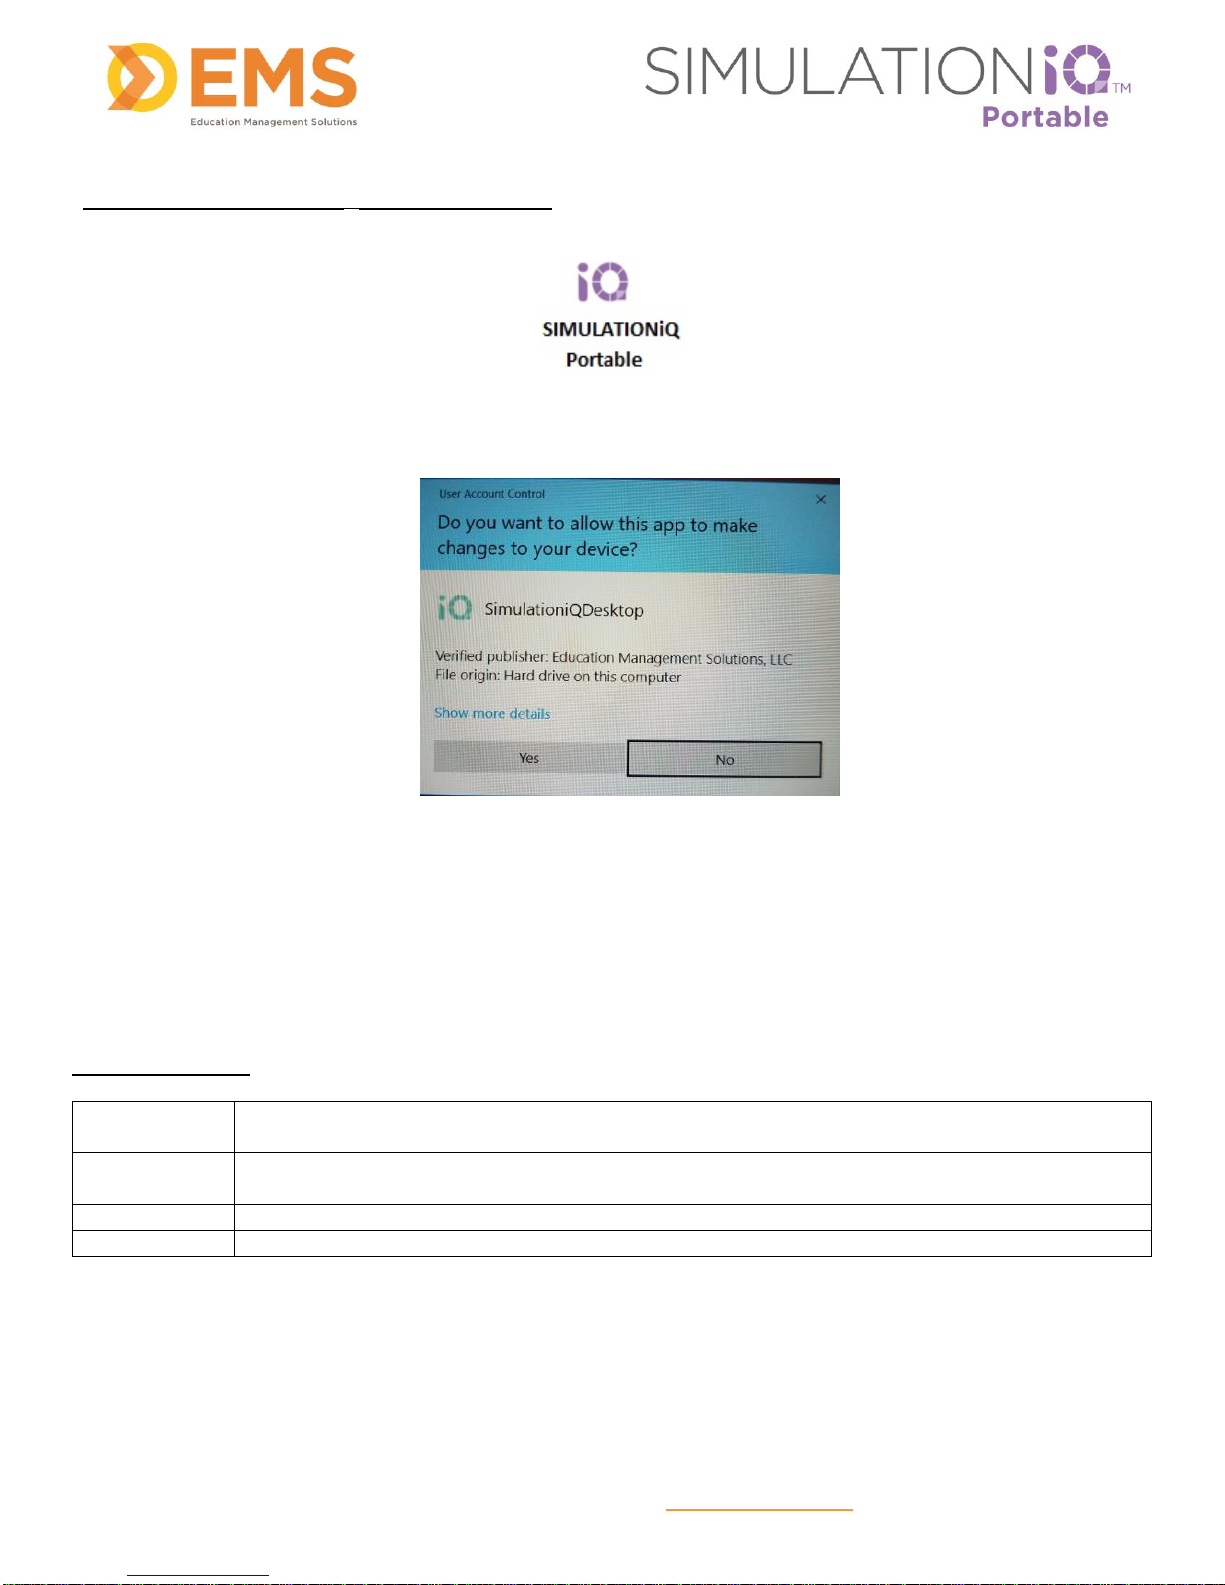
Login for SIMULATIONiQTM Portable Software
Pan
Swipe the screen left or right or use the arrow keys on the keyboard to move the camera left
or right.
Tilt
Swipe the screen up or down or use the arrow keys on the keyboard to move the camera up
or down.
Zoom In
Pinch the screen or use the Page Up button on the keyboard to zoom in.
Zoom Out
Stretch the screen or use the Page Down button on the keyboard to zoom out.
1. After both cameras display a “green” status, touch the SIMULATIONiQ Portable desktop icon to
initialize the application. The User Account Control screen appears.
2. Touch Yes.
Note: The range of the SIMULATIONiQ Portable cameras is 20 meters (64 feet) unobstructed from laptop to
camera.
Camera Controls
Education Management Solutions, LLC ◊ www.SIMULATIONiQ.com
©2018 Confidential Information – Not for disclosure without authorization from Education Management Solutions, LLC
Page 5 of 22
Page 6
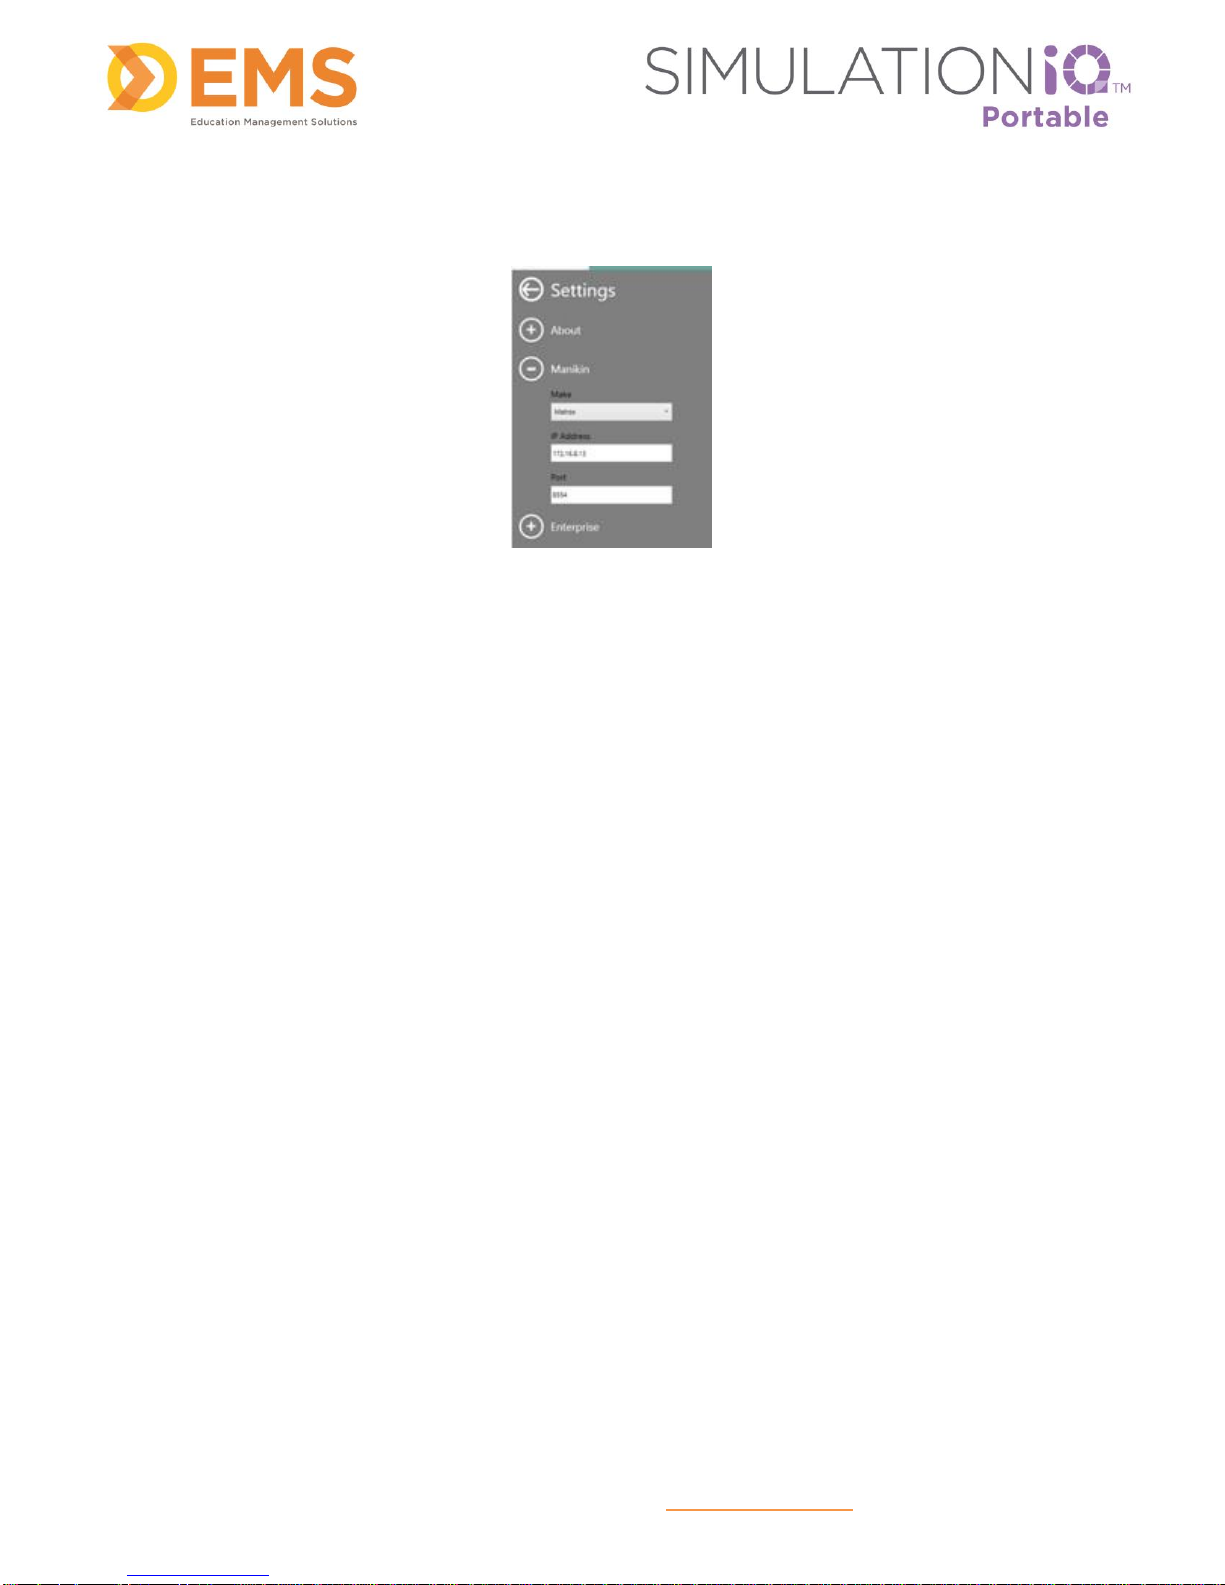
Matrox Integration
To integrate vital signs from Matrox in the upper right corner of the Mobile screen.
1. From the Mobile application, tap Settings > Manikin.
2. In the Make field, select Matrox.
3. From the Matrox Monarch HD Command Center, tap Settings > Stream.
4. Select RTSP in the Streaming section and note the following:
a. The Port number
5. From the Mobile application, enter the Port number and the IP address of the Matrox unit.
IMPORTANT! If Matrox is integrated, only two camera feeds can be enabled.
Education Management Solutions, LLC ◊ www.SIMULATIONiQ.com
©2018 Confidential Information – Not for disclosure without authorization from Education Management Solutions, LLC
Page 6 of 22
Page 7

2
3
4
5
6
Sync SIMULATIONiQ Portable with SIMULATIONiQ Enterprise/Cloud or
SimBROWSER
Complete the following steps to test the SIMULATIONiQ Enterprise or SimBROWSER connection. To make
sure all videos synchronize automatically, make sure Synchronization is on; otherwise make sure it is turned
off.
1. Touch to open the Settings area.
2. Touch the plus sign next to Enterprise to open the section. Type the website address of your
Enterprise/Cloud system in the URL field.
3. Enter a valid username and password of an administrator account from the Enterprise system.
4. Touch Test to validate the connection. After validating the connection, close the Settings area.
5. Toggle switch for having Sync function On or Off.
6. Touch the About tab. For the videos to be uploaded properly, the Portable unit name and the
Room name in your Enterprise/Cloud account must be the same. You will also find the version number
of the software currently loaded on the Portable device in the About section.
Education Management Solutions, LLC ◊ www.SIMULATIONiQ.com
©2018 Confidential Information – Not for disclosure without authorization from Education Management Solutions, LLC
Page 7 of 22
Page 8

ff
ff
Synchronization
A message in the lower left hand corner of the screen displays whether the Sync feature is turned on or off to
upload your videos.
Education Management Solutions, LLC ◊ www.SIMULATIONiQ.com
©2018 Confidential Information – Not for disclosure without authorization from Education Management Solutions, LLC
Page 8 of 22
Page 9

Record a Session
To record a session:
1. Touch the icon on the desktop to begin recording.
2. Tap and release inside the tiled camera view to toggle to a thumbnail view. Touch, hold, and release
inside the desired camera view to switch cameras.
Note: A tap minimizes the view, but a longer “hold” touch switches views.
IMPORTANT! A third camera is available for the Pluto release and up to add an additional camera feed
to the Portable display.
Education Management Solutions, LLC ◊ www.SIMULATIONiQ.com
©2018 Confidential Information – Not for disclosure without authorization from Education Management Solutions, LLC
Page 9 of 22
Page 10

Bookmark Video
While recording a session, the following view appears (sample only):
1. The Recording area appears on the screen while recording. Information and keywords can be typed in
the highlighted fields. This data will sync to the recording, which will make searching for videos easier
and will also be entered in the SIMULATIONiQ Enterprise database when the video is uploaded to the
server. Existing users appear in a drop-down menu as you type. New users can be added from here.
2. The elapsed time displays as the session is recorded.
3. Touch to create a bookmark in the recording to allow that point to be instantly found and played
during playback. Multiple bookmarks can be added to a recording, even during a playback. To rename
Bookmarks, see page 13.
4. Touch to stop recording.
Education Management Solutions, LLC ◊ www.SIMULATIONiQ.com
©2018 Confidential Information – Not for disclosure without authorization from Education Management Solutions, LLC
Page 10 of 22
Page 11
1
2
3
4
5
Home
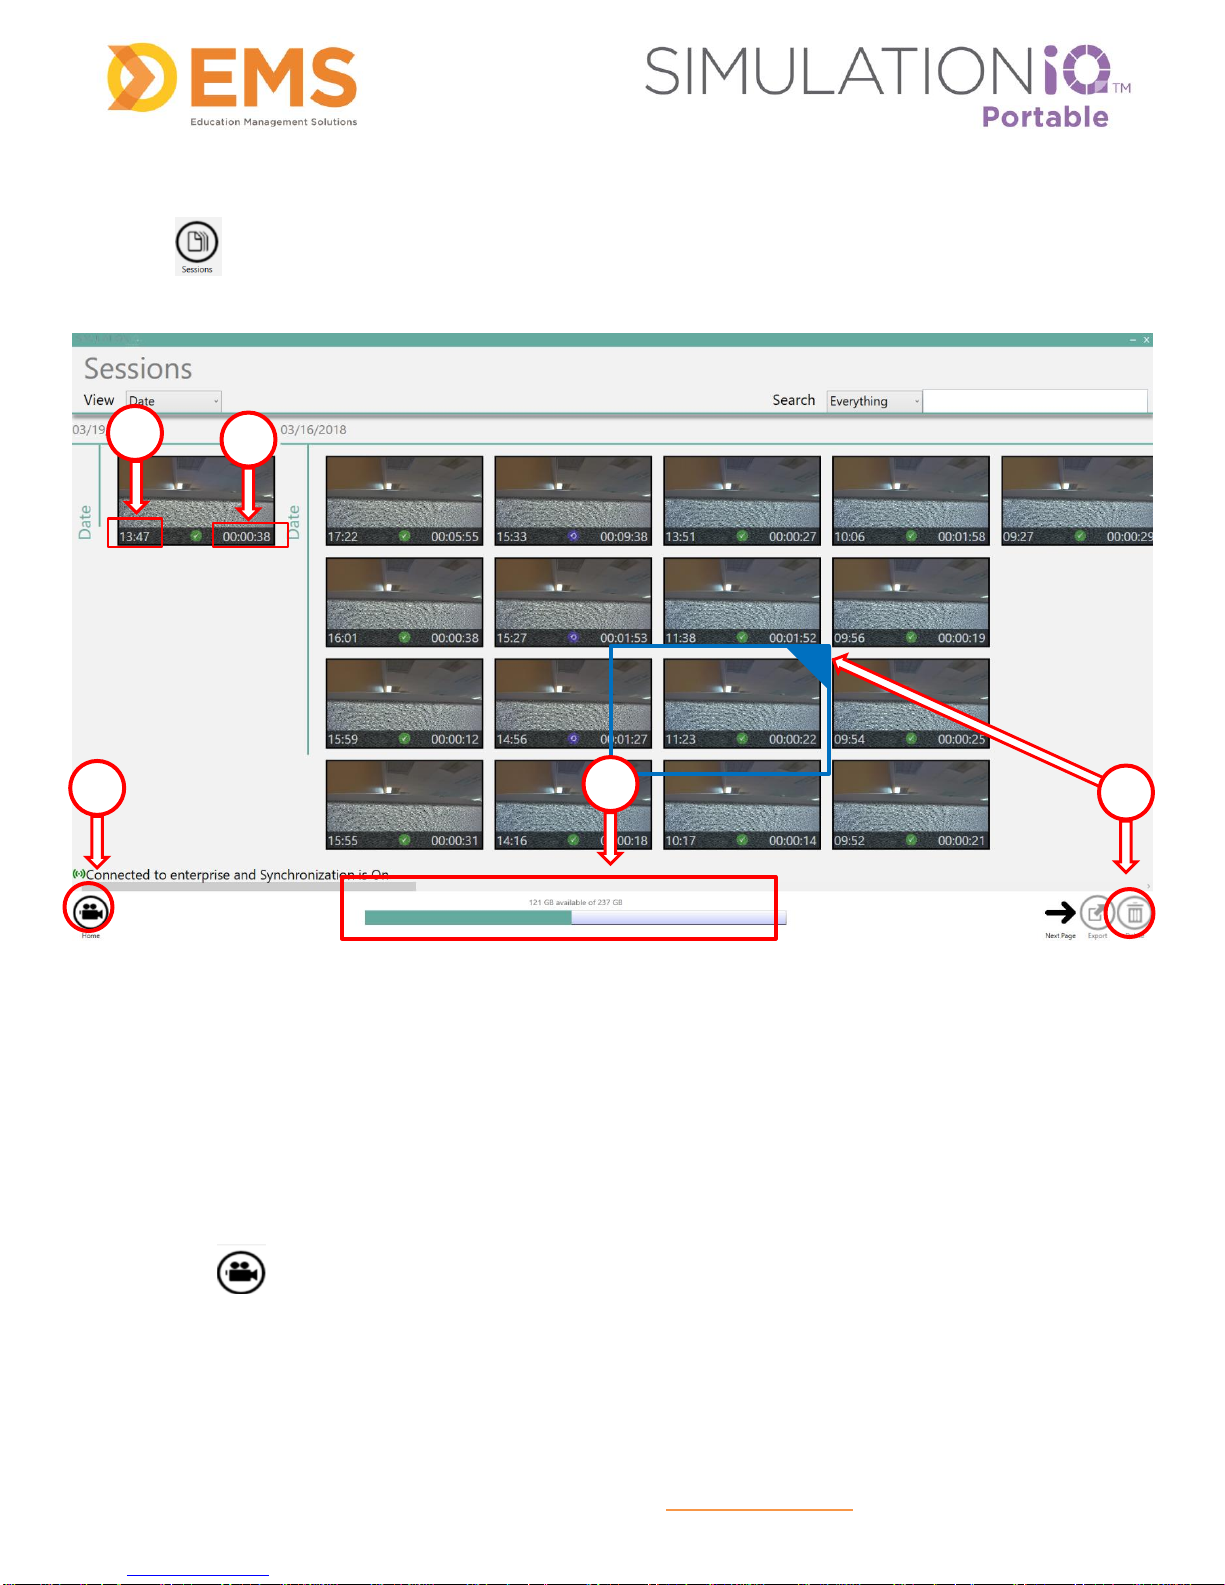
Access Sessions
Touch the icon (unavailable while recording) in the lower left corner of the Recording screen to access
the Sessions:
1. Displays the time of day of the recording.
2. Displays the length of the recording.
3. Tap and hold a video thumbnail to mark it for deletion. Then press the trash can icon in the lower right
corner to delete it. A confirmation message appears to make sure you want to delete the selected
video.
4. Displays the free recording space available on this computer (100 to 200 hours).
5. Touch to return to the recording screen.
Education Management Solutions, LLC ◊ www.SIMULATIONiQ.com
©2018 Confidential Information – Not for disclosure without authorization from Education Management Solutions, LLC
Page 11 of 22
Page 12

2
3
Note: The following icons appear in the black bar of a tile between the time and video length:
1) The green icon indicates that the video has been uploaded to the Enterprise/Cloud System.
2) The purple icon indicates that the video is still pending upload to the Enterprise/Cloud System.
Playback Video
From the Session screen, touch a session (indicated by a tile with Time of Recording and Video Length) to
view the following:
1. Touch to play video (toggles to pause).
2. Drag to fast forward or rewind the recording.
3. Drag to adjust the volume.
4. Touch in the upper left corner to view bookmarks. To learn more about Bookmarks and their
functions see page 13.
5. Touch to select other recorded videos from the Session screen.
Education Management Solutions, LLC ◊ www.SIMULATIONiQ.com
©2018 Confidential Information – Not for disclosure without authorization from Education Management Solutions, LLC
Page 12 of 22
Page 13

3
View Bookmarks
1. After touching the icon, the screen shown above appears with the tiled Bookmarks on the left.
2. Touch to select a bookmark to move to the bookmarked point of the recording.
3. To rename a bookmark, touch the current name and then type a new name.
4. Touch to close the Bookmark view.
Education Management Solutions, LLC ◊ www.SIMULATIONiQ.com
©2018 Confidential Information – Not for disclosure without authorization from Education Management Solutions, LLC
Page 13 of 22
Page 14

Enterprise
Only selected videos will be uploaded to SIMULATIONiQ Enterprise when the unit
is on the same network as SIMULATIONiQ Enterprise. Select the video to
manually upload from the Sessions screen (see next page).
SimBROWSER
Only selected videos will be uploaded to SimBROWSER when the unit is
connected to the Internet. Select the video to manually upload from the Sessions
screen (see next page).
Manually Upload Videos
To manually upload videos if SIMULATIONiQ™ Enterprise or SimBROWSER is offline (Settings >
Synchronization > Off), complete the steps below.
IMPORTANT! Videos are uploaded to SIMULATIONiQ Enterprise or SimBROWSER automatically when the
Portable unit is connected to the Internet AND the Portable unit is on the same network as the Enterprise
application (Settings > Synchronization > On).
©2018 Confidential Information – Not for disclosure without authorization from Education Management Solutions, LLC
Education Management Solutions, LLC ◊ www.SIMULATIONiQ.com
Page 14 of 22
Page 15

Only selected videos will be uploaded when the Portable unit is connected to the Internet again.
1. From the Sessions screen, press and hold or right-click on the video(s) to upload and then tap the
Upload button. Note: When Synchronization is enabled (Settings > Synchronization > On), the Upload
icon is disabled.
2. Click OK.
IMPORTANT! The selected videos will be uploaded to SIMULATIONiQ Enterprise when the Portable unit is
connected to the Internet AND the Portable unit is on the same network as the Enterprise application.
Education Management Solutions, LLC ◊ www.SIMULATIONiQ.com
©2018 Confidential Information – Not for disclosure without authorization from Education Management Solutions, LLC
Page 15 of 22
Page 16

Export Video
To export recorded video(s) to an external drive:
1. From the Session screen, tap and hold a video thumbnail to select it. Then press the icon in the
lower right corner to export video.
2. Browse to the desired file location or press Make New Folder and then press OK.
Education Management Solutions, LLC ◊ www.SIMULATIONiQ.com
©2018 Confidential Information – Not for disclosure without authorization from Education Management Solutions, LLC
Page 16 of 22
Page 17

Search other SIMULATIONiQ Portable computers for Live/Recorded Video
1. The local host icon indicates this computer and is always grayed out. Other SIMULATIONiQ Portable
computers on the same network will also be displayed here if applicable. Touch the SIMULATIONiQ
Portable computer name to access the remote computer for viewing live video and playing back
recordings created on the remote computer. Note: You cannot record on other Portable units from your
unit. You can only watch live and recorded video.
2. Press (as shown above) to manually search for other SIMULATIONiQ Portable computers on
your network. The application will search for other computers automatically.
3. Other SIMULATIONiQ Portable computers will appear next to the local host in the bottom center of the
screen. Touch another SIMULATIONiQ Portable computer to view live camera feeds or recorded video
from that computer.
Education Management Solutions, LLC ◊ www.SIMULATIONiQ.com
©2018 Confidential Information – Not for disclosure without authorization from Education Management Solutions, LLC
Page 17 of 22
Page 18

Locate Recorded and Uploaded Videos in SIMULATIONiQ Enterprise/Cloud
1. Uploaded videos appear in the following locations in your SIMULATIONiQ Enterprise/Cloud account:
My Items on the Dashboard
Sessions grid in Sessions & Courses
Videos tab
Please refer to online help in the SIMULATIONiQ Enterprise application for instructions on indexing
non-indexed videos, assigning checklists, and evaluating learners.
All videos are uploaded as ad hoc sessions to SIMULATIONiQ Enterprise/Cloud in all Mobile units that
have the Enterprise/Cloud integration.
For more information, refer to the SIMULATIONiQ Enterprise Session documentation.
Education Management Solutions, LLC ◊ www.SIMULATIONiQ.com
©2018 Confidential Information – Not for disclosure without authorization from Education Management Solutions, LLC
Page 18 of 22
Page 19

SIMULATIONiQ™ SimBrowser
Introduction
SIMULATIONiQ™ SimBrowser is a web-based application that enables you to view live and recorded video
from SIMULATIONiQ™ Mobile, SIMULATIONiQ™ Portable, and/or SIMULATIONiQ™ One Room from any
device within your institution’s network.
Recommended computer specifications to access SimBrowser:
Intel® Core™ 2 Quad
16 GB RAM or higher
500 GB Hard Drive
1000 Mbps Network Interface
Windows 8.1 Professional Edition (64-bit) or higher
Video Display Card: MSI NVIDIA® GeForce GT 620 2GB DDR3 (1xDVI, 1xHDMI, 1xVGA) {or
equivalent}
Initial Setup
For best results:
Open SimBROWSER in Internet Explorer or Google Chrome to view live and playback videos.
Install the Windows Media Player Plugin (one-time installation)
The IP Address of the Mobile, Portable and/or One Room product(s) must be Static or DHCP reserved.
The product laptop and the device on which you are viewing SimBROWSER must be on the same
network.
The SIMULATIONiQ product(s) must be updated to the Orange release to view SimBROWSER.
Welcome email
One primary user from your institution will receive a welcome email with a link to register an account in
SimBrowser and create his or her own password.
Education Management Solutions, LLC ◊ www.SIMULATIONiQ.com
©2018 Confidential Information – Not for disclosure without authorization from Education Management Solutions, LLC
Page 19 of 22
Page 20

Login
1. Click the link in your welcome email to register your account.
2. Create and confirm your password and then click Create Account.
Note: Your password must be at least 6 characters and must have at least one letter, one number and one
special character.
Future Login
Click http://apps.simulationiq.com to log in to SimBrowser.
Education Management Solutions, LLC ◊ www.SIMULATIONiQ.com
©2018 Confidential Information – Not for disclosure without authorization from Education Management Solutions, LLC
Page 20 of 22
Page 21

Dashboard
The SIMULATIONiQ™ SimBrowser Dashboard displays all products you have access to.
Live Video
Click the product you want to view and then click Live to view live video.
Playback & Bookmark Video
1. Click the product you want to view and then click Sessions.
2. Click the session you want to view.
3. Click Add to add bookmarks.
Education Management Solutions, LLC ◊ www.SIMULATIONiQ.com
©2018 Confidential Information – Not for disclosure without authorization from Education Management Solutions, LLC
Page 21 of 22
Page 22

Share
Click Share next to the desired product to:
Set user access permissions for Live Video and Sessions
Set ability for users to add Bookmarks
Set ability for users to manage user permissions, Live, Playback and Bookmark videos
Add ability for users to create new users if desired
New User
The Administrator as well as any user the Administrator gives access permission to can create new users.
1. Click the product you want to add a user for and then click Share.
2. Enter the email address of the user you want to add and then click Next.
3. Enter the user’s first and last name and then set the access permissions.
4. Click Save.
Education Management Solutions, LLC ◊ www.SIMULATIONiQ.com
©2018 Confidential Information – Not for disclosure without authorization from Education Management Solutions, LLC
Page 22 of 22
 Loading...