

Page 1
1
Electron Microscopy Sciences
P.O. Box 550
1560 Industry Road Hatfield, PA 19440
TOLL FREE: 1-800-523-5874
TEL: 215-412-8400 WEB: www.emsdiasum.com
FAX: 215-412-8450 EMAIL: sgkcck@aol.com
Electron
Microscopy
Sciences
INSTRUCTION MANUAL
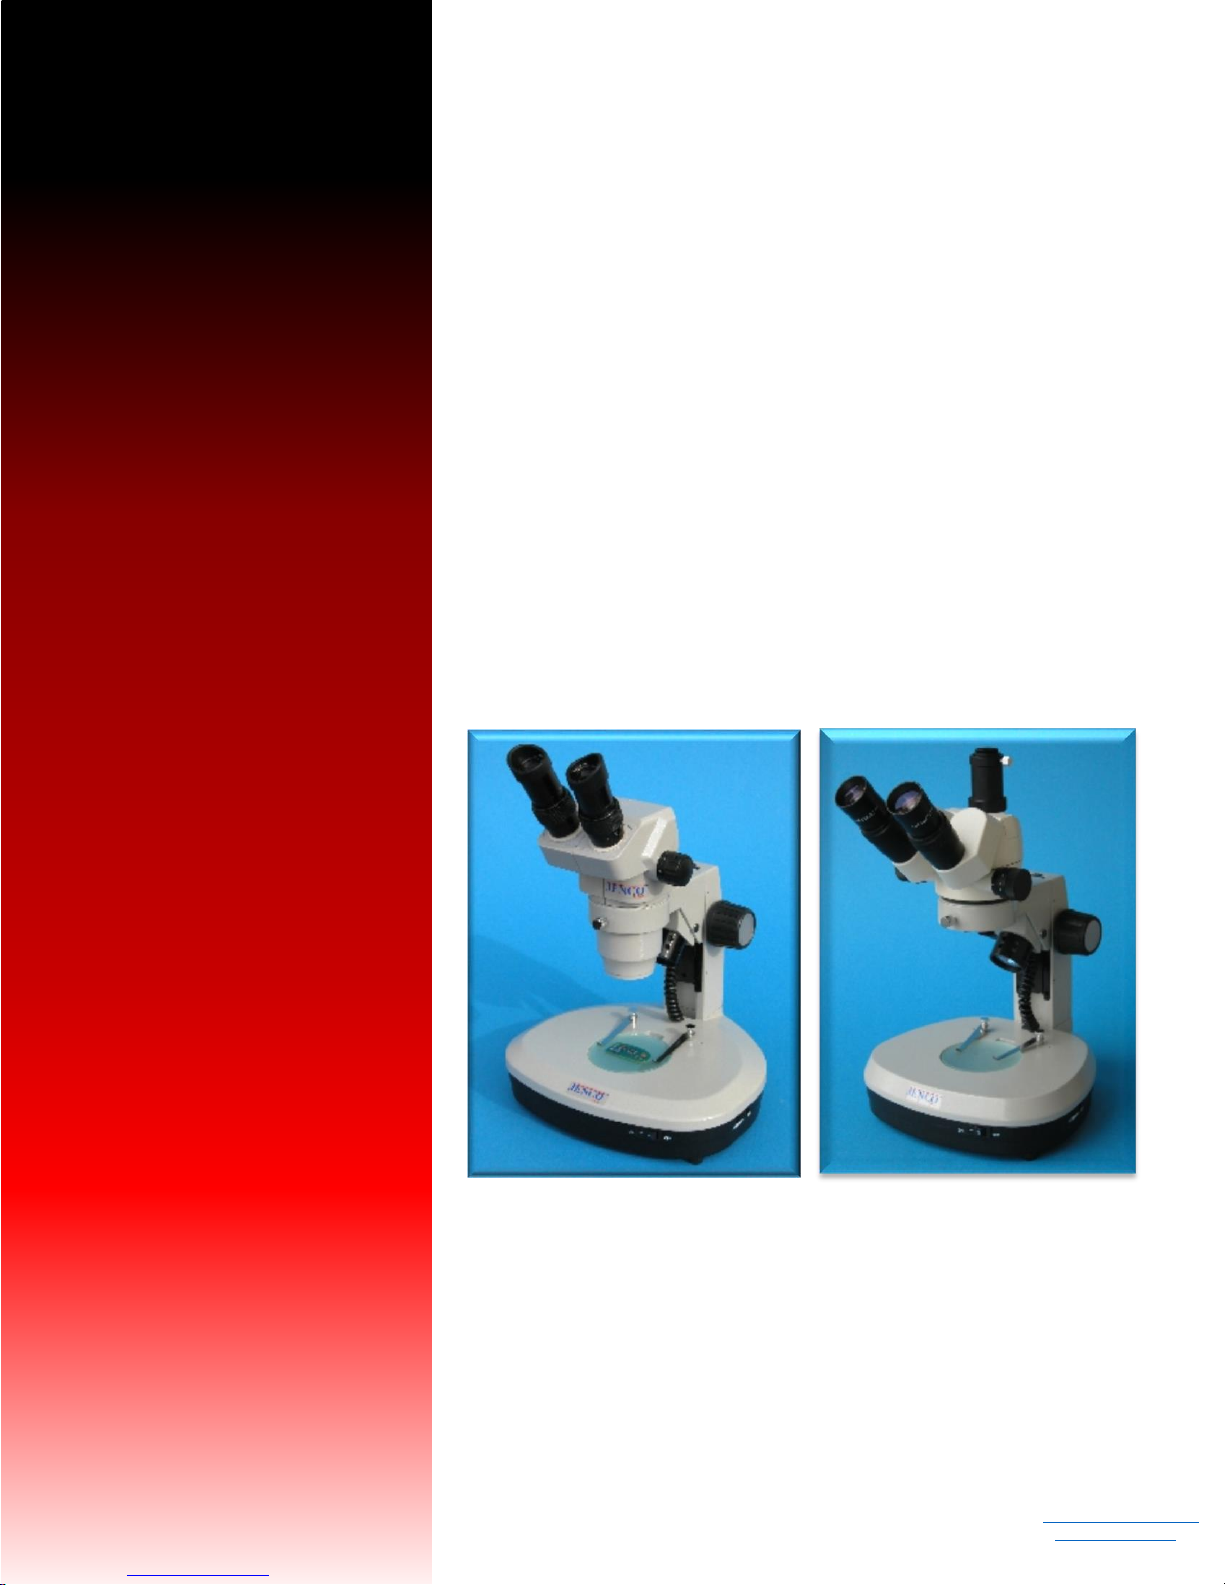
Stereo Microscopes – Non-illuminated Stands
Model GL7-207: Binocular, 6.5:1 Zoom Ratio 10X to 65X,
smooth ball bearing construction
and
Model GL7-307: Trinocular, 6.5:1 Zoom Ratio 10X to 65X,
smooth ball bearing construction
Page 2

Electron Microscopy Sciences
P.O. Box 550
1560 Industry Road Hatfield, PA 19440
TOLL FREE: 1-800-523-5874
TEL: 215-412-8400 WEB: www.emsdiasum.com
FAX: 215-412-8450 EMAIL: sgkcck@aol.com
PLEASE READ THE FOLLOWING INFORMATION CAREFULLY BEFORE USING
THIS PRODUCT.
AVOID EXPOSING THIS PRODUCT TO HIGH TEMPERATURES
AVOID USING THIS PRODUCT IN SIGNIFICANTLY DIRTY OR DUSTY AREAS
NEVER IMMERSE THE INSTRUMENT IN WATER OR IN ANY SOLVENT
DO NOT PUT ANY FOREIGN OBJECTS INTO THE FRAME OR INTO ANY MOVING PARTS
OF THIS PRODUCT
OPERATING TEMPERATURE IS 5°C TO 35°C
OPERATING HUMIDITY IS 20% TO 80% AT 25°C
Contents
Stand (1)
Optical head (1)
Focus mount (1)
10X eyepiece (2)
Eye guard (2)
Dust cover (1)
Instructions
2
When reading these instructions, please refer to the assembly picture and to the microscope drawing
(Figure 1).
1. Unpack the microscope (NOTE: Remove the base and frame assembly first).
2. Using three (3) hex bolts with lock washers, which are taped to Styrofoam under the base, stand
the black base on rend with holes closest to the bottom and attach the Pole assembly.
3. Attach the roller boom assembly to the Pole by inserting the black knob, which is taped to
Styrofoam under boom, in the boom assembly to tighten.
4. Install the focus mount assembly by unscrewing the collar on the chrome post and slide the focus
mount onto the post, securing the collar.
5. Assemble the microscope by placing the optical head in the focus mount, tightening the setscrew.
Page 3

Electron Microscopy Sciences
P.O. Box 550
1560 Industry Road Hatfield, PA 19440
TOLL FREE: 1-800-523-5874
TEL: 215-412-8400 WEB: www.emsdiasum.com
FAX: 215-412-8450 EMAIL: sgkcck@aol.com
Assembly picture
3
1. Inner six corner screw M8X20
2. Base
3. Pole
4. Double arm
5. Microscope body
6. Focus mount
7. Gasket
8. Tightening screw
Page 4

Electron Microscopy Sciences
P.O. Box 550
1560 Industry Road Hatfield, PA 19440
TOLL FREE: 1-800-523-5874
TEL: 215-412-8400 WEB: www.emsdiasum.com
FAX: 215-412-8450 EMAIL: sgkcck@aol.com
Figure 1
4
Page 5

Electron Microscopy Sciences
P.O. Box 550
1560 Industry Road Hatfield, PA 19440
TOLL FREE: 1-800-523-5874
TEL: 215-412-8400 WEB: www.emsdiasum.com
FAX: 215-412-8450 EMAIL: sgkcck@aol.com
Auxiliary Lens
10X Eyepiece, Field No. 22
15X Eyepiece, Field No. 16
20X Eyepiece, Field No. 13
Working
Distance
(mm)
Magnification
Field diameter
(mm)
Magnification
Field diameter
(mm)
Magnification
Field diameter
(mm)
0.5X
3.3X - 22.5X
67.7 - 9.8
4.9X - 33.8X
49.2 – 7.0
6.5X – 45X
40 - 5.8
163
0.75X
4.9X - 33.8X
45.1 - 6.5
7.3X - 50.6X
32.8 - 4.7
9.75X – 67.5X
26.6 - 3.8
117
1X (none)
6.5X - 45X
33.8 - 4.9
9.8X - 67.5X
24.6 - 3.5
13X – 90X
20 - 2.9
100
1.5X
9.8X - 67.5X
14.6 - 3
14.6X - 101.3X
16.4- 2.3
19.5X - 135X
13.3 - 1.9
45
2X
13X - 90X
19.5 - 2.5
19.5X – 135X
12.3 - 1.8
26X – 180X
13.3 - 1.9
40
Protocol for the Stereo Microscope
1. Place specimen under the optical body.
2. Rotate Zoom Control Knobs to the lowest magnification.
3. Adjust Interpupillary Distance. Grasp and look through the eyepieces. If two separate fields
appear, move the eyepieces closer together. If two overlapping fields appear, the eyepieces
should be moved apart.
4. Adjust the focus and diopter by setting the diopter adjustment on each eyetube to “0”.
5. Turn the zoom magnification changer to the highest magnification level.
6. With one eye closed, focus on a flat specimen until the image is in clear focus.
7. Without changing the focus, rotate the zoom control knob to the lowest magnification. Keep the
same eye closed and refocus the image using the diopter adjustment ring on the eyepiece.
8. Using the other eye, focus on the image using the diopter adjustment on the other eyetube – this
sets the diopter control to your own vision.
9. Zoom up to the highest magnification and check to see that the image is still in clear focus.
10. Note that the focusing mechanism is limited by travel stops on both the top and bottom of the rack
gear. This prevents the pinion from disengaging from the rack gear.
11. If required, you may need to focus the tension adjustment. You can do this by holding the right
focus control knob firmly while rotating the left knob clockwise. Be careful not to overtighten this
knob.
GL7 Series Specifications, Zoom Ratio 7:1
5
GL7 Series Specifications, Zoom Ratio 7:1
Maintenance
Because the eyepieces and objectives on the microscope are already coated, we highly advise against
cleaning or wiping them while dry as dirt or any other contaminants may scratch its coating. We suggest
using an optical lens cleaner or even the use of an air canister to clean the eyepieces and objectives
properly and safely. If using a lens cleaner, use a cotton swab, which can minimize wetting, and then
continue to clean the surface with a lens tissue. As mentioned previously, solvents should not be used in
the maintenance or cleaning of this product and its parts.
For painted surfaces, we suggest cleaning on a regular basis with mild detergent and a soft cloth. Please
note that the efficiency of cleaning and maintenance will help increase the overall service life.
Page 6

Electron Microscopy Sciences
P.O. Box 550
1560 Industry Road Hatfield, PA 19440
TOLL FREE: 1-800-523-5874
TEL: 215-412-8400 WEB: www.emsdiasum.com
FAX: 215-412-8450 EMAIL: sgkcck@aol.com
Electron
Microscopy
Sciences
For any questions or for ordering
information, please contact Customer
Service at 1-800-523-5874.
Thank you for choosing Electron
Microscopy Sciences!
6
 Loading...