

Page 1
HOW TO SETUP YOUR ROCK SPEAKER
IMPORTANT! Before running speaker wire through walls, under walkways, patios,
etc… check local building code requirements or contact a qualied installation
professional.
WARNING! Before digging, verify location of utility, gas lines and buried cables
with a reputable utility locating organization.
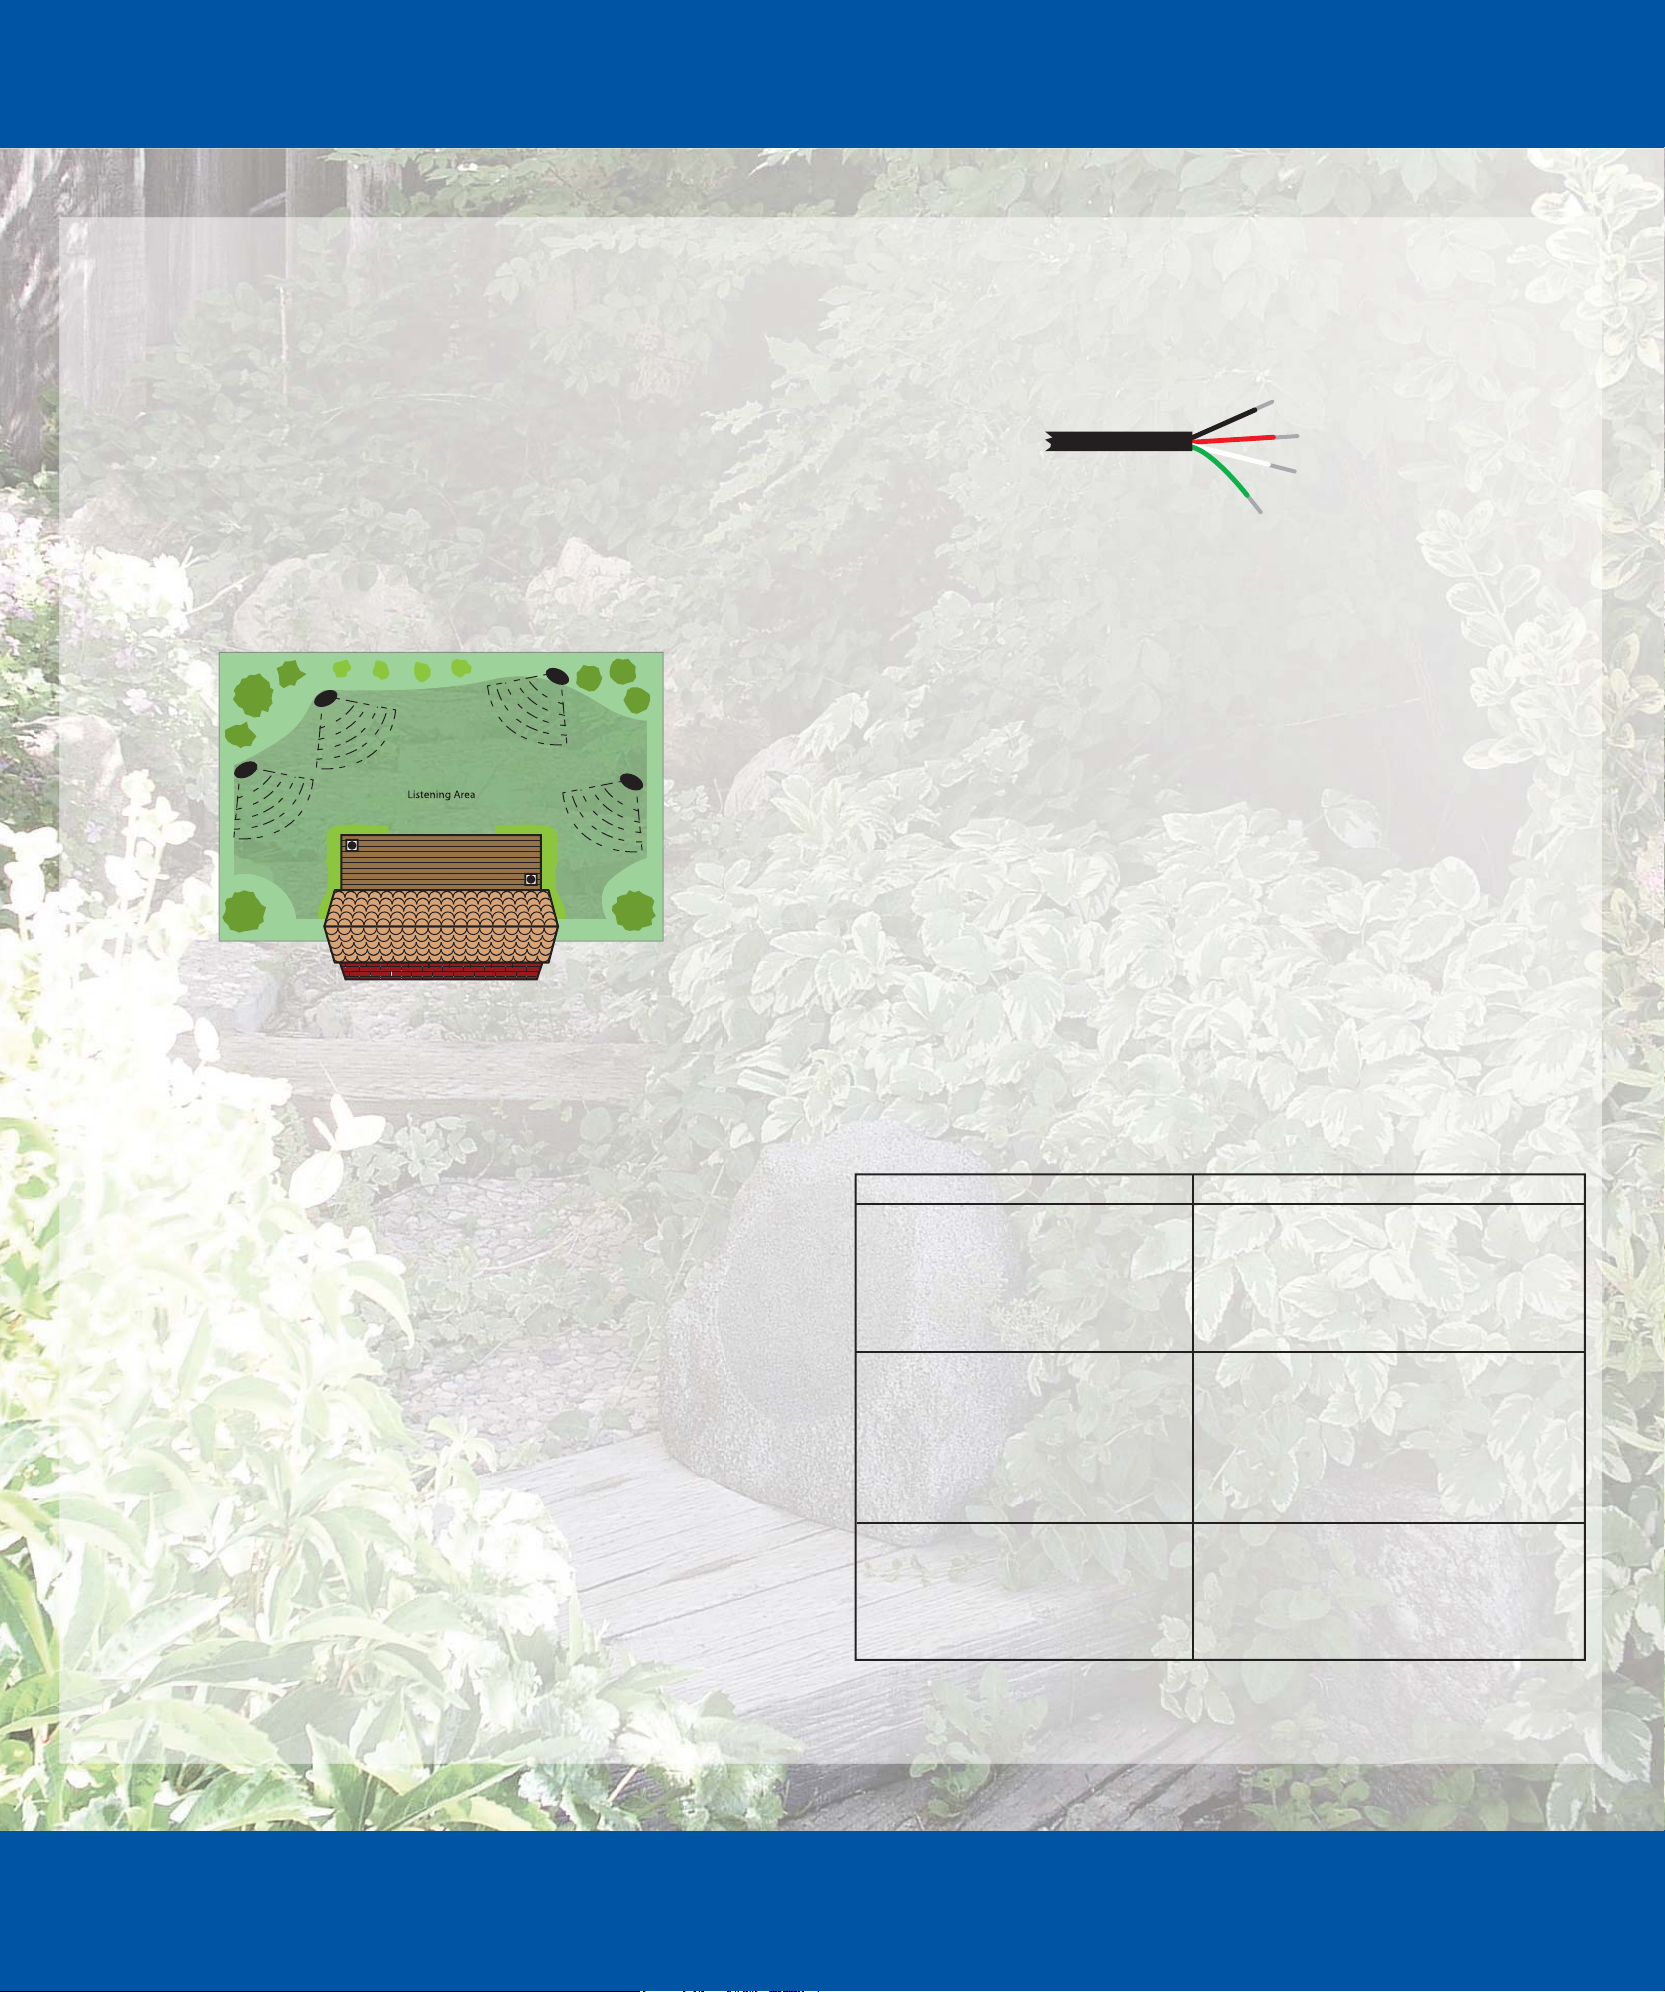
1. Speaker Placement
Establish where the most likely or average listening area will be. Ideally, speakers
should be placed on either side of the targeted listening area with at least 8 to 10-feet of
total separation. For best performance, try to leave at least 4 to 5-feet of distance
between each speaker and the listening area. ese rock-type speakers have been
designed so they can be placed on the ground among garden plantings; however, to
avoid impeding the sound from the speaker, be careful not to cover up the grille area
with any substance or heavy-coverage plants or shrubbery.
A) Make sure your receiver/amplier is turned o before performing
any connections.
B) Using wire strippers, carefully remove 2 to 3-inches of the outer protective layer
of the speaker wire. en remove about ½-inch of the insulation from the ends of
all four wires, exposing the copper wire for each. Optional: Slightly twist the loose
copper strands together.
NOTE: is rock-type speaker has the ability to play both the le and right channels of
a stereo audio system. When connecting speaker wires together, pay close attention to
the labels (and colors) of each speaker wire, making sure to correctly connect each wire.
C) Make the following speaker wire connections using weatherproof wire nuts:
Connect the black wire to the amplier’s le negative wire. Connect the red
wire to the amplier’s le positive wire. Connect the green wire to the
amplier’s right negative wire. Finally, connect the white wire to the amplier’s
right positive wire. As an additional weatherproong option, ll the wire nut
with a quality silicone-based sealant (if necessary) aer each speaker has been
tested and is working properly.
IMPORTANT! Most speaker wires use a red wire as positive and a black wire as
negative. Connecting the positive and negative wires incorrectly or backwards will
result in a weak bass response and may cause damage to your rock speaker and
receiver/amplier.
Black L-
Red L+
White R+
Green R-
2. Speaker Wire Preparation & Connections
NOTE: Check your receiver/amplier’s specications to determine the number of pairs
of speakers your amplier is capable of driving before you connect multiple speakers.
e minimum safe impedance load of most receivers/ampliers is typically 8 Ohms,
which is usually one pair of speakers for each output. If you will be connecting more
than two pairs of speakers to a single receiver/amplier, it is recommended that you
purchase and install a speaker selector. A speaker selector will allow you to install up
to 8 pairs of speakers to a single receiver/amplier, and allow you to turn on/o
individual pairs of speakers as needed.
NOTE: Before proceeding, if you are unfamiliar with running speaker wires and are
uncomfortable with this type of installation, please contact a qualied installation
professional.
Use high-quality, moisture-resistant, four-conductor speaker wire. To determine the
required length of speaker wire, measure and mark the path from the
receiver/amplier
to each speaker and add enough extra speaker wire to accommodate burying the
cable and moving the receiver/amplier. It is always better to have more than
enough than not enough. When choosing speaker wire, select the correct
gauge based on the total length of the wire from the chart below:
Minimum Wire Gauge Requirements
Under 50-feet 16 AWG (16 gauge)
100 to 200-feet 14 AWG (14 gauge)
Over 200-feet 12 AWG (12 gauge)
IMPORTANT! If you are running the speaker wire underground, it must
be rated for direct burial (or ran inside PVC or metal conduit) to prevent
deterioration. To prevent additional work, do not bury the speaker wire
until aer you have connected and tested your speakers.
3. Speaker Wire Preparation & Connections
When all connections have been made and double-checked, turn on your
receiver/amplier and test for proper operation by walking around the listening area
to ensure sound is coming from all connected speakers. If a speaker is not working
correctly, please refer to the troubleshooting guide below. If everything sounds good
and is working properly, you can now bury the speaker wires if necessary.
Troubleshooting
Problem Solution
No sound Make sure the receiver/amplier is plugged
in and turned on. Check for power to the
outlet on the wall. Check headphones if
being used, are they plugged in or is the
system on Mute? Re-check all connections.
No sound from one or more speakers Check your balance control or volume
control. Check that all speaker wires are
properly connected. Swap a non-working
speaker with a working one to determine if
the problem is with the speaker or something else (i.e. wiring, receiver/amplier)
Lack of bass or dislocated image One or more speakers may be connected
out of phase (their polarity is reversed).
Check to ensure that each speaker’s wire is
connected with correct polarity: Red (+) to
Red (+), Black (-) to Black (-), etc.
EMP Tek
382 Marshall Way, Layton, UT 84041
(800) 543-2205 • www.emptek.net
 Loading...