

Page 1

Model Number: HD-3701P
Page 2

1
Table of Contents
Preface
........................................................................................................................................................... 3
Before Using This Product
Communication Regulations ................................................................................................................ 4
Important Safety Instructions ............................................................................................................... 5
Safety Information ................................................................................................................................. 7
Maintenance and Precaution ................................................................................................................. 8
Getting Started (Preparation)
.............................................................................................................. 10
Introduction Your Television
Supplied Accessories ........................................................................................................................... 1
1
TV Control Functions
........................................................................................................................... 12
Setting Up the Remote Control .............................................................................................................13
Remote Control Functions
...................................................................................................................
1
4
Inputs and Outputs
.............................................................................................................................. 15
Connecting
the Antenna or Analog Cable TV (CATV)
.
........................................................ 16
Connectin
g
the Digital Set-Top Box (Commonly Used For HDTV
s,
Satellite TVs etc.)
......... 18
Connecting the
Component Video
....................................................................................... 20
Connecting t
he S-video or Composite Video
.......................................................................
2
1
Connecting the PC ................................................................................................................ 22
Connecting
the HDMI
.......................................................................................................... 23
Setting Up Your Television
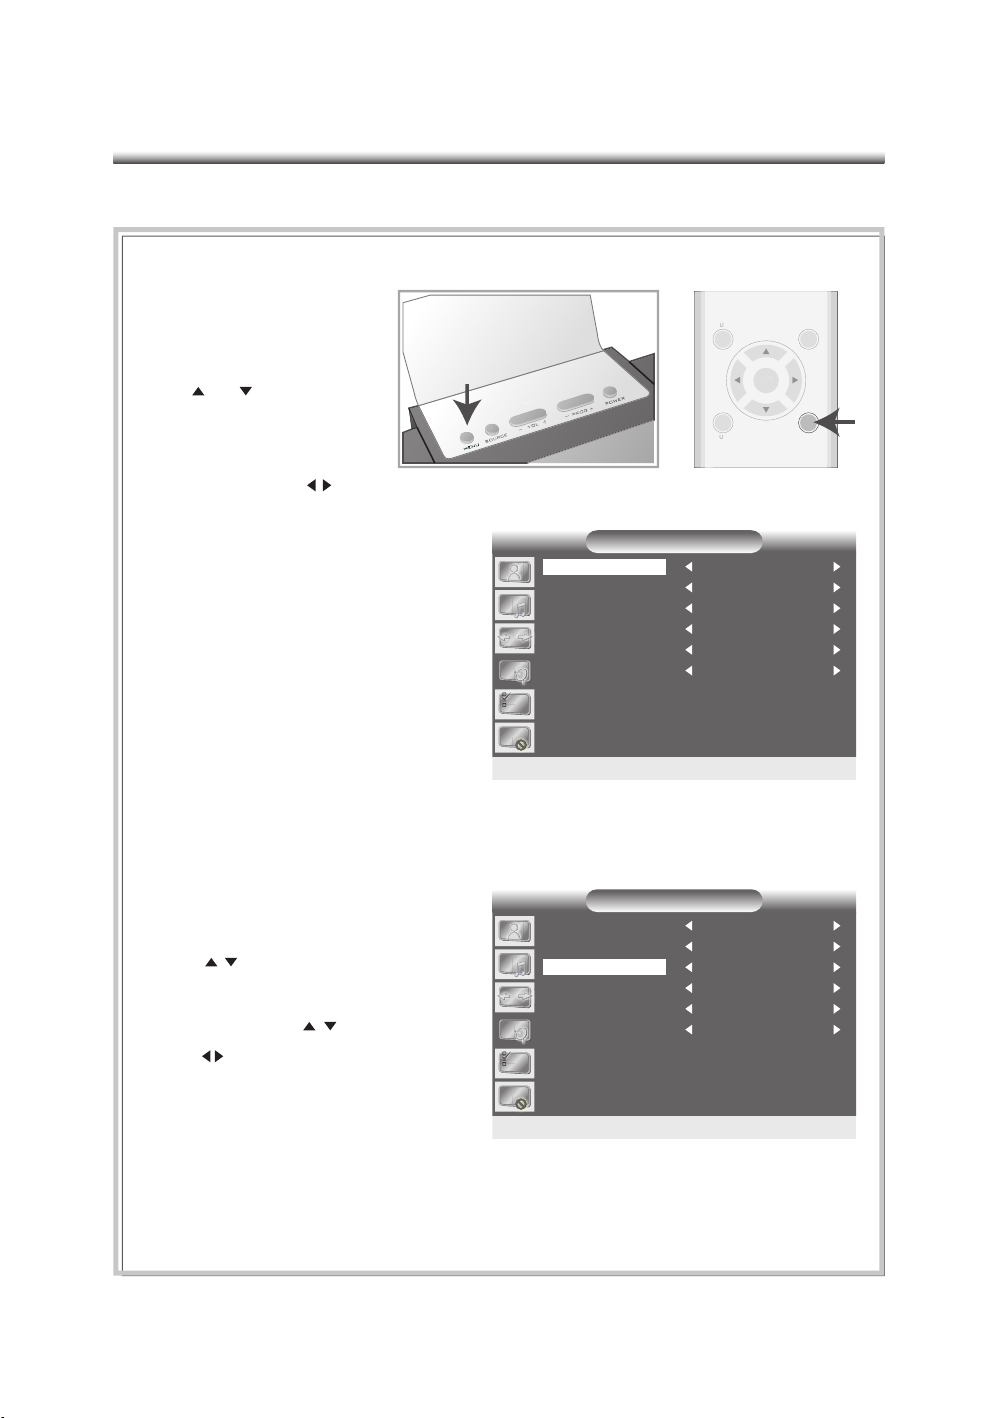
Changing the Source ............................................................................................................................ 24
Accessing the OSD (On S
creen Display) Menu
................................................................................... 25
Icon Description
................................................................................................................................... 2
6
Video
.................................................................................................................................................... 27
Audio
................................................................................................................................................... 29
Screen
................................................................................................................................................... 30
TV
......................................................................................................................................................... 32
Options
................................................................................................................................................. 34
V-Chip
.................................................................................................................................................. 35
Setting Up TV Rating Limits .................................................................................................. 37
Setting Up Movie Rating Limits
............................................................................................ 3
7
Changing the Password
....................................................................................................... 3
9
TV Rating Descriptions
........................................................................................................
40
Movie Rating Descriptions
.................................................................................................. 40
C
ontrolling PIP, PAP
, and MAIN
........................................................................................................
41
DTV Setup and C
onnections
Page 3

2
Connecting the DTV
......................................................................................................................................... 42
Understanding the Remote Control for DTV
.............................................................................................. 42
Setting Up the DTV
Channel
.
.............................................................................................................................................. 43
Capion (Closed-Caption Options)
...................................................................................................... 47
Setup
....................................................................................................................................................
49
Lock
...................................................................................................................................................... 54
INFO (Information-plate
)
..............................................................................................................................
57
EPG (Electric Program
Guide)
........................................................................................................................ 59
Channel Guide
.........................
............................................................................................................ 60
Basi
c Troubleshooting
...........
............................................................................................................. 61
General Specifi cations
...........
.............................................................................................................. 63
R
GB Frequency Table
.............
............................................................................................................. 64
Acronyms
, Abbreviations, Functions, and T
erms
........................................................................ 65
Warranty Card Info
................................................................................................................................ 6
9
Page 4

3
Preface
About This Manual
This manual is designed to make operating your 37” LCD TV as easy as possible. Informa-
tion in this document has been carefully checked for accuracy; however, no guarantee is
given to the correctness of the contents. Due to continuing system improvements, these
changes will be incorporated in newer editions.
Copyright
©
Copyright 2005
This document contains proprietary information protected by copyright. All rights are re-
served. No part of this manual may be reproduced in any form by any mechanical, electronic
or other means, without written consent.
Trademarks
All trademarks and registered trademarks are the property of their respective owners.
Page 5

4
Communication Regulation
Communication Regulation
FCC Compliance
This equipment has been tested and found to comply with the limits for a class B digital
device, pursuant to Part 15 of the FCC Rules. These limits are designed to provide rea-
sonable protection against harmful interference in a residential installation. This equipment
generates, uses, and can radiate radio frequency energy and, if not installed and used in
accordance with the instructions, may cause harmful interference to radio communications.
However, there is no guarantee that interference will not occur in a particular installation. If
this equipment does cause harmful interference to radio or television reception, which can
be determined by turning the equipment off and on, the user is encouraged to try to correct
the interference by one or more of the following measures:
Reorient or relocate the receiving antenna;
Increase the separation between the equipment and receiver;
Connect the equipment into an outlet on a circuit different from that to which the receiver is
connected;
Consult the dealer or an experienced radio/TV technician for help.
This device complies with Part 15 of the FCC Rules. Operation is subject to the following
two conditions:
1. This device may not cause harmful interference, and
2. This device must accept any interference received, including interference that may cause un-
desired operation.
Canada Class B Statement
This Class B device meets all requirements of the Canadian interference-causing equipment
regulations.
Cet appareil numérique de la Class B respecte toutes les exigencies du Réglemensur le mate-
riel brouilleur du Canada.
Page 6

5
Important Safety Instructions
1. Read these instructions.
All the safety and operating instructions should be read before
the product is operated.
2. Keep these Instructions.
The safety and operating instructions should be retained for
future reference.
3. Heed all Warnings.
All warnings on the product and in the operating instructions should
be adhered to.
4. Follow all Instructions.
All operating and using instructions should be followed.
5. Cleaning.
Unplug this product from the power outlet before cleaning. Clean only with
dry cloth.
6. Do not use this apparatus near water and moisture.
7. Ventilation.
Do not block any ventilation openings. Install in accordance with the man-
ufacturer’s instructions.
8.
Do not install the product near any heat sources such as radiators, heat registers, stoves,
or other apparatuses (including amplifi ers) that produce heat.
9. Grounding or Polarization.
Do not defeat the safety purpose of the polarized or ground-
ing-type plug. A polarized plug has two blades with one wider than the other.
A
grounding type plug has two blades and a third grounding prong. The wide blade or the
third prong is provided for your safety. If the provided plug does not fi t into your outlet,
consult an electrician for replacement of the outlet.
10. Power-Cord Protection.
Protect the power cord from being walked
on or pinched particularly at plugs, convenience receptacles, and
points that exit from the apparatus.
11. Only use attachments/accessories specifi ed by the manufacturer.
12.
Only use the cart, stand, tripod, bracket, or table specifi ed by the manufacturer, or
pro-
vided with the apparatus. When a cart is used, use caution when moving the cart/ap-
paratus to avoid injury.
13.
Unplug this apparatus during lightning storms or during long unused periods.
14. Outdoor Antenna Grounding.
If an outside antenna or cable system is connected to the
product, be sure the antenna or cable system is grounded to provide protection against
voltage surges and built-up static charges.
PORTABLE CART WARNING
Page 7

6
15. Power Lines.
An outside antenna system should not be located in the vicinity of over-
head power lines, electric lights, power circuits, or other areas where the antenna can fall
into such power lines or circuits. When installing an outside antenna system, extreme
care should be taken to prevent contact with power lines or circuits as contact with them
might be fatal.
16. Overloading.
Do not overload power outlets, extension cords, or integral convenience
receptacles as this can result in a risk of fi re or electric shock.
17. Servicing.
Do not attempt to service this product yourself. Opening or removing covers
may expose you to dangerous voltage or other hazards. Refer all servicing to a qualifi ed
service personnel.
18. Damage Requiring Service.
Unplug this product from the wall outlet and refer servicing
to qualifi ed service personnel under the following conditions:
If
the power-supply cord or plug is damaged,
If liquid has been spilled, or objects have fallen into the product,
If the product has been exposed to rain or water,
If the product does not operate normally ,
If the product has been dropped or damaged in any way, and
If
the product exhibits a distinct change in performance.
19. Wall or Ceiling Mounting.
The product should be mounted to a wall or ceiling only by
manufacturer’s recommendation.
Antenna
Lead-in
Wire
Antenna
Discharge
Unit
Electric
Service
Equirment
Ground
Clamp
Grounding
Conductors
Power service grounding
Electrode system
GROUND CLAMPS
Page 8
7
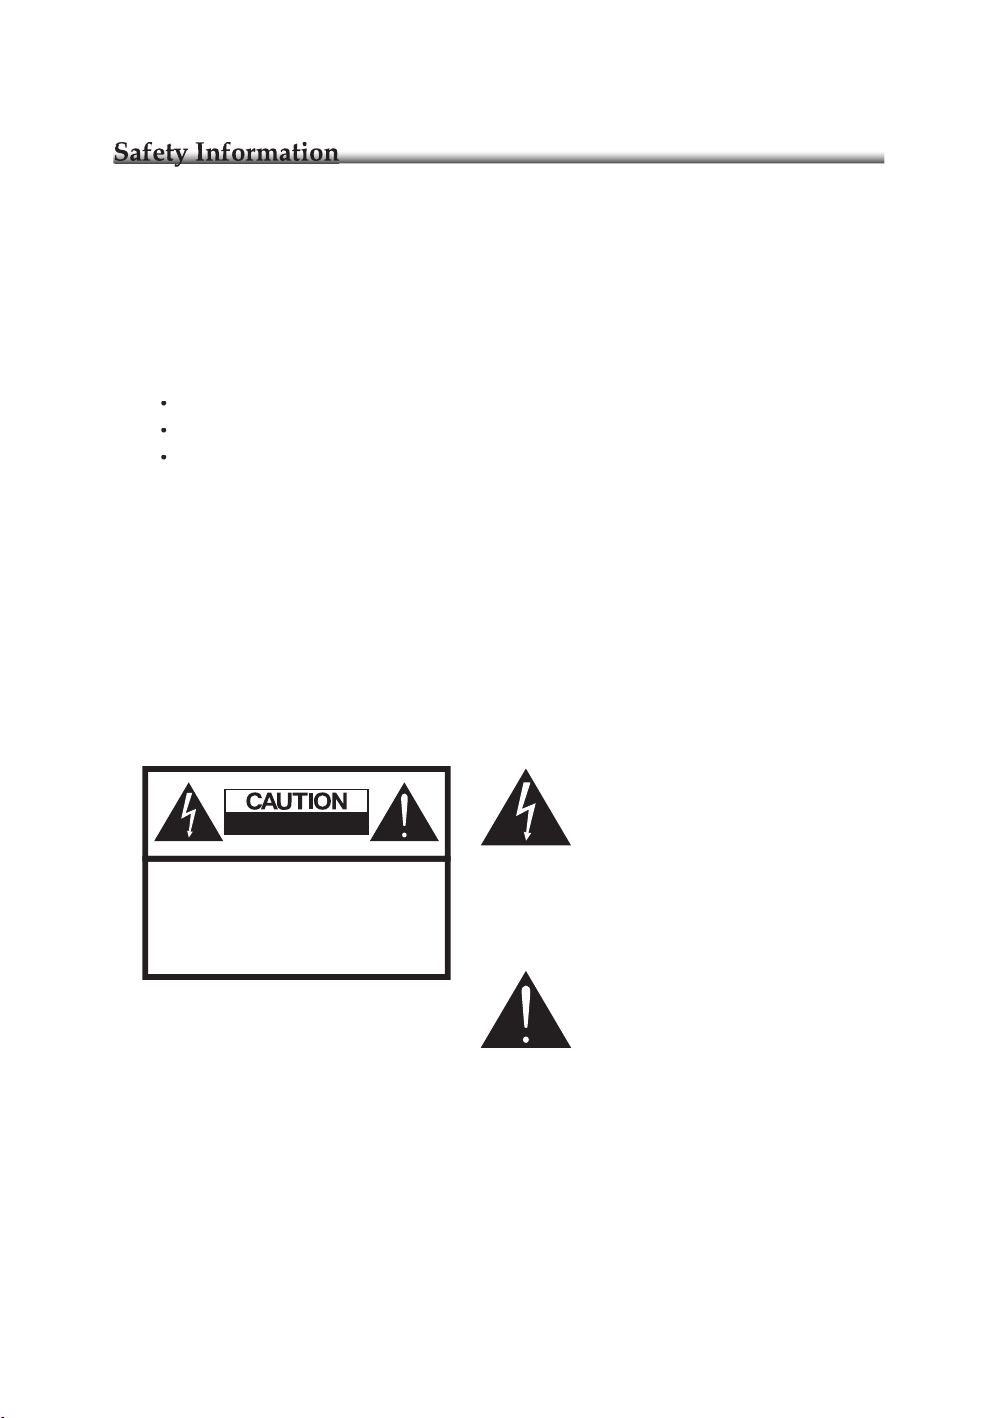
CAUTION: TO REDUCE THE RISK OF ELECTRIC SHOCK
DO NOT REMOVE COVER
NO USER-SERVICEABLE PARTS INSIDE
REFER SERVICING TO QUALIFIED SERVICE PERSONNEL
RISK OF ELECTRICSHOCK
DO NOT OPEN
Page 9

8
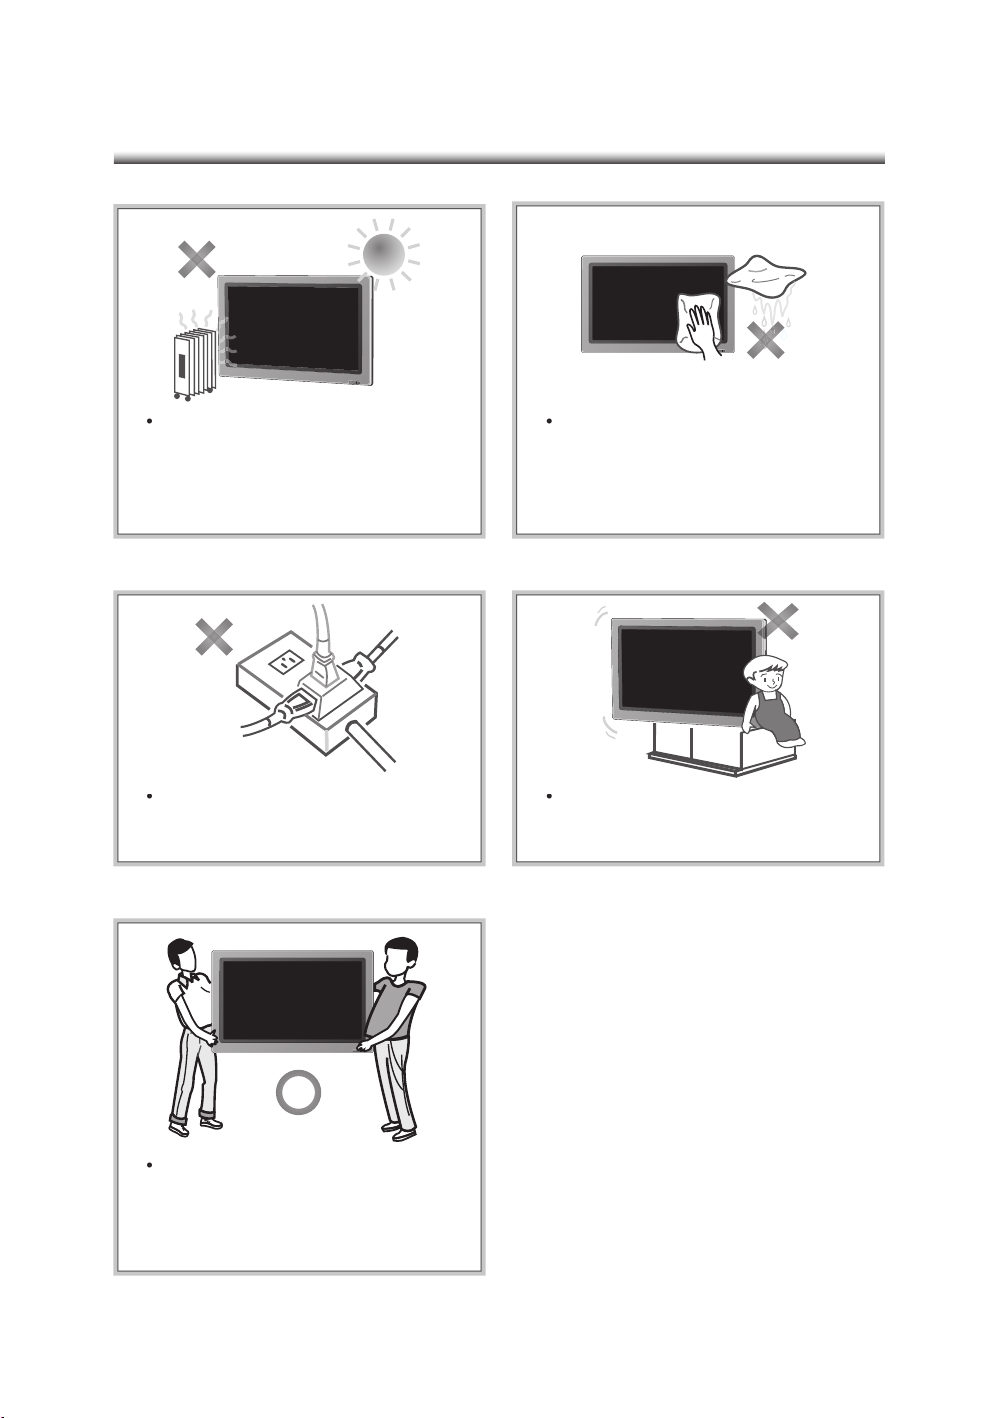
Turn off the product if liquid is acciden-
Page 10
9
Page 11
10
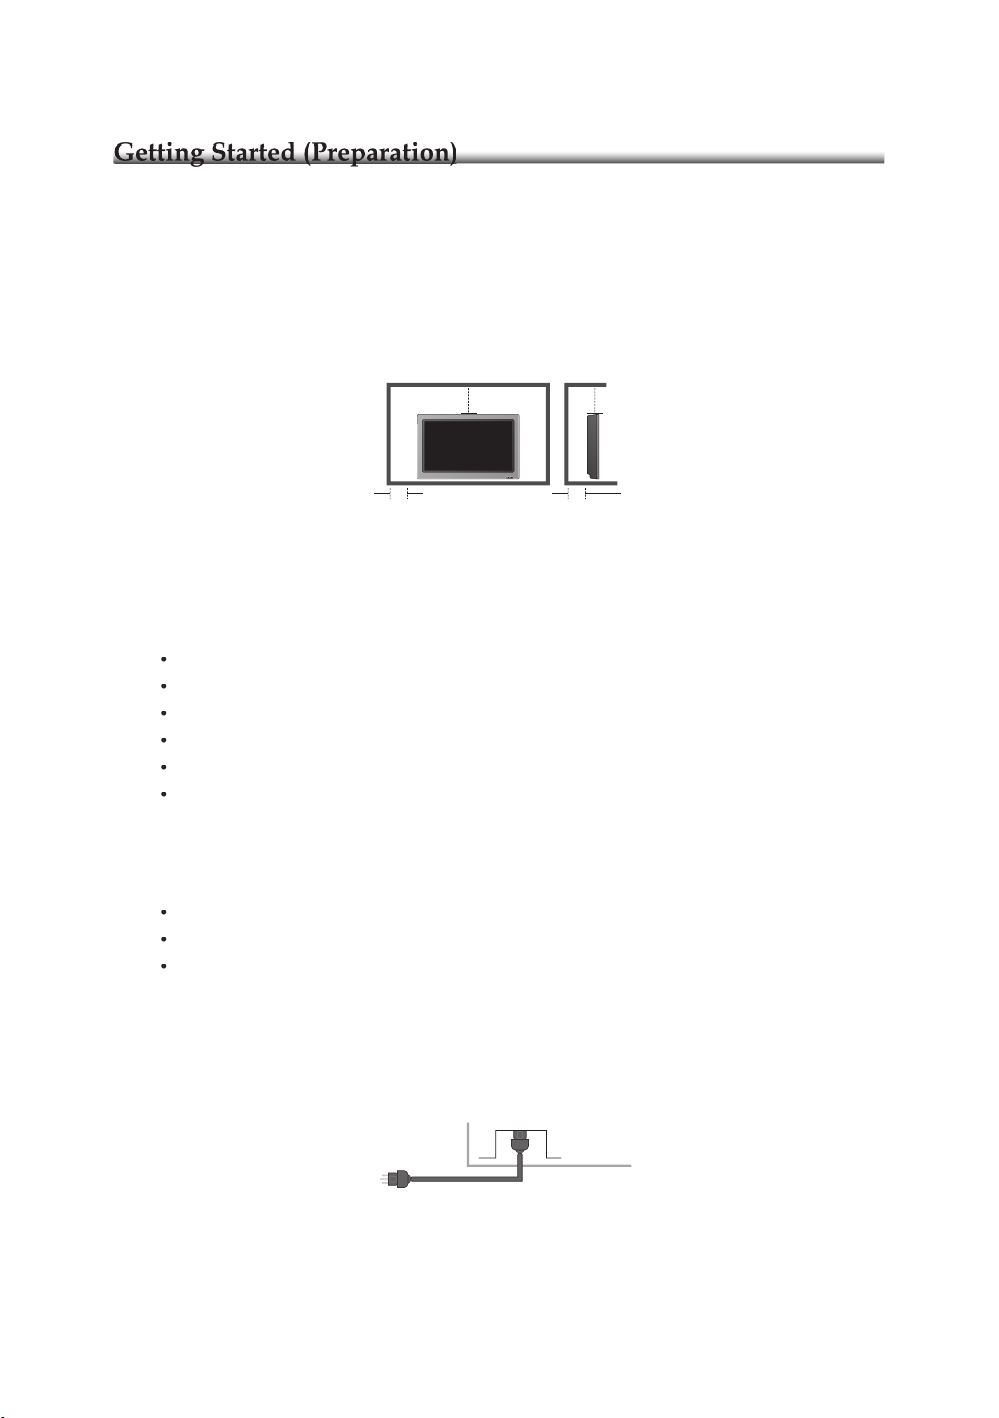
(200 mm)
7.87 inches
(150 mm)
5.9 inches 5.9 inches
(150 mm)
(200 mm)
7.87 inches
(1)
(2)
Page 12
11
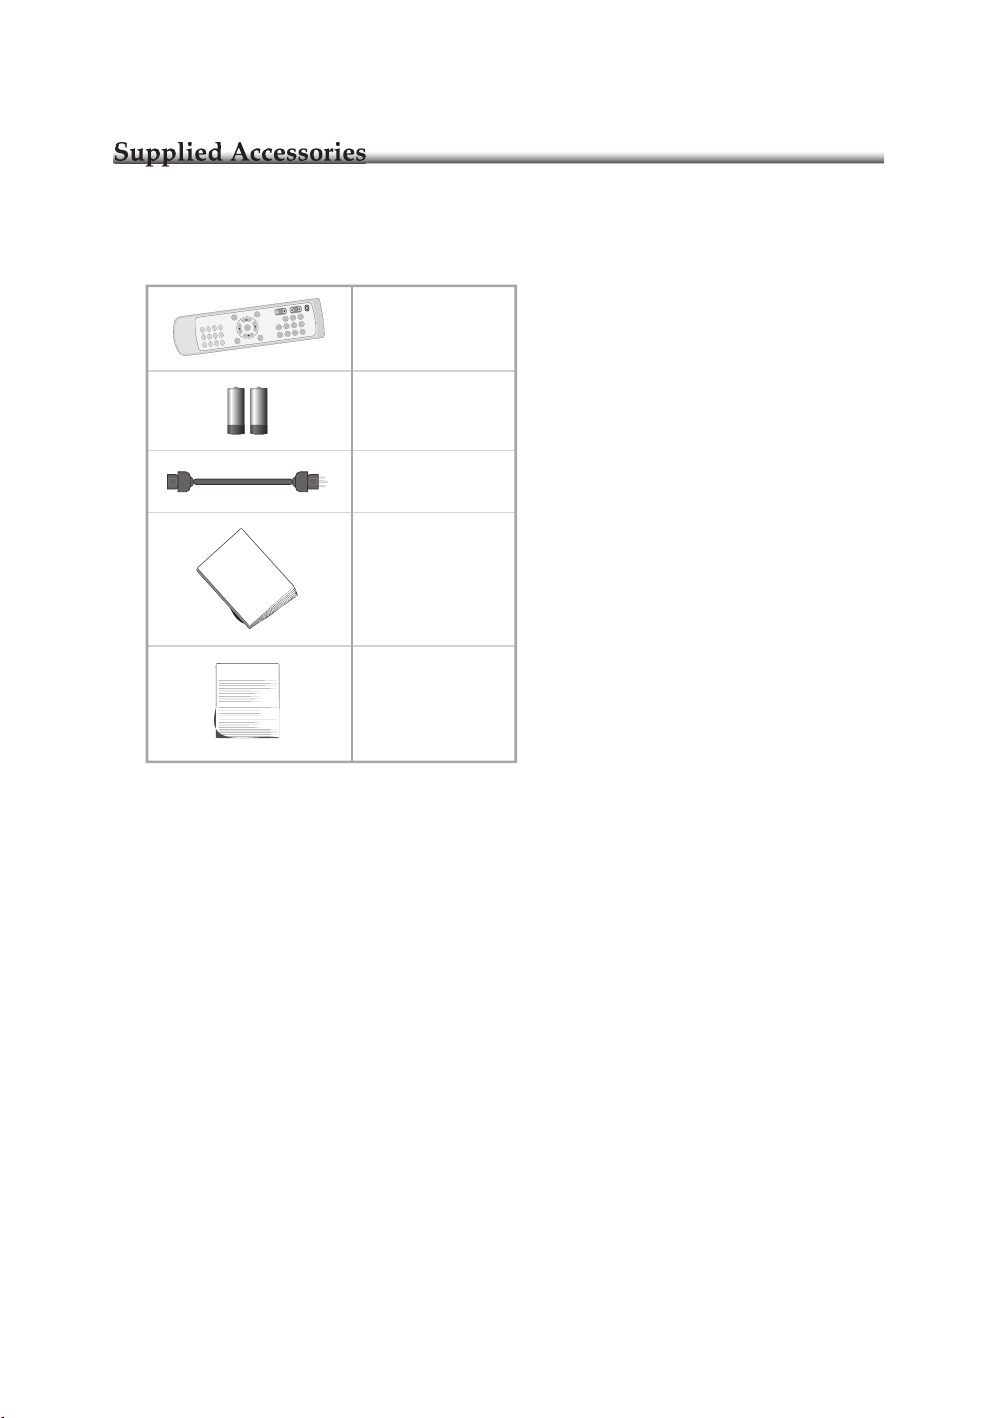
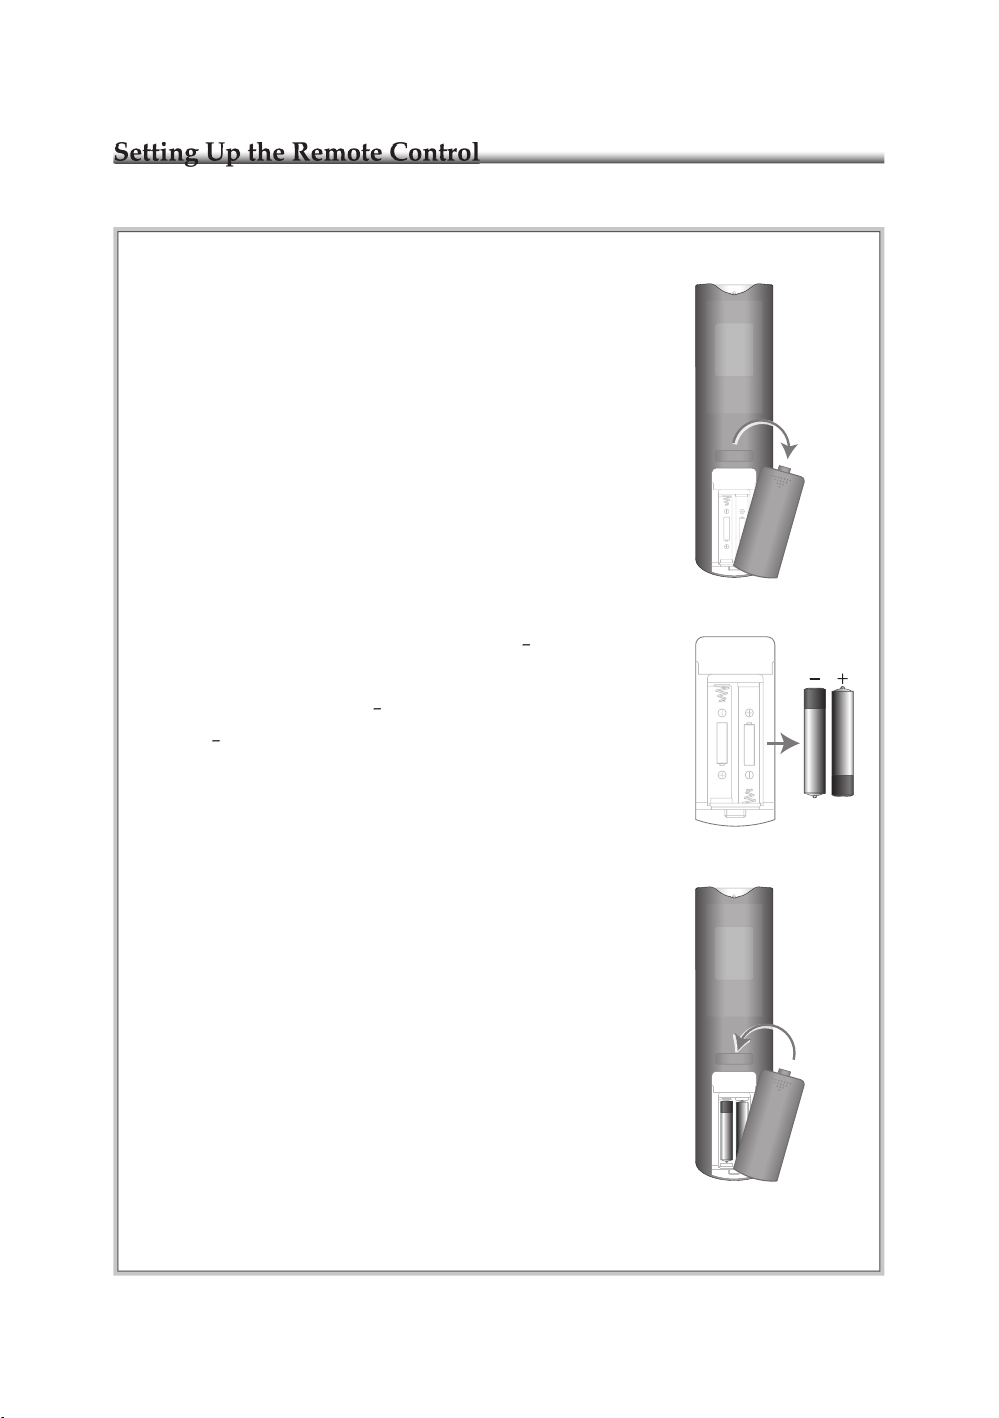
Remote control
Two AAA batteries
Power Cord
User Manual
Warranty Card
U
S
E
R
M
A
N
U
A
L
C
H
V
O
L
1
4
7
2
5
8
0
3
6
9
1
0
0
+
S
L
E
E
P
A
S
P
E
C
T
D
I
S
P
L
A
Y
M
A
I
N
/
S
U
B
F
R
E
E
Z
E
P
I
P
C
.
C
I
N
F
O
A
U
D
I
O
D
T
V
/
M
E
N
U
E
X
I
T
E
P
G
P
OW
E
R
R
E
C
A
L
L
M
U
T
E
M
E
N
U
S
O
U
R
C
E
O
K
Warranty Card
Page 13
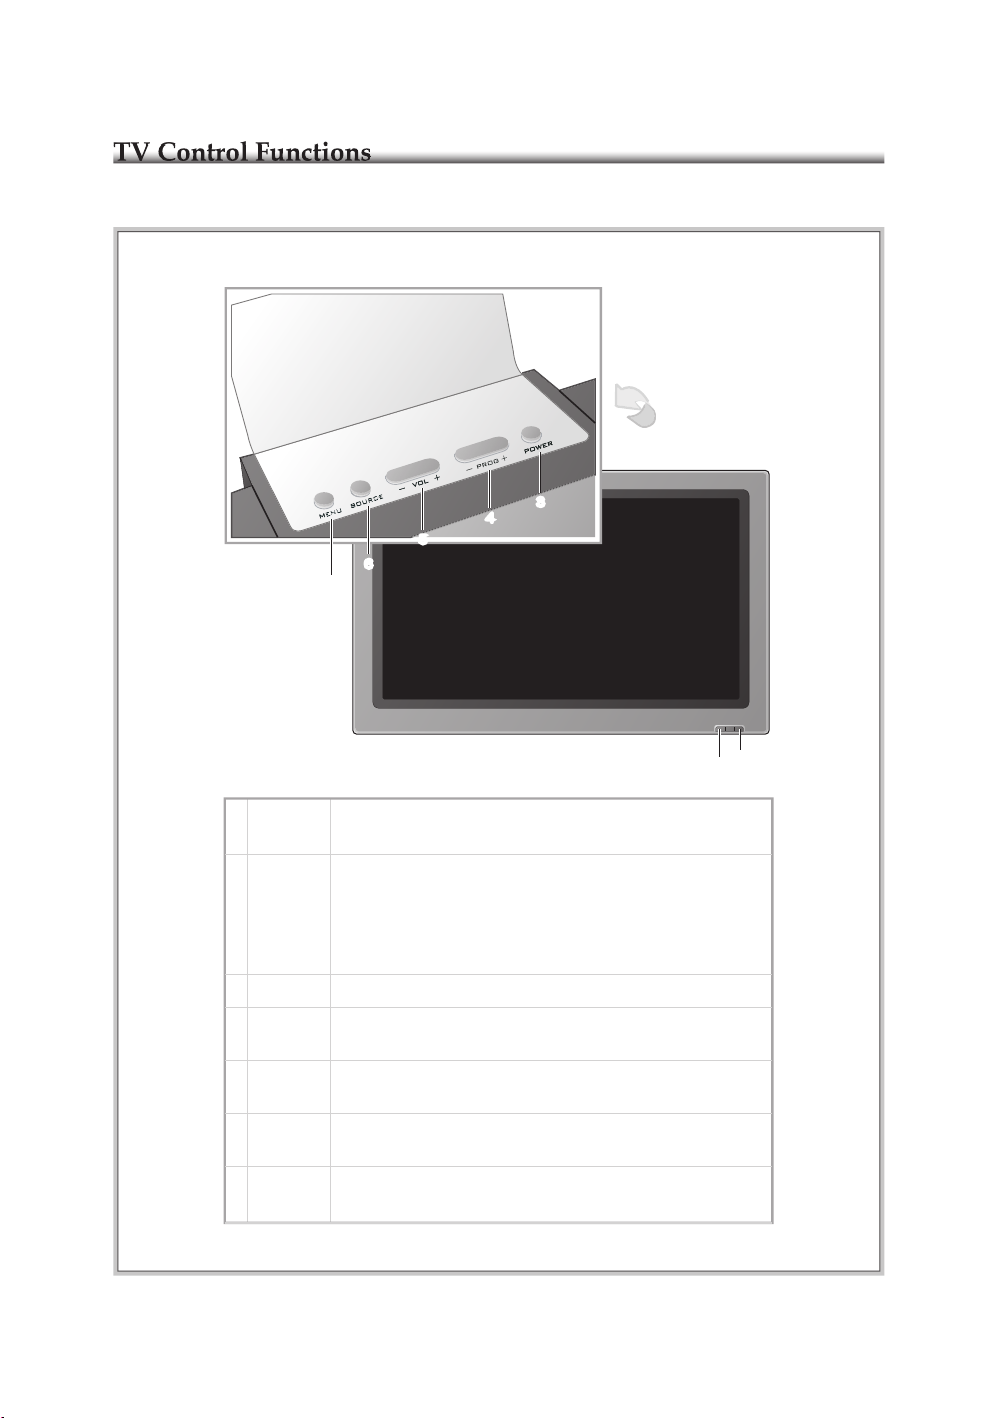
12
MAIN
POWER
1
Press this button to turn on/off the master power.
LED
Indicators
2
The LED indicator lights up in 3 different colors: green, red or
orange. Each colors represent different status.
Green - Power is on.
Red - Standby.
Orange - Power saving mode.
POWER
3
Press this button to turn the power on/stard by.
-PROG+
4
Press to change channel/when is menu mode, these acts as
navigation keys.
-VOL+
5
Press adjust the volume/when is menu mode, these acts as
navigation keys.
SOURCE
6
Video input selection. Press this button to display the menu for
input selection mode.
MENU
7
Press this button to display the OSD menu. It contains all the options
to configure your TV's settings.
1
2
button (Above)
6
5
4
3
4
3
5
6
7
7
Page 14
13
"AAA"
"AAA"
"AAA"
"AAA"
Do not mix new and old or different brands of batteries.
Page 15
14
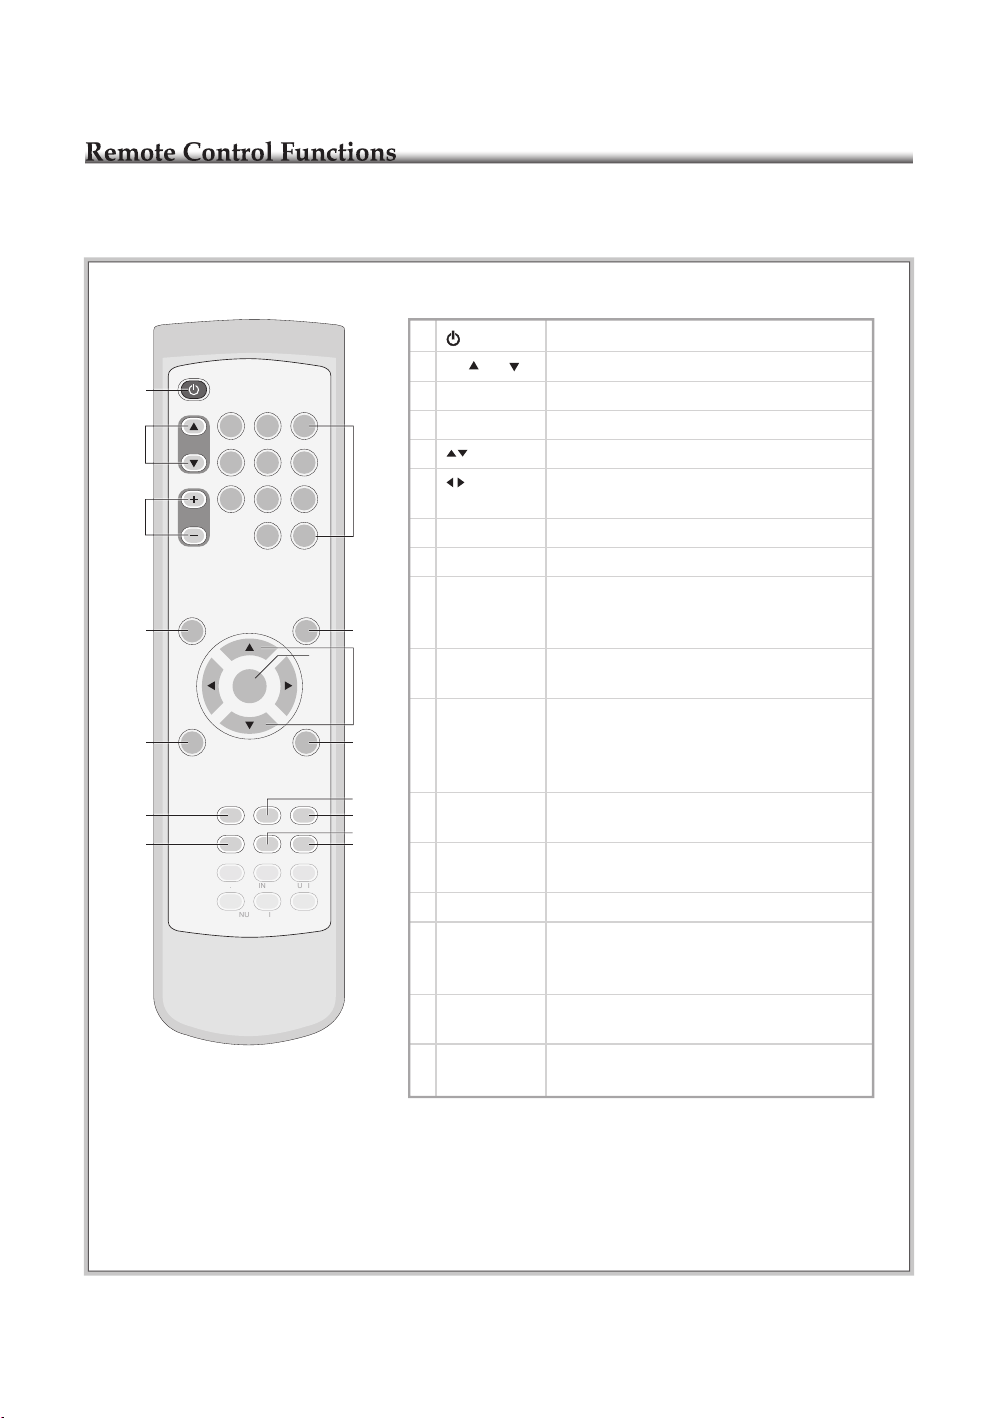
CH /CH
1
Power on/off.
OK
Press this key to confirm selection.
6
MUTE
8
Press this key to turn off the sound.
Press the "MUTE" button again or press "VOL+/
VOL-" to enable sound.
VOL +/VOL
-
3
Press these keys to adjust volume.
2
Press these keys to change the channels.
RECALL
7
Recall last channel.
MENU
9
Press this key to display the OSD menu. In the
OSD menu, press this key to exit the menu.
SOURCE
10
Press this key to display the video source
selection menu. If you have a DVD player
connected to the component input 2, then select
"COMPONENT 2" from source menu.
5
Navigation keys in Source and Setup menu.
Adjusting keys in Source and Setup menu when
in PIP mode.
0~9/100+
4
Numerical keys to select desired channel.
On screen display on/off. (Shows channel and
other details)
DISPLAY
11
Activates the sleep timer.
SLEEP
13
ASPECT
12
Choose from widescreen, panoramic, 4: 3 video,
16: 9 zoom. (More details on Page 30)
PIP
14
Switches among PIP (Picture In Picture) mode,
PAP (Picture And Picture) mode, and MAIN
(Main Picture Only) mode.
FREEZE
15
Press this key to freeze current frame from the
screen.
MAIN/SUB
16
Switches controlling between the PIP or PAP
and the MAIN.
CH
VOL
1
4
7
2
5
8
0
3
6
9
100+
SLEEP ASPECT DISPLAY
MAIN/SUB FREEZE PIP
V/X
POWER
RECALLMUTE
MENUSOURCE
OK
1
8
10
13
16
2
3
4
5
6
7
9
11
12
14
15
Page 16
15
5. HDMI A/V Cable
4. RGB (VGA) video cable
3. RCA component video cable
2. S-video cable
1. RCA composite video cable
Cables
Available Interface
Description
Progressive DVD player, HDTV set-top-
box, HD PVR, D-VHS, digital media player.
HDTV, Set-top Box, Progressive HD DVD
Player.
Component support both High Definition
programs (720p/1080i) and standard definition
programs (480i/ 480p).
PC.
RGB input (PC Input) and a pair of R/L audio
inputs.
Contains, one composite video and one pair of
R/L audio outputs.
HDMI
HDMI input.
Power Input
1
PC Input
2
Camcorder, non-progressive DVD player,
digital camera, VCR.
Contains two S-video, two composite video, two
pair of R/L audio inputs.
AV Inputs (AV1, AV2)
4
Audio/Video Outputs
5
Component Inputs
3
6
Any amplifiers with SPDIF input.
COAXIAL (SPDIF)
Digital audio output.
7
Maintenance use only.
SVC
Service connector.
8
AC 120V~.
Recommended Devices
1
43 5
78 6
120V~
Y P /C P /C
COMPONENT
AV 1
POWER
PC
LSPDIF HDMISVC PC R
VS1L
R
AV 2
VS2L
R
OUT
V
L
R
L
R
2
Page 17

16
4. Connect the power cord of the LCD TV to a power outlet.
SOURCE
TV
AV1
S1
AV2
S2
PC
HDMI
ATSC
COMPONENT
A
SOURCE
Coaxiel Cable
(not supplied)
V
W
ANT
CABLE SOCKET
or
(not supplied)
Page 18
17
A
MENU
CHANNEL
AUTO PROGRAM
MTS
ADD / ERASE
SKIP
< / > : TO ADJUST MENU: TO RETURN
CATV
1
MAIN
START
ADDED
ON
TV
TV / CATV
keys and then
CHANNEL
MTS
ADD / ERASE
SKIP
< / > : TO ADJUST MENU: TO RETURN
CATV
1
MAIN
START
ADDED
ON
TV
TV / CATV
AUTO PROGRAM
or
Page 19
18
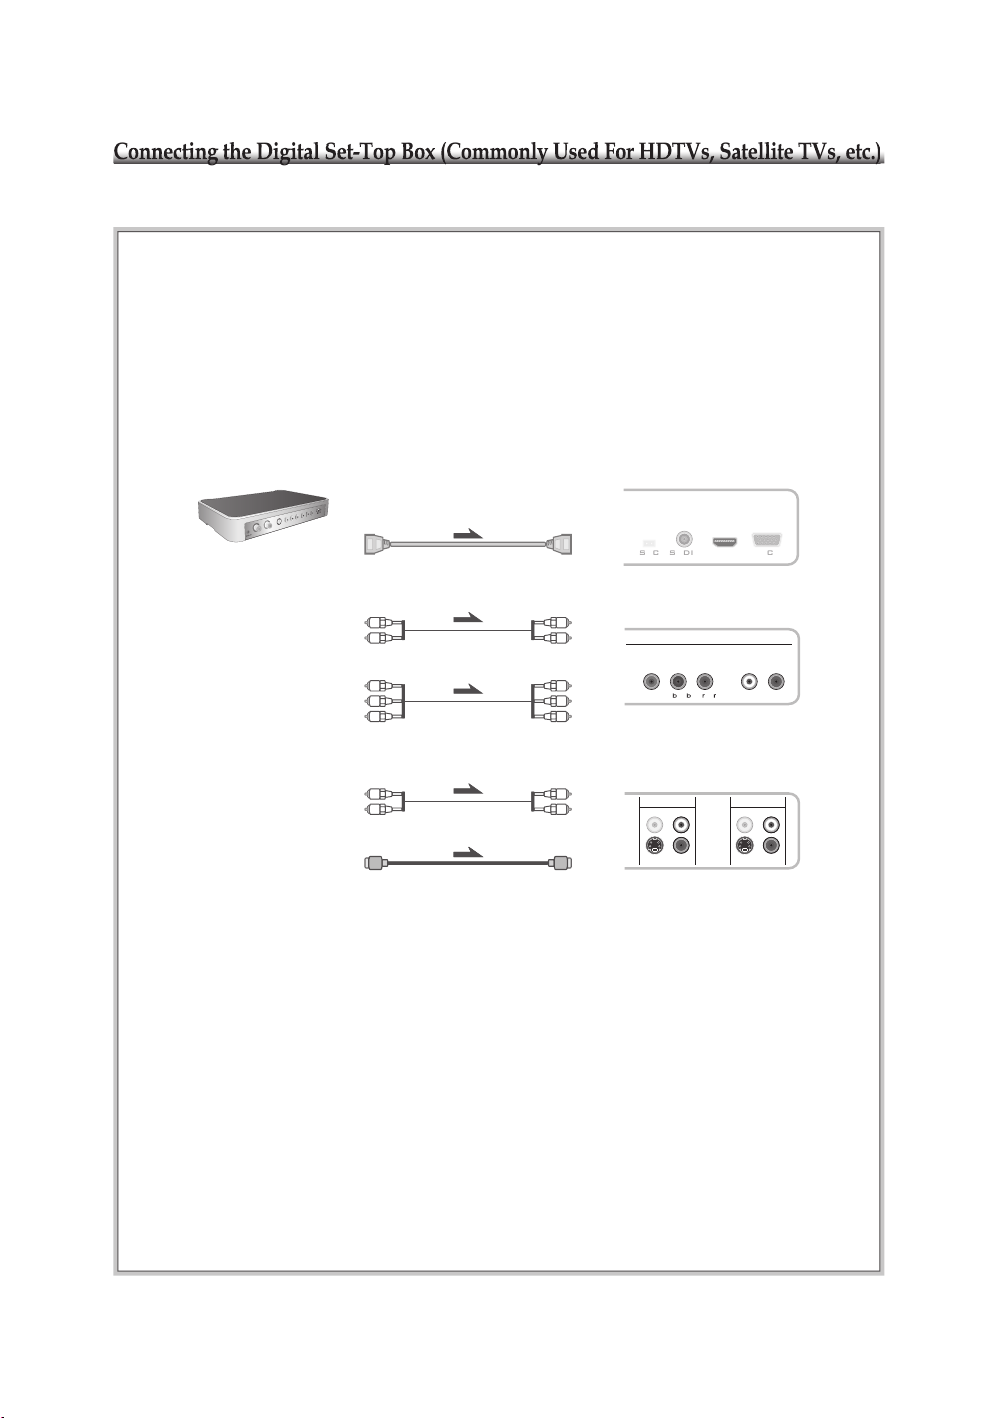
4. Connect the power cords of your digital set-top box and LCD TV to the power outlets.
(Y)
(Pb/Cb)
(Pr/Cr)
(Y)
(Pb/Cb)
(Pr/Cr)
Component
Set-top Box
(L)
(R)
(L)
(R)
Y P /C P /C
COMPONENT
L R
HDMI
V
S1
AV 1
L
R
AV 2
S2
L
R
or
S-Video
HDMI
(not supplied)
(not supplied)
(not supplied)
Audio
(not supplied)
(L)
(R)
(L)
(R)
Audio
(not supplied)
Page 20

19
SOURCE
TV
AV1
S1
AV2
S2
PC
HDMI
ATSC
COMPONENT
Page 21

20
jack on the rear of the LCD TV.
4. Use the AUDIO Cable to connect the AUDIO (L/R) output jacks of your DVD Player
SOURCE
TV
AV1
S1
AV2
S2
PC
HDMI
ATSC
COMPONENT
Y P /C P /C
COMPONENT
L R
DVD player
(Y)
(Pb/Cb)
(Pr/Cr)
(Y)
(Pb/Cb)
(Pr/Cr)
Component Cable
(L)
(R)
(L)
(R)
(not supplied)
Audio Cable
(not supplied)
Page 22
21
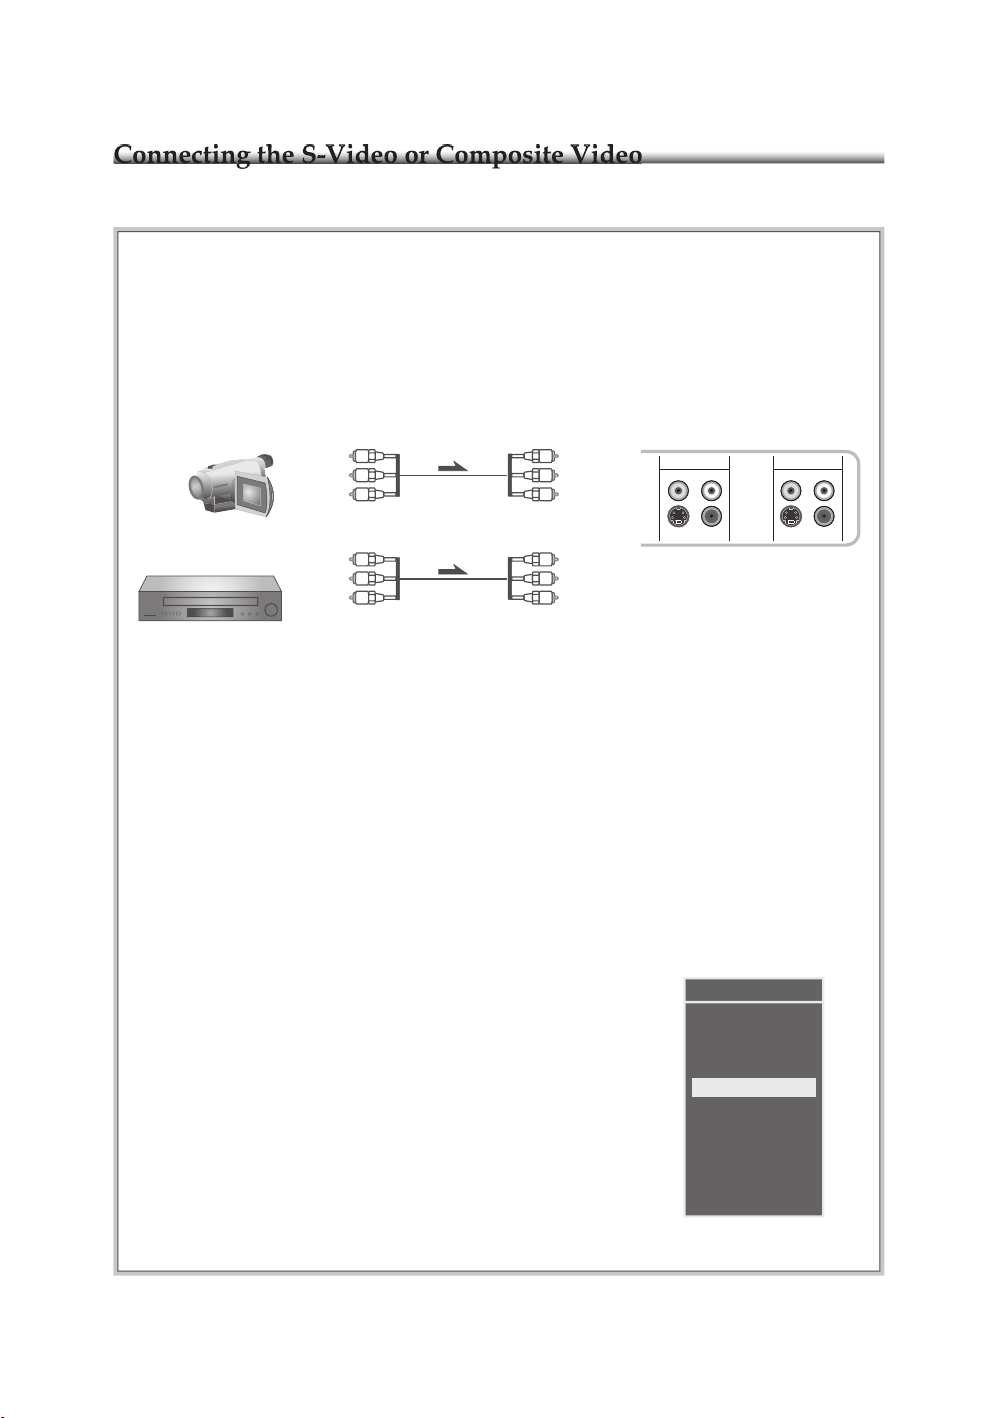
jack.
4. Connect the red (R) and white (L) audio jacks on the back of your VCR to the secondary
S-video
Audio (L)
Audio (R)
S-video
Audio (L)
Audio (R)
Camcorder
VCR
V
S1
AV 1
L
R
AV 2
VS2L
R
or
Composite Cable
(not supplied)
Composite video
Audio (L)
Audio (R)
Composite video (V)
Audio (L)
Audio (R)
S-video Cable
(not supplied)
SOURCE
TV
AV1
S1
AV2
S2
PC
HDMI
ATSC
COMPONENT
Page 23
22
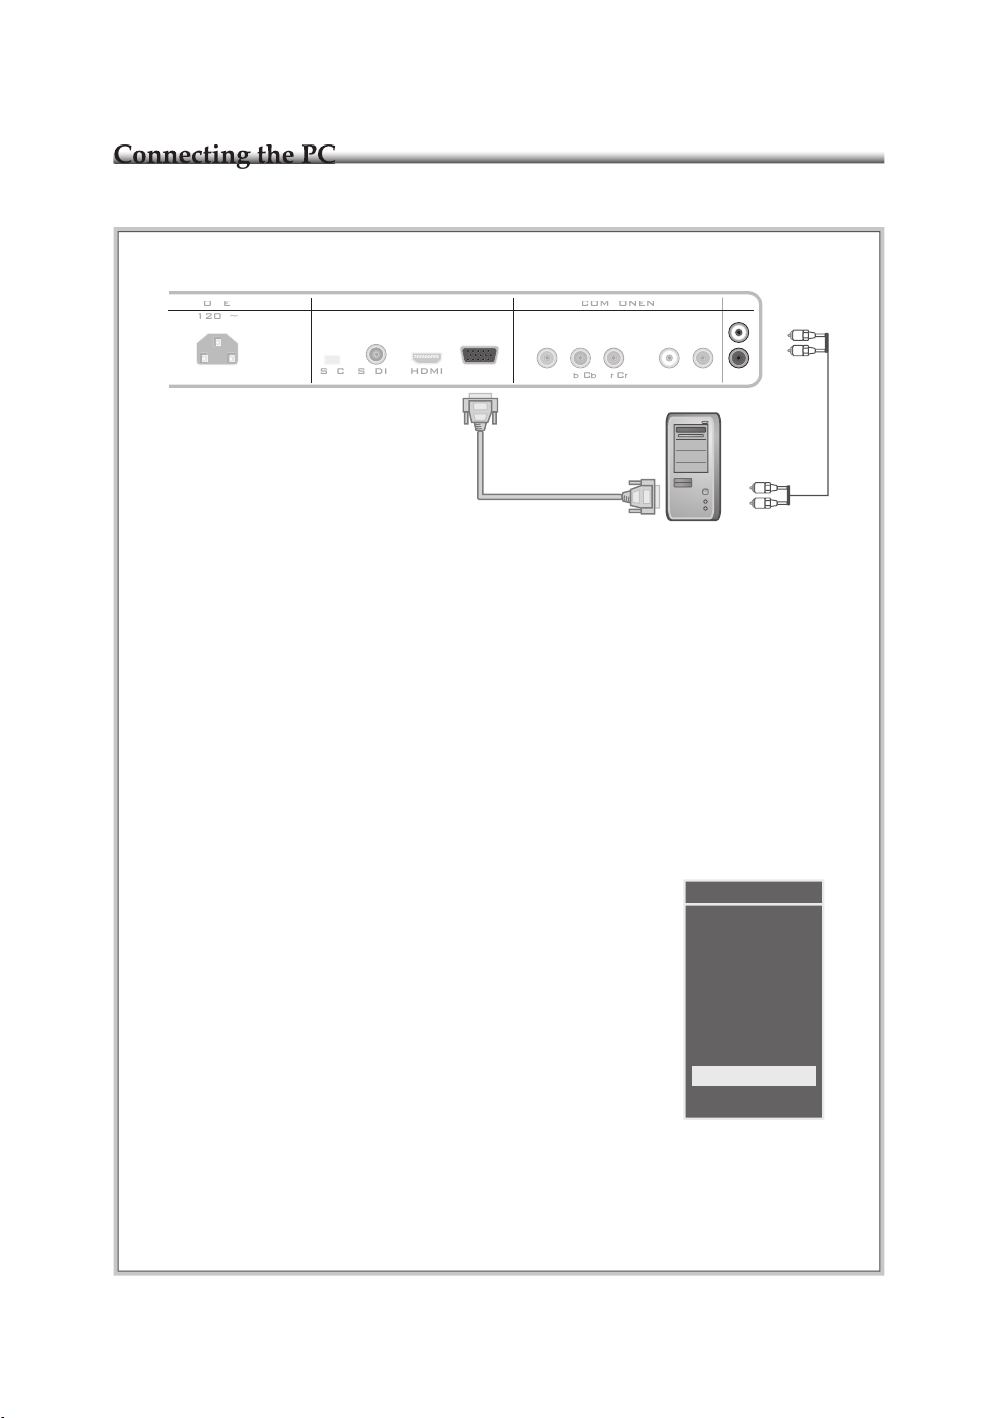
4. You may confi gure your PC’s VGA resolution to optimized resolution on the LCD TV.
SOURCE
TV
AV1
S1
AV2
S2
PC
HDMI
ATSC
COMPONENT
PC
PC
/
/
PC
L
R
15-pin D-Sub Cable
(not supplied)
(L)
(R)
(L)
(R)
Audio Cable
(not supplied)
Page 24
23
SOURCE
TV
AV1
S1
AV2
S2
PC
HDMI
ATSC
COMPONENT
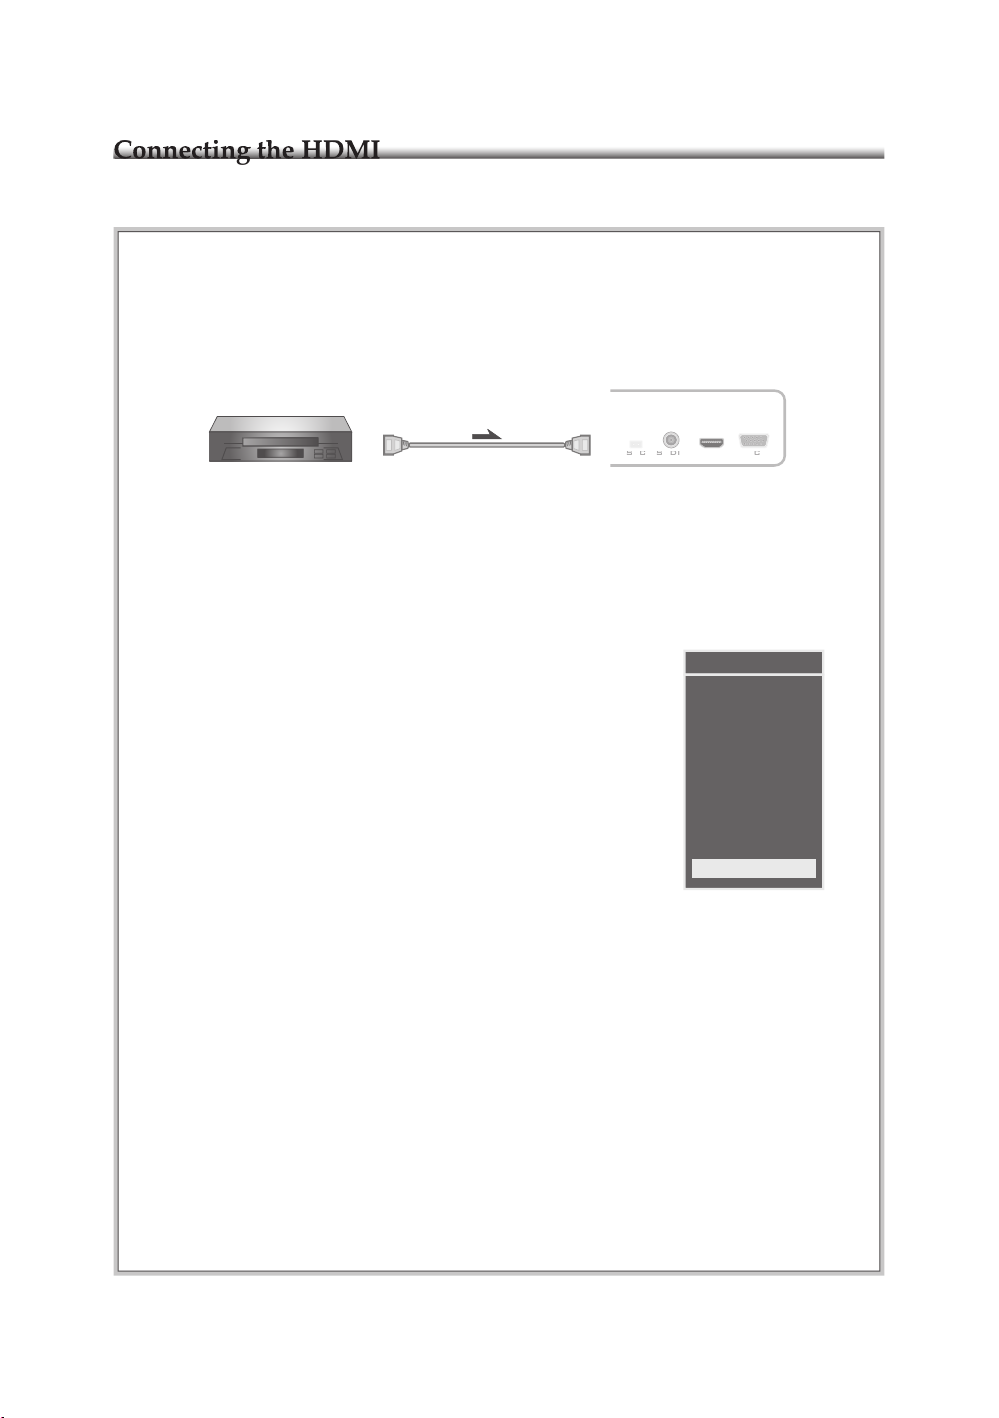
HDMI connection includes both digital audio and video signals.
DVD player
HDMI
HDMI
(not supplied)
Page 25

24
or
on the remote control or “– CH +” on TV con-
SOURCE
TV
AV1
S1
AV2
S2
PC
HDMI
ATSC
COMPONENT
Page 26

25
Press “MENU” on the remote con-
to navigate through the
or “OK” to enter the high-
4.
to navigate.
to change the se-
MODE
COLOR
BRIGHTNESS
CONTRAST
TINT
SHARPNESS
ALL RESET
/ : TO NAVIGATE OK: TO SELECT MENU: TO EXIT
NR
CLOSED CAPTION
STANDARD
OFF
AUTO
OFF
VIDEO
50
50
50
0
50
VIDEO
COLOR
BRIGHTNESS
TINT
SHARPNESS
< / > : TO ADJUST MENU: TO RETURN
NR
CLOSED CAPTION
STANDARD
AUTO
OFF
ALL RESET OFF
CONTRAST
50
50
50
0
50
MODE
Page 27

26
MODE
CONTRAST
BRIGHTNESS
COLOR
TINT
SHARPNESS
NR
CLOSED CAPTION
ALL RESET
VIDEO
AUDIO
OPTIONS
V-CHIP
TV
SCREEN
TREBLE
BASS
BALANCE
SOUND MODE
SPEAKER
ALL RESET
DISPLAY MODE
H SIZE
H POSITION
V POSITION
FINE TUNE
DEFAULT
AUTO
TV/CATV
MTS
AUTO PROGRAM
CHANNEL
ADD/ERASE
SKIP
COLOR TEMPERATURE
OSD TIMEOUT
MENU BACKGROUND
BLUE SCREEN
AUTO POWER OFF
BACKLIGHT
PIP POSITION
V-CHIP
UNRATED PROGRAM
TV RATING LIMIT
MOVIE RATING LIMIT
CHANGE PASSWORD
Page 28
27
1. Use
or
2.
to contrast and press
to select.
3.
to
VIDEO
COLOR
BRIGHTNESS
TINT
SHARPNESS
< / > : TO ADJUST MENU: TO RETURN
NR
CLOSED CAPTION
STANDARD
AUTO
OFF
ALL RESET OFF
CONTRAST
50
50
50
0
50
MODE
VIDEO
MODE
COLOR
BRIGHTNESS
TINT
SHARPNESS
< / > : TO ADJUST MENU: TO RETURN OK: TO SELECT
NR
CLOSED CAPTION
CUSTOM
AUTO
OFF
ALL RESET OFF
CONTRAST
50
50
50
0
50
CONTRAST
50
Page 29

28
Function Options
STANDARD- Use this selection for balanced
settings.
VIVID- Use this selection to increase color
differences.
CUSTOM- Customizable Selection.
Mode is the selection that allow the
user to choose among default
video settings and customizable
video settings.
Description
MODE
0-100Contrast adjusts the brightness
differences (custom mode must be
on).
CONTRAST
0-100Brightness adjusts the color
differences (custom mode must be
on).
BRIGHTNESS
ON/OFFThis option will reset the contrast,
brightness, color, tint, and sharpness
options to default. (Custom Mode
only)
ALL RESET
0-100Color adjusts the intensity of color
(custom mode must be on).
COLOR
(-25) - (+25)Tint adjusts the natural aspect of a
color (custom mode must be on).
TINT
0-100Sharpness adjusts the sharpness,
the fuzziness of the image (custom
mode must be on).
SHARPNESS
AUTO- the television will control NR
automatically (recommended for TV/Cable TV).
OFF- the television will not use NR.
WEAK- recommended use for high quality
videos.
MEDIUM- recommended use for medium
quality videos (VCR movies/tapes).
This is used to reduce image noise.
NR
(Noise Reduction)
OFF
CC1, CC2, CC3, CC4, Text 1, Text 2, Text 3, Text 4
XDS (XDS shows the title of the program,
network name, start time, length of the program
and audio settings of the program)
If this option is turned on, text of
the program's dialogue will be
shown.
CLOSED CAPTION
Page 30

29
TREBLE
SOUND MODE
BALANCE
BASS
SPEAKER
ALL RESET
OFF
STEREO
ON
AUDIO
/ : TO NAVIGATE OK: TO SELECT MENU: TO EXIT
0
0
0
Function Options
(-12) - (+12)Adjusts the higher pitched sounds.
Description
TREBLE
ON/OFFThis option lets the user turn off or
on your TV speakers.
SPEAKER
ON/OFFAll reset will revert the treble, bass,
and balance back to default.
ALL RESET
MONO/STEREOThis option lets the user choose
between mono and stereo.
SOUND MODE
(-12) - (+12)Adjusts the lower pitched sounds.
BASS
(-32) - (+32)Adjusts the "position" of the sound.
The negative end represents that
the sound will lean towards the left
and the positive end represents
that the sound will lean towards
the right.
BALANCE
Page 31
30
DISPLAY MODE
V POSITION
H POSITION
H SIZE
FINE TUNE
DEFAULT
AUTO
WIDE SCREEN
SCREEN
/ : TO NAVIGATE OK: TO SELECT MENU: TO EXIT
50
50
50
Function Options
WIDE SCREEN
PANORAMIC
4:3 VIDEO
16:9 ZOOM
Display mode lets the user to
choose among four choices that
will change the viewing area on
the screen.
(please see Page 30 for more
details)
Description
DISPLAY MODE
0-100Adjusts the horizontal size. (PC
source only)
H SIZE
0-100Adjusts the horizontal position.
(PC source only)
H POSITION
0-100Adjusts the vertical position.
(PC source only)
V POSITION
0-63Adjust the quality of the image
by eliminating distortion. (PC
source only)
FINE TUNE
ON/OFFThis option will allow auto
positioning for your screen (PC
source only).
AUTO
ON/OFF
Resets H size, H position, V
position, and fine tune to default.
DEFAULT
Panoramic is disabled under HDMI, component, VGA input jack.
Page 32
31
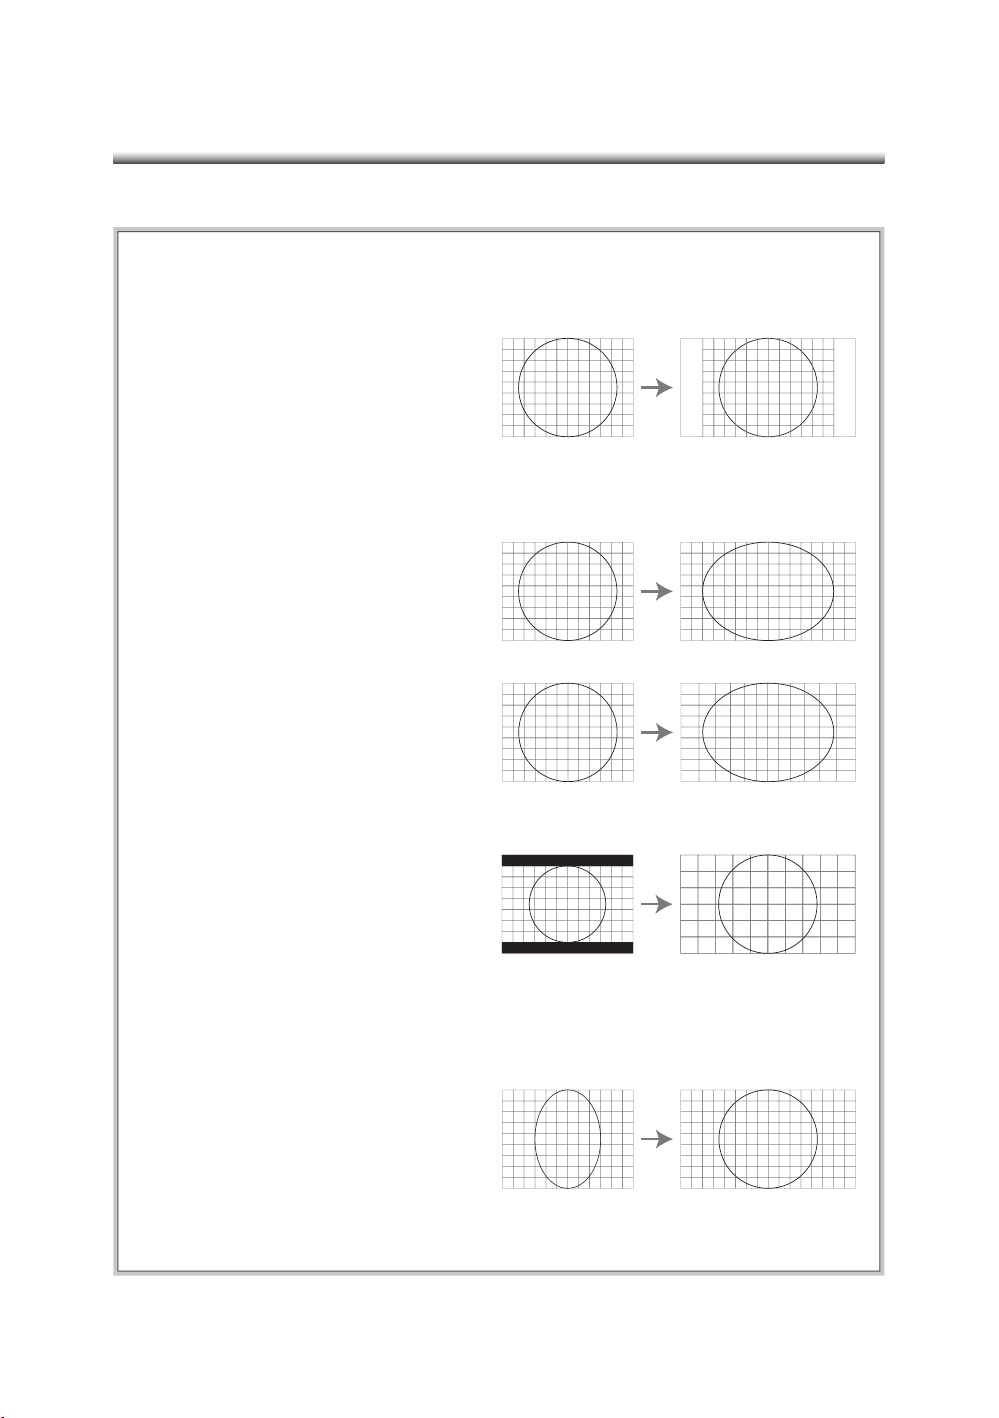
4 : 3 4 : 3
4 : 3 WIDE SCREEN
4 : 3 PANORAMIC
LETTERBOX (4 : 3 / 16 : 9) 16 : 9 ZOOM
WIDE SCREENWIDE SCREEN
Page 33

32
TV / CATV
CHANNEL
AUTO PROGRAM
MTS
ADD / ERASE
SKIP
CATV
1
MAIN
START
ADDED
ON
TV
/ : TO NAVIGATE OK: TO SELECT MENU: TO EXIT
or
TV / CATV
AUTO PROGRAM
MTS
ADD / ERASE
SKIP
CATV
1
MAIN
START
ADDED
ON
TV
< / > : TO ADJUST MENU: TO RETURN
CHANNEL
TV / CATV
AUTO PROGRAM
MTS
SKIP
CATV
1
MAIN
START
ADDED
ON
TV
< / > : TO ADJUST MENU: TO RETURN
CHANNEL
ADD / ERASE
Page 34
33
4. If you need to add/erase another channel, scroll up to CHANNEL and redo the pro-
Function Options
TV(Analog antenna)/CATV(Cable TV)This allows the user to switch
between analog antenna and cable
TV.
Description
TV/CATV
ON/OFFThe auto program helps the user to
search for available channels on
television.
AUTO PROGRAM
(Channel #)This option selects the channel you
want to view, add, or erase. Use
the and buttons.
CHANNEL
ON/OFFThis option allows the user to use
the channel up and down buttons
and not encounter invalid or dead
channels.
SKIP
MAIN, SAP (Second Audio Program)MTS is the option that allows the
user to change the sound options
between main TV audio and SAP
(Second Audio Program). Many
channels have this option to allow
the viewer to switch between
different languages.
MTS
(Multichannel
Television Sound)
ADD/ERASEThis option allows the user to
add/delete recognized channels
that can be reached by using the
channel up and down buttons. Use
the and buttons to switch
between add and erase. (refer to
the example above)
ADD/ERASE
Page 35

34
Function Options
COOL- The colors of the television will shift towards
the blue end of the spectrum.
NATURE- The colors of the television will be natural
(unaltered).
WARM- The colors of the television will shift towards
the red end of the spectrum .
This option allows the user choose among
three styles of displaying colors.
Description
COLOR
TEMPERATURE
Transparent- the background will be see-through.
Opaque- the background will be solid or unable to be
seen through.
This changes the background's transparency.
MENU
BACKGROUND
10, 15, 20, 25, 30, 35, 40 seconds.
This is an adjustment of how much time of
idle is allowed before the menu screen exits.
OSD TIMEOUT
BLUE/BLACKThe blue screen occurs when the channel is
either dead or invalid. The user may chose
the color of the "Blue Screen".
BLUE SCREEN
ON/OFFWhen this option is turned on, if the user
is in idle for more than five minutes on a
dead or invalid, the TV will turn off
automatically.
AUTO POWER
OFF
0-100This adjusts the brightness of the
backlights of the LCD screen. (You use this
option to adjust the backlights without
affecting the contrast, brightness, color,
tint, and sharpness.)
BACKLIGHT
Select Position (The PIP screen will position itself in a
different location [goes clockwise]: UPPERLEFT,
UPPERRIGHT, LOWERRIGHT, and LOWERLEFT).
Press "OK" on this option to adjust the
position of the PIP screen. (Make sure the
PIP screen is on)
Use or to change positions.
PIP POSITION
COLOR TEMPERATURE
BLUE SCREEN
MENU BACKGROUND
OSD TIMEOUT
AUTO POWER OFF
BACKLIGHT
PIP POSITION
NATURE
UPPERLEFT
BLACK
40 SECONDS
TRANSPARENT
OFF
OPTIONS
/ : TO NAVIGATE OK: TO SELECT MENU: TO EXIT
60
Page 36

35
V-CHIP
MOVIE RATING LIMIT
TV RATING LIMIT
UNRATED PROGRAM
CHANGE PASSWORD
ON
EDIT
VIEW
EDIT
EDIT
V-CHIP
/ : TO NAVIGATE OK: TO SELECT MENU: TO EXIT
V-CHIP
MOVIE RATING LIMIT
TV RATING LIMIT
UNRATED PROGRAM
CHANGE PASSWORD
ON
EDIT
VIEW
EDIT
EDIT
V-CHIP
/ : TO NAVIGATE OK: TO SELECT MENU: TO EXIT
PASSWORD :
V-CHIP
MOVIE RATING LIMIT
TV RATING LIMIT
UNRATED PROGRAM
CHANGE PASSWORD
ON
EDIT
VIEW
EDIT
EDIT
V-CHIP
/ : TO NAVIGATE OK: TO SELECT MENU: TO EXIT
PASSWORD :
* * * * * *
Page 37

36
Function Options
ON/OFFThis enables(ON)/disables(OFF)
the settings in the UNRATED
PROGRAM, TV RATING LIMIT,
and MOVIE RATING LIMIT.
(Note: this option will be ON after
the TV has been turned off then
on).
Description
V-CHIP
VIEW/BLOCKThis allows the viewer to view or
block unrated programs.
UNRATED
PROGRAM
Edit (refer to Page 38)This allows the user to change the
V-Chip menu password.
CHANGE
PASSWORD
Edit (refer to Page 36)This allows the user to block or
view certain TV program ratings
assinged by the NAB.
TV RATING
LIMIT
Edit (refer to Page 37)This allows the user to block or
view certain movie program
ratings assigned by the MPAA.
MOVIE RATING
LIMIT
Page 38

37
TV_Y7
TV_Y
RATING
TV_G
TV_14
TV_PG
TV_MA
V
FV V
V
V
V
S
V
V
V
L
V
V
V
D
V
V
V: VIEW B: BLOCK
V-CHIP
< / > : TO ADJUST MENU: TO RETURN
TV RATING LIMIT
V
V
ALL
V
V
V
V
4. “V” means that the selection can
Page 39

38
V: VIEW B: BLOCK
V-CHIP
< / > : TO ADJUST MENU: TO RETURN
MOVIE RATING LIMIT
PG
G
PG-13
NC-17
R
X
V
V
V
V
V
V
4. “V” means that the selection can
Page 40

39
V: VIEW B: BLOCK
V-CHIP
< / > : TO ADJUST MENU: TO RETURN
CHANGE PASSWORD
NEW PASSWORD:
* * * * *
NEW PASSWORD AGAIN:
* * * * *
OLD PASSWORD:
4. Press
Page 41
40
Symbol/Icon Description
Television shows with Y ratings are usually designed for children;
these are suitable for all ages.
TV_Y
Menu Text
Television shows with Y7 ratings are designed for older children;
these are suitable for ages 7 and up.
TV_Y7
Television shows with G ratings are designed to be family-friendly.TV_G
Television shows with PG ratings are designed to be family-friendly,
and they aim for older children.
TV_PG
Television shows with 14 ratings are designed for viewers ages 14 and
older.
TV_14
Television shows with MA ratings are designed for adult viewers
only.
TV_MA
Content Descriptions
Fantasy Violence
FV
Violence
V
Sexual Situations
S
Language
L
Suggestive dialogs
D
Symbol/Icon Description
Movies with G ratings are suitable for all ages.G
Menu Text
Movies with PG ratings may have some unsuitable materials for
children.
PG
Movies with PG-13 ratings may have some materials unsuitable for
children under 13.
PG-13
Movies with R ratings require anyone under 17 to be accompanied by
an adult guardian.
R
Movies with NC-17 ratings prohibit anyone 17 and under to be admitted.
NC-17
G
(General Audiences)
PG
(Parental Guidance Suggested)
PG-13
(Parents Strongly Cautioned)
R
(Restricted)
NC-17
Movies with X ratings prohibit anyone 17 and under to be admitted (NC-17).
X
X
Page 42
41
COLOR TEMPERATURE
BLUE SCREEN
MENU BACKGROUND
OSD TIMEOUT
AUTO POWER OFF
BACKLIGHT
PIP POSITION
NATURE
UPPERLEFT
BLACK
40 SECONDS
TRANSPARENT
OFF
OPTIONS
/ : TO NAVIGATE OK: TO SELECT MENU: TO EXIT
60
AAY
/
PIP
A
/
AAY
MAIN/SUB
A
/
4. To adjust the position of the PIP,
PIP mode PAP modeMAIN mode
Page 43
42
ATSC
ATSC: DTV Ant in, used to connect an over-the-air terrestrial antenna.
1
Use these navigation keys in OSD
menu.
Navigation keys
(up/down/left
/right & OK)
DTV/MENU
(DTV & DTV
Menu hot key)
10
Press this button to enter the
DTV module.
In the DTV mode, press DTV
Menu to display the DTV set-up
menu.
EXIT
9
To exit DTV OSD menu or function
select.
VOL +/VOL
-
3
Press these keys to adjust volume.
0~9
4
Change channels directly and enter
numerical values in OSD.
INFO
6
Press to display "I-plate" which
provides information about the
current channel. Press the second
fine, the screen will show the
program's extended information.
AUDIO
5
Allows the user to select the audio
channels provided by the channel
station (commonly used to select
between/among languages).
CH +/CH
-
2
Press these keys to scan through
channels.
CC
(Closed
Captions)
7
Turns the DTV closed caption on or
off.
EPG
(Electronic
Programming
Guide)
Opens the Program Guide & shows
all the active channels.
8
CH
VOL
1
4
7
2
5
8
0
3
6
9
100+
AAY
/
C.C INFO AUDIO
DTV/MENU EXIT EPG
OK
10
7
2
3
4
1
8
5
9
6
Page 44

43
or
or
Press (Menu) Key and then select
Channol to run Auto / Manual scan.
C
h
a
n
n
e
l
Channel
C
a
p
t
i
o
n
Caption
S
e
t
u
p
Setup L
o
c
k
Lock
Password
Page 45
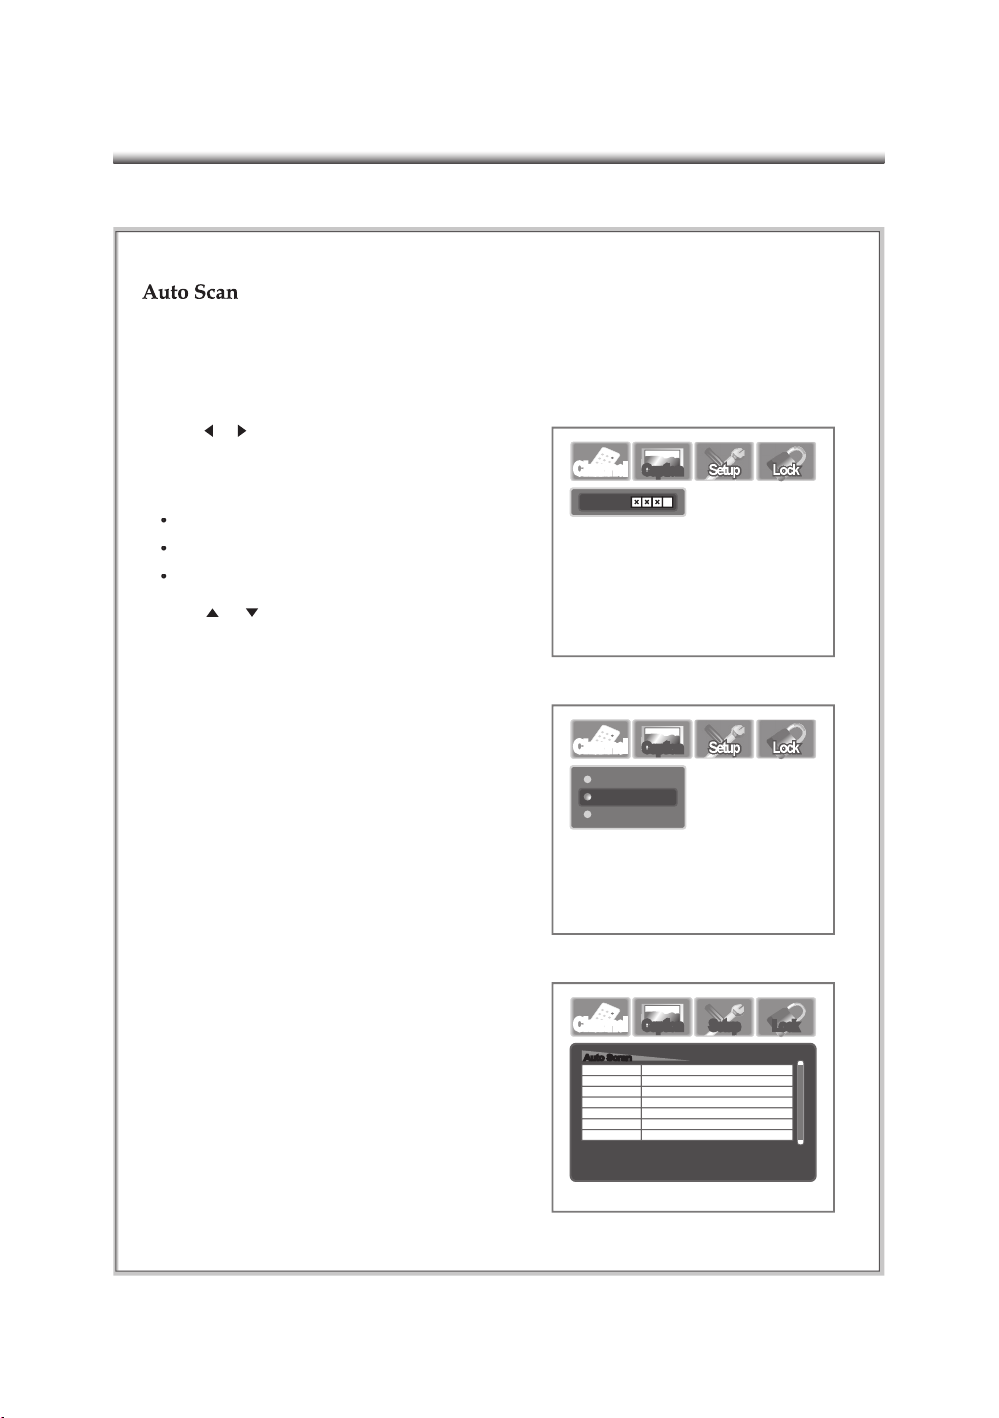
44
4. Once the digital TV signal is scanned,
C
h
a
n
n
e
l
Channel
C
a
p
t
i
o
n
Caption
S
e
t
u
p
Setup L
o
c
k
Lock
Password
C
h
a
n
n
e
l
Channel
C
a
p
t
i
o
n
Caption
S
e
t
u
p
Setup L
o
c
k
Lock
Edit
Manual Scan
Auto Scan
C
h
a
n
n
e
l
Channel
C
a
p
t
i
o
n
Caption
S
e
t
u
p
Setup L
o
c
k
Lock
A
u
t
o
S
c
r
a
n
Auto Scran
03-0
05-0
02-1
02-2
23-0
30-3
OFF-AIR
OFF-AIR
SBC2-D1
SBC2-D2
OFF-AIR
PBS1DTV
6 channels found.
Auto Scan complete. Press (Menu) Key to exit
Page 46

45
On the Channel menu, select the third
4. If the ATSC signal is found and locked,
C
h
a
n
n
e
l
Channel
C
a
p
t
i
o
n
Caption
S
e
t
u
p
Setup L
o
c
k
Lock
Edit
Auto Scan
Manual Scan
C
h
a
n
n
e
l
Channel
C
a
p
t
i
o
n
Caption
S
e
t
u
p
Setup L
o
c
k
Lock
M
a
n
u
a
l
S
c
a
n
Manual Scan
OFFAIR
ChannelNo : 34 Freq : 593000
Status : Press [Enter] to Addchannel.
Signal : 72%
Addchannel
C
h
a
n
n
e
l
Channel
C
a
p
t
i
o
n
Caption
S
e
t
u
p
Setup L
o
c
k
Lock
M
a
n
u
a
l
S
c
a
n
Manual Scan
OFFAIR
ChannelNo :
Status : AddNo. 348VSB channelsuccessfully.
Signal : 0 %
0
Page 47
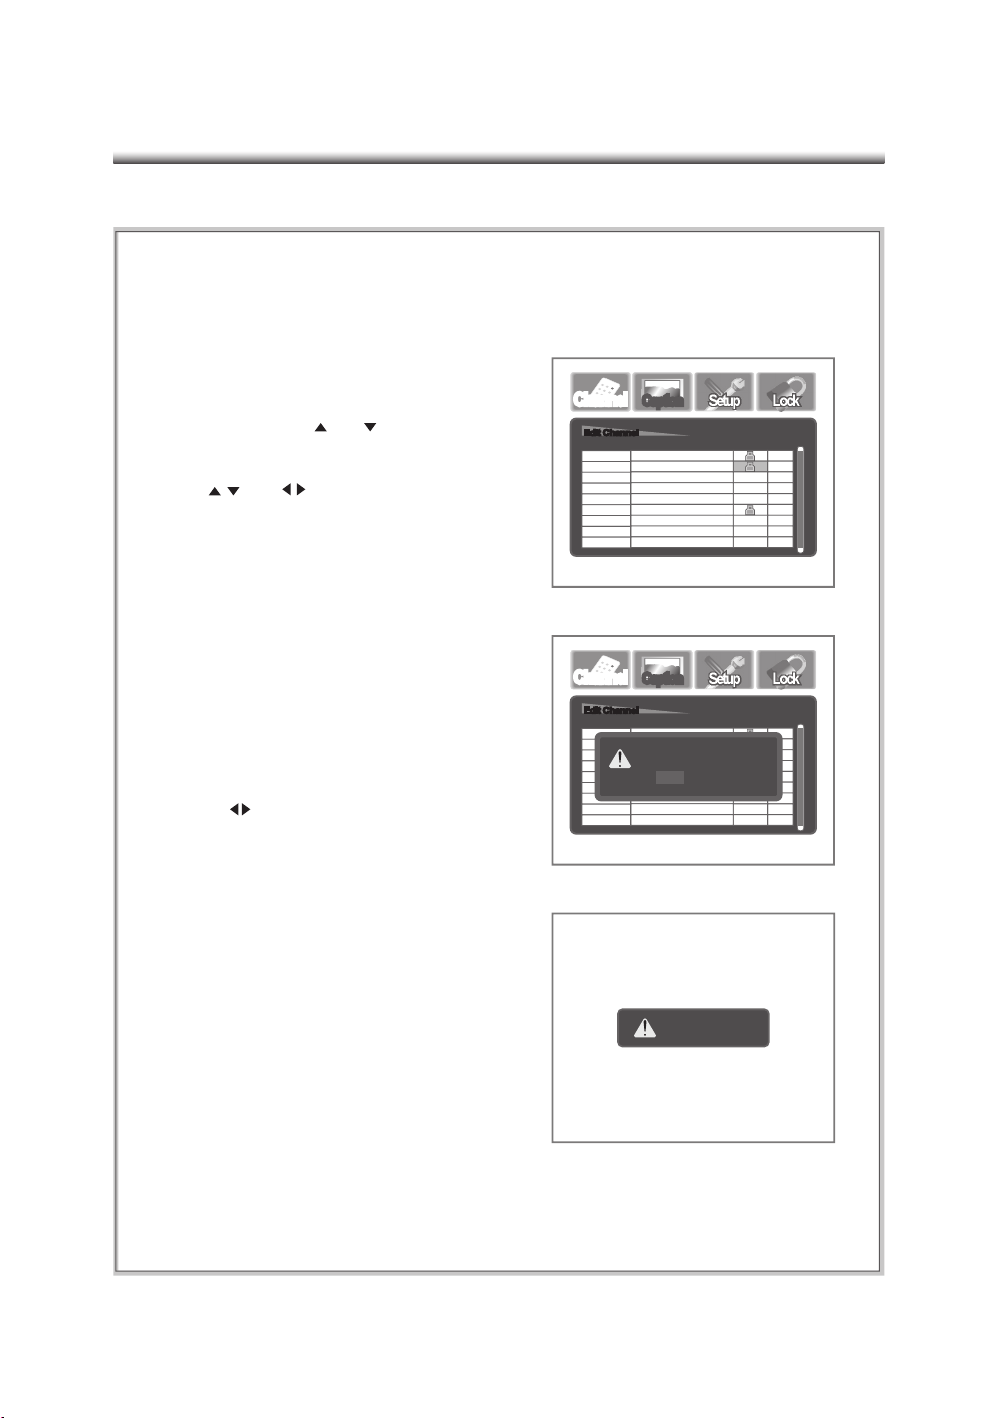
46
and
C
h
a
n
n
e
l
Channel
C
a
p
t
i
o
n
Caption
S
e
t
u
p
Setup L
o
c
k
Lock
E
d
i
t
C
h
a
n
n
e
l
Edit Channel
No.
02-1 F1
02-2 F1
03-0
05-0
23-0
ChannelName Block Fav
SBC2-D1
SBC2-D2
OFF-AIR
OFF-AIR
OFF-AIR
80-3 F1PBS1DTV
C
h
a
n
n
e
l
Channel
C
a
p
t
i
o
n
Caption
S
e
t
u
p
Setup L
o
c
k
Lock
E
d
i
t
C
h
a
n
n
e
l
Edit Channel
No.
02-1 F1
02-2 F1
03-0
05-0
23-0
ChannelName Block Fav
SBC2-D1
SBC2-D2
OFF-AIR
OFF-AIR
OFF-AIR
80-3 F1PBS1DTV
Save changes to database?
Yes No
Channel is blocked
Page 48

47
Options)
Options)
C
h
a
n
n
e
l
Channel
C
a
p
t
i
o
n
Caption S
e
t
u
p
SetupL
o
c
k
Lock
Font Size
Font Color
Font Style
Font Opacity
Default
Middle
Small
Large
Edge Style
Edge Color
C
h
a
n
n
e
l
Channel
C
a
p
t
i
o
n
Caption S
e
t
u
p
SetupL
o
c
k
Lock
Font Size
Font Color
Font Style
Font Opacity
Default
Style2
Style0
Style4
Style3
Style1
Style5
Style6 Style7Edge Style
Edge Color
C
h
a
n
n
e
l
Channel
C
a
p
t
i
o
n
Caption S
e
t
u
p
SetupL
o
c
k
Lock
Font Size
Font Color
Font Style
Font Opacity
Default
White
Red
Black
Green
Edge Style
Edge Color
Closed CaptionsPreview
Background Foreground
Yellow
Pink
Light Blue
Light Blue
Page 49

48
Opacity:
C
h
a
n
n
e
l
Channel
C
a
p
t
i
o
n
Caption S
e
t
u
p
SetupL
o
c
k
Lock
Font Size
Font Color
Font Style
Font Opacity
Edge Style
Edge Color
Default
Translucent Fill
Solid Fill
Transparent Fill
Background Foreground
C
h
a
n
n
e
l
Channel
C
a
p
t
i
o
n
Caption S
e
t
u
p
SetupL
o
c
k
Lock
Font Size
Font Color
Font Style
Font Opacity
Default
Raised
None
Depressed
Drop_Shadow(L)
Uniform
Drop_Shadow(R)
Edge Style
Edge Color
C
h
a
n
n
e
l
Channel
C
a
p
t
i
o
n
Caption S
e
t
u
p
SetupL
o
c
k
Lock
Font Size
Font Color
Font Style
Font Opacity
Default
Blue
Gray
Red
Cyan
Green
Yellow
Dark
Edge Style
Edge Color
Page 50
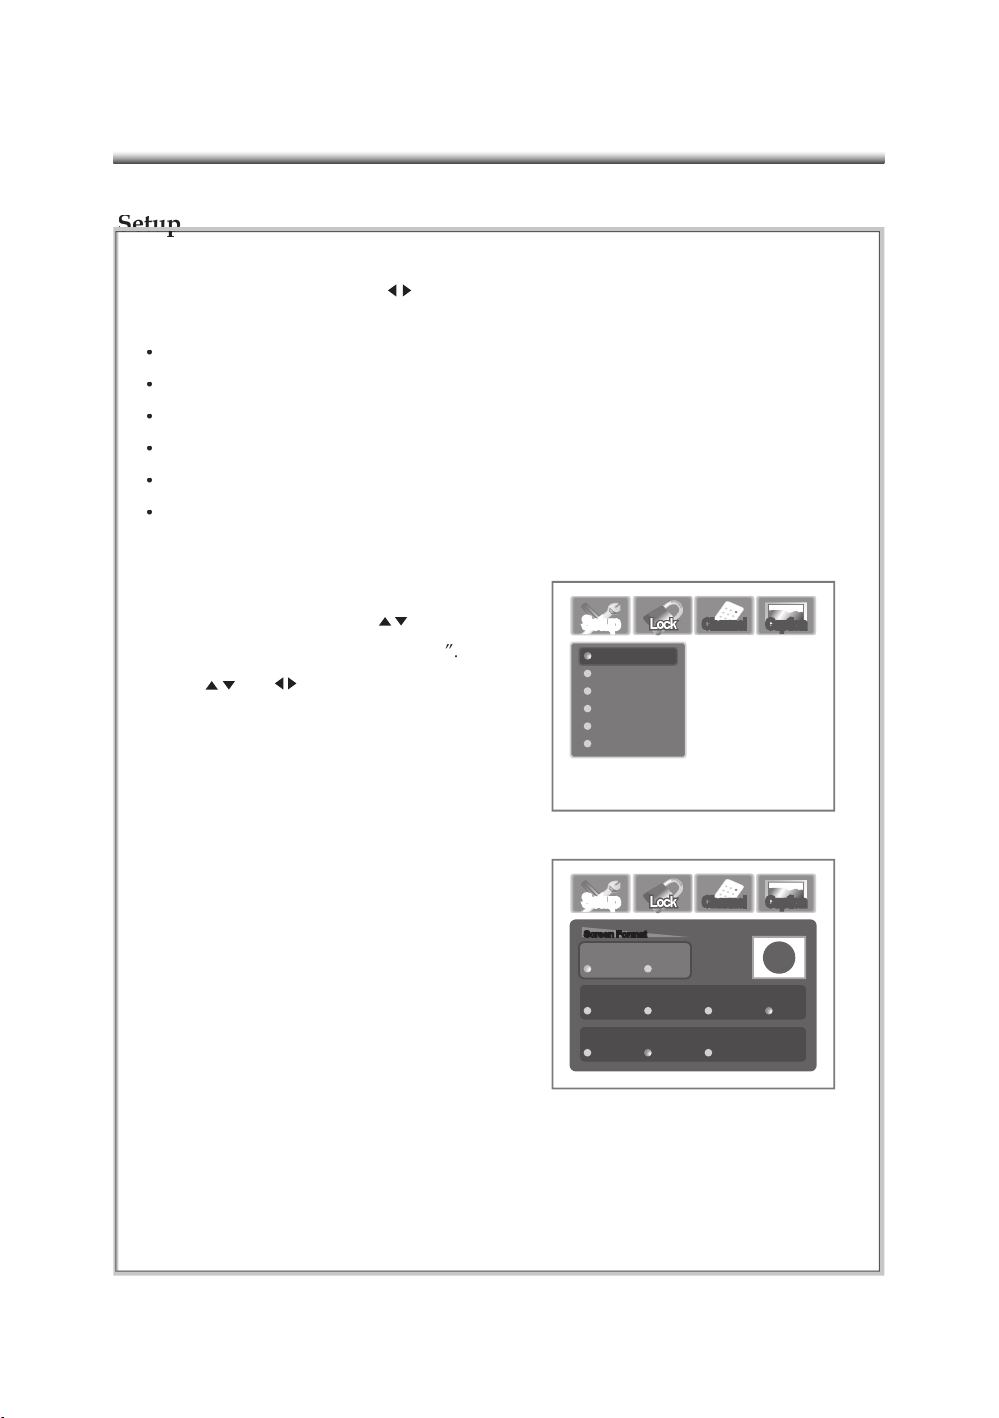
49
buttons to highlight the (Setup) menu. The sub-menus
C
h
a
n
n
e
l
Channel
C
a
p
t
i
o
n
Caption
S
e
t
u
p
Setup L
o
c
k
Lock
Format
Opacity
Sound
I-Plate
Time Zone
About
C
h
a
n
n
e
l
Channel
C
a
p
t
i
o
n
Caption
S
e
t
u
p
Setup L
o
c
k
Lock
S
c
r
e
e
n
F
o
r
m
a
t
Screen Format
4 : 3 16 : 9
TVType
480i 480p 1080i720p
TVType
LetterBox Zoom Full
TVType
Page 51

50
480I
480P
Select this when the television is receiving a 4:3 signal and you want to see the
Select this option to eliminate the left and right black panels that appear in the “Pillar
Select this option when you are receiving a 16:9 signal and you want the image to fi ll
SOURCE SIGNAL ZOOM FULLPILLAR BOX
16
4
3
9
Page 52

51
(Digital Audio Output Set-
or PCM formats.
C
h
a
n
n
e
l
Channel
C
a
p
t
i
o
n
Caption
S
e
t
u
p
Setup L
o
c
k
Lock
Format
Opacity
Sound
I-Plate
Time Zone
About
PCM Dolby D
C
h
a
n
n
e
l
Channel
C
a
p
t
i
o
n
Caption
S
e
t
u
p
Setup L
o
c
k
Lock
Format
Opacity
Sound
I-Plate
Time Zone
About
0% 50% 100%
Page 53

52
4
C
h
a
n
n
e
l
Channel
C
a
p
t
i
o
n
Caption
S
e
t
u
p
Setup L
o
c
k
Lock
Format
Opacity
Sound
I-Plate
Time Zone
About
2 sec
6 sec Off
4 sec
C
h
a
n
n
e
l
Channel
C
a
p
t
i
o
n
Caption
S
e
t
u
p
Setup L
o
c
k
Lock
Format
Opacity
Sound
I-Plate
Time Zone
About
2002\09\27 FRI
13: 51 : 44
DaylightSaving:
ON OFF
AREA: Pacific
Page 54
53
C
h
a
n
n
e
l
Channel
C
a
p
t
i
o
n
Caption
S
e
t
u
p
Setup L
o
c
k
Lock
Format
Opacity
Sound
I-Plate
Time Zone
About
System information
H/W: Rev.B
S/W: 0.87-1998
Loader: 1.71-1914
Lib:TL.332(3D)-1914
EPSON_STB
Page 55
54
4. Press
(Program is rating
on the TV screen.
C
h
a
n
n
e
l
Channel
C
a
p
t
i
o
n
Caption S
e
t
u
p
SetupL
o
c
k
Lock
Password
C
h
a
n
n
e
l
Channel
C
a
p
t
i
o
n
Caption S
e
t
u
p
SetupL
o
c
k
Lock
Rating
Reset DTV
Password
C
h
a
n
n
e
l
Channel
C
a
p
t
i
o
n
Caption S
e
t
u
p
SetupL
o
c
k
Lock
R
a
t
i
n
g
C
o
n
t
r
o
l
Rating Control
Block All
MAPP VSLFV D
G
PG
PG-13
UnblockAll
USTV
TV-Y
TV-Y7
TV-G
TV-14
TV-MA
R
NC-17
X
TV-PG
Page 56

55
Symbol/Icon Description
Television shows with Y ratings are usually designed for children;
these are suitable for all ages.
TV_Y
Menu Text
Television shows with Y7 ratings are designed for older children;
these are suitable for ages 7 and up.
TV_Y7
Television shows with G ratings are designed to be family-friendly.TV_G
Television shows with PG ratings are designed to be family-friendly,
and they aim for older children.
TV_PG
Television shows with 14 ratings are designed for viewers ages 14 and
older.
TV_14
Television shows with MA ratings are designed for adult viewers
only.
TV_MA
Content Descriptions
Fantasy Violence
FV
Violence
V
Sexual Situations
S
Language
L
Suggestive dialogs
D
Symbol/Icon Description
Movies with G ratings are suitable for all ages.G
Menu Text
Movies with PG ratings may have some unsuitable materials for
children.
PG
Movies with PG-13 ratings may have some materials unsuitable for
children under 13.
PG-13
Movies with R ratings require anyone under 17 to be accompanied by
an adult guardian.
R
Movies with NC-17 ratings prohibit anyone 17 and under to be admitted.
NC-17
G
(General Audiences)
PG
(Parental Guidance Suggested)
PG-13
(Parents Strongly Cautioned)
R
(Restricted)
NC-17
Movies with X ratings prohibit anyone 17 and under to be admitted (NC-17).
X
X
Page 57

56
4
C
h
a
n
n
e
l
Channel
C
a
p
t
i
o
n
Caption S
e
t
u
p
SetupL
o
c
k
Lock
Rating
Reset DTV
Password
NewPassword
Confirm again
C
h
a
n
n
e
l
Channel
C
a
p
t
i
o
n
Caption S
e
t
u
p
SetupL
o
c
k
Lock
Rating
Reset DTV
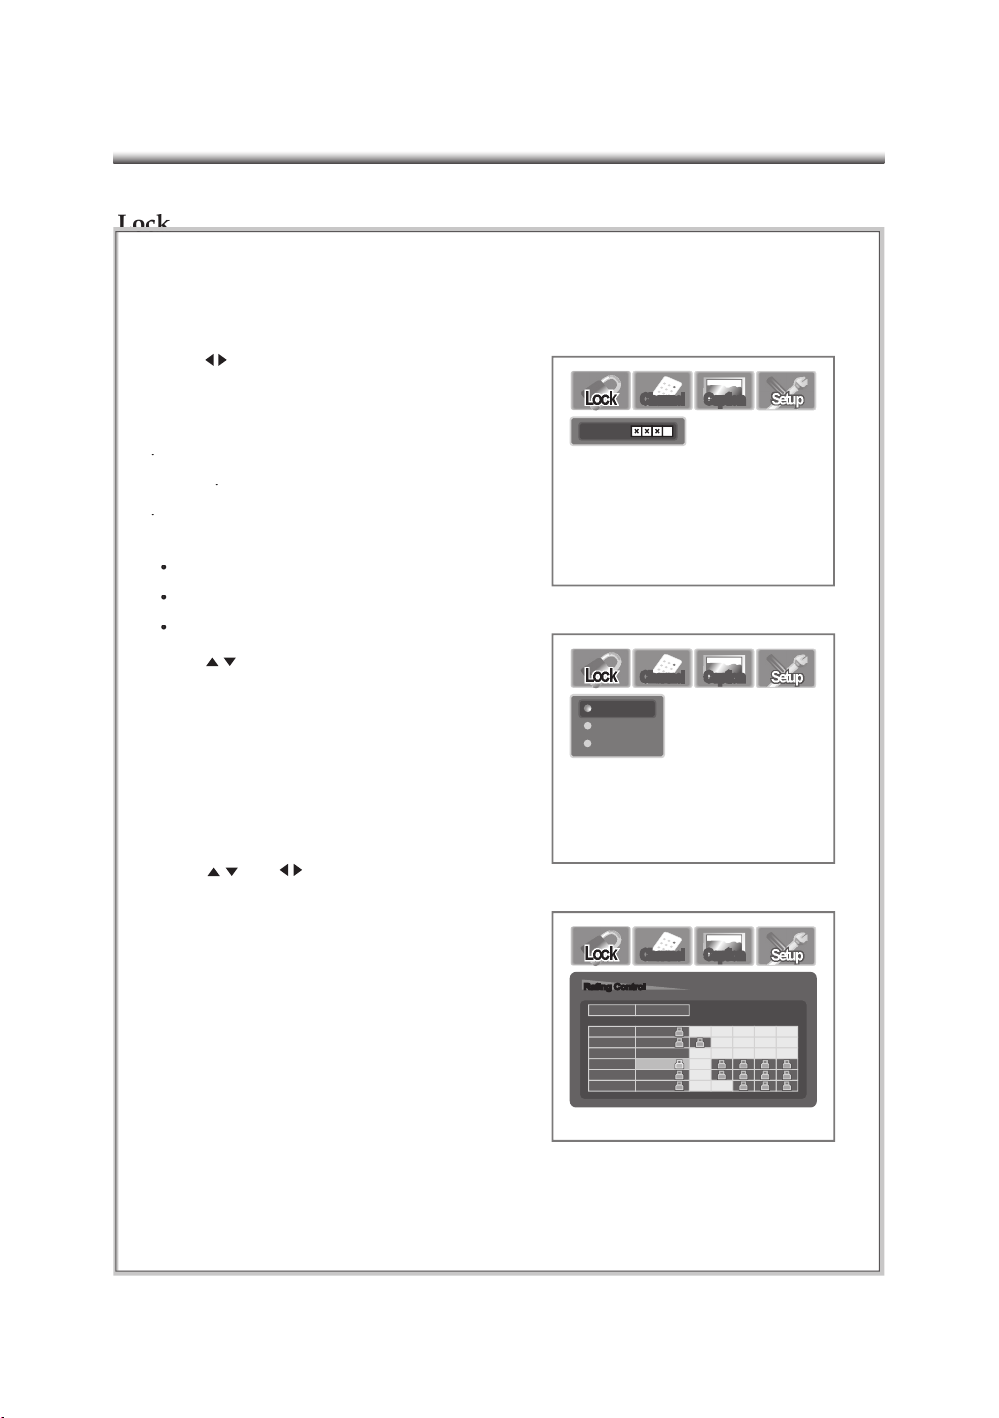
Password
Select YES to restore
default value.
Yes No
Page 58
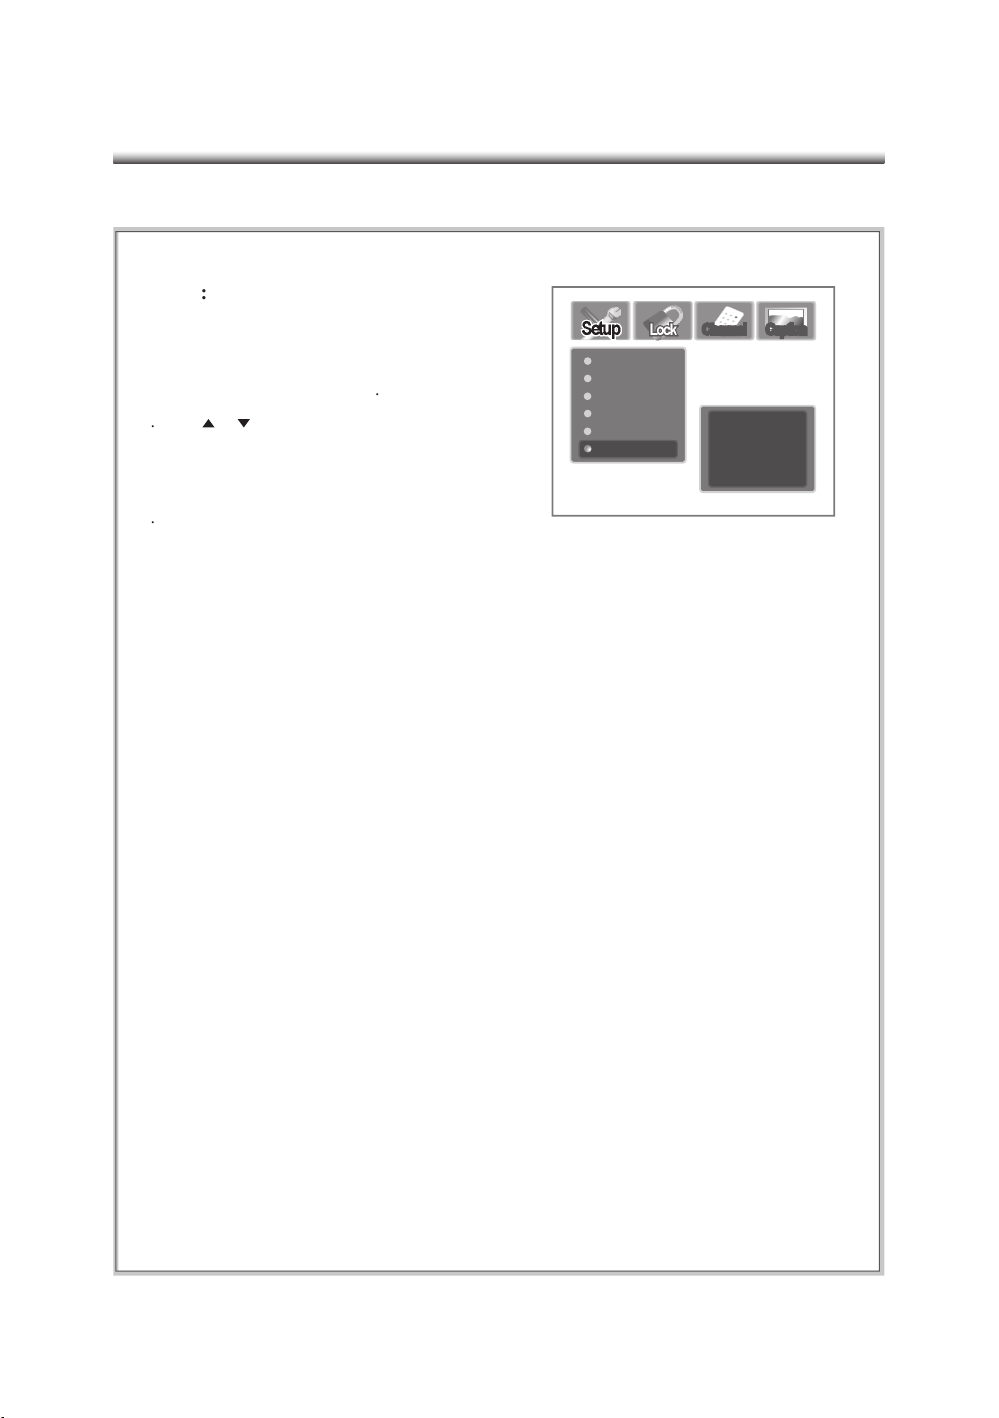
57
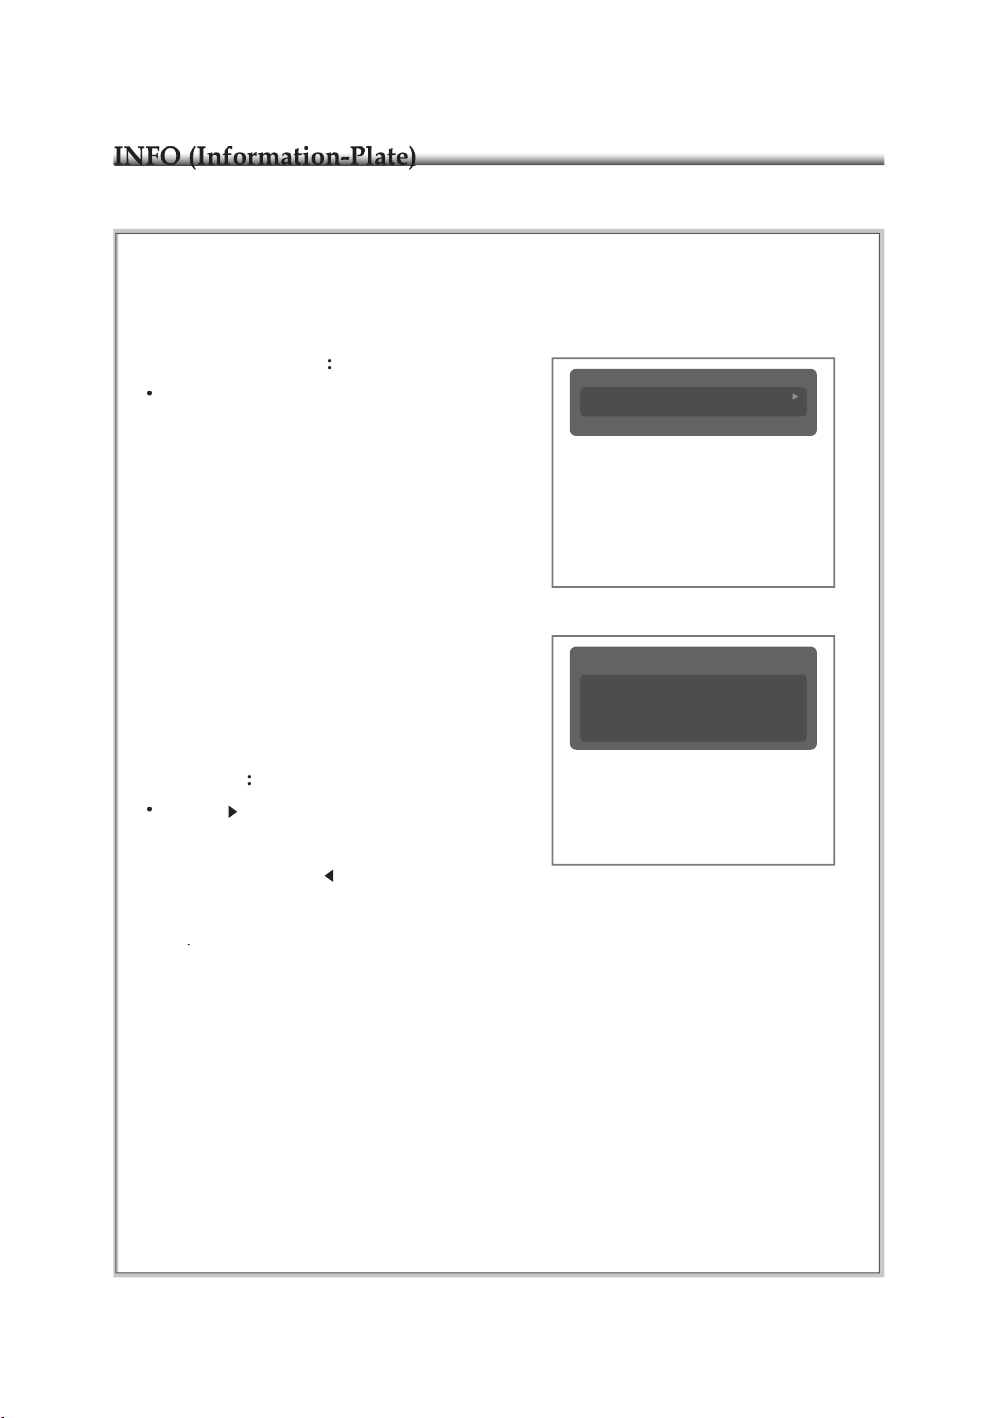
KTRK-80 13. 03
(None, None)
Sep.27 10:51 PM
DTVProgram
04:30~05:00 480i Dolby CC1
13.03 DTV Program
04:30~0500 (None, None)
DTVProgram
Page 59
58
Language1
Language2
Multi Language
The TV should be tuned to a DTV chan
Page 60

59
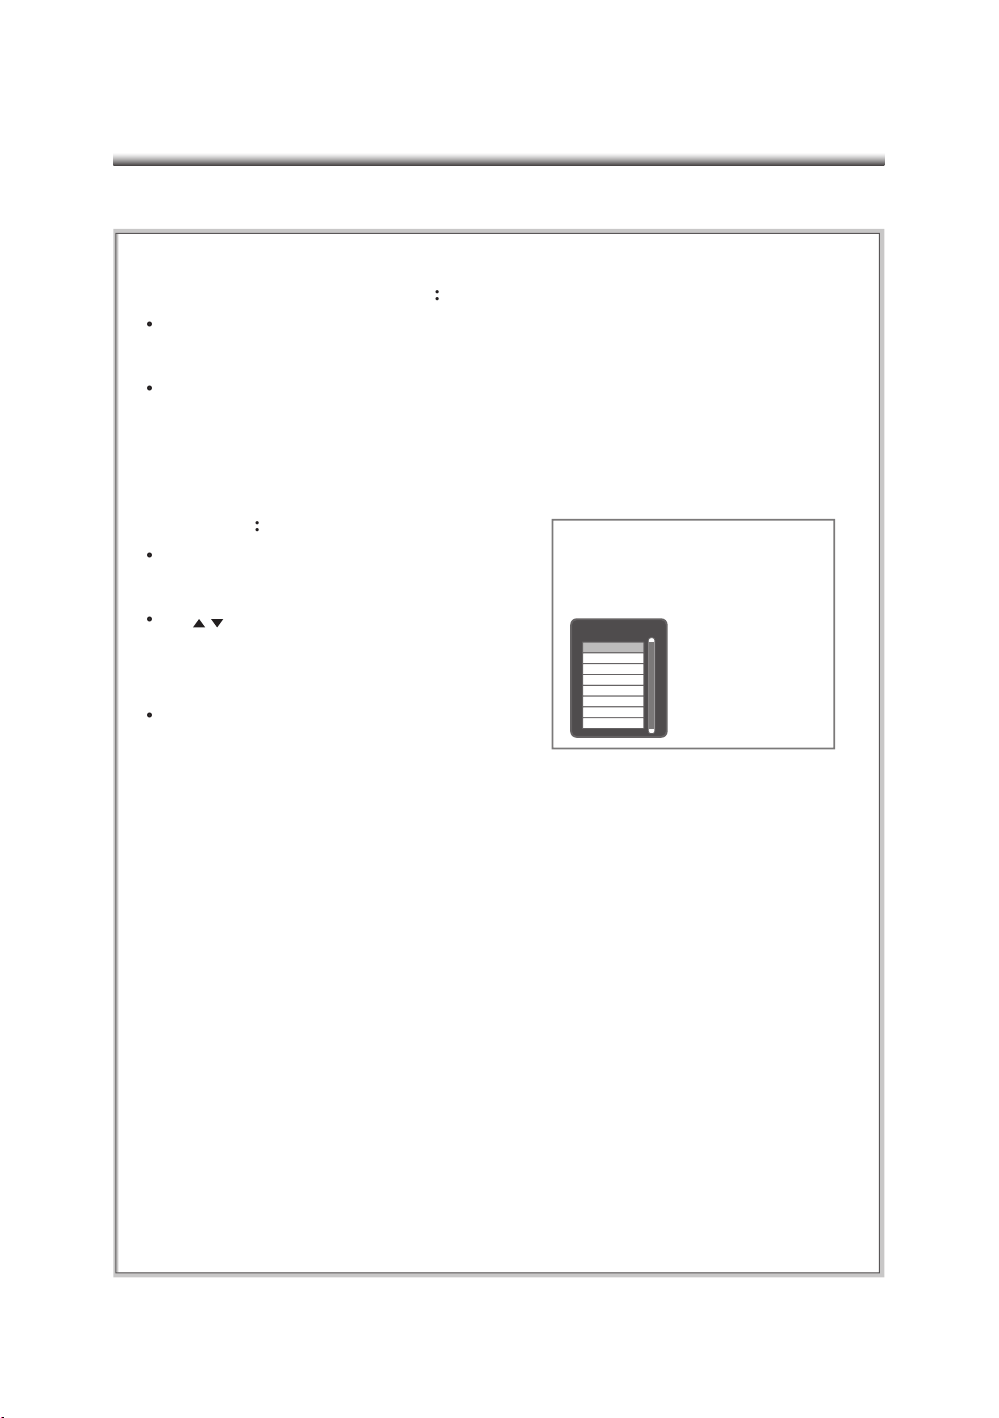
buttons to roll the channel list up
P
r
o
g
r
a
m
G
u
i
d
e
ProgramGuide
PBSHD Programming (10 : 00PM~11: 00PM)
Sep.27 10:51 PM
VariousHD Programs
80-03 PBS1 DTV
CHANNEL
RF(34)
PBS1DTV
80- 03
10:00PM Sep.27
PBSHD Programming PBSHD Progra...
10: 30PM 11: 00PM
C
h
a
n
n
e
l
G
u
i
d
e
ChannelGuide
PBSHD Programming (10 : 00PM~11: 00PM)
Sep.27 10:51 PM
VariousHD Programs
80-03 PBS1 DTV
Physical
channel
3
5
34
OFF- AIR
03- 00
OFF- AIR
05- 00
PBS1DTV
80- 03
VirtualChannel
Page 61
60
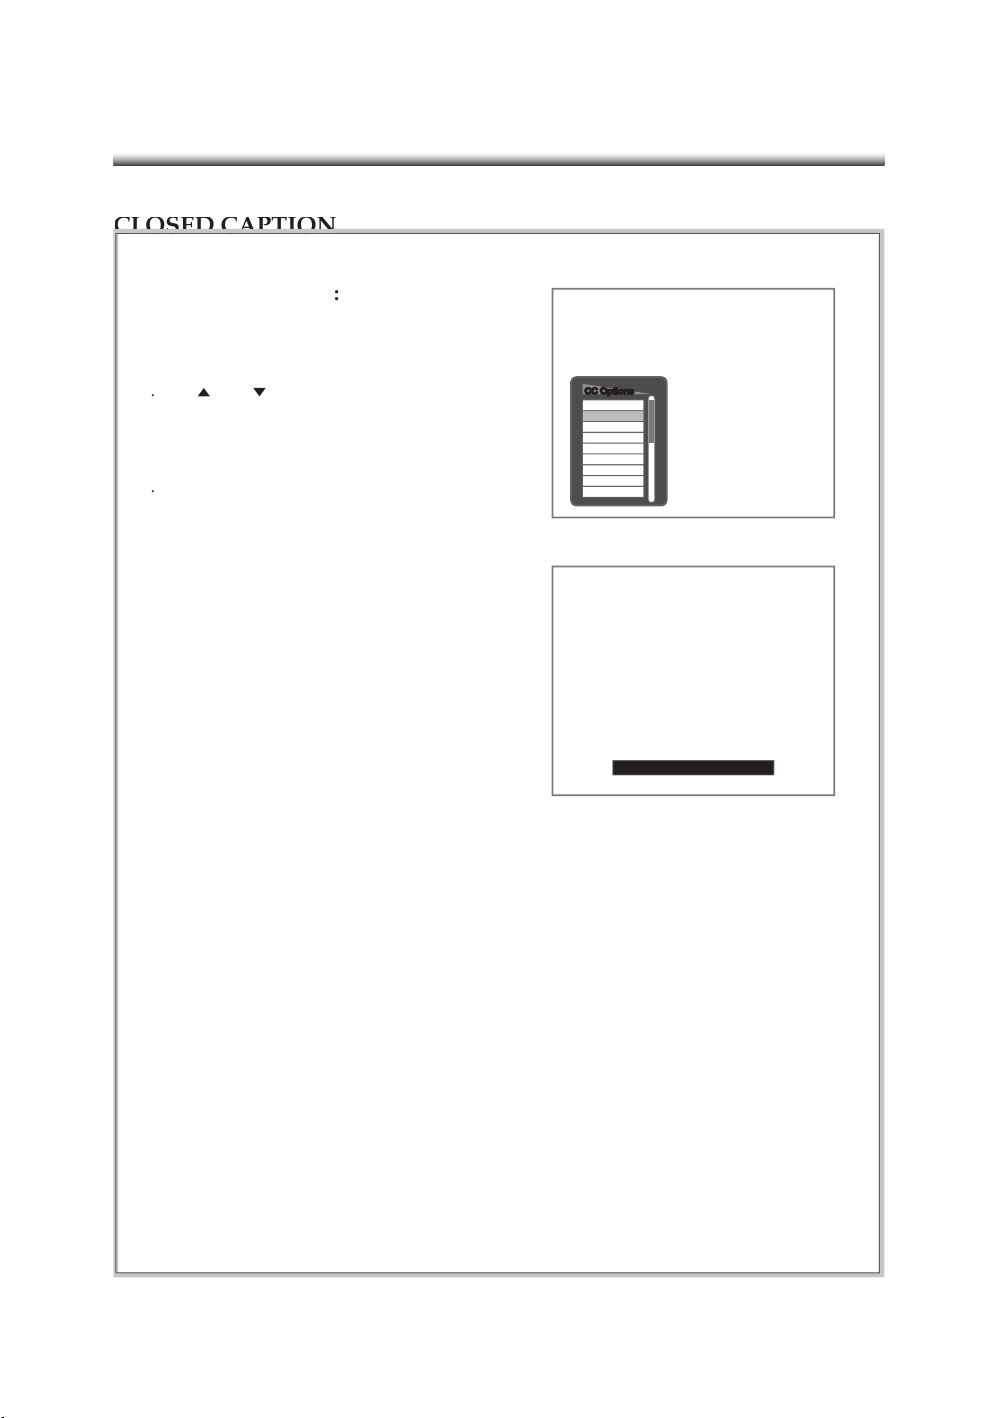
CCOFF
CC1
CC2
CC3
CC4
CS1
CS2
CS3
CS1
C
C
O
p
t
i
o
n
s
CCOptions
OUT ACROSS THE SANCTUARY
Page 62
61
1. Make sure the power plug is properly
connected to the power outlet.
2.
The channel may not have been scanned
and can be re-scanned again from the
setup OSD menu.
3.
Make sure you have selected the correct
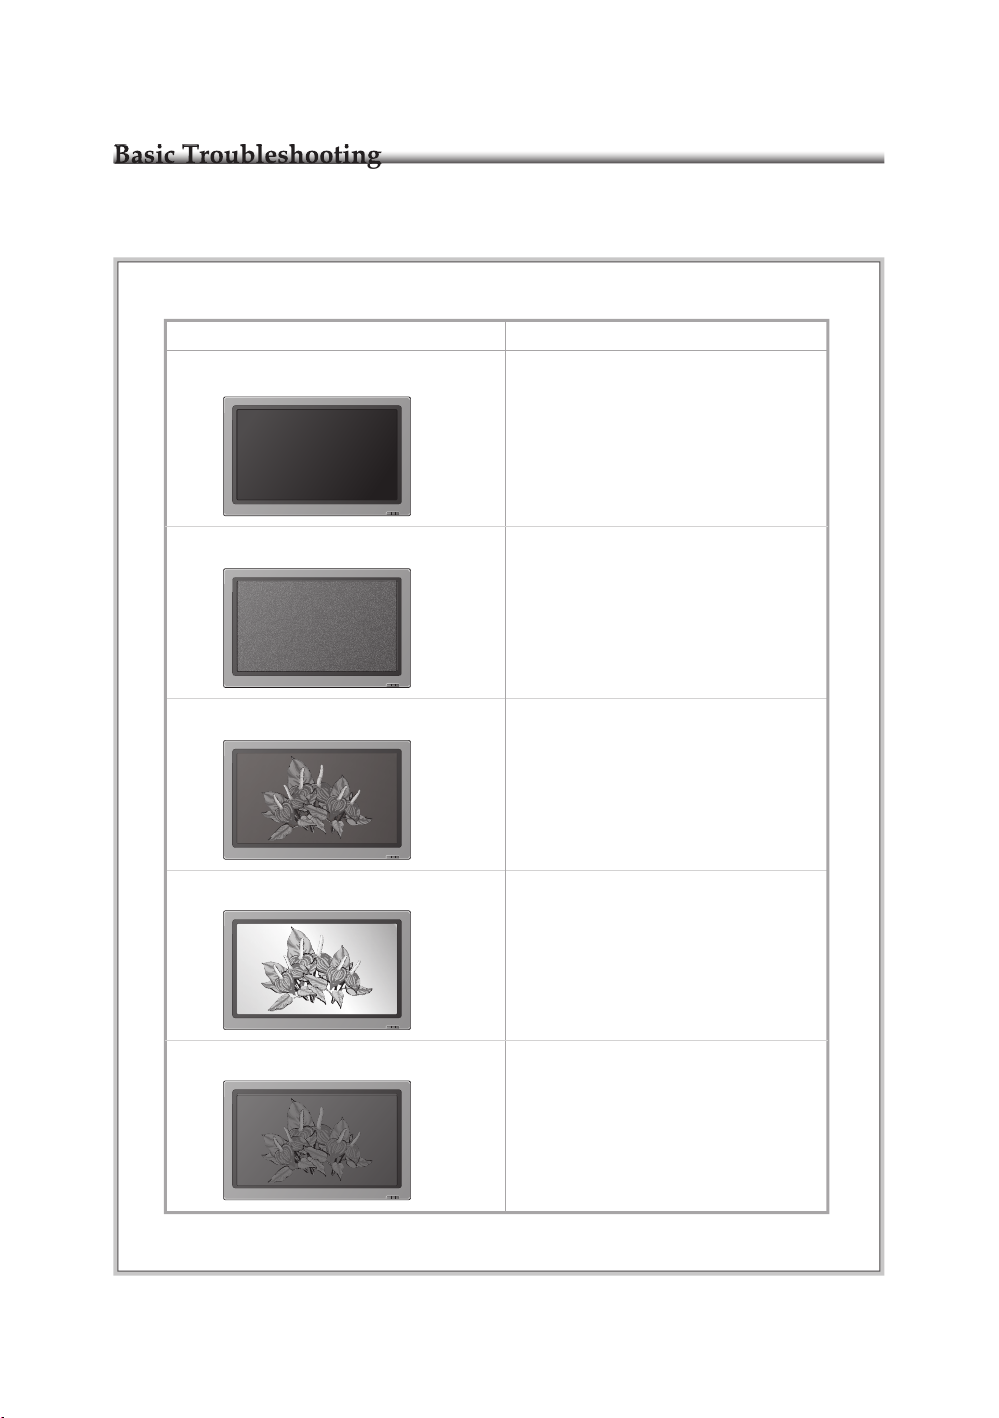
input mode.
1. Check the color adjustment in the
OSD video menu. (Refer to page 27)
Problem Possible Solution
Color abnormal or improper.
There is no picture or sound.
1. Check the brightness and contrast
level setting from the OSD video
menu.
2. Check the "Backlight" setting in the
OSD options menu.
1. Check the brightness setting; it may
be set too high.
2. Check the "Backlight" setting in the
OSD options menu. The Backlight
setting is to adjust the screen's
backlight with respect to the
environment's lighting.
Picture is too bright.
1. The antenna reception strength may
be weak.
2. Reposition the antenna's placement.
3.
Make sure the antenna cable is properly
connected to the LCD TV set.
There is just noise.
Picture is too dark.
Page 63
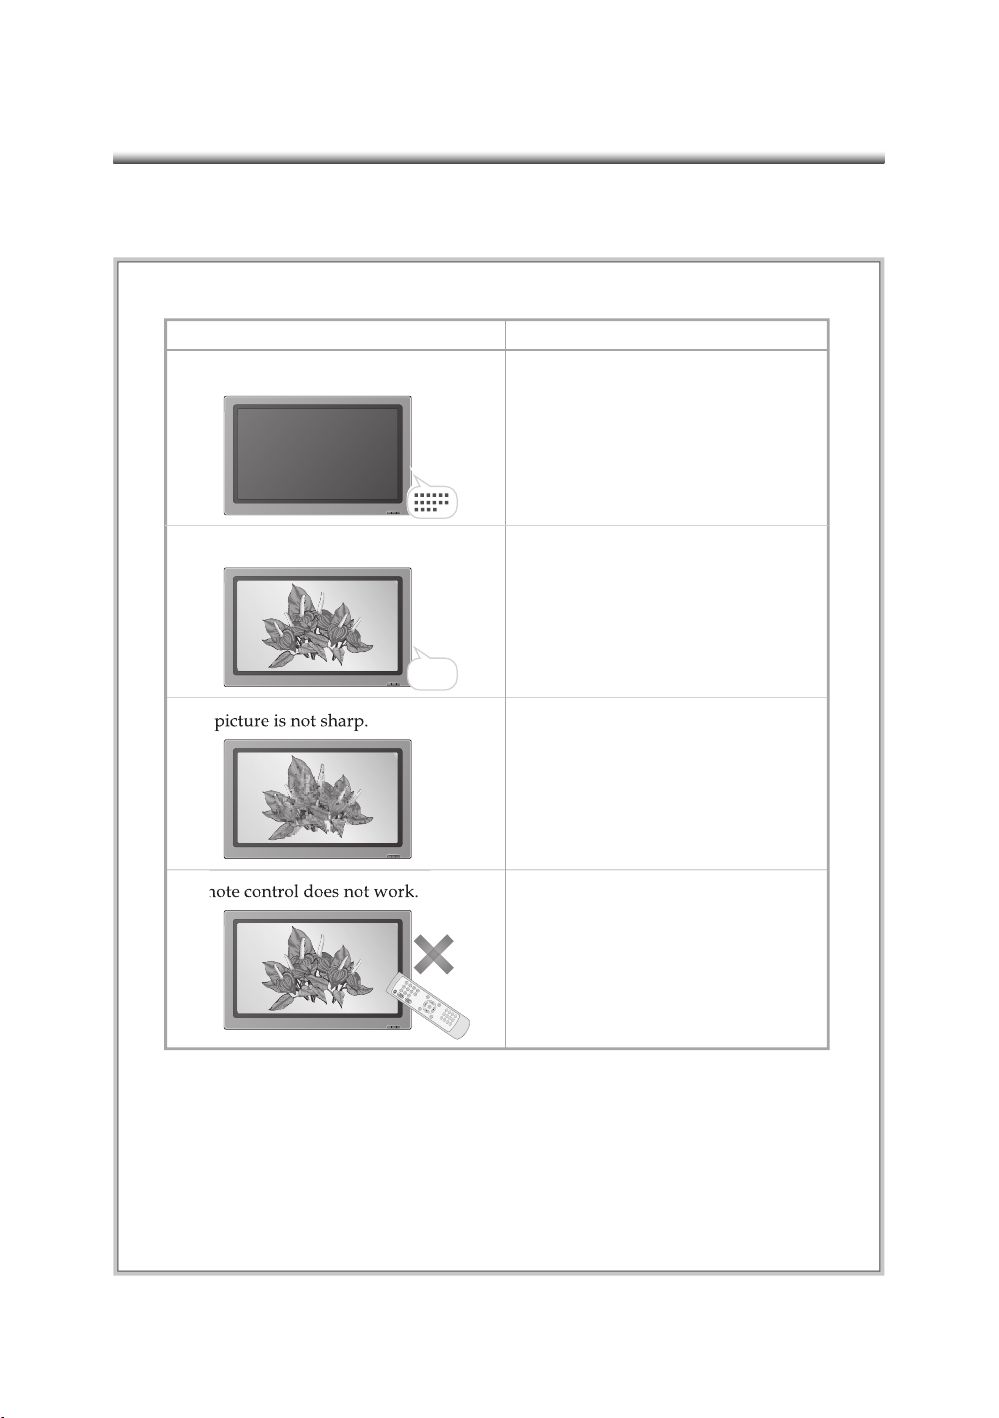
62
1. The program reception may be weak .
2. Check the "Sharpness" setting in the
OSD video menu. (Refer to page 27)
Problem Possible Solution
The picture is not sharp.
No picture, there is sound.
1. Check the remote control's batteries.
2. Make sure there is no device near by
the LCD TV generating interference.
3. Turn the TV off for 10 seconds and
turn it on again.
Remote control does not work.
1. Make sure the volume level is not set
to the minimum.
2. Make sure the mute function is not
selected.
1. Check to see if the video cable is
properly connected.
2. Press the "SOURCE" button from the
remote control to see if the input is
correctly selected.
There is no sound.
C
H
V
O
L
1
4
7
2
5
8
0
3
6
9
1
0
0
+
S
L
E
E
P
A
S
P
E
C
T
D
I
S
P
L
A
Y
M
A
I
N
/
S
U
B
F
R
E
E
Z
E
P
I
P
C
.
C
I
N
F
O
A
U
D
I
O
D
T
V
/
M
E
N
U
E
X
I
T
E
P
G
P
O
W
E
R
R
E
C
A
L
L
M
U
T
E
M
E
N
U
S
O
U
R
C
E
O
K
Page 64

63
Resolution
Display Color
LCD Panel
Screen Size
WXGA (H) 1366×(V) 768pixels
16, 777, 216 Color
37" diagonal
S-VIDEO in
VIDEO in/out
Aspect Ratio
Y 1 Vp-p/75 Ω, C 0.7 Vp-p/75 Ω
1 Vp-p/75 Ω
16:9 WIDE
Input/Output
PC Audio L/R in RCA Jack×2
Y / Pb/Cb / Pr/Cr Y 1 Vp-p/75 Ω, Cb/Pb / Cr/Pr 0.7 Vp-p/75 Ω
Audio L/R in/out Input: 400 mV/47 KΩ, Output: 400 mV/600 Ω
Analog RGB in D-Sub×1
Built-in speaker 10W×2
HDMI in HDMI×1
Multi picture
Screen Size adjustment
Video Features
Color Temperature
Progressive Scan
3-2 pull down
Yes
Wide Screen/Panoramic/4:3 Video/16:9 Zoom
Cool/Nature/Warm
Yes
Yes
Antenna input 75 Ω
Audio Features
PC
VGA/SVGA/XGA
Video system
Color system
NTSC
NTSC
Compatibility
SDTV/HDTV 480i, 480p, 1080i, 720p
Operative temperature
Power
32o- 95oF
Dimension (W)44.88×(D)4.57×(H)24.29 inch (without stand)
Net Weight/Gross Weight
(W)44.88×(D)9.33×(H)25.04 inch (with stand)
27kg/32kg
AC 120V, 250W
Other
Storage temperature 14
o
~ 104oF
Page 65

64
Source Vertical
Frequency
(Hz)
Horizontal
Frequency
(Khz)
Resolution
PC input
* P: positive, N: negative
640 x 350
720 x 400
640 x 480
1024 x 768
800 x 600
37.86
31.46
31.469
37.861
37.500
43.269
48.363
56.476
60.023
68.67
53.674
37.927
35.156
37.879
48.077
46.875
85.080
70.08
59.940
72.809
75.000
85.008
60.004
70.069
75.029
84.997
85.061
85.039
56.250
60.317
72.188
75.000
Horizontal
Sync Polarity
(TTL)
P
N
N
N
N
N
N
N
P
P
P
N
P
P
P
P
Vertical
Sync Polarity
(TTL)
N
P
N
N
N
N
N
N
P
P
P
P
P
P
P
P
Source Vertical
Frequency
(Hz)
Resolution
640 x 480
HDMI input
480i
480p
576p
480i
Component
(Y/PbCb/PrCr)
480p
1080i
720p
1080i
720p
60
60
60
50
60
60
60
60
50/60
50/60
Refresh
Rate
(Hz)
85
70
60
72
75
85
60
70
75
85
85
85
56
60
72
75
Page 66

65
general
4:3-
a popula
480
general
480
general
general
high quality video processing; 720 lines 1/60 seconds; progressive scanning (top to bot-
general
general
general
Page 67

66
general
general
Digital Video Home System.
general
inputs and outputs
general
general
general
general
general
general
general
Page 68

67
general
general
general
genera/inputs and outputs l
adjusts the position of the picture in picture screen.
part of the component input.
general
inputs and outputs
inputs and outputs
Coaxial (RF); the output socket that transmits to the cable connecting
Page 69

68
general/screen menu/V-Chip menu
general
general
general
Warm-
gives a red tint.
Widescreen
this is generally used to view widescreen signals from DVD videos and
video menu
Extended Data Service; this provides information of the program, network name,
Y-
part of video signal.
Page 70

69
Warranty Card Info
Warranty Card Info
ONE YEAR LIMITED WARRANTY
This EMPREX device is guaranteed against manufacturing defects for one full year from the original date of
purchase.
This warranty is valid at the time of purchase and is non-transferable. Sales slip or other authentic evidence
is required to validate warranty. Damage caused by accident, misuse, abuse, improper storage, and/or
uncertified repairs is not covered by this warranty.
All mail or transportation costs including insurance are at the expense of the owner.
DO NOT send any product to EMPREX for warranty without an RMA (Return Merchandise Authorization)
and proof of purchase. Ensure delivery method can be tracked (keep tracking number).
Before returning a product, obtain an RMA number from EMPREX by:
1. Emailing: techsupport@allsupport.net or
2. Calling: (510)657-3956 x325
The RMA number should be clearly displayed on the outside of the returned package and on the
accompanying RMA form. EMPREX will refuse any package without an RMA number.
Warranty is valid only in the country of purchase.
EMPREX assumes no liability that may result directly or indirectly from the use or misuse of these products.
IMPORTANT
This warranty will be voided if the device is tampered with, improperly serviced, or the security seals are
broken or removed.
Technical support email: techsupport@allsupport.net
Technical support phone number: (510) 657-3956 x 321
RETURN MERCHANDISE AUTHORIZATION (RMA) FORM
RMA Number:__________________________ Date:__________________________
Name:_________________________________ E-mail:________________________
Company:_____________________________________________________________
Address:______________________________________________________________
City:___________________________________ State:_______ Zip:______________
Phone Number: (____)__________________________________________________
Product Name/Model:__________________________________________________
Purchase Date:__________________________ Serial Number:_________________
Problem(s) (please be specific):___________________________________________
______________________________________________________________________
______________________________________________________________________
______________________________________________________________________
______________________________________________________________________
Page 71

Parts No.: 21-4T562
 Loading...