

Page 1
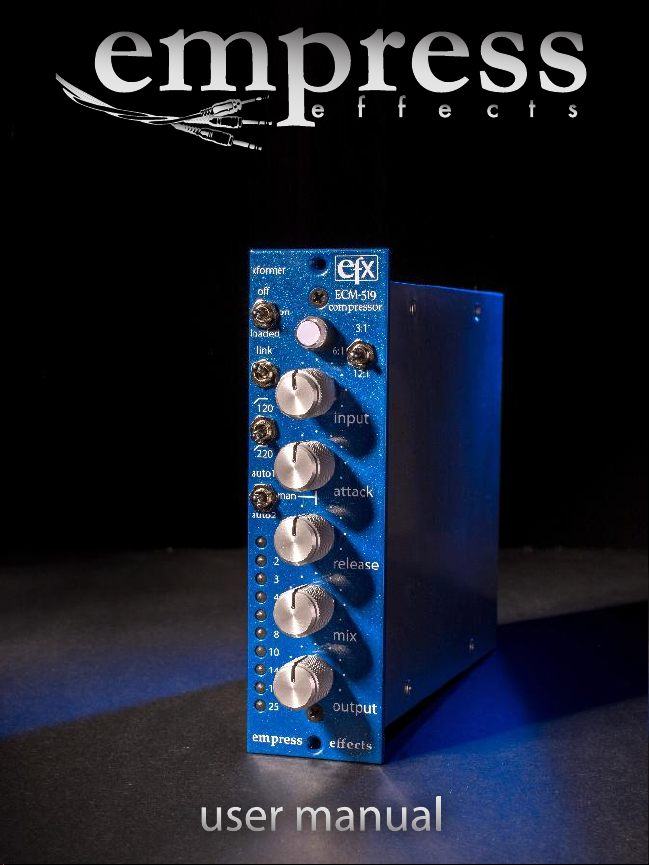
ECM-519
compressor
Page 2

Introduction
We've strived to design a feedback FET compressor with
personality, that can excel where plug-ins fall short and
seamlessly integrate with your DAW to add some often needed
analog warmth. The pleasing FET harmonic distortion, and
some transformer saturation options really help to add that
analog character.
This compressor is extremely versatile. It's great on aggressive
time settings and applying a lot of gain reduction, but can also
be extremely transparent. The auto modes engage two
completely separate side-chain circuits that change the way the
compressor behaves, giving you sounds that aren't possible with
conventional attack and release settings.
True bypass switching makes meaningful comparisons against
the original signal quick and easy, and parallel compression is
only a knob twist away. Happy squishing!
- Jason Fee
Page 3
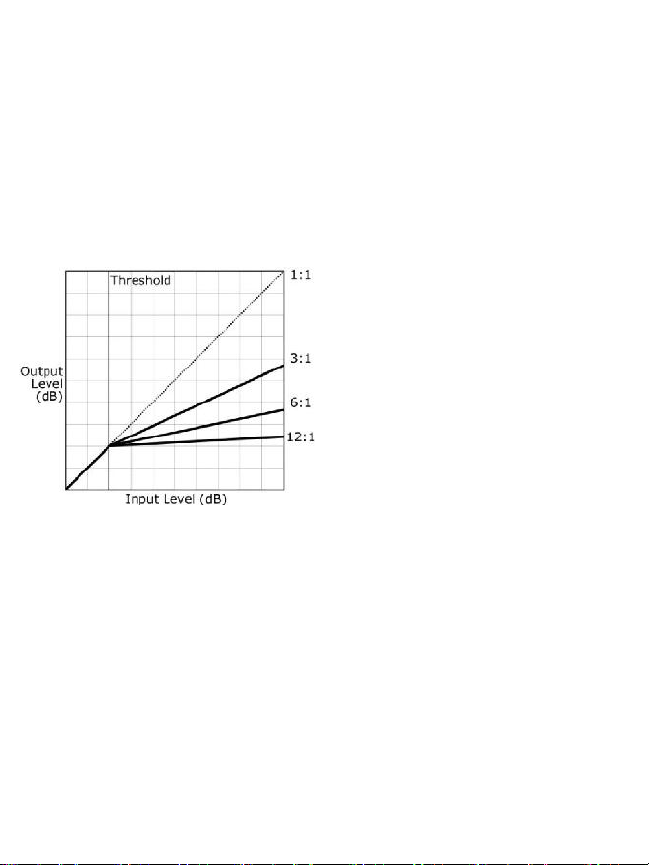
The Basics of Compression
Compression works by narrowing the difference between high
and low audio levels by reducing the gain of any signal over the
threshold. By doing this at specific time constants, compression
can add consistency, sustain, punch, detail, definition and
personality to your tracks.
The ratio determines how
much gain reduction will be
applied to the signal once it
crosses the threshold. At a 3:1
ratio, for every 3dB of input
signal above the threshold,
there will be 1dB of output
signal. A 12:1 ratio would
output 1dB for every 12dB of
input signal, etc.
Attack controls how quickly the gain reduction will begin after a
signal has crossed the threshold. Release controls how long it
takes for the compressor to return to its initial level after the
signal drops below the threshold.
Page 4
Quick Start Settings
Vocal Tracking
Drum Buss Smashing
This setting is great for
controlling the dynamics while
tracking. The auto mode
handles the attack and release
times, so setup is super fast.
This adds a ton of character to
your drum buss. Set the input
level for 25dB of reduction.
Mixing in some dry signal
keeps transients intact.
Page 5

Quick Start Settings
Acoustic Guitar
Bass
Extremely natural sounding on
acoustic guitar. This setting
will control the dynamics
without feeling squashed.
This will lock the bass in the
mix, giving a solid bottom end
that is very controlled. It will
also even out any
inconsistencies in the playing.
Page 6

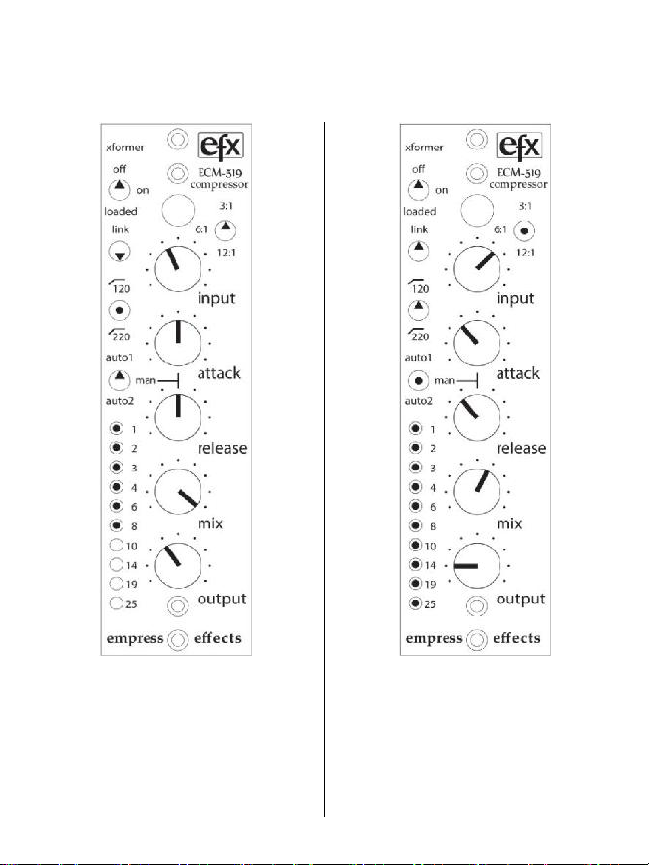
xformer: Select how the output transformer is used in the circuit.
O: The output transformer is not used and the output is
balanced with active electronics. Very clean sound with the
largest bandwidth.
On: Inserts the output transformer in the circuit. Smooths
transients providing warmer top end and thicker low mids.
Loaded: Loads down the output transformer so it saturates
easily. Provides a warm, vintage feel. Great for controlling
cymbals and sibilance in vocals.
link: Links 2 compressors to form a stereo pair. See “Using the
Link Function” for details on connecting the units.
side chain hpf: The high-pass lter cuts out low frequencies in the side chain below either 120Hz or 220Hz.
manual / auto: Control the attack and release times manually or
with one of the two auto modes: *
auto1: Great for dynamic control. Use when tracking to
control peaks or to smooth out a mix.
auto2: Attack is more open making things sound big
and present.
Controls at a Glance
GR meter: This 10 segment meter shows the amount of gain
reduction being performed by the compressor at any given time.
Page 7

bypass: Use to engage/bypass the unit. It will illuminate when the
compressor is in the signal chain. It is true bypass and will pass
signal when bypassed even if the unit is powered o.
ratio: Determines the compression ratio for signals above the threshold.
3:1 - Gentle and transparent.
6:1 - More aggressive compression.
12:1 - Limiting.
Note the threshold raises slightly with higher ratios so that the
output volume is more constant when switching ratios at typical
gain reduction settings. This makes comparing the eect of dierent
ratios more accurate.
input: Controls the level of the signal entering the compressor.
The unit has a xed threshold so higher input settings will result
in increased amounts compression.
attack: Controls the time constant which aects how quickly
gain reduction acts after the signal has exceeded the threshold.
(50us - 50ms) *
release: Controls the time constant which aects how quickly the
gain reduction decreases after the signal drops below the threshold.
(50ms-1s) *
mix: Blend between wet(compressed) signal and dry(uncompressesed)
signal. Counter clockwise is dry, clockwise is wet.
output: Controls the overall output level leaving the compressor.
*The attack and release controls are not used when the compressor is in
auto mode. Switch to manual mode for control over attack and release.
Page 8

Using the Link Function
The link function allows two ECM-519s to work as a stereo pair.
The front panels of both linked units should be set the same to
maintain the stereo image and the link switch needs to be set to
'link' on both units as well.
Connecting the link: there's two ways to connect the link, either
through your 500 series rack enclosure (if your 500 series rack
supports linking ) or through the supplied link cable using the
link connector.
Tip: If you want the absolute closest matching we recommend
sending the same mono signal to both units. Return them to
your console/daw and invert the phase of one channel, and
blend both signals to mono so the signal nulls, then adjust the
output controls for most cancellation.
Page 9

Linking through the cable is always engaged. If you'd like to link
using the enclosure set the 'Link through rack' dip switch to the
'on' position. By having this dipswitch off (default), the unit
won't interfere with any other units you may have linked in your
rack. (Typically, racks link with pin 6 on the card edge
connector).
High Pass Filter
The high pass filters cut out low frequencies in the side-chain
below either 120hz or 220hz. Good uses for this would be:
- Engaging the 120hz filter on bass will allow you to smooth out
the mid-range without over-compressing the lower notes.
- The 220hz filter is useful on instruments like chugging guitar
or other low mid instruments to avoid the pumping effect.
Page 10

Auto Modes
The auto modes react to the audio coming in and modify the
attack and release in real-time depending on what the music's
doing. In each auto mode, there are 2 detectors that run in
parallel. One with really fast time constants at a higher
threshold that reacts primarily to peaks, and a slower detector,
with a lower threshold to smooth the overall signal. There is
also some frequency compensation in these detectors which
changes the ratio slightly depending on frequency. This allows
the auto modes to provide extremely transparent compression
that isn't possible with traditional attack and release controls.
Auto mode 1 : This mode is great for general dynamic control. It
can be used while tracking vocals to control peaks and smooth
out the overall level, without nasty artifacts. Also, it works great
for sitting things in a dense mix, but still allowing them to
breathe.
Auto mode 2 : This is great on acoustic guitar. The attack is
more open and it makes things sound big and present without
squashing the transients too much. On individual sources it's
good for bringing them forward in a mix and even works well on
a mix buss to add some overall punch.
Page 11

Xformer Loading
The compressor is equipped with an output transformer that
can be switched in and out of the circuit.
Off: In this mode the unit runs with an electronically balanced
output. It is very clean and provides the largest bandwidth.
On: This inserts the output transformer in the circuit. It is pretty
clean sounding but you'll start to notice a smoothing of
transients providing a warmer top end, and a slightly thicker
low-mid from slight saturation in the low frequencies.
Loaded: In this mode the output transformer is loaded down so
it saturates easily. This really smoothes out the transients, and
provides a vintage feel. It's amazing for controlling cymbals in a
drum buss or for taming sibilance in vocals.
Tip: The transformer is at the very output of the unit. So if you'd
like to add the transformer sound without any compression, you
can run with completely dry mix to do this.
Tip 2: The Output control on the front panel also controls how
much level the transformer sees, so turning up the output will
provide more saturation.
Page 12

Input Impedance:
48kΩ
Output Impedance:
50Ω (600Ω with x-former)
Frequency Response (-3dB):
10Hz – 35kHz
Distoron:
Varies based on gain reducon
Noise:
Varies with sengs
Output Level:
Input Level:
Up to +22dBu
Up to +22dBu
Required Current:
Aack Range (manual mode):
Release Range (manual mode):
120mA per rail.
50us - 50ms
50ms - 1s
Specications
user manual version 1.0
 Loading...