

Page 1
Page 2

Page 3

Important Safety Precautions and Explanation of Symbols
The exclamation point within an equilateral triangle is intended to alert the user to the presence of important
installation, operation, and service instructions in this manual.
!
The lightning ash with arrowhead symbol within an equilateral triangle is intended to alert the user to the
presence of uninsulated dangerous voltages within the enclosure that may be of sucient magnitude to
constitute a risk of electrical shock to the user.
Please read this manual thoroughly before attempting to install, congure, or operate the Emotiva
XMC-2. After successful installation and conguration of the XMC-2, be sure to retain this manual in a safe
place for future reference.
Safety is a key component of a long lasting and trouble free installation. Please read and follow all
instructions and heed all warnings on the XMC-2 and in this manual. The vast majority of the subsequent
safety precautions are common sense. If you are not comfortable with the installation of audio/video
entertainment equipment, you should seek the services of a qualied installation professional or call us for
help.
WARNING: TO REDUCE THE RISK OF FIRE OR ELECTRIC SHOCK, DO NOT USE THE XMC2 NEAR WATER
OR IN WET LOCATIONS, DO NOT EXPOSE IT TO RAIN OR MOISTURE, DO NOT EXPOSE IT TO DRIPPING
!
OR SPLASHING FROM OTHER SOURCES, AND ENSURE THAT NO OBJECTS FILLED WITH LIQUIDS SUCH
AS VASES ARE PLACED ON IT. DOING SO MAY RESULT IN DAMAGE TO THE XMC2 AND THE RISK OF
ELECTRIC SHOCK, WHICH MAY RESULT IN BODILY INJURY OR DEATH.
WARNING: TO REDUCE THE RISK OF ELECTRIC SHOCK, DO NOT REMOVE THE COVER FROM THE
XMC2. THERE ARE NO USERSERVICEABLE PARTS INSIDE THE XMC2. REFER ALL SERVICE TO
QUALIFIED SERVICE PERSONNEL.
Do not install the XMC-2 near or above any heat sources such as radiators, heating vents, or other apparatus’
that produce heat. Do not block any ventilation openings or heat sinks. Avoid installing the XMC-2 directly
above other heat-producing equipment unless sucient ventilation or forced-air cooling is provided.
Do not install the XMC-2 in locations without proper ventilation. The XMC-2 should not be operated on a bed,
sofa, rug, or similar surface that may block vents. The XMC-2 should not be installed in an enclosed location
such as a bookcase, cabinet, or closed equipment rack unless sucient forced-air ventilation is provided.
Always install your XMC-2 according to the manufacturer’s instructions and only use attachments or
accessories specied by the manufacturer.
Do not install the XMC-2 on any stand, shelf, or other piece of furniture that is unable to support its weight. If
a cart is used to move the XMC-2, use caution to avoid injury from tip-over.
Connect the XMC-2 only to power sources of the correct voltage (as shown in this manual and on the XMC-2).
Protect power supply cables from being pinched, walked on, or otherwise damaged. Be especially careful
where the power cable enters the power outlet and the XMC-2 unit.
Only connect the XMC-2 to an electrical outlet or extension cord of appropriate type and rating.
DO NOT defeat the safety purpose of a grounding or polarized plug by removing ground pins or using unsafe
adapters. A polarized plug has two blades - one wider than the other. A grounding plug has a third ground
prong in addition to the two main conductors. The wide blade or third grounding prong is provided for your
safety. If the provided plug does not t your outlet, consult an electrician to replace your obsolete outlet. If
you replace the power cord on the XMC-2, only use one of similar type and equal or greater current rating.
Page 4
The power cable for the XMC-2 should be unplugged from the outlet during severe electrical storms, or when
unused for a long period of time.
Only replace the fuses in the XMC-2 with fuses of proper value and voltage rating.
The XMC-2 should only be cleaned as directed in the manual. Avoid spraying liquids directly onto the XMC-2
and NEVER spray liquids into the vents. Care should be taken so that small objects do not fall into the inside
of the XMC-2.
You should seek service for your XMC-2 by qualied service personnel if any of the following occur:
!
1. The power-supply cord or the plug has been damaged.
2. Objects or liquid have fallen or spilled into the vents.
3. The XMC-2 has been exposed to rain.
4. The XMC-2 exhibits a marked change in performance.
5. The XMC-2 has been dropped, or its enclosure or chassis is damaged.
NOTE: TO COMPLETELY DISCONNECT THE XMC-2 FROM THE AC POWER MAINS, DISCONNECT THE
AC POWER CORD FROM THE AC RECEPTACLE.
NOTE: THE XMC-2 AC POWER CORD MUST REMAIN READILY ACCESSIBLE AT ALL TIMES.
CAUTION
CAUTION: TO REDUCE THE RISK
OF ELECTRICAL SHOCK, DO
NOT REMOVE COVER. NO USER
SERVICEABLE PARTS INSIDE.
REFER SERVICING TO QUALIFIED
SERVICE PERSONNEL.
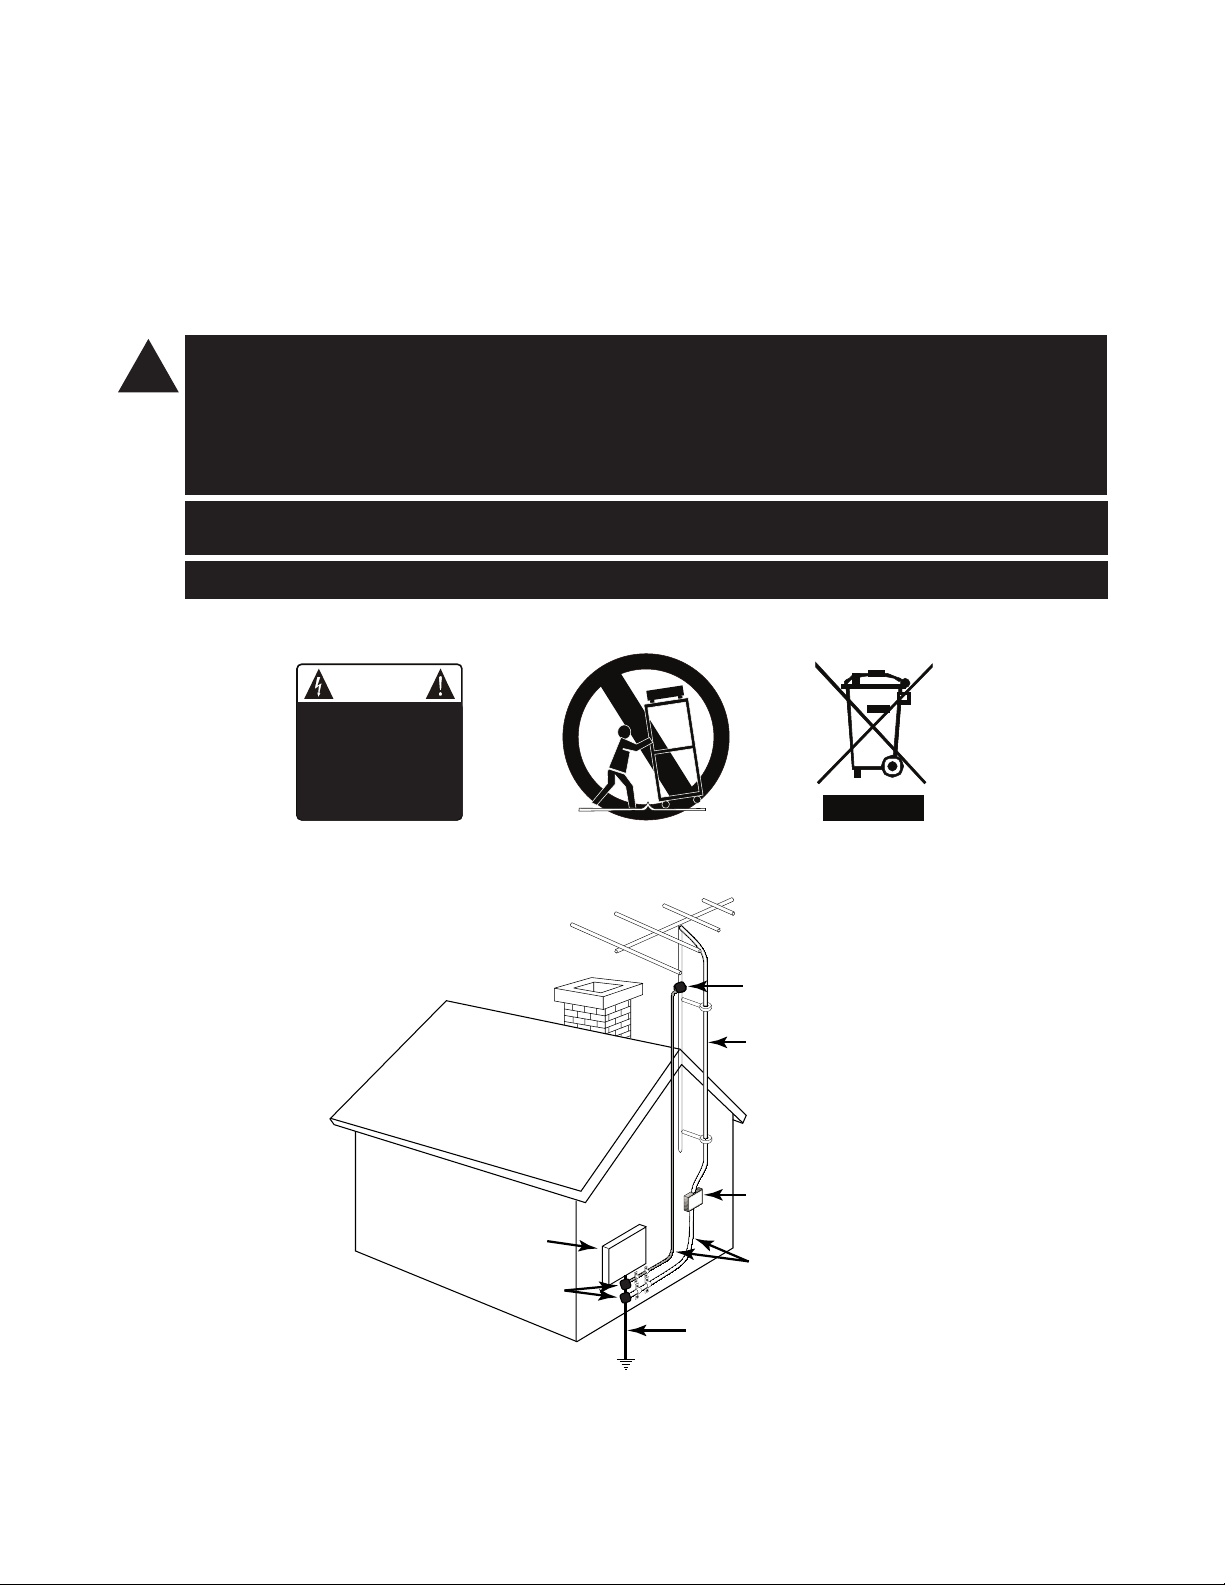
Electric service
equipment
Ground clamps
NEC - National Electrical Code
Ground clamp
Antenna lead-in wire
Antenna discharge unit
(NEC section 810-20)
Grounding conductors
(NEC section 810-20)
Power service grounding
electrode system
(NEC art 250, part H)
Page 5

FCC Interference Statement
Note: This equipment has been tested and found to comply with the limits for a Class B digital
device, pursuant to Part 15 of the FCC rules. These limits are designed to provide reasonable
protection against harmful interference in a residential installation. This equipment generates,
uses and can radiate radio frequency energy and, if not installed and used in accordance with
the instructions, may cause harmful interference to radio communications. However, there is no
guarantee that the interference will not occur in a particular installation. If this equipment does
cause harmful interference to radio or television reception, which can be determined by turning
the equipment o and on, the user is encouraged to try to correct the interference by one or
more of the following measures:
Reorient or relocate the receiving antenna.
Increase the separation between the equipment and receiver.
Connect the equipment to an outlet on a circuit dierent from that of the receiver.
Consult the manufacturer or an experienced radio/TV technician for help.
For questions regarding service, please contact:
Emotiva Audio Corporation
Attn: Repair Department
139 Southeast Parkway Court
Franklin, TN 37064
1-877-366-8324
www.emotiva.com
Page 6

Page 7
Emotiva XMC-2
16 Channel Reference Cinema Processor
with Dolby Atmos® and DTS-X™ technology
HDMI 6 Volume -49.0dB
A: HDMI 6 48kHz 24bits
NAV
V: HDMI 6 2160P/24 8bits YCbCr 4:4:4 SDR
ATMOS
D
D
TRUEHD
D
D
MENU DIM
STANDBY
Contents
Important Safety Precautions and Explanation of Symbols
FCC Interference Statement
Introduction ......................................................................................................................2
About This Manual .......................................................................................................... 3
Unpacking ..........................................................................................................................4
Welcome to the Emotiva XMC-2 ................................................................................ 5
Specications ................................................................................................................. 10
XMC-2
Differential Reference
Operating the XMC-2 .................................................................................................. 12
The XMC-2 Menu System ........................................................................................... 26
Operating the XMC-2 .................................................................................................. 66
Care and Maintenance ............................................................................................... 84
Troubleshooting ........................................................................................................... 91
Appendices ..................................................................................................................... 93
Emotiva Audio Corporation Five-Year Limited Warranty ............................... 98
Notes ............................................................................................................................... 102
Manufactured under license from Dolby Laboratories. Dolby, Dolby Atmos, Dolby Vision, and the double-D
symbol are trademarks of Dolby Laboratories. Copyright © 2018 Dolby Laboratories. All rights reserved.
Manufactured under license from DTS, Inc. DTS, the Symbol, DTS and the Symbol together, DTS:X, and the
DTS:X logo, Neural:X, and the Neural:X logo, are registered trademarks and.or trademarks of DTS, Inc in the
United States and/or other countries. ©DTS, Inc. All Rights Reserved.
Page 1
Page 8

Introduction
Introduction
Thank you for choosing the new Emotiva XMC-2 Sixteen Channel Reference Cinema Processor
with Dolby Atmos® and DTS:X™ technology. The XMC-2 is our newest state-of-the-art surround
sound processor, and represents the culmination of years of research and design into audio
equipment and surround sound processing.
The XMC-2 is based on the custom designed hardware platform that we developed for our
agship RMC-1 processor, which combines cutting edge video performance and true audiophile
calibre sound quality. Powerful DSP processors decode the latest surround sound formats; highquality DACs deliver superb quality audio to a highly optimized fully balanced analog signal path;
and hardware-based interstage ASRCs (asynchronous sample rate converters) ensure immunity
from the jitter that plagues other processors. The front panel of the XMC-2 features a large, easy
to read, high-resolution graphical OLED display, which can be congured to provide a variety of
useful information about your audio and video sources and the operating status of the XMC-2.
Volume and muting are controlled via a single large knob, surrounded by an illuminated halo ring,
and the simple yet powerful menu system is accessed and navigated via a set of ve buttons. A
sixth button instructs the XMC-2 to display its status information on both the front panel and onscreen displays. The XMC-2 can also be controlled by the included all-metal remote control, most
whole-home control systems, or a remote control application on your computer or smart phone.
Firmware updates, when necessary, are no more complex than inserting a USB memory stick.
Regardless of how you congure it, we designed the XMC-2 rst and foremost to deliver true
audiophile sound quality. As an audio component, whether playing stereo music or multi-channel
surround sound, the XMC-2 delivers performance and sound quality equal to what you would
expect from the best high-end analog preamp. As a cinema processor, the XMC-2 supports both
traditional surround sound formats like Dolby TrueHD and DTS-HD Master Audio, and the latest
cutting edge immersive object-based surround sound formats – Dolby Atmos and DTS:X, and
extracts the best possible performance from each. The XMC-2 includes a full set of powerful
controls that let you get the absolute best from your room and speakers, including powerful
parametric equalizers for audiophiles who prefer to manually dial-in their own correction
parameters, and state of the art Dirac Live™ room correction with extensive user customization
opions. The XMC-2 can also import lter settings from the Room Equalization Wizard™ program,
and for those who prefer them, we’ve included real tone controls with variable bass and treble
turnover frequencies and true Fletcher-Munsen Loudness compensation.
The XMC-2 provides bit-perfect video switching of all the latest video formats; all of the video
inputs and outputs on the XMC-2 are fully compliant with HDMI 2.0b and HDCP 2.2, and support
the latest 4k UHD video formats, including HDR and Dolby Vision. Our advanced color OSD
displays important status information directly on your TV or projector screen, and our Video
On Standby feature allows you to watch video, and even change video inputs, while your audio
system is in Standby.
Enjoy your new XMC-2.
The Emotiva Team
Page 2
Page 9

About This Manual
About This Manual
This manual will provide you with all the information you need to install and congure the
XMC-2 to achieve its optimum potential.
You may wish to record serial numbers or other purchase information on the Notes page at the
back of this manual.
Page 3
Page 10
Unpacking
Unpacking
Your XMC-2 was carefully packed and should reach you in perfect condition. If you notice any
shipping damage or other issues when you unpack it, please contact Emotiva immediately.
Gently remove your XMC-2 from the packing carton and remove all wrappings and shipping
material.
It is important to save the box and all packing materials in case your processor ever needs to be
moved or shipped back to the factory for service.
We truly value customer feedback and would like to hear from you.
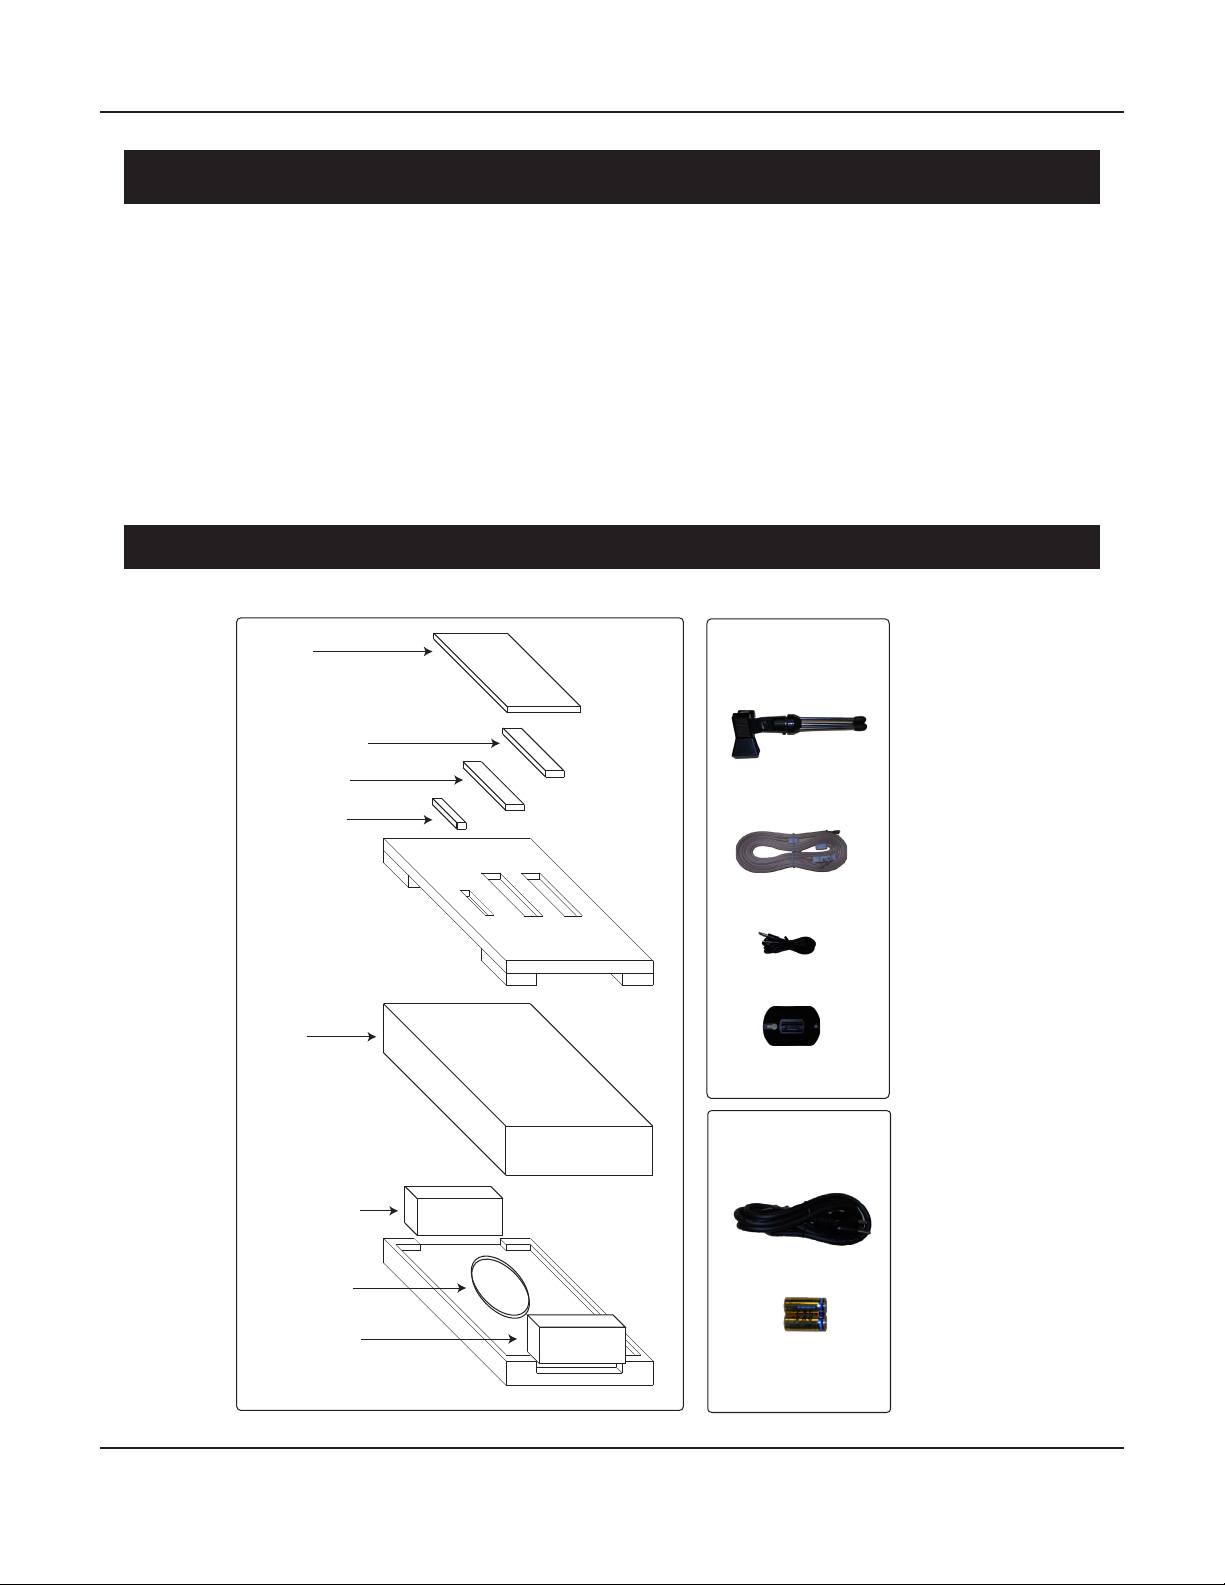
What’s In The Box
Manual
Remote Control
Microphone
Preamp/Digitizer
Microphone
XMC-2
Accessory Box
Accessory Box 1
Contents
Microphone Stand
FM Antenna
Trigger Cable
AM Antenna Stand
Accessory Box 2
Contents
AM Antenna
Accessory Box
Page 4
AC Power Cord
Remote Control Batteries
(2 x “n” cells)
Page 11
Welcome to the XMC-2
Welcome to the Emotiva XMC-2
HDMI 6 Volume -49.0dB
NAV
A: HDMI 6 48kHz 24bits
V: HDMI 6 2160P/24 8bits YCbCr 4:4:4 SDR
ATMOS
D
D
TRUEHD
D
D
MENU DIM
STANDBY
XMC-2
Differential Reference
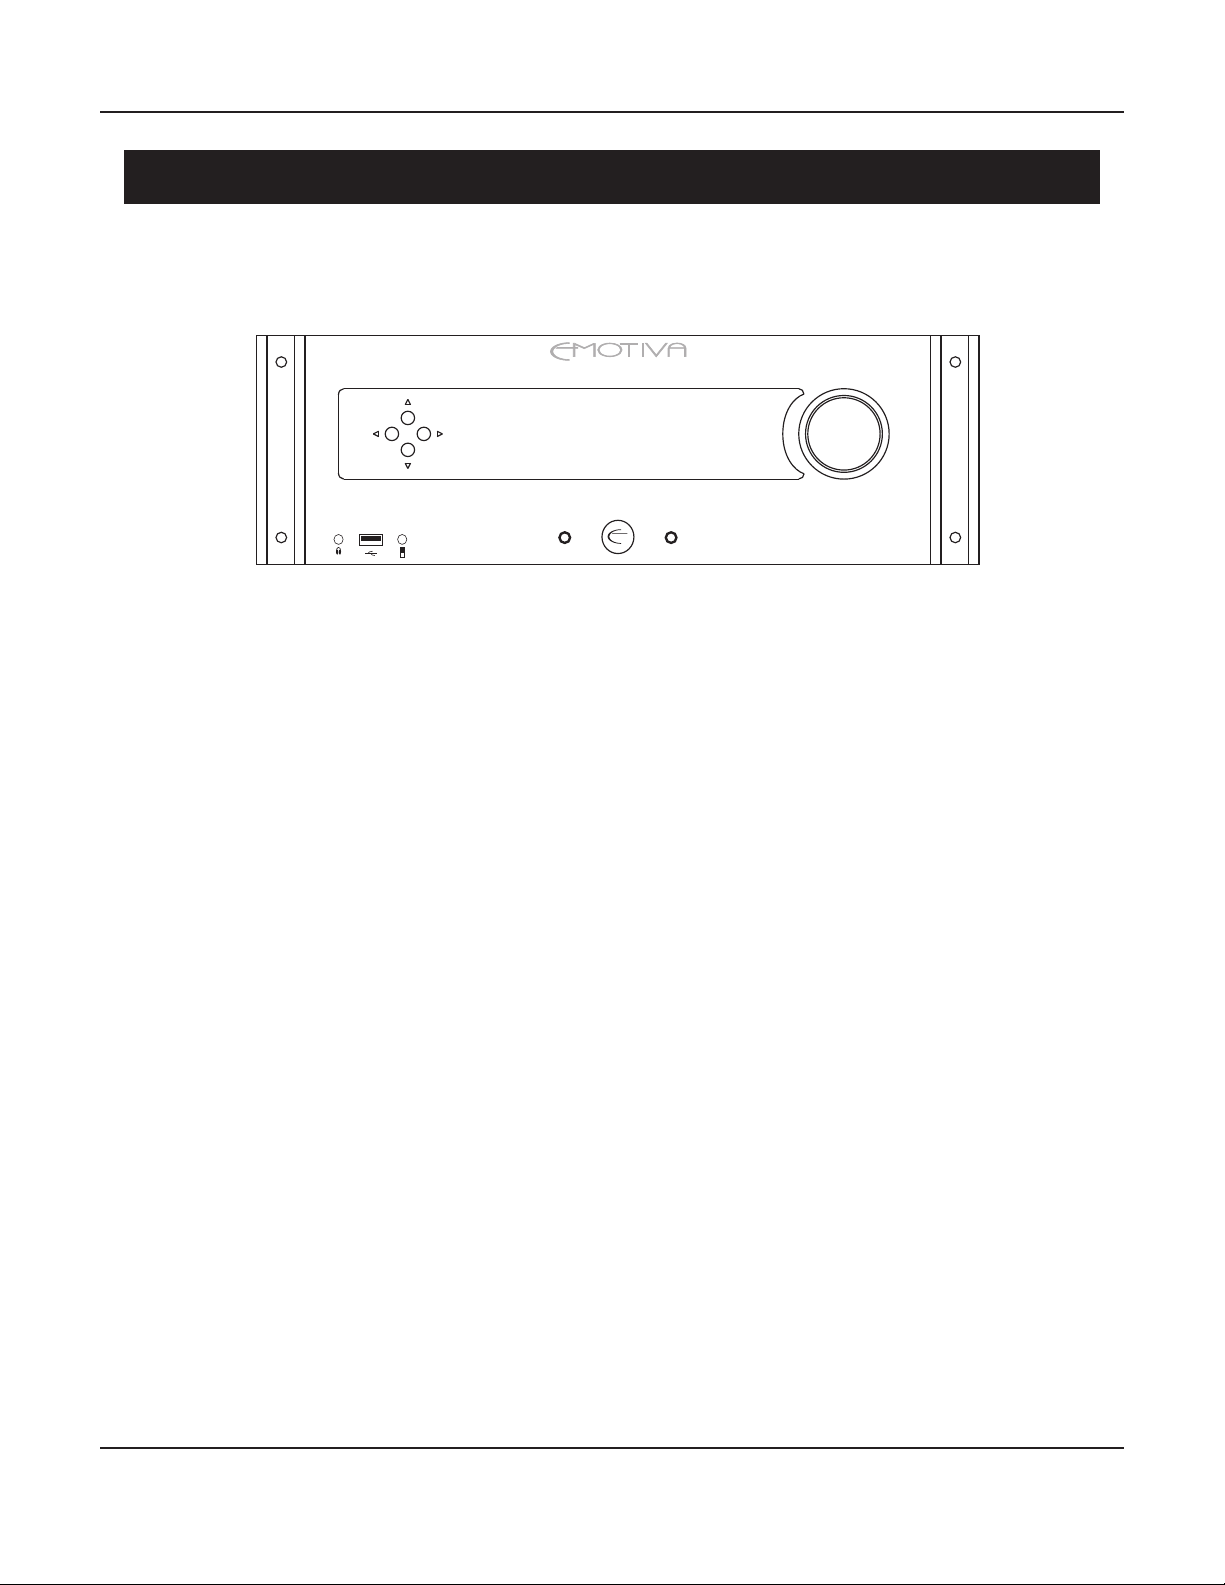
The Emotiva XMC-2 combines enhanced exibility, cutting edge features, true audiophile sound
quality, superior video switching capabilities, and a comprehensive yet easy to use menu and
control system - all in a single cinema processor that will redene your expectations for both
stereo music and surround sound performance.
Power, Flexibility, And Ease Of Use
Modern home theater systems can be very complex. The XMC-2 shares the custom menu and
control system that we developed for our XMC-1 and RMC-1 - which combines both power and
exibility with unprecedented ease of use. Frequently used options are easy to nd and access,
more in-depth options are arranged logically, and the current status is always clearly displayed on
informative front panel OLED display, and optionally on the highly congurable on-screen display.
The XMC-2 can be controlled from its front panel buttons and Volume knob, from its iconic solid
metal remote control, or using the handy remote control app, which is available for Apple and
Windows computers and Android phones. The XMC-2 can also be integrated into most universal
remote and whole-home control systems.
Because the XMC-2 is all about power and control, it gives you unprecedented exibility to
congure your system to sound just the way you want it to. Advanced bass management supports
up to three subwoofers, and lets you set independent crossover points for each set of speakers.
Two entirely separate sets of manual parametric equalizers let you create custom response curves,
and can import settings from the popular Room EQ Wizard (REW) program. Handy Trim controls
let you make temporary adjustments on the y, either via the conguration menu, or directly from
the remote control. Settings can be saved as les, exported to a computer, and saved settings
can be modied using a simple XML or text editor. Precision bass and treble controls, separate
from the more advanced EQ settings, make simple response adjustments easy, and true FletcherMunson loudness compensation keeps your music sounding good, even at very low listening
levels.
Page 5
Page 12

Welcome to the XMC-2
Video Switching For The Latest 4k UHD Video Standards
Home theater video is continually evolving to deliver a sharper picture, more colors, and more
advanced features - which can make it dicult to keep track of what you actually need to take
advantage of the latest video content and this year’s 4k displays. The XMC-2 has eight HDMI video
inputs and two HDMI video outputs, all of which support HDMI 2.0b and HDCP 2.2. The XMC-2
supports the full HDMI 2.0b 18 gBps video data rate, so it supports full 4k UHD video, at frame
rates up to 4k/60, with full 12-bit color, and 4.4.4 chroma subsampling. It also supports static
and dynamic HDR, including Dolby Vision, for a brilliant picture, with pure, intense colors, and
remarkable contrast. The XMC-2 provides everything you need to get the most from the latest
streaming content and 4k UHD Blu-Ray discs.
Audiophile Sound Quality
Regardless of how you congure it, we designed the XMC-2 rst and foremost to deliver true
audiophile sound quality, so it always sounds great. As an audio component, whether playing
stereo music or multi-channel surround sound, the XMC-2 delivers performance and sound
quality equal to those you would expect from the best high-end analog preamp. As a home
theater processor, the XMC-2 supports both traditional surround sound formats like Dolby TrueHD
and DTS-HD Master Audio, and the latest cutting edge immersive formats – Dolby Atmos and
DTS:X, and gives you the best possible sound quality with each.
The XMC-2 combines superb quality analog circuitry, which enables all of your high quality music
to sound its best, with precision digital processing, and plenty of channels and decoding options
to ensure you the ultimate listening experience with the latest blockbuster movies and concert
videos. Audiophile quality AKM4490 Verita DACs on all channels deliver a balanced audio signal
to a fully balanced analog signal path, with the DACs on the critical front three channels operated
in even higher quality mono mode, and the highest quality analog circuitry and components are
use throughout the entire signal path. With the XMC-2, you really can have a superb stereo music
system, and a truly awesome home theater audio system, in a single convenient, practical, and
easy to master audio component.
Dolby Atmos™ And DTS:X™
Until recently, most popular surround sound formats oered either 5.1 or 7.1 channels, and
surround sound music and movie sound tracks were mixed to work well with the standard
speaker layouts. Some audiophiles and dedicated video fans chose to install more speakers,
including more surround channels, and even speakers above the screen, but all the existing
surround sound decoders could do was guess what to send to those speakers. The result was
sometimes interesting, but usually less than compelling.
The latest immersive surround sound formats, the most popular of which are Dolby Atmos and
DTS:X, have broken this barrier by encoding audio content based on object location rather than
static speaker channels. As a result, when decoded properly, this new immersive content can
take full advantage of larger numbers of speakers, which can include both surround speakers in a
wider variety of locations, and height speakers, specically positioned to enable sounds to appear
above the listener, for a truly immersive three dimensional listening experience.
Page 6
Page 13

Welcome to the XMC-2
In order to take full advantage of this new technology, a surround sound processor must both
include the advanced technology necessary to decode it properly, and support enough channels
to deliver a compelling immersive experience. The Emotiva XMC-2 provides support for sixteen
audiophile quality fully balanced audio output channels, which can be congured as fteen
full-range channels and one subwoofer output, or thirteen full-range channels and up to three
subwoofer outputs.
The XMC-2 supports all of the standard channel congurations specied by the applicable
licenses for Dolby Atmos and DTS:X, as well as continuing to fully support existing high quality
surround sound formats like Dolby TrueHD and DTS-HD Master Audio. Users familiar with the
previous standards will notice a few changes in how they are decoded. All Dolby Atmos content
will be decoded using the new Dolby Atmos renderer; and Dolby TrueHD and other Dolby Digital
content will be decoded exactly as before; but the older Dolby PLIIx surround synthesizer has
been replaced with the more advanced Dolby Surround Upmixer. Likewise, DTS:X content will be
decoded by the DTS:X decoder; and DTX-HD Master Audio and DTS Digital content will continue
to be decoded as before; but the DTS Neo:6 upmixer has been replaced by the new DTS Neural:X
upmixer. New licensing requirements also mandate that, while stereo content may be upmixed
into surround sound using a variety of dierent options, each specic type of digitally encoded
content is now associated with a specic upmixer option.
What Is Dolby Atmos?
Dolby Atmos is a surround sound technology which is commonly used in movie theaters and for
the sound tracks on Blu-Ray and 4k UHD movie discs and streaming content. With virtually all
previous surround sound formats, like Dolby TrueHD and DTS Master Audio, the audio content
consists of several tracks, each intended to be played via a specic speaker. With Dolby Atmos, the
audio content is divided into bed channels and objects. The bed channels are each played from a
specic speaker. However, sound objects are dened as having locations in space; when the audio
information is decoded, each object is optimally assigned to one or more speakers, based on
the speaker layout you have. Most previous surround sound formats support either ve or seven
speakers plus a subwoofer; Dolby Atmos adds the option to include width and height speakers.
Height channels are used to portray objects above the listener, and are reproduced either by
speakers mounted in the ceiling, or by special speakers mounted on top of certain other main
channel speakers, and positioned to bounce their audio signal o the ceiling, so it reaches the
listener from above.
What Is DTS:X?
DTS:X is an object oriented surround sound technology, and is the main competitor to Dolby
Atmos in the USA. While the current version of DTS:X supports fewer channels and options than
the current version of Dolby Atmos, the basic principle is quite similar, and updates are planned.
We can expect both Dolby Atmos and DTS:X to evolve over time, and the XMC-2 has both the
channels and the processing power needed to continue to evolve with them.
Page 7
Page 14

Specications
Flexible Audio Processing Modes
The XMC-2 oers the ultimate combination of advanced surround sound processing modes and
purist audiophile options. In addition to the latest high-resolution and immersive object oriented
surround-sound modes, Reference Stereo Mode provides absolutely pure audiophile sound with
no processing whatsoever, and our rened Direct Mode includes minimal processing options, but
still oers bass management.
Powerful Manual Room Correction
For those who prefer to do their own room adjustments, the XMC-2 provides powerful manual
parametric equalization controls. The XMC-2 allows you to create two entirely independent
EQ presets; each preset includes 11 fully adjustable bands of parametric equalization for each
speaker. You can then independently congure each input to use either of the manual speaker
presets or the results of the automatic room correction.
Integration With Room EQ Wizard (REW)
Room EQ Wizard is a very popular free software program that allows you to perform many
dierent measurements on your audio system, analyze the results, produce a wide variety of
reports and graphs, and calculate correction parameters for use with a parametric equalizer.
Correction lter settings generated by REW can be imported into the XMC-2, and lter settings
from the XMC-2 can be exported directly to REW. Parametric equalizer lter settings on the
XMC-2 are imported and exported using a standard XML le format, which allows them to be
exchanged with REW, or exported for manual editing and then re-imported, or saved for later
analysis and use.
Dirac Live Automatic Room Correction System
The XMC-2 features the latest version of Dirac Live™, the most advanced automatic room
correction system available for both audiophile and home theater systems. Dirac Live performs
a series of measurements, then uses sophisticated mathematics to calculate a set of lters which
correct both the frequency and time domain response of your room and speakers. The result is
crystal clear, accurate sound reproduction, with a cohesive sound stage and excellent rendition of
transients - even in less than ideal rooms.
Convenient Tone Controls
In addition to manual parametric equalizers, the XMC-2 also includes true Tone Controls. Both
Bass and Treble Controls include fully congurable turnover points, and the Tone Controls are
available both as temporary adjustments (Tone Trims) and as persistent controls (which remain
set until changed). The Tone Controls and Tone Trims operate independently of each other, and
both can be used in conjunction with either Dirac Live or the Manual EQ Presets enabled.
Page 8
Page 15

Specications
True DSD Playback
The XMC-2 oers audiophile quality playback of DSD audio (when received via HDMI from an
SACD or a DSD audio le). DSD audio is routed directly to the DACs in the XMC-2, and bypasses
all format conversions and other processing, for the most accurate audio rendition possible. The
XMC-2 also supports playback of DSD audio content via its USB Stream Input using the DoP
(DSD-over-PCM) standard. (This feature is still in the nal stages of development and will be
available shortly.)
Popular Remote Control Options
The XMC-2 oers a wide range of remote control options, including a solid metal infrared (IR)
remote control, network-based remote control, and remote control apps for a variety of portable
devices (including Apple devices, Android devices, and Windows computers). Remote control
codes will be provided for programming intelligent IR remote controls and for developing
network-based remote control applications.
Advanced Video On Standby Mode
The XMC-2 incorporates an advanced feature which not only allows you to watch - or continue
to watch - video on your monitor while the XMC-2 is in Standby Mode, but even allows you to
change sources while in Standby. This feature is great if you just want to do a quick check of the
weather, or let the kids watch TV without turning on your main system.
Multiple Zones
The XMC-2 oers an independent second audio zone, which can deliver a stereo version of
the same content that is selected in the Main Zone, or can be congured to play audio from a
dierent source (either digital or analog).
Page 9
Page 16

Specications
Digital Decoding Modes
Dolby Atmos™
Dolby TrueHD
Dolby Digital Plus
Dolby Digital 5.1
DTS:X
DTS-HD Master Audio
DTS-HD High Resolution Audio
DTS 5.1
DTS ES Discrete 6.1
PCM-Multi 5.1
PCM-Multi 7.1
Digital Post Processing Modes
Specications
Dolby Surround Upmixer (DSU)
DTS Neural:X upmixer
Audio Operating Modes
Reference Stereo (purist stereo mode)
Direct Mode (minimal processing; with bass management)
Stereo Mode
All Stereo Mode
Display and OSD
Display
OLED (blue; high resolution 256 x 60 pixel graphical; variable brightness)
OSD
Color OSD is displayed over live video, including 4k and 3D sources
(variable transparency; multiple operating modes provide dierent levels of information)
Page 10
Page 17

Specications
Inputs / Outputs
Analog Inputs
• 1 pair (stereo) – Reference quality analog audio (balanced; XLR)
• 3 pair (stereo) – Reference quality analog audio (unbalanced; RCA)
Digital Inputs
• 8 – HDMI 2.0b / HDCP 2.2
• 3 – Toslink optical S/PDIF digital audio
• 3 – Coax (RCA) electrical S/PDIF digital audio
• 1 – AES/EBU (XLR) digital audio
• 2 – USB Type A digital data (for rmware updates and future enhancements)
• 1 – USB Type B digital audio (“USB DAC” input)
• 1 – Ethernet port (RJ-45) (network connection for Dirac and remote control applications)
Other Inputs
• Internal high-performance AM/FM tuner
(antenna connections: FM - “F” connector; AM - push terminals)
Analog Outputs
• 16 channels – Reference quality main analog audio (balanced XLR)
• 1 pair (stereo) – analog line level Zone 2 output (unbalanced)
• 1 – high quality headphone output (1/8” stereo connector)
Digital Outputs
• 2 – HDMI 2.0b with HDCP 2.2
• 1 – Toslink optical S/PDIF digital audio
• 1 – Coax (RCA) electrical S/PDIF digital audio
Power / Environmental
Dimensions
Unboxed: 17 inches Wide x 15.5 inches Deep x 5.25 inches High (not counting feet)
Unboxed: 17inches Wide x 15.5 inches Deep x 6 inches High (with feet)
Page 11
Page 18
Operating the XMC-2
Operating the XMC-2
HDMI 6 Volume -49.0dB
NAV
A: HDMI 6 48kHz 24bits
V: HDMI 6 2160P/24 8bits YCbCr 4:4:4 SDR
ATMOS
D
D
TRUEHD
D
D
MENU DIM
STANDBY
XMC-2
Differential Reference
Page 12
Page 19

Operating the XMC-2
Audio Modes
Reference Stereo Mode
Reference Stereo Mode provides the purest listening experience, with the fewest options for
processing or modifying the signal.
In Reference Stereo Mode:
• The output is always TWO CHANNEL STEREO.
• There is NO bass management, and NOTHING is sent to the subwoofer.
• You CANNOT use the Loudness Control, or the Tone Presets, or the Tone Trims.
• You CANNOT use Dirac Live or the manual Parametric EQ Presets.
• Level Trims, which operate in the analog domain, are still available.
• Speaker Distance adjustments are active for digital inputs but not for analog inputs.
• Stereo analog input signals are passed straight to the Volume Control and the outputs.
• Stereo digital input signals are converted to analog then sent to the Volume Control.
• Surround sound digital signals are decoded, mixed down to stereo (the Center Channel and
LFE signals, if present, are mixed into the stereo output), and converted to analog.
Note: Because Reference Stereo Mode does not include bass management, care should be used
when playing “small” speakers in this mode. Reference Stereo Mode can ONLY be selected
using the “Mode Up/Down” buttons if your front speakers are set to Large, but can be selected
as the current mode in the Main Zone Conguration Menu, and can be congured as the
default mode for an input.
Note: In Reference Stereo Mode and Direct Mode, you cannot use the Dolby Surround Upmixer,
the DTS Neural:X upmixer, or any other post processing mode intended to “enhance” the audio
signal. Decoding is limited to converting digital surround signals to analog using the highest
quality, purest decoding method possible.
Direct Mode
Direct Mode provides a relatively pure listening experience, and eliminates most processing, but
still retains bass management.
In Direct Mode:
• The output contains the same number of channels as the input signal.
• No extra channels are synthesized; if the output channel that corresponds to a given input
channel is not present, that channel signal is mixed into the appropriate available
channels.
• Bass management IS available and the subwoofer IS active.
• You CANNOT use the Loudness Control, or the Tone Presets, or the Tone Trims
• You CANNOT use Dirac Live or the manual Parametric EQ Presets.
• Level Trims, which operate in the analog domain, are still available.
Page 13
Page 20

Operating the XMC-2
• Speaker Distance adjustments are available for both analog and digital inputs.
• Stereo digital signals are presented directly to the processor.
• Stereo analog input signals are converted to digital and passed to the processor.
• Surround sound digital signals are decoded, and passed to the processor.
• Multi-channel discrete digital signals (like multi-PCM) are passed directly to the processor.
• All signals receive bass management - but no other processing.
• If an LFE signal is present, and subwoofers are also present, the LFE content
will be routed to the subs along with low-frequency content from the main channels
(as determined by the bass management settings).
Stereo Mode
Stereo Mode provides a full complement of processing and control options - with a stereo output.
In Stereo Mode:
• The output is always TWO CHANNEL STEREO.
• Bass management IS available and the subwoofer IS active.
• Loudness Control, the Tone Controls, and the Tone Trims are active.
• Dirac Live and the manual Parametric EQ Presets are active.
• Level Trims are active.
• Speaker Distance adjustments are available for both analog and digital inputs.
• Stereo digital signals are presented directly to the processor.
• Stereo analog input signals are converted to digital and passed to the processor.
• Surround sound digital signals are decoded, down-mixed to stereo, and passed to the
processor.
• Multi-channel discrete digital signals (like multi-PCM) are down-mixed to stereo and passed
to the processor.
• If an LFE signal is present, and one or two subwoofers are also present, the LFE content
will be routed to the subs along with low-frequency content from the main channels
(as determined by the bass management settings).
All Stereo Mode
All Stereo Mode provides a full complement of processing and control options - with a stereo
output. In addition, the left signal is routed to all left side speakers and the right signal is routed to
all right side speakers for a “room lling” experience. In All Stereo Mode:
• The output is always TWO CHANNEL STEREO - routed to all speakers.
• The left channel is routed to all left side speakers; the right channel to all right side speakers;
and the center channel speaker receives a mix of left and right.
• Bass management IS available and the subwoofer IS active.
• Loudness Control, the Tone Presets, and the Tone Trims are active.
• Dirac Live and the manual Parametric EQ Presets are active.
• Level Trims are active.
Page 14
Page 21

Operating the XMC-2
• Speaker Distance adjustments are available for both analog and digital inputs.
• Stereo analog signals are converted to digital audio and routed through the processor.
• Stereo digital input signals are routed through the processor.
• Surround sound digital signals are decoded, mixed down to stereo, and converted to analog
(the Center Channel and LFE signals, if present, are mixed into the stereo output).
• After all processing is completed, the left signal is routed to ALL left side speakers and the
right signal is routed to ALL right side speakers; and the center channel speaker receives a
mix of left and right. .
• If an LFE signal is present, and one or two subwoofers are also present, the LFE content will be
routed to the subs along with low-frequency content from the main channels (as determined
by the bass management settings).
Immersive (Digital) Surround Sound Formats
Immersive digital surround sound formats like Dolby Atmos and DTS:X contain high-quality multichannel audio, in the form of both xed channels, and audio objects, which are assigned to the
appropriate speakers when the audio stream is decoded.
Dolby Atmos content is always decoded by the Dolby Atmos Renderer.
DTS:X content is always decoded by the DTS:X decoder.
Discrete (Digital) Surround Sound Formats
Discrete digital surround sound formats like Dolby TrueHD and DTS-HD Master Audio contain
high-quality discrete multi-channel digital audio; each channel is stored separately, and the decoded
audio is an exact replica of the original content.
For audio encoded in these formats, the RMC-1 will automatically detect the format and use the
correct decoder.
Upmixing Surround Sound
The Dolby Surround Upmixer (DSU), and the DTS Neural:X upmixer, are used to synthesize extra
channels from the content in existing channels. They may be used to convert stereo content into
surround sound content, or to synthesize additional surround sound channels for existing surround
sound content.
Dolby Atmos content is decoded by the Dolby Atmos Renderer; upmixing may not be applied to it.
DTS:X content is decided by the DTS:X decoder; upmixing may not be applied to it.
Dolby Digital, and Dolby TrueHD content is decoded by the appropriate decoder;
the Dolby Surround Upmixer may be used with it to synthesize extra channel content.
DTS Digital, and DTS-HD Master Audio content is decoded by the appropriate decoder;
the DTS Neural:X upmixer may be used with it to synthesize extra channel content.
Either the Dolby Surround Upmixer or the DTS Neural:X upmixer may be used with stereo or multi-
channel PCM digital content to synthesize extra channel content.
Page 15
Page 22

Operating the XMC-2
How the XMC-2 Treats Content in Dierent Surround Sound Formats
The combination of surround sound decoding and surround sound processing the XMC-2 uses
for a given input signal will depend on the format of the incoming signal, and on how you have
congured the Surround Mode in the Setup Inputs Menu and Main Zone Menu.
The Setup Inputs Menu allows you to congure the default behavior independently for each input
for each type of input signal:
In Auto Mode - the XMC-2 will attempt to process the incoming signal to match the number of
speakers you have congured - within the constraints listed above. For example, if your
XMC-2 is congured for 5.1 speakers, a Dolby TrueHD 5.1 channel input signal will be decoded to
5.1 channels, and a Dolby TrueHD 7.1 channel input signal will be decoded to 7.1 channels, then
mixed down to 5.1 channels. If your XMC-2 is congured for 7.1 speakers, a Dolby TrueHD 5.1
channel input signal will be decoded to 5.1 channels, then the Dolby Surround Upmixer will be
used to synthesize additional rear surround content to create a 7.1 channel output optimized for
your 7.1 channel system.
In Last Used Mode - the XMC-2 will use as it’s default the same decoding and processing options as
were used the last time a similar signal was received on that input.
You will also have the option of manually conguring an initial default mode for each input - for
each type of input signal which may be received. The specic options available will depend on the
type of input.
Regardless of what decoding and post processing modes are selected automatically by the
XMC-2, you will always be able to manually choose to use any combination of decoding and
processing modes that are appropriate for the type of input signal being received - either by using
the Mode Selector buttons on the front panel or remote control, or from the Main Zone Menu.
Note: If your front speakers are NOT set to Large, Reference Stereo Mode must be congured
from the menu system; it cannot be selected manually using the Mode Up/Down buttons.
Note: Dolby Atmos and DTS:X content includes internal conguration settings that enable it to
override the default preferences you have congured in your XMC-2. So, for example, a specic
Dolby Atmos disc may be congured to render to only four height speakers, which would
override the default behavior of expanding that content to all available height speakers.
The XMC-2 Start-Up Routine
The XMC-2 is controlled by a custom Linux-based operating system. Even though loading and
initializing the operating system is a complex process, the start up sequence on the XMC-2 has
been optimized to minimize the delays you will experience in normal operation.
The start up routine for the XMC-2 will progress dierently depending on whether you have
enabled the Video on Standby feature in the conguration menu.
Page 16
Page 23

Operating the XMC-2
Video On Standby
The XMC-2 has a feature which allows it to operate in a special Standby mode when you switch it
into Standby. In this mode, all video and audio processing is disabled, but the XMC-2 will still pass
audio and video directly to your TV or monitor, and the controls on the XMC-2 will still allow you
to change sources. This feature may be used to allow your family to continue to watch TV on the
TV monitor connected to the XMC-2 even when “the big stereo” is turned O.
The Video on Standby feature is congured in the Setup | Advanced Menu (to use this mode,
congure Standby in the XMC-2 for “Video Remains On”).
When the Video on Standby feature is NOT Enabled
When you turn on the rear panel Power switch, the XMC-2 will go into Standby Mode (the halo
ring around the front panel Standby button will illuminate amber).
When you then press the front panel Standby button, the XMC-2 will load and initialize the
operating system. During this time, the Emotiva logo will appear in the front panel display, and a
progress bar will be shown along the bottom of the display.
When the XMC-2 is fully initialized, the display will change to the normal Information display.
Pressing the Standby button on the front panel or the remote control will return the XMC-2 to
Standby Mode.
When the Video on Standby feature IS Enabled
When you turn on the rear panel Power switch, the XMC-2 will go into a special Standby Mode
which allows the Video on Standby feature to operate even though the main power is o.
When you rst turn on the rear panel switch, the halo ring around the front panel Standby switch
will illuminate blue. The XMC-2 will then load and initialize the operating system, during which
time the Emotiva logo will appear in the front panel display a progress bar will be shown along
the bottom of the display.
When the XMC-2 is fully initialized, the display will switch o and the halo ring around the front
panel Standby button will illuminate amber. At this point the XMC-2 is in a special Standby mode
and the Video on Standby feature is operational.
Note: When the Video on Standby feature is enabled, pressing the Standby button (from On)
places the XMC-2 in a special standby mode. The XMC-O/S remains loaded in this mode, and so
doesn’t have to be re-loaded when you turn the XMC-2 back On. Leaving the Video on Standby
Mode enabled allows the XMC-2 to switch from Standby Mode to On very quickly. For this
reason, you may prefer to have Video on Standby Mode enabled even if you don’t watch video
while the XMC-2 is in Standby Mode.
Note: When the XMC-2 is On, or in High Power Standby mode, pressing and holding the Standby
button will switch the XMC-2 into Lowest Power Standby mode. (Press and hold the button until
a relay click is heard.)
Page 17
Page 24

Operating the XMC-2
Bass Management
The XMC-2 has three outputs designated for connecting subwoofers. These can be congured
in a number of ways, depending on the number of subwoofers you have, the number of height
speakers you have, and your bass management preferences.
The Center Sub output may be congured as either LFE, Mono, or None.
The Left/Right Subs may be congured as either Mono, Dual Mono, Height Speakers, or None.
If the Center Sub is congured as LFE, then all Low Frequency Eects (LFE) content from surround
sound sources will be routed directly to the Center Sub, LFE content will NOT be routed to the
other subs, and no content will be routed to the Center Sub by the bass management system.
The Dolby Atmos consumer standard only species a single subwoofer channel. This channel
contains the sum of any content that originates in the Low Frequency Eects (LFE) channel of
surround sound material, and any low frequency content that is routed to the subs by the bass
management system. This channel is then distributed to however many subwoofers you have
congured. (Each subwoofer may be calibrated and adjusted separately, but they all receive the
same content, in what would be considered “mono”, “dual mono”, or “triple mono”.)
However, because some users prefer to use dierent subwoofers for music and for movies, we
have included an extra option that provides signicantly more exibility.
If you connect any combination of one, two, or three subwoofers to the appropriate outputs, and
congure those outputs as Mono or Dual Mono, all of your subs will be treated equally, and will be
used for both LFE content and content directed to your sub by the bass management system.
However, by connecting one subwoofer to the Center Sub output, and then conguring that
output as LFE, you may instruct the XMC-2 to use that subwoofer exclusively for LFE content. That
sub, in eect, becomes your “low frequency eects speaker” for movies. All LFE content is routed
only to that sub, and any low frequency content that is redirected from any other channels by the
bass management system is routed to your OTHER sub or subs.
Note: If you plan to connect two subs to the Left Sub and Right Sub outputs, then you must
congure the Left/Right Subs outputs as Dual Mono. If you plan to connect only a single sub
to those outputs, then you MUST connect it to the Left Sub output, and you must congure
the Left/Right Subs as Mono. When Left/Right Subs is set to Mono ONLY the Left Sub output is
active. (This setting is independent from the conguration of the Center Sub output.)
Enhanced Bass
Enhanced Bass is a feature which allows you to combine the bass output of your subwoofers with
the bass output of your large main speakers.
When Enhanced Bass is disabled (normal operation), bass from the LFE channel is routed to your
subwoofer (or subs), bass below the crossover frequency of any speaker you have congured as
small is also routed to your sub or subs, and bass from any channels you have congured as large
is routed to the intended main speaker.
Page 18
Page 25

Operating the XMC-2
When Enhanced Bass is enabled on the XMC-2, bass from the LFE channel is routed to your
subwoofer (or subs), bass below the crossover frequency of any speaker you have congured as
small is also routed to your sub or subs, and bass from any channels you have congured as large
is routed to the intended main speaker. IN ADDITION, bass from all main speakers congured as
large (including the center channel) is also routed to your sub or subs. (The range of frequencies
which is shared with other speakers by speakers set to Large is still controlled by their congured
crossover frequency. The default setting for this is 80 Hz, but it may be changed by temporarily
setting each speaker to Small, and then adjusting the Crossover Frequency setting associated
with it.)
Note: Enhanced Bass is designed to boost the overall amount of bass available. Music is
rendered more accurately when Enhanced Bass is DISABLED. Also, since there is no industry
standard, Enhanced Bass may be implemented dierently on devices other than the XMC-2.
Tone Presets and Tone Trims
In addition to Dirac Live, and the parametric equalizer Preset options, the XMC-2 oers Tone
Controls for making broad adjustments to large segments of the frequency band. Bass and Treble
Tone Controls have independently congurable turnover points, and operate just like traditional
“Bass and Treble” knobs or sliders.
The Tone Presets accessed via the Setup | Speakers | Presets | {preset} | Equalization | System EQ
Menu are retained when the XMC-2 is powered O. The Tone Trims accessed via the Main Zone |
Trims | Tone Menu are temporary trims, and are not retained when the XMC-2 is turned O.
Note: The Tone Presets and Tone Trims on the XMC-2 operate independently, and in addition to
the Parametric EQs and Level Trims. (You can use them all at the same time and the eects will
add together.)
Note: The XMC-2 utilizes automatic normalization routines to ensure that, no matter what
combination of settings you make in the various Tone Presets, Tone Trims, and Level Controls,
the XMC-2 will NOT digitally clip the audio signal. Therefore, no combination of settings made
in the Level Trims, Tone Presets, or Tone Trims should result in clipping.
Note: Even though the normalization routines in the XMC-2 will prevent clipping under normal
circumstances, it is POSSIBLE, by applying positive gain to multiple overlapping bands in the
Parametric Equalizers in the XMC-2, to create a situation that will cause the XMC-2 to clip.
WE STRONGLY RECOMMEND THAT YOU AVOID APPLYING POSITIVE GAIN TO MULTIPLE
OVERLAPPING PEQ BANDS. If you do so, please check carefully for clipping, and reduce the
settings on those bands if any clipping occurs. (If clipping does occur due to band overlap, you
must reduce the gain in one of the bands; you CANNOT eliminate it using the Level Trims.)
Page 19
Page 26

Operating the XMC-2
Headphone Output
The XMC-2 includes a high-quality front panel Headphone Output; the Main Outputs on the
XMC-2 are muted when headphones are plugged into this output. When headphones are
connected, all internal EQ processing is disabled (Dirac Live and the Speaker Presets are disabled
while the headphones are connected.)
The XMC-2 also includes a unique level of intelligence in how it handles Level Trims and Tone
Trims for the headphones; both sets of trims are congured and stored independently for the
Main Outputs and the Headphone Outputs. When no headphones are connected, the Tone Trim
and Level Trim settings you make apply to the Main Outputs; when headphones are connected,
the Tone Trim and Level Trim settings apply to the headphones. When you unplug your
headphones, the trim settings return to their previous settings for the Main Outputs; when you
plug your headphones back in, they return to the previous settings for the headphones.
Note: Trim settings for BOTH the Headphone Output and Main Outputs are not persistent, and
both are reset when you switch the XMC-2 into Standby Mode or switch it O.
Playing SACD Audio in Pure DSD
There are a wide variety of disc players which support playback of standard SACD discs (and the
SACD portion of hybrid discs). These discs are recorded in a special digital audio format called
DSD (direct stream digital).
For audio purists who prefer to play the DSD content from SACD discs directly, without
modication or processing, the XMC-2 supports direct playback of DSD audio content received
over an HDMI connection. In order to utilize this feature, your player must be congured to deliver
the unaltered DSD “bitstream” to the XMC-2 via HDMI.
Note: Dierent players require dierent settings to enable them to output DSD digital audio
without converting it; and some players may not oer this option. On some players, you will
select “DSD” as your output mode; on some you may select “bitstream” as your output mode
when playing SACDs; and on others you will DISABLE the option “convert SACD output to PCM”;
some players may require you to set multiple options on dierent menu pages.
Note: Many SACDs include versions of the same content in both Stereo and Surround Sound.
These are actually separate tracks on the disc, and you must choose the one you want when
playing the disc.
Note: Some players can also play DSD audio directly from a DXD or DSDIFF digital audio le. As
long as the result is output to the XMC-2 as standard DSD via HDMI it should play as DSD.
Because DSD digital audio cannot be processed in the normal way, and because most purists
who choose to listen to unconverted DSD content prefer to avoid any and all conversions and
processing, the playback options for DSD content on the XMC-2 are limited. Two channel DSD
content may be played in modes equivalent to Stereo and All Stereo, with no bass management
or other processing. Surround Sound DSD content may be played in its original 5.1 channels,
or the XMC-2 can be congured to duplicate the Surround Channels into the Rear Surround
Channels (if you have a 7.1 or 7.2 system), also with no bass management or other processing.
Page 20
Page 27

Operating the XMC-2
If your player only supports converting DSD content to PCM, then the XMC-2 will treat it as it
would any other PCM digital audio input. If you require bass management, or any other features
not available with a DSD signal input, then you should congure your player to send its output to
the XMC-2 in PCM format when playing SACDs.
Note: To play digital audio from an SACD, you MUST use an HDMI connection. The copy
protection present on all SACD discs (including the SACD layer of hybrid discs) restricts the
formats in which players are legally allowed to provide an audio output when playing them.
When playing an SACD disc, players are allowed to provide analog audio (if they have analog
outputs), and they are allowed to provide a digital audio output over an HDMI connection.
They are NOT allowed to provide digital audio from other standard types of digital audio
outputs (like Coax S/PDIF or Toslink). When playing an SACD disc, the player will mute all
digital outputs OTHER THAN HDMI.
(If you connect only the Coax digital output of your universal disc player to the appropriate
input on your XMC-2, you will be able to use that connection to play CDs, and to play the CD
layer on hybrid SACDs, but you will get silence if you attempt to play an SACD, or the SACD layer
of a hybrid disc, through that output. Some players may provide a lower quality digital audio
output from their non-HDMI outputs, and some players will play a few seconds of music from
those outputs before the copy protection mutes them, but the only output you can use to play
full quality digital audio from an SACD disc is HDMI.)
Future enhancements will enable the XMC-2 to play DSDx2, and to accept DSD via USB (DoP).
Using the XMC-2 Tuner
The XMC-2 includes a high-quality AM/FM tuner, which can play all standard content from
terrestrial radio stations. The XMC-2 tuner plays standard FM broadcasts (but not “digital” or
“HD” radio broadcasts).
The XMC-2 display will show station or program identication information that is received via the
RBDS data system used by many FM stations.
Note: The Name eld, which can be congured for each station that is entered as a preset, is
manually entered by the user, and is NOT derived from the RBDS information.
Pressing the Tuner direct input button on the remote control will select the Tuner as the active
input. Once the Tuner is your selected Input, you can use the direct control buttons on the remote
control to move between stations or radio bands.
The AM/FM Button can be used to switch between the AM and FM radio bands.
The Station Up and Station Down buttons can be used to move directly to the next/last
congured station preset.
The Seek Up and Seek Down buttons can be used to instruct the XMC-2 to seek in the chosen
direction for the next available station with sucient signal strength to provide acceptable
listening quality.
Page 21
Page 28

Operating the XMC-2
The Tune Up and Tune Down buttons can be used to instruct the XMC-2 to move up or down to
the next station frequency increment.
Note: The Tune buttons allow you to “manually” shift the frequency up or down to the next
valid location for a station - whether any station is currently broadcasting at that frequency
with sucient strength for the XMC-2 to tune it or not. This is equivalent to manually turning
a tuning dial, and can be used to congure preset stations that are too weak for the XMC-2 to
detect automatically, or to congure preset stations that are not currently on the air.
Page 22
Page 29

Operating the XMC-2
Manual Room Correction
The XMC-2 oers two separate Manual Room Correction Presets; each Preset can be labelled
with a user-dened name; and each includes 11 bands of independent Parametric EQ for each
speaker/channel, and Tone Presets (which are applied to all speakers). Each Input on the XMC-2
can be congured to use either of the two Presets, or the results of the Dirac Live Automatic Room
Correction.
The parametric equalizers (parametric EQ or PEQ for short) oer 11 independently adjustable
frequency bands for each channel/speaker. The center frequency, the width of the band, and
the gain or cut, can be independently adjusted for each of those bands. The center frequency
for each band is specied in Hz; the width of each band is specied in both Q and in Hz; and the
gain is specied in dB. A band with a Q of 1.4 is approximately equivalent to a band in an old-stlye
graphic equalizer; a higher Q value corresponds to a narrower band.
Note: You may adjust the width of each PEQ band by changing either the Q or the width in Hz.
Because of the way the XMC-2 updates the display, only the value you are working with will
change in real time on the display; the other value will change to match when you exit the eld
you are adjusting.
There are many dierent ways in which you can determine the proper values required to calibrate
your system and your room using a parametric equalizer. A wide variety of textbooks are available
on the subject of room equalization for those who are interested. Some audiophiles prefer to take
manual measurements using a sound pressure level (SPL) meter or real-time audio analyzer (RTA).
For them the XMC-2 includes sophisticated calibration tools, including a pink noise generator and
a highly congurable sine wave generator. Some audiophiles prefer various software solutions;
one very popular and incredibly exible software room calibration tool is Room Equalization
Wizard (REW). Some basic tools, including a simple SPL meter, only provide the information you
need to manually determine what corrections to make; others, like REW, can provide you with
specic values to enter into each PEQ lter on the XMC-2 to achieve a specic result.
The conguration controls for the Parametric EQ on the XMC-2 have been optimized to make this
process as simple and ecient as possible - and to minimize the number of buttons you have to
press to get the job done:
• You may, of course, adjust all of the lter bands for one speaker, then move on to the next
speaker. However, if you prefer to adjust a specic band for all speakers, then move on
to adjust the next band for all speakers, the XMC-2 facilitates this by remaining set to the
particular EQ band number you’re working on when you switch between speakers. For
example, if you’re adjusting Filter 3 for your Front Right speaker, and you then switch to
the Front Left speaker, you will be taken directly to the settings for Filter 3 for the Front Left
speaker; this way you can very easily adjust each Filter band sequentially for all your speakers.
• Test Tone Level and Test Tone Frequency settings are global; even though the controls for the
Test Tone Generator appear on several dierent menu screens, there is only a single Test Tone
Generator which you are accessing from dierent places. Therefore, as you move from place to
place in the menu system where the Test Tone Generator is used, the Test Tone Generator will
remain set at the last Level and Frequency you select until you change it. When you exit the
area of the menu where the Test Tone Generator is used, it will automatically switch O.
Page 23
Page 30

Operating the XMC-2
Conguring Triggers
The XMC-2 has four fully independent triggers, each one of which may be congured to activate
an associated piece of trigger-enabled equipment when specic conditions are met. For example,
you could use the triggers to activate the ampliers that power your main front speakers
whenever you play music, and the amplier that powers your surrounds, and your powered
subwoofer, only when you’re listening to a surround sound source.
The triggers on the XMC-2 are congured by checking various boxes in the Setup Triggers Menu.
First, each trigger must be congured to be active when the Main Zone, Zone 2, or both zones are
On. The trigger will only be active when one or more of the zones it is associated with are active.
Next, each trigger must be congured be associated with one or more Inputs. The trigger will only
be active when one or more of the Inputs it is associated with are active.
For triggers associated with Zone 2, the trigger will be active whenever Zone 2 is On AND one of
the Inputs associated with that trigger is selected.
For triggers associated with the Main Zone, there is an additional condition that must be met. For
the Main Zone, each trigger must also be associated with one or more Speaker groups. The trigger
will be active whenever the Main Zone is On, AND one or more of the Inputs associated with that
trigger is active, AND one or more of the Speaker groups associated with that trigger is active.
Note: The triggers respond based on how the XMC-2 is congured; the XMC-2 does not detect
the presence or absence of an active audio signal on specic channels.
Note: The option to congure associated Speaker groups only pertains to the Main Zone.
Therefore, if you only have Zone 2 checked for a particular trigger, the Speakers column will not
be displayed. However, if you have both Zone 2 and the Main Zone checked for that trigger, the
Speakers column will be displayed; but please remember that the settings in that column ONLY
pertain to the Main Zone and don’t aect the status of Zone 2 triggering.
Note: All of the XMC-2 trigger logic is based on how the XMC-2 is currently congured.
Whether your XMC-2 will send audio to the Surrounds will depend on which Input you have
selected, the Mode you have congured that Input to use, the conguration of the Preset you
have associated with that Input - including whether Surrounds are set to None in that Preset,
and the source signal itself. If all these conditions are met, such that the XMC-2 is delivering
audio content to the Surrounds, then any triggers associated with Surrounds will be active if
their other requirements have also been met.
By default, the four triggers on the XMC-2 are congured as follows:
• Trigger 1: Main Zone (only), ALL Inputs, ALL Speakers
• Trigger 2: Main Zone AND Zone 2, ALL Inputs, ALL Speakers
• Trigger 3: Zone 2 (only), ALL Inputs
• Trigger 4: Main Zone AND Zone 2, ALL Inputs, ALL Speakers
Page 24
Page 31

Operating the XMC-2
Note: In many situations, there are multiple ways of conguring the triggers on the XMC-2 to
produce a certain result. Also, once a sucient combination of conditions is met to cause a
given trigger to be active, additional redundant conditions will be ignored. For example, if you
congure a trigger to be active when a certain input and Surrounds are active, it will be active
when that input and a surround sound mode are selected. Conguring that same trigger to
also be active when that same input and Fronts are active would be redundant - because the
Fronts are always active when the Surrounds are active - but the extra condition won’t aect
the end result.
Headphone
Since triggers are most often used to switch ampliers On and O, the triggers on the XMC-2 are
normally congured to be disabled when a pair of headphones is plugged into the front panel
headphone jack. If you uncheck the Headphone Override box for a particular trigger, this override
will be disabled.
Note: The Headphone Override option is useful if you are using one of the XMC-2’s triggers
to activate your monitor, and you sometimes watch TV wearing headphones; if you uncheck
the Headphone Override for that trigger, that trigger will remain active (assuming the other
congured conditions are met), even when headphones are plugged in.
Note: The XMC-2 detects when headphones are connected by sensing a plug physically inserted
into the front panel Headphone jack. If you leave a headphone extension cable plugged
into the jack - but with no headphones connected, the XMC-2 will act as if headphones are
connected. Also note that, if you use a separate headphone amplier connected to one of the
XMC-2 line level outputs, the XMC-2 will be unaware that you’re using headphones.
As an example of how the Triggers work on the XMC-2, let’s assume you have a stereo amplier
which you use to power your Front Left and Front Right speakers, and a ve-channel amplier
that you use to power your Surrounds, Backs, and Center speakers. You want both ampliers to be
On when you listen to surround sound movies, but only the Fronts and your stereo amp to be on
when you listen to stereo CDs. For this example, we’ll assume that you only use the Main Zone.
One way to achieve this result would be to connect your two channel amplier to Trigger 1, and
your ve-channel amp to Trigger 3.
You would congure Trigger 1 to be activated ONLY by the Main Zone, but leave all the Input
boxes checked, and leave all the Speaker boxes checked. This would congure your two-channel
amp to be On whenever the Main Zone was on.
You would then congure Trigger 3 to be activated ONLY by the Main Zone, leave all the Input
boxes checked, but uncheck all Speaker association boxes EXCEPT the box for Surrounds. This
would congure your ve-channel amp to be On whenever the Main Zone is On and any Input is
selected, but ONLY if you have a mode that uses surround sound selected. Your Surrounds will be
O if you’re using Reference Stereo or Direct Mode, but On if you use the Dolby Surround Upmixer
or the DTS Neural:X upmixer.
Page 25
Page 32
The XMC-2 Menu System
The XMC-2 Menu System
HDMI 6 Volume -49.0dB
NAV
A: HDMI 6 48kHz 24bits
V: HDMI 6 2160P/24 8bits YCbCr 4:4:4 SDR
ATMOS
D
D
TRUEHD
D
D
MENU DIM
STANDBY
XMC-2
Differential Reference
Page 26
Page 33
The XMC-2 Menu System
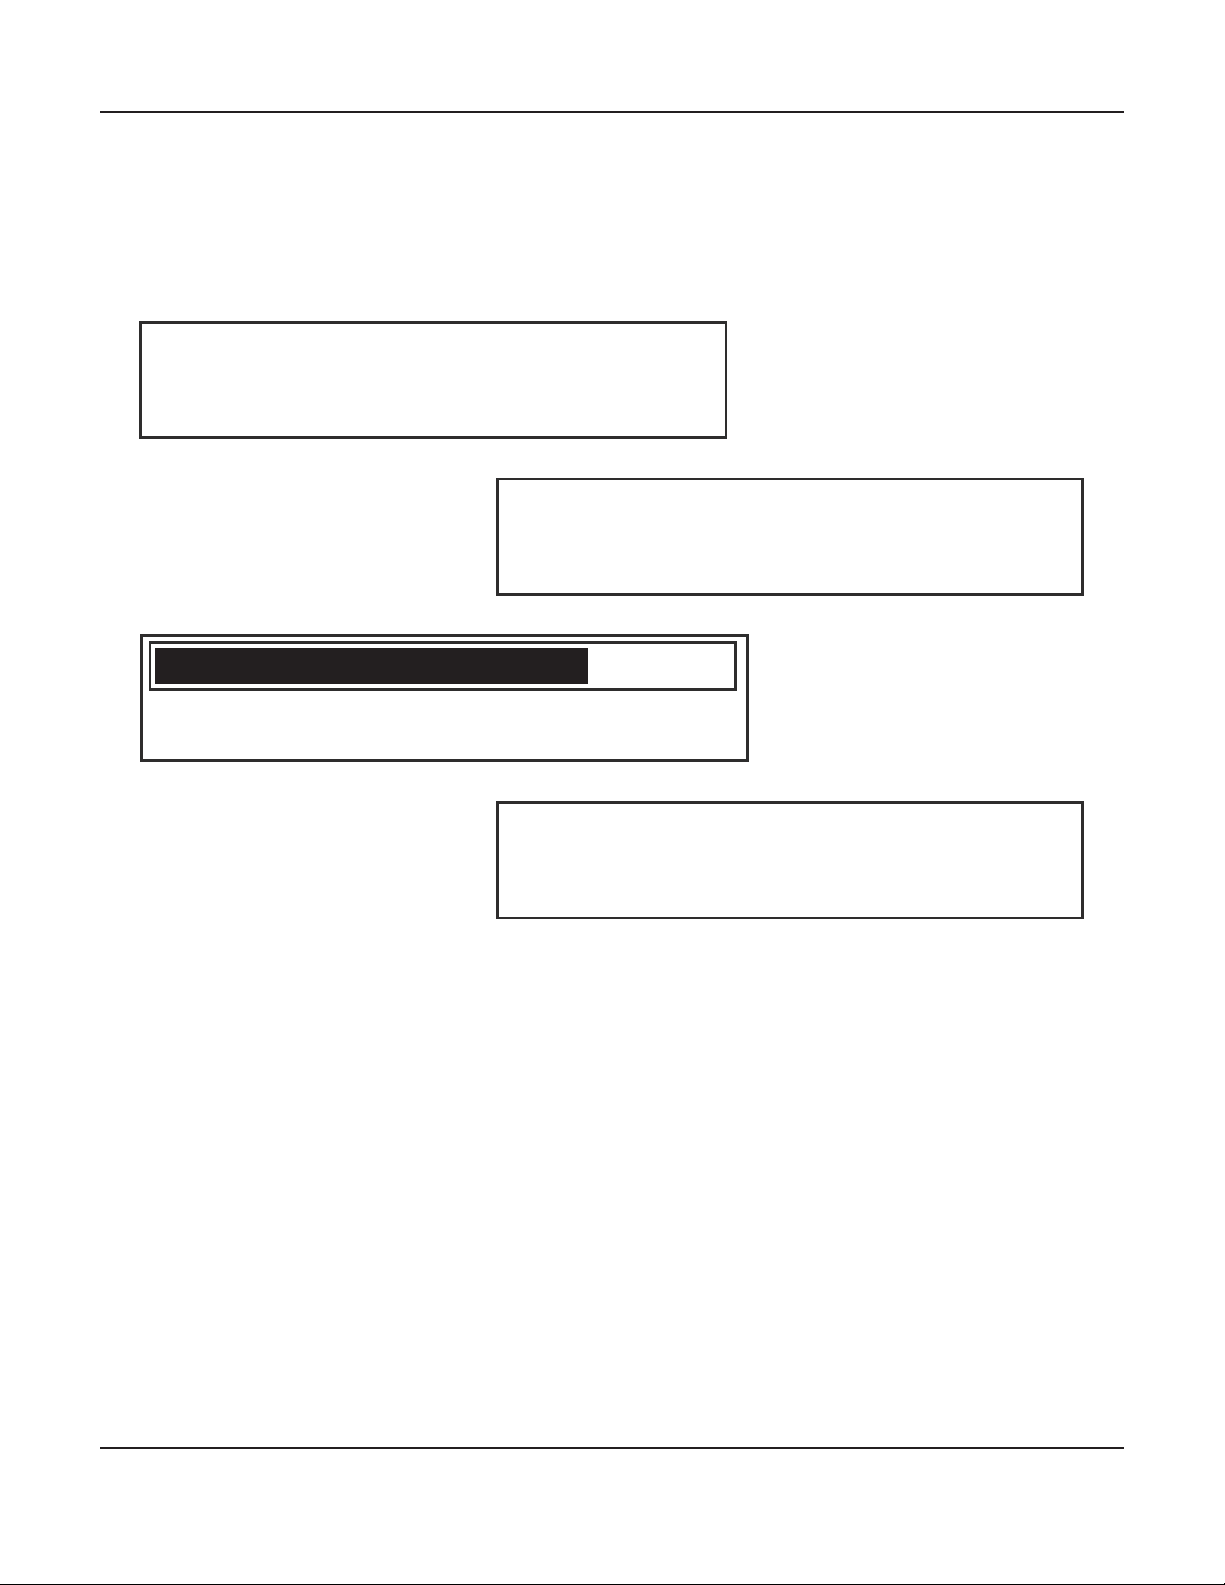
The front panel of the XMC-2 is dominated by a large, bright, easy to read blue OLED display. The
display can be set to any of six dierent brightness levels, including totally o. If the display is
fully dimmed, it will illuminate for a few seconds when you press the Info button, and, when you
activate the Menu, the display will illuminate for as long as you are using the Menu.
HDMI 1
Volume -35.0dB
48kHz 24bits
Setup
HDMI 1
A: HDMI 1
V: HDMI 1
Surround
PCM 7.1
1920x1080p/60 RGB 8bits
Volume -35.0dB
FM 104.90MHz
Mono 0dBuV
V: HDMI 1
Surround
1920x1080p/60 RGB 8bits
The information displayed can be congured in the Setup | Preferences menu. By default, the front
panel display shows three lines of detailed information about the source that is currently selected,
and the audio and video modes currently in eect. When you operate a direct control, like the
Volume knob or buttons, or one of the Input selector buttons, the display will momentarily switch
to a large, easy to read, representation of the item being chosen or adjusted. When you use the
Menu System, the display will switch to show that, then return to the Information screen when
you exit the Menu. When using the Setup Menu, settings made on any screen are automatically
updated or saved when you exit the screen.
Volume -35.0dB
For all menus except the Setup Menus, the on screen display will show the same content as the
front panel display. In the Setup Menus, if a certain menu screen displays a list of more than three
items, the front panel display will show the current item and a single item above and below it,
while the on-screen display shows the entire list of items. Also, in the Setup Menu, certain menus
show additional useful information on the OSD version (like the user dened name of the Presets).
Page 27
Page 34
The XMC-2 Menu System
The Menu Syetem on the XMC-2 is accessed by pressing the Menu Button on the front panel, and
navigated using the four Nav Buttons. (The Volume knob on the XMC-2 controls the Volume, and
is pressed to toggle Mute On and O.)
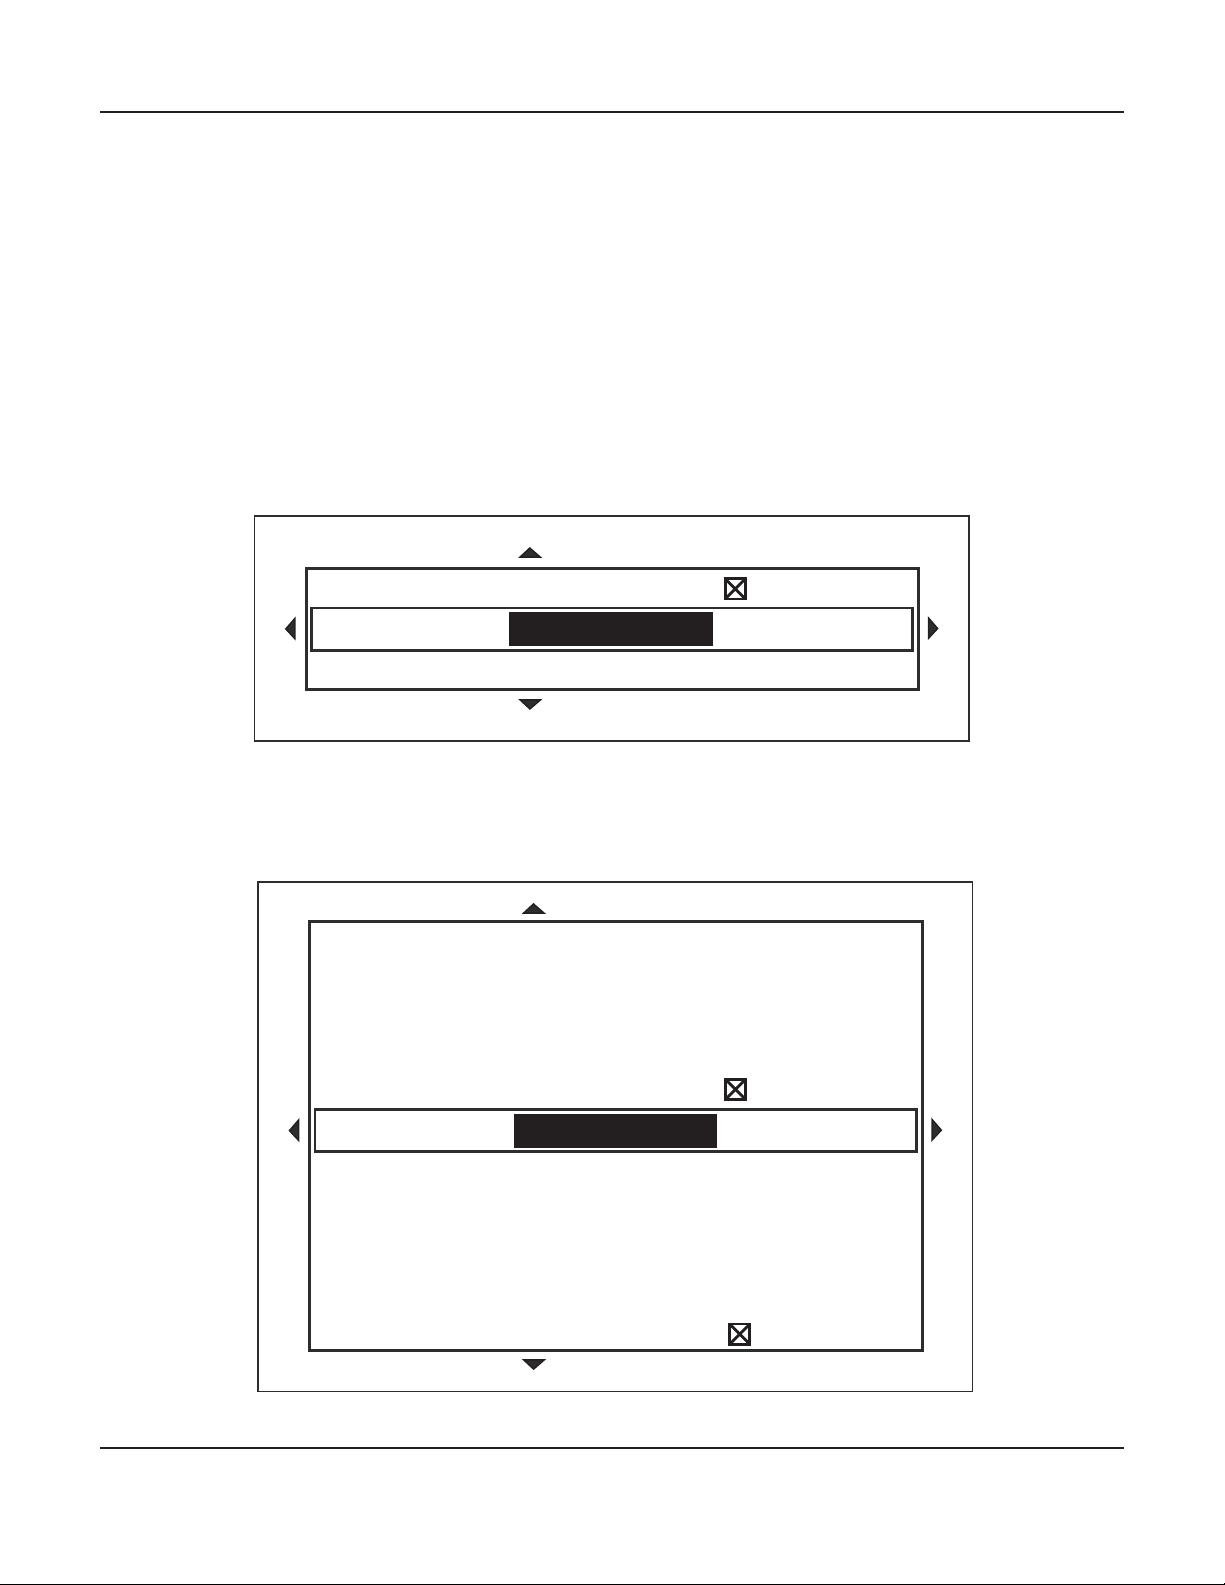
This is what the front panel menu on the XMC-2 looks like when conguring the various settings
for the HDMI 1 Input in the Setup | Inputs Menu.
Lip Synch Auto
HDMI 1
Button
5.1 Mode
Input 1
Auto
This is what the same Setup | Inputs Menu for HDMI 1 looks like in the on-screen display.
Name Blu-Ray
Audio Input HDMI 1
Lip Synch Delay 0 msec
Lip Synch Auto
HDMI 1
Button
5.1 Mode
Input 1
Auto
2.0 Mode Auto
Speaker Preset Movie
Level Trim 0.0 dB
Visible
Page 28
Page 35
The XMC-2 Menu System
The Menu System is entered by pressing the Menu button on the front panel or the remote
control. Pressing the button a second time, or using the Left Nav button when you are already
at the top level of the menu, exits the menu and returns you to the Information Screen. Menu
navigation is accomplished using the Up, Down, Left, and Right Nav Buttons on the front panel or
the remote control.
The menu system of the XMC-2 is intuitive, and was carefully optimized to make the XMC-2 not
only exible and powerful, but easy to use.
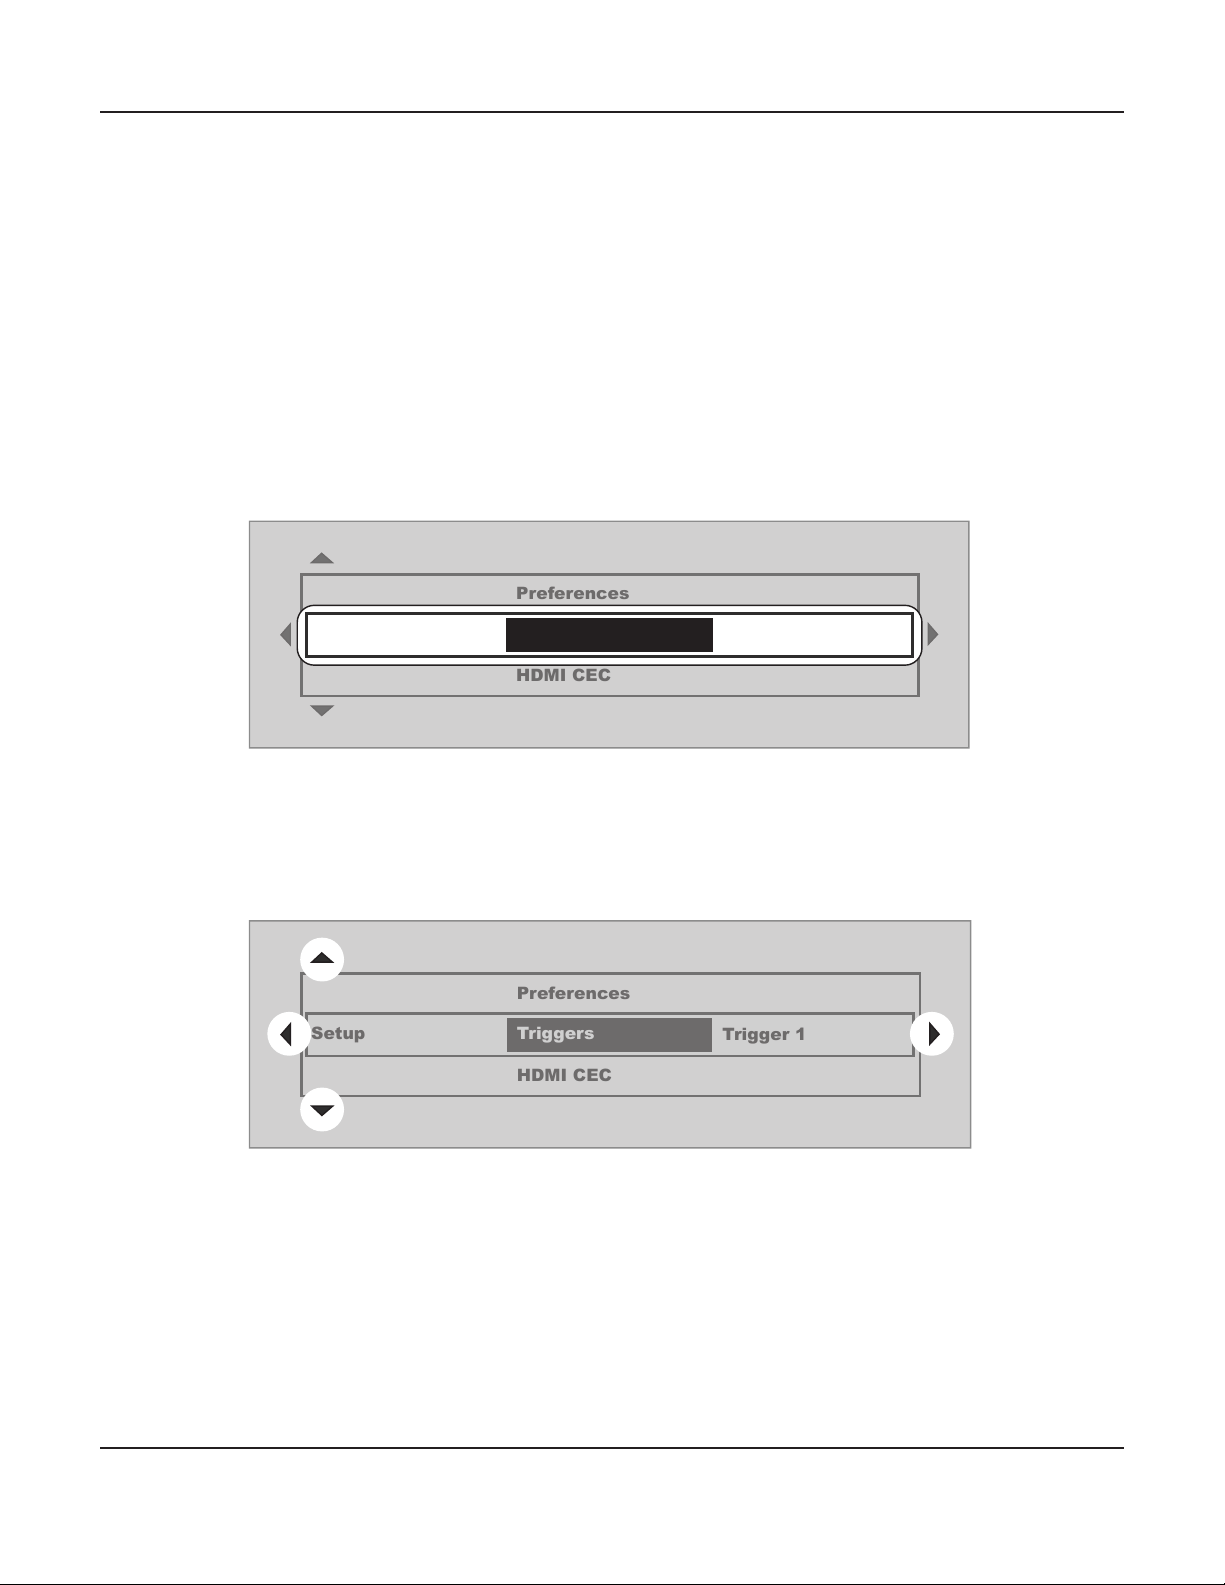
When using the Menu System, the center line of the menu is active. The lines above and below the
active center line remain visible to provide context.
Preferences
Setup
Triggers
HDMI CEC
Trigger 1
The small arrows to the left, right, above, and below show you which directions you can move in
the menu from your current location.
Preferences
Setup
Triggers
HDMI CEC
Trigger 1
Page 29
Page 36
The XMC-2 Menu System
This example will show you exactly how the process works, although it seems a lot more
complicated on paper than it does in real life. Once you have an XMC-2 in front of you in person,
you’ll see how simple and intuitive the XMC-2 Menu System really is.
In this example we’ll congure Trigger 1 to come on when the Main Zone Power is On and When
Zone 2 Power is On.
In normal operation the XMC-2 will usually
HDMI 1
A: HDMI 1
V: HDMI 1
Tuner
Setup
Information
Surround
PCM 7.1
1920x1080p/60 RGB 8bits
Triggers
Volume -35.0dB
48kHz 24bits
Trigger 1
display the Information Screen.
Press and hold the encoder, or press the Menu
button, to bring up the Main Menu screen. The
highlight shows that the Setup Menu is already
the active choice, and the arrows show that we
can move up to the Tuner Menu or down to the
Information Menu.
Setup
Setup
Preferences
Triggers
HDMI CEC
Triggers
Trigger 1
Trigger 2
Trigger 1
Trigger 4
Press the Right arrow button to enter the Setup
Menu. Now the highlight shows that the active
choice is Triggers, and we can move up to the
Setup Preferences Menu or down to the Setup
Network Menu. Use the Right arrow button to
move to the Setup Triggers Menu.
Since we want to congure one of the Triggers,
use the Up, Down, and Right arrow buttons to
select the particular Trigger we want. At this
point the arrows show that we can move up or
down to select the Trigger we want to congure.
Since Trigger 1 is already the active choice, use
the Right arrow button to select it and enter
into the Trigger 1 section of the Setup Triggers
Menu.
Page 30
Page 37
Speakers
Input HDMI 1
Power
Input
Power Main Zone
Headphone
Power Main Zone
Zone 2
The XMC-2 Menu System
This time the highlight is showing us that the
active choice is to congure how Trigger 1
responds to each Input. Since this time the
default choice is not the one we want, use the
Down arrow button to move to Power, which is
the option we want.
Now the highlight is showing the choice we
want, so use the Right arrow button to select it
and move into that part of the menu.
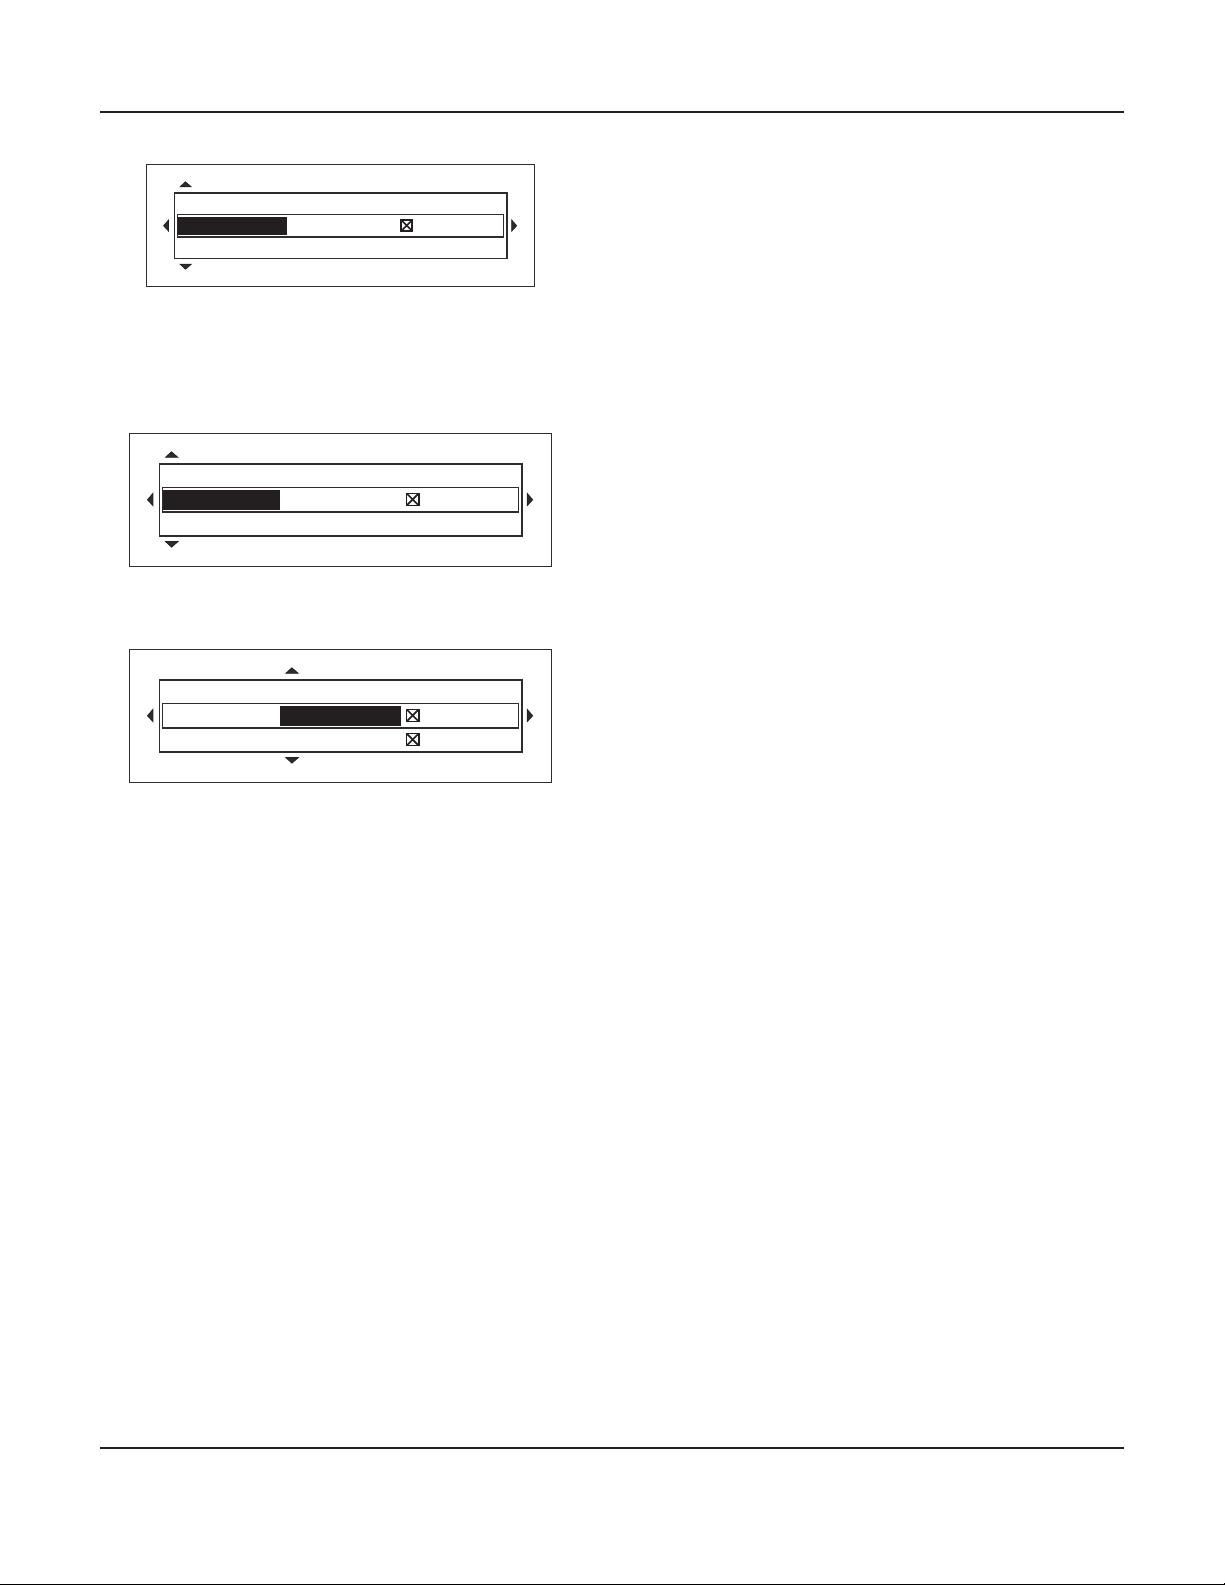
As you can see, we’re in the nal menu screen
for conguring how Trigger 1 will respond to
Power conditions. All we have to do is use the
Up and Down arrow buttons to select Main
Zone, and then Zone 2. Then, for each of those,
use the Right arrow button to move to the
check box, the Up and Down arrow buttons
to check the box, and the Left arrow button
to move back to where we are. After we’ve
checked the box for both zones, we’ll use the
Menu button to exit back to the Information
screen.
Note: Since, in our example, we wanted Trigger 1 to remain active when any combination of
Inputs and Speakers was used, we left the Inputs and Speakers check boxes set to their default
condition - which is “all checked”.
Note: Whenever you use the Left arrow button to exit a Menu screen, or use the other arrow
buttons to move around the Menu System, all changes you’ve made in any screen you leave are
automatically saved: check a box and it stays checked; uncheck a box and it stays unchecked;
change a value and it stays where you set it. You don’t have to remember to save settings, or to
exit the Menu screen using the correct button. And, at any point, you can exit the Menu System
using the Menu button and all your settings will be saved.
Note: Before experimenting with new options or settings, we recommend that you save your
current conguration; that way you can discard your changes and return to it if you change
your mind. See Creating a Conguration Backup on page 87 for details.
Once you try the XMC-2 menu system for a few minutes, you’ll realize how incredibly intuitive it
really is - and how easy it makes controlling the amazing power and exibility of the XMC-2.
Page 31
Page 38
Main Menu
The XMC-2 Menu System
Information
Screen
Tuner
(menu)
Setup
(menu)
Information
(menu)
Main Zone
(menu)
Zone 2
(menu)
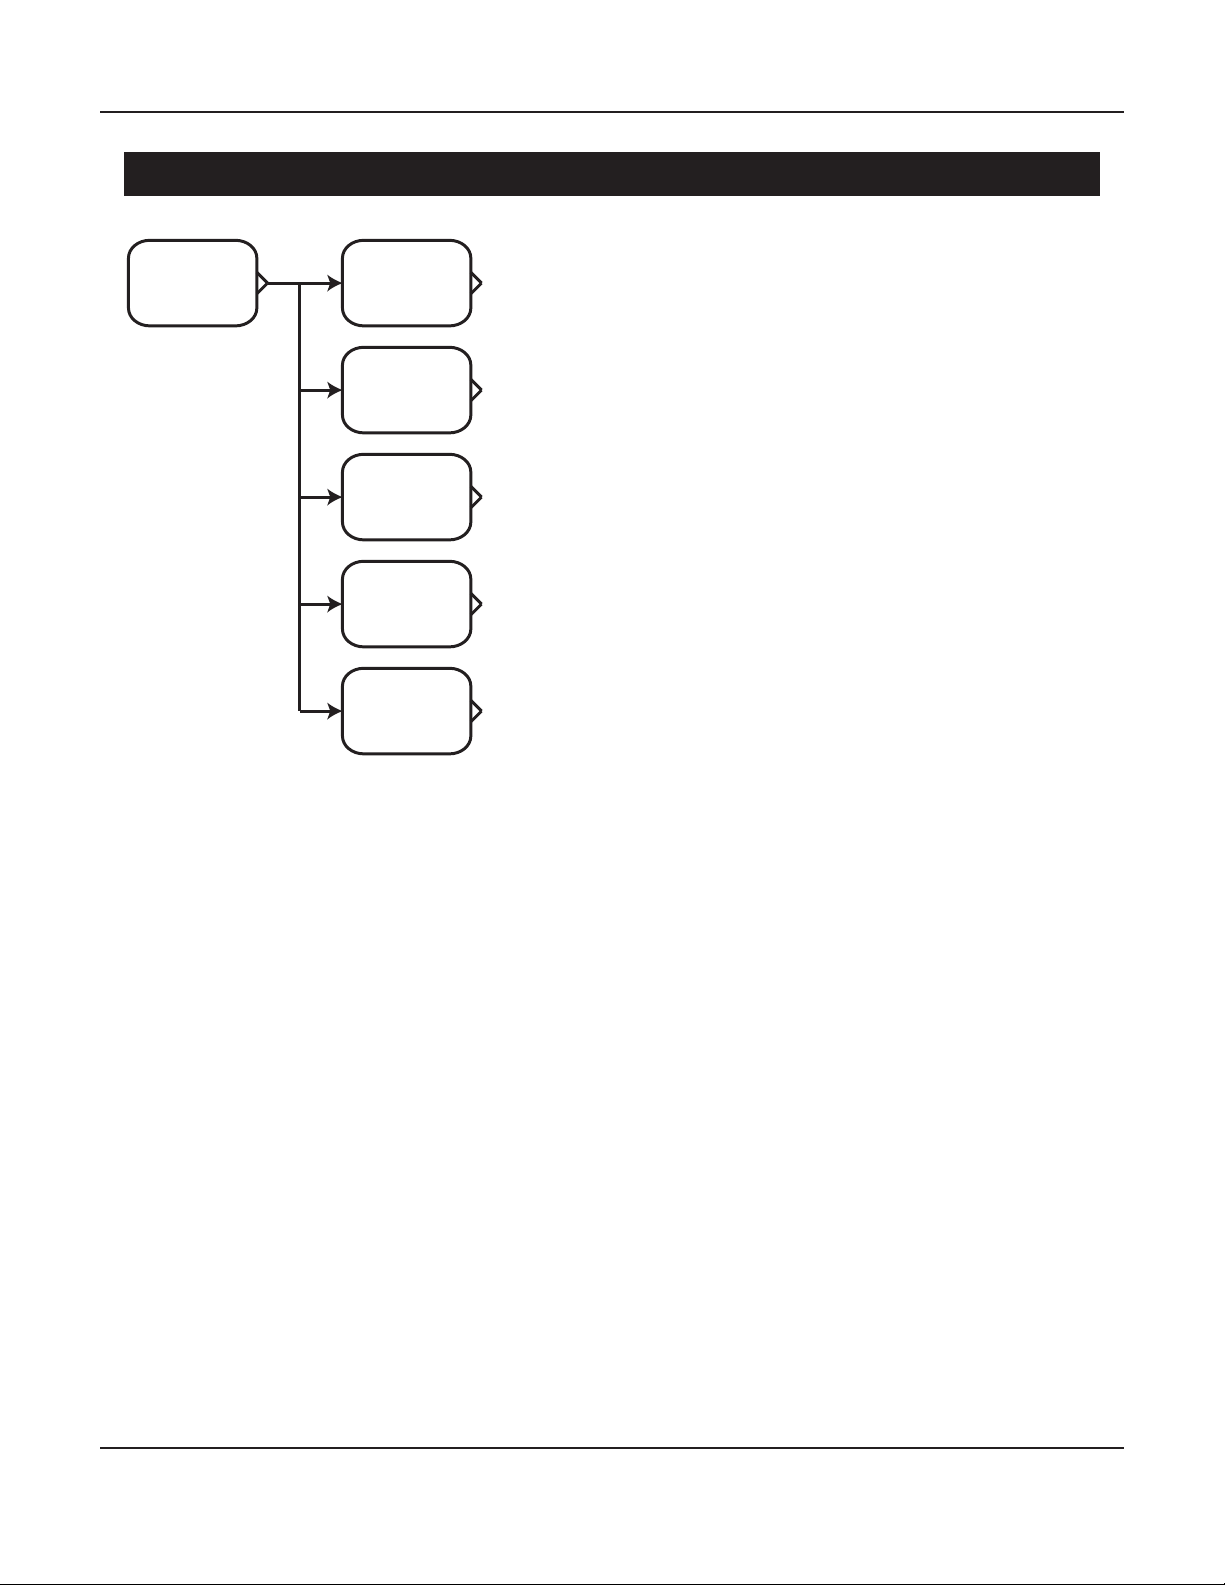
The XMC-2 Menu System is displayed by pressing
the Menu button, and is displayed on the XMC-2
front panel display and the on-screen display. The
Menu System is divided into ve major functional
categories.
Tuner (menu)
The Tuner menu provides the controls used to
operate the XMC-2’s built-in high quality AM/FM
tuner. Station Presets and Station Names are also
congured from this menu.
Setup (menu)
The Setup menu provides all the controls used to
congure the XMC-2’s various features and settings.
These will be covered in detail in the Setup Menu
section.
Information (menu)
The Information menu displays information about
the XMC-2’s Network Address and about the
currently installed versions of the XMC-2’s various
rmware modules.
Note: Information displayed on this screen is read-only. The XMC-2 Network information and
Friendly Name can be changed from the Setup Menu if desired.
Main Zone (menu)
The Main Zone menu provides the controls used to operate the XMC-2’s main listening zone in
day-to-day use, including Input and Mode selection and the Tone and Level Trims.
Note: Trim adjustments made in the Main Zone menu are temporary and are not saved when
the XMC-2 is shut down or a dierent Input is selected. To make permanent adjustments, use
the Setup menu
Zone 2 (menu)
The Zone 2 menu provides the controls used to operate the XMC-2 second listening zone in dayto-day use.
Page 32
Page 39
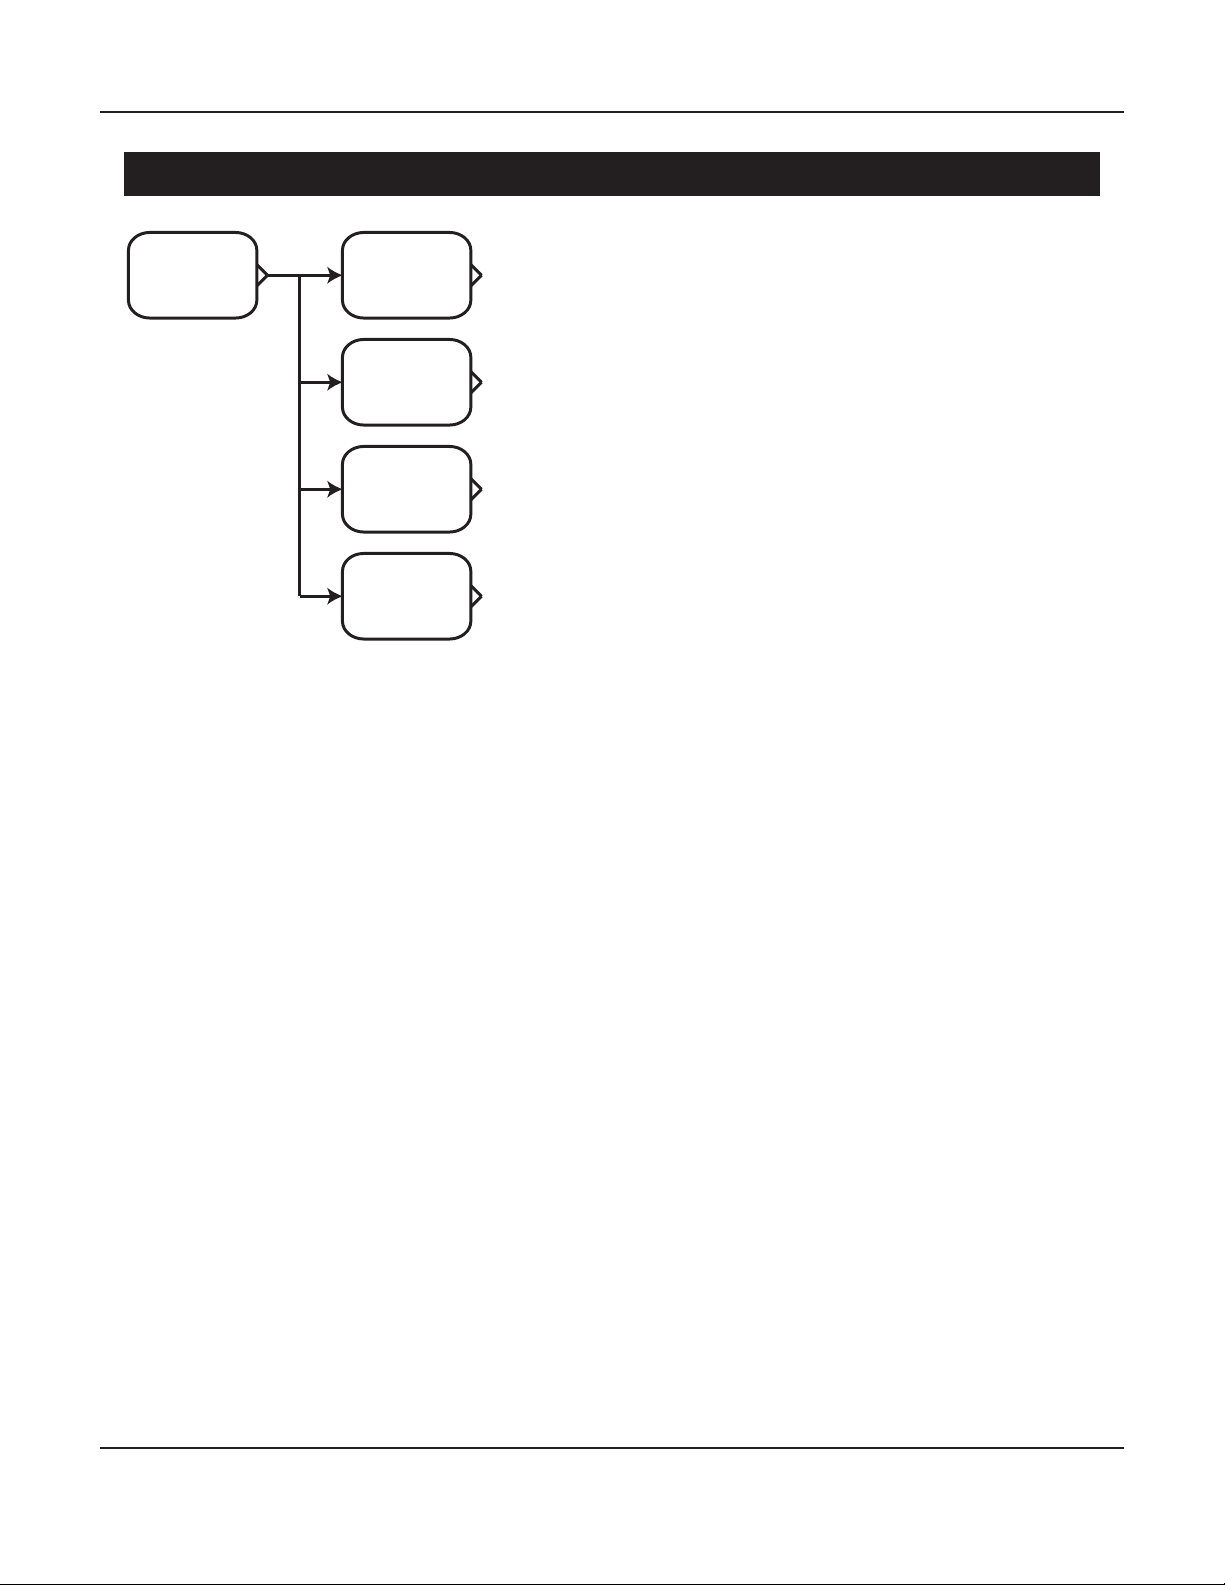
Tuner Menu
The XMC-2 Menu System
Tuner
(menu)
Band
XMC-2’s built-in high quality AM/FM tuner, and to
create, rename, and delete station presets.
Band & Frequency
The Tuner Menu is used to select a station on the
Frequency
Station
The Band and Frequency controls are used to select
a radio station to listen to by number (frequency).
To do so, simply select the appropriate band (AM or
FM) and frequency of the station you wish to listen
to.
Station
Saved
Stations
The Station control is used to select a station to
listen to by name. (With this option, you will be able
to select any station you have saved and named.)
Saved Stations
The Saved Stations control will act dierently depending on whether the station you are currently
on has already been saved as a Preset station or not.
If the currently selected station has NOT already been saved - then you will be oered the option
to Add it to your list of preset stations. After you choose to Add the current station, you will be
oered the option of entering a name for it.
If the currently selected station has already been saved in your list of presets - then you will be oered
the choices of Renaming the station preset, or of Forgetting it (deleting it from the list).
Page 33
Page 40
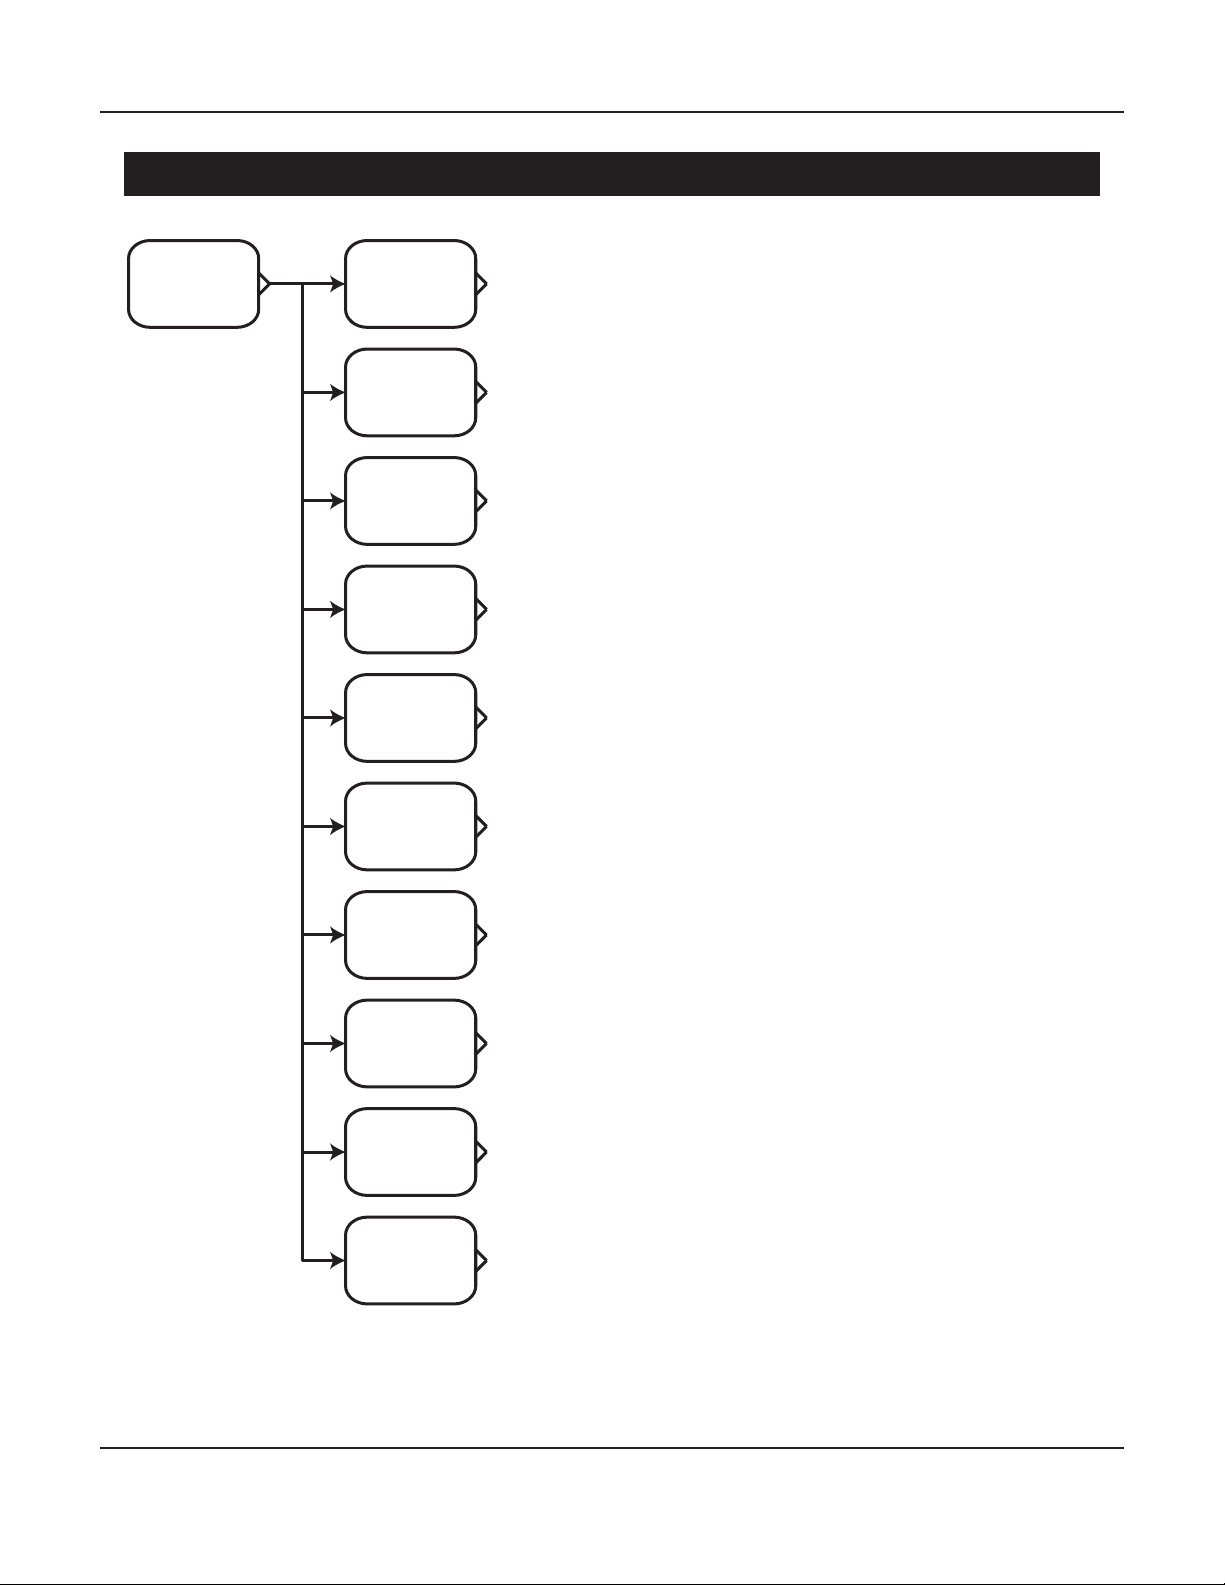
Information Menu
The XMC-2 Menu System
Information
(menu)
Friendly
Name
Network
MAC
Address
Firmware
Version
FP
Version
Kernel
Version
HDMI
Version
The Information Menu gives you access
to information about the current Network
conguration of the XMC-2, shows the versions of
the currently installed rmware modules, and allows
you to see the XMC-2’s Friendly Name.
The information displayed on this screen is
congured from other screens in the Setup Menu
and cannot be changed from this screen.
Friendly Name
The Friendly Name is used by various remote control
applications to identify the XMC-2 (the default is
“XMC-2”).
Network
The Network Address is the IP address assigned
to your XMC-2. If the XMC-2 is congured to use
DHCP, then this address is set by your DHCP server;
otherwise it may be entered manually. A valid
Network Address is required to congure Dirac Live,
and to control the XMC-2 using a network attached
remote control. If your XMC-2 isn’t connected to a
network this address may show as 0.0.0.0 (none).
MAC Address
DSP0
Version
DSP1
Version
USB
Version
This is the hardware address assigned to the
network interface on the XMC-2. This address may
be requested by some routers in order to allow the
XMC-2 to access the Internet.
Firmware Version
This is the current version of the main XMC-2
rmware installed on your XMC-2.
FP Version
This is the current version of the Front Panel
rmware installed on your XMC-2.
Page 34
Page 41

The XMC-2 Menu System
Kernel Version
This is the current version of the operating system kernel installed on your XMC-2.
The XMC-2 operates on a highly-customized version of the Linux operating system.
HDMI Version
This is the current version of the HDMI rmware installed on your XMC-2.
DSP0 Version
This is the current version of the DSP0 rmware installed on your XMC-2.
DSP1 Version
This is the current version of the DSP1 rmware installed on your XMC-2.
USB Version Version
This is the current version of the USB interface rmware installed on your XMC-2.
Page 35
Page 42
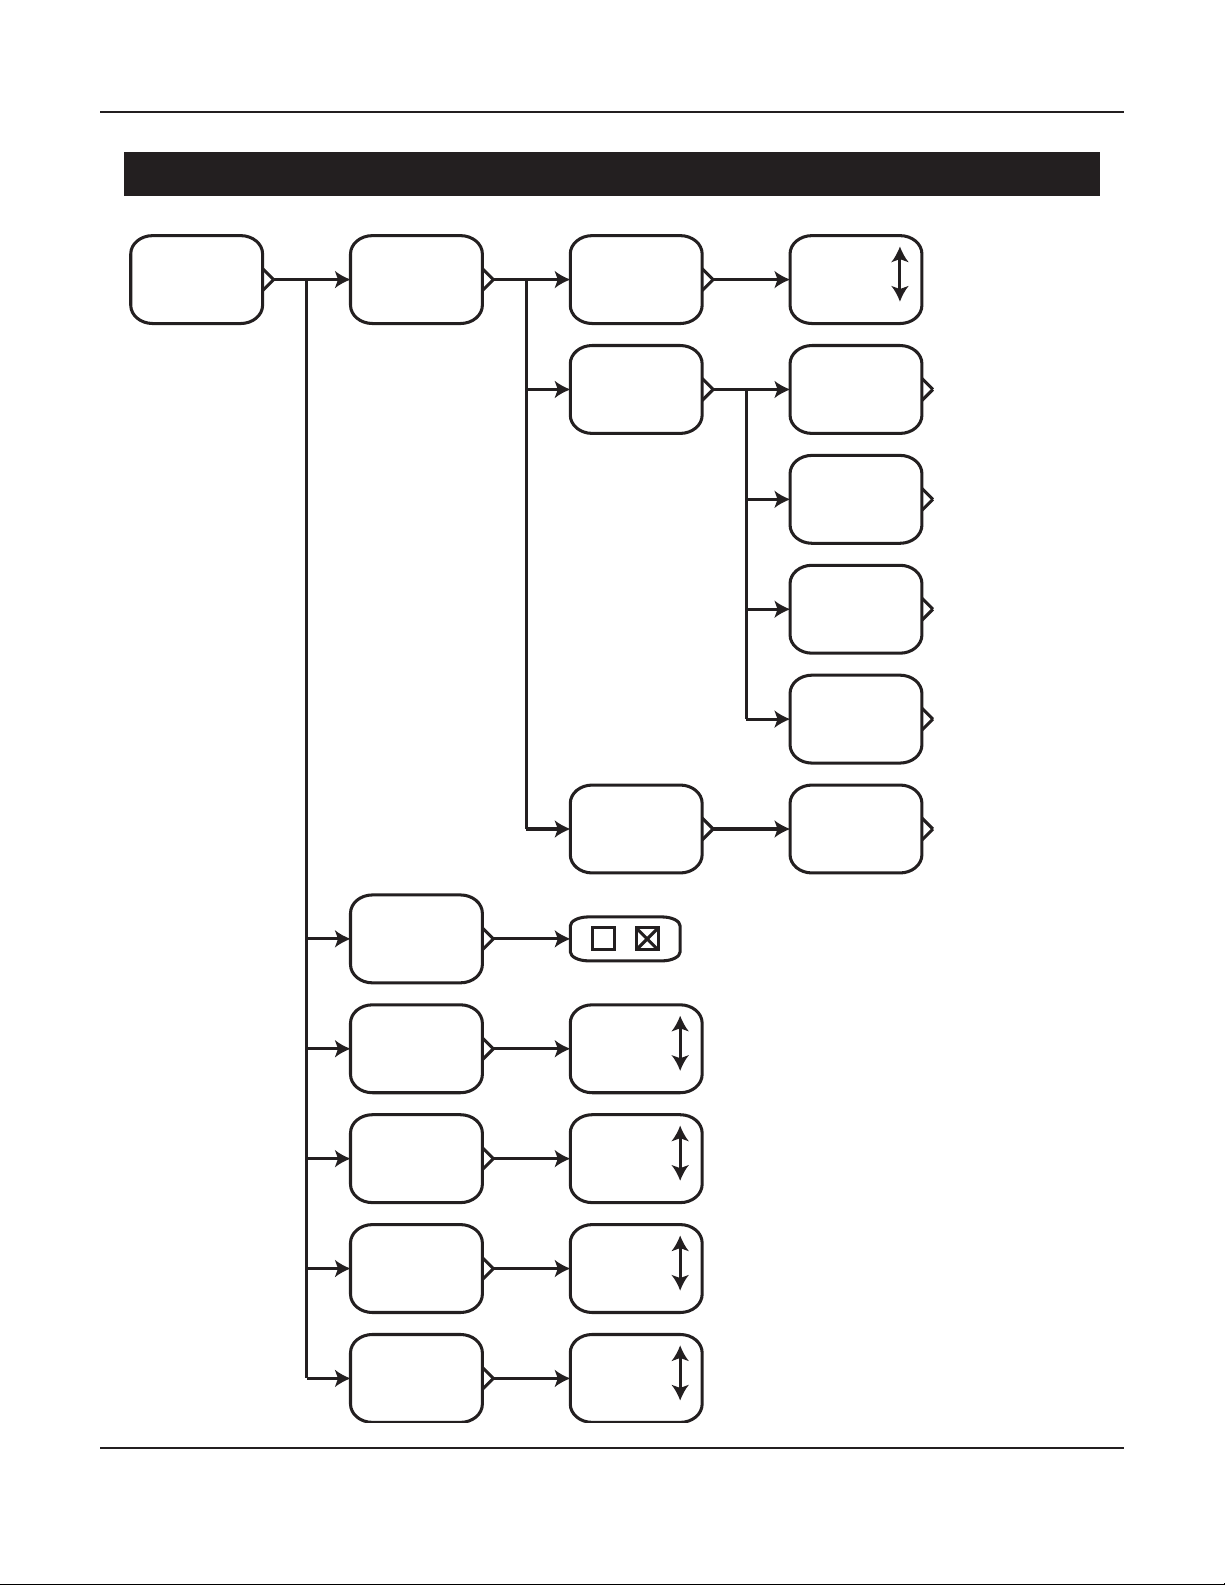
Main Zone Menu
The XMC-2 Menu System
Main Zone
(menu)
Trims
Level
Tone
Lip
Synch
Speaker
List
Bass
Level
Bass
Frequency
Treble
Level
Treble
Frequency
Delay
Loudness
Dolby
Loudness
Management
Input
Speaker
Preset
Surround
Mode
DLM
Modes
Input
List
Speaker
Presets
List
Surround
Mode
List
Page 36
Page 43

The XMC-2 Menu System
The Main Zone Menu contains the settings and controls typically used in the day-to-day
operation of your XMC-2. These are settings that are typically chosen each time when viewing
content; settings that remain in eect across multiple viewing sessions are accessed from the
Setup Menu.
Note: The Level and Tone Trim settings on the Main Zone Menu are temporary trim settings,
and apply only to the current listening session. To make changes to these settings that will
persist after you restart the XMC-2, you will need to change them in the Setup Menu.
Note: The default settings for several parameters on the Main Zone Menu will be dependent on
settings elsewhere in the Setup Menu.
For example, if you have previously set the Treble Adjustment for a given speaker to +5 dB at
5 kHz in the Setup Menu, the Treble Trim in the Main Zone Menu will still initially show the level
for that speaker as 0 dB. If you then set the Treble Trim to +5 dB at 5 kHz, that adjustment will
be ADDED to the other setting - with the result that Treble will actually be boosted by +10 dB
at 5 kHz. If you set the Treble Trim to -5 dB at 5 kHz, it will be ADDED to the +5 dB setting in the
Setup Menu - with the result that the Treble will actually be set to +0 dB (at). When you restart
your XMC-2, the Treble adjustment you made in the Setup Menu will remain in eect, while the
Treble Trim adjustment you made in the Main Zone Menu will revert to the default +0 dB.
Note: While “stacking” controls for extra gain or cut at a specic frequency is usually not
recommended, the XMC-2 will generally normalize the overall level to prevent clipping if you
choose to do so.
Note: When the Tuner is selected as your Input, the middle row on the display will show the
signal strength of the current station, and whether it is being received stereo or monaural.
Since there is no video signal associated with the Tuner, the third row will continue to display
information about the last selected video input.
Level Trim
The Level Trim is used to temporarily alter the relative level of each set of speakers. For each set of
speakers you may change the level by up to +/- 12 dB in 0.5 dB steps.
Bass Level Tone Trim & Bass Frequency Trim
The Bass Level Tone Trim is used to temporarily alter the relative level of the bass for all speakers
by up to +/- 12 dB in 0.5 dB steps.
The Bass Frequency Trim allows you to congure the turnover frequency for the Bass Level Tone
Trim to any frequency between 40 Hz and 400 Hz.
Treble Level Tone Trim & Treble Frequency Trim
The Treble Level Tone Trim is used to temporarily alter the relative level of the treble for all
speakers by up to +/- 12 dB in 0.5 dB steps.
The Treble Frequency Trim allows you to congure the turnover frequency for the Treble Level
Tone Trim to any frequency between 500 Hz and 10 kHz.
Page 37
Page 44

The XMC-2 Menu System
Note: The Level Trims, Bass and Treble Trims, and Lip Synch Delay Trim in the Main Zone Menu
are independent of those in the Setup Menu and changes congured in the trims operate IN
ADDITION TO the levels and settings congured in the Setup Menu.
Lip Synch Delay Trim
The Lip Synch Delay Trim adjusts the lip synch delay from 0 mSec to 200 mSec in 1 mSec steps.
Lip Synch Auto Enable
Some monitors and projectors report their internal Lip Synch delay value to the processor. If your
monitor reports its delay to the XMC-2, you will see a Menu option to Enable Auto Lip Synch,
which instructs the XMC-2 to use the value returned by your monitor. If you then manually enter
a value for Lip Synch Delay Trim, that value will be used to adjust or modify the value provided by
your monitor.
Loudness
The Loudness check box allows you to enable or disable true Fletcher Munson loudness
compensation. Loudness compensation adjusts the audio frequency response to compensate
for the varying frequency response of human hearing at low volume levels. Our hearing is
increasingly less sensitive to very high and very low frequencies as the listening level is reduced,
and the Fletcher Munson loudness curve compensates for this by applying a boost to those
frequencies that increases as the level is reduced.
Dolby Loudness Management
Enables Dolby Loudness Management and selects which DLM mode to use. When enabled, Dolby
Loudness Management attempts to control the dynamic range of incoming audio. Dynamic
Range Control (DRC) reduces the dynamic range (the loudness dierence between loud and
quiet sounds) to make it easier to hear quiet sounds when the overall volume level is low; this
is sometimes referred to as “midnight mode”. Dialog Normalization seeks to make the dialog in
various program material play at a similar level to improve intelligibility.
Note: This option is only available for content encoded in Dolby (not DTS or analog). The exact
eect produced by the various settings is determined by information encoded into the source
material.
Note: Because DLM only works with Dolby encoded content, it will only function if your source
or Blu-Ray player is sending the full digital bit stream, encoded in a Dolby digital format, to
the XMC-2 for decoding (if your source is converting the bit stream to PCM, or is in some other
format, then DLM will have no eect).
All O disables both Dynamic Range Control and Dialog Normalization; DRC O disables
Dynamic Range Control but enables Dialog Normalization; Auto enables DRC (when the ag
in the content requests it) and enables Dialog Normalization; On enables both DRC and Dialog
Normalization.
Page 38
Page 45

The XMC-2 Menu System
Input
The Input control is used to select which input on the XMC-2 to listen to or view. Inputs may also
be assigned to individual Input Select buttons in the Setup Menu.
Speaker Preset
The XMC-2 has both Dirac Live automatic room correction, and two full banks of parametric
equalization that can be used for precise, detailed manual correction of room and system
frequency response. The Speaker Preset control allows you to select between the Presets that you
have congured in the Setup Menu; listed by the names you have assigned.
Note: Your XMC-2 is congured to use the Presets, and Dirac Live Automatic Room Correction,
from the Setup Menu, under Setup Speakers. Dirac Live is executed and congured from a
separate computer, which must have network access to connect to the XMC-2 and the Internet.
Surround Mode
The Surround Mode control is used to select which surround mode is used by the XMC-2 to
decode incoming audio. This control will present you with a list of available modes and allow you
to override the XMC-2’s default selection. Selecting Auto on this menu will instruct the XMC-2 to
automatically choose the best decoding and processing modes based on the incoming audio.
Note: The XMC-2 will automatically detect the surround mode used by incoming audio and
only allow you to choose modes that are appropriate for the type of incoming signal that is
detected. If you set the XMC-2 to Auto, it will automatically select the best choice for a given
type of input signal; if you congure a specic mode, then that mode will be used; if you
congure the XMC-2 to Last Used, then it will use the same surround mode that you manually
selected the last time a similar type of input signal was detected.
Page 39
Page 46

The XMC-2 Menu System
Dolby Atmos And DTS:X Compatibility
The Emotiva XMC-2 provides support for sixteen audiophile quality fully balanced audio output
channels, which can be congured as fteen full-range channels and one subwoofer output,
or thirteen full-range channels and up to three subwoofer outputs. The XMC-2 supports all of
the standard channel congurations required by the applicable licenses for Dolby Atmos and
DTS:X. (We are also required, as a condition of the license requirements, to avoid oering specic
combinations of channel assignments and upmixing options.)
Dolby
Atmos
Dolby Atmos content YES x x x
DTS:X content x YES x x
Dolby Digital content (except Atmos) x x YES x
DTS Digital content (except DTS:X) x x x YES
Stereo Analog content x x YES YES
Stereo PCM content x x YES YES
Multi-channel PCM content x x YES YES
DSD content x x x x
- Dolby Atmos content is ALWAYS played using the Dolby Atmos decoder.
- The Dolby Surround upmixer can be used with analog stereo content.
- The Dolby Surround upmixer can be used with stereo PCM or multi-channel PCM content.
- The Dolby Surround upmixer can be used to add channels to non-Atmos Dolby content.
- The Dolby Surround upmixer CANNOT be used with Dolby Atmos content.
- The Dolby Surround upmixer CANNOT be used with ANY DTS digital audio content.
- DTS:X content is ALWAYS played using the DTS:X decoder.
- The DTS Neural:X upmixer can be used with analog stereo content.
- The DTS Neural:X upmixer can be used with stereo PCM or multi-channel PCM content.
- The DTS Neural:X upmixer can be used to add channels to DTS content (other than DTS:X).
- The DTS Neural:X upmixer CANNOT be used with DTS:X content.
- The DTS Neural:X upmixer CANNOT be used with ANY Dolby digital audio content.
DTS:X Dolby
Digital
Upmixer
DTS
Neural:X
Upmixer
- The Emotiva RMC-1 supports all standard modes in the Dolby Atmos and DTS:X technology, but
does not include and proprietary upmixing technology or options precluded by license.
Dolby Atmos™
Dolby Atmos is a surround sound technology which is commonly used in movie theaters and for
the sound tracks on Blu-Ray and 4k UHD movie discs and streaming content. With virtually all
previous surround sound formats, like Dolby TrueHD and DTS Master Audio, the audio content
consists of several tracks, each intended to be played via a specic speaker. With Dolby Atmos,
the audio content is divided into bed channels and objects. The bed channels are each intended
to be played from a specic speaker. However, sound objects are dened as having specic
Page 40
Page 47

The XMC-2 Menu System
locations in space; when the audio information is decoded, each object is assigned to one or more
speakers based on the speaker layout you have. Most previous surround sound formats support
either ve or seven speakers plus a subwoofer; Dolby Atmos adds the option to include width
speakers. Dolby Atmos also specically supports “height channels”. Height channels are used to
portray objects above the listener, and are reproduced either by speakers mounted in the ceiling,
or by special speakers mounted on top of certain other main channel speakers, and positioned to
bounce their audio signal o the ceiling, so it reaches the listener from above.
Users familiar with the options available under previous surround sound standards may nd the
options oered by Dolby Atmos systems to be somewhat confusing.
- ALL DOLBY ATMOS CONTENT IS PLAYED ON THE XMC-2 USING THE DOLBY ATMOS DECODER.
When Dolby Atmos content is decoded by a Dolby Atmos decoder, both the bed channels and
the sound objects are assigned to the appropriate speakers by the Atmos Renderer. Because the
Atmos technology is able to assign any object to any speaker or speakers it chooses, and will do
so in what it considers to be optimum fashion, there is no option or need to upmix content to
ensure that all speakers are used. The Dolby Atmos decoder ONLY works on Dolby Atmos content.
- The Dolby Atmos system includes the Dolby Surround upmixer. The Dolby Surround upmixer is a
separate option designed to convert non-Atmos content into full surround sound audio, including
support for height channels. THE DOLBY SURROUND UPMIXER CAN BE USED WITH STEREO ANALOG
CONTENT, STEREO OR MULTI-CHANNEL PCM DIGITAL AUDIO CONTENT, OR DOLBY DIGITAL CONTENT
OTHER THAN ATMOS CONTENT, INCLUDING DOLBY DIGITAL AND DOLBY TRUEHD AUDIO. THE
DOLBY SURROUND UPMIXER CANNOT BE USED WITH DOLBY ATMOS CONTENT OR WITH CONTENT
ENCODED USING ANY DTS DIGITAL AUDIO FORMAT.
- The Dolby Atmos license does NOT allow audio in Dolby Atmos or other Dolby surround sound
formats to be processed using competing third-party upmixers like DTS Neural-X. (While the
Dolby license doesn’t specically preclude it, the XMC-2 does not oer any proprietary upmixing
options.)
DTS:X™
DTS:X is an object oriented surround sound technology, and is the main competitor to Dolby
Atmos in the USA.
- ALL DTS:X CONTENT IS PLAYED ON THE XMC-2 USING THE DTS:X DECODER. When DTS:X content
is decoded by the DTS:X decoder, the decoder assigns the audio content to the appropriate
speakers, and is able to assign any object to any speaker or speakers it chooses (within the
limitations of the technology). Becaue of this, there is no option or need to upmix content to
create additional channels.
- The DTS:X system includes the DTS Neural:X upmixer. The DTS Neural:X upmixer is a separate
option designed to convert non-DTS:X content into full surround sound audio, including support
for height channels. THE DTS NEURAL:X UPMIXER CAN BE USED WITH STEREO ANALOG CONTENT,
STEREO OR MULTI-CHANNEL PCM DIGITAL AUDIO CONTENT, OR DTS DIGITAL AUDIO CONTENT OTHER
THAN DTS:X CONTENT, INCLUDING DTS AND DTS MASTER AUDIO. THE DTS NEURAL:X UPMIXER
CANNOT BE USED WITH DTS:X CONTENT OR WITH CONTENT ENCODED USING ANY DOLBY DIGITAL
AUDIO FORMAT.
Page 41
Page 48
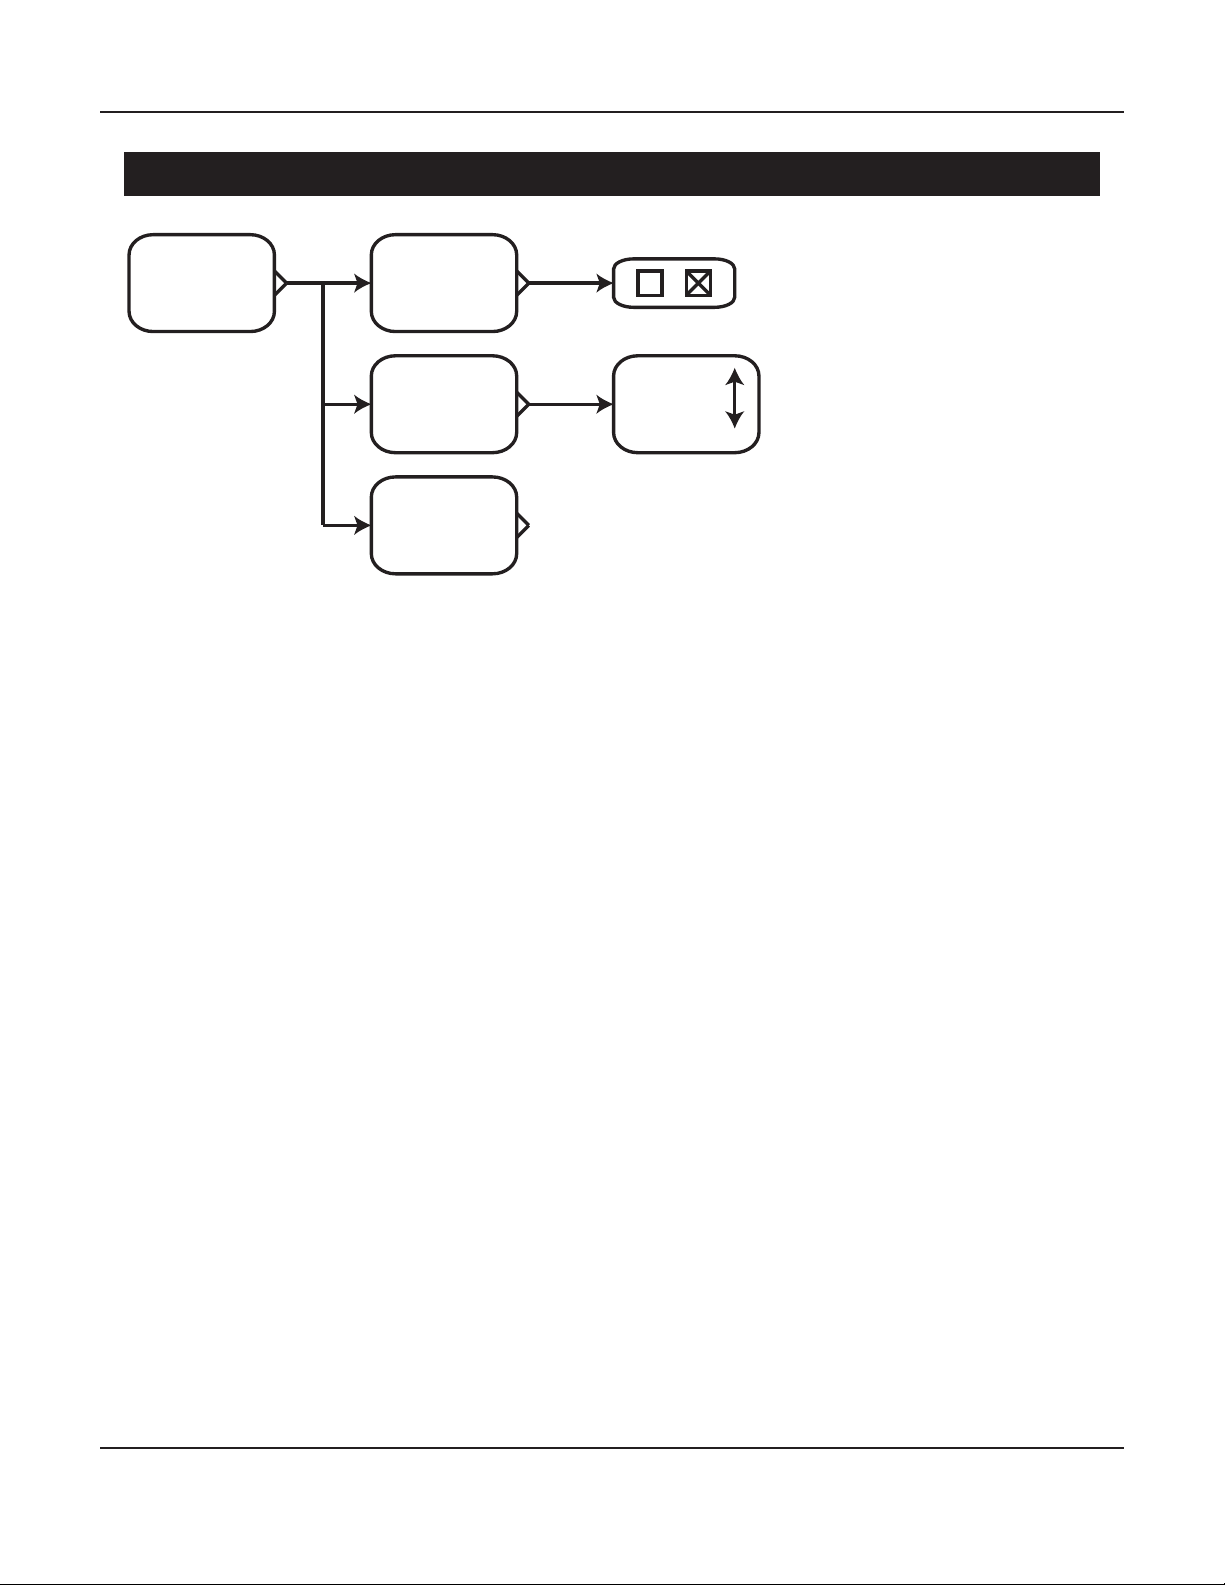
Zone 2 Menu
The XMC-2 Menu System
Zone 2
(menu)
The Zone 2 Menu contains the settings and controls typically used to control the second audio
zone in the day-to-day operation of your XMC-2. These are settings that are typically chosen each
time when viewing content.
Power
Input
Volume
Input
List
Power
The Power check box is used to turn Zone 2 On and O from the menu system. Zone 2 can also be
turned On and O directly from the remote control.
Input
The Input control is used to select which input on the XMC-2 to listen to or view.
Note: On the XMC-2, the Zone 2 Input is selected independently from the main zone. ANY input
that is currently selected as the Main Zone Input can also be routed to the Zone 2 Input - by
selecting Follow Main. If you wish to set the Zone 2 Input to a dierent source than the main
zone, you will be able to select ANALOG sources, and 2 CHANNEL PCM DIGITAL sources. You will
NOT be able to select a dierent digital surround sound or HDMI source for the Zone 2 Input
than is selected for the Main Zone.
Note: The halo ring on the front panel Standby button will ash alternating blue and amber to
remind you when Zone 2 is On.
Note: The Input and Volume options will only be visible if the Zone 2 Power is set t On. If the
Video On Standby feature is enabled, or the Main Zone is already On, Zone 2 will respond very
quickly when turned On. If the Video On Standby feature is disabled, and the XMC-2 Main Zone
is O, then the XMC-2 will have to load its operating system when Zone 2 is turned On, which
may take up to one minute
Volume
The Volume control is used to control the level of the Zone 2 output from the menu system.
Zone 2 Volume can also be set directly from the remote control.
Page 42
Page 49
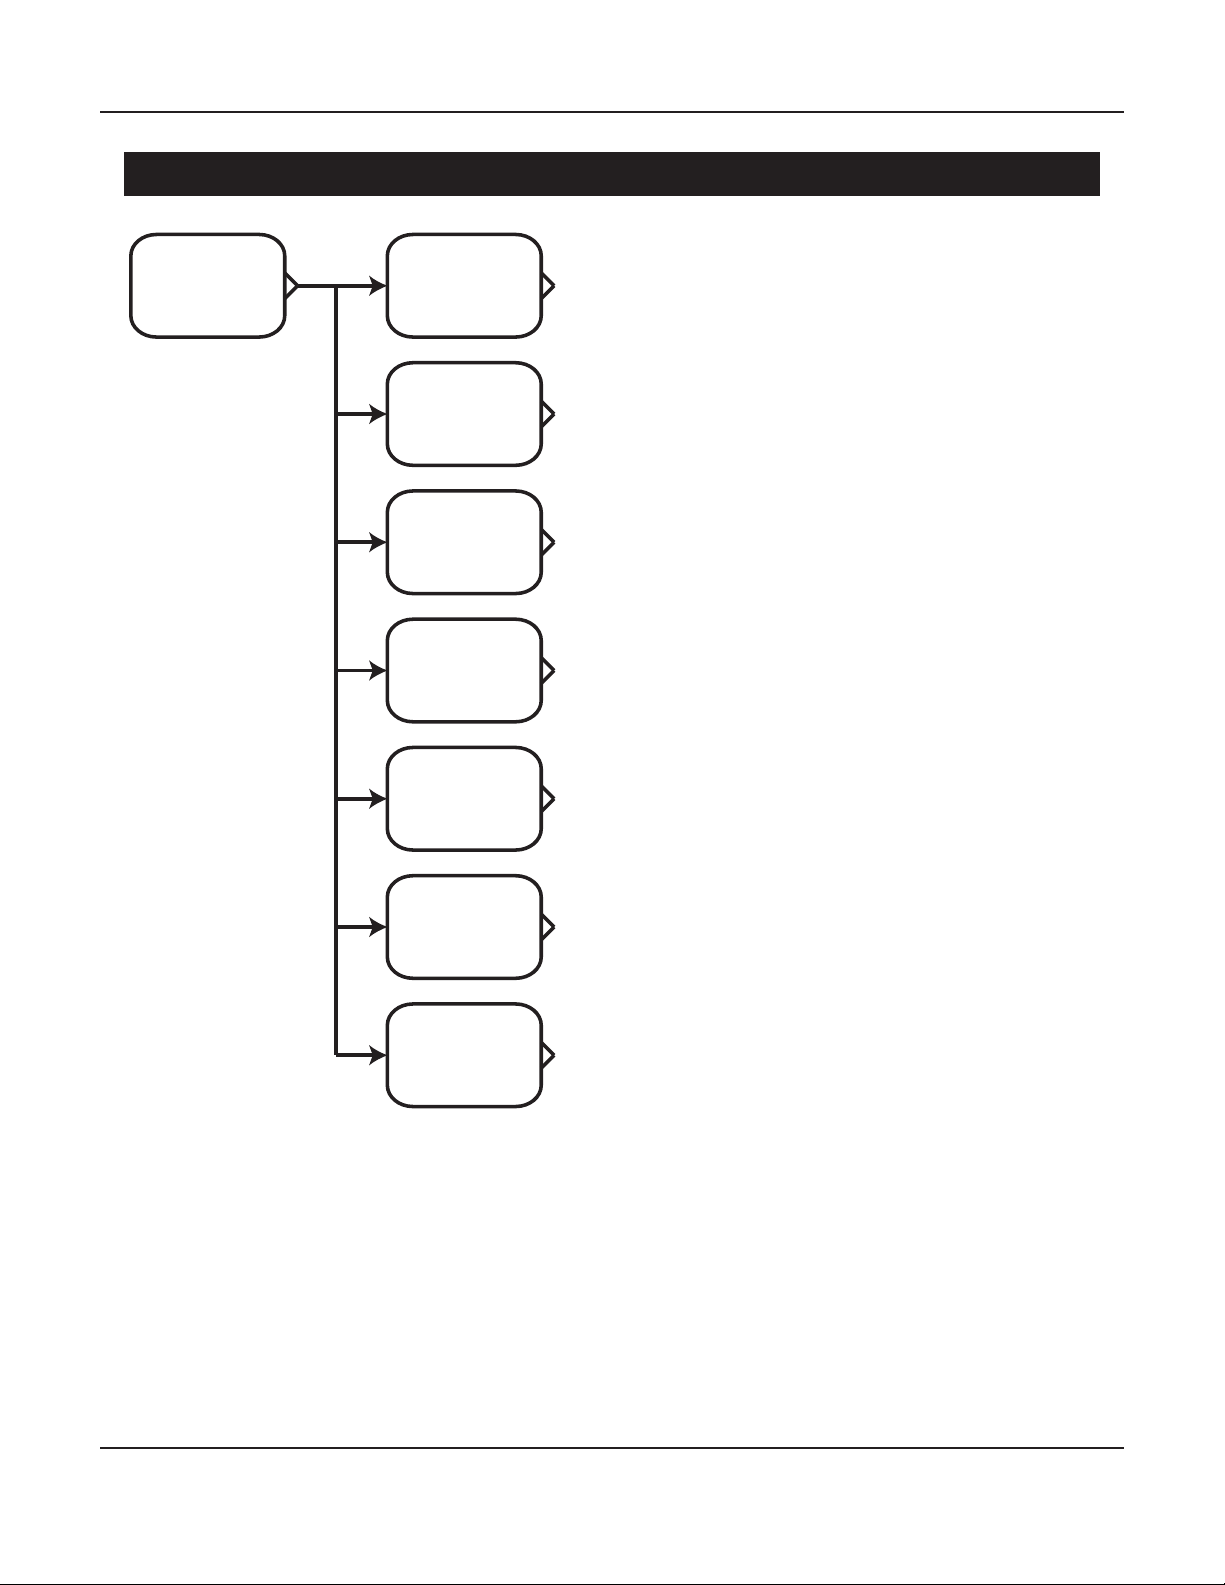
Setup Menu
Setup
(menu)
The XMC-2 Menu System
The Setup Menu allows you to view and change
Preferences
(menu)
Triggers
(menu)
HDMI CEC
(menu)
the main conguration settings for the XMC-2.
Setup | Preferences Menu
The Preferences Menu is used to congure
various system operating preferences, including
Max Volume, Turn-On Volume and Input, and the
behavior of the OSD pop up.
Setup | Triggers Menu
The Triggers Menu is used to congure the
behavior of the XMC-2’s four independent
triggers.
Network
(menu)
Setup | HDMI CEC Menu
The HDMI CEC Menu is used to congure how the
XMC-2 participates in sending and receiving CEC
commands.
Advanced
(menu)
Setup | Network Menu
The Network Menu is used to congure various
network parameters for the XMC-2.
Speakers
(menu)
Setup | Advanced Menu
The Advanced Menu allows you to congure
various system operating preferences, including
selecting a Standby Mode, and enabling various
Inputs
(menu)
controls and remote control inputs and outputs.
Firmware updates, and resetting your XMC-2 to
factory defaults, are also initiated from this menu.
Setup | Speakers Menu
The Speakers Menu is used to congure your speakers and room correction, including Dirac Live
automatic room correction and manual EQ using the XMC-2’s built-in test tones and parametric
equalizers.
Setup | Inputs Menu
The Inputs Menu is used to congure each Input on the XMC-2, including the Input Name and
how the XMC-2 handles various types of input signals on each input.
Page 43
Page 50
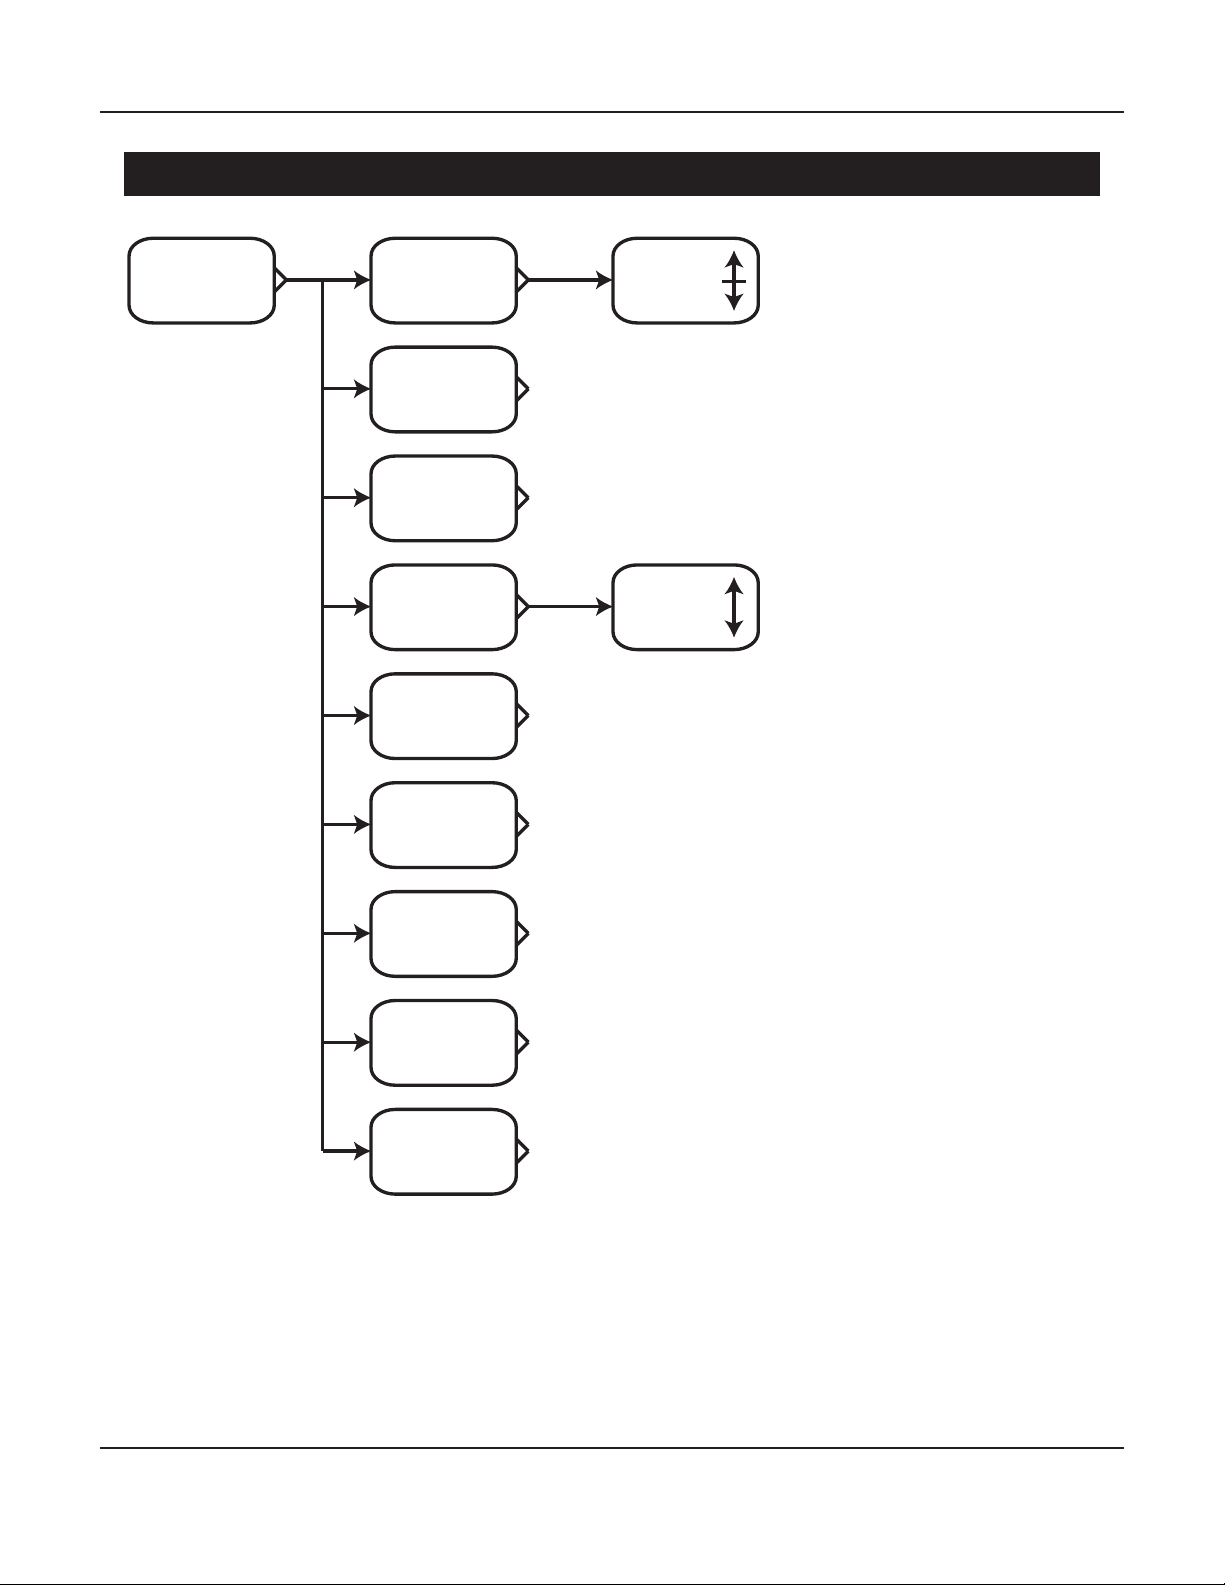
The XMC-2 Menu System
Setup | Preferences Menu
Setup
Preferences
(menu)
Friendly
Name
OSD
Popups
LFE Level
Turn-On
Input
Turn-On
Volume
Max
Volume
Front
Bright
Status
Display
Selector
Input
List
The Setup Preferences Menu
allows you to congure
various general system
settings and defaults.
Note: Settings congured
in the Setup Preferences
Menu remain in eect after
the XMC-2 is shut down and
restarted.
Friendly Name
The Friendly Name is used
by various remote control
applications to identify the
XMC-2. Up to 10 characters
may be used; the default
value is “XMC-2”.
OSD Popups
The OSD Popups option lets
you congure when the pop
up information box appears
on the screen.
All causes the pop up box to
appear whenever user input
is received and whenever
the incoming signal type or
sample rate changes.
OSD
Transparent
User causes the pop up box
to appear whenever user
input is received, but NOT
when the incoming signal
type or sample rate changes.
None disables the OSD pop
up info box completely.
Page 44
Page 51

The XMC-2 Menu System
LFE Level
The LFE Level control allows you to adjust the level for the LFE channel for all inputs from 0 dB to
-20 dB in 0.5 dB increments.
Turn-On Input
The Turn-On Input setting allows you to congure which Input on your XMC-2 is active when you
rst turn it on. If you select Last Used, then the input which was in use when the XMC-2 was shut
down will be chosen.
Turn-On Volume
The Turn-On Volume setting allows you to congure the Volume Level your XMC-2 will default to
when rst turned on. Choices are -10 dB, -20 dB, -30 dB, -40 dB, -50 dB, -60 dB, and Last Used; if
you select Last Used, then the Volume Level will return to where it was when the XMC-2 was shut
o.
Max Volume
The Max Volume setting allows you to congure the maximum Volume Level which can be
selected from the front panel Volume knob or the Volume buttons on the remote control. This
setting controls the Volume setting in the Main Zone, and can be set from -30 dB to +11 dB in
1 dB increments.
Note; The Max Volume setting is a safety feature intended to prevent you (or other users) from
accidentally turning the Volume on your XMC-2 up too high; it does NOT prevent Level Trims
from raising the overall Level or gain of the XMC-2, or specically limit input or output levels.
Front Brightness
The Front Bright control congures the brightness of the XMC-2’s front panel OLED display.
Display brightness can be set to 0, 20, 40, 60, 80, and 100. If the Front Bright is set to 0, then the
front panel display will be entirely dark. If the Front Bright is set to 0, when the user makes an
adjustment or operates a control the display will momentarily brighten so the results are visible,
then return to full dark after a few seconds.
Status Display
The XMC-2 features a bright, easy to read, OLED status display which can show a detailed three
line Full Status display, or a single line display that can be congured to show Input, Surround
Mode, Volume, or Bitstream in a larger font.
OSD Transparency
The OSD Transparent control congures the transparency of the XMC-2’s OSD (on-screen display).
Transparency can be set from 0% to 75% in 12.5% increments.
Page 45
Page 52
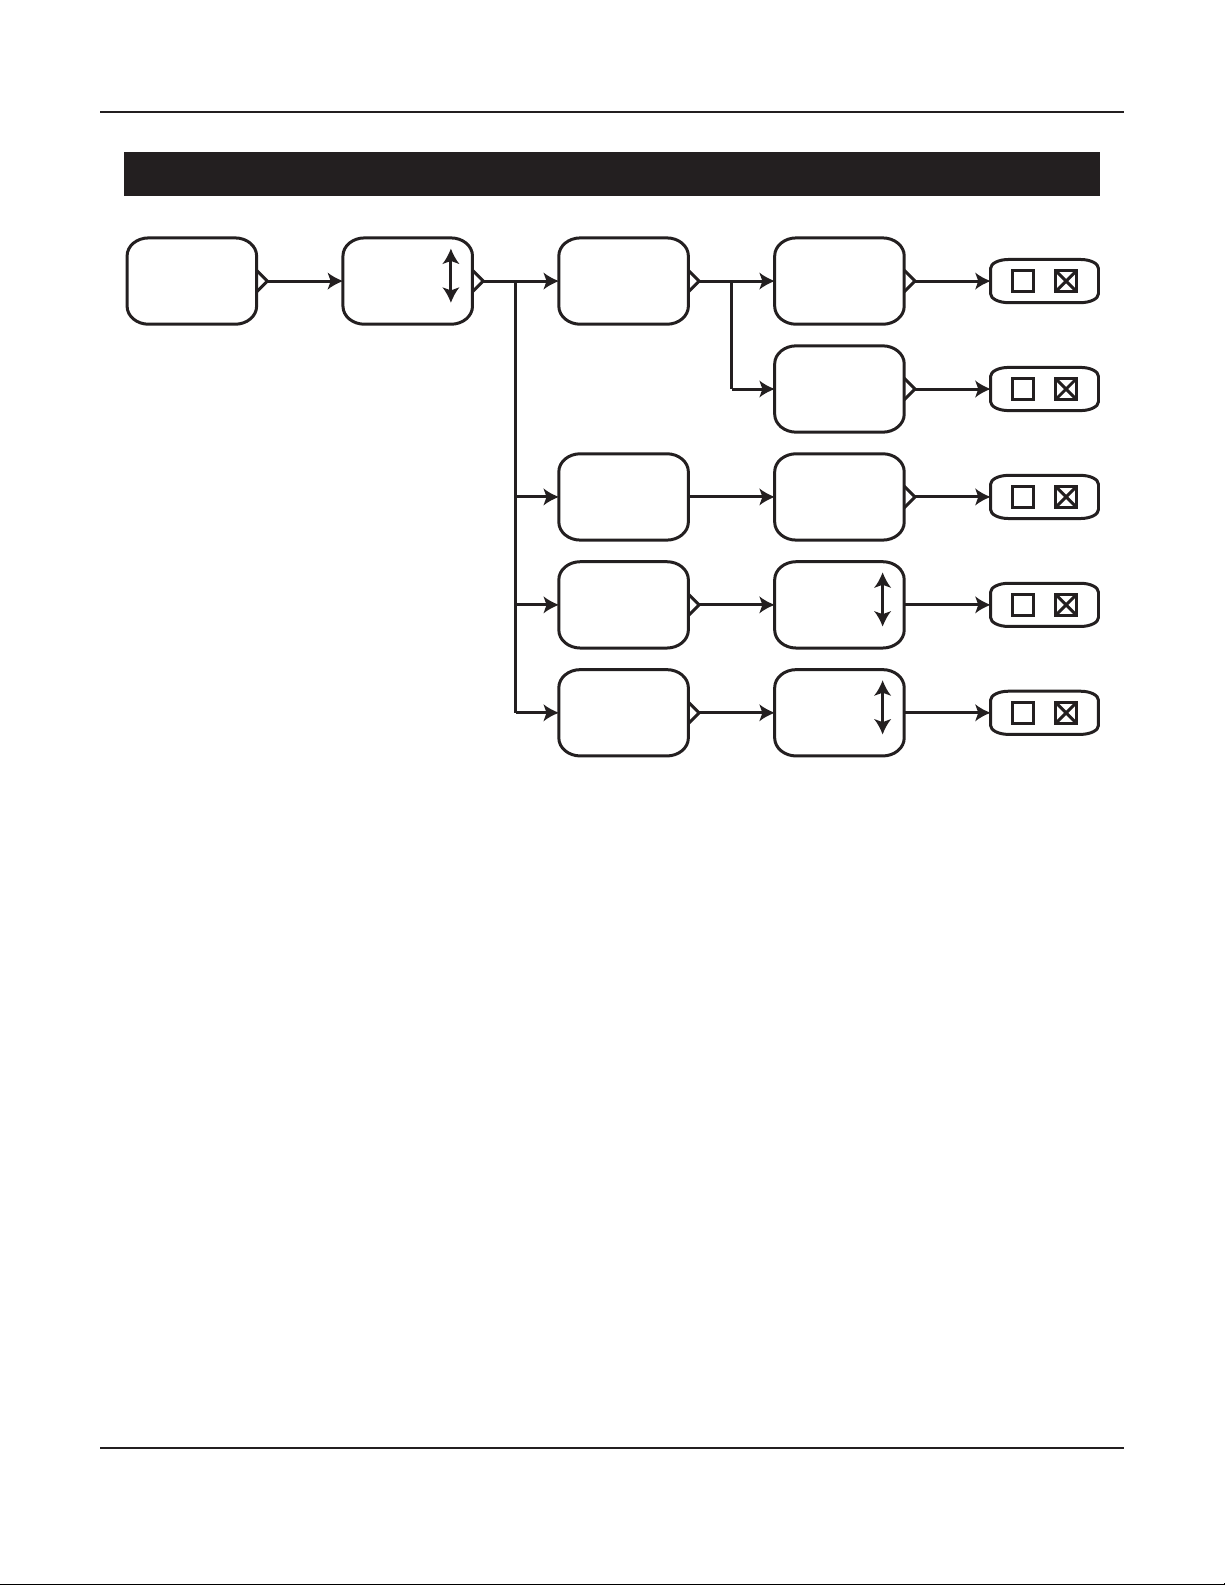
The XMC-2 Menu System
Setup | Triggers Menu
Setup
Triggers
(menu)
Triggers
List
Power
Headphone
Speakers
Input
Main
Zone
Zone 2
Override
Speakers
List
Inputs
List
The Setup Triggers Menu allows you to congure how the triggers on the XMC-2 operate.
The XMC-2 has four fully independent triggers, each one of which may be congured to activate
an associated piece of trigger-enabled equipment when specic conditions are met. For example,
you could congure the triggers to activate the ampliers that power your main front speakers
whenever you play music, and the amplier that powers your surrounds, and your powered
subwoofer, to only be activated when you’re listening to a surround sound source.
The triggers on the XMC-2 are congured by checking various boxes in the Setup Triggers Menu.
All of the following options are available independently for each of the four triggers on the XMC-2.
For triggers associated with Zone 2, the trigger will be active whenever Zone 2 is On AND one of
the Inputs associated with that trigger is selected.
For triggers associated with the Main Zone, there is an additional condition that must be met. For
the Main Zone, each trigger must be associated with one or more Inputs AND also be associated
with one or more Speaker groups. The trigger will be active whenever the Main Zone is On, AND
one or more of the Inputs associated with that trigger is active, AND one or more of the Speaker
groups associated with that trigger is active.
Power
Each trigger must be congured to be active when the Main Zone, Zone 2, or both zones are On.
The trigger will only be active when at least one of the zones it is associated with are active. Under
Power, check the zones for which you want the trigger to be active.
Page 46
Page 53

The XMC-2 Menu System
Input
Each trigger must be congured to be associated with one or more Inputs. The trigger will only be
active when one or more of the Inputs it is associated with are active.
Speakers
For triggers associated with the Main Zone, the trigger will only be active when, in addition to the
chosen Input, one or more of the Speaker groups associated with the trigger is active. A Speaker
group is considered to be active when the speakers in the group are NOT set to None in the
Speaker Size Menu, and when you are using a Mode that uses that Speaker group. (Surrounds will
be active in modes like Dolby TrueHD, will not be active in Reference Stereo, and may or may not
be active in Auto mode, depending on which Modes your RMC-1 has chosen to use.)
Note: The triggers respond based on how the XMC-2 is congured; the XMC-2 does not detect
the presence or absence of an active audio signal on specic channels.
Note: The option to congure associated Speaker groups only pertains to the Main Zone.
Therefore, if you only have Zone 2 checked for a particular trigger, the Speakers column will not
be displayed. However, if you have both Zone 2 and the Main Zone checked for that trigger, the
Speakers column will be displayed; but please remember that the settings in that column ONLY
pertain to the Main Zone and don’t aect the status of Zone 2 triggering .
By default, the triggers on the XMC-2 are congured as follows:
• Trigger 1: Main Zone (only), ALL Inputs, ALL Speakers
• Trigger 2: Main Zone AND Zone 2, ALL Inputs, ALL Speakers
• Trigger 3: Zone 2 (only), ALL inputs
• Trigger 4: Main Zone AND Zone 2, ALL Inputs, ALL Speakers
Headphone
Since triggers are most often used to switch ampliers On and O, the triggers on the XMC-2 are
normally congured to be disabled when a pair of headphones is plugged into the front panel
headphone jack. If you uncheck the Headphone Override box for a particular trigger, this override
will be disabled.
Note: The Headphone Override option is useful if you are using one of the XMC-2’s triggers to
activate your monitor, and you sometimes watch TV wearing headphones; if you uncheck the
Headphone Override for that trigger, then that trigger will remain active (assuming the other
congured conditions are met), even when headphones are plugged in.
Note: The XMC-2 detects when headphones are connected by sensing a plug physically inserted
into the front panel Headphone jack. If you leave a headphone extension - with no headphones
attached - plugged into the jack, the XMC-2 will act as if headphones are connected. Also,
obviously, if you use a separate headphone amplier connected to one of the XMC-2’s outputs,
the XMC-2 will be unaware that you’re using headphones.
See Conguring Triggers on page 23 for more information and examples.
Page 47
Page 54
The XMC-2 Menu System
Setup | HDMI CEC Menu
Setup
HDMI CEC
(menu)
Enable
Audio to TV
Power On
Power O
Input
Change
Volume
The Setup HDMI CEC Menu
allows you to congure what
types of CEC commands the
XMC-2 sends and responds to.
Enable
This check box enables all CEC
functionality on the XMC-2.
When this box is unchecked,
the XMC-2 will not respond to
or issue CEC commands. The
other options shown on this
page will be hidden unless CEC
is Enabled.
Audio to TV
Congures the XMC-2 to
accept a command to send all
audio to the TV for processing.
Note: This command is used
by some TVs to “steal audio”
from the XMC-2. We normally
recommend that it be left
disabled.
Power On
Congures the XMC-2 to accept a command to turn On from a connected CEC-enabled device.
Power O
Congures the XMC-2 to accept a command to turn O from a connected CEC-enabled device.
Input Change
Congures the XMC-2 to accept a command to switch inputs to display the output of a
CEC-enabled device when commanded to do so.
Volume
Allows a CEC-enabled device to control the Volume setting on the XMC-2.
Page 48
Page 55

The XMC-2 Menu System
Note: When HDMI CEC is DISABLED only the ENABLE option will be visible. The other options
will become visible once you check the box to ENABLE HDMI CEC.
Note: CEC is a system that allows various audio and video components to issue commands to
each other; for example, your Blu-Ray player may use CEC to instruct the XMC-2 to switch on
and select its input when you insert a disc and press play. Many equipment manufacturers
implement some form of CEC control, although they may call it something else, and the
features and capabilities of each vary. Because each vendor interprets the CEC standard
dierently, CEC can cause unexpected and undesired things to happen.
The XMC-2 allows you to individually enable or disable several dierent CEC functions,
allowing you to use the CEC features that prove useful in your system, while avoiding unwanted
and unexpected interactions.
Note: The Audio Return Channel (ARC) feature on many TVs requires CEC in order to operate.
Therefore, if you fully disable CEC on the XMC-2, you will probably not be able to congure ARC
as your audio source.
Note: You do NOT need to have CEC Enabled in order to use Video on Standby Mode; and fully
disabling CEC should NOT aect the audio on your TV when you’re in Video on Standby Mode.
Page 49
Page 56
The XMC-2 Menu System
Setup | Network Menu
Setup
Network
(menu)
DHCP
DNS 1
DNS 2
Gateway
Subnet
Mask
The Setup Network Menu
allows you to congure
various network parameters
for the XMC-2.
Note: The XMC-2’s Ethernet
connection is used to
connect the XMC-2 to the
Internet via your home
network. An Internet
connection is required in
order to congure DIrac
Live automatic room
correction, and to allow
Ethernet-based or Internetbased remote control
apps to connect to the
XMC-2. Once Dirac Live
is congured, the XMC-2
does NOT need to remain
connected to the Internet
- or your local network - to
operate.
IP
Address
DHCP
If DHCP is selected, then the XMC-2 will obtain all network setup parameters from your local
DHCP Server. If you have a cable modem or router, then it probably also provides a DHCP Server
for your home network. If your network doesn’t have a DHCP server, or you wish to set up the
network conguration of your XMC-2 manually, then disabling the DHCP check box will allow you
to set each parameter manually.
Note: Most users will nd DHCP the best choice. If you prefer to congure your XMC-2 network
parameters manually, please consult your network service provider or local computer expert
about the appropriate addresses and subnet mask to enter.
Note: If you disable DHCP in the XMC-2’s conguration after the XMC-2 has obtained network
settings via DHCP, the settings already obtained will NOT be cleared. This can be used as a
handy shortcut for manually conguring the network settings in your XMC-2; simply allow the
XMC-2 to ll in all the network settings via DHCP, then disable DHCP and manually modify only
the settings you wish to change.
Page 50
Page 57
The XMC-2 Menu System
Setup | Advanced Menu
Setup
Advanced
(menu)
Factory
Reset
Backup
Settings
Restore
Settings
Tuner
Region
Setup
Lock
Front
Buttons
Front
IR Blaster
Conrm
Conrm
Conrm
The Setup Advanced Menu
allows you to congure
various system operating
preferences, including
selecting a Standby Mode,
and enabling various
controls and remote
control inputs and outputs.
Firmware updates, and
resetting your XMC-2 to
factory defaults, are also
initiated from this menu.
Factory Reset
Selecting Factory Reset
clears all user settings
and returns the XMC-2 to
its factory defaults. After
selecting Factory Reset you
will be prompted to Conrm
your choice. To do so, check
the conrmation box, then
use the Left arrow key to
conrm the action.
Backup Settings
Front
IR In
USB Audio
UAC2
Standby
Firmware
Update
Conrm
Page 51
Selecting Backup Settings
instructs the XMC-2 to save
a copy of its conguration
le. After selecting Backup
Settings you will be
prompted to Conrm your
choice.
Note: If a USB stick is
inserted in the XMC-2,
the conguration will be
stored there. If no USB
stick is inserted, then the
conguration will be stored
internally.
Page 58

The XMC-2 Menu System
Restore Settings
Selecting Restore Settings instructs the XMC-2 to retrieve a stored copy of its conguration le
and apply the stored conguration. After selecting Restore Settings you will be prompted to
Conrm your choice.
Note: If a USB stick is inserted in the XMC-2, the conguration stored there will be used. If no
USB stick is inserted, or no external conguration le is present, then the conguration that is
stored internally will be used.
Tuner Region
The Tuner Region setting is used to congure the tuner in the XMC-2 to comply with the correct
channel frequency spacing for your region. You may select either Americas or Europe/Asia.
Setup Lock
Setup Lock is used to prevent the XMC-2 conguration settings from being inadvertently
changed.
Selecting None will leave all conguration settings unlocked. This is the normal default
conguration.
Selecting Advanced locks the Setup Advanced Menu - which will then no longer appear on the
Setup Menu. This prevents anyone from inadvertently changing any settings on the Setup
Advanced Menu, which include resetting the XMC-2 to factory defaults.
Selecting All locks the entire Setup Menu.
Note: If you lock the entire Setup Menu - by selecting All, or just the Setup Advanced Menu - by
selecting Advanced, you will no longer have access to the Setup Advanced Menu, which will
prevent you from changing the lock settings. This will prevent you from unlocking the menus.
If you nd yourself in this situation, you may still access the Setup Advanced Menu directly
by pressing the Standy button on the front panel WHILE PRESSING AND HOLDING THE FRONT
PANEL VOLUME KNOB IN.
Front Buttons
Check this box to disable all front panel controls.
Note: This feature is intended to prevent settings on the XMC-2 from being inadvertently
changed (and also acts as a “child lock”). If you accidentally become locked out of the XMC-2 by
disabling all controls, including the remote control, you can override this feature and access the
Setup Advanced Menu by pressing the Standy button on the front panel WHILE PRESSING AND
HOLDING THE FRONT PANEL VOLUME KNOB IN.
This will allow you to enter the Setup Advanced Menu and re-enable the controls.
Page 52
Page 59

The XMC-2 Menu System
Front IR Blaster
Use this check box to disable the front panel IR blaster.
Front IR In
Check this box to disable the front panel IR Input.
Note: When the front panel IR Input is disabled, the remote control will NOT function unless an
external IR remote sensor (“eye) is used.
USB Audio UAC2
By default , the USB Stream Input on the XMC-2 operates as a USB Audio Class 1 device. This
enables it to accept USB audio at sample rates up to 24/96k from most devices, including most
phones, and most computers, without requiring the user to install extra drivers. By enabling USB
Audio Class 2 (UAC2) operation, the USB Stream Input will accept USB audio up 24/192k. Future
enhancements will enable support for DSD and DSDx2 via DoP.
Standby
Use this option to enable the XMC-2’s Video on Standby feature.
Selecting Video Remains On will congure the XMC-2 to use its Video on Standby Mode. When
this mode is selected, the XMC-2 will continue to pass video and audio from the selected input
source to the display, and will allow you to change the Input source, even when the XMC-2 is in
Standby Mode. The XMC-2 uses slightly more power when in Standby Mode if Video on Standby
Mode is enabled.
Selecting Lowest Power will congure the XMC-2 to use its lowest power Standby Mode. In this
mode, video and audio will NOT be passed to the display when the XMC-2 is in Standby Mode.
Note: When the XMC-2 is set to Video on Standby Mode, the XMC-2 Operating System remains
loaded when the XMC-2 is in Standby Mode. Because a signicant portion of the start up time
on the XMC-2 is used to load the operating system, setting the XMC-2 to use Video on Standby
Mode will considerably shorten the amount of time it takes the XMC-2 to wake up from Standby
Mode.
Note: The start-up sequence on the XMC-2 is dierent depending on which Standby Mode you
have congured the XMC-2 to use.
In Lowest Power Mode, turning the XMC-2 On using the rear panel Power switch will cause it
to immediately enter Standby Mode (halo ring around the Standby button lit amber). Pressing
the Standby button will then cause the XMC-2 to load the XMC-2 Operating System and turn
fully On. The XMC-2 Operating System is loaded during this start up sequence, which may take
up to one minute. Pressing the Standby button when the XMC-2 is On will cause it to return to
Standby Mode (and unload the operating system).
Page 53
Page 60

The XMC-2 Menu System
In Video on Standby Mode, turning the XMC-2 On using the rear panel Power switch will cause
it to rst load the XMC-2 Operating System, then return to Standby Mode. (While the operating
system is loading, the halo ring around the Standby button will illuminate blue. Once the
operating system is loaded, the XMC-2 will drop into Standby Mode and the halo ring will
change to purple.) Since the operating system remains loaded while the XMC-2 is in Standby
Mode, switching between On and Standby Mode can then be accomplished very quickly.)
Firmware Update
Selecting Firmware Update instructs the XMC-2 to load a rmware update from the inserted USB
stick. After selecting Firmware Update you will be prompted to Conrm your choice. Use the Up
Arrow to conrm that you want to perform a Firmware Update, then the Left Arrow to start toe
update process. DO NOT TURN OFF YOUR XMC-2 UNTIL THE FIRMWARE UPDATE PROCESS HAS
COMPLETED!
Page 54
Page 61
The XMC-2 Menu System
Setup | Speakers Menu
Setup
Speakers
(menu)
Preset
Dirac Live
Presets
1 & 2
Name
Distance
Levels
See Dirac Live
Manual
Equalization
Speakers
List
Test
Tones
Size
Speakers
List
The Setup Speakers Menu is where you access the powerful speaker and room correction features
of the XMC-2, including Dirac Live automatic room correction, and the XMC-2’s incredibly exible
manual calibration system, which includes two fully independent banks of parametric equalizers,
along with pink noise and test tone generators.
When you rst enter the Setup Speakers menu, you will be asked to choose between Dirac Live
automatic room correction and the two available EQ presets. (When you congure the EQ presets,
you will get to assign each a name, which will then appear when you Setup Inputs and when you
choose a preset in the Setup Speakers Menu; the default names for the two presets are Preset 1
and Preset 2.)
Page 55
Page 62

The XMC-2 Menu System
If you chose Dirac, you will be sent to the Dirac Live Menu.
If you choose to manually congure a preset, you will be prompted to choose Preset 1 or Preset 2,
and the following settings will be available for EACH preset.
Name
The Name setting allows you to set an alphanumeric “human friendly” name for each Preset.
Distance
The Distance setting will present you with a list of speakers, and allow you to manually enter a
distance measurement for each.
Size
The Size screen will enable you to congure the sizes, crossover frequencies, and crossover slopes
for your speakers, the conguration of your Rear Surround speakers, and the conguration of your
subwoofers.
For each type of speaker you set to Small, you will be able to set a Crossover Frequency between
40 Hz and 200 Hz in increments of 10 Hz.
Note: The option to Enable Enhanced Bass will be shown in the Speaker | Size menu when it is
available. (The Enhanced Bass option is only available when some of your speakers are set to
Large.)
Levels
The Levels screen allows you to adjust the relative level of each speaker by up to +/- 12 dB in
0.5 dB increments, and provides a pink noise test tone to help you perform SPL measurements.
The test tone can be set to three dierent levels (Low, Medium, and High), or can be disabled if
you prefer to use your own test signal source.
Note: The actual sound level at which the test tones will play in your listening room will depend
on the gain of your ampliers and the eciency of your speakers. Always select the setting that
produces the appropriate level with your equipment.
Note: Certain speaker conguration options will only appear in the Menu under certain
conditions - when you are permitted to select or enable them. For example, the ability to
congure Center Height Speakers will be hidden unless you have already enabled Front Height
and Rear Height speakers. As a result, these options must be enabled or congured in a certain
order.
Note: DIRAC LIVE options and Speaker Presets are initially disabled/invisible in the Menu
System. These will be visible and operate as described when the Dirac Live software is nalized.
Note: If you select an external signal source for use with setting Levels, the source Input that is
currently selected will be summed for left and right, then that signal will be routed individually
to the channel you are currently adjusting.
Page 56
Page 63
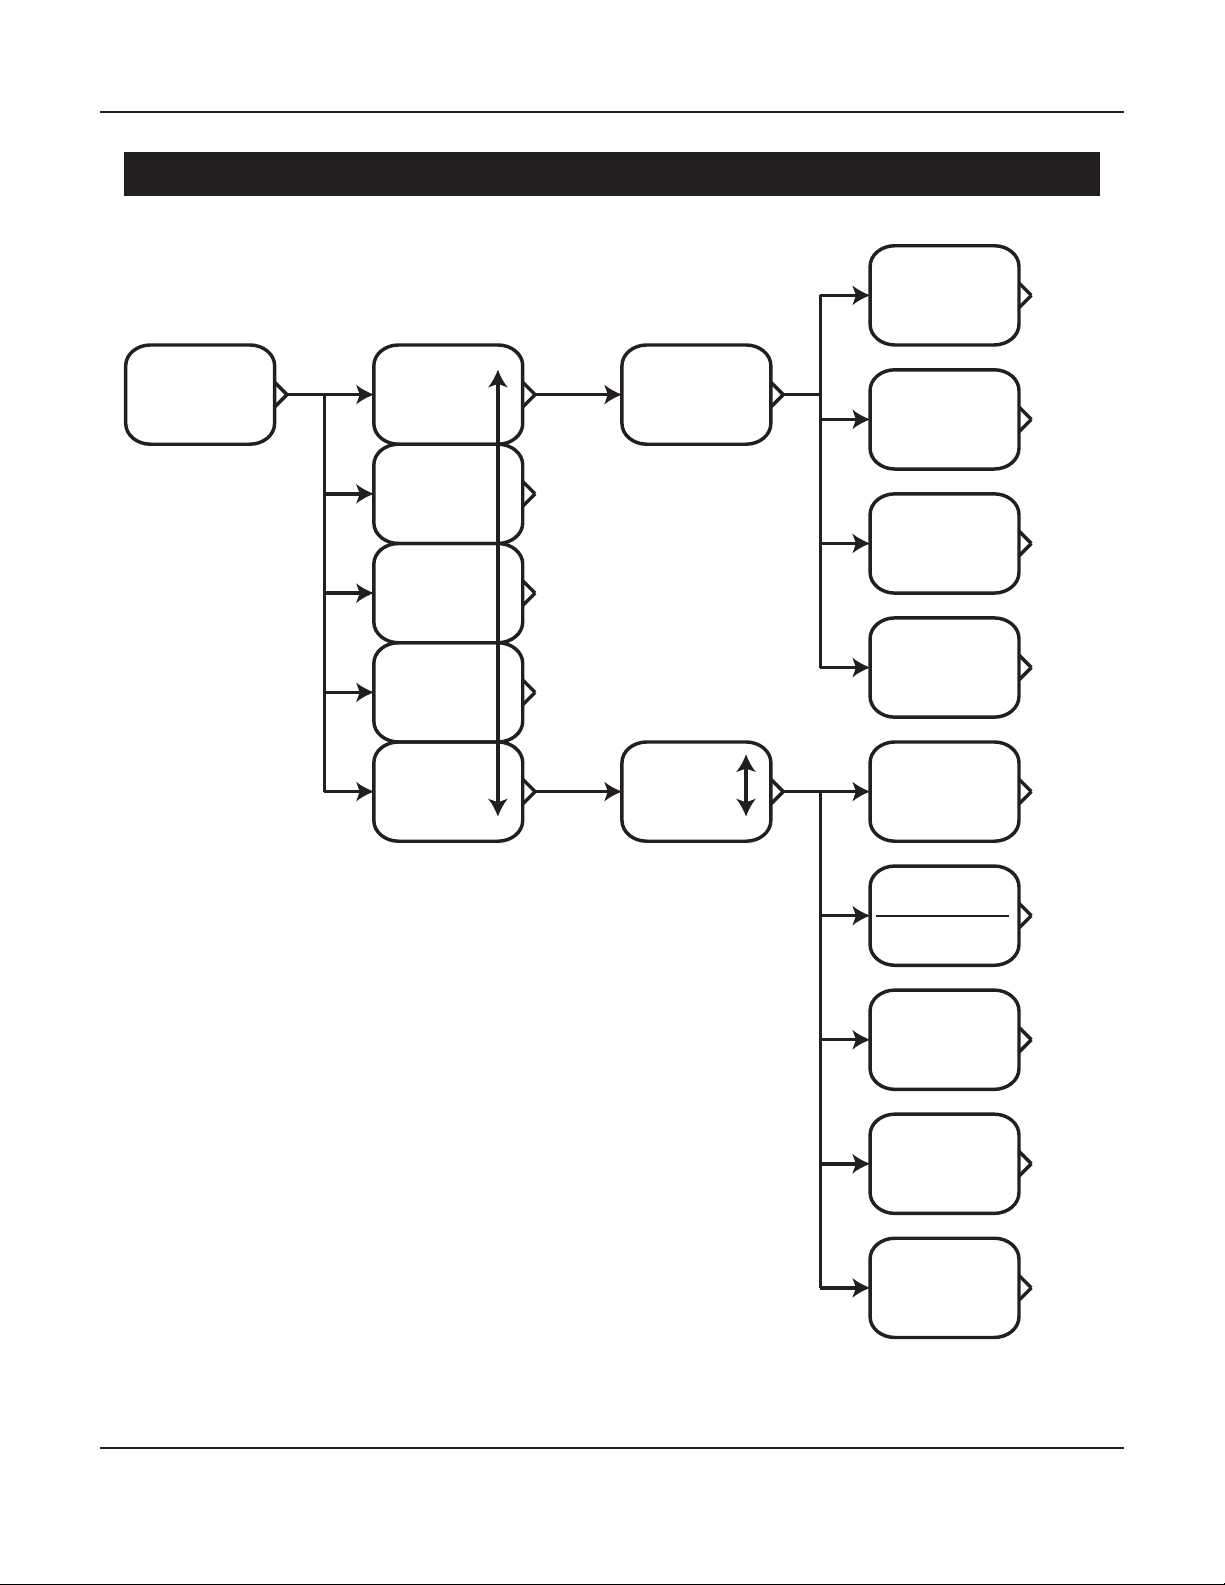
The XMC-2 Menu System
Setup | Speakers | EQ
Bass
Level
Setup Spkrs
Spkr Preset
Equalization
System
EQ
Import
Filters
Export
Filters
Reset
Filters
Speakers
List
Tone
Filters
List
Bass
Frequency
Treble
Level
Treble
Frequency
Level
(lter)
Width (lter)
Q (lter)
Page 57
Frequency
(lter)
Test Tone
Level
Tone
Frequency
Page 64

The XMC-2 Menu System
Once you have set the basic parameters for each preset (Speaker Size, Crossover Points, and Level
Trims), you can use the XMC-2’s powerful Parametric EQ lters and convenient Tone Controls
to customize the sound just the way you want. Both the Tone Controls and the Parametric EQ
lters may be used at the same time, giving you the precision and exibility of Parametric EQ for
detailed adjustments combined with the convenient sweeping tonal corrections oered by Tone
Controls.
System EQ | Tone Presets (Tone Controls)
Note: The Tone Presets apply to all speakers (in the Preset you are currently conguring).
Each Speaker Preset has its own independent set of Tone Presets.
Bass Level & Frequency Controls
The Bass Level Control is used to alter the relative level of the bass for all speakers by up to
+/- 12 dB in 0.5 dB steps.
The Bass Frequency Control allows you to congure the turnover frequency for the Bass Level
Control to any frequency between 40 Hz and 400 Hz.
Treble Level & Frequency Controls
The Treble Level Control is used to alter the relative level of the treble for all speakers by up to
+/- 12 dB in 0.5 dB steps.
The Treble Frequency Control allows you to congure the turnover frequency for the Treble Level
Control to any frequency between 500 Hz and 10 kHz.
Parametric EQ Filters
Note: There are 11 independent bands of full parametric equalization for EACH speaker in
EACH of the two presets.
Note: If you’re not familiar with using a parametric equalizer, you should understand that
EACH band in a parametric equalizer can be congured to aect a wider or narrower range of
frequencies. Even though the XMC-2 provides 11 bands of PEQ for each speaker, because of the
combination of power and exibility you get with parametric controls, you may only need to
use one or two bands to make the required adjustments in a given situation. In fact, for various
technical reasons, it’s actually better to use the fewest bands you can to produce the necessary
result.
The Test Tone Generator used to adjust the parametric equalizers generates a pure sine wave at a
single congurable frequency.
Note: The actual sound level at which the test tones will play in your listening room will depend
on the gain of your ampliers and the eciency of your speakers. The SPL values shown for the
dierent test signal output levels are estimates based on typical amplier gain and speaker
eciency; always select the setting that produces the appropriate level with your equipment.
Page 58
Page 65

The XMC-2 Menu System
The behavior of the controls used to adjust the parameters for the parametric equalizers in the
XMC-2 has been meticulously optimized to make the process of making so many adjustments as
simple and straightforward as possible. As a result, certain displayed elds will be synchronized
even though they may be independently congurable. Others may display the same information
in multiple locations to make the process of adjusting them easier.
It may take you a little while to get used to the way the controls work but, once you practice
a little bit, we’re sure you’ll nd them ecient, convenient, and, most important of all, not
confusing.
• You may, of course, adjust all of the lter bands for one speaker, then move on to the next
speaker. However, if you prefer to adjust a specic band for all speakers, then move on
to adjust the next band for all speakers, the XMC-2 facilitates this by remaining set to the
particular EQ band number you’re working on when you switch between speakers. For
example, if you’re adjusting Filter 3 for your Front Right speaker, and you then switch to
the Front Left speaker, you will be taken directly to the settings for Filter 3 for the Front Left
speaker; this way you can very easily adjust each Filter band sequentially for all your speakers.
• Test Tone Level and Test Tone Frequency settings are global; even though the controls for the
Test Tone Generator appear on several dierent menu screens, there is only a single Test Tone
Generator which you are accessing from dierent places. Therefore, as you move from place to
place in the menu system where the Test Tone Generator is used, the Test Tone Generator will
remain set at the last Level and Frequency you select until you change it. When you exit the
area of the menu where the Test Tone Generator is used, it will automatically switch O.
Filter Level
For each lter, you can set the level from -64 dB to +6 dB in 0.5 dB increments.
Note: While it is not uncommon to have some overlap between EQ lters, or to have a narrow
notch that falls inside a wider lter band where gain is applied, you should be careful about
applying positive gain on overlapping lters; and avoid deliberately stacking multiple lters
to create gain in excess of +6 dB. Although unlikely, it is possible, by applying excessive gain to
overlapping bands,to cause the XMC-2 to clip.
Filter Width / Filter Q
For each lter, you can set the range of frequencies that if aects, from a fraction of an octave to
several octaves. With the Filter Width control this range is expressed as a range of frequencies.
The edges of the band are dened as the points where the lter is at 50% of its maximum eect
- expressed in dB. For example, if a band is set to provide -10 dB of gain, then edges of that band
are dened as the -5 dB points.) With the Filter Q control this range is expressed as the more
traditional Q value. The values shown in these two elds refer to the same parameter and will
move together, showing the same setting in both formats, when you adjust either control.
Note: You can adjust the width of each lter by changing the value in either the Q eld or the
eld that shows the width of the band in Hz. However, while you are changing the value, only
the number in the eld you are using will change dynamically; the value in the other eld will
synchronize as soon as you exit the active eld.
Page 59
Page 66

The XMC-2 Menu System
Filter Frequency
For each lter, you can set the center frequency of the band to any frequency between 20 Hz and
20 kHz, and the result will be displayed in Hz (or kHz).
Test Tone Level
The Test Tone Generator on the XMC-2 oers both pink noise and sine wave test tones at various
frequencies for use in calibrating the parametric EQs. For each type of test tone you may select
three dierent output levels: High -85 dB, Medium - 75 dB, Low - 65 dB, and O for use with
external calibration signal sources.
Note: The actual sound pressure level your system will produce at each dierent output
level setting will depend on many factors, including the gain of your ampliers and the
eciency of your speakers. The “dBspl” settings shown for each level choice are therefore only
approximations of the sound level that may be produced - based on the characteristics of a
“typical system”. Always use common sense and select reasonable sound pressure levels at
which to perform tests based on the results of your measurements.
There is only a single Tone Generator, even though the control appears in duplicate under the
options for each lter.
If you select O (External) as your test signal source, then whatever input source is currently
selected on the XMC-2 will be used as the test tone source. This input will be treated as if it were
playing in the equivalent of All Stereo Mode, but the resulting output signal will then be sent to
ONLY the currently selected channel.
Test Tone Frequency
If you have selected sine wave test tones using Test Tone Level, then you can use the Test Tone
Frequency control to set the output frequency of the sine wave test tone. There is only a single
Tone Generator, even though the control appears in duplicate under the options for each lter.
The Test Tone Generator output frequency can be set to any frequency between 20 Hz and 20 kHz,
and the result will be displayed in Hz (or kHz).
Note: You may notice that the test tones are not absolutely pure continuous sine waves - and
may include audible ticking noises at certain frequencies. While audible, these noises are
simply artifacts of the program code used to generate the test tones; they do NOT signicantly
aect the energy distribution of the test tones, and have no signicant eect on measurements
performed using the test tones.
Page 60
Page 67

The XMC-2 Menu System
Import Filters
This option allows you to import sets of parametric EQ settings that you have previously saved,
and to import correction lter settings exported by Room EQ Wizard or other third-party
programs. Filter settings are stored in a set of XML les - one le for each channel, which are
stored on a USB thumb drive, in a folder whose name corresponds to the Speaker Preset. When
you Import Filters, all XML les in the appropriate preset folder on the USB thumb drive will
be read, and the settings in each le present will replace the current settings for that Speaker
Preset in your XMC-2. If only les corresponding to some channels are present, settings for those
channels will be updated, and all other channels will remain unchanged.
See the Appendix entitled Importing and Exporting Parametric EQ Filters for more details, and
for specic information about importing settings from Room EQ Wizard.
Export Filters
This option allows you to export the parametric EQ settings for the current Speaker Preset to a
USB thumb drive as a set of XML les (these will be standard XML les with a .EMO extension).
See the Appendix entitled Importing and Exporting Parametric EQ Filters for more details.
Reset Filters
This option allows you to reset all the parametric EQ settings in the current Speaker Preset to their
default values (at).
Page 61
Page 68
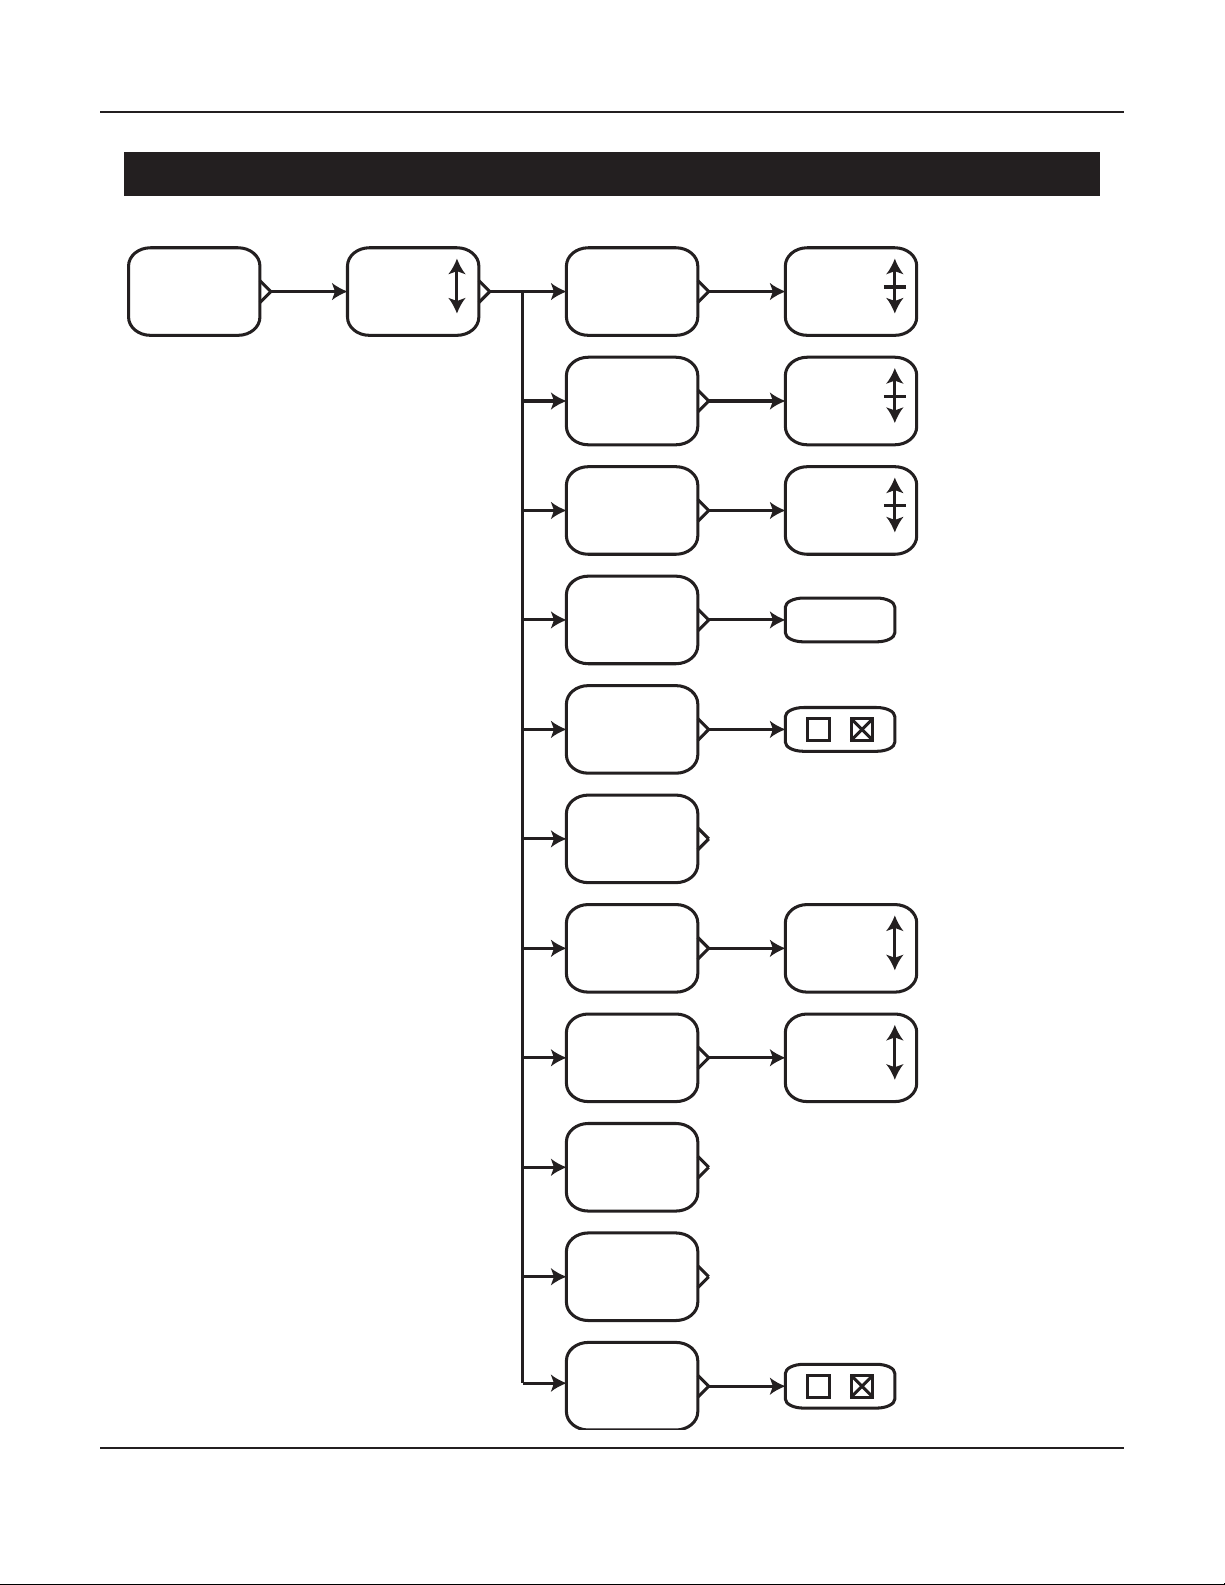
Setup | Inputs Menu
The XMC-2 Menu System
Setup
Inputs
(menu)
Input
List
Name
Audio
Input
HDMI
Type
Lip Synch
Delay
Lip Synch
Auto
Button
Selector
Selector
Selector
Conrm
5.1 Mode
2.0 Mode
Speaker
Preset
Level
Trim
Visible
Page 62
Surround
Mode
List
Surround
Mode
List
Page 69

The XMC-2 Menu System
The Setup Inputs Menu allows you to independently set a Level Trim and various other
parameters for each Input, and determine how that particular Input will handle each of several
dierent types of input signals.
Note: Remember that the Input settings are independent for each Input, and so must be
congured individually for each Input you use.
After selecting Setup Inputs you will be asked to select which Input you wish to congure. ALL
of the following settings are available for EACH Input, and may be congured independently for
each.
Note: When you enter the Setup Inputs Menu, the Input you are conguring will become the
active Input and the XMC-2 will switch to it.
Name
The Name eld allows you to congure an alphanumeric “human friendly” name for each Input.
Audio Input
By default, when an HDMI Input is selected, both audio and video signal are taken from that Input.
This setting allows you to choose a dierent audio Input to be used with each HDMI Input.
Note: Normally, when using an HDMI Input, using that same Input for both your audio and
video signal is preferred. However, there are two situations where that may not be true.
Sometimes specic hardware compatibility issues may be avoided by choosing a non-standard
audio Input. For example, if your cable box has issues with the audio it sends over its HDMI
outputs, you may use this setting to tell the XMC-2 to take audio for that Input from a Coax
digital or Toslink connection instead. Another possibility is that you may simply prefer to use
a certain output - other than HDMI audio - with certain equipment. For example, if you have a
Blu-Ray player with high-quality DACs, you may wish to allow it to decode and play the audio
when you play discs on it. If so, then you would connect the analog outputs of your player to
one of the analog inputs on the XMC-2, and use this setting to congure your XMC-2 to use
audio from those analog Inputs with the video signal it receives via that HDMI Input.
Note: Because it concerns which audio signal is associated with a given video input signal, the
Audio Input conguration option is ONLY available for HDMI Inputs.
HDMI Type
This option allows you to individually congure one or more inputs as HDMI 1.4 rather than HDMI
2.0 compatible. Even though HDMI 2.0 is supposed to be fully backwards compatible, we have
found that not all legacy HDMI sources function properly when connected to an HDMI 2.0 input.
This option allows you to congure specic inputs as “HDMI 1.4” for better compatibility with
some legacy equipment.
Note: This option is intended to be used to eliminate HDMI compatibility issues with some older
legacy non-4k equipment. When a specic input on the XMC-2 is congured as HDMI 1.4, it will
no longer support some HDMI 2.0 features, which may include the ability to play commercial
4k video content.
Page 63
Page 70

The XMC-2 Menu System
Lip Synch Auto
With most equipment, an HDMI connection includes the ability to automatically negotiate and set
the correct Lip Synch Delay in most situations. Enable Lip Synch Auto to allow the XMC-2 to set
the Lip Synch Delay automatically.
Note: The Lip Synch Auto option will only be available if your monitor provides information
about its lip synch delay - otherwise this option will not appear.
Lip Synch Delay
The Lip Synch Delay setting is used to manually congure the Lip Synch Delay.
Note: The Lip Synch Delay is normally only congured manually if the automatic conguration
fails to work properly with certain source equipment and/or a certain display or projector. If Lip
Synch Auto is enabled, values you enter into the Lip Synch Delay are used to modify the values
received from your monitor.
Button
The Button setting allows you to congure a direct access button for this Input (on the remote
control and remote control apps).
None assigns no button to the Input.
1 - 8 assigns that button on the remote control to that Input.
(Only buttons 1 through 7 exist on the remote control.)
2.0 Mode & 5.1 Mode
The 2.0 Mode setting determines what mode will be used by default when a two channel signal is
received at this Input. The 5.1 Mode setting determines what mode will be used by default when
a surround sound signal is received at this Input. Setting these to Auto will instruct the XMC-2 to
use the “best” option, based on your speaker conguration, and the incoming content - and is
usually a good choice.
Note:
Only certain decoding options are available for each dierent type of input signal; the options
you enter here instruct the XMC-2 of your preference for how certain types of inputs will be
handled, but will only be used IF they are valid for the input signal currently being received.
For example....
- If the input signal is Dolby Atmos: the ONLY valid decoder mode for it is Dolby Atmos.
- If the input signal is DTS:X: the ONLY valid decoder mode for it is DTS:X.
(For both of those, your only options would be Direct, All Stereo, and Auto.
If you’ve selected Stereo, then, after being decoded, the results will be down-mixed to stereo.)
- If the Input signal is Dolby TrueHD, or DTS Digital, and you have chosen Surround as your
default choice, then each will be decoded by the appropriate decoder, but no upmixing will be
applied. (If the original is 5.1, and you have 7.1 speakers, it will simply play in 5.1).
Page 64
Page 71

The XMC-2 Menu System
- If the Input signal is Dolby TrueHD, and you have chosen Auto as your default choice, then
the signal will be decoded into 5.1 by the Dolby TrueHD decoder. If you have 5.1 speakers it
will play in 5.1. If you have 7.1 speakers, it will then be upmixed to 7.1 by the Dolby Surround
Upmixer.
- If the Input signal is DTS Digital, and you have chosen Auto as your default choice, then the
signal will be decoded into 5.1 by the DTS decoder. If you have 5.1 speakers it will play in 5.1.
If you have 7.1 speakers, it will then be upmixed to 7.1 by the DTS Neural:X upmixer.
- If the incoming signal is two-channel PCM or analog, and you have chosen Direct, Stereo, or
All Stereo, it will play as per your preference. Since both the Dolby Surround Upmixer and the
DTS Neural:X upmixer are valid choices for a setero input signal, if you have selected either
of those as your default choice for 2.0 inuts, it will be used to upmix the input to 5.1 or 7.1
channels (to match your speaker conguration).
Speaker Preset
For each Input, you may select to apply any of the three separate speaker/room preset
equalization curves provided by the XMC-2.
The Dirac preset is provided by the Dirac Live automatic room correction system; this curve is
created when the Dirac software is run.
The other two presets (which will be named whatever name you assign to them when you create
them) are created manually using the XMC-2’s advanced parametric equalizer banks and controls.
(See the Setup |Speakers and Setup | Speakers EQ sections for details.)
Level Trim
The Level Trim setting allows you to individually adjust the audio level for each Input. This is
typically used to adjust the levels of each input to be similar. The Level Trim can be adjusted to
anywhere between +/- 10 dB in 0.5 dB increments.
Visible
The Visible setting allows you to congure whether each Input appears when you scroll through
the list of available Inputs. By setting Inputs you don’t use to NOT Visible, you won’t have to scroll
past them when selecting an Input.
Note: The Visible setting only aects whether an Input will be skipped over when you switch
Inputs using the Input Up and Input Down buttons. Even if you set an Input to Not Visible, you
will still be able to access it using a button that you have assigned directly to it.
Page 65
Page 72
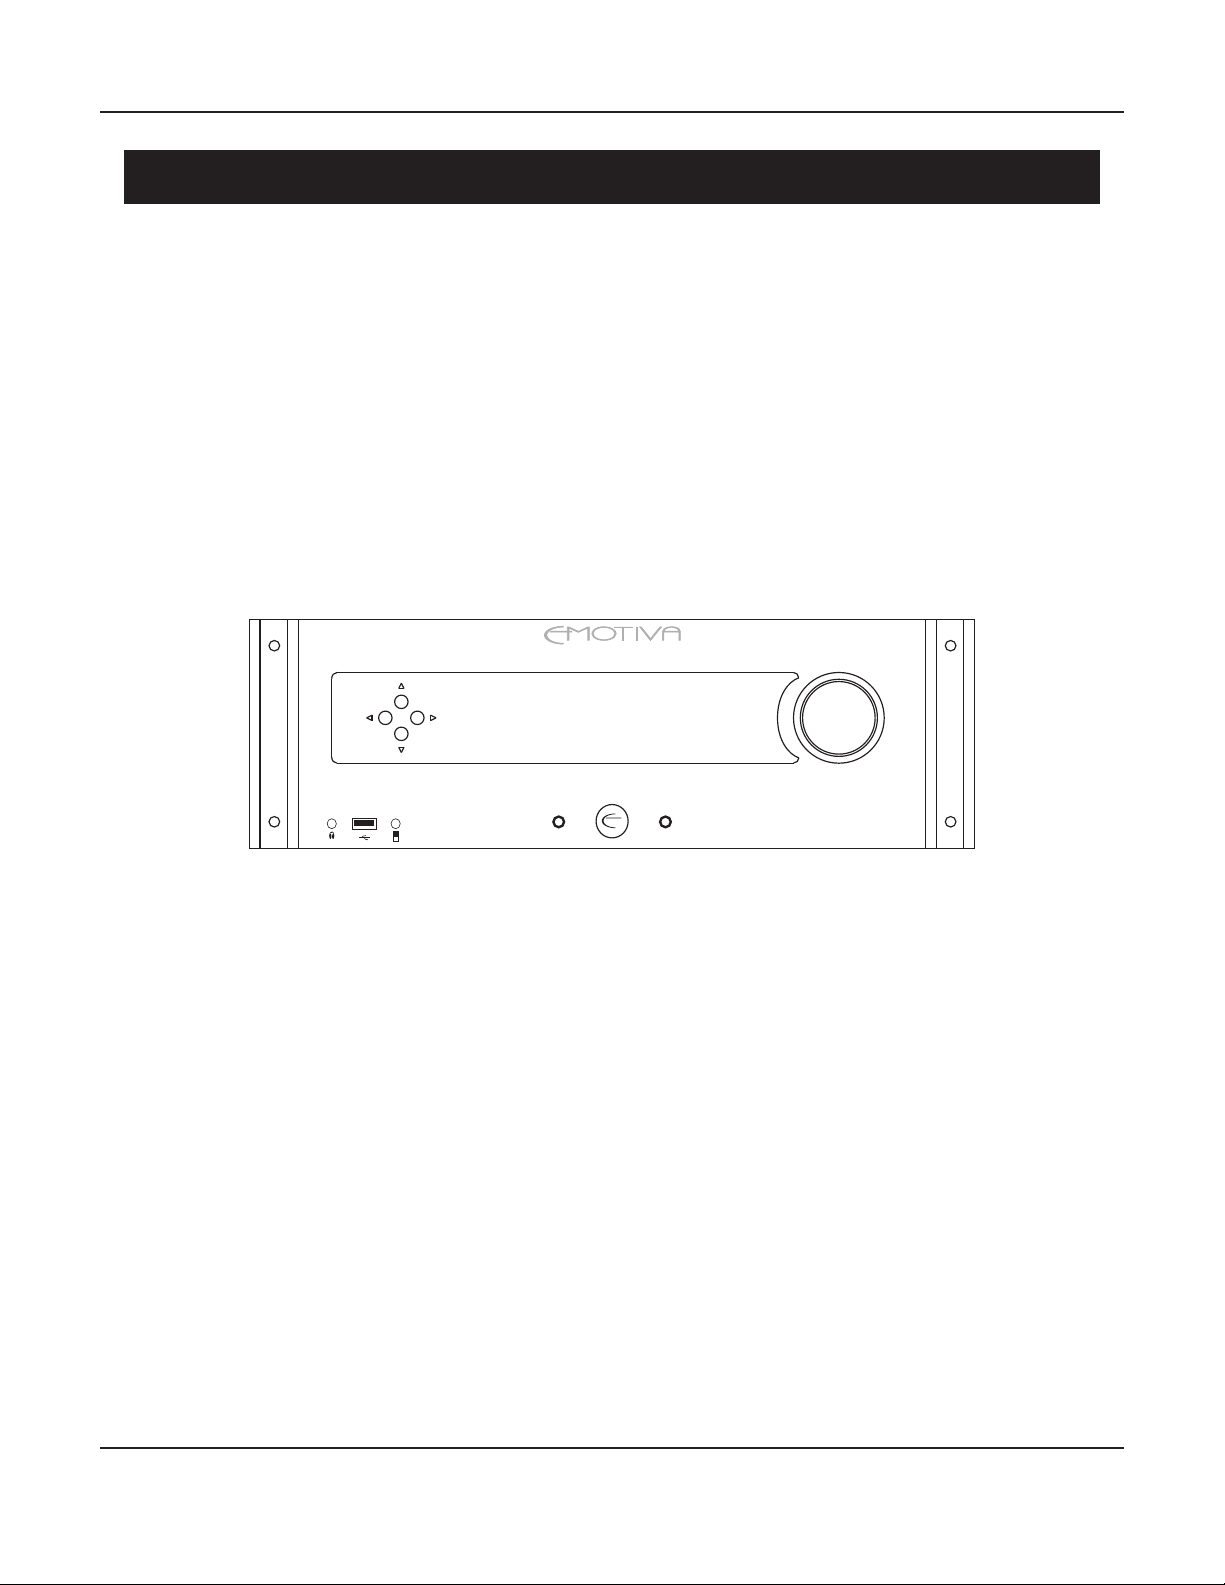
Connecting and Operating the XMC-2
Operating the XMC-2
HDMI 6 Volume -49.0dB
NAV
A: HDMI 6 48kHz 24bits
V: HDMI 6 2160P/24 8bits YCbCr 4:4:4 SDR
ATMOS
D
D
TRUEHD
D
D
MENU DIM
STANDBY
XMC-2
Differential Reference
Page 66
Page 73
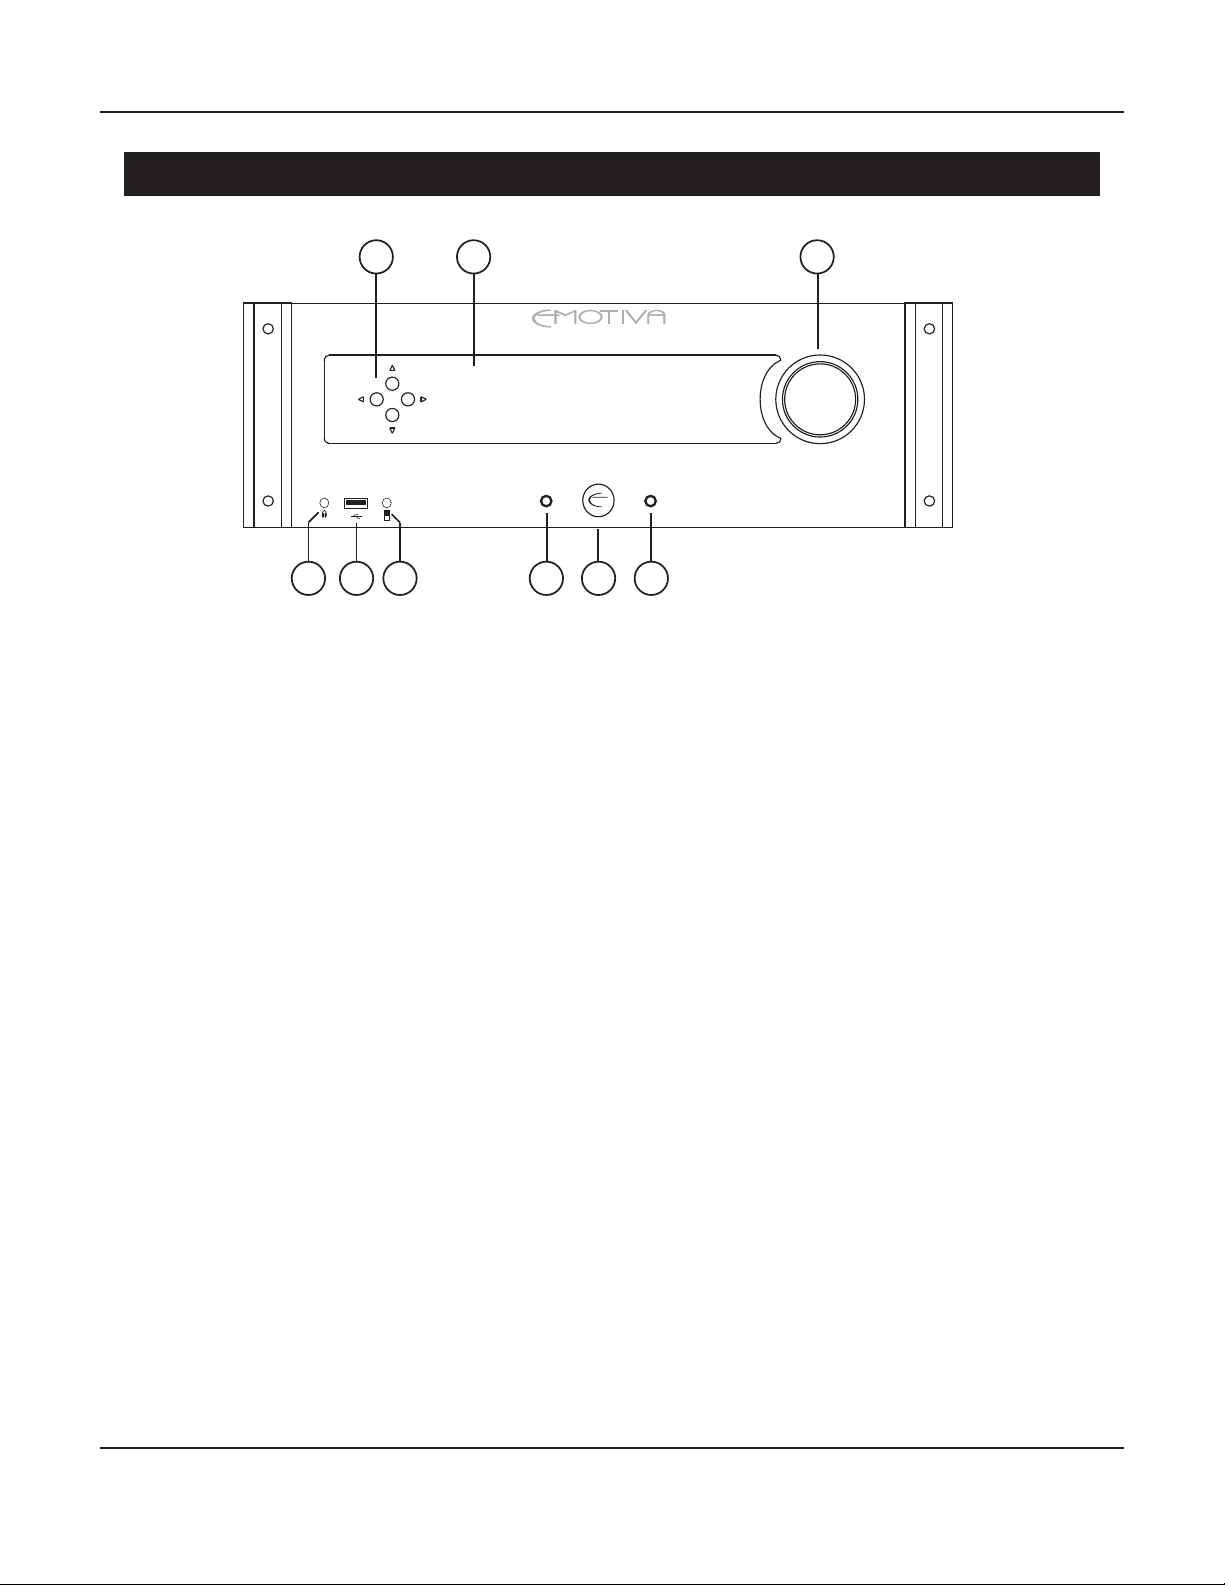
Connecting and Operating the XMC-2
XMC-2 Front Panel
1 2 3
HDMI 6 Volume -49.0dB
NAV
4 5 6 7 8 9
A: HDMI 6 48kHz 24bits
V: HDMI 6 2160P/24 8bits YCbCr 4:4:4 SDR
ATMOS
D
D
TRUEHD
D
D
MENU DIM
STANDBY
XMC-2
Differential Reference
1. Navigation Buttons
The Navigation Buttons are used to navigate the XMC-2 Menu System.
2. Front Panel Status Display
Large, bright, easy to read graphical 64 x 256 pixel blue OLED status display. The information
shown on the display can be customized in the Setup Menu.
3. Volume Control
The Volume control is used to adjust the Volume on the XMC-2. You can also press this knob
momentarily to toggle the Mute function On and O.
4. Headphone Jack
Connect any standard pair of stereo headphones for high-quality personal listening. When you
plug in a pair of headphones, the main outputs are automatically muted.
5. Front Panel USB Input
This input is used to apply rmware updates to the XMC-2 via a standard USB stick (thumb drive).
6. Front Panel Analog Input
Connect any music source that supplies line level stereo analog audio to this input. This input is
named “Analog Front”, and is typically used for an iPod or other portable music player.
7. Menu Button
Press this button once to enter the Menu System, and again to exit the Menu System and return
the XMC-2 to normal operation.
Page 67
Page 74

Connecting and Operating the XMC-2
8. Standby Button
Press this to switch the XMC-2 from Standby to On; press it again to return the XMC-2 to Standby
mode. (The rear panel AC Power switch must be On.) The halo ring around the Standby button
illuminates amber for Standby and blue for On.
9. Dim Button
Press the Dim button once to display the current Brightness setting; then, press the button
repeatedly to adjust the Brightness setting of the XMC-2 front panel display; each subsequent
press advances the Brightness one level; if the Brightness is at 100%, the next button press returns
it to 0%. (Brightness can be adjusted in six steps: 0%, 20%, 40%, 60%, 80%, 100%).
Note:
In its default conguration (Standby = Lowest Power), when the XMC-2 is powered on using
the rear panel Power switch, the halo ring around the Standby button will immediately ash
between amber and blue several times, then illuminate steady amber. Pressing the Standby
button on the front panel, or the Standby button on the remote control, will then initiate the
boot-up process. The Emotiva name will appear in the display, and a progress bar will move
across the bottom of the display to indicate that the XMC-2 is booting up. When the boot-up
process is complete, the display will become active. Pressing the front panel Standby button,
or the Standby button on the remote control while the XMC-2 is On, will return the XMC-2 to
Standby mode; in Standby Mode, only the halo ring around the front panel Standby button will
remain illuminated amber.
In the High-Power Standby mode (Standby = Video Remains On), when the XMC-2 is
powered on using the rear panel Power switch, the halo ring around the Standby button will
immediately ash blue several times, then illuminate steady blue. The Emotiva name will
appear in the display, and a progress bar will move across the bottom of the display to indicate
that the XMC-2 is booting up. Once the boot-up process is complete, the XMC-2 will return to
Standby mode. At this point, pressing the front panel Standby button, or the ON button on the
remote control, will switch the XMC-2 fully On, and the display will become active. Pressing the
front panel Standby button or the Standby button on the remote control when the XMC-2 is On
will then return it to Standby mode.
Note:
The Setup Menu, the Front Panel controls, and the remote control, can all be locked out from
inside the Setup | Advanced Menu. You may wish to lock the Front Panel controls if you never
use them, and you may wish to lock the Front Panel controls or the Setup Menu to avoid
unauthorized or unintentional operation or changes to the XMC-2’s conguration.
To override one or both of these locks if you become locked out of your XMC-2, do the following:
PRESS AND HOLD THE VOLUME KNOB; THEN, WHILE CONTINUING TO PRESS THE VOLUME
KNOB, MOMENTARILY PRESS THE STANDBY BUTTON ON THE FRONT PANEL; FINALLY, RELEASE
THE VOLUME KNOB. If you do this, you will be granted temporary access to the Setup Menu,
where you can then access the Setup | Advanced Menu and disable one or more of the locks.
Page 68
Page 75
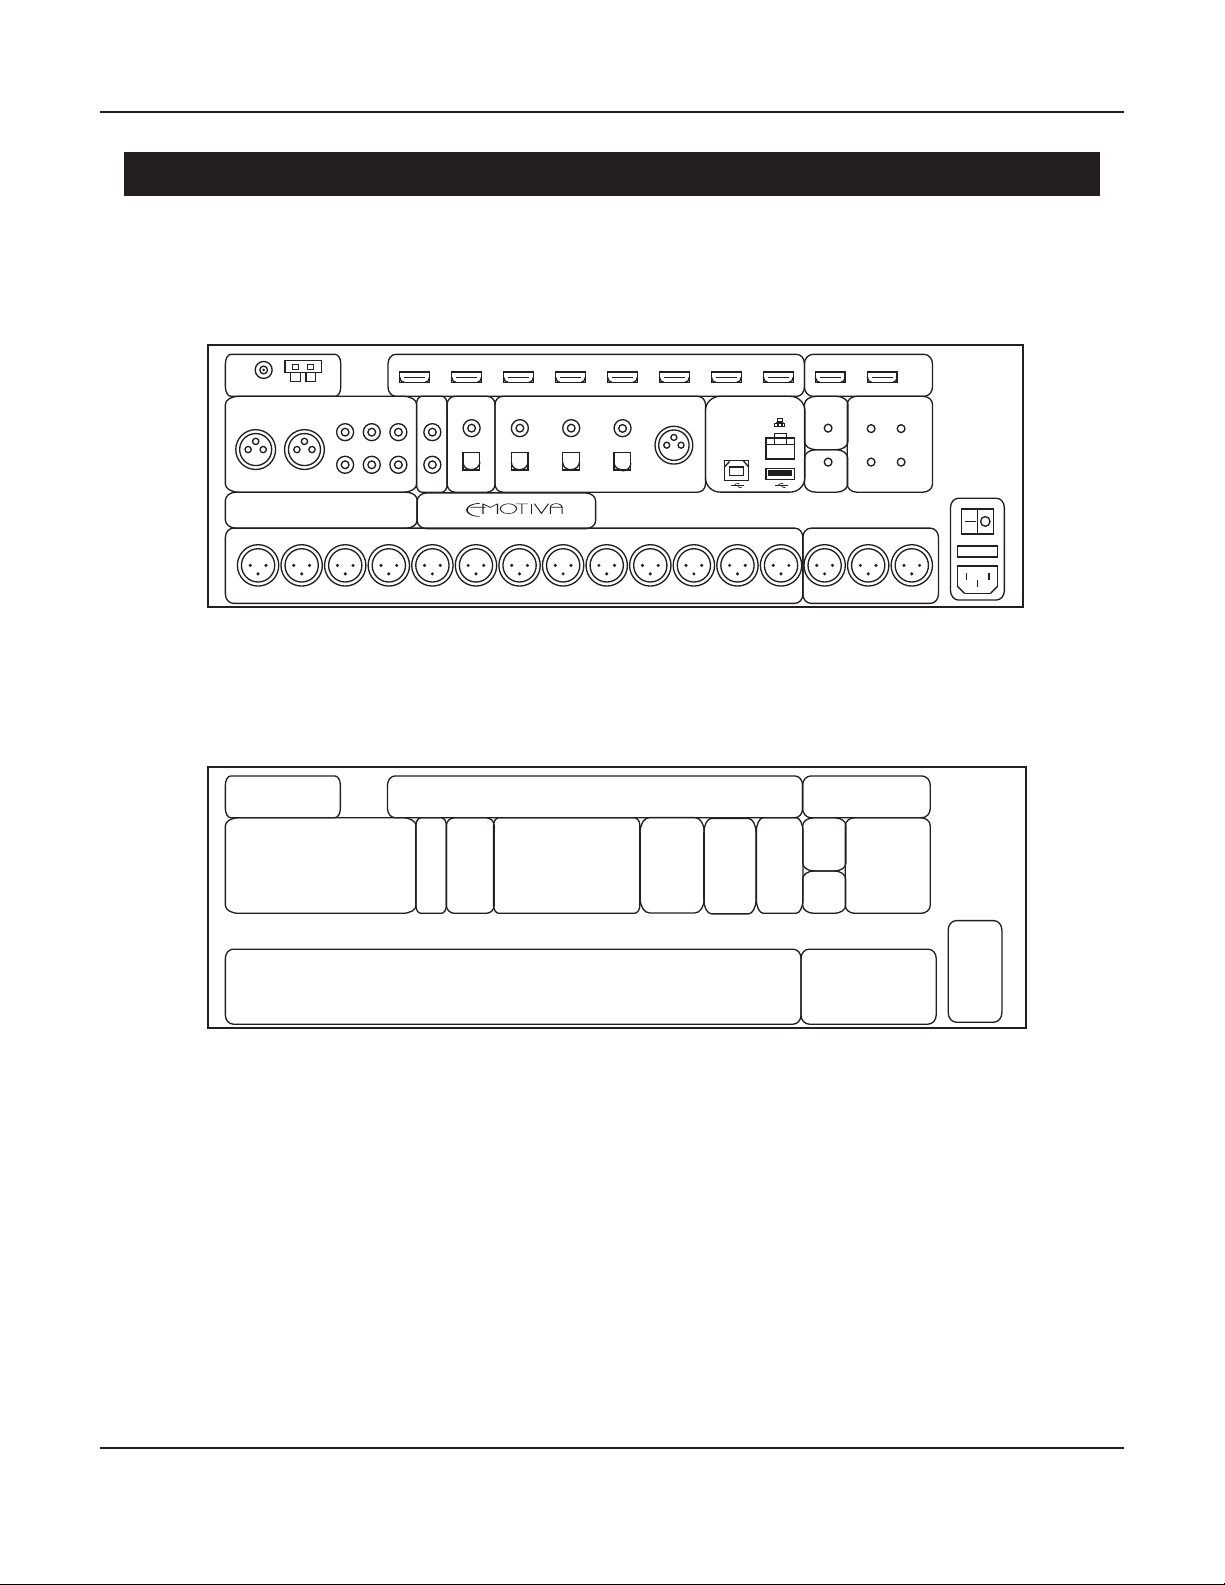
Connecting and Operating the XMC-2
XMC-2 Rear Panel
FM AM 8 7 6 5 4 3 2 1 1 2/ARC
TUNER HDMI INPUTS HDMI OUTPUTS
R L 3 2 1 Z2 OUT DIGITAL OUT 3 2 1 AES/EBU NETWORK IR INPUT TRIGGER OUTPUT
LRL
1 2
ANALOG INPUTS DIGITAL INPUTS IR OUTPUT
R
3 4
XMC-2
RR HEIGHT RF HEIGHT R BACK R SURR R WIDTH R FRONT CENTER L FRONT L WIDTH L SURR L BACK LF HEIGHT LR HEIGHT RSUB/HEIGHT CENTER SUB LSUB/HEIGHT
AM & FM
ANTENNA INPUTS
ANALOG
INPUTS
DIGITAL
OUTPUTS
ZONE 2 OUTPUT
MAIN OUTPUTS
(BALANCED)
DIGITAL INPUTS
(S/PDIF COAX & TOSLINK)
DIGITAL
AES/EBU
INPUT
USB
STREAM
INPUT
HDMI OUTPUTSHDMI INPUTS
IR
IN
INPUTS
IR
ETHERNET &
USB UPDATE
OUT
SUBWOOFER OUTPUTS
TRIGGER
OUTPUTS
(BALANCED)
POWER
INLET,
FUSE
&
SWITCH
Page 69
Page 76
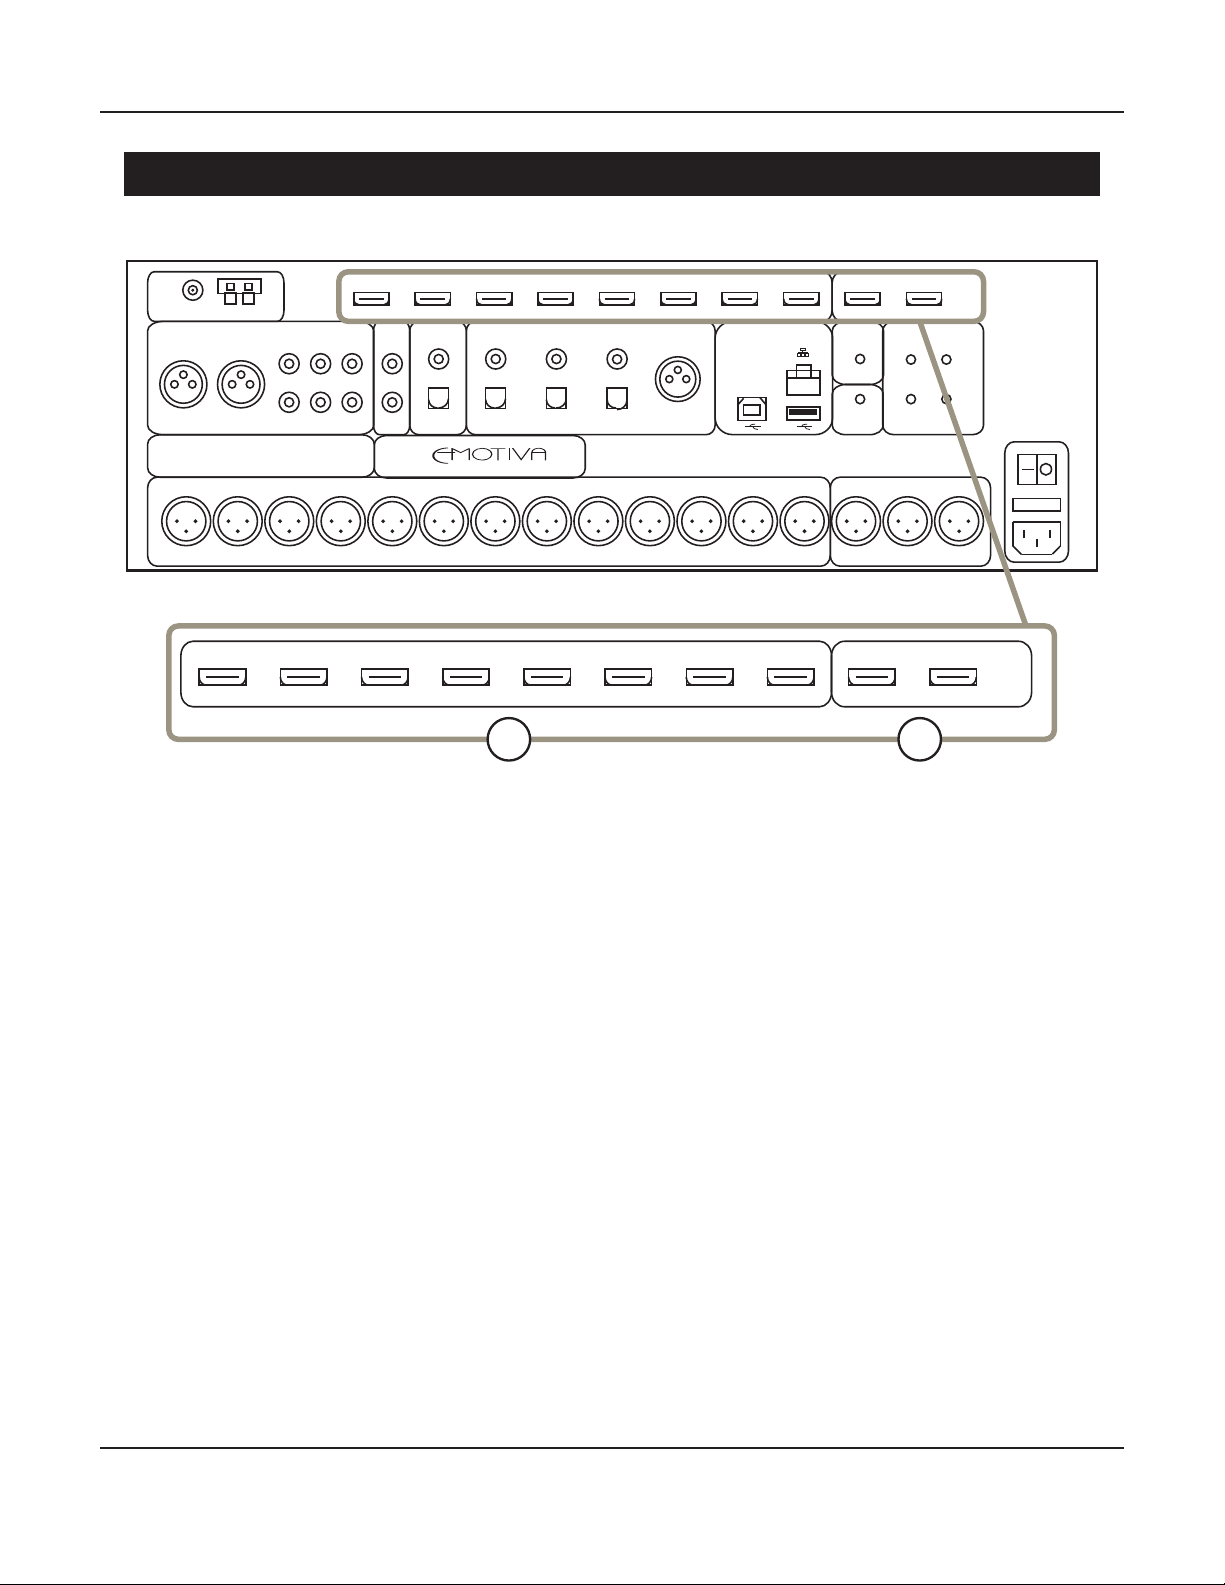
Connecting and Operating the XMC-2
Rear Panel - Video Inputs and Outputs (HDMI)
FM AM 8 7 6 5 4 3 2 1 1 2/ARC
TUNER HDMI INPUTS HDMI OUTPUTS
R L 3 2 1 Z2 OUT DIGITAL OUT 3 2 1 AES/EBU NETWORK IR INPUT TRIGGER OUTPUT
LRL
1 2
ANALOG INPUTS DIGITAL INPUTS IR OUTPUT
R
3 4
XMC-2
RR HEIGHT RF HEIGHT R BACK R SURR R WIDTH R FRONT CENTER L FRONT L WIDTH L SURR L BACK LF HEIGHT LR HEIGHT RSUB/HEIGHT CENTER SUB LSUB/HEIGHT
HDMI HDMI
8 7 6 5 4 3 2 1 1 2/ARC
1 2
1. HDMI Inputs (8)
Provide eight inputs for components that have HDMI outputs. All eight HDMI inputs are identical,
and are HDMI 2.0b and HDCP 2.2 compliant.
2. HDMI Outputs (2)
Each HDMI output is HDMI 2.0b and HDCP 2.2.
HDMI Output 2 is considered to be the primary output, and is both ARC and CEC enabled.
Page 70
Page 77
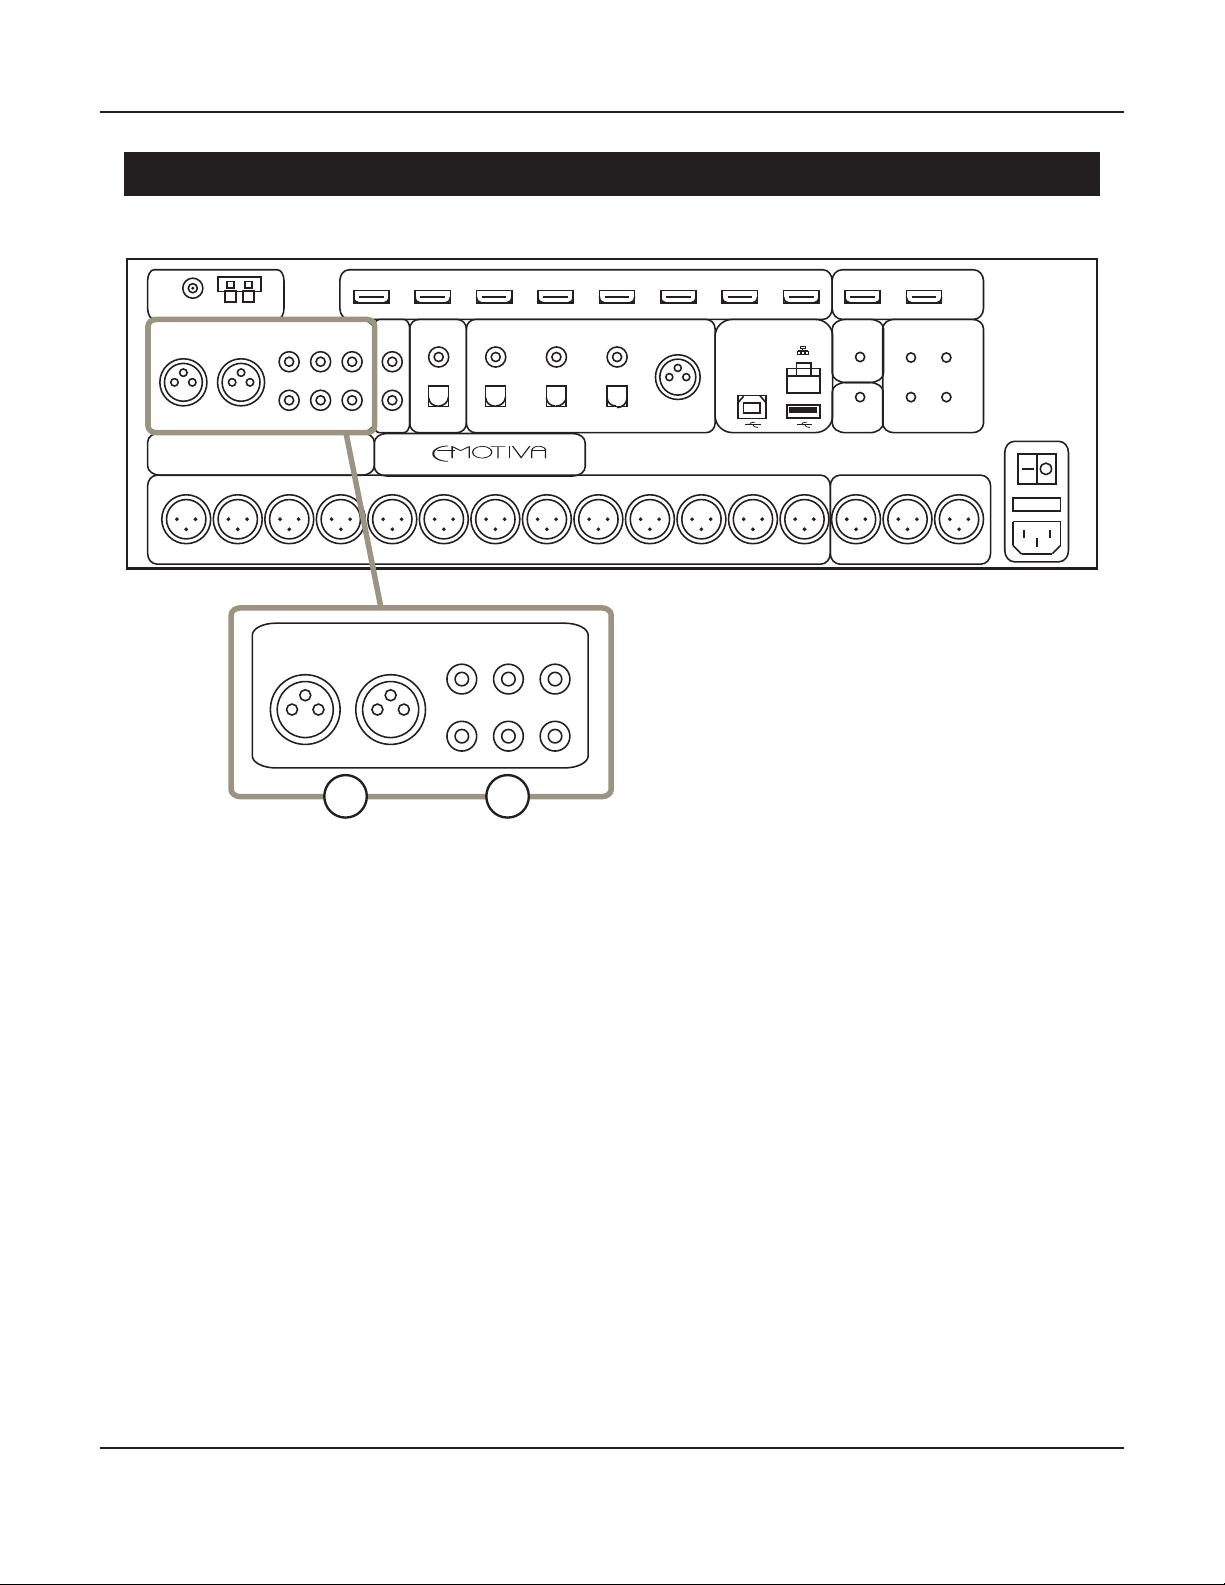
Connecting and Operating the XMC-2
Rear Panel - Analog Audio Inputs
FM AM 8 7 6 5 4 3 2 1 1 2/ARC
TUNER HDMI INPUTS HDMI OUTPUTS
R L 3 2 1 Z2 OUT DIGITAL OUT 3 2 1 AES/EBU NETWORK IR INPUT TRIGGER OUTPUT
LRL
1 2
ANALOG INPUTS DIGITAL INPUTS IR OUTPUT
R
3 4
XMC-2
RR HEIGHT RF HEIGHT R BACK R SURR R WIDTH R FRONT CENTER L FRONT L WIDTH L SURR L BACK LF HEIGHT LR HEIGHT RSUB/HEIGHT CENTER SUB LSUB/HEIGHT
R L 3 2 1
L
ANALOG INPUTS
1 2
RLR
1. Stereo Balanced Analog Audio Inputs (1 pair)
Provides an input for one balanced analog source.
2. Stereo Unbalanced Analog Audio Inputs (3 pairs)
Provide inputs for three unbalanced stereo analog sources.
Page 71
Page 78
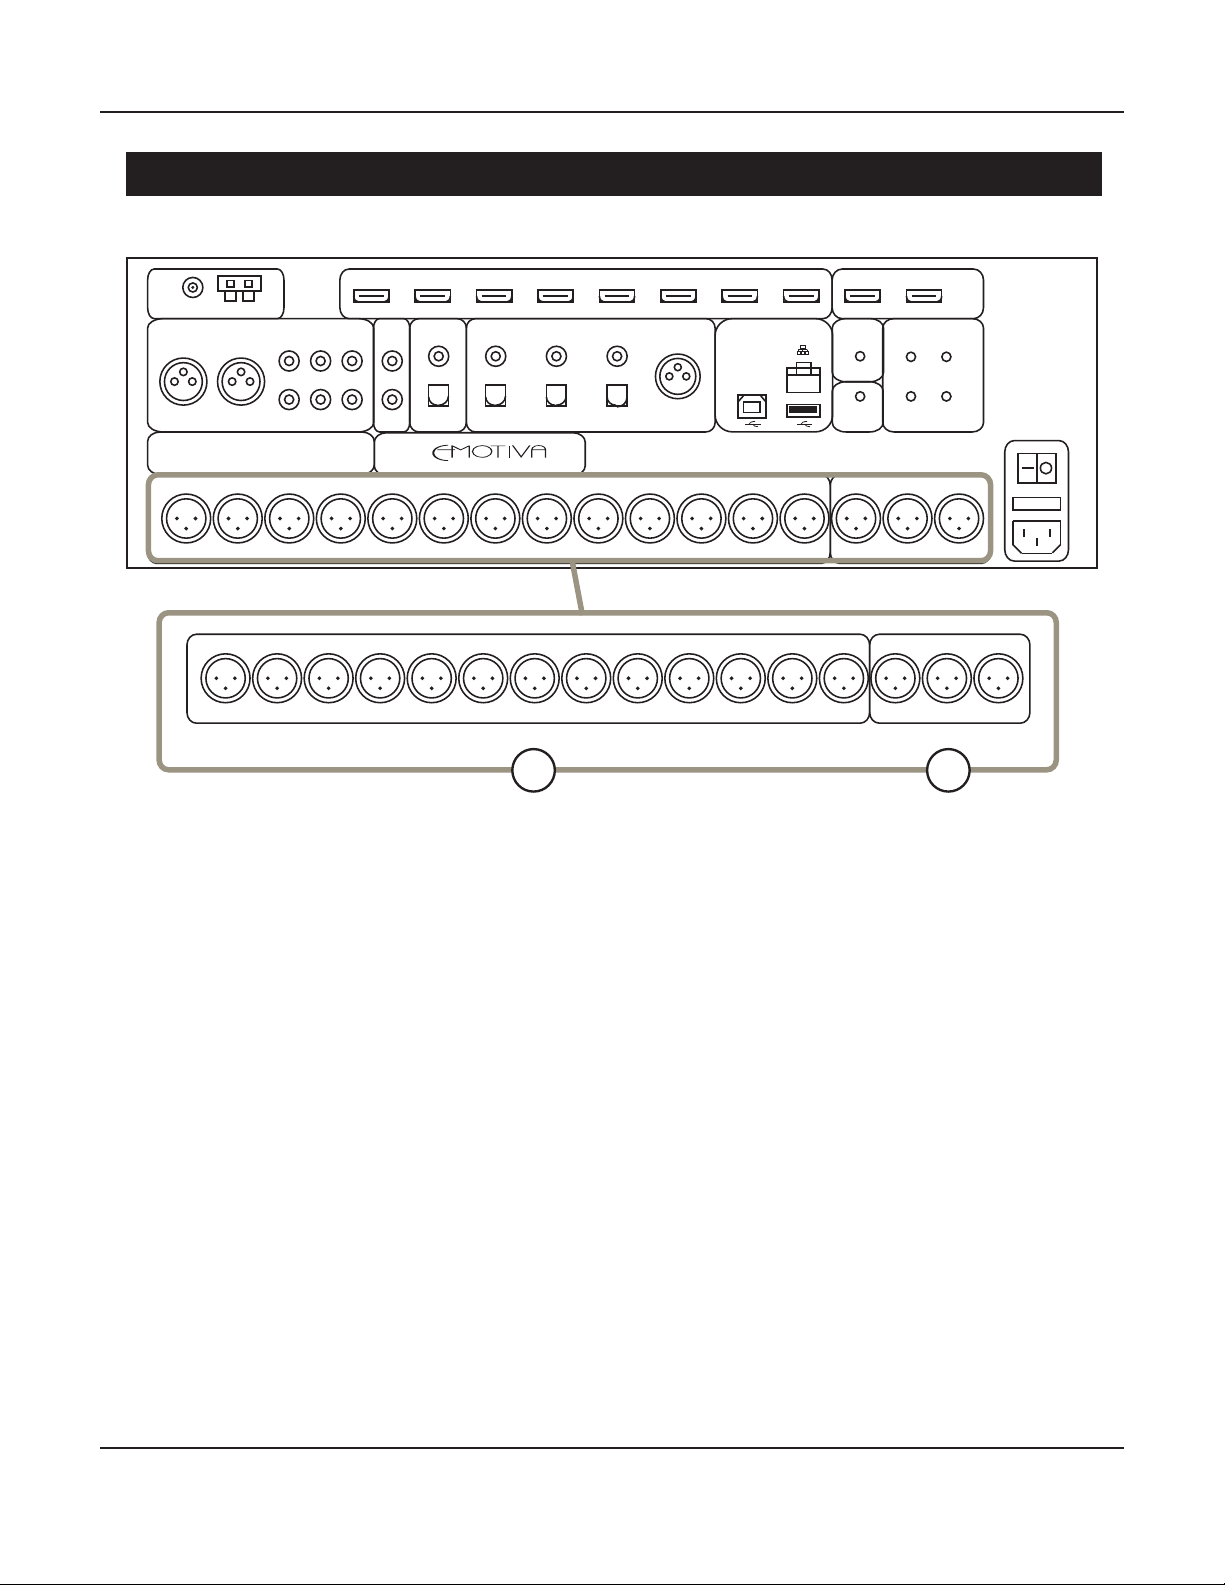
Connecting and Operating the XMC-2
Rear Panel - Main Analog Audio Output
FM AM 8 7 6 5 4 3 2 1 1 2/ARC
TUNER HDMI INPUTS HDMI OUTPUTS
R L 3 2 1 Z2 OUT DIGITAL OUT 3 2 1 AES/EBU NETWORK IR INPUT TRIGGER OUTPUT
LRL
1 2
ANALOG INPUTS DIGITAL INPUTS IR OUTPUT
R
3 4
XMC-2
RR HEIGHT RF HEIGHT R BACK R SURR R WIDTH R FRONT CENTER L FRONT L WIDTH L SURR L BACK LF HEIGHT LR HEIGHT RSUB/HEIGHT CENTER SUB LSUB/HEIGHT
RR HEIGHT RF HEIGHT R BACK R SURR R WIDTH R FRONT CENTER L FRONT L WIDTH L SURR L BACK LF HEIGHT LR HEIGHT RSUB/HEIGHT CENTER SUB LSUB/HEIGHT
1 2
1. Main Audio Outputs (balanced)
Connect these line level outputs to one or more external power ampliers.
Note: All of the analog audio outputs on the XMC-2 follow a fully balanced signal path
internally and oer balanced XLR output connections . Many modern high quality power
ampliers oer balanced input connections, and this is the preferred connection method if it is
available. However, if one or more of your ampliers oers only unbalanced inputs, then a set
of standard low-cost adapters or adapter cables can be used to connect it to the XMC-2.
2. Subwoofer/Height and Center Sub Outputs (balanced)
The XMC-2 supports up to three subwoofers, each of which can be individually adjusted and
calibrated. The Center Sub can be congured as a standard subwoofer, or set to only handle Low
Frequency Eects (LFE) content. The LSub/Height and RSub/Height outputs can be congured as
either two additional subwoofers, or as Center Height speakers.
See the Bass Management section on Page 18 for more details about the various options for
conguring the subwoofer outputs on the XMC-2.
Page 72
Page 79
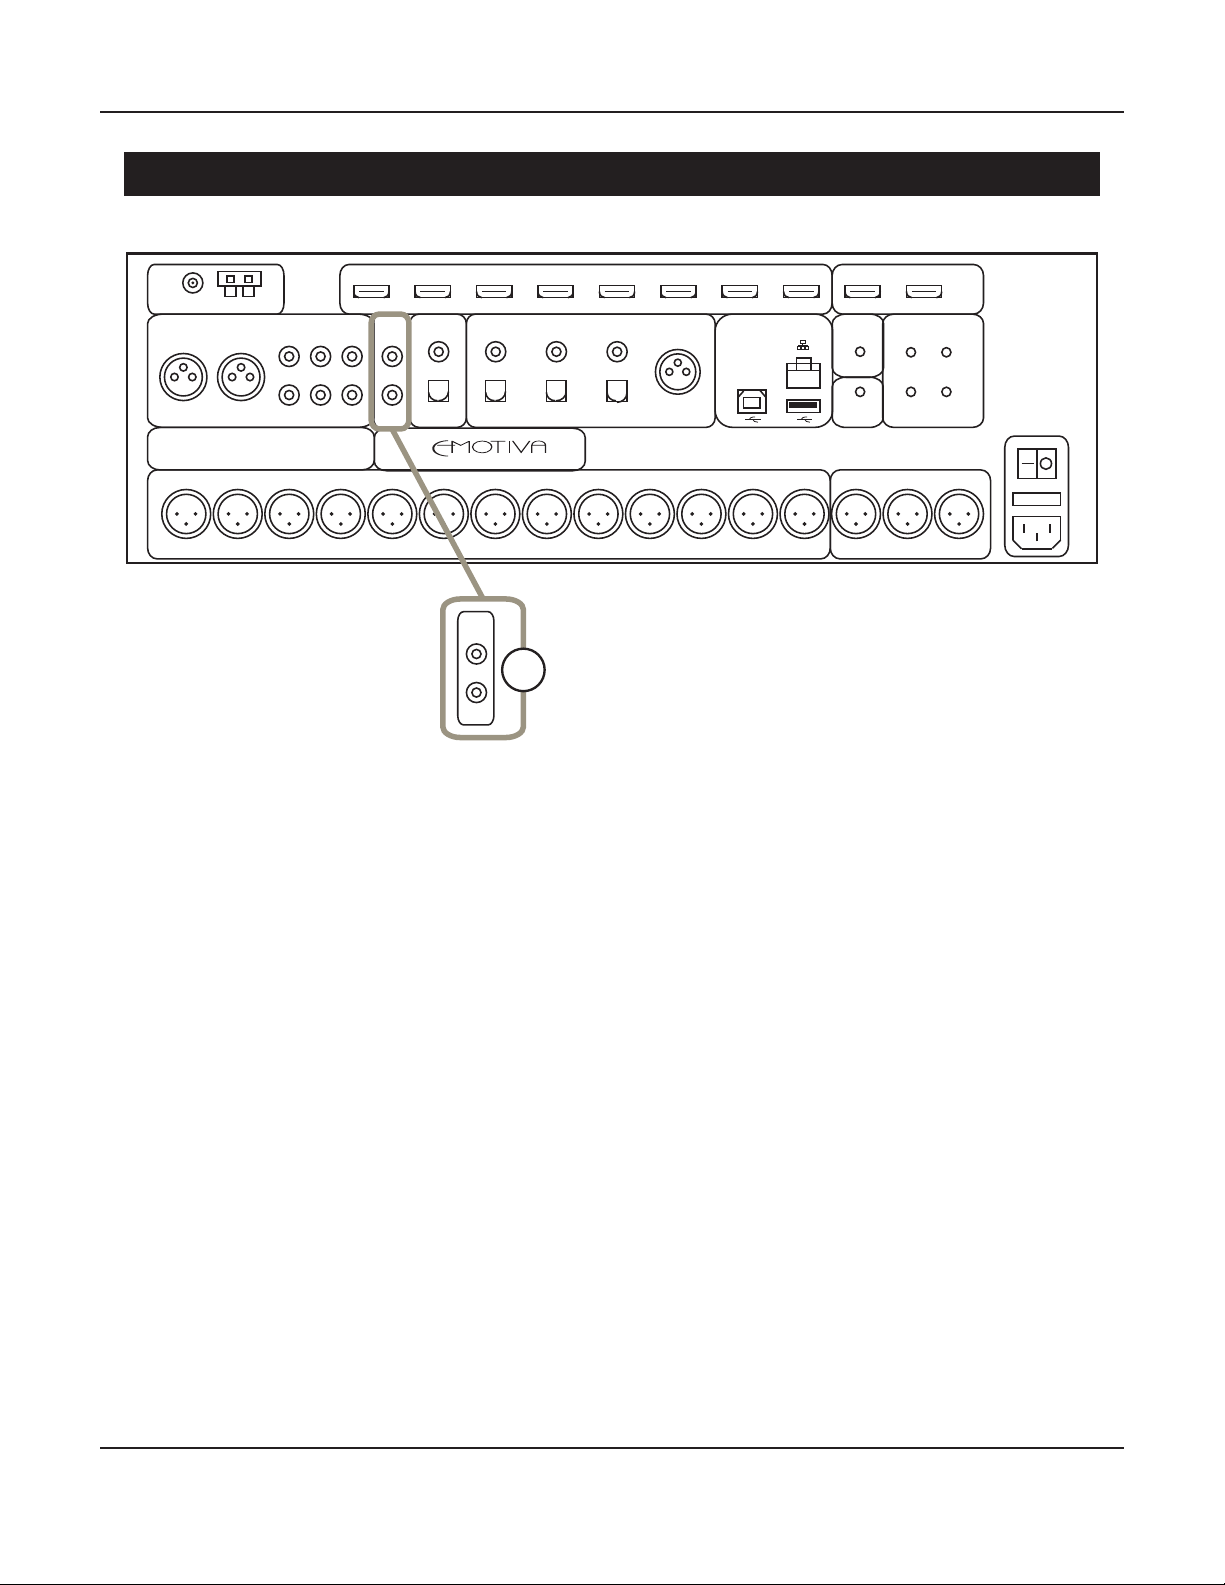
Connecting and Operating the XMC-2
Rear Panel - Zone 2 Outputs
FM AM 8 7 6 5 4 3 2 1 1 2/ARC
TUNER HDMI INPUTS HDMI OUTPUTS
R L 3 2 1 Z2 OUT DIGITAL OUT 3 2 1 AES/EBU NETWORK IR INPUT TRIGGER OUTPUT
LRL
1 2
ANALOG INPUTS DIGITAL INPUTS IR OUTPUT
R
3 4
XMC-2
RR HEIGHT RF HEIGHT R BACK R SURR R WIDTH R FRONT CENTER L FRONT L WIDTH L SURR L BACK LF HEIGHT LR HEIGHT RSUB/HEIGHT CENTER SUB LSUB/HEIGHT
Z2 OUT
1
1. Zone 2 Audio Output
Provide a stereo unbalanced line level analog audio output for Zone 2.
Note: The XMC-2 supports two audio zones, the Main Zone and Zone 2.
Note: On the XMC-2, the Zone 2 source may be selected independently from the Main Zone
source. If you select Follow Main as your Input for Zone 2, then Zone 2 will play whatever is
playing in the Main Zone - with no restrictions. If you prefer to have Zone 2 play content from
a dierent source, you will be able to select ANALOG sources, and 2 CHANNEL PCM DIGITAL
sources connected to Optical or Coax digital inputs. You will NOT be able to select a dierent
digital surround sound or HDMI source for Zone 2 than what is selected for the Main Zone. If
a source that provides a surround sound signal is selected, the Zone 2 Output will deliver a
Mixed-Down Stereo version of it.
Page 73
Page 80
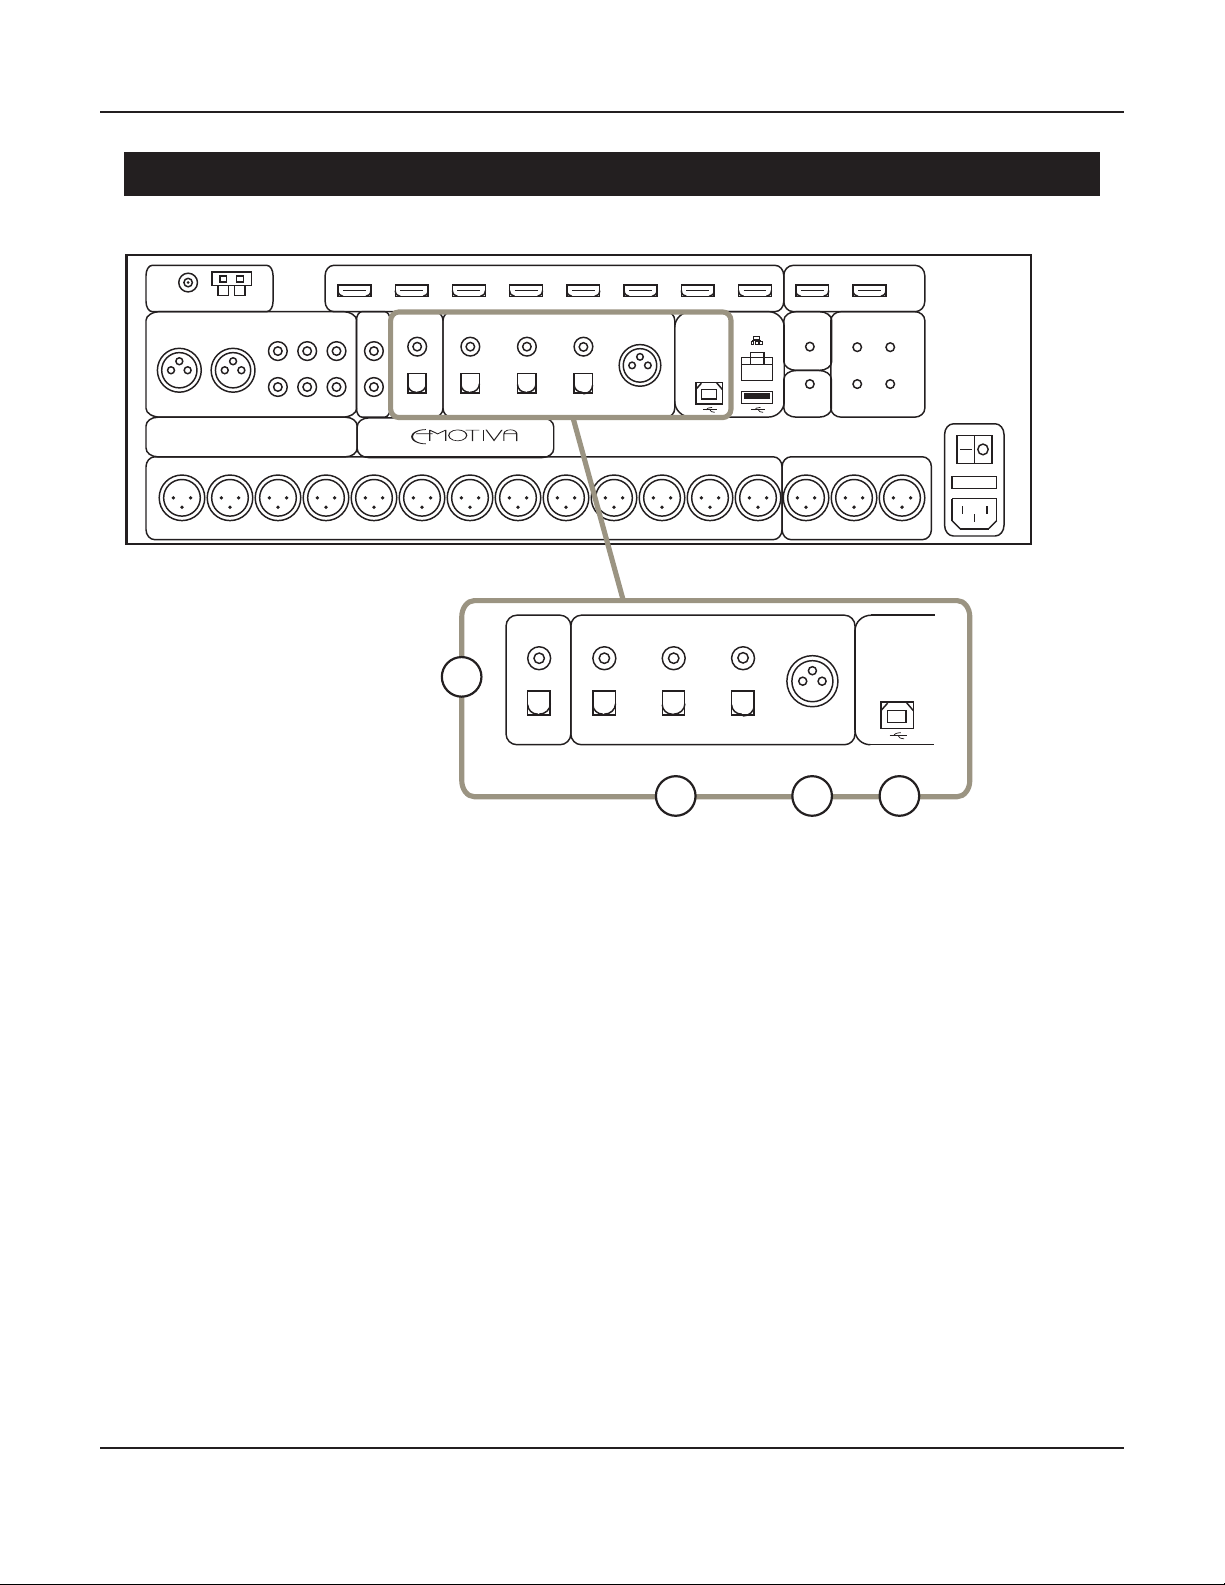
Connecting and Operating the XMC-2
Rear Panel - Digital Audio Inputs and Outputs
FM AM 8 7 6 5 4 3 2 1 1 2/ARC
TUNER HDMI INPUTS HDMI OUTPUTS
R L 3 2 1 Z2 OUT DIGITAL OUT 3 2 1 AES/EBU NETWORK IR INPUT TRIGGER OUTPUT
LRL
1 2
ANALOG INPUTS DIGITAL INPUTS IR OUTPUT
R
3 4
XMC-2
RR HEIGHT RF HEIGHT R BACK R SURR R WIDTH R FRONT CENTER L FRONT L WIDTH L SURR L BACK LF HEIGHT LR HEIGHT RSUB/HEIGHT CENTER SUB LSUB/HEIGHT
DIGITAL OUT 3 2 1 AES/EBU
1
DIGITAL INPUTS
2 3 4
1. Digital Audio Outputs
Connect these outputs to the digital inputs of an external audio device or DAC.
Note: The Digital Audio Outputs of the XMC-2 are subject to processing, and/or re-sampling
or sample rate conversion in some instances. They are intended for connecting other external
devices with their own digital inputs, but should not be considered to be bit-perfect copies of
the digital input signal.
2. & 3. Digital Audio Inputs
The XMC-2 provides seven standard digital audio inputs (not counting the USB Stream Input),
designated Coaxial 1, Coaxial 2, Coaxial 3, Optical 1, Optical 2, Optical 3, and AES/EBU.
Page 74
Page 81

Connecting and Operating the XMC-2
4. USB Stream Input
Use this input to connect a computer or other compatible media client to the XMC-2.
The XMC-2 will appear as a USB audio device (sound card or speaker) to a computer that is
connected to this input. This input supports all standard sample rates between 44.1k and 384k,
and DoP (DSD-over-PCM) at both standard and double rates.
Note: The USB Stream input can be congured as a USB Audio Class 1 (UAC1) or USB Audio
Class 2 (UAC2) device. Almost all devices that oer a USB audio output support UAC1 - but
UAC1 is usually limited to 24/96k. Modern Apple computers, recent Windows 10 computers, and
many Linux computers and Android phones, support UAC2 - which is cabable of higher sample
rates - at least up to 24/384k. However, older Windows computers will require a separate driver
download to support UAC2. The USB Stream input currently supports PCM audio up to 24/192k.
Future enhancements will expand that to include higher sample rates and DSD via USB (using
DoP).
Page 75
Page 82
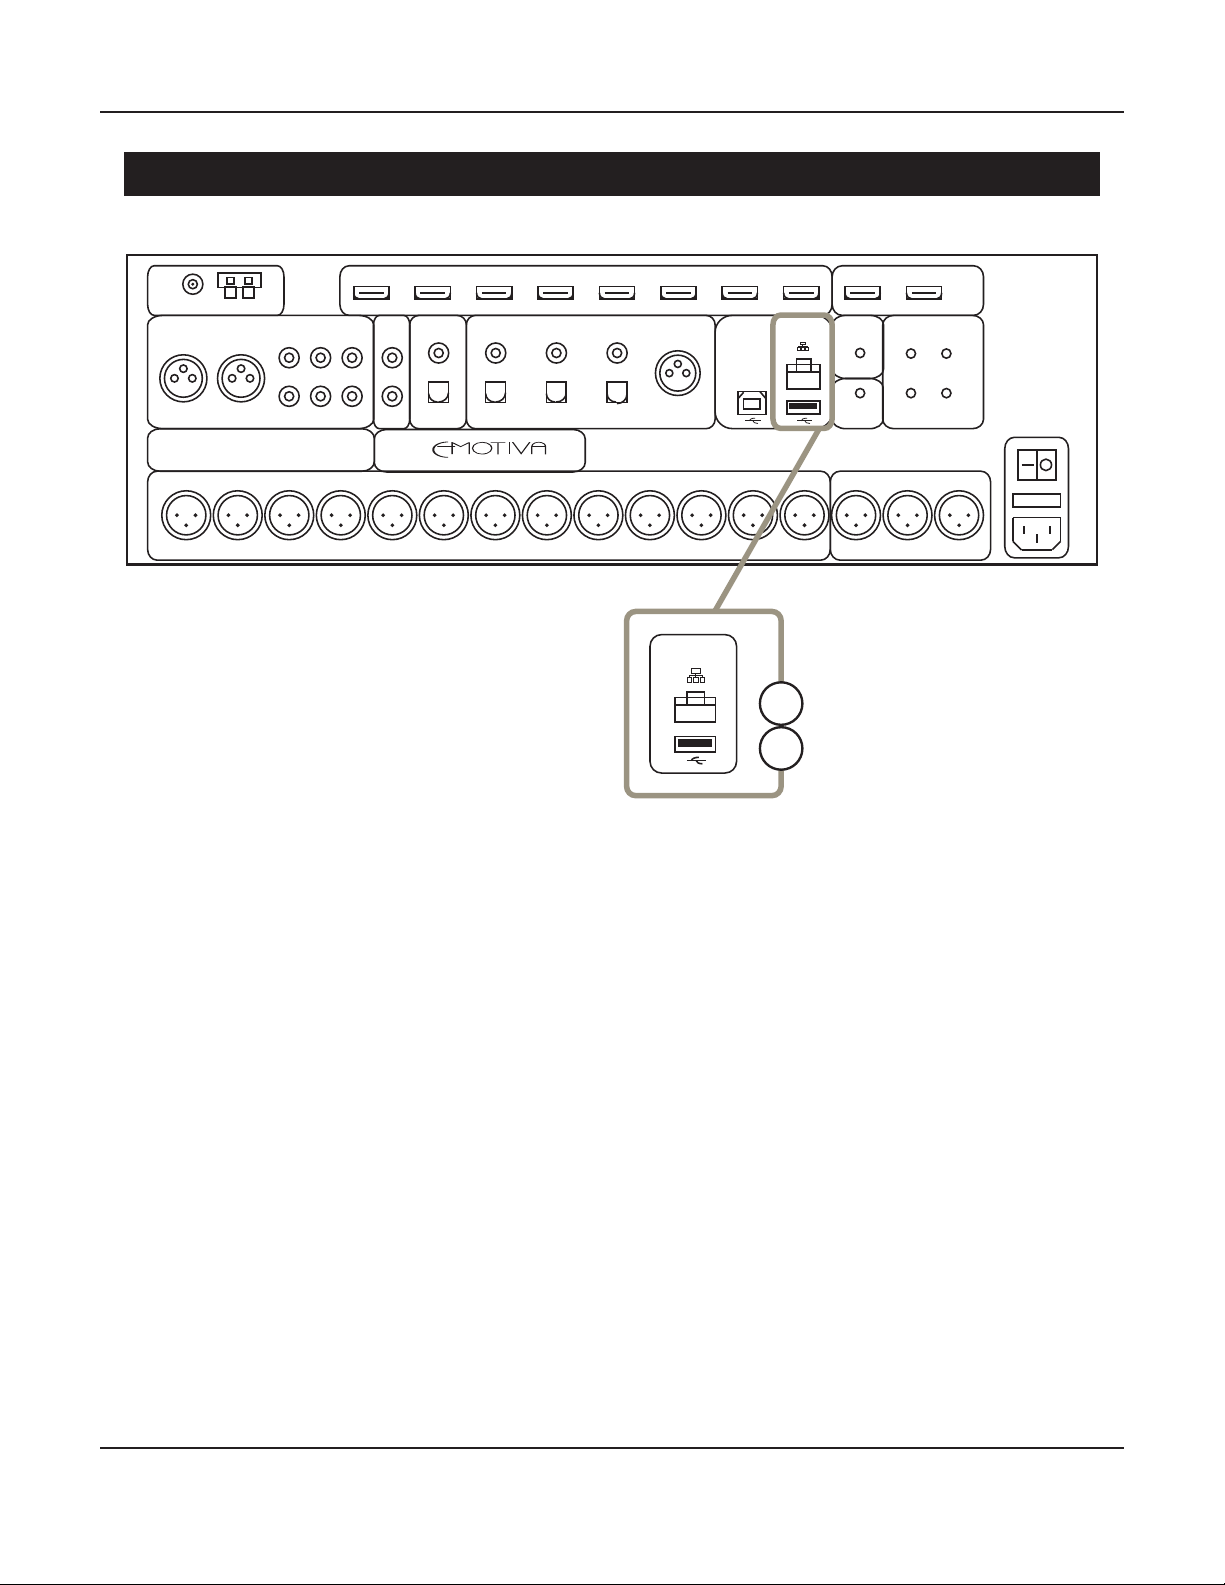
Connecting and Operating the XMC-2
Rear Panel - Ethernet and USB Update Ports
FM AM 8 7 6 5 4 3 2 1 1 2/ARC
TUNER HDMI INPUTS HDMI OUTPUTS
R L 3 2 1 Z2 OUT DIGITAL OUT 3 2 1 AES/EBU NETWORK IR INPUT TRIGGER OUTPUT
LRL
1 2
ANALOG INPUTS DIGITAL INPUTS IR OUTPUT
R
3 4
XMC-2
RR HEIGHT RF HEIGHT R BACK R SURR R WIDTH R FRONT CENTER L FRONT L WIDTH L SURR L BACK LF HEIGHT LR HEIGHT RSUB/HEIGHT CENTER SUB LSUB/HEIGHT
1
2
1. Ethernet Connection
The XMC-2’s Ethernet connection is used to connect the XMC-2 to the Internet via your home
network. A network connection is required in order to congure Dirac Live automatic room
correction, and to allow Ethernet-based or Internet-based remote control apps to connect to the
XMC-2 .
Note: A network connection with an Internet connection is required for conguring Dirac Live
but, once Dirac is congured, the XMC-2 does NOT need to remain connected to the Internet -
or to your local network - to operate.
Note: The XMC-2 does NOT have the ability to play audio or video sources via the Ethernet
input.
2. Rear Panel USB Input
The front panel and rear panel USB data inputs are used to apply rmware updates to the XMC-2
via a standard USB stick (thumb drive). This input duplicates the function of the front panel USB
update input.
Page 76
Page 83
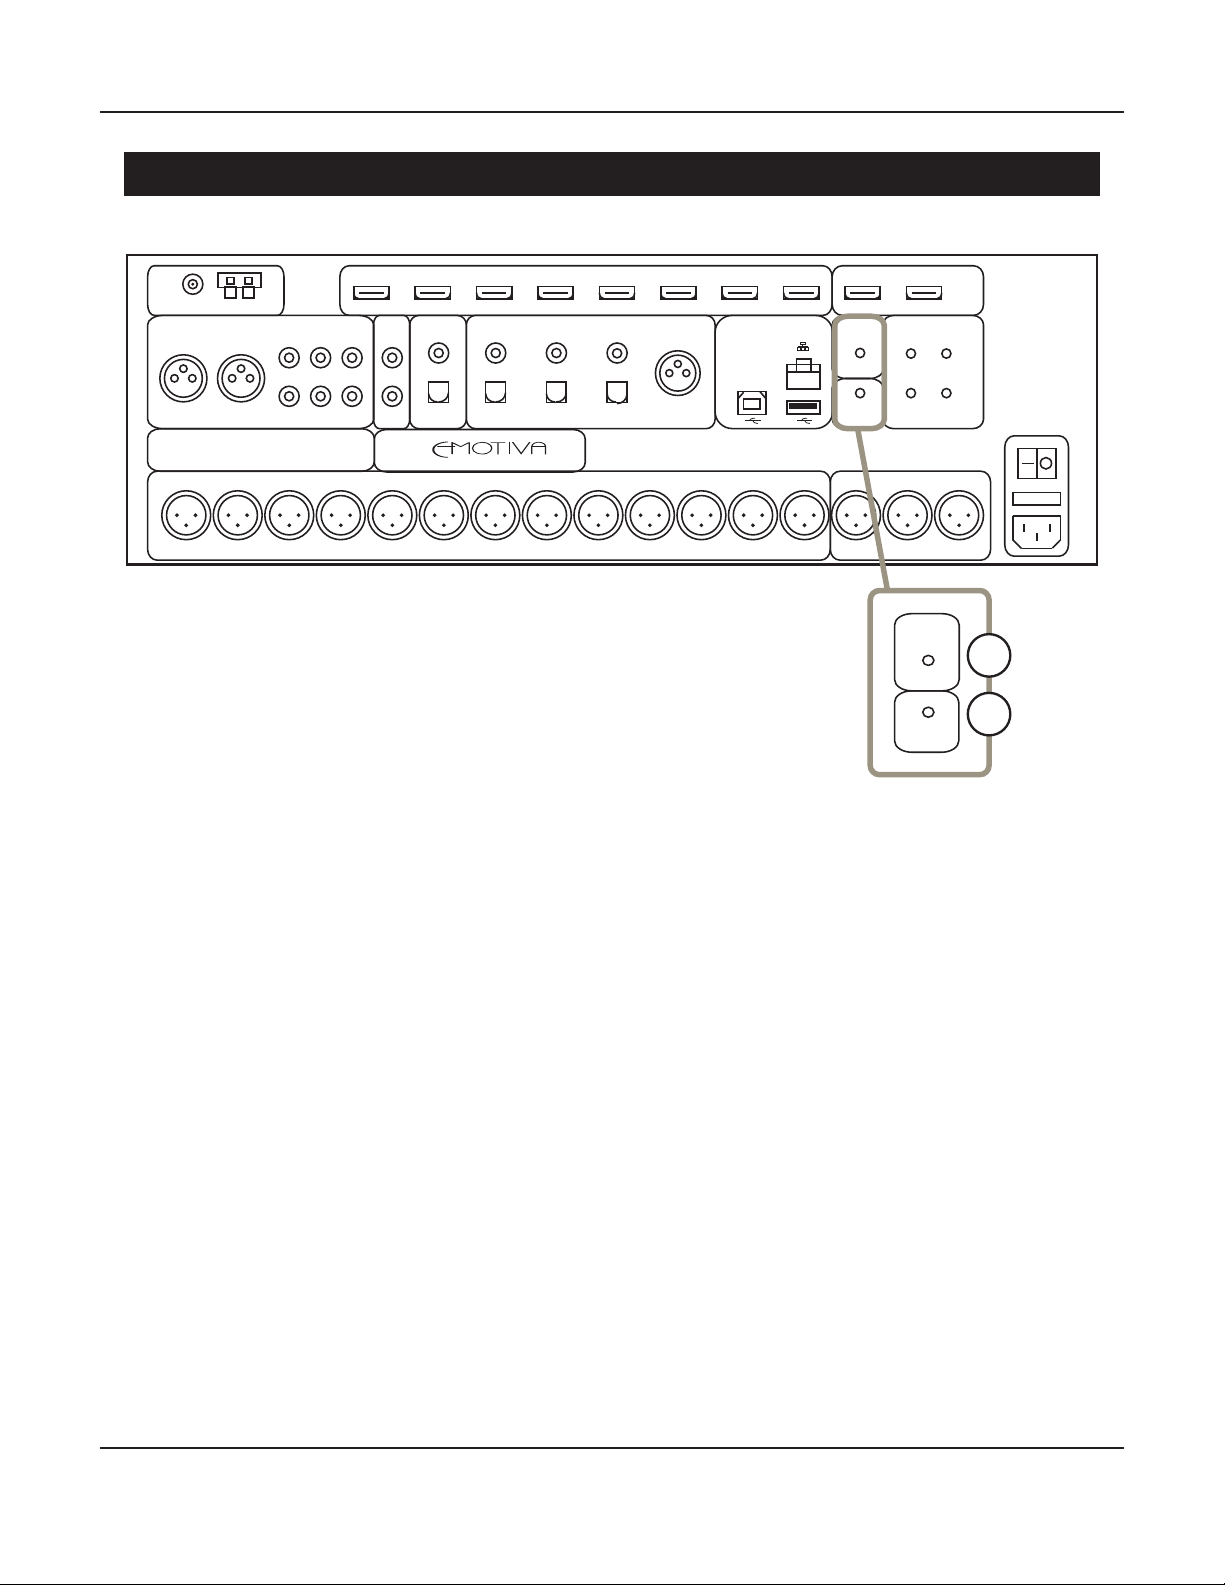
Connecting and Operating the XMC-2
Rear Panel - Infrared (IR) Remote Input and Output
FM AM 8 7 6 5 4 3 2 1 1 2/ARC
TUNER HDMI INPUTS HDMI OUTPUTS
R L 3 2 1 Z2 OUT DIGITAL OUT 3 2 1 AES/EBU NETWORK IR INPUT TRIGGER OUTPUT
LRL
1 2
ANALOG INPUTS DIGITAL INPUTS IR OUTPUT
R
3 4
XMC-2
RR HEIGHT RF HEIGHT R BACK R SURR R WIDTH R FRONT CENTER L FRONT L WIDTH L SURR L BACK LF HEIGHT LR HEIGHT RSUB/HEIGHT CENTER SUB LSUB/HEIGHT
IR INPUT
1
2
IR OUTPUT
1. & 2. IR Remote Input and Output
Connect a remote IR detector (eye) to this input. This is especially useful if your XMC-2 is located
in a cabinet or other area where the front panel IR detector is blocked. Connect a remote IR
transmitter (“blaster”) to this output to control other equipment.
Note: When the XMC-2 is On or in Standby, it always “listens” for IR remote control codes. If
congured to do so, the XMC-2 can accept remote control codes intended for other devices via
its front panel and remote IR inputs, and relay remote control codes intended for other devices
via its IR remote control outputs. Because this capability is always active, the Standby button
on the XMC-2 will icker to indicate that it is receiving remote control codes when you operate
IR remote controls for OTHER devices within range of its sensors; this is normal.
Note: The IR In port on the XMC-2 must be connected to a powered IR detector - or “eye”.
(Appropriate IR detectors include a small circuitry module that provides a buered output
signal. In many cases, you will connect the XMC-2 to the output which is intended for
connection to an IR “asher” or “repeater”.)
Page 77
Page 84
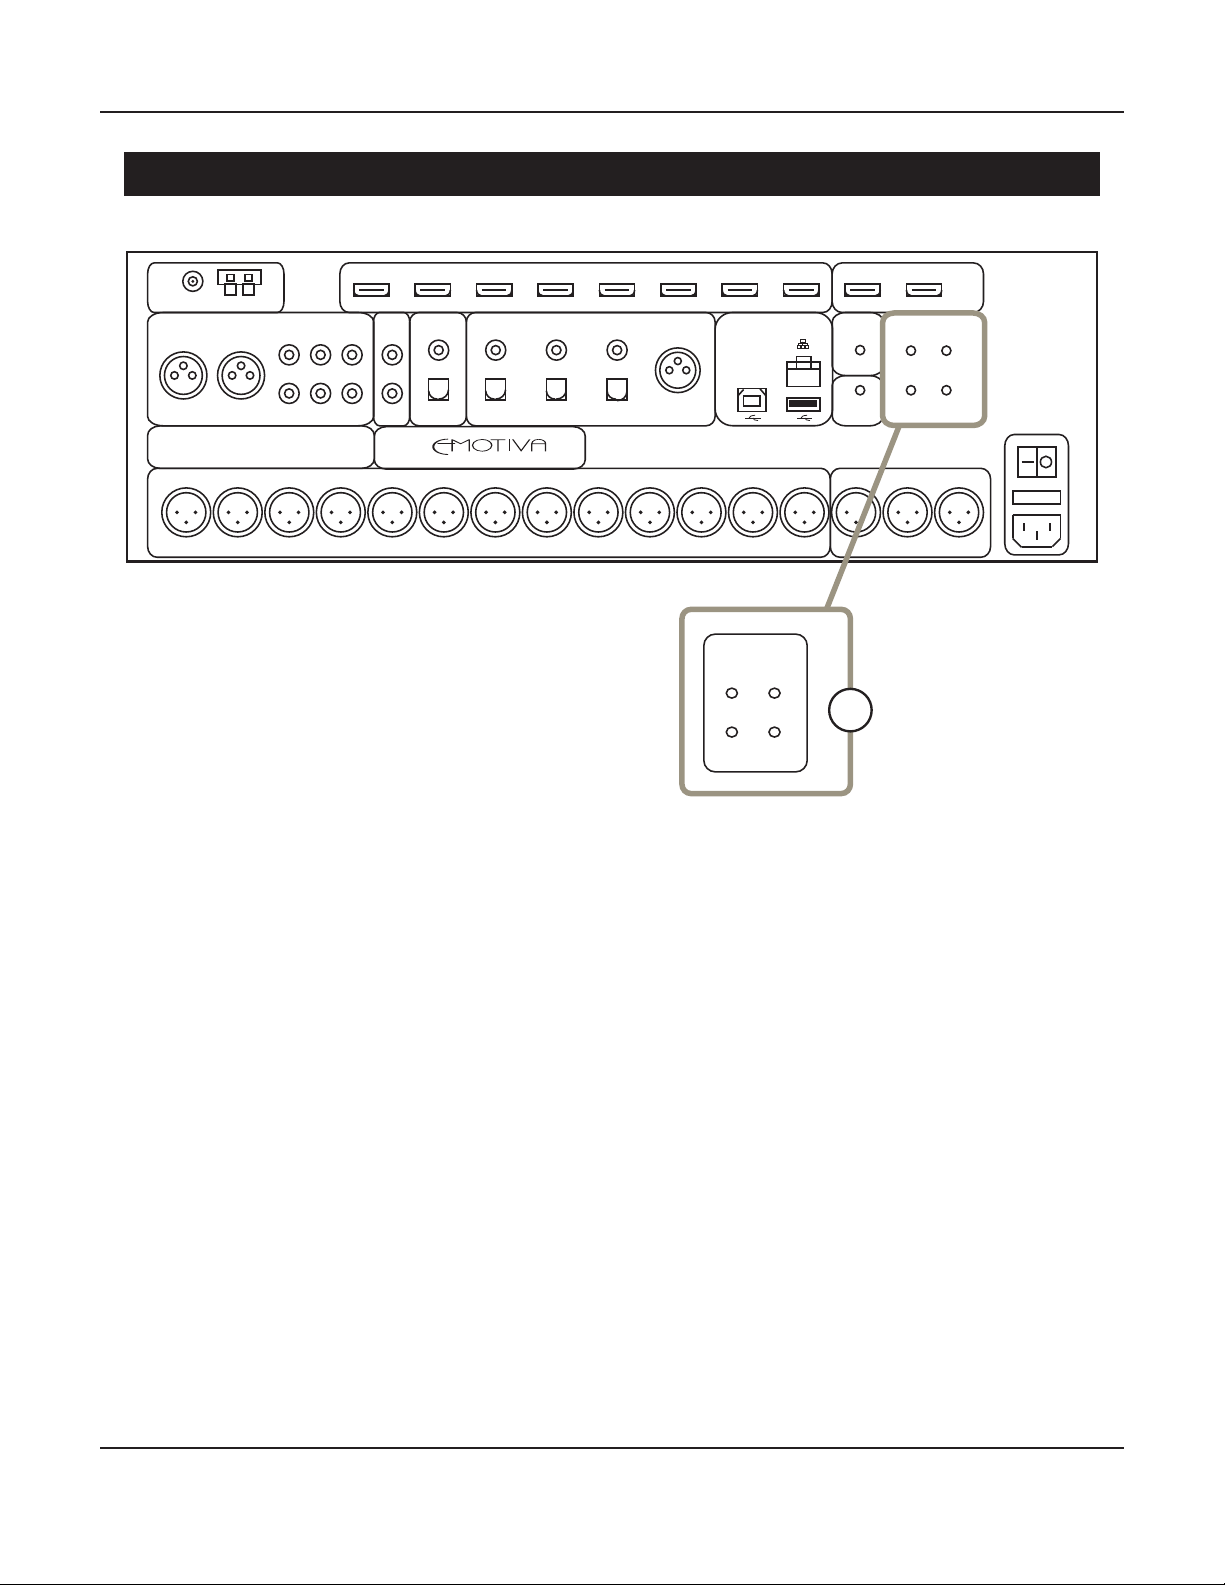
Connecting and Operating the XMC-2
Rear Panel - Trigger Outputs
FM AM 8 7 6 5 4 3 2 1 1 2/ARC
TUNER HDMI INPUTS HDMI OUTPUTS
R L 3 2 1 Z2 OUT DIGITAL OUT 3 2 1 AES/EBU NETWORK IR INPUT TRIGGER OUTPUT
LRL
1 2
ANALOG INPUTS DIGITAL INPUTS IR OUTPUT
R
3 4
XMC-2
RR HEIGHT RF HEIGHT R BACK R SURR R WIDTH R FRONT CENTER L FRONT L WIDTH L SURR L BACK LF HEIGHT LR HEIGHT RSUB/HEIGHT CENTER SUB LSUB/HEIGHT
TRIGGER OUT
1 2
1
3 4
1. Trigger Outputs (4)
Connect each Trigger Output to one piece of trigger-enabled audio equipment. You can then
congure the XMC-2 to turn on specic trigger-enabled equipment when specic input sources
or modes are selected.
Page 78
Page 85
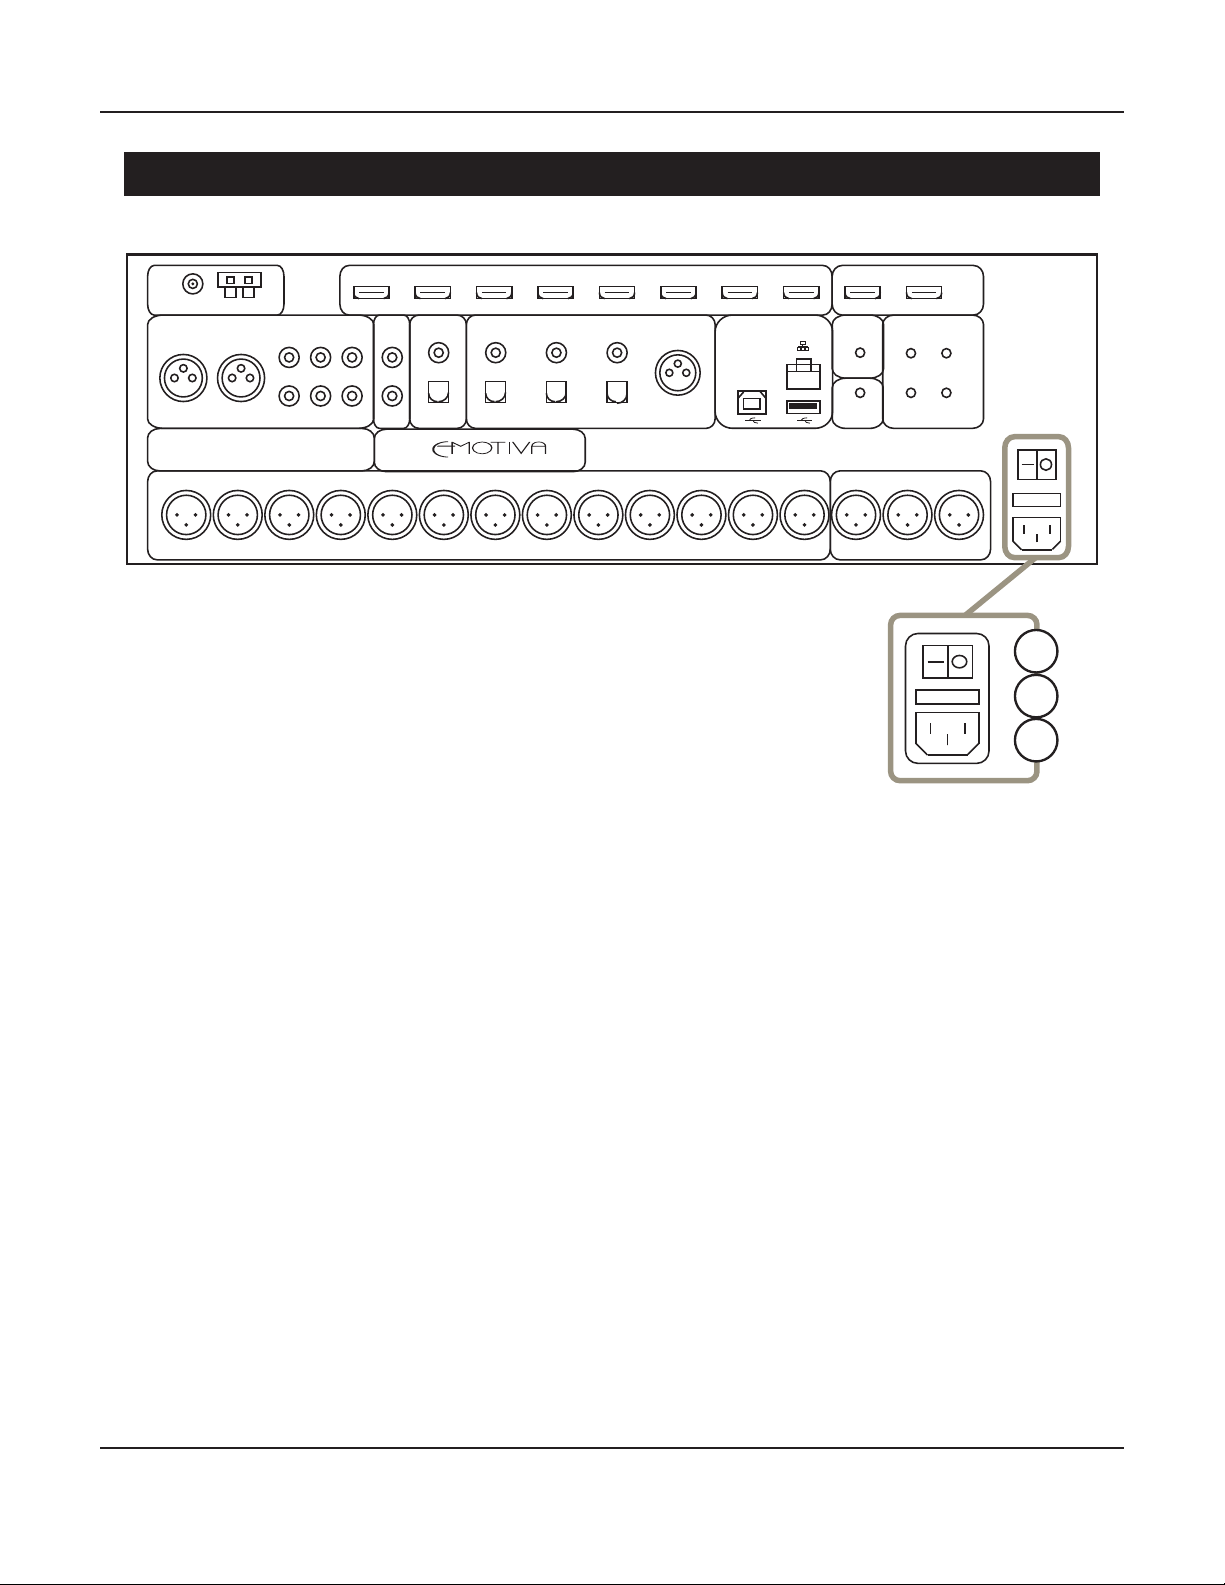
Connecting and Operating the XMC-2
Rear Panel - Power Switch, IEC Receptacle, and Fuse Holder
FM AM 8 7 6 5 4 3 2 1 1 2/ARC
TUNER HDMI INPUTS HDMI OUTPUTS
R L 3 2 1 Z2 OUT DIGITAL OUT 3 2 1 AES/EBU NETWORK IR INPUT TRIGGER OUTPUT
LRL
1 2
ANALOG INPUTS DIGITAL INPUTS IR OUTPUT
R
3 4
XMC-2
RR HEIGHT RF HEIGHT R BACK R SURR R WIDTH R FRONT CENTER L FRONT L WIDTH L SURR L BACK LF HEIGHT LR HEIGHT RSUB/HEIGHT CENTER SUB LSUB/HEIGHT
1. Main AC Power Switch
Switches the AC main power to the XMC-2 On and O. When this switch is O, the
RMC-1 will not respond to trigger signals or manual controls.
1
2
3
2. Fuse Holder
This fuse holder holds the XMC-2’s main system AC fuse. See the section entitled Fuses for details
about how to check this fuse, and change it if necessary.
3. Standard IEC Power Inlet
The XMC-2 can be used with either a two-wire or three-wire standard IEC power cable.
Page 79
Page 86
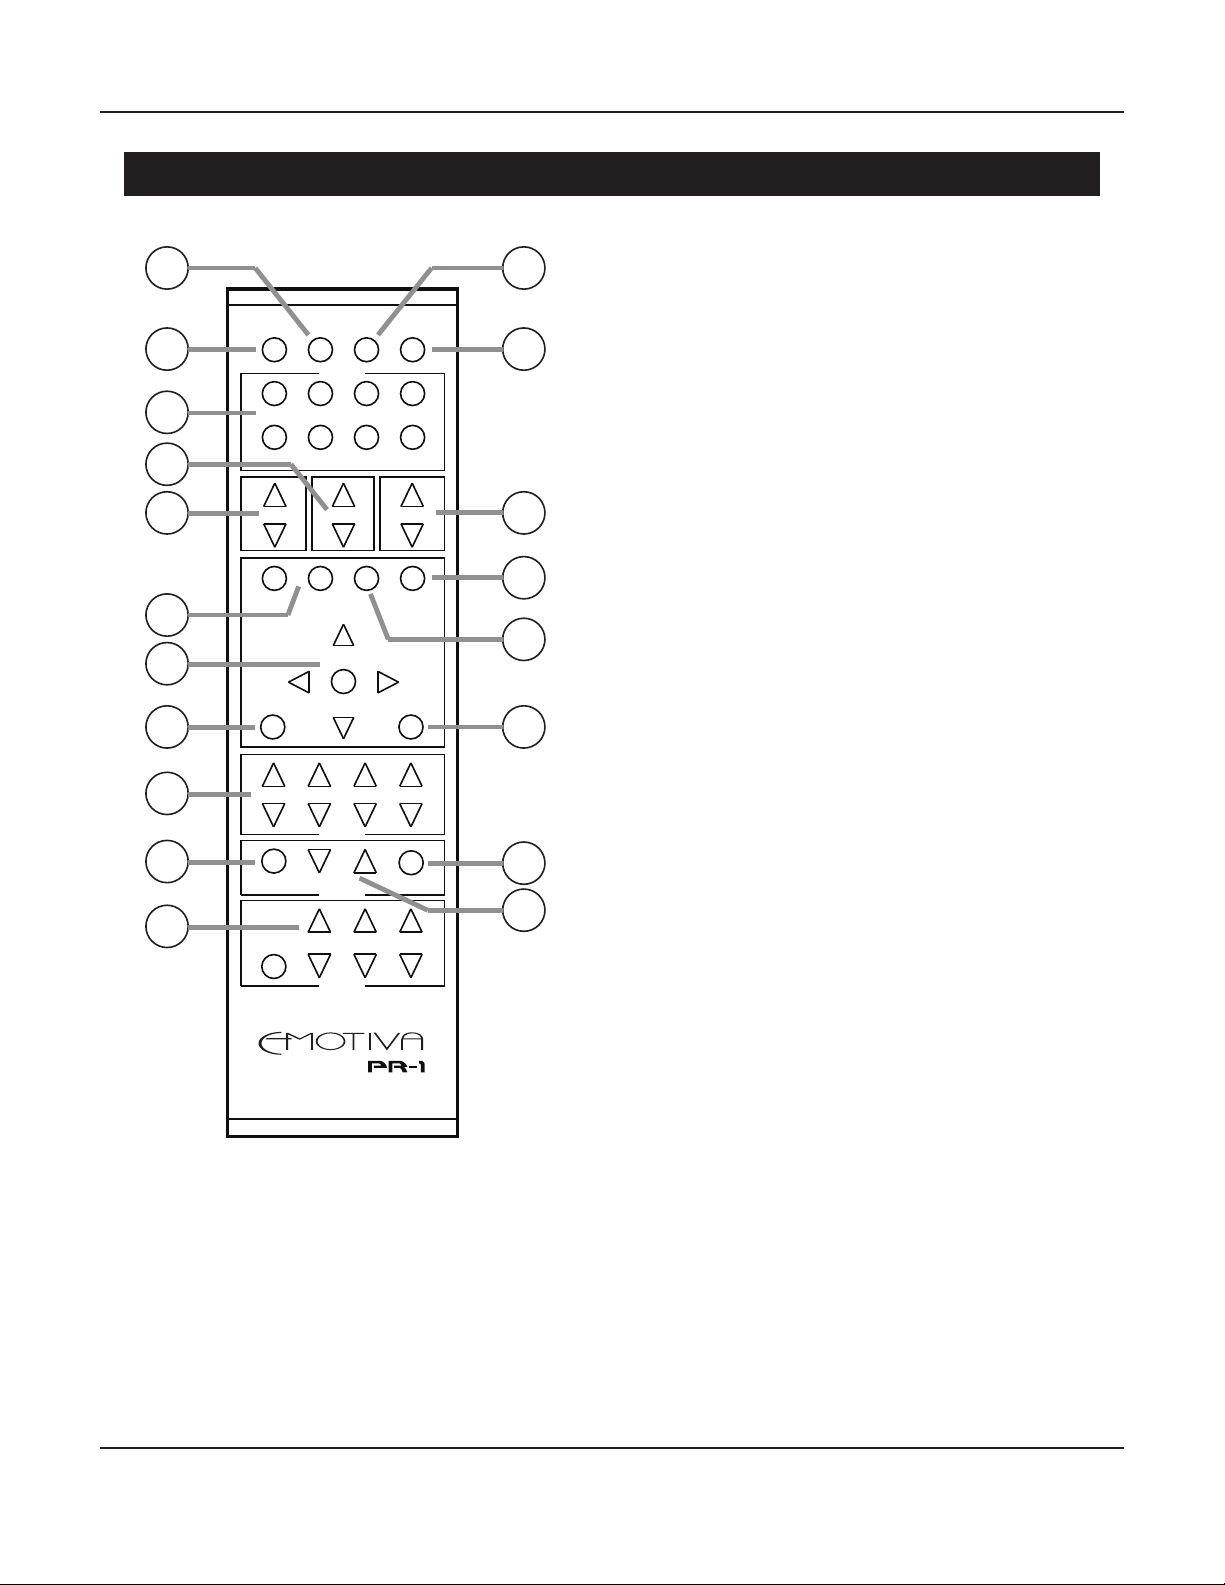
Connecting and Operating the XMC-2
XMC-2 Remote Control
1
2
3
4
5
6
7
8
9
10
11
STANDBY DIM MUTE ON
INPUTS
TUNER 1 2 3
4 5 6 7
MODE INPUT VOLUME
DIRECT ALL LOUDNESS SPEAKER
STEREO PRESETS
SELECT
INFO MENU
CENTER SUB SURR HEIGHT
TRIMS
POWER VOLUME INPUT
AM/FM STATION SEEK TUNE
ZONE 2
TUNER
12
13
14
15
16
17
18
19
1. Dim Button
Press the Dim button once to display the current
Brightness setting; then, press the button
repeatedly to adjust the Brightness setting of
the XMC-2 front panel display; each subsequent
press advances the Brightness one level; if the
Brightness is at 100%, the next button press
returns it to 0%. (Brightness can be adjusted in six
steps: 0%, 20%, 40%, 60%, 80%, 100%).
2. Standby Button
Press the Standby button to switch the XMC-2
from On to Standby mode.
3. Direct Input Selector Buttons
Press one of the Direct Input Selector buttons to
switch the XMC-2 directly to a specic input.
Note: Buttons are assigned to specic inputs
using the Setup Menu.
4. Input Selector Buttons
Use the Input Selector buttons to cycle through
the entire list of available inputs on the XMC-2.
Note: Only Inputs congured as Visible on the
Setup Inputs Menu will be shown here.
5. Mode Selector Buttons
Use the Mode Selector buttons to cycle through
the available modes for the input you have
selected.
Note: The Mode Selector buttons will only allow you to select modes that are valid for the
particular input and source content you have selected. When playing DVD and Blu-Ray discs,
your player and the disc itself may oer a choice of several audio modes. After you select this
output audio format, the XMC-2 will determine which type of audio is being supplied by your
source component, and will ONLY allow you to choose audio modes that are compatible with
that input signal.
Page 80
Page 87

Connecting and Operating the XMC-2
6. Direct Mode & All Stereo Mode
Press one of these buttons to switch the XMC-2 into Direct Mode or All Stereo Mode without
cycling through the available choices on the menu.
7. Menu Navigation Buttons
Use the Select Button (center), and the Up, Down, Left, and Right buttons for navigating the front
panel and on-screen menus.
8. Info Button
If the Info screen is already displayed on the XMC-2 front panel display, pressing the Info button
will cause the Info screen to display momentarily on the OSD. If the Menu screen is displayed on
the XMC-2 front panel, pressing the Info button will cause the Info screen to display momentarily
on both the front panel display and the OSD (you will be returned to the Menu screen when the
Info screen times out).
9. Trims Adjustments
Use the Trims Adjustment buttons to temporarily adjust the levels on specic sets of speakers. The
Surround buttons act equally on all surround channels currently congured; the Height buttons
act equally on all height channels currently congured.
Note: These Trims are used to make temporary adjustments to speaker levels; for example,
to adjust the levels for a particular movie or disc. Since these settings are intended to be
temporary, they are NOT retained when you switch Inputs or change Speaker Presets, and they
are NOT retained when the XMC-2 is restarted. To make changes to speaker levels which will be
retained, use the Levels settings in the Speakers Preset section of the Setup Menu.
10. Zone 2 Power Button
Use the Zone 2 Power button to turn Zone 2 On and O. Pressing this button once turns Zone 2
On; pressing it again turns Zone 2 O.
Note: Pressing the Zone 2 Power button will turn Zone 2 On, even if the XMC-2 is in Standby
mode, and even if the XMC-2 is congured to use its Lowest Power Standby mode. However, if
you turn on Zone 2 while the Main Zone is O, and while the XMC-2 is in Lowest Power Standby
mode, there will be a delay while the XMC-2’s operating system is loaded. You can avoid this
delay by conguring your XMC-2 to use Video On Standby mode.
11. Tuner Control Buttons
Note: Once you have used the Tuner Direct Input button to select the XMC-2 tuner, the Tuner
Control buttons control operation of the tuner.
Press the AM/FM button to toggle between the AM and FM bands. Press the Station Up or Station
Down button to move to the previous/next preset station. Press the Seek Up or Seek Down button
to instruct the XMC-2 to seek to the previous/next received station. Press or hold the Tune Up or
Tune Down button to instruct the XMC-2 to manually seek a station by tuning up or down the
frequency band.
Page 81
Page 88

Connecting and Operating the XMC-2
12. Mute Button
Press the Mute button to mute the audio output on the XMC-2; press it again to unmute the
audio.
13. On Button
Press the On button to switch the XMC-2 from Standby mode to On.
14. Volume Up and Volume Down Buttons
Use the Volume Up and Volume Down buttons to raise and lower the audio volume on the XMC-2.
Note: Audio level on the XMC-2 is controlled by an electronic digitally controlled analog ladder
network. When you change the Volume using the buttons on the remote control, the Volume
knob will not move.
15. Speaker Preset Button
Toggles between the speaker presets: Dirac Live, and the two manual presets, which will show the
names you have congured for them.
16. Loudness Button
Press this button to congure the Level Controls on the XMC-2 to act as a true Fletcher-Munsen
Loudness control; press it again to congure the XMC-2 Level Controls as a standard audio Volume
control.
17. Menu Button
Press this button enter the XMC-2 Menu system; press it again to close the Menu and return to
normal operation.
18. Zone 2 Input Button
Use the Zone 2 Input button to cycle between the available inputs for Zone 2.
Note: On the XMC-2, the Zone 2 input is selected independently from the main zone. ANY input
that is currently selected as the Main Zone Input can also be selected as the Zone 2 Input. If you
wish to set the Zone 2 Input to a dierent source than the main zone, you will be able to select
both ANALOG sources and 2 CHANNEL PCM DIGITAL SOURCES. You will NOT be able to select a
dierent digital surround sound or HDMI source for the Zone 2 Input that is dierent than what
is playing in the Main Zone.
19. Zone 2 Volume Button
Use these buttons to raise and lower the volume of the Zone 2 audio outputs.
Page 82
Page 89

Connecting and Operating the XMC-2
Using The USB Stream Input (the Computer/DAC Input)
Use this input to connect a computer or other compatible media client to the XMC-2.
The XMC-2 will appear as a USB audio device (sound card or speaker) to a computer that is
connected to this input. This input supports all standard sample rates between 44.1k and 384k,
and DoP (DSD-over-PCM) at both standard and double rates.
Note: The USB Stream input can be congured as a USB Audio Class 1 (UAC1) or USB Audio
Class 2 (UAC2) device. Almost all devices that oer a USB audio output support UAC1 - but
UAC1 is usually limited to 24/96k. Modern Apple computers, recent Windows 10 computers, and
many Linux computers and Android phones, support UAC2 - which is cabable of higher sample
rates - at least up to 24/384k. However, older Windows computers will require a separate driver
download to support UAC2. The USB Stream input currently supports PCM audio up to 24/192k.
Future enhancements will expand that to include higher sample rates and DSD via USB (using
DoP).
Page 83
Page 90

Care and Maintenance
Care and Maintenance
Periodic Maintenance
Your Emotiva XMC-2 requires no periodic maintenance or calibration.
Cleaning your XMC-2
• If necessary, the XMC-2 should be cleaned gently with a soft rag.
• If something sticky gets on the front panel or case of the XMC-2, it should be cleaned with a
mild cleaning solution applied to a soft rag, followed by wiping with a clean rag dampened
with plain water and drying with a soft dry rag or cloth.
Note: DO NOT spray water or cleaning solution directly onto the XMC-2 or into
the vents.
• If something sticky gets on the remote control, it should be cleaned with a mild cleaning
solution applied to a soft rag, followed by wiping with a clean rag dampened with plain water
and drying with a soft dry rag or cloth.
Note: DO NOT submerge the remote control in liquid or spray water or cleaning solution
directly onto it.
Fuses
The XMC-2 has three fuses that protect it from power surges and other fault conditions.
• A blown fuse does not necessarily indicate a problem; fuses may blow for many reasons,
including a power surge in your AC line, or a fault with your XMC-2.
• If a fuse blows, ALWAYS REPLACE IT WITH ONE OF THE SAME SIZE, RATING, AND TYPE;
NEVER USE A FUSE OF HIGHER RATING.
• If one or more fuses blows repeatedly CONTACT EMOTIVA TECHNICAL SUPPORT.
The main AC power fuse for the XMC-2 is located in the IEC power cable receptacle, behind the
small plastic panel with the picture of a fuse on it, and is easily accessible without removing the
top cover. In addition, there are two power supply fuses located on the power supply board inside
the XMC-2.
If you suspect that a fuse is blown, remove the fuse and test it with an ohmmeter or low-current
continuity tester. If the fuse measures more than a few ohms of resistance, shows “no continuity”,
or is obviously cracked or scorched, then it should be replaced.
Note: Always use a modern continuity tester or resistance meter to check fuses. Some older
ashlight style continuity testers deliver enough current to blow a low-value fuse, and so
should be avoided.
Page 84
Page 91

Care and Maintenance
Changing the Main AC Power Fuse
To test or change the main AC power fuse, do the following:
• Unplug the AC power cord from the IEC receptacle on the rear panel of the XMC-2.
• Carefully pry up the small plastic panel with the picture of a fuse on it - located adjacent to the
power cable opening. The panel should snap, then slide straight out like a drawer.
• Test the fuse, and replace it if it tests “bad”, or if it is obviously cracked or charred.
• Carefully replace the fuse holder. The little tab on the panel should face towards the power
cable cutout. Make sure you have it facing the right way, and that you snap it rmly in place.
Note: The fuse should t quite loosely in the small plastic clip in the side of the fuse holder. It
will engage the electrical fuse contacts tightly when the panel is in its closed position. The fuse
holder itself snaps quite rmly into position, and should sit ush when properly inserted.
Changing the Internal Power Supply Fuses
The power supply fuses on the XMC-2 are located on the power supply board, which is located
inside the XMC-2, mounted to the bottom of the chassis, towards the front of the unit. To access
the power supply board, you will need to remove the outside top cover of the XMC-2.
To test or change the power supply fuses, do the following:
• Unplug the AC power cable from the XMC-2.
• Allow the XMC-2 to sit unplugged for ten minutes to discharge the power supply.
• You will need access to the top, sides, back, and bottom of the XMC-2, so move it to a location
where you have room to work, and be sure to place it on a soft or padded surface to avoid
scratching the nish; a clear area on a carpeted oor will work ne.
• Remove and carefully set aside the eight screws securing the top panel to the XMC-2
(three on each side, and two on the rear panel, all near the top edge of the RMC-1).
• Remove and carefully set aside the top cover.
• You should now see the two power supply fuses, located on the top of the power supply
board (near the front of the XMC-2).
• Test each fuse, and replace it if it tests “bad”, or if it is obviously cracked or charred.
To close your XMC-2 back up for use after testing or changing the internal fuses, do the following:
• Replace the top panel of the XMC-2, and replace the eight screws securing it.
• Replace the power cable.
• It’s a good idea to conrm that your XMC-2 is now working before replacing it in your
equipment rack and reconnecting it.
Fuse Type
All fuses are 20mm x 5mm 250 V time delay type: T250
Page 85
Page 92

Care and Maintenance
Changing Remote Control Batteries
Emotiva recommends using high quality Alkaline or Lithium “N-cell” batteries in the XMC-2
remote control.
Installing the Remote Control Batteries
The back plate of the XMC-2 remote control is attached by magnets. To remove it, simply insert a
small screwdriver into the slot on the back plate - toward the bottom - and pry gently.
To install batteries:
• Remove the back plate of the remote control.
• Locate the battery holder.
• Carefully insert the two batteries into the battery holder. The negative end of each battery
should face the pressure spring in each section of the battery clip.
• Replace the back plate (the slot should be toward the bottom end of the remote control and
the small metal loop next to the slot should be on the inside when the back is in place.)
Your remote control is now ready to use.
Note: Your XMC-2 may arrive with the batteries packaged separately, or the remote control
may arrive with batteries already installed, but with a small insulator installed between one
battery and the battery contact to prevent the batteries from discharging in shipping. If so,
then simply follow the instructions for opening the remote control, and pull out the small
insulator strip that is inserted between the end of the battery and the battery contact, before
using your remote control.
Replacing the Remote Control Batteries
• Remove the back plate of the remote control.
• Locate the battery holder.
• Note the direction in which the batteries are installed in the holder.
• Remove the depleted batteries and dispose of them in accordance with the manufacturer’s
recommendations.
• Insert new batteries, taking care to insert them in the same orientation (facing the same way)
as the original batteries.
• Replace the back plate (the slot should be toward the bottom end of the remote control and
the small metal loop next to the slot should be on the inside when the back is in place.)
Your remote control is now ready to use.
Page 86
Page 93

Care and Maintenance
Updating the XMC-2 Firmware
The rmware update is installed from a standard USB ash drive. The update consists of a single
le, which may be downloaded and written to a USB drive, or may be provided on a pre-recorded
ash drive.
Note: If you download the rmware update le, it can be written to most standard USB drives.
The USB drive you use should be at least 500 mB in size, and should be formatted using
a standard FAT32 format; avoid multiple partitions or drives with permanently installed
management software, and place the le in the main folder on the drive. Either a USB drive
formatted on a Windows computer or a pre-formatted USB drive should work, and the le may
be downloaded using either a Windows or Apple computer, but USB drives formatted on Apple
computers using the default settings may not work.
Note: ALWAYS erase any previous XMC-2 update les from the USB drive before copying new
ones to it - having multiple dierent rmware update les in the main folder of the same drive
may result in unpredictable behavior.
Note: It is perfectly acceptable to use the same USB drive for a rmware update le and a
conguration backup.
To update the XMC-2 rmware:
• If necessary, copy the XMC-2 rmware update le onto a standard FAT32 formatted USB ash
drive. See the above Notes for details.
• Insert the USB drive into the USB port on the front or back of the XMC-2.
• Press the Menu button.
• Use the Up/Down buttons to select Setup; press the Right button to enter the Setup menu.
• Use the Up/Down buttons to select Advanced; press the Right button to enter the Advanced
Setup menu.
• Use the Up/Down buttons to select Firmware Update; press the Right button to enter the
conrmation screen.
• Use the Up button to conrm your choice; the conrmation box will change to “X”.
• Use the Left button to conrm the update.
• During the update process the screen will display the names of the various rmware modules
being updated; for some modules, you will see a progress bar while the update is completed.
The entire update process will take approximately ve to seven minutes.
• When the update process is complete, the XMC-2 will switch into Standby mode.
WARNING! DO NOT REMOVE THE USB STICK OR POWER YOUR XMC-2 OFF BEFORE IT SWITCHES
INTO STANDBY AT THE END OF THE UPDATE PROCESS. DOING SO MAY RESULT IN SERIOUS
FIRMWARE CORRUPTION WHICH MAY REQUIRE FACTORY SERVICE TO CORRECT.
• Remove the USB drive containing the rmware update.
Note: Unless otherwise instructed, you do NOT have to reset your XMC-2 to factory
defaults after updating the rmware. The update process itself will NOT erase your current
conguration settings.
Page 87
Page 94

Care and Maintenance
Creating a Conguration Backup for the XMC-2
The Backup Settings feature on the XMC-2 allows you to save your entire current conguration onto a
USB drive. We STRONGLY suggest that, after conguring your XMC-2 just the way you want it, you save
a backup copy of the conguration. You can then use this backup at a later date to restore your XMC-2
to its current conguration. (This is handy if you want to experiment with various options.)
Note: Most standard USB ash drives can be used to create a conguration backup. The USB
drive you use should be formatted using a standard FAT32 format; avoid multiple partitions
or drives with permanently installed management software. Either a USB drive formatted on
a Windows computer or a pre-formatted USB drive should work, but USB drives formatted on
Apple computers using the default settings may not work.
Note: The XMC-2 will only store a single conguration le; this le will be stored in the main
folder of the drive, under a pre-congured name. When restoring the conguration, the XMC-2
will automatically use this same le. If desired, you can rename the current conguration le to
save multiple versions, but you will have to rename it back to the original name and place it in
the default location in order for the XMC-2 to recognize it.
Note: It is perfectly acceptable to use the same USB drive for a rmware update le and a
conguration backup.
To back up the conguration on your XMC-2:
• Insert the USB drive into the USB port on the front or back of the XMC-2.
• Press the Menu button.
• Use the Up/Down buttons to select Setup; press the Right button to enter the Setup menu.
• Use the Up/Down buttons to select Advanced; press the Right button to enter the Advanced
Setup menu.
• Use the Up/Down buttons to select Backup Settings; press the Right button to enter the
conrmation screen.
• Use the Up button to conrm your choice; the conrmation box will change to “X”.
• Use the Left button to conrm the backup.
• You will see a status message indicating that the backup is in progress, and another message
to conrm when it is completed.
• You may remove the USB drive and exit the Setup Menu as soon as the “Done” status message
appears.
Note: The XMC-2 has internal storage which can hold one conguration backup. Initiating the
Backup Conguration procedure with no USB ash drive inserted will prompt the XMC-2 to
save its conguration to internal memory. Initiating a Restore Settings procedure with no USB
drive installed will prompt the XMC-2 to restore the internal conguration backup le - if one
exists.
Note: The XMC-2 stores a second copy of the conguration le in the same location as the
original for safety purposes; this le is a duplicate of the current backup le; it is NOT a backup
of the previous conguration.
Page 88
Page 95

Care and Maintenance
Restoring a Conguration Backup to the XMC-2
The Restore Settings feature on the RMC-1 allows you restore a previously saved conguration from a
USB drive.
Note: RESTORING A SAVED CONFIGURATION WILL REMOVE/DELETE THE CURRENT
CONFIGURATION. If you are unsure about whether you wish to do this, you may wish to save
the current conguration - on a dierent USB ash drive - rst.
Note: It is perfectly acceptable to use the same USB drive for a rmware update le and a
conguration backup.
Note: In order to restore a conguration to the XMC-2, the le containing it must be stored in
the default location on the USB drive, and must have the default e name. If you are managing
multiple conguration les, be sure to put the one you want in the correct location, and rename
it to the default name, before proceeding.
Note: The XMC-2 has internal storage which can hold one conguration backup. Initiating
a Restore Settings procedure with no USB drive installed will prompt the RMC-1 to use the
internally stored conguration le - if one exists.
To restore a conguration to your XMC-2:
• Insert the USB drive containing your saved conguration le into the USB port on the front or
back of the XMC-2.
• Press the Menu button.
• Use the Up/Down buttons to select Setup; press the Right button to enter the Setup menu.
• Use the Up/Down buttons to select Advanced; press the Right button to enter the Advanced
Setup menu.
• Use the Up/Down buttons to select Restore Settings; press the Right button to enter the
conrmation screen.
• Use the Up button to conrm your choice; the conrmation box will change to “X”.
• Use the Left button to conrm the backup.
• You will see a status message indicating that the restore is in progress, and another message
to conrm when it is completed.
• You may remove the USB drive and exit the Setup Menu as soon as the “Done” status message
appears.
Note: Unless otherwise instructed, you do NOT have to reset your XMC-2 to factory defaults
after restoring a stored conguration.
Note: Restoring a saved conguration will restore all SETTINGS; however certain STATUS
information will be lost, which may cause it to appear as if settings were lost. For example, if
you restore a conguration that designates one or more Inputs as Last Used, then the Inputs
themselves will be congured as Last Used, but the XMC-2 won’t remember what mode was
used last for that Input and signal type; and so it will have to “relearn” your preferences for
each Input congured that way.
Note: Dirac Live for Emotiva Correction Filters are NOT part of the stored conguration.
Page 89
Page 96

Care and Maintenance
Performing a Factory Reset on the XMC-2
The Factory Reset feature on the XMC-2 allows you restore all settings to their default factory
conguration.
Note: Performing a Factory Reset restores all current settings on your XMC-2 to their factory
default settings, but does NOT erase the internal conguration backup le stored on the XMC-2
- if one exists.
Note: While the speaker conguration in the Dirac Speaker Preset will be cleared if you perform
a Factory Reset on your XMC-2, the actual Dirac Correction Filters currently stored on your
XMC-2 will NOT be deleted.
Note: A Factory Reset is used to restore your XMC-2 to its factory default conguration. It is NOT
necessary to perform a Factory Reset after performing a Restore Settings. It is NOT necessary to
perform a Factory Reset after performing an Update Firmware - unless otherwise noted in the
instructions you receive with the update le or from Emotiva Technical Support.
To perform a Factory Reset on your XMC-2:
• Press the Menu button.
• Use the Up/Down buttons to select Setup; press the Right button to enter the Setup menu.
• Use the Up/Down buttons to select Advanced; press the Right button to enter the Advanced
Setup menu.
• Use the Up/Down buttons to select Factory Reset; press the Right button to enter the
conrmation screen.
• Use the Up button to conrm your choice; the conrmation box will change to “X”.
• Use the Left button to conrm the reset.
• You will see a status message indicating that the Factory Reset is in progress, and another
message to conrm when it is completed.
• You may exit the Setup Menu as soon as the “Done” status message appears.
Page 90
Page 97

Troubleshooting
Troubleshooting
Problem: My XMC-2 won’t respond to the remote control or the front panel controls.
Reason: Your XMC-2 has no power.
• Conrm that the rear panel Power switch in turned On.
• Conrm that the XMC-2 is plugged into an active outlet.
• Check main fuse in the XMC-2.
• Check internal fuses in the XMC-2.
Problem: My XMC-2 won’t respond to the remote control (but the front panel
controls work ne).
Reason: Your remote control isn’t working.
• Conrm that your remote control has good batteries in it.
• If you’re using an IR eye or repeater, conrm that it is congured correctly and located in a
position where it isn’t blocked or being ooded by another IR light source.
Problem: My XMC-2 takes a long time to start up.
Problem: When I turn on the rear panel Power switch, my XMC-2 turns On, goes
through a startup routine, then returns to Standby mode; this takes too long.
Reason: You have the Standby mode on your XMC-2 set to Use Least Power so the XMC-2
has to boot up every time you turn it on.
• Set the Standby mode to Video Remains On.
Problem: When I use the Mode Up/Down buttons on the remote control or the front
panel, Reference Stereo Mode isn’t there.
Reason: If your front speakers are set to Small then Reference Stereo Mode has to be congured in the
Setup Menu.
• In the Setup Menu, congure the Input you’re using to use Reference Stereo as it’s default
mode. (For each input, you can set separate default modes for 2 channel and surround sound
signals; the default setting for both is “Last Used”.
Problem: The Standby button on my XMC-2 blinks whenever I use any remote control
near it, even the one for some other piece of equipment; is something wrong?
Reason: Because the XMC-2 can act as a repeater for signals from any remote control, it listens to all
IR remote control signals, and the Standby button blinks whenever the XMC-2 is receiving any remote
control signal.
• This is normal.
Page 91
Page 98

Troubleshooting
Problem: It seems like I have to set the Volume on my XMC-2 to a much higher/lower
number than I did yesterday to get the same output volume.
Reason: The audio processors in the XMC-2 have a feature called normalization; if you adjust the
Tone Trims or Level Trims in such a way that the result is to raise the overall gain, the XMC-2 will use
its internal master gain control to ensure that digital audio signals aren’t clipped. Because this only
happens while you’re changing the settings, it doesn’t aect the dynamics of the music in any way, but
it may alter the Volume setting required to produce a specic output level.
• This is normal.
Note: Normalization is a static setting that aects only the overall gain of the XMC-2 (similar
to the Master Gain setting on an equalizer), and is necessary to ensure that excessive boost
applied by user conguration settings won’t cause the XMC-2 to clip loud passages in the music.
Normalization is applied at the time you make each user level or trim setting. It does NOT aect
the dynamics or dynamic range of the music.
Problem: My XMC-2 seems to be acting oddly; sometimes the Volume control doesn’t
work, or the XMC-2 urns itself On of O when I switch the TV or my Blu-Ray player
On.
Reason: CEC is a remote control protocol supported to varying degrees by many TVs and Blu-Ray
players. CEC is intended to provide a convenient way for some devices to control others; for example,
to allow your Blu-Ray player to tell the XMC-2 to switch On when you insert a disc and press Play.
Dierent vendors may refer to CEC by dierent names and, unfortunately, implementations vary and
not everyone follows the same standard. Your XMC-2 ships with its CEC options disabled by default, but
CEC commands exchanged between other devices may still cause problems.
• Disable CEC in your other devices. (Most TVs and many Blu-Ray players have some CEC
features). You may have to look online, or consult the manufacturers of your other devices, to
determine what they call CEC on their devices. Alternately, you can simply disable any “remote
control” features on other equipment that you don’t use.
• (We are specically aware of CEC issues when using the XMC-2 with Oppo model BDP-203
and BDP-205 Blu-Ray players, and we strongly suggest disabling CEC support on them.)
Problem: The audio takes a long time to start after I switch inputs on the XMC-2.
Reason: The time it takes for the XMC-2 to lock onto a new incoming signal and start decoding audio
is determined by both hardware and rmware. We are constantly working to improve the future
performance of the XMC-2.
If none of these simple suggestions eliminates your problem, please contact Emotiva Technical
Support, at 1-877-366-8324, where a real live person will be happy to get you up and running.
Page 92
Page 99
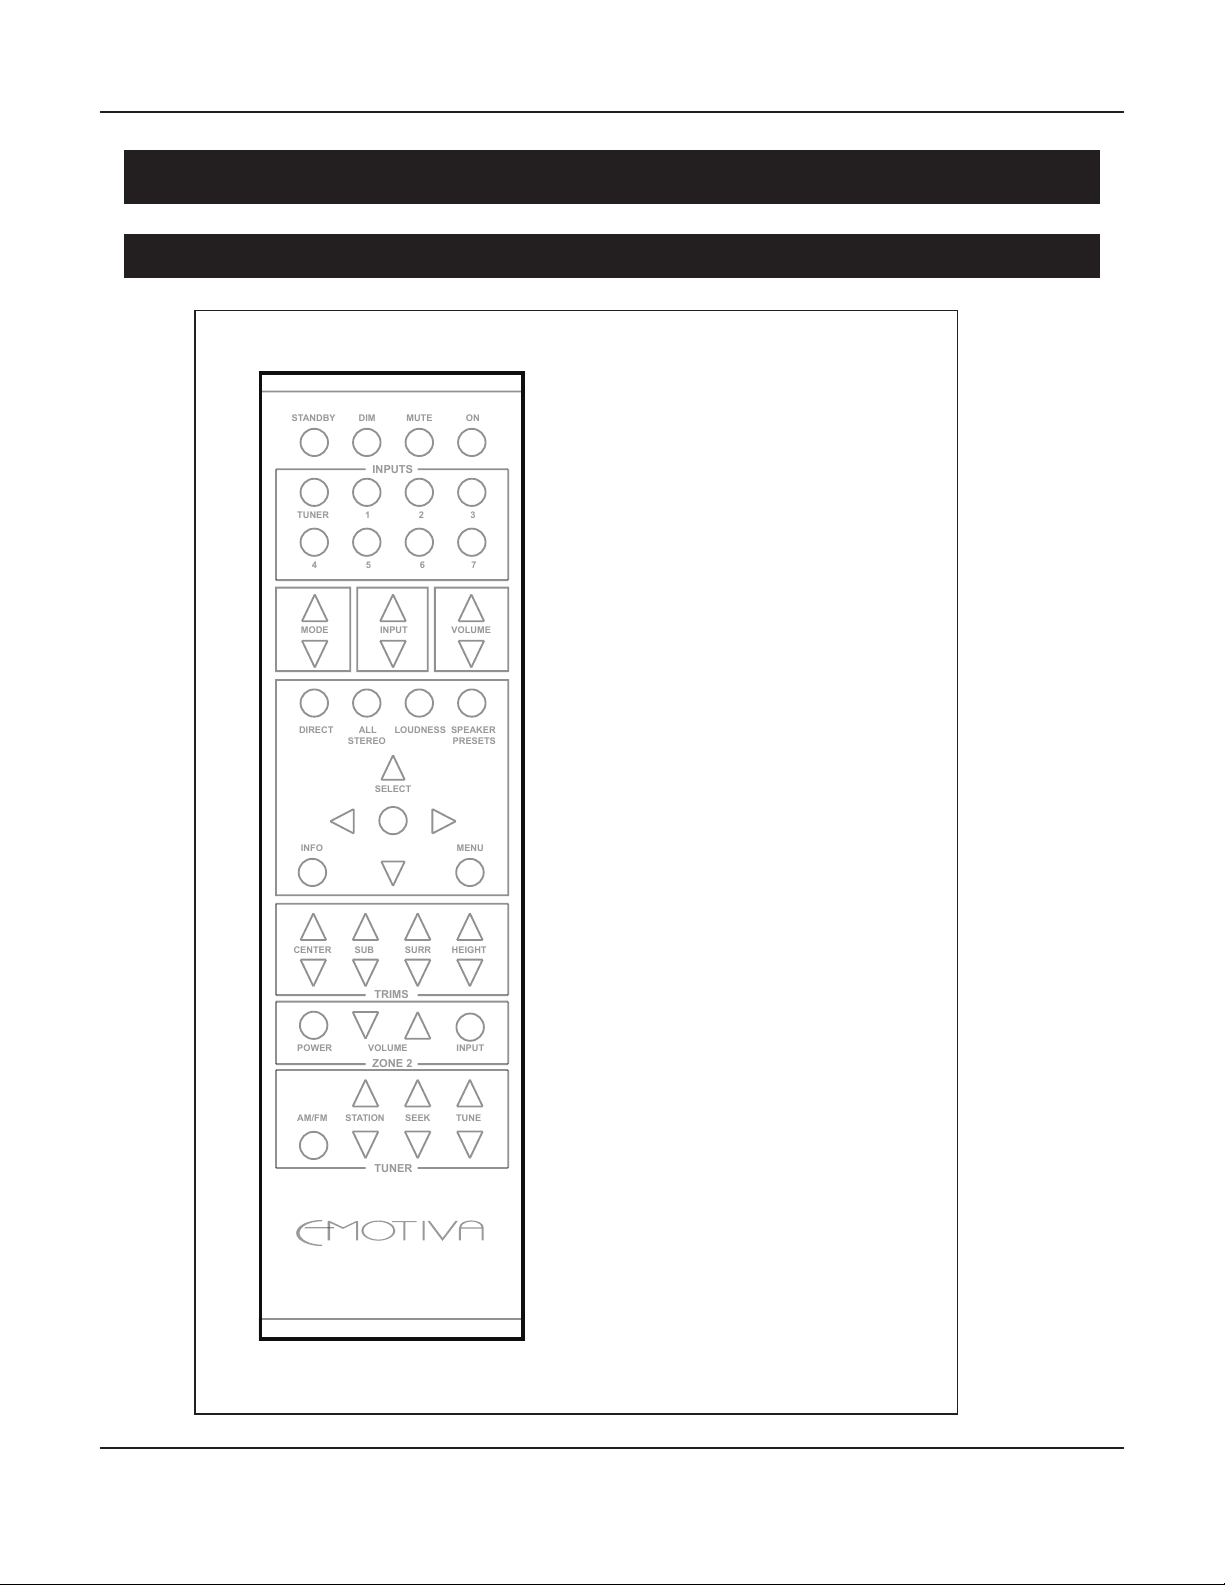
Appendices
STANDBY DIM MUTE ON
INPUTS
ZONE 2
TUNER
TUNER 1 2 3
4 5 6 7
MODE INPUT VOLUME
DIRECT ALL LOUDNESS SPEAKER
STEREO PRESETS
SELECT
INFO MENU
CENTER SUB SURR HEIGHT
POWER VOLUME INPUT
AM/FM STATION SEEK TUNE
TRIMS
Appendices
XMC-2 Infrared (IR) Remote Control Codes
80 81 C3 C2
84 85 C7 C6
88 89 CB CA
8C 8D CE
90 91 D2
94 95 D7 D6
DB
98
DA
99
9C DE
9D
8F 83 87 8B
CD C1 C5 C9
CC C0 C4 C8
XMC-2
IR Remote Control Codes
Product ID (HEX) 0x79
82 86 8A
8E CF DF D3
Page 93
Page 100
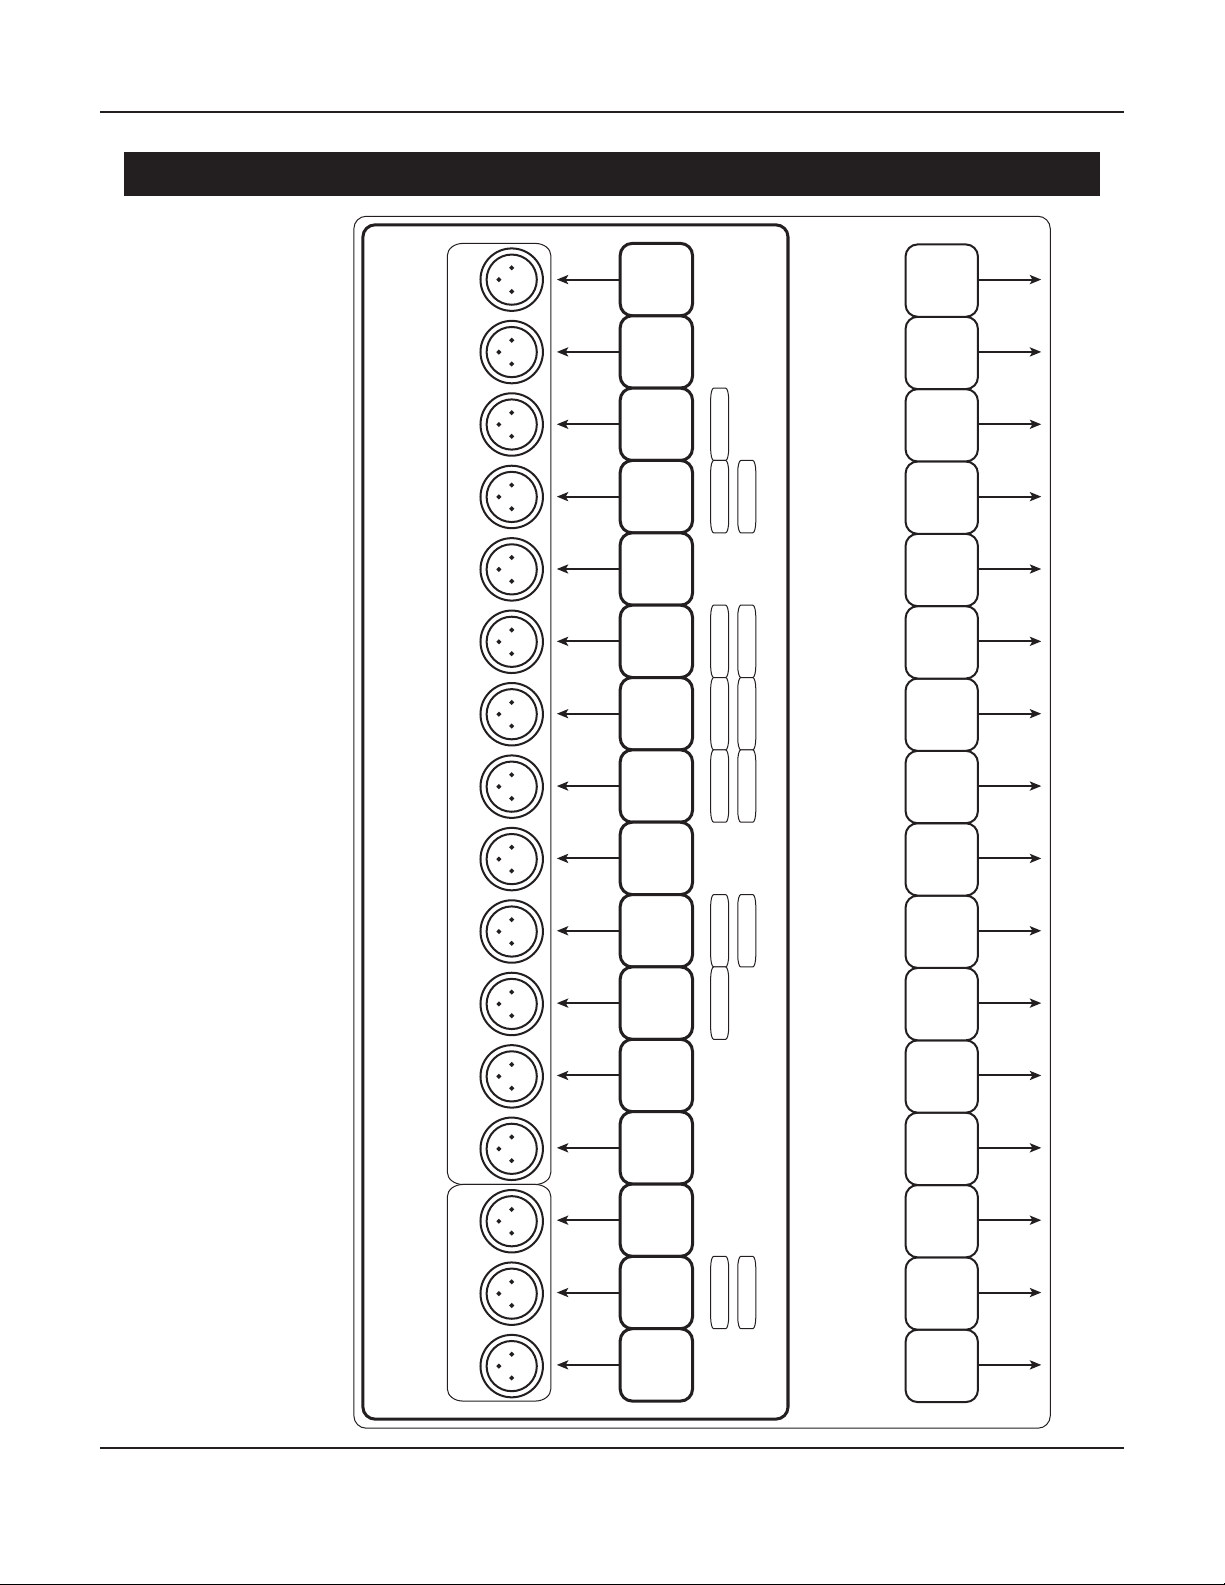
Appendices
XMC-2 Main Outputs (detail and over-the-top views)
RR HEIGHT RF HEIGHT R BACK R SURR R WIDTH R FRONT CENTER L FRONT L WIDTH L SURR L BACK LF HEIGHT LR HEIGHT
Use this view if you are looking at the rear panel of your XMC-2.
REAR VIEW
Height
Rear
Height
Front
Surround
Back
Surround
Width
Front
(Front)
Front
Right
Right
Right
7.1
Right
Right
Right
Center
Left
7.17.17.17.1 7.1 7.1 7.1
5.15.15.1 5.1 5.1 5.1
(Height)
Left
Sub
Center
Sub
(Height)
Right
Sub
Height
Rear
Left
This view will help you identify the outputs on your XMC-2 if you are looking over the top of the unit.
Height
Front
Left
Surround
Back
Left
Surround
LOOKING OVER THE TOP
Width
Left
Left
R SUB/HEIGHT CENTER SUB L SUB/HEIGHT
Width
Surround
Surround
Back
Height
Front
Height
Rear
(Height)
Sub
Sub
(Height)
Sub
Left
Left
Left
Left
Left
Right
Center
Left
Front
Left
(Front)
Center
Right
Front
Width
Right
Surround
Right
Surround
Back
Height
Front
Height
Rear
Right
Right
Right
Page 94
 Loading...