

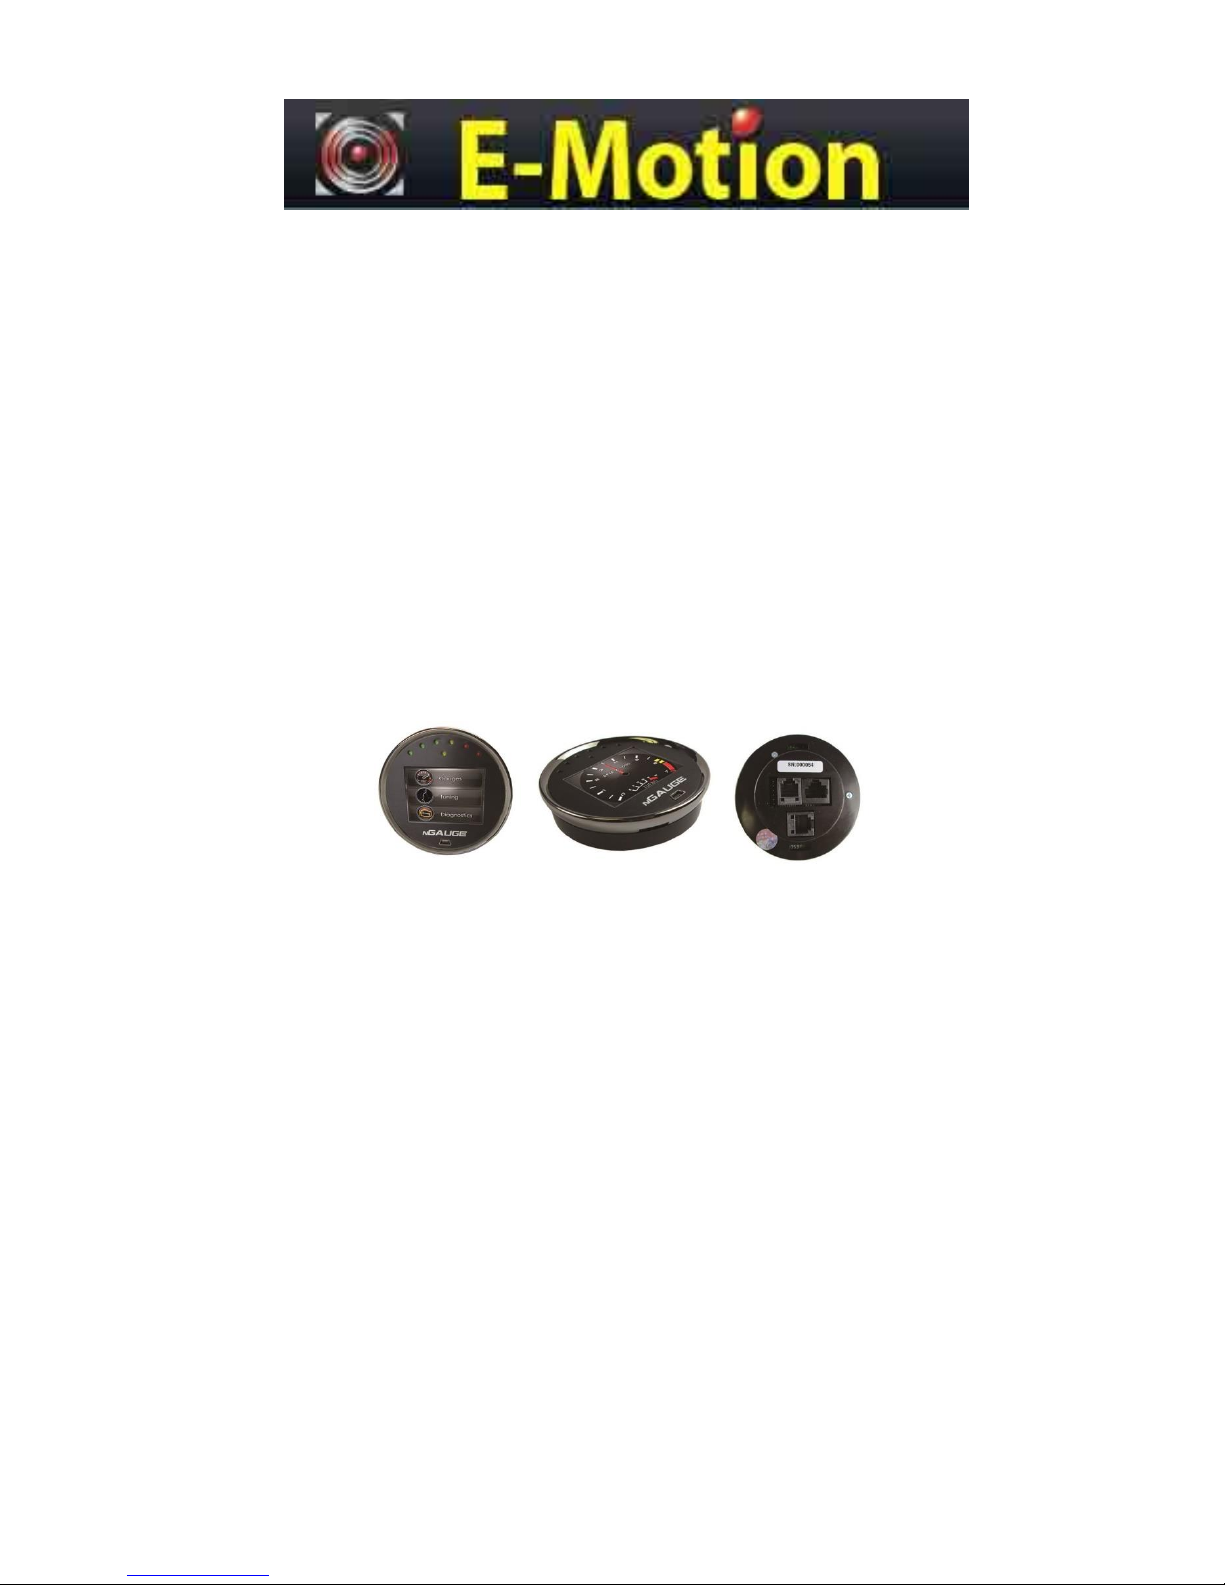
nGauge
Instruction Manual
v1.14

nGauge Instruction Manual v1.14 | © 2017 E-Motion Products, LLC 1
Table of Contents
List of Revisions ...................................................................................................................... 3
Important Notes ...................................................................................................................... 4
Pre-Installation Notice ............................................................................................................ 5
1 Installation ............................................................................................................................ 5
1.1 Cable Routing ................................................................................................................................... 5
1.2 Attaching Windshield Mount ........................................................................................................... 5
1.3 SD Memory Card .............................................................................................................................. 5
2 Basic Operation .................................................................................................................... 6
2.1 Menu Navigation .............................................................................................................................. 6
2.2 New Vehicle Setup/Find Signals ....................................................................................................... 6
3 Gauge Setup & Navigation ................................................................................................... 7
3.1 Navigating Gauges ............................................................................................................................ 7
3.2 Assign a Signal to a Gauge ................................................................................................................ 7
3.3 Change a Signal Display .................................................................................................................... 7
3.4 Set Gauge Low Warning / High Warning-Optional .......................................................................... 7
3.5 Set Minimum/Maximum/Scaling (Round Gauges Only) .................................................................. 8
3.6 Data Logger ...................................................................................................................................... 9
3.7 Using Zeitronix Products ................................................................................................................ 10
3.8 Data Logging in Gauges .................................................................................................................. 11
4 Diagnostic Code Reader ..................................................................................................... 12
5 Customizing Your nGauge .................................................................................................. 13
5.1 Installing Files From SD Card .......................................................................................................... 13
5.2 Installing Files From PC or MAC ..................................................................................................... 13
5.3 Adjusting Standard/Metric Units ................................................................................................... 14
5.4 Display Brightness .......................................................................................................................... 14
5.5 Default Power-up Screen ............................................................................................................... 14

nGauge Instruction Manual v1.14 | © 2017 E-Motion Products, LLC 2
5.6 Sleep/Wake Settings ...................................................................................................................... 14
5.7 Reset Settings ................................................................................................................................. 15
5.8 Touchscreen Calibration................................................................................................................. 15
6 nGauge Analog Inputs ........................................................................................................ 16
6.1 Connections and Wiring ................................................................................................................. 16
6.2 Analog Input Driver Setup .............................................................................................................. 16
7 Updating nGauge ................................................................................................................ 18
Appendices ............................................................................................................................ 19
Appendix A: Accessory Cable Pin Out .................................................................................................. 19
Limited Warranty ................................................................................................................... 21
nGauge Instruction Manual v1.14 | © 2017 E-Motion Products, LLC 3
LIST OF REVI SI ONS
Revision
Date
Chapters
Comments
1.9
2016-03-03
All
Initial Indexed Release
1.10
2016-03-29
All
Initial Release for website
1.11
2016-04-14
All
Corrected company name
1.12
2016-05-12
5.4, 5.6, 5.7
Added Sleep/Wake, and Reset Settings sections
1.13
2016-07-28
5.4, 3.4, 3.5
Added Round Gauge specifics
1.14
2017-09-27
5.8
Added Touch Calibration section
nGauge Instruction Manual v1.14 | © 2017 E-Motion Products, LLC 4
IMPORTANT NOTES
IMPORTANT!
THIS IS A HIGH PERFORMANCE PRODUCT, USE AT YOUR OWN RISK
Do not use this product until you have carefully read the following terms and conditions for the use of this product. The installation of
this product indicates the BUYER has read and understands this agreement and accepts its terms and conditions. This agreement takes
precedence.
DISCLAIMER OF LIABILITY
E-Motion and its successors, distributors, jobbers, and dealers (hereafter SELLER) shall in no way be responsible for the product’s proper
use and serviceability.
THE BUYER HEREBY WAIVES ALL LIABILITY CLAIMS.
The BUYER acknowledges that he/she is not relying on the SELLER’s skill or judgment to select or furnish goods suitable for any
particular purpose and that there are no liabilities which extend beyond the description on the face hereof and the BUYER hereby
waives all remedies or liabilities, expressed or implied, arising by law or otherwise, (including without any obligations of the SELLER with
respect to fitness, merchantability, and consequential damages) or whether or not occasioned by the SELLER’s negligence. The SELLER
disclaims any warranty and expressly disclaims any liability for personal injury or damages. The BUYER acknowledges and agrees that
the disclaimer of any liability for person injury is a material term for this agreement and the BUYER agrees to indemnify the SELLER and
to hold the SELLER harmless from any claim related to the item of the equipment purchased. Under no circumstances will the SELLER be
liable for damages or expenses by reason of use or sale of any such equipment. The SELLER assumes no liability regarding the improper
installation or misapplication of its products. It is the installer’s responsibility to check for proper installation and if in doubt, contact the
manufacturer.
IN THE EVENT THAT THE BUYER DOES NOT AGREE WITH THIS AGREEMENT: THE BUYER MAY PROMPTLY RETURN THIS PRODUCT, IN A
NEW AND UNUSED CONDITION, WITH A DATED PROOF OF PURCHASE, TO THE PLACE OF PURCHASE FOR A FULL REFUND. THE
INSTALLATION OF THIS PRODUCT INDICATES THAT THE BUYER HAS READ AND UNDERSTANDS THIS AGREEMENT AND ACCEPTS ITS
TERMS AND CONDITIONS.
Warning: Minnesota and California state laws restrict the method of attachment and placement of objects to the
windshield and side windows of motor vehicles (See Minnesota Statutes 2005, Section 169.71 and California Vehicle
Code Section 26708(a)). E-Motion does not take any responsibility for any fines, penalties, or damages that may be
incurred as a result of disregarding the laws and statutes of the jurisdictions in which a nGauge is operated. Similar laws
may apply within your province or state. Please verify your provincial or state laws prior to installation.
Warning: When mounting the nGauge to the windshield, place the device in a location where it does not obstruct the
driver’s view of the road and does not interfere with vehicle controls and safety devices or the safe operation of the
vehicle.
Attention: Onstar subscribers may notice an interruption in Onstar diagnostic services while using OBD II scan tool
devices, including nGauge. Normal operation will resume once the device has been removed from the OBD II port.

nGauge Instruction Manual v1.14 | © 2017 E-Motion Products, LLC 5
PRE-INSTALLATION NOTICE
When reflashing the engine controller, we strongly recommend using an external battery charger or booster. If the battery voltage
gets too low during a reflash, your engine controller may be damaged, which can be time consuming and costly to repair.
1 INSTALLATION
1.1 CABLE ROUTING
The nGauge OBD II cable must be routed so that it does not interfere with safe operation of the vehicle.
Cable routing tips:
• Find the OBD II connector first and work the cable to where nGauge is to be mounted on the windshield.
• Route the nGauge OBD II cable between interior panel grooves to hold the cable as well as conceal it.
• Use wire or zip ties to bundle any excess cable.
Cable routing “Don’ts”
• Don’t let the cable dangle by your feet.
• Don’t let the cable hang free.
• Don’t allow the cable to be near the steering wheel and any steering column controls.
• Don’t mount the cable in a way that puts stress on the connector on the back of the nGauge. This includes routing the cable at
angles other than directly out the back of the mount. That connector can be broken off when too much physical force is
applied. Any damage caused by improper cable routing is not covered under the nGauge limited warranty.
1.2 ATTACHING WINDSHIELD MOUNT
Mount the nGauge on the windshield in a spot that does not obstruct the view of the road or in any way that interferes with the safe
operation of the vehicle.
Mounting Suggestions:
• Mount the nGauge as low to the dashboard as possible.
• Mounting to the left or in the middle works well.
• It may be illegal to mount the nGauge on the windshield in some states.
1.3 SD MEMORY CARD
Always insert and remove the memory card with the nGauge powered off.
Insert the card with the gold contacts facing towards the chrome ring. Press the card into the nGauge until a click is heard. If the card
sticks out at all, it has not been pushed in all the way. Using the black plastic spudger eases installation and removal of the card.
To remove, press the card in until a click is heard. Release and the card will eject enough to grab it.

nGauge Instruction Manual v1.14 | © 2017 E-Motion Products, LLC 6
2 BASIC OPERATION
2.1 MENU NAVIG ATION
When nGauge first starts up, a splash screen will appear. It will take a few seconds to start up.
The [√] button advances the screen to the next menu.
The [x] button returns the screen to the previous or main menu.
The home screen contains Gauges, Tuning and Diagnostics tabs.
2.2 NEW VEHICLE SETUP/FIND SIGNALS
The nGauge has been designed to be used on most 1996 and newer OBD II vehicles. Vehicles to which the nGauge is connected, will
typically offer a different set of parameters or signals available.
The New Vehicle setup:
1. Plug nGauge into the vehicle.
2. Turn the vehicle’s key to the on position. The engine does not need to be started.
3. From the nGauge main menu, Tap [Gauges], tap [connect].
4. Tap [Select the correct make and model for your vehicle].
5. Follow the on-screen instructions. When nGauge lists how many signals were found, nGauge has finished.
6. Tap the [√] button to confirm the selection once scanning has completed.
7. Repeat steps 1-6 every time nGauge is connected to a new vehicle.

nGauge Instruction Manual v1.14 | © 2017 E-Motion Products, LLC 7
3 GAUGE SETUP & NAVIGATION
The nGauge offers the ability to monitor vehicle sensors for real time display and data logging. Data sample rates will vary by vehicle.
This rate is a fixed amount and the total of active signals being monitored and logged will share this sample rate.
3.1 NAVIG ATING G AUGES
From the Main Menu tap [Gauges].
Tap on the [<] and [>] buttons to view other gauge display layouts.
3.2 ASSIGN A SIGNAL TO A GAUGE
Be sure the New Vehicle Setup (see section: 2.2 New Vehicle Setup/Find Signals) has been completed before assigning signals to a
gauge.
Ensure gauge is connected to vehicle through Gauges, Connect and Key is ON
1. Tap on the gauge region where the signal will be displayed.
2. Use the [<] or [>] to locate and select the signal you wish to monitor.
3. Tap [√] to save signal to nGauge.
3.3 CHANGE A SIGNAL DISPLAY
Ensure gauge is connected to vehicle through Gauges, Connect and Key is ON
1. Tap on the display tab
2. Use the [up] or [down] arrows to locate and select the attribute you wish to change.
3. Change the name, unit, color or high/low value range
4. Tap [√] to save signal to nGauge.
3.4 SET GAUGE LOW WARNING / HIGH WARNING-OP T IONAL
For the round gauges, the low and high warnings appear with fixed colors similar to a “redline” implementation. For the other gauges,
the value displayed by the gauge will change color when it reaches the warning thresholds. The color in the non-round gauges is
customizable via the Low/Normal/High Color selections in the Display menu.
To set a High/Low Warning:
1. Tap on the gauge where a High/Low Warning is to be set.
2. Tap [Display].
3. Tap on [High Warning] or [Low Warning].
4. Type in the desired upper or lower warning level number. Tap [+/-] to make the value negative.
5. Tap [√].
6. Tap [Return] to go back to the gauges.

nGauge Instruction Manual v1.14 | © 2017 E-Motion Products, LLC 8
3.5 SET MINIMUM/MAXIMUM/SCALING (ROUND G A U G E S O NL Y )
Both the small and big round gauges have customizable Minimum/Maximum and Scaling to accommodate PIDs of varying ranges. The
Minimum refers to the preferred low end value of the gauge, and the Maximum refers to the preferred high end value of the gauge.
The algorithm in the nGauge rounds user-entered values if necessary. The figure in this section shows the Round Gauge display and
how the Min/Max, Scaling, and Low/High Warnings are implemented.
The labels on the round gauges can be scaled, e.g. RPM x1000. The available scales are:
x1
x10
x100
x1000
When entering a Minimum/Maximum, the value entered must take account for the scaling set for that signal. For example, if desired
Maximum RPM is 8000, and the scale is x1000, the value entered would be “8”. There is a display box which includes the scale when
entering the value for Min/Max to prevent confusion. Note: Low and High Warnings are not affected by scaling and should be entered
as absolute numbers regardless of scale. Warnings are also unaffected by Min/Max changes.
To set a Minimum/Maximum:
1. Tap on the round gauge where a Min/Max is to be set.
2. Tap [Display].
3. Tap on [Minimum] or [Maximum].
4. Type in the desired upper or lower warning level number. The “true” value will be the number entry times the scaling which
appears to the right of the number entry.
5. Tap [√].
6. Tap [Return] to go back to the gauges.
To set the Scaling:
1. Tap on the round gauge where a Scale is to be set.
2. Tap [Display].
3. Tap on [Scaling].
4. Choose the desired scaling option from the list.
5. Once the desired Scale is tapped, the nGauge returns to the gauges with the new scale loaded
Figure 1: Round Gauge Display

nGauge Instruction Manual v1.14 | © 2017 E-Motion Products, LLC 9
3.6 DATA LOGGER
The nGauge will monitor and log all signals shown on the active gauge screen. It is also possible to monitor signals not shown on the
active gauge screen. This allows the user to view only the most valuable data, while still being able to review all the vehicle data in the
log file. The Global Data Logger can silently monitor up to 16 signals and will be logged with the active gauge screen data.
Using a tuner supplied config (.dle) file
1. Tap on [Diagnostics] from the Main Menu.
2. Tap on [ Datalogging].
3. Use [<] or [>] to select proper datalog config file downloaded to SD card from your tuner
4. Tap on [√] to accept
5. nGauge will connect
6. Tap on either box on the left side of the display to start logging. Logging is indicated by LED activity in the light center ed
directly above the screen.
7. To stop datalogging, either exit out of the datalogger using the [x] button, or tap again on either box on the left side of the
display. The LED activity should cease
File will be stored on the SD card.
Creating your own datalogged pids to record to SD card.
1. Tap on [Gauges] from the Main Menu.
2. Tap on [Connect]
3. Tap screen and a selection menu will appear
4. Select desired signal
5. Use [<] or [>] to select the desired signals
Tap the star in the left corner to datalog that signal.

nGauge Instruction Manual v1.14 | © 2017 E-Motion Products, LLC 10
3.7 USIN G Z E ITRONI X P RODUCTS
If you are going to use a Zeitronix wideband, the nGauge comes with a Zeitronix driver that uses the serial port to connect digitally to
the Zt-2 controller. This is the preferred way to connect the Zt-2 wideband as compared to connecting the wideband voltage to the
nGauge Analog Input. This allows the nGauge to display all of the Zt-2 signals, including the wideband O2 reading.
• Connect the four wire RJ-12 cable to the Zeitronix port on the back of the nGauge (see Appendix A).
• IMPORTANT: The Zt-2’s USER2 channel may be configured by using the Zeitronix ZDL software on a PC, while the Zt-2 is
connected to the PC through a serial port. When a temperature sensor is assigned to the Zt-2 USER2 input though ZDL
software, an internal pull-up resistor is automatically enabled. No external resistors are required on the Zt-2 USER2 input.
• If any Zeitronix temperature sensors are connected to the Zt-2 USER1 input, or the nGauge Analog-1 or Analog-2 ports,
those inputs require an external 1 K ohm pull up resistor to +5V (see Figure 1). Please see the Zeitronix web page for
further details.
Figure 2: 1kOhm Pull-Up Wiring for Zeitronix Temp Sensors to Zt-2 USER1 Input or nGauge Analog-1 or Analog-2 Ports
• Most Zt-2 signals are mapped to existing signals in the nGauge Analog Driver (for Zeitronix sensors connected to the
Analog-1 and Analog-2 inputs), or in the Zeitronix Driver (for sensors connected to the Zt-2). Signal calculators will be
needed for any unsupported sensors.

nGauge Instruction Manual v1.14 | © 2017 E-Motion Products, LLC 11
3.8 DATA LOGGING IN GAUGES
The nGauge can log and save all information represented on the gauges from the active screen. The information can be saved as a
Microsoft Excel *.csv directly to the inserted SD memory card.
To begin data logging:
1. Assign signals to the gauges to data log (see Chapter 3.5, “Creating your own datalogged pids to record to SD card”).
2. Tap on [Start Log]. The signals will be saved to the SD card with a timestamp. The signals will continue to be displayed on the
screen even as they are being saved to the card. Once a log has begun the gauge screen cannot be changed.
3. To log signals you don’t wish to put into a gauge, select the favorites star in the signal list.
4. Tap [End Log] when finished logging session. The data is now saved to the memory card.
Each time a data logging session is started and ended, nGauge saves one file to the SD memory card in a directory called “logs.” Each
saved file has a log prefix. The default prefix is “log”, and will be changed by a value of +1 as new logs are added. (ex log_001.csv)
To start the log x:
1. From the Main Menu, tap on [Gauges].
2. Tap on [Connect]
3. Tap on a signal
4. Tap [Start Log]
5. File will save to SD card in numerical order with a time stamp
6. A red record button will be shown on the center of the screen confirming the nGauge is logging, and the LED in the center
directly above the screen will also show confirmation of logging.
To view log files:
1. Remove the SD memory card from the nGauge.
2. Place the memory card into a SD card reader and attach to your PC.
3. Open the contents of the card. Log files are saved in the “logs” directory on the card. Log files may be opened in Microsoft
Excel or any other spreadsheet program that accepts *.csv files.
Note: Auto brightness will not adjust while datalogging. Instead, whatever brightness was being used at the beginning of datalogging
will persist until datalogging is done, at which point the auto brightness resumes its normal activity without the need for further user
input.

nGauge Instruction Manual v1.14 | © 2017 E-Motion Products, LLC 12
4 DIAGNOSTIC CODE READER
To view and clear diagnostic trouble codes:
From the Main Menu tap on [Diagnostics]. This screen will appear:
Turn the vehicle’s key to the on position. The vehicle does not need to be running.
Tap diagnostics
Tap the down arrow to reach [Read Codes]. If the vehicle’s check engine light is on, diagnostic trouble code(s) (DTCs) will be displayed
along with a short description of each code.
Fix the diagnosed problem, or make note of it.
To clear the diagnostic trouble codes, tap [Clear Codes]. You will be asked to confirm that you want to clear the codes.
Note: Clearing codes does not solve any underlying vehicle issues.
Tap [Yes] to clear the code(s) and turn the check engine light off.
Tap [No] to leave the code(s) set and leave the check engine light on.

nGauge Instruction Manual v1.14 | © 2017 E-Motion Products, LLC 13
5 CUST OM I Z I NG YOUR NGAUGE
Custom background images are not customizable for the end user. This feature may be added in the future.
5.1 INSTALLING FILES FROM SD C ARD
Drag and drop the newest firmware .ng file from your pc to the SD card
Insert the SD into the nGauge as directed
From the Main Menu tap on [Diagnostics].
Select [Settings.]
Scroll down using the down arrow on the left to update from SD
Tap screen for [Update from SD]
nGauge will search SD card for newest firmware
Follow on screen prompts to update new firmware.
** Do not turn off key or unplug device during a firmware update*
Important note: The firmware update file must be named FIRMWARE-XXX.ng where XXX is the version number.
Do not delete your previous firmware’s files from the SD card until AFTER you update to the new firmware – they are still needed until
the new firmware is installed.
5.2 INSTALLING FILES FROM P C O R MAC
Connect PC to nGauge via mini USB cable
Select Diagnostics.
Scroll down and TAP [USB SD]
PC will “ding” once PC recognizes device
Open window with computer drives i.e. C:, D:, etc.
Identify the letter for nGauge.
Drag and drop the file onto the correct drive associated with the nGauge
Copy and Paste can also be used
Allow the file to transfer
After the file has transferred, use the PC’s function to “Safe Eject” the drive to make sure that all transfers have completed. Usually, you
can right-click on the nGauge’s drive icon and select “Safe Eject”.
Select settings within diagnostics
Press Update from SD
nGauge will search SD card for newest firmware
Follow on screen prompts to update new firmware.
** Do not turn off key or unplug device during a firmware update*
Important note: The firmware update file must be named FIRMWARE-XXX.ng where XXX is the version number.
Do not delete your previous firmware’s files from the SD card until AFTER you update to the new firmware – they are still needed until
the new firmware is installed.

nGauge Instruction Manual v1.14 | © 2017 E-Motion Products, LLC 14
5.3 ADJUSTING STANDARD/METRIC UNITS
nGauge offers the ability to automatically adjust a signal to the English standard or metric units.
To Change Units:
1. From the Main Menu tap [Setup], [Display], [Units].
2. Select the Units you wish to use and select [Ok].
3. All signals will be adjusted to the selected unit of measure.
5.4 DISPLAY BRIGHTNESS
1. Tap on [Diagnostics] menu
2. Tap on [Settings]
3. Tap on [Brightness]
4. Select the desired brightness level.
5.5 DEFAULT POWER-UP SCREEN
nGauge allows you to easily change which screen appears on initial power-up of the nGauge. This can help make it faster and easier to
navigate through the nGauge to find the functions you use most.
1. From the Main Menu, tap [Diagnostics]
2. Tap on [Settings]
3. Tap on [Startup Mode]
4. Select the item you’d like to be present on power-up. The current choices are “Main Menu” and “Gauges”.
The change will be seen the next time the nGauge is powered back on.
5.6 SLEEP/WAKE SETTINGS
The user can set the events desired to trigger sleep and wake of the nGauge.
1. From the Main Menu, tap [Diagnostics]
2. Tap on [Settings]
3. Tap on [Sleep/Wake]
4. Choose sleep mode (Never, Alternator On, Engine Running, Vehicle Data, Touch)
5. Wake Mode (Touch, Alternator On, Alternator Noise, or Engine Running)
6. Also adjustable are the following:
Idle Time: 5 to 300 seconds
On/Off Volts
Voltage Threshold
The change will be seen the next time the nGauge is powered back on.

nGauge Instruction Manual v1.14 | © 2017 E-Motion Products, LLC 15
5.7 RESET SETTINGS
nGauge settings can be restored to default using the Reset Settings function.
1. From the Main Menu, tap [Diagnostics]
2. Tap on [Settings]
3. Tap on [Reset Settings]
4. If you wish to reset the settings to factory default, tap on [√]
5. The nGauge will restart with default factory settings
5.8 TOUCHSCREEN CALIBRATION
The nGauge’s screen can be calibrated for touch with firmware v252 or later, using three predefined touch points. The specific
parameters of the calibration are stored on the SD card in a file named “touchcal”. When calibrating the screen, it is important to touch
the dots as precisely as possible to avoid causing accuracy issues. The spudger provided with the nGauge works best for this.
To reset or redo the touch calibration settings, there are several options:
1. Delete “touchcal” file off of the SD card, then restart the nGauge
2. Navigate to [Diagnostics], [Settings], [Calibrate Touch]
3. At the main menu (showing Gauges, Tuning, Diagnostics), tap and hold for 5 seconds
If touch accuracy issues are still present after recalibrating, or if the nGauge is unable to perform all these actions, please contact
support.

nGauge Instruction Manual v1.14 | © 2017 E-Motion Products, LLC 16
6 NGAUGE ANALOG INPUTS
nGauge has two analog inputs available on the accessory connector. They accept a 0-5v DC signal and are compatible with most
automotive sensors. These signals can be displayed on the gauge screens along with any other input. They can be rescaled from the 0-5v
scale into Fahrenheit, PSI, Air-Fuel ratios, or whatever the voltage represents. The analog inputs on nGauge have a 24.7 kilo ohm input
impedance and may not be accurate when connected to a device with a high output impedance. For example, a narrowband O2 sensor
output cannot be connected directly to an nGauge because the output impedance of the sensor is in the mega ohm range.
To use the two analog signals, settings are located under Diagnostics/Settings/Other Inputs.
A linear conversion is for measuring signals that have a constant input voltage change for a given change in what’s being measured. An
example is a sensor that has a 0.1V output change for every temperature degree it’s measuring. 3 terminal sensors that have a voltage
input, a voltage output, and ground are often linear sensors.
A non-linear conversion is for measuring signals that do not have a constant input change for a given change in what’s being measured.
An example is a NTC (negative temperature coefficient) type resistive temperature sensor, which is very common in vehicles. The NTC
temperature sensor will change resistance by a few ohms per degree at high temperatures and many thousands of ohms per degree at
cold temperatures. 2 terminal resistive temperature sensors are usually non-linear.
6.1 CONNECTIONS AND WIRING
Connect the analog input signal you wish to measure to either Analog In 1 or Analog In 2 on the nGauge. See Appendix A: Accessory
Cable Pin Out for the I/O cable wiring table.
6.2 ANALOG INPUT DRIVER SETUP
6.2.1 LINEAR AN AL OG DRIVER CORRECTION F A CTOR AND CORRECTION OFFSET
For this example, we will assume we have a Zeitronix Zt-2 wideband AFR sensor connected to the Analog #1 input. (Tip: For Zeitronix
products that support it, the Zeitronix digital serial output should be used with the nGauge Zeitronix driver instead [see Chapter 3.6],
because it is more accurate and easier to configure than using the analog input. This is just an example).
The documentation for the Zt-2 (2006+) describes its analog output as shown in Figure 2.

nGauge Instruction Manual v1.14 | © 2017 E-Motion Products, LLC 17
Figure 3: Linear Wideband Output Graph
We see the formula desired is 2*V+9.6. The factor of 2 is called the "Correction Factor" and the 9.6 is called the "Correction Offset".
Refer to the actual sensors user manual for Correction factor and offset values. This is a simple linear formula.
6.2.2 CONVERTING AN ANALOG VOLTAGE INTO P HYSIC A L U N ITS
Navigate to Diagnostics/Settings/Other Inputs. You can then select Analog channel 1 or 2. After selecting the channel, it will display a
screen where you can select from predefined conversions or “user” settings where you can specify the units, scale, offset, and number
of decimal places.
These Scaling Parameters are used when converting an analog signal into physical units:
• User Scale: How to scale the signal, see the “Correction Factor” in the previous section.
• User Offset: The offset for the signal, see the “Correction Offset” in the previous section.
• User Units: Physical units for the calculation. Any automatic Imperial/Metric occurs afterward. For example, if a calculation
results in °C the number could be automatically converted to °F before display. Use DegC for °C and DegF for °F.
• User Decimals: How many decimals to display. Leaving this blank or entering 0 will display 1.256 as 1. Entering 1 will display
1.256 as 1.3. Entering 2 will display 1.256 at 1.26.

nGauge Instruction Manual v1.14 | © 2017 E-Motion Products, LLC 18
7 UPDATING NGAUGE
Your nGauge’s software is field updateable. It can be downloaded from http://www.e-motionproducts.com in the “Support” area.
To update nGauge:
If your installed nGauge FW is v120 or later:
1. Be sure you have the correct version of firmware to install on the nGauge:
a. LUND customers: download the firmware from the LUND link on the support page.
b. All others: download from the "non-LUND" link on the support page.
2. Place firmware file onto your SD card, one of two ways:
a. Via USB to nGauge connection:
i. Connect nGague to PC via USB cable.
ii. Go to "Settings > USB SD" in your nGauge menus. nGauge should then be recognized as a drive by your PC.
iii. Place the downloaded firmware file on the root of your SD Card. Do not rename the file.
Older firmware files can stay.
iv. Go to Step 3.
b. Via SD Card inserted into PC (if you have a microSD adapter):
i. Remove SD Card from nGauge and insert into appropriate adapter to connect to PC.
ii. Place the downloaded firmware file on the root of your SD Card. Do not rename the file.
Older firmware files can stay.
iii. Remove the SD Card from your computer and insert it into your powered-down nGauge.
iv. Apply power to the nGauge.
v. Go to Step 3.
3. Update the firmware via "Diagnostics > Settings > Update from SD". Wait for process to complete.
4. New FW version should be displayed in "Diagnostics > Settings > Device Info".
a. If the update is unsuccessful or not found, repeat the procedure.
b. If the repeat fails, contact support@e-motionproducts.com.
If your installed nGauge FW is v119 or earlier:
1. Be sure you have the correct version of firmware to install on the nGauge:
2. Install two copies of the latest firmware on your SD card and leave all existing files
3. Name one FIRMWARE.ng and one Firmware-xxx.ng (Latest firmware #) and follow the v120 or later instructions.

nGauge Instruction Manual v1.14 | © 2017 E-Motion Products, LLC 19
APPENDICES
APPENDIX A: ACCESSORY CABLE PIN OUT
For nGauge serial numbers below 20,000:

nGauge Instruction Manual v1.14 | © 2017 E-Motion Products, LLC 20
For nGauge serial number 20,000 and up:

nGauge Instruction Manual v1.14 | © 2017 E-Motion Products, LLC 21
LIMITED WARRANTY
E-Motion LLC guarantees that every nGauge is free from physical defects in material and workmanship under normal use for one year
from the date of purchase. If the product proves defective during this warranty period, contact your nGauge distributor in order to
obtain a Return Authorization number and form. When returning a product, mark the Return Authorization number clearly on the
outside of the package and include a copy of your original proof of purchase and the form.
IN NO EVENT SHALL E-MOTION LLC LIABILITY EXCEED THE PRICE PAID FOR THE PRODUCT FROM DIRECT, INDIRECT, SPECIAL,
INCIDENTAL, OR CONSEQUENTIAL DAMAGES RESULTING FROM THE USE OF THE PRODUCT, ITS ACCOMPANYING SOFTWARE, OR ITS
DOCUMENTATION.
E-Motion LLC makes no warranty or representation, expressed, implied, or statutory, with respect to its products or the contents or use
of this documentation and all accompanying software, and specifically disclaims its quality, performance, merchantability, or fitness for
any particular purpose. E-Motion LLC reserves the right to revise or update its products, software, or documentation without obligation
to notify any individual or entity. Please direct all inquiries to: support@e-motionproducts.com .
Warranty is void if the nGauge case is opened.
Warranty is void if nGauge is used in a manner not consistent with reasonable care.
CONTACTS
Website: http://www.e-motionproducts.com
Email: support@e-motionproducts.com
 Loading...