

Page 1

quick start guide
TB3
Page 2

Copyright © 2013 eMotimo LLC
All Rights Reserved
Page 3
3 4
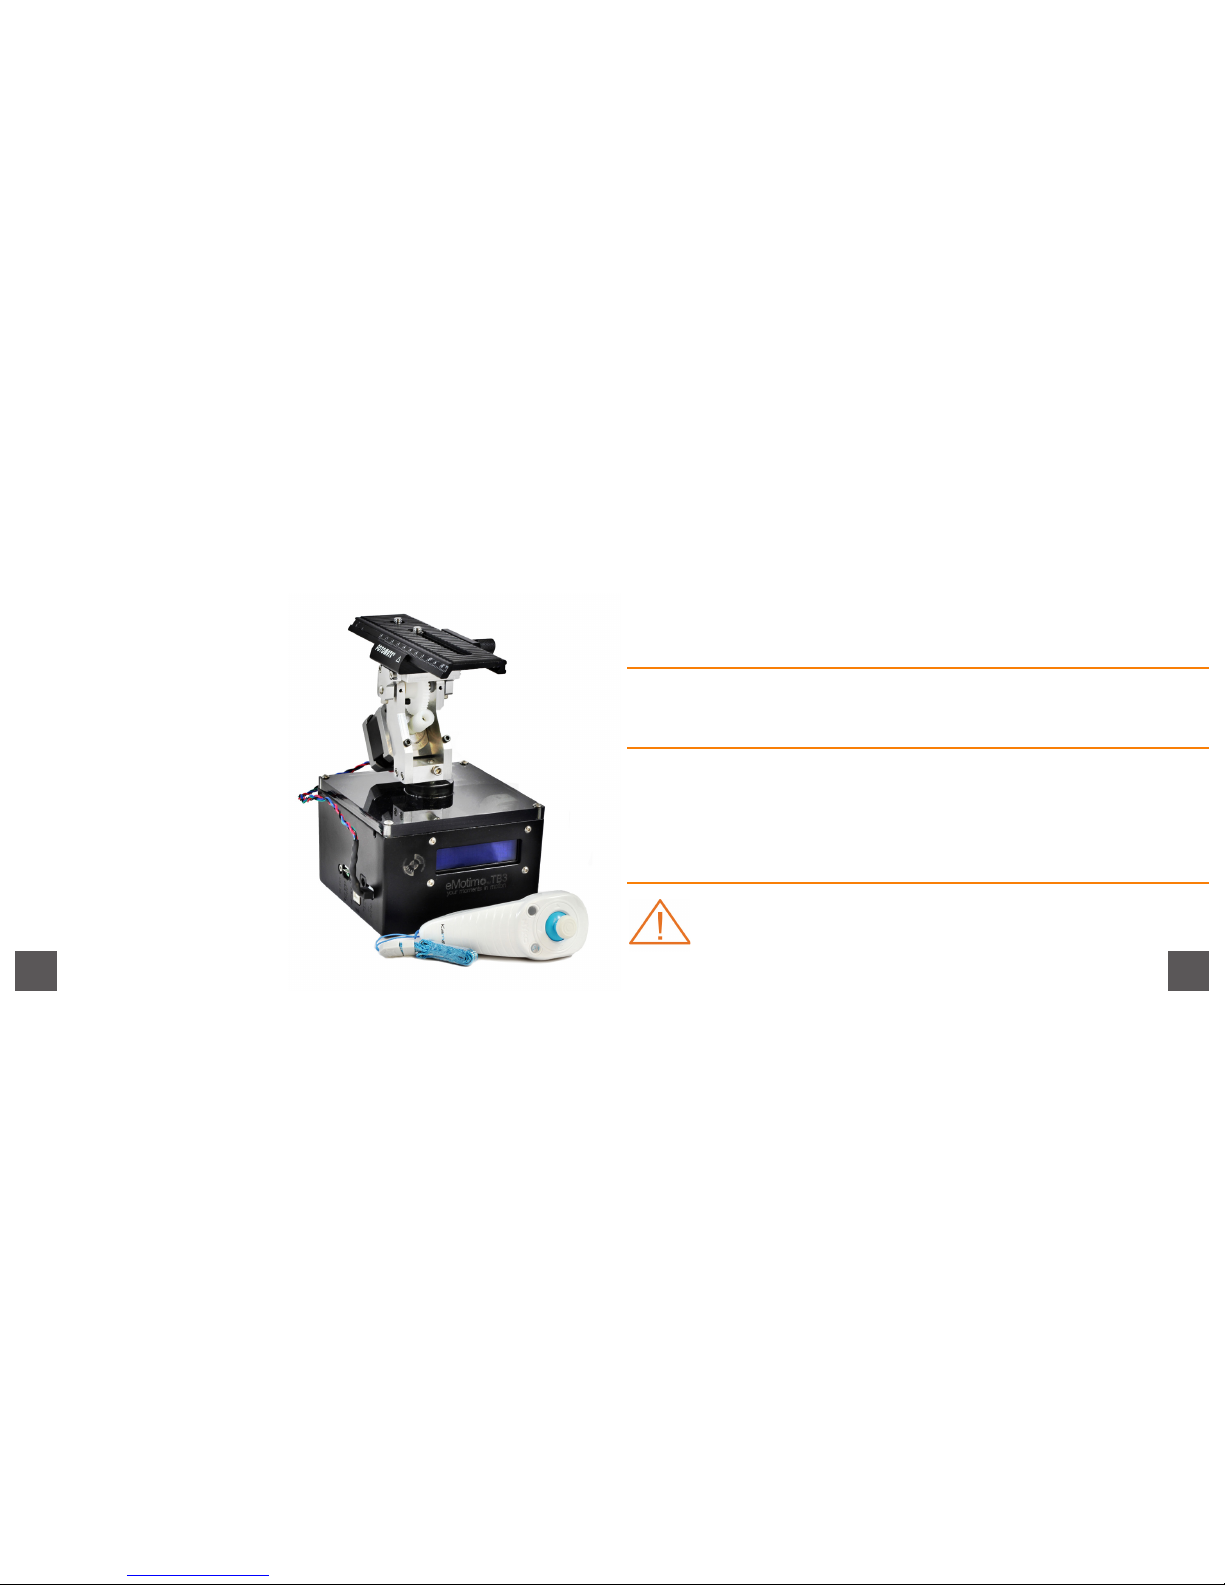
Congratulations on the
purchase of your new TB3!
Prepare to capture
your moments in motion
Follow the easy steps in this quick start guide to set up your
TB3 and begin shooting.
Warnings: You will nd this symbol next to all items that could
potentially damage your equipment.
Customer Service:
www.emotimo.com/forum
www.emotimo.com
[email protected]
Page 4
5 6
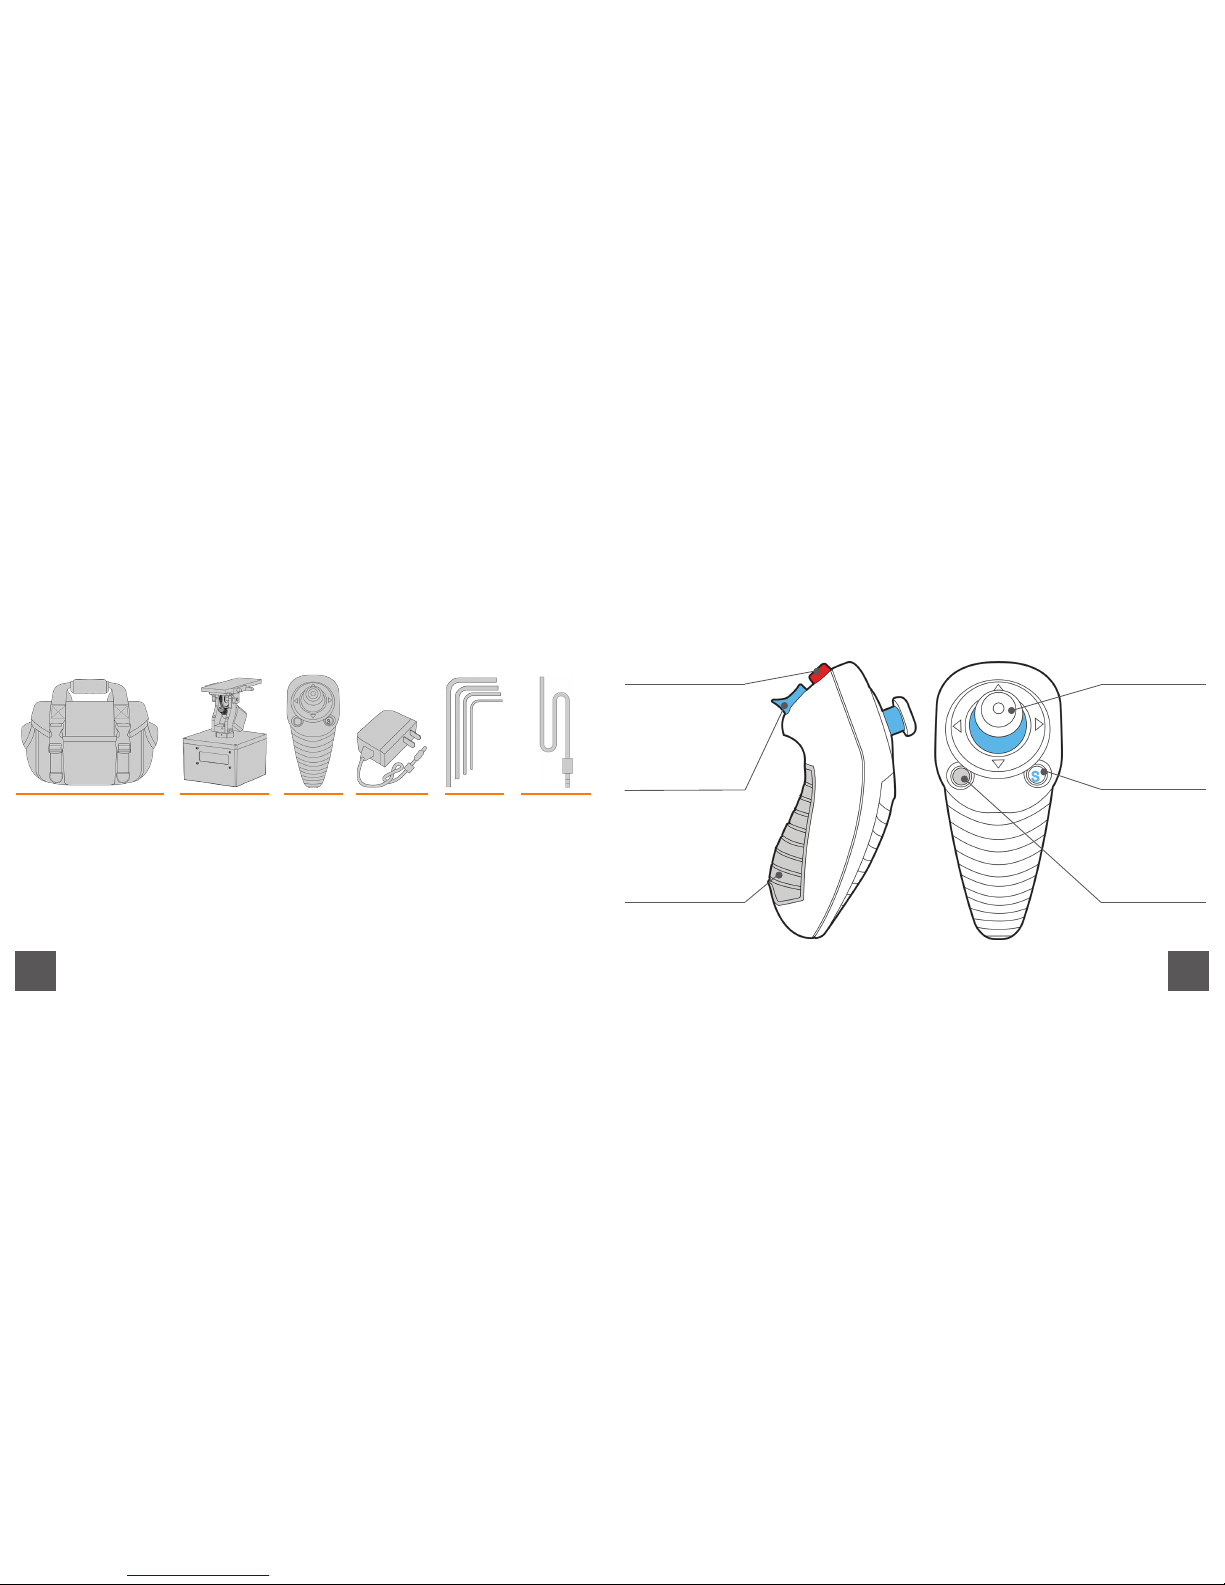
Included & needed for setup:
Camera
Shutter
Cable
Purchased
individually
(not
required for
video)
TB3Carrying Case Remote
Wired or
wireless
Tool Kit12V DC
Power
Source
Controls: remote features
C Button
Move forward
- Select
Z Button
Move backwards
- Reset
Battery
Power
Joystick
Move - tilt - pan
head
S Button
Pair Remote
LED
On / Off
Indication
Page 5
7 8
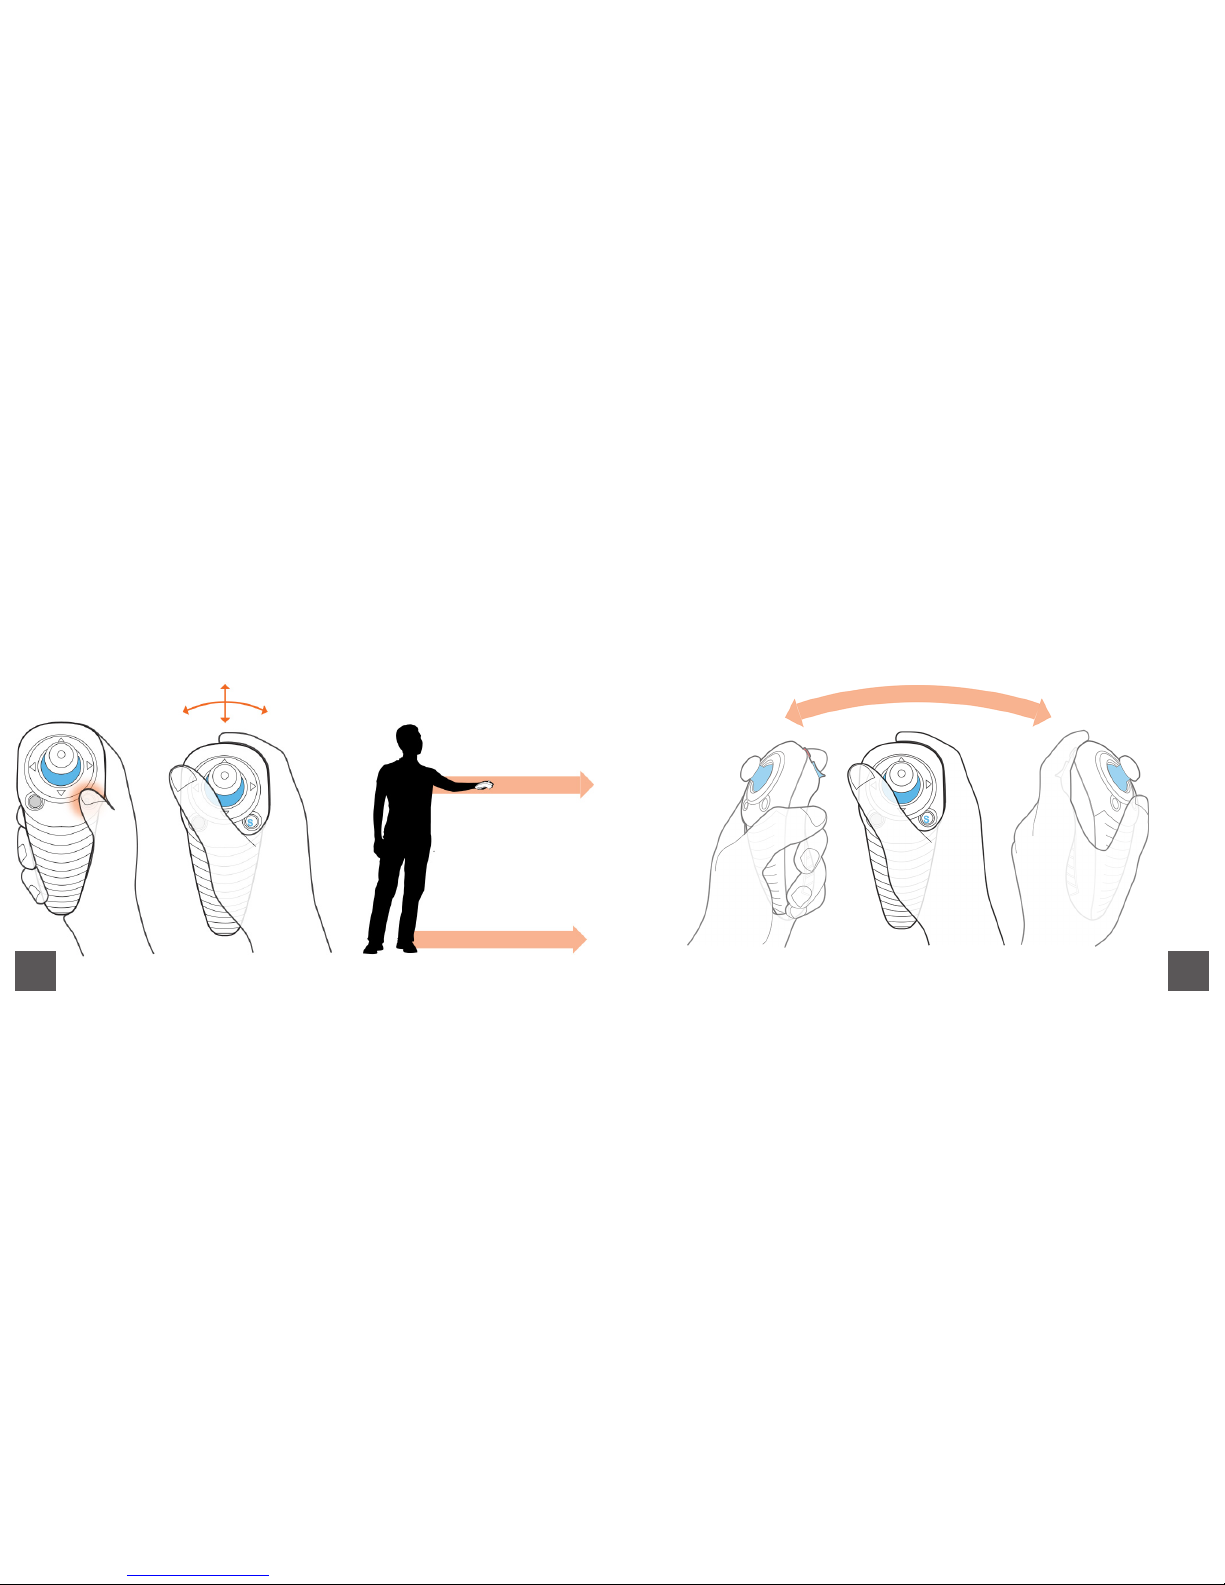
Controls: Remote in use Controls: Remote in use - 3rd axis
Control joystick with
thumb
Press “S” button to
pair remote to TB3
When using TB3, hold remote
parallel to ground
To control the 3rd axis (when using an auxillary motor) rock the
remote from side to side to move the auxillary motor
Page 6
9 10
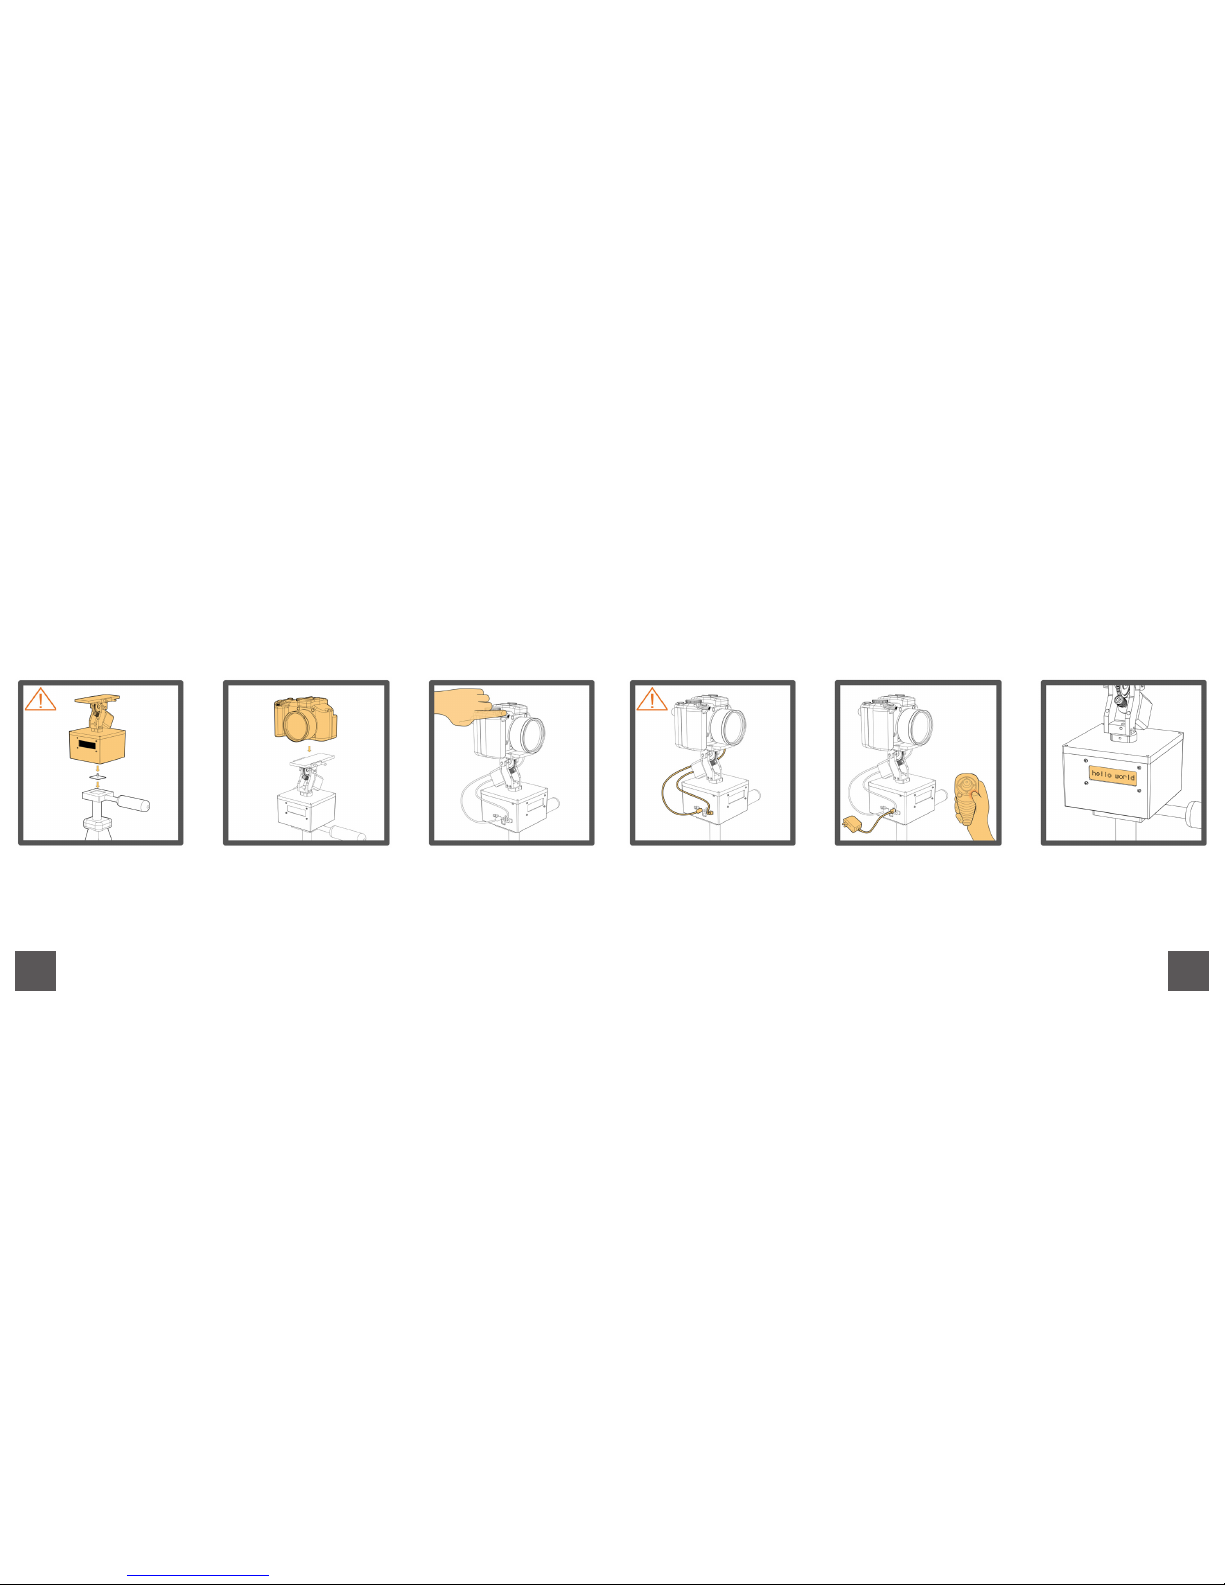
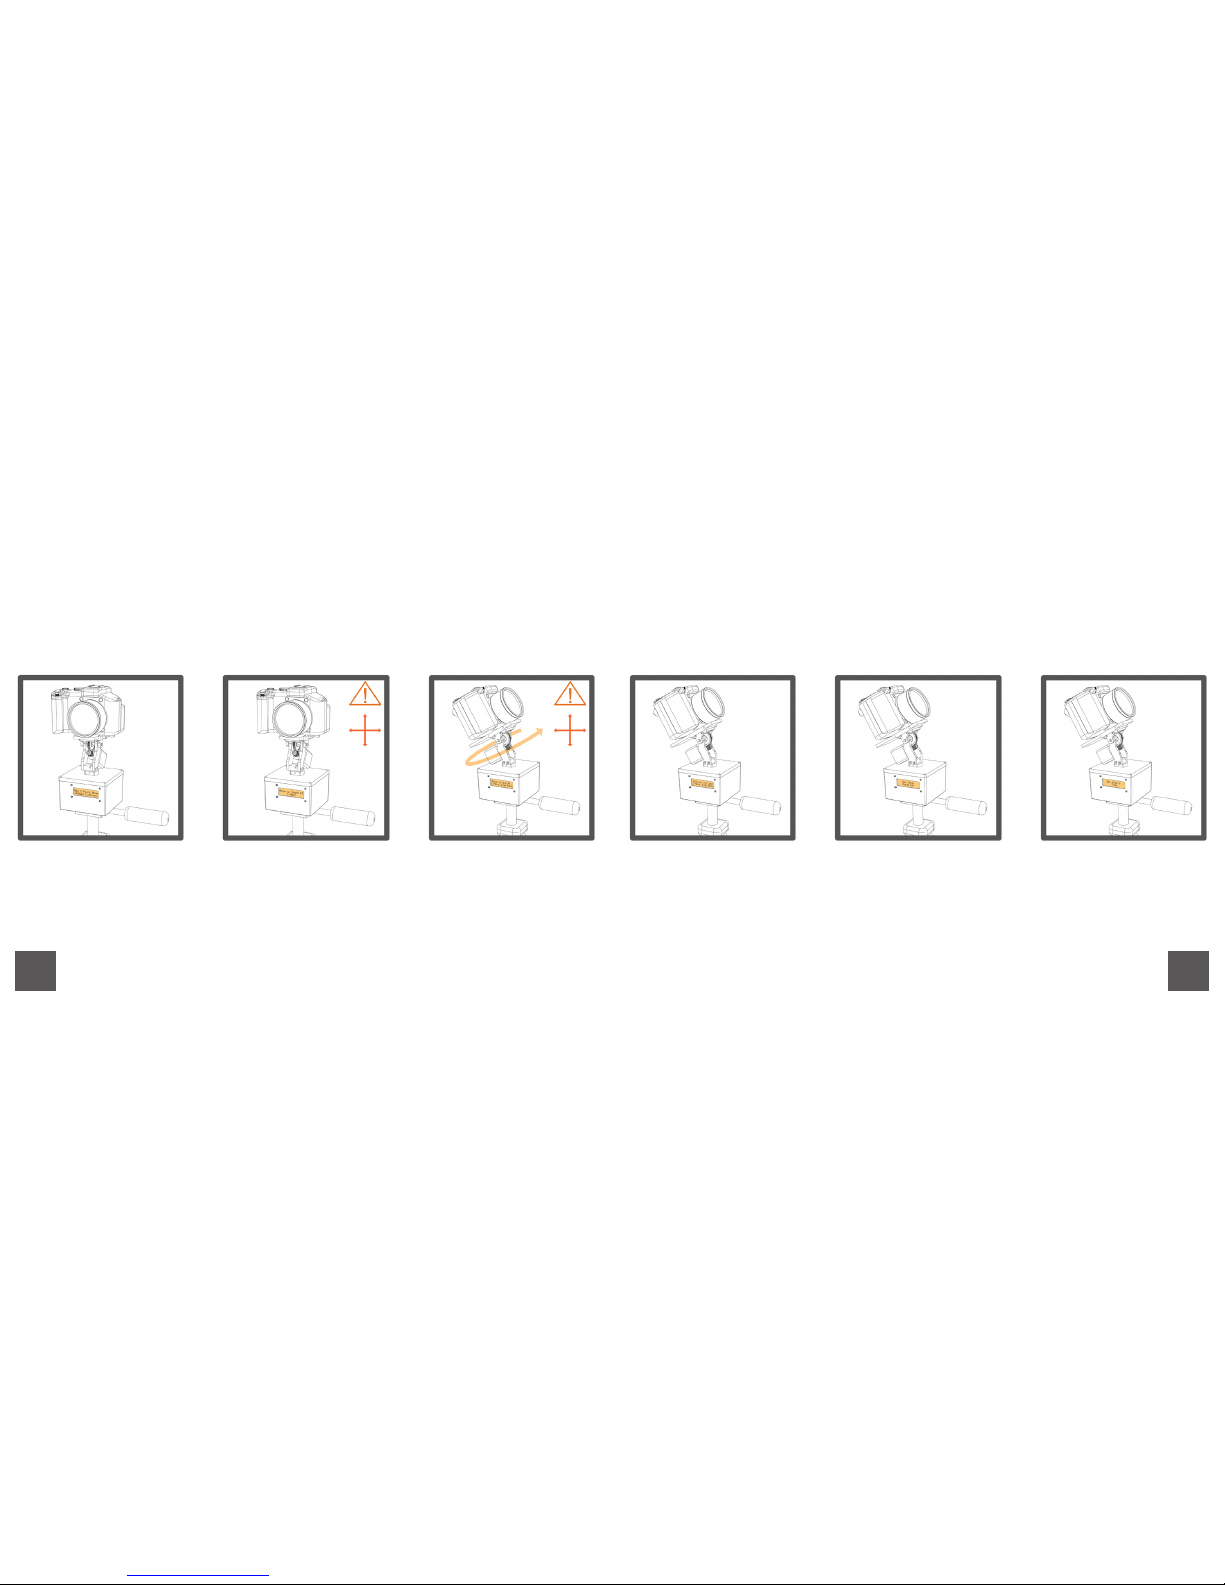
Setting up your TB3: Mounting & cables
- Use quick mount plate
for stability
- Level your TB3
- Don’t use your TB3
without securing it
- Set your camera to
manual mode
-Take test shots
- Make note of exposure
time
- Orient camera to point
in line with sliding plate
- Tighten thumb screw
- Balance your lens and
camera using the sliding
plate
- Lock down sliding
plate
- Tilt Motor Cable to TB3
- Camera Shutter Cable
to TB3 (not required for
video)
- Optional aux motor to
TB3
- Connect Power Cable
- Sync Remote (if using
wireless option)
- See prompts on next
page
Mount your TB3 - on
tripod or dolly
Take test shotMount your
camera to your TB3
Connect cables Power it on Follow prompts to
set your rst move
Page 7
11 12
Setting up your TB3: Display prompts
- Select default run
mode: “New 2 Point
Move”
- Press “C” button to set
- Using up/down on
joystick select your shot
interval
- Press “C” button to set
- Using joystick, frame
your start point
- Press “C” button to set
- Using up/down on
joystick select the
number
of frames and resultant
shot duration
- Press “C” button to set
- Using joystick, frame
your end point
- Press “C” button to set
- Using up/down on
joystick set static time to
0.2 sec more than
exposure time noted
during manual test shot
- Press “C” button to set
New 2 Point Move
UpDown C-Select
Intval: X.X sec
C-Next Z-Go Back
Move to Start Pt.
C-Next
Set Move
Duration
Move to End Pt.
C-Next Z-Go Back
Set Static
Time
Page 8
13 14
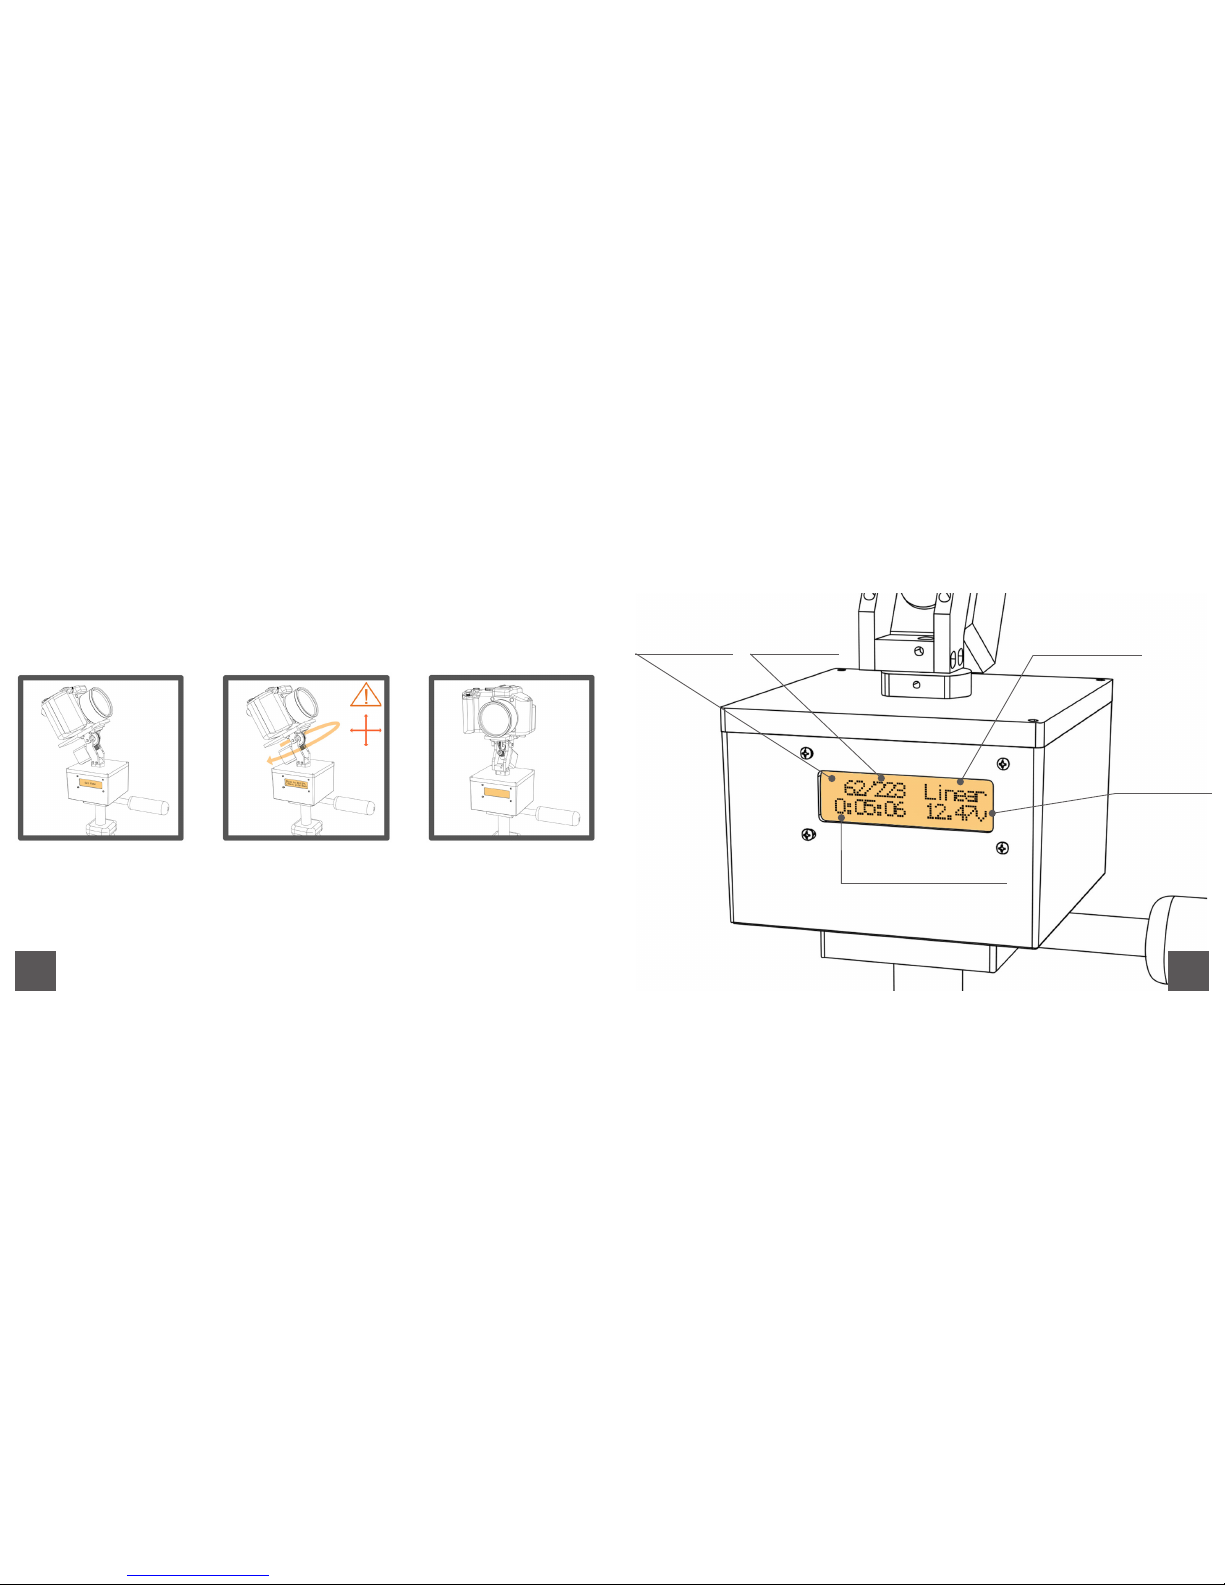
Setting up your TB3: Display prompts Monitor your shot
- Set ramp frames
- Higher value =
smoother starts and
stops
-- Press “C” button to set
- Use left/right on joystick
to select lead in or lead
out
- Using up/down on
joystick set the values
- Press “C” button to set
-TB3 Moves to start point
- Review total shots and
time
- Press “Z” button to
cycle back if necessary
- Press “C” button to start
shot sequence
Shots taken
Real time remaining
HH:MM:SS
DC voltage
10-14 volts
required
Total shots
Program part
Set Ramp Set Static Lead
In / Out
Review and
Confirm Settings
Page 9
16
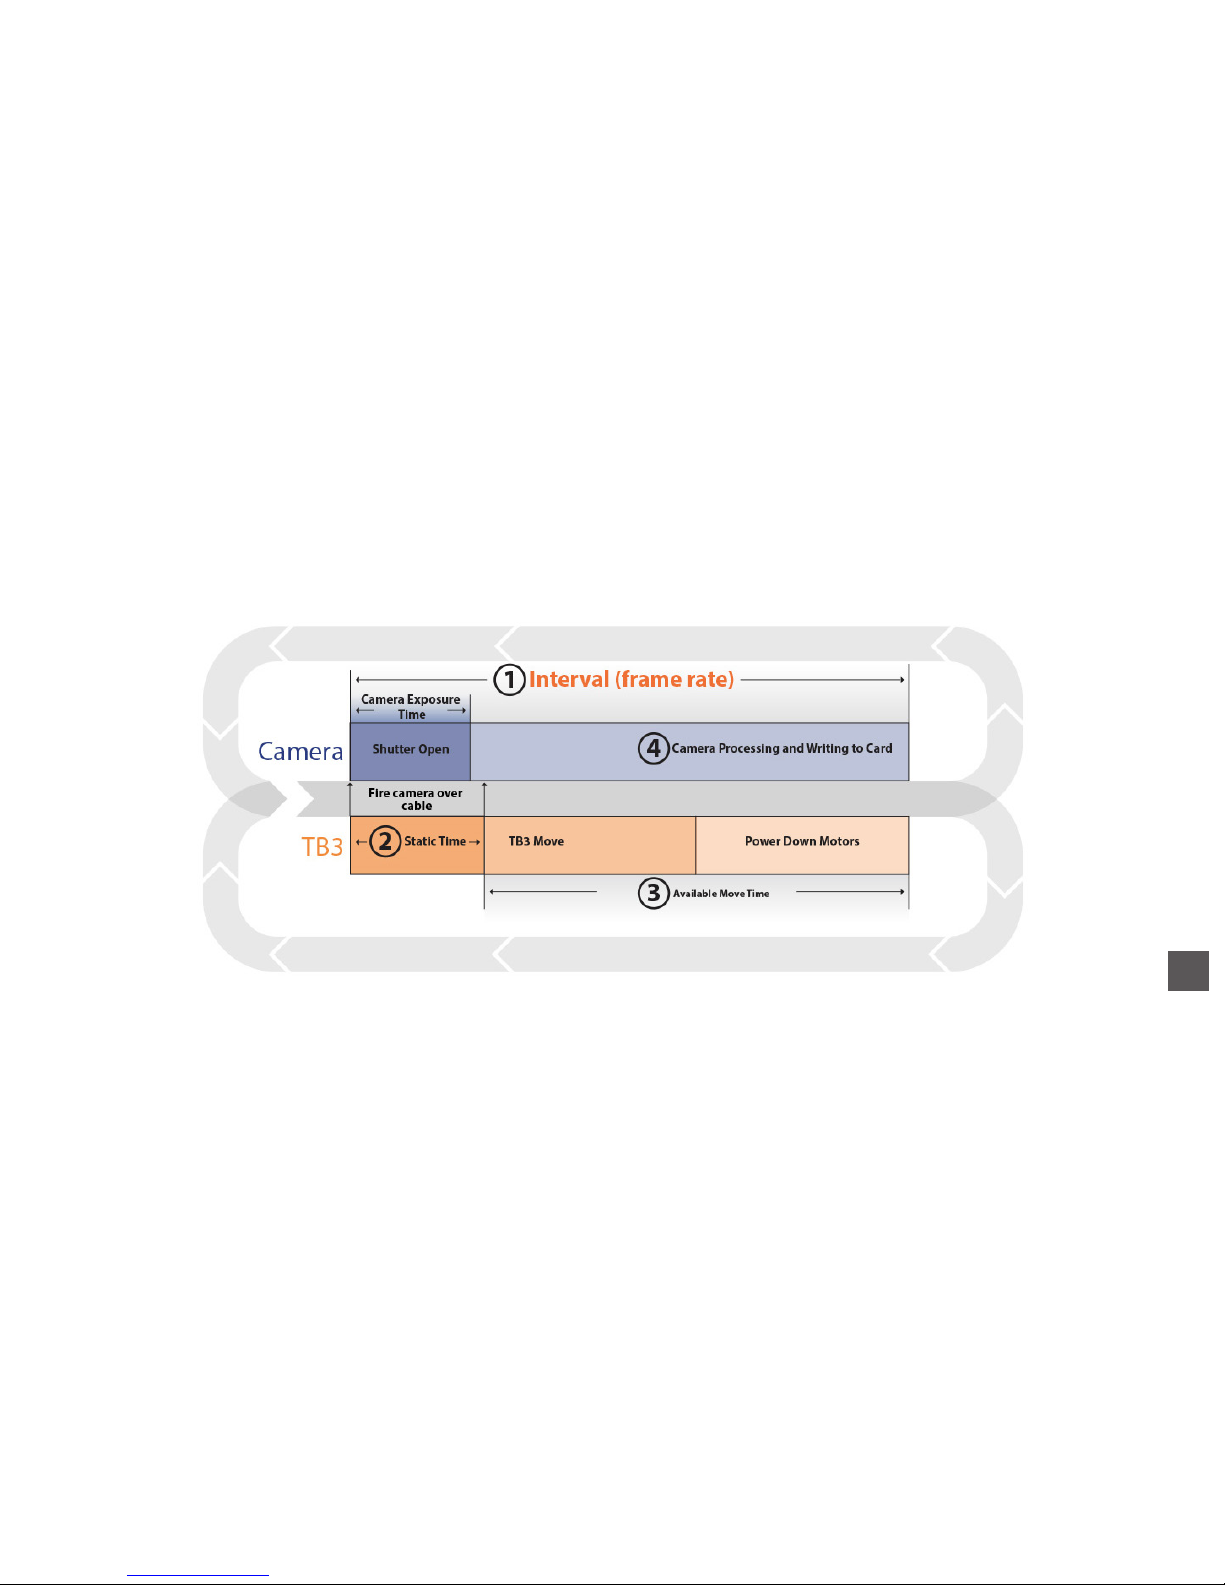
Anatomy of a single SMS frame: Balancing TB3 & camera parameters for SMS
1) Interval is the time
between Shot Starts.
Notes Cont.Notes:
2) Set static time slightly
longer than camera
exposure time to prevent
movement while your
camera has its shutter
open.
3) Interval time - Static
Time = the amount of
available move, settle
and sleep time for the
TB3. It is also the time
in which your camera
processes your images
and writes them to your
card. You typically want
to allow for at least 0.5 to
1.0 seconds of time here
for good shots.
4) For long exposures
your camera may need a
long time to process and
write to your card.
Page 10
17 18
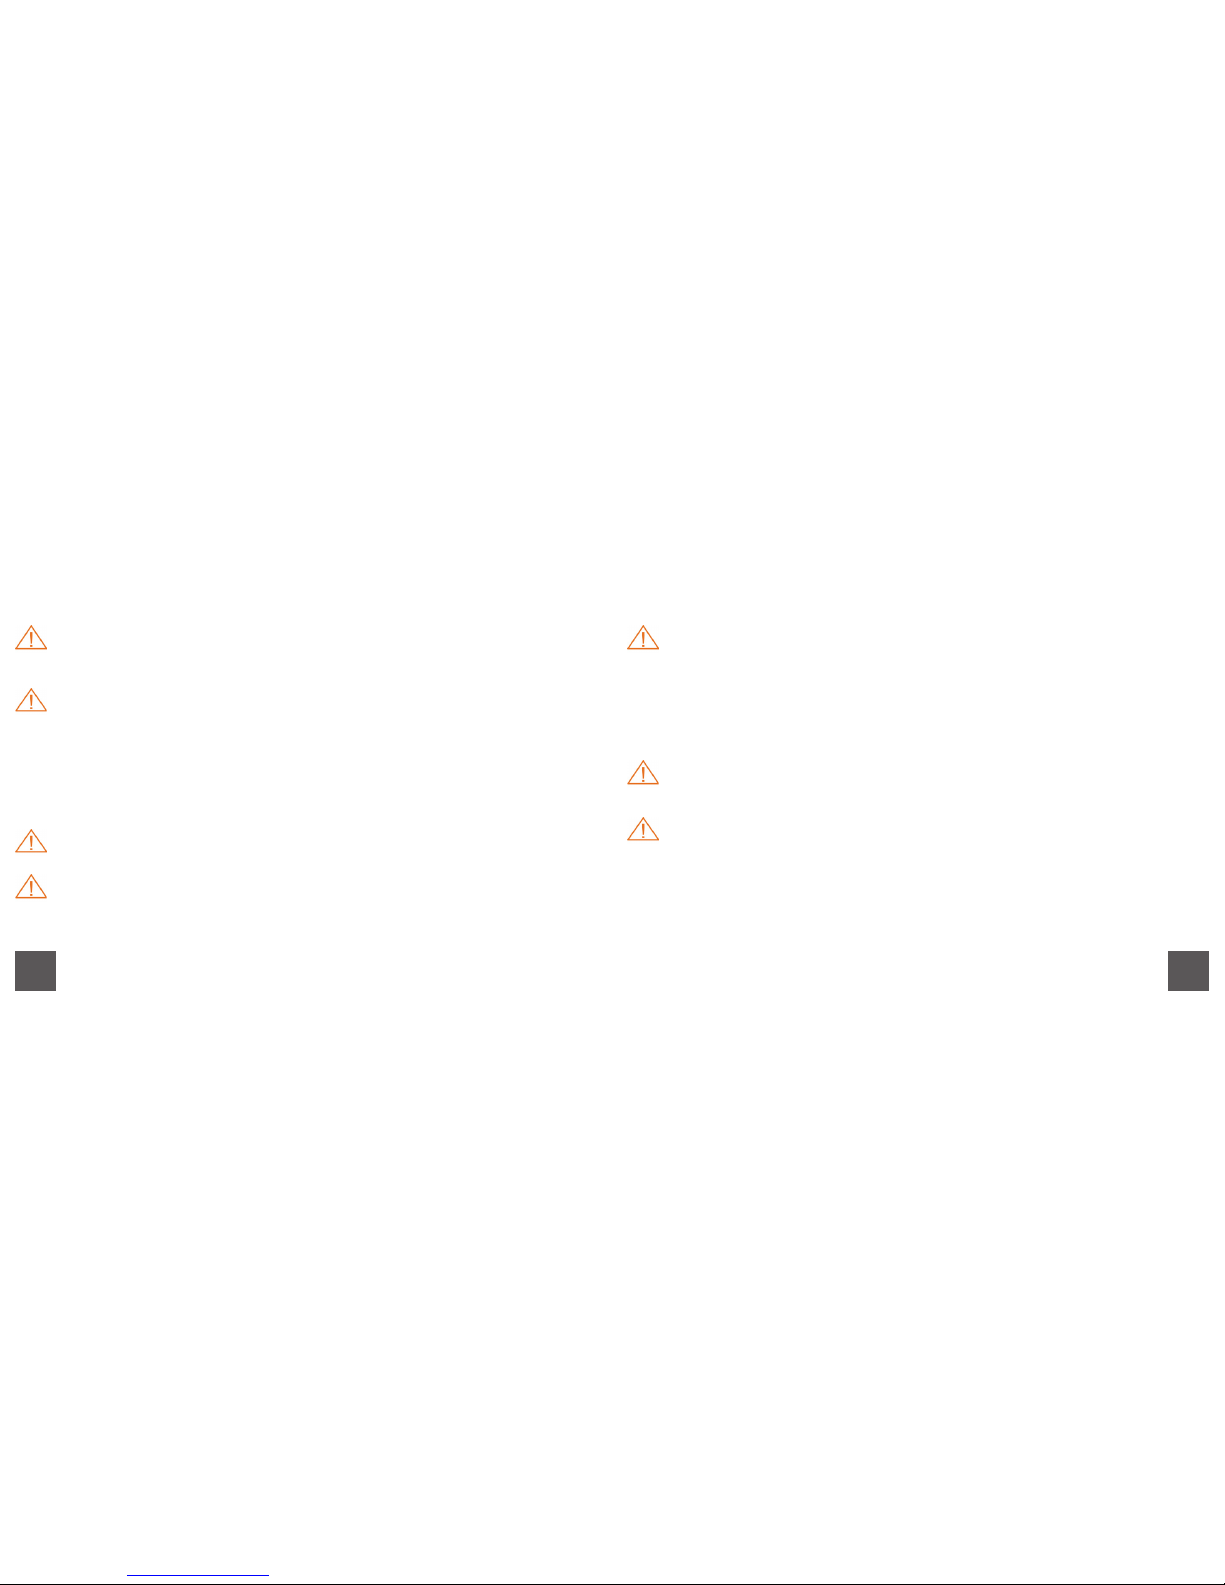
Warnings Warnings
1) Mounting TB3 - eMotimo TB3 is NOT meant to be a table top device! Do not use
eMotimo TB3 without a tripod or securely locking down the unit. The unit may become
unbalanced and tip over, damaging your camera and eMotimo TB3!
5) During moves on setup and during the program, watch for interference with:
A. The Camera Lens / Body and eMotimo TB3 or other objects.
B. The Shutter Release Cable attached to the Camera body and eMotimo TB3
(especially watch out for high degree tilts).
C. The tilt cable wrapping and pulling from eMotimo TB3 or getting caught
between the Vertical Pan Arm and Base Plate.
D. The shifting camera weight causing an imbalance and tipping over the rig.
3) Setting Start & End Point - There are no limits on how far you can pan or tilt. You
can cause motor and eMotimo damage if the tilt motor wire gets pulled.
6) Stepper Motors Can Get Hot - Especially on warm days! Avoid touching the tilt motor
during the program. Always monitor eMotimo TB3 while running to ensure that others
don’t touch the unit!
7) Batteries can be dangerous! - If using a portable battery, follow manufacturers
warnings for charging, transportation and storage.
4) Set Static Lead In / Out - Camera will move from end point to start point
2) Connecting Cables - At extreme tilt angles the shutter plug could have interference
with eMotimo TB3. During pan and tilt moves ensure there is no interference
between the plug and eMotimo TB3. This could damage the eMotimo TB3 and your
camera!
Connecting Cables - Have the unit powered down when you plug in, or remove the
tilt motor cable. The stepper drivers can be damaged if the unit is powered up when
you plug it in.
Page 11
Limited warranty
We are a small shop, but stand behind our products. We’ll x or replace anything that suffers
from a defect in manufacturing or assembly for 90 days. If you do have to return something,
we’ll do our best to make it right. We do not warranty damage incurred in handling or shipping. If
you need to return something, please contact us at [email protected] to receive an RMA
number and shipping destination. Returns must have an RMA number clearly printed on the box
with all parts safely packed. Items must be returned in their original or equivalent packaging, we
will not be able to accept returned items that are not appropriately packaged or damaged due to
inappropriate packaging on return transit.
Under no conditions will we accept liability for any amount higher than the original
purchase price of the product in question.
19
Page 12

 Loading...