

Page 1

I. Specifications
II. Important Information
III. Bike Overview
IV. Safety guidelines
V. Charging
A. Indoor Charging
CONTENT
B. Outdoor Charging
VI. How to start the e-bike
A. Key start
B. Remote Start
VII. Operating guide
A. Control Panel/Dash board buttons
B. Driving the e-bike
VIII. Warranty Information
Page 2

Specifications
Motor
Continuous 500W brushless motor
Climbing angle
20 degrees incline
Torque
60Nm
Load Capacity
160kg
Front brake
Drum brakes
Rear brake
EABS (electronic absorption braking system)
Max speed
32km/h
Recharge distance
55-60 km *
Controller
Output torque
60Nm
Battery type
Sealed Lead Acid
Battery capacity
48V / 20Ah
Charging time
3-8 hours
Charger
110V / 2.8A smart charger
Speed control
Throttle controlled
Lights voltage
12V
Wheel size
16” x 3.0”
Tire pressure
Front - 35 psi / Rear – 40 psi
Body size
1680x760x1320
Weight (incl. Battery)
70 kg
Cruise control
No
Alarm
Yes
Steering lock
Yes
Emmo Alien
* The distance is calculated on 175Lb rider without extra cargo, on level ground, no stops, no winds, with new
battery.
I. Important Information
This vehicle is a power assisted bicycle and meets all the requirements under section2(1) of the
Canada motor vehicle safety regulations.
Before you start your electric bicycle, you must ensure to comply by all laws regarding electric
bicycles according to the Highway Traffic Act.
1. All riders must be over 16 years of age
2. Inspect and ensure that all signals, lights and brakes are working in good condition
3. Must wear a properly fitted helmet approved by your municipal bylaws
4. Pedals must be installed and functional
5. Remember to turn the bicycle off when driver is not on the bike
6. Abide by all traffic laws
7. Bicycle must have the Bylaw sticker stating that it is a “power assisted bicycle” at all times.
Page 3
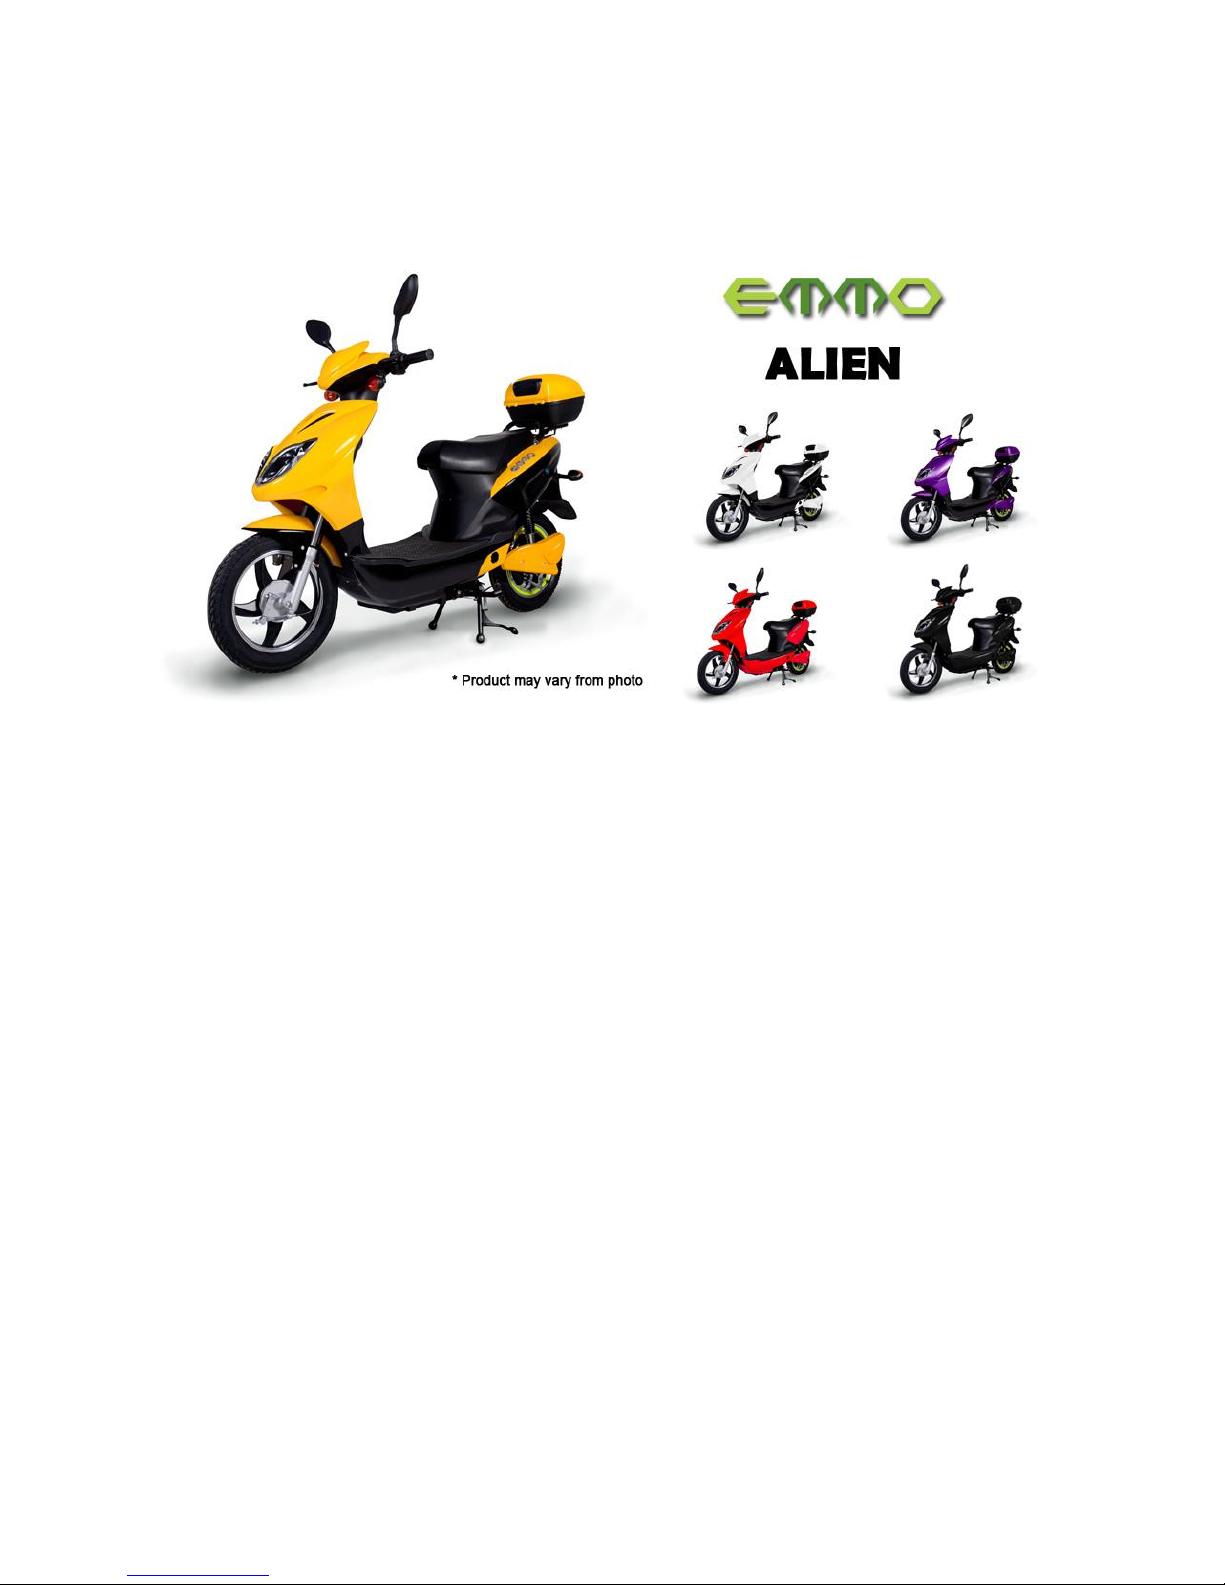
II. Bike Overview
Features
1. Security system
Emmo bikes come with alarm system which can be activated when parked for safety of the bike. This can
be set and unlocked from the remote controller.
There are also steering locks that can be locked for added security. Steering will be locked to the left most
position and will be only unlocked with a key.
Batteries are also locked by key and secondly by pushing the handles into the battery.
2. Smart Brushless Motor
Emmo e-bikes are equipped with a brushless hub motor that are efficient yet give continuous 500W of
power to push any riders at enjoyable speeds.
III. Safety Guidelines
Before riding the Emmo electric bike, please carefully read and completely comprehend the manual.
Follow all instructions and warnings.
Page 4

Follow local traffic laws and know the road restrictions.
Share the road or path with others – motorists, pedestrians, and other cyclists.
Ride cautiously.
Wear an approved helmet.
Ride on the right hand edge of the road but not on the side walk.
Emmo e-bikes are not to be operated by any individual with a physical or mendal disability.
Never operate after drinking or under the influence of drugs.
Do not use cell phone, iPod or other electric equipment when operating Emmo e-bike.
Stop at all STOP sighns and traffic lights.
Always use turning signal or hand gesture when you intend to change lanes or make a turn.
Always ride the Emmo E-bike at safe speed which allows for safe braking.
Do not brake and accelerate at the same time. It will damage the motor.
Do not use front brake only. The momentum will tip over the bike.
IV. Charging
Ride slowly when going downhill or in rainy or wet road conditions. Gently apply the brake and
release if for several times to reduce the momentum of your bike.
Do not turn sharp corners especially in wet and rainy conditions.
Do not wear clothing that will obstruct your vision or get caught in the moving parts.
The battery equipped with your bike is top of
the line Lead-Acid battery which is safe and
reliable.
A. Indoor Charging
Page 5
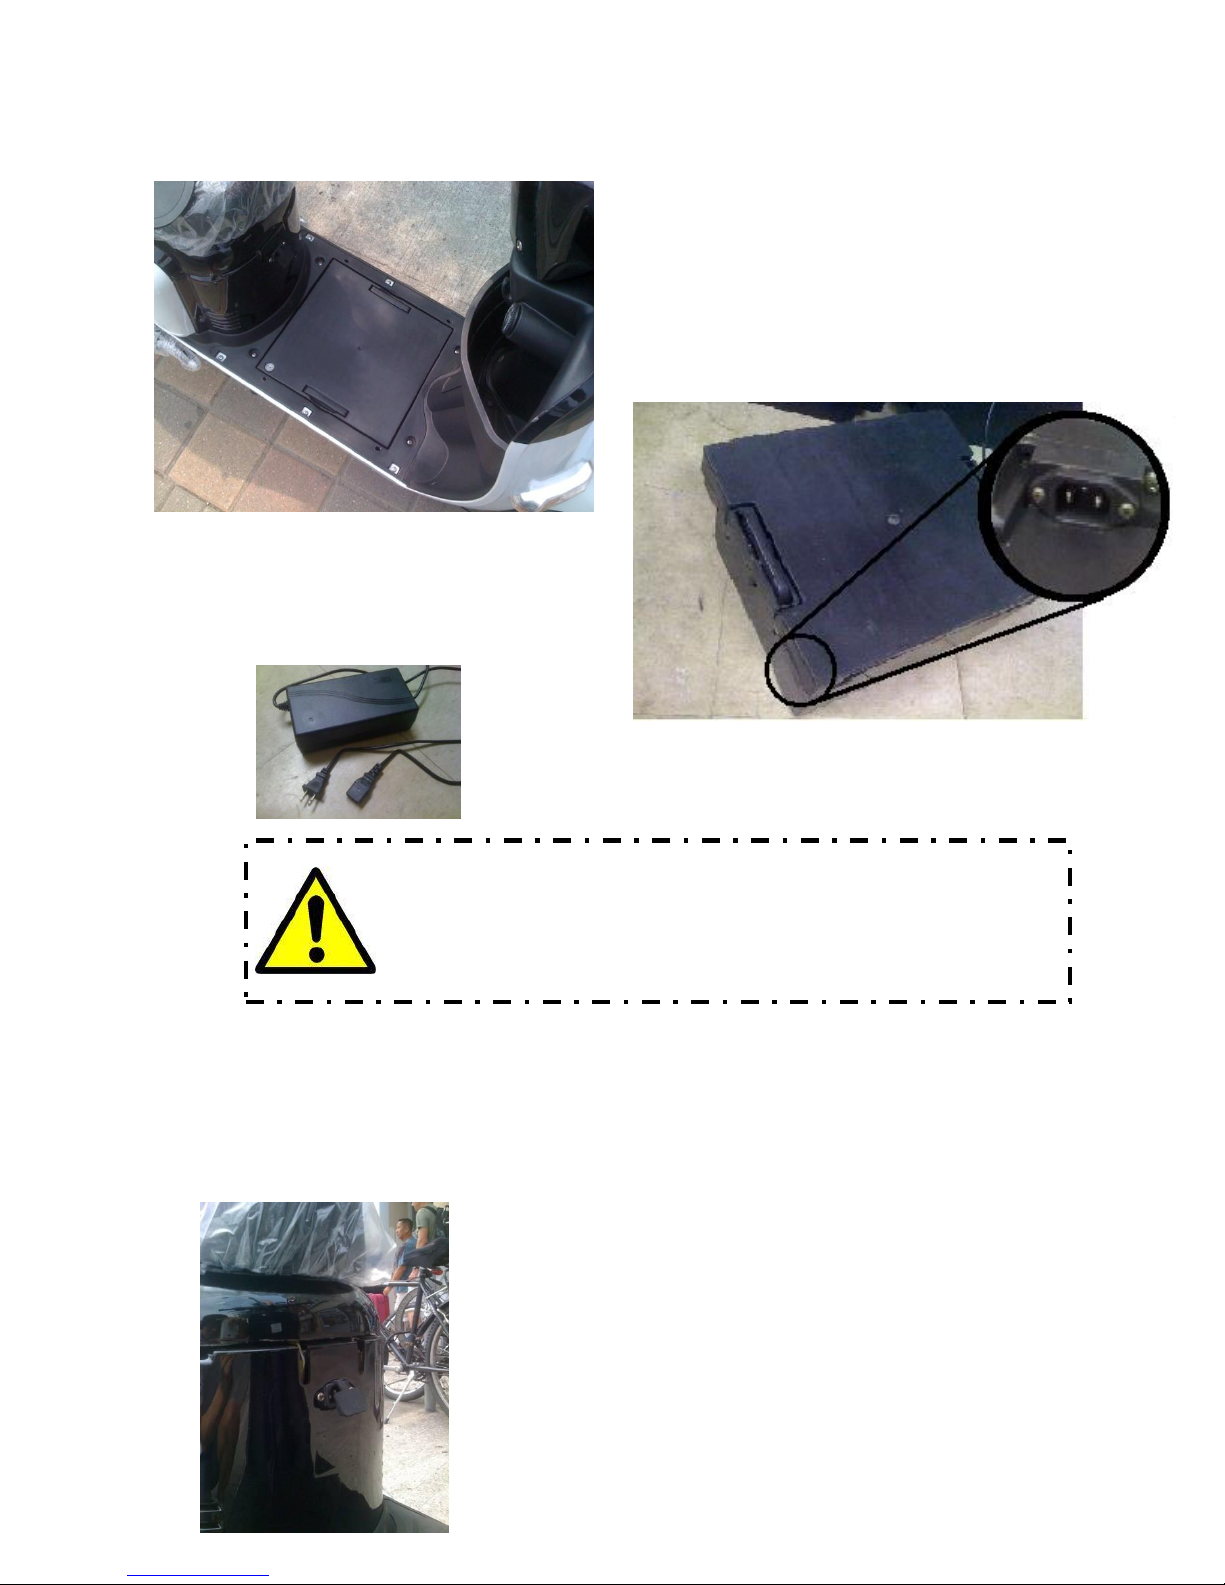
Once indoors, plug the charger into the
battery-side first. This side must be firmly
pushed in all the way. After, plug the
charger into the wall.
When it is plugged in, the charger will show a red light while charging. After the battery is fully
charged, the charger signal will turn green and cut down the power. Do not worry about over charge.
When fully charged, unplug the battery-side plug first then, unplug the wall outlet.
B. Outdoor Charging
The battery pack has security features for protection. To
unlock the battery, first, ensure the bike is turned off.
Secondly, with your key, open a secondary lock located on
the floor of the bike. Lastly, pull the battery straight up
with both handles and rest it on the side of the bike. You
will see a wire plugged into the battery. Gently pull it off
and take the battery indoors.
Make sure to plug the charger into the battery first, then
into the wall. Also, Unplug the battery first and then,
unplug the wall outlet.
There is also a plug on the bike itself for charging outdoors. They are
located in front of the seat as shown in the picture. As explained above
for indoor charging, you must plug the charger to the bike securely
first, then plug the charger to the wall.
Page 6
V. How to start the e-bike
A. Key start
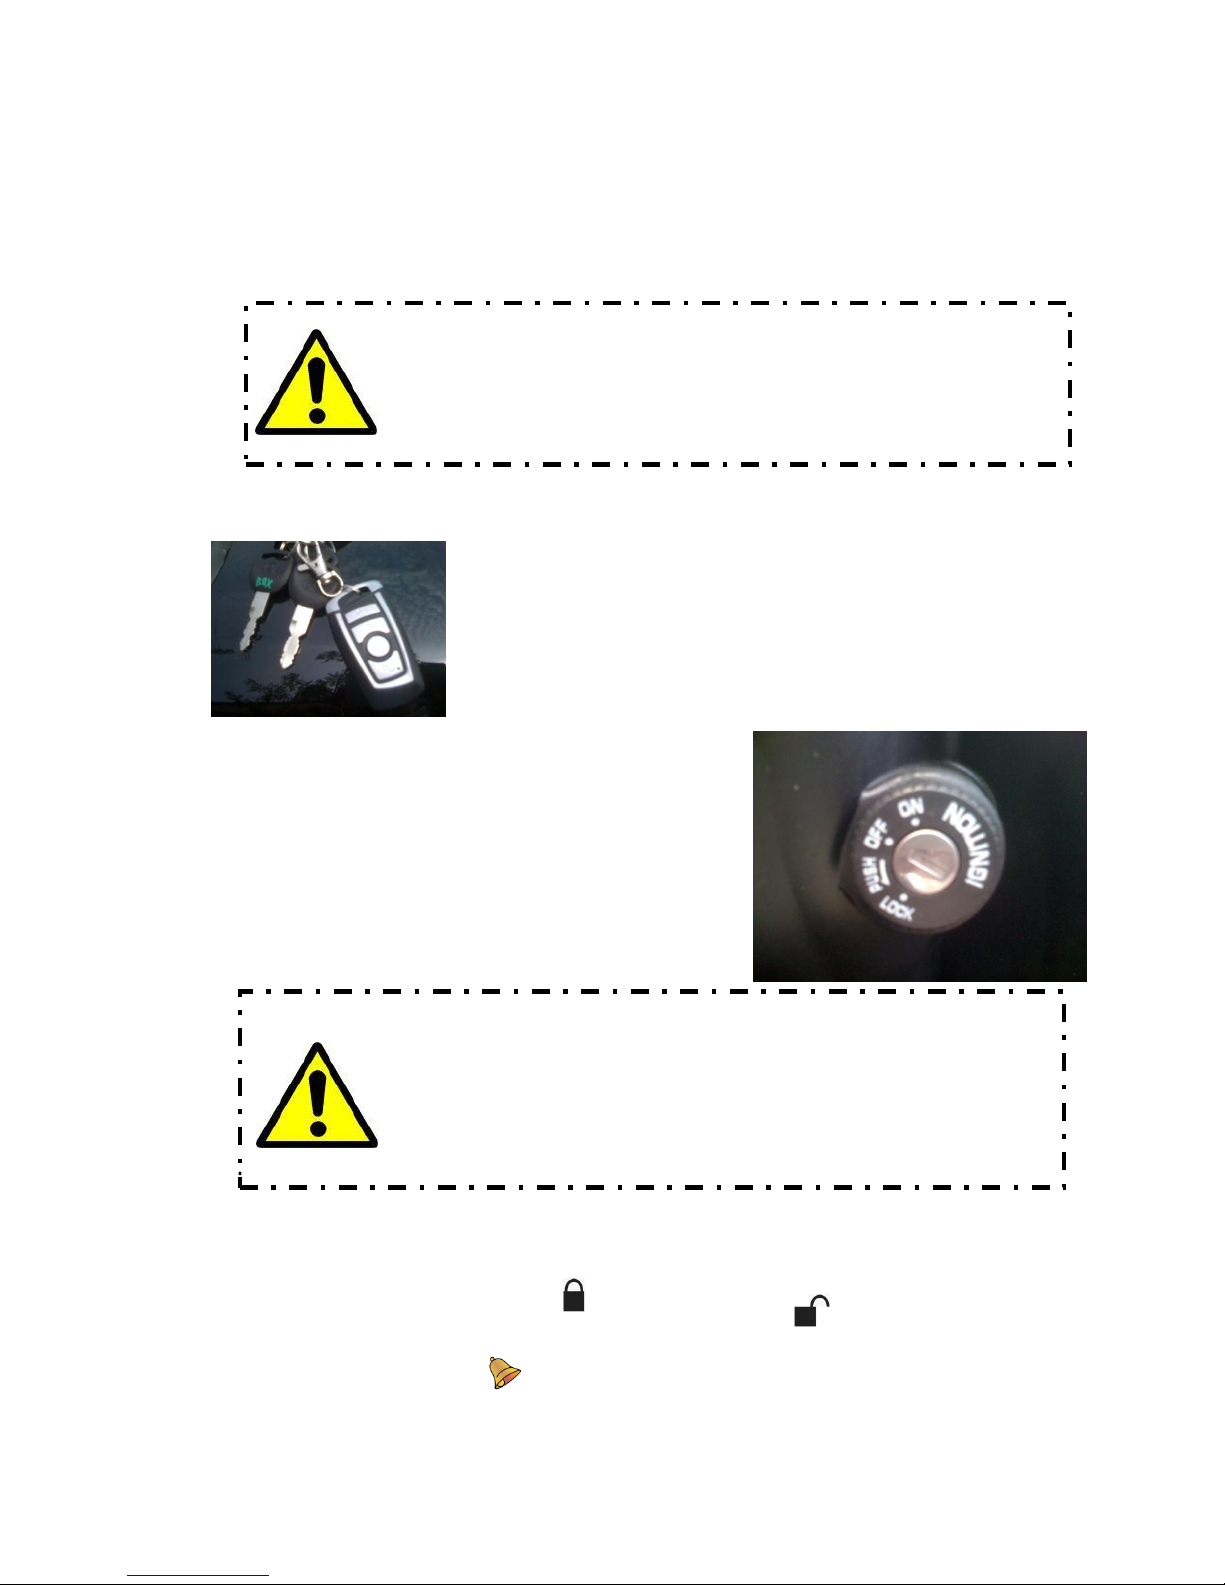
Once key is inserted, one click clock wise,
To leave it turned off, leave the key at “OFF”
To lock the steering, first insert key at “OFF”
To unlock steering, simply insert the key and
Make sure to plug the charger into the battery first, then
into the wall. Also, Unplug the battery first and then,
unplug the wall outlet.
You are given two sets of keys for spare, (two keys to start the bike, two
remotes, and two rear cargo key). The key opens battery lock and under seat
cargo. Most importantly, it starts the bike. The key that has “box” written on
it opens the rear cargo space.
towards “ON” turns on the bike.
position. This will not lock the steering.
position and while turning the handle to the left,
firmly push the key in and turn key counter
clockwise, to “LOCK” position. You may have
to jiggle the handle to find the right position.
turn clockwise.
When key is used to turn on the bike, use the key
to turn off the bike. Always remember to lock
the steering and set the alarm on when you park
the bike
B. Remote Start
You are also given two sets of remote for your bike. From the key, the bike can be unlocked, locked,
remotely started, and set off alarm.
To lock the bike, press and hear the alarm setting sound.
To unlock the bike, press
sound.
For panic button, , press to make noise and find your bike.
to unlock and hear a double
Page 7
VI. Operating guide
The basic operating rules for the control panel are the same as any car or motorcycle. And driving and
safety rules are similar to a regular bicycle.
A. Control Panel/Dash board buttons
On the right handle side, there are:
To start the bike remotely, double click the to start the bike
To turn off a remotely started bike, click once to turn off.
When the bike was turned on using remote
start, always use the unlock button to turn the
bike off, the key will not turn the bike off.
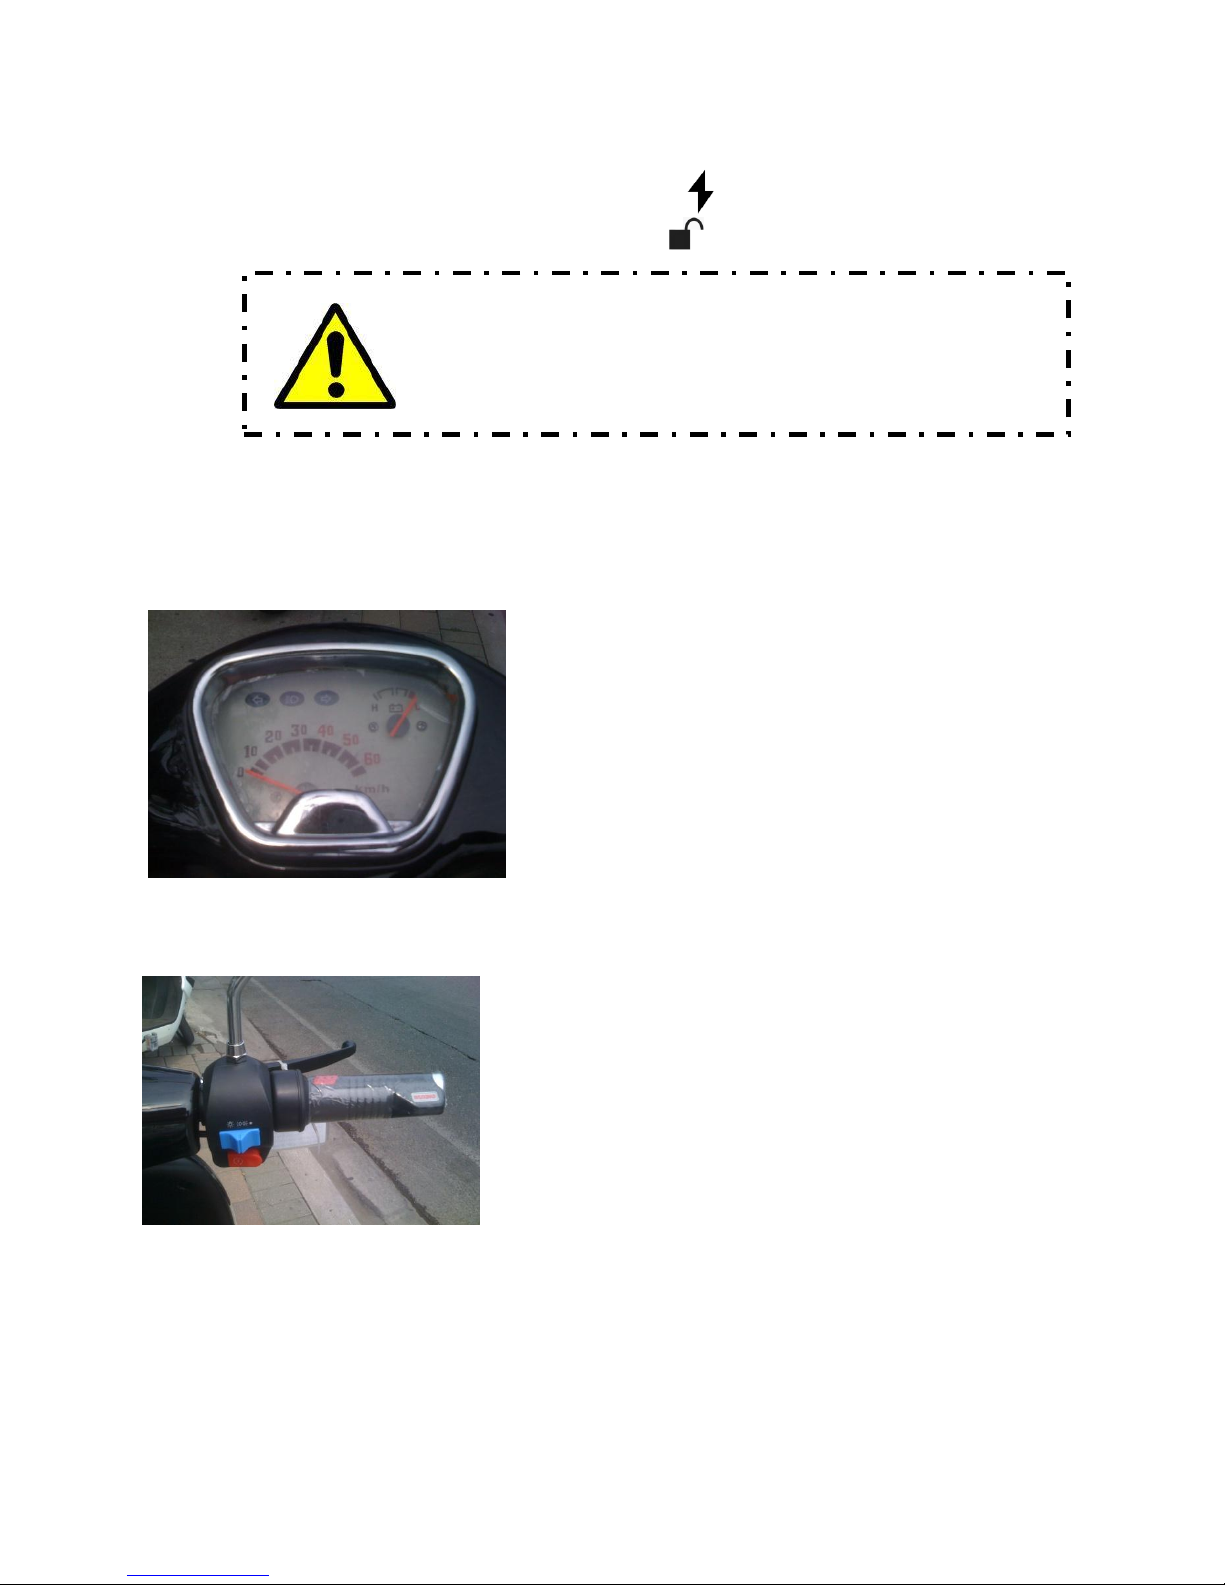
On the dashboard, as shown to the left, many indicators are located
for your convenience.
1. Battery meter to indicate how much power is left.
2. Speedometer for your safety.
3. Turn signal lights
4. High beam head light
1. Throttle
2. Light setting
3. Honk
1. Turn the throttle towards yourself go give the
motor some power. This will start the motor running and push the bike forward.
2. The light setting has three positions.
A. When this switch is set to the right most setting, there will be no lights. Only the rear
brake lights will come on when you brake. This setting is for daytime use.
B. The middle position will turn on the lights on your speedometer and your rear brake
lights. This setting is for dawn or dusk when there is little bit of light.
C. The left most setting on this switch will turn on all the lights. Headlights, control panel
lights and rear brake lights.
Page 8
3. The button for honk will make the honk noise to be used to warn others.
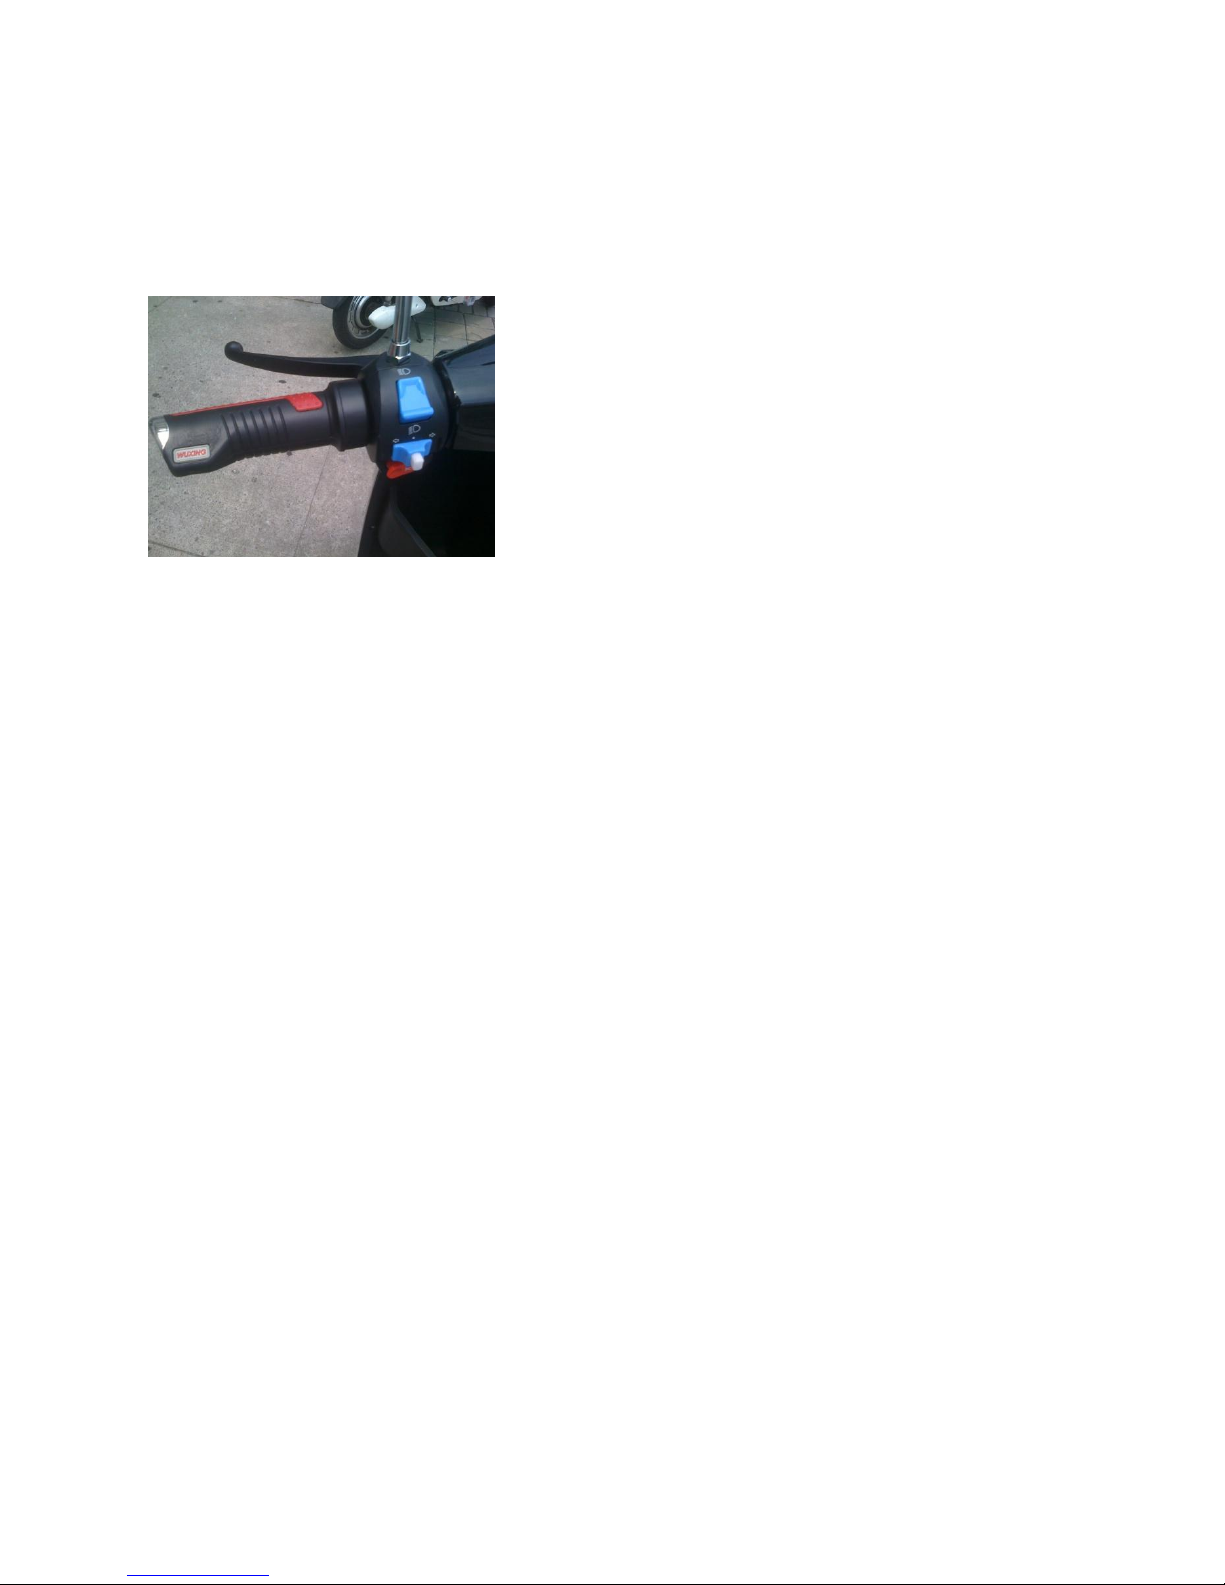
On the left handle side, there are:
1. Headlight setting
2. Signal light switch
3. Honk
1. There are two settings for headlights, the lower button is for low beam, and upper button is to turn on the
high beam.
2. The turning signal lights are located in the front and back. Push the switch to right to turn on the right
signal or left for left signal lights. To turn off the signal lights, push this button straight in until you hear a
click.
3. This honk button serves the same purpose as the right honk.
B. Driving the e-bike
1. Abide by all traffic laws.
2. Always stay on the right hand side of the road
3. If there is a bicycle lane, stay on the bicycle lane.
4. You may travel on bike paths within parks.
5. Always use turn signals to warn others on the road.
6. When turn signal is not working, use hand signals and get it fixed right away.
7. Remember to turn on head lights and rear brake lights when dark.
8. Use rear brake first to avoid tipping over
VII. Warranty Information
Your bike comes with 1 year comprehensive warranty with EMMO Inc. This includes all except plasti
c parts, and any wear down parts. Battery and charger is half year warranty.
Your warranty may be void / cancelled for following reasons.
A. Products that have been modified, disassembled, abused, poorly maintained.
Page 9

B. Involved in any accident or collision
C. Disassembled or repaired by unauthorized dealer or person during warranty period.
D. Rewired electrical circuit
E. Purchased in box and assembled by the user
F. The frame number and motor serial is erased, scratched or removed from the bike
G. The frame number and motor serial does not match our records
 Loading...