

TWEETER REPLACEMENT INSTRUCTIONS FOR THE LFT-8b
Removing The Original Tweeter From The Speaker Frame
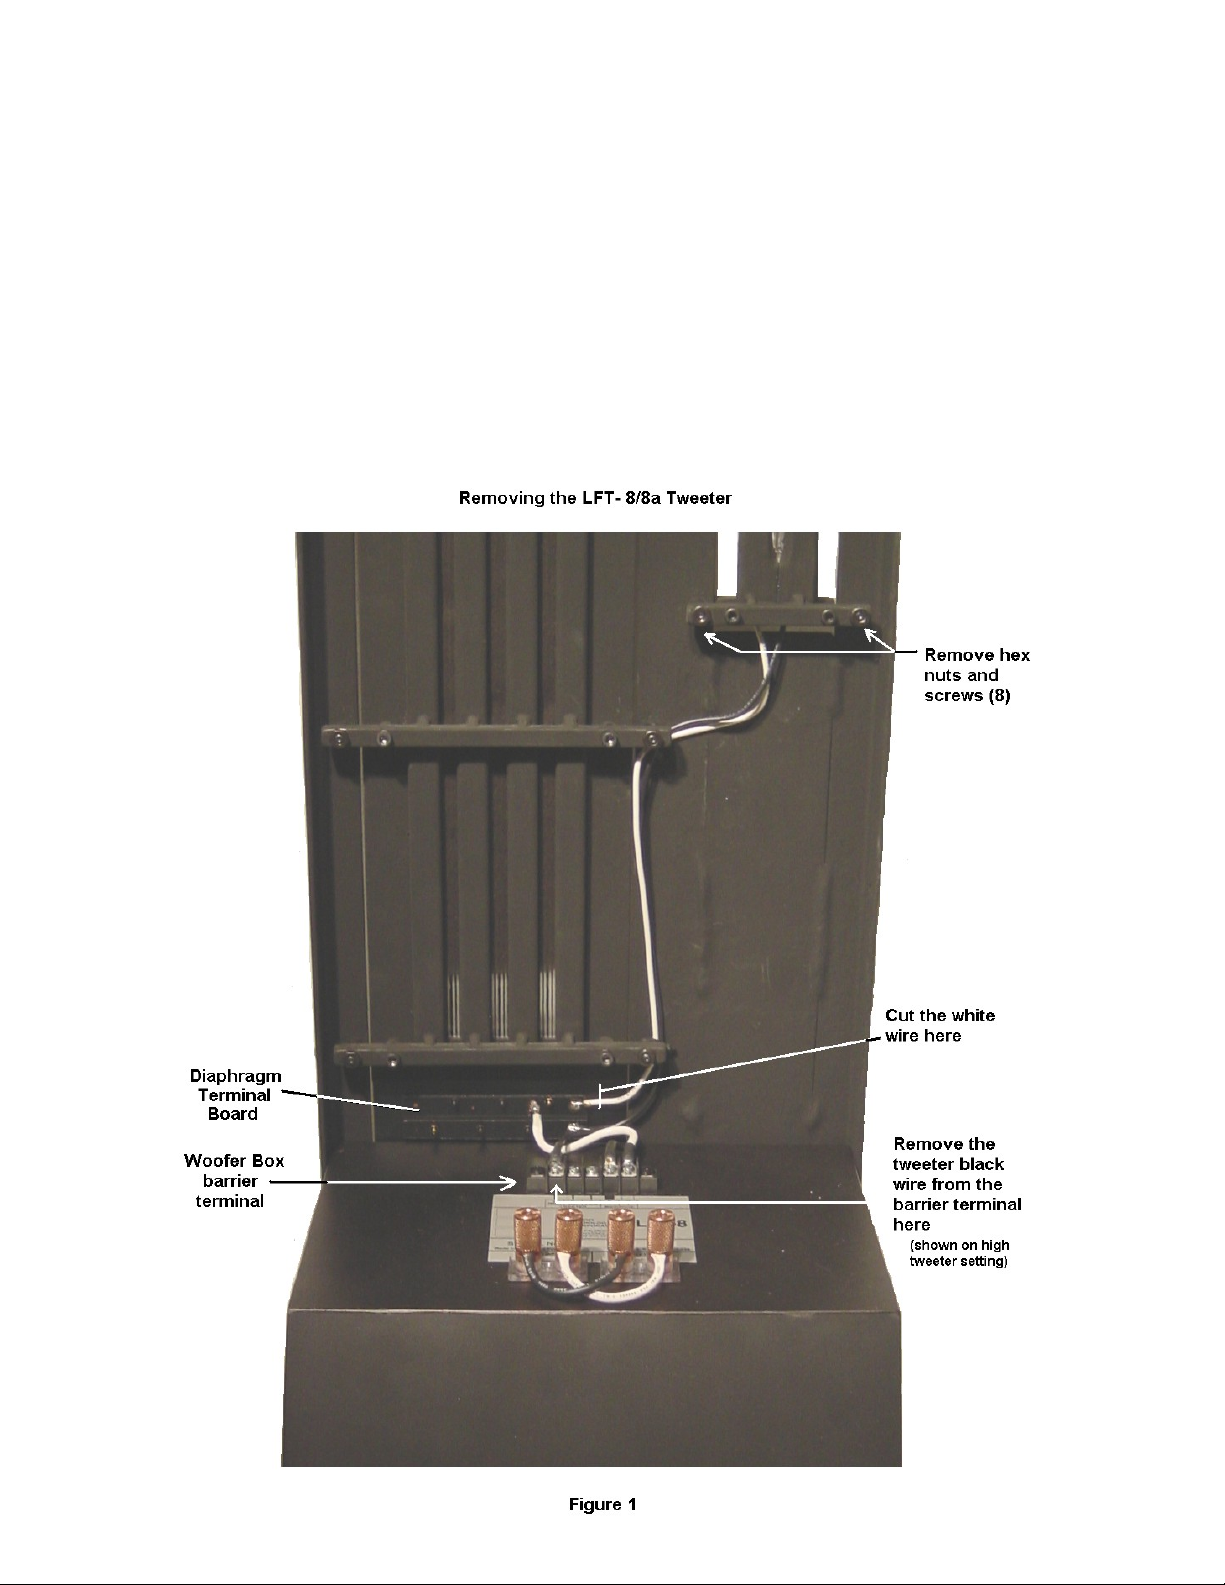
Remove the tweeter black wire spade lug from the barrier terminal strip on the top
of the woofer box (Figure 1). Cut the small diameter white wire near the solder joint
connecting the original tweeter and the mid range diaphragm terminal board (Figure 1).
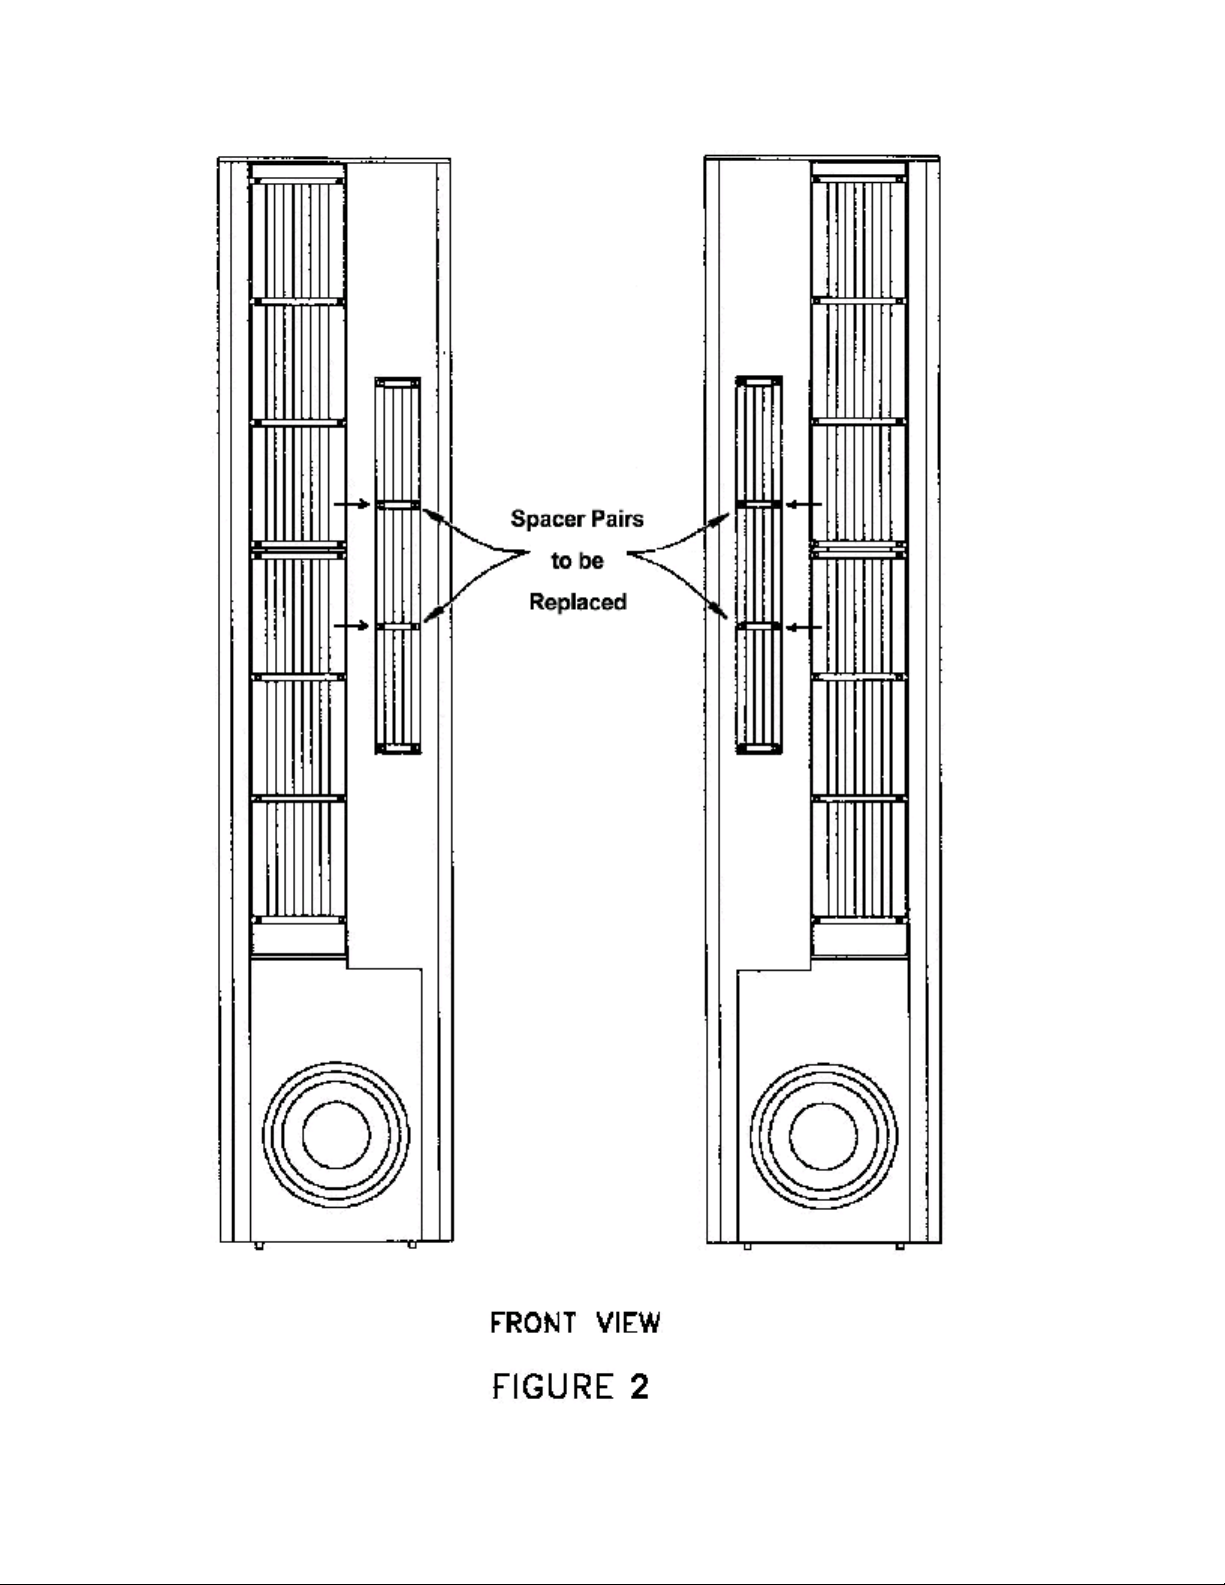
Remove the eight machine screws, hex nuts, and spacers (Figure 1&2). Keep track of the
spacer location so that the inner four spacers can be replaced with the new spacers
provided with the tweeter upgrade (Figure 2). Separate the tweeter driver completely
from the speaker frame. Repeat for the second tweeter.

Installing The New Tweeter Driver Upgrade
Install the updated tweeter in the speaker frame placing the spacers in there
original locations along with the replacement spacers shown in Figure 2. Run the black
and white tweeter wires next to cross bar “A” (Figure 3) of the midrange assembly and
attach a black nylon tie wrap for strain relief (Figure 3). Use the double stick tape on the
back of the tweeter’s barrier block to attach it between crossbars A&B. (Figure 3&4).
Run the second set of black and white wires from the tweeter barrier terminal to the
barrier terminal on top of the woofer box. Fasten the black spade lug to the high tweeter
setting on the barrier terminal strip. Fasten the white spade lug to the positive midrange
terminal on the barrier strip (Figure 3). Repeat for the second tweeter.
lAdjusting The New Tweeter Level Settings
The new Tweeter barrier block has two wires connected to the woofer box. The
black wire from the new tweeter barrier block always remains connected to the woofer
box’s high tweeter setting. The new level adjustment is made on the tweeters barrier
block (FIGURE 4). It was shipped with the white wire on the high tweeter setting. The
white wire controls the tweeter levels, which decrease from left to right (hi/med/low).

Figure 3

Figure 4
 Loading...