

Emfit L-0656, IP-9360 Installation & Operating Instructions Manual

HEART CONTRACTIONS, BREATHING AND BODY MOVEMENT ANALYTICS IN SLEEP
Installation &
operating instructions
V1.8 25.10.2017

3
Thank you for purchasing this EMFIT QS
sleep tracker! You have made a great choice.
In this user guide you will find useful information about your device from taking it into
use to analyzing your sleep patterns and
longtime trends.
Content
1. Package contents . . . . . . . . . . . . . . . . . . . . . . . . . . . . . . . . . . . . . . . . . . . . . . . . . . . . . . . . . . . . . . . . . . . . . . . . . . . . . . . . . 4
2. Safety instructions . . . . . . . . . . . . . . . . . . . . . . . . . . . . . . . . . . . . . . . . . . . . . . . . . . . . . . . . . . . . . . . . . . . . . . . . . . . . . . . . 5
3. Minimum requirements . . . . . . . . . . . . . . . . . . . . . . . . . . . . . . . . . . . . . . . . . . . . . . . . . . . . . . . . . . . . . . . . . . . . . . . . . . . 6
4. Overview . . . . . . . . . . . . . . . . . . . . . . . . . . . . . . . . . . . . . . . . . . . . . . . . . . . . . . . . . . . . . . . . . . . . . . . . . . . . . . . . . . . . . . . . . . . 7
4.1. Intended use . . . . . . . . . . . . . . . . . . . . . . . . . . . . . . . . . . . . . . . . . . . . . . . . . . . . . . . . . . . . . . . . . . . . . . . . . . . . . . . . . . . . 7
4.2. Liability of the m anufacturer . . . . . . . . . . . . . . . . . . . . . . . . . . . . . . . . . . . . . . . . . . . . . . . . . . . . . . . . . . . . . . . . . . . 7
4.3. About these instr uctions for use . . . . . . . . . . . . . . . . . . . . . . . . . . . . . . . . . . . . . . . . . . . . . . . . . . . . . . . . . . . . . . . . 7
4.4. Why to use EMFIT QS . . . . . . . . . . . . . . . . . . . . . . . . . . . . . . . . . . . . . . . . . . . . . . . . . . . . . . . . . . . . . . . . . . . . . . . . . . . 7
5. Setup . . . . . . . . . . . . . . . . . . . . . . . . . . . . . . . . . . . . . . . . . . . . . . . . . . . . . . . . . . . . . . . . . . . . . . . . . . . . . . . . . . . . . . . . . . . . . . . 8
5.1. Connecting EMFIT QS to your Wi-Fi network (without WPS button) . . . . . . . . . . . . . . . . . . . . . . . . . . . 11
5.2. Connecting through Wi- Fi Protected Setup (WPS) button . . . . . . . . . . . . . . . . . . . . . . . . . . . . . . . . . . . . . 15
5.2.1. My network is hidden . . . . . . . . . . . . . . . . . . . . . . . . . . . . . . . . . . . . . . . . . . . . . . . . . . . . . . . . . . . . . . . . . . . . 16
5.3. Checking device’s data flow to server ’s database . . . . . . . . . . . . . . . . . . . . . . . . . . . . . . . . . . . . . . . . . . . . . . 19
6. Register the device . . . . . . . . . . . . . . . . . . . . . . . . . . . . . . . . . . . . . . . . . . . . . . . . . . . . . . . . . . . . . . . . . . . . . . . . . . . . . . . 20
7. Restoring EMFIT QS device to Access Point (AP) mode . . . . . . . . . . . . . . . . . . . . . . . . . . . . . . . . . . . . . . . . 22
8. Meaning of lights . . . . . . . . . . . . . . . . . . . . . . . . . . . . . . . . . . . . . . . . . . . . . . . . . . . . . . . . . . . . . . . . . . . . . . . . . . . . . . . . . 23
9. Using the device . . . . . . . . . . . . . . . . . . . . . . . . . . . . . . . . . . . . . . . . . . . . . . . . . . . . . . . . . . . . . . . . . . . . . . . . . . . . . . . . . . 26
9.1. Overview of web interface . . . . . . . . . . . . . . . . . . . . . . . . . . . . . . . . . . . . . . . . . . . . . . . . . . . . . . . . . . . . . . . . . . . . . 26
10. Analyzing the measurements . . . . . . . . . . . . . . . . . . . . . . . . . . . . . . . . . . . . . . . . . . . . . . . . . . . . . . . . . . . . . . . . . . . 27
10.1. Main display (dashboard) items . . . . . . . . . . . . . . . . . . . . . . . . . . . . . . . . . . . . . . . . . . . . . . . . . . . . . . . . . . . . . . 27
10.2. More detailed information accessible through arrow button or tabs . . . . . . . . . . . . . . . . . . . . . . . . . . 32
12. Troubleshooting . . . . . . . . . . . . . . . . . . . . . . . . . . . . . . . . . . . . . . . . . . . . . . . . . . . . . . . . . . . . . . . . . . . . . . . . . . . . . . . . . . 34
13. Cleaning . . . . . . . . . . . . . . . . . . . . . . . . . . . . . . . . . . . . . . . . . . . . . . . . . . . . . . . . . . . . . . . . . . . . . . . . . . . . . . . . . . . . . . . . . . 37
14. Technical specifications . . . . . . . . . . . . . . . . . . . . . . . . . . . . . . . . . . . . . . . . . . . . . . . . . . . . . . . . . . . . . . . . . . . . . . . . . 37
15. Warranty information . . . . . . . . . . . . . . . . . . . . . . . . . . . . . . . . . . . . . . . . . . . . . . . . . . . . . . . . . . . . . . . . . . . . . . . . . . . . 38
16. Regulatory Statements . . . . . . . . . . . . . . . . . . . . . . . . . . . . . . . . . . . . . . . . . . . . . . . . . . . . . . . . . . . . . . . . . . . . . . . . . . 39

4 5
1. Electronic unit with attached bed sensor
2. Power supply
3. Plug adapter for European countries
4. Plug adapter for United Kingdom
5. Plug adapter for United States of America
6. Plug adapter for Australia
7. User guide
8. Quick guide
1.
2.3.
5.
4.6.
1. Package contents
Quick Guide
7.
8.
2. Safety instructions
If the device gets wet or starts overheating stop using immediately and disconnect power
supply from mains power.
Equipment is not suitable for use in the presence of a flammable anaesthetic mixture with air
or with oxygen or nitrous oxide.
Only use the power supply (as specified in chapter Technical specifications) supplied with
the product.
This product is designed for indoor use only.
This product IS NOT intended to be used for direct diagnosis or monitoring of disease or
other conditions, or physiological processes.
Do not use this device for any purpose other than that specified by the manufacturer.
Do not try to repair the device yourself.
If the instructions are not adhered to, the situation may lead to a death or serious personal injury (in these
instructions for use). ATTENTION - consult accompanying documents (i.e. these instructions for use)
SYMBOLS USED IN THESE INSTRUCTIONS FOR USE
The following instructions are designed to ensure the personal safety of the user and protect this device
or any device connected to it from damage. These instructions use symbols to draw the user’s attention to
the instructions at hand. The symbols act as safety and warning signs. The symbols and their explanations
are as follows:
Means that the section contains important information for the user (in these instructions for use).
Installation &
operating instructions
6 7
3. Minimum requirements
4.1. Intended use
The EMFIT QS hardware (Product) and web application (Service) together is a general wellness product
intended to be used for tracking the impact of freetime activities on recovery, fatigue and sleep quality
on a healthy subject. It is not a medical device and is
not intended to be used for diagnosis or monitoring
of disease or other conditions, or investigation of a
physiological process.
The product consists of electronic unit with attached
bed sensor and a separate power supply.
4.2. Liability of the manufacturer
Emfit Ltd is liable to ensure the safety, reliability and
performance of the device, provided that:
• The device is installed, used and cleaned in
accordance with these instructions
• Any changes to the product, maintenance and
repairs are conducted by a person trained by
Emfit Ltd or its representative.
4.3. About these instructions for use
Read all warnings and reminders in these instructions
for use with care to avoid any hazardous situations
and damage.
4.4. Why to use EMFIT QS
• Long term measurement, all your round, every night,
whole night!
• Ease of use, nothing needs to be turned on, no need
to wear anything, no irritation on skin, etc.
• User can see long term development, and also
possible deterioration, and look reasons for this.
• System gives information about training load
(evening HRV sinks), recovery rate (ratio between
evening and morning HRV’s), and recovery status
(morning HRV). With this information, the user can
optimize the training schedule based on actual body
needs, and not on what calendar says.
• System can also prevent the user from training
when it is not beneficial; for example Resting HR
usually sinks if person is getting ill, before the person
even knows that. Long term decrease in RMSSD
may be indication of over-training syndrome.
4. Overview
• 2,4 GHz (802.11 b/g/n) home* Wi-Fi network with access to Internet.
The 5 GHz Wi-Fi is not supported.
• Channels 1 - 11 in use (channels 12-14 are not supported)
• For Wi-Fi set up process, a computing device (for example laptop, desktop computer, smart phone)
with internet browser.
• Electrical outlet (110 - 230V AC) for the included 5V power supply
* In home Wi-Fi networks usually all outgoing ports are open. If you use professional (oce, corporate) Wi-Fi
you need to enable outgoing ports 35110 - 35121 open.
As per experience in October 2017, using Windows 10 for Wi-Fi setup process is dicult or impossible.
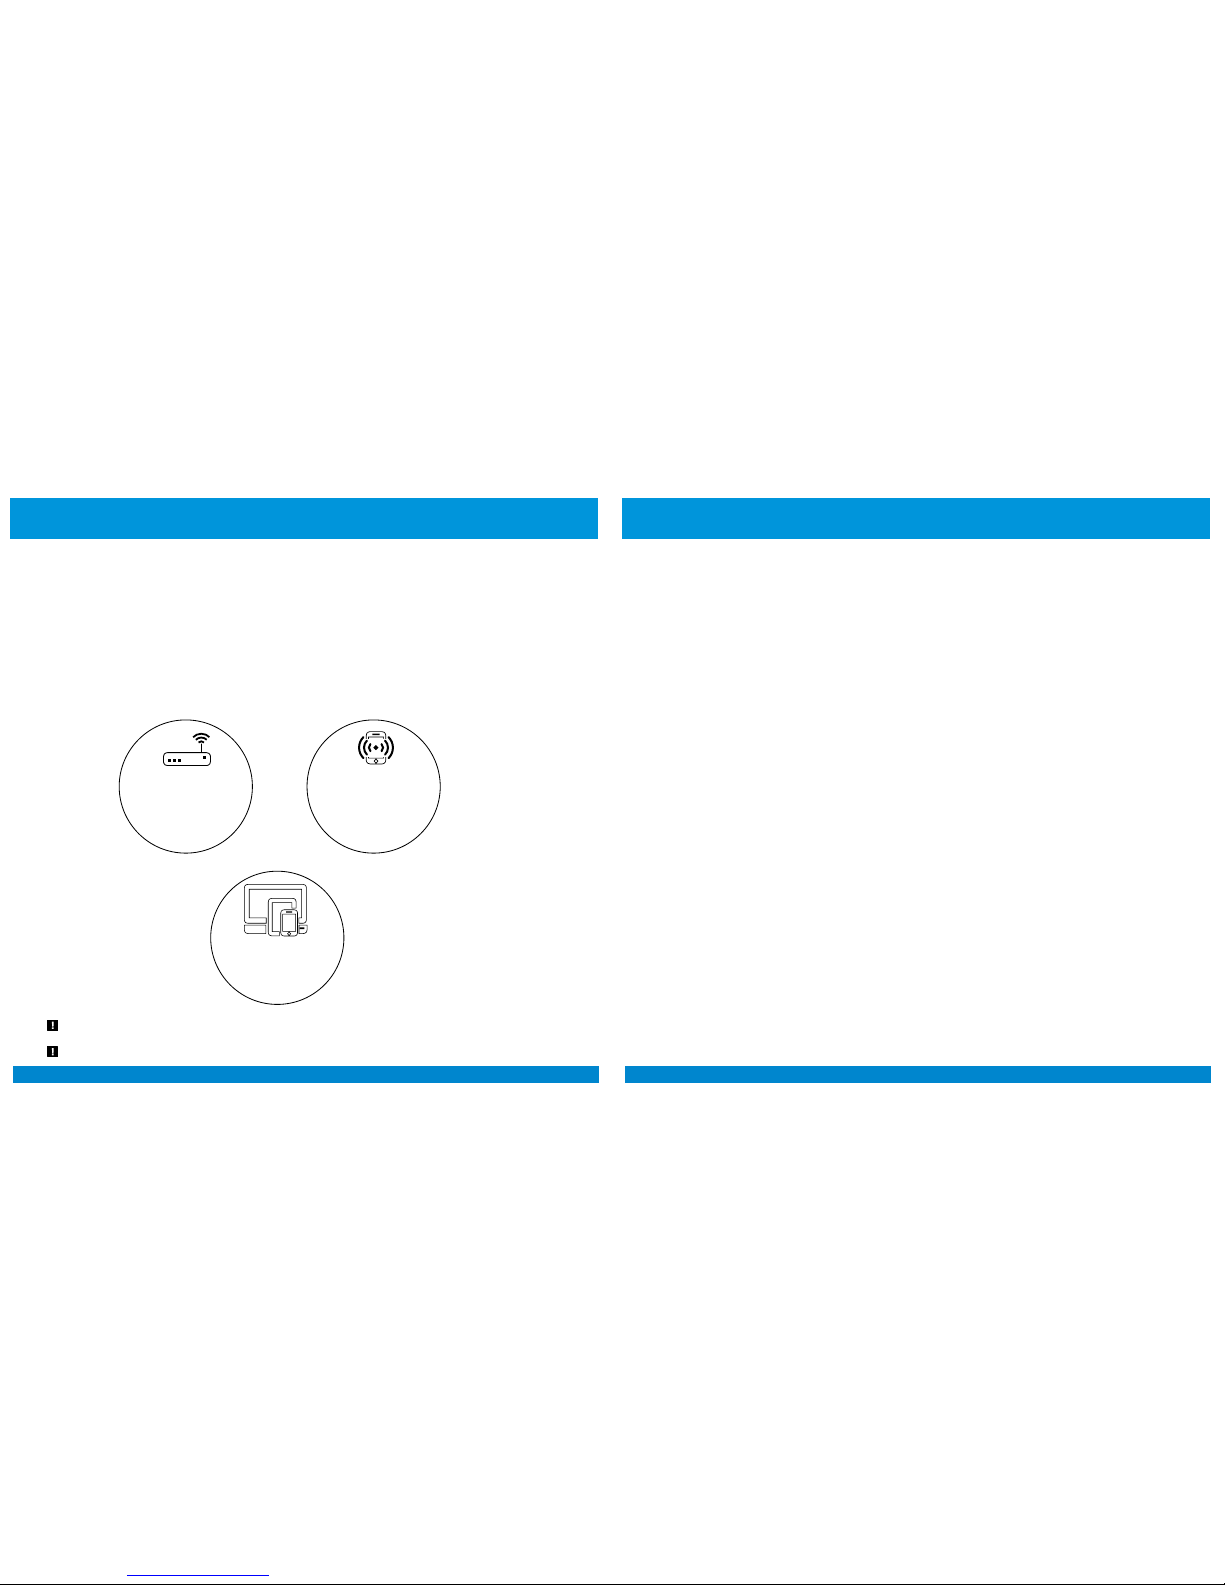
or
Your Wi-Fi network
password
or
Home Wi-Fi
with Internet access
Mobile device as
Wi-Fi hotspot
Your hotspot Wi-Fi
network password
Computing device
(computer or tablet
or smartphone
with browser)
For
Wi-Fi set up
you need
(only once):
To operate, EMFIT QS needs:
To use your phone/tablet as hotspot to provide Wi-Fi for EMFIT QS, you need once some other
computing device to enable this setup.

8 9
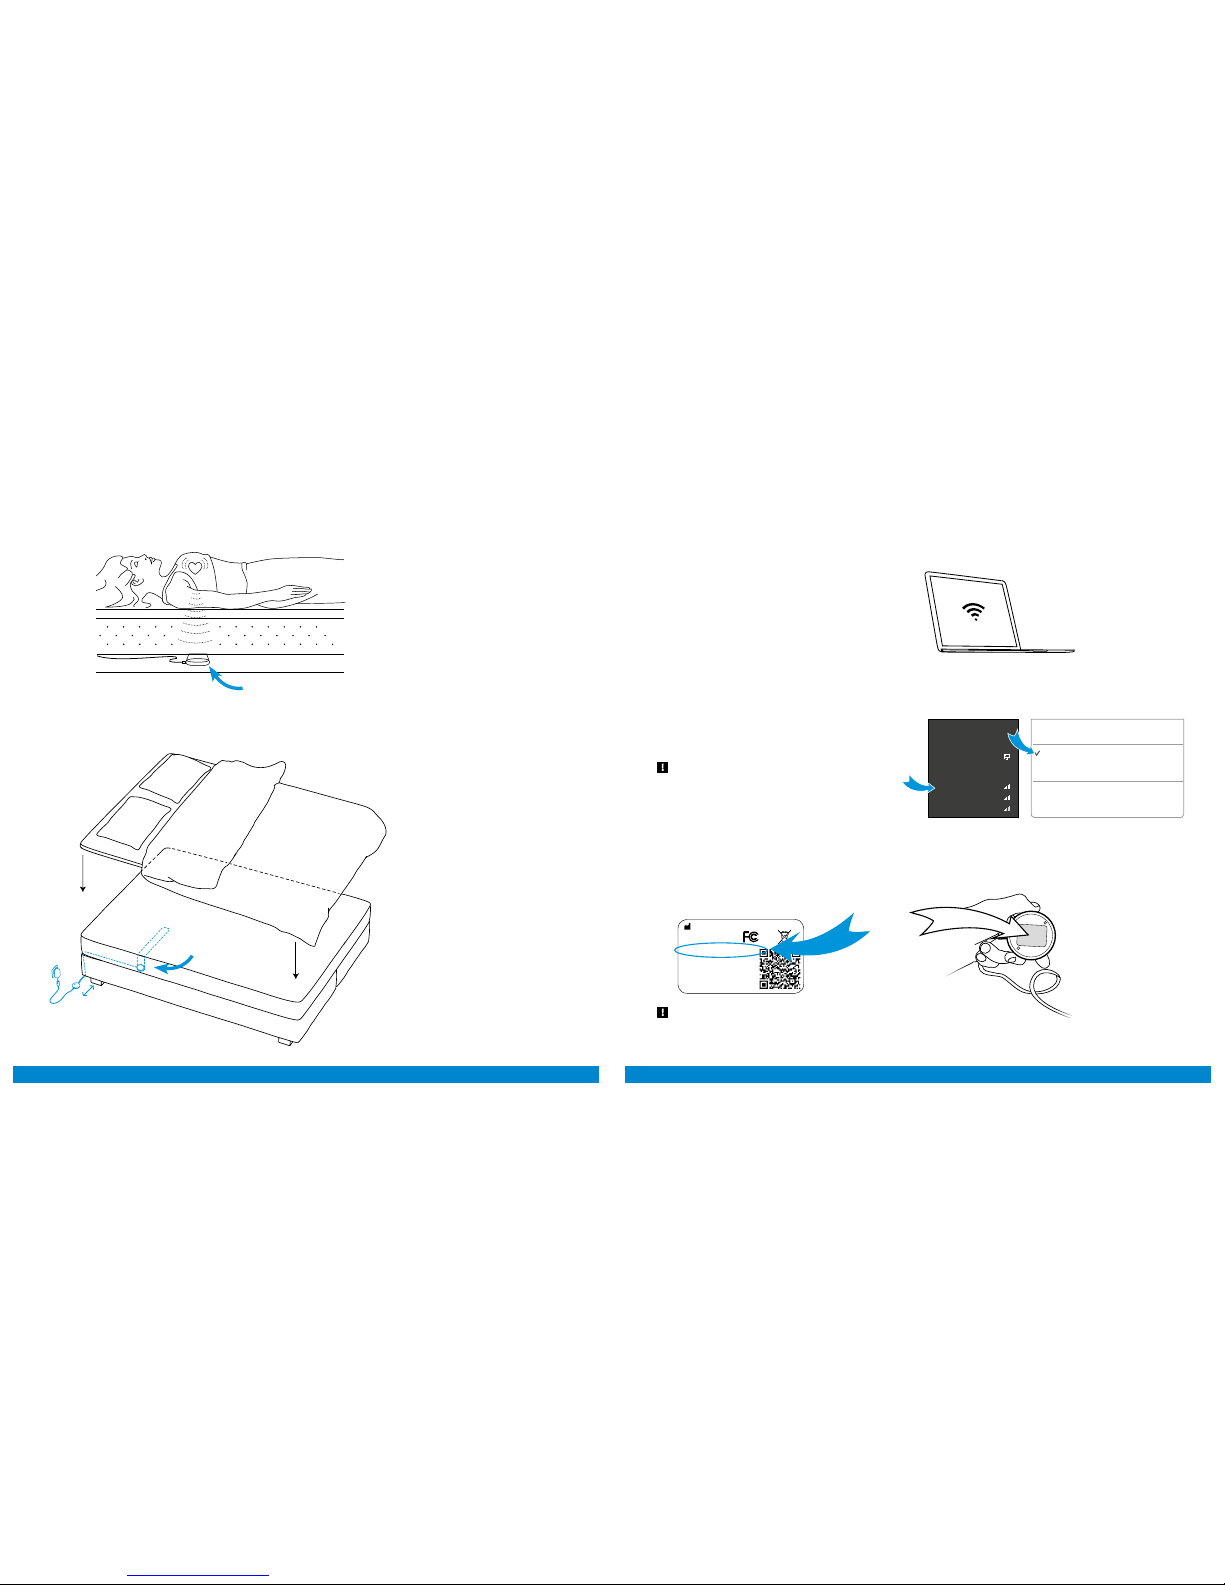
20 cm
Place the electronics unit on the
floor and at minimum 20 cm
distance from your body.
Note! If only the red led flashes you
need to restore the device into AP
mode. Please see chapter 7 on page 22.
Power cord
Red
Green
Power cord Sensor cord
1
Select a suitable adapter from the four
alternatives.
2
Connect the correct adapter to the power
supply and ensure that it locks in its place.
CLICK!
3
Connect the power supply to electrical outlet (110 - 230V AC) and connect the power cord to Emfit QS.
Green and red lights start to flash
alternately and device makes beep
sounds.
Place the bed sensor beneath the mattress
or mattress topper across the bed under your
chest area.
4
5. Setup
20 cm
You can place the EMFIT QS
beneath the mattress topper…
… or you can place it beneath the mattress.
10 11
3
Fill in the requested password
(PW: XXX-XXXX-XXX).
Note! The password must be filled in
with the hyphens.
2
Connect your computing device to the network:
Emfit_xxxxxx (where xxxxxx is the serial number
of your device).
Ignore possible “No internet connection”.
Emt Ltd, Finland | Product: Emt QS | Model: IP-9360
Contains FCC ID: W70MRF24WG0MAMB
Contains transmitter module IC:
7693A-24WG0MAMB
Designed and manufactured in Finland.
SN: XXXXXX
PIN: XXXXX
PW: XXX-XXXX-XXX
http://192.168.1.3
Windows Mac OSX
Networks
Turn Wi-Fi O
Emt _1234567
AppleWiFi
Testwork
Join Other Net work…
Create Network…
Open Network Preferences…
Wi-Fi: O n
Connections
Wi-Fi
ConnectedNetwork
Emt_1234567
Some-Guest-2.4GHz
2WIRE123
1
With your computing device search for wireless
networks.
Placing the EMFIT QS in double bed
If you sleep with a partner in a double
bed, place the sensor on to your side
of the bed as far as possible from your
partner. Make sure the sensor is still under your chest area.
You can bend the sensor over the corner
of your mattress. It will help to prevent
sensing your partner’s heart rate, especially when you leave the bed earlier
than he/she.
20 cm
The device works most reliably when
the sensor is located directly below your
heart.
5.1. Connecting EMFIT QS to your Wi-Fi network
(without WPS button)

12 13
6
Press enter and EMFIT QS will now try to
connect to your Wi-Fi network. Connecting
can take up to few minutes. You hear short
“beep” sounds and see the red led flashing.
Successful connection type 1
Device will emit high tone sounds. In about
1-3 minutes red light will stop flashing and
green light will start flashing.
Successful connection type 2
Device will emit high tone sounds. However
red light will not stop flashing. It flashes one
or two or three times between pauses.
9
You are done! Your device is now
connected and ready to track your sleep.
Sorry, you are not done yet! Please see
chapter Troubleshooting page 21 in the
Main Manual. This occurs usually in a
corporate Wi-Fi network.
Only red light remain flashing.
Red light starts flashing.
Green light will start flashing.
4
5
Open your computing devices’ browser
(Mozilla, Safari, Chrome, Internet Explorer etc.).
Type in address/url bar:
http://192.168.1.3 and hit enter.
Select your own Wi-Fi network from the list
and type its password.
If you cannot access above IP-address,
check that your computing device did not
disable itself from EMFIT QS and is perhaps
again connected to your own Wi-Fi. Problem
especially arise with desktop computer and
LAN/ethernet cable connected. To solve
possible problem, simply remove LAN/ethernet cable temporarily.
http://192.168.1.3
http://192.168.1.3
Emt
“Your network”
Detected Wireless Networks
Other Network…
 Loading...