


Personal CD-R/RW Player
with 60 Second Anti-Shock
and Wired Remote Control,
Stereo Headphones, Car Kit
OWNER’S MANUAL
HD9116BL
Visit our web site at www.emersonradio.com
HD9116_041006.p65 10/4/2006, 9:1023

Thank you.........
For purchasing this Emerson Personal CD Player. The CD player has a 20
track programmable memory so you can listen to the songs on your favorite
CDs in any order you choose. Or you can use the Random playback feature
and let the player select the playback order for you. Use the 3-way Repeat
feature to repeat a single track, the entire disc, or a programmed sequence
of tracks, indefinitely. We've also included 60 second Electronic Anti-Shock
Protection which makes this player virtually skip-free during most active
uses.
Finally, this model includes a cassette adapter that allows you to play your
CDs through the cassette player in your car radio, and a wired remote
control that lets you operate the player while it is being carried in a purse,
back-pack, or pocket book.
Please read this Owner’s Manual completely and carefully to make sure
you understand the proper operation of this product, and get the maximum
enjoyment out of all the features of this state-of-the-art CD player.
Once again, thanks for purchasing this Emerson product.
1
HD9116_041006.p65 10/4/2006, 9:101
IMPORTANT NOTES
!
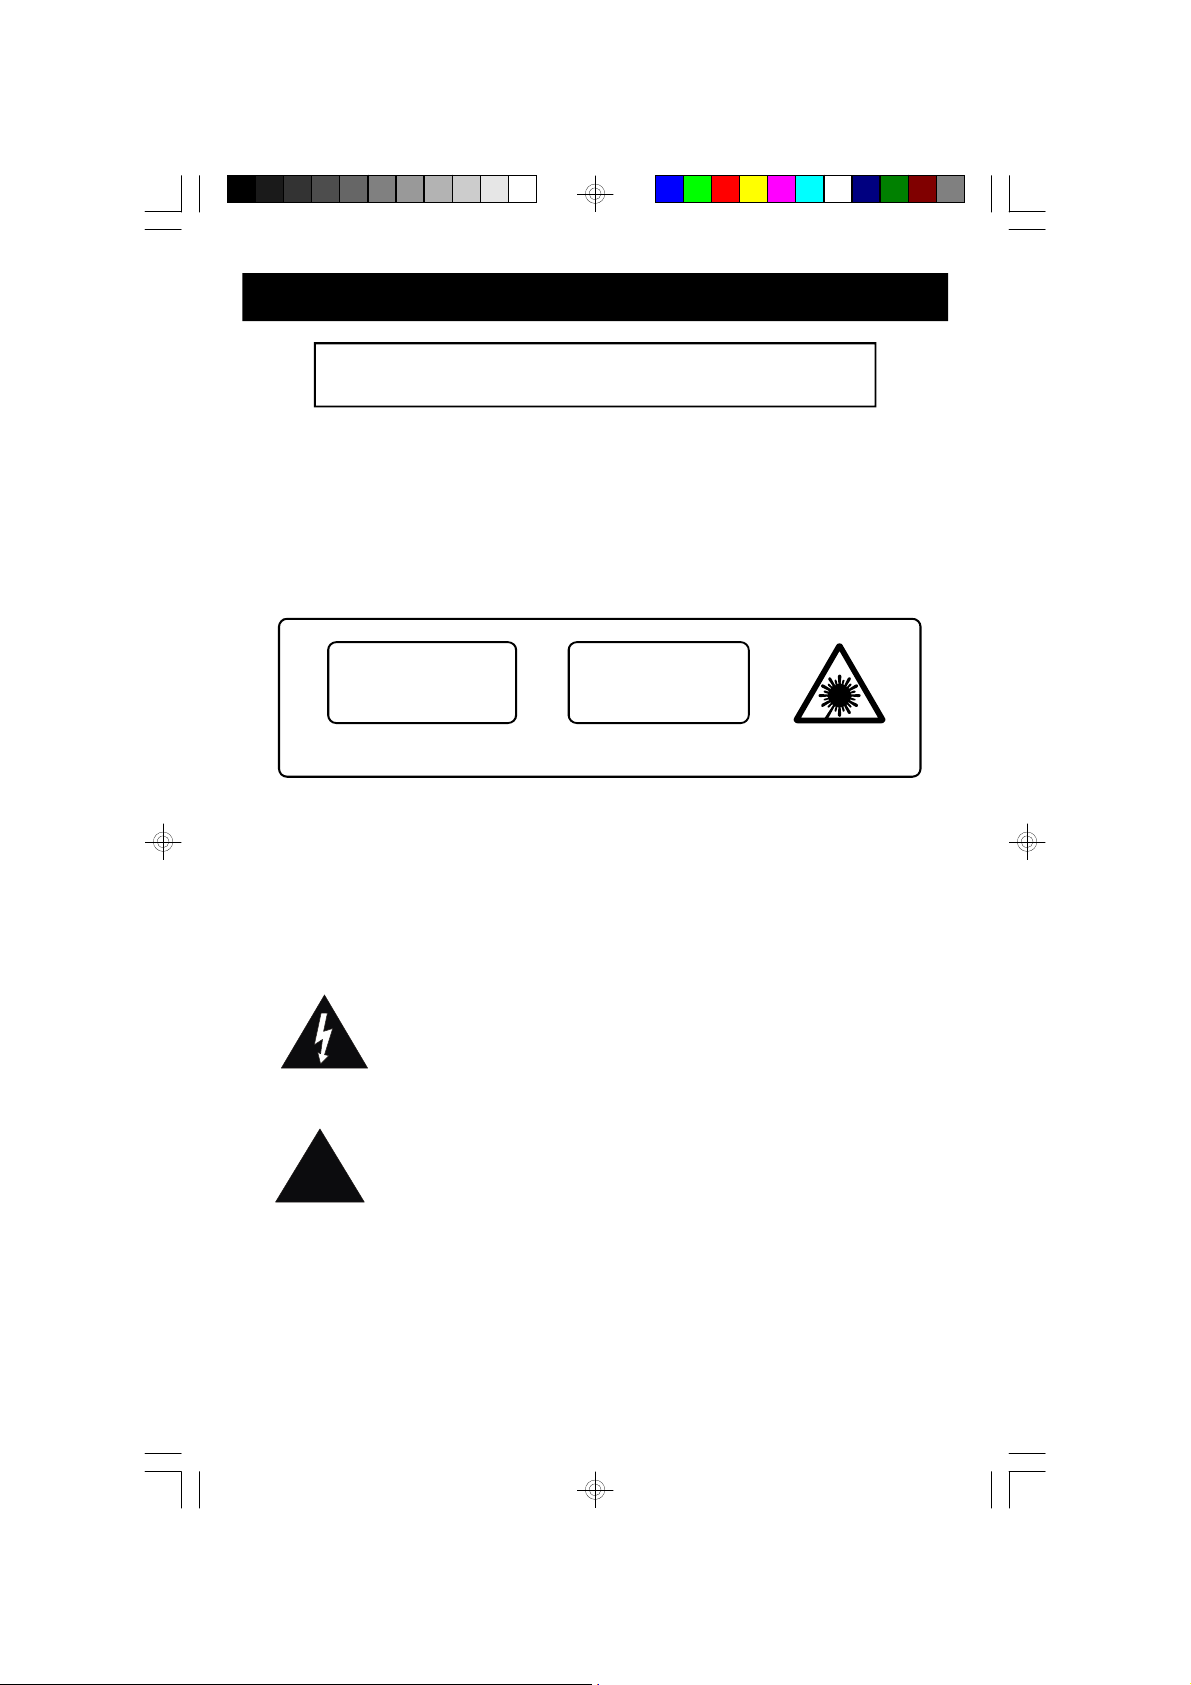
WARNING: TO PREVENT FIRE OR SHOCK HAZARD,
DO NOT EXPOSE THIS UNIT TO RAIN OR MOISTURE.
Avoid installing the unit in locations described below:
• Places exposed to direct sunlight or
close to heat radiating appliances such
as electric heaters.
CLASS 1 LASER PRODUCT
• Dusty places.
• Places subject to constant
vibration.
• Humid or moist places.
CLASS 1 LASER PRODUCT
APPAREIL Á LASER DE CLASSE 1
PRODUCTO LASER DE CLASE 1
CAUTION
INVISIBLE LASER RADIATION
WHEN OPEN AND INTERLOCKS
DEFEATED.
AVOID EXPOSURE TO BEAM
This product contains a low power Laser Device.
CAUTION
THIS LASER COMPACT DISC PLAYER FUNCTIONS BY HELP OF INVISIBLE
LASER LIGHT AND IS EQUIPPED WITH SAFETY SWITCHES TO AVOID
EXPOSURE WHEN DOOR IS OPEN AND SAFETY INTERLOCKS ARE
DEFEATED. IT IS DANGEROUS TO DEFEAT OR BYPASS SAFETY SWITCHES.
DANGEROUS VOLTAGE
Uninsulated Dangerous Voltage, that may be of sufficient
magnitude to constitute a risk of electric shock to persons is
present within this product's enclosure.
ATTENTION
The Owner's Manual contains important operating and
maintenance instructions.
For your safety, it is necessary to refer to the manual.
This device complies with part 15 of the FCC rules. Operation is subject to the
condition that this device does not cause harmful interference.
Changes or modifications not expressly approved by the party responsible for
compliance could void the user’s authority to operate the equipment.
2
HD9116_041006.p65 10/4/2006, 9:102

PREPARATION FOR USE
Remove The Transit Card
This personal CD player is shipped with a dummy CD ‘transit card’ inside the CD
compartment. The purpose of this card is to prevent the laser from moving during
shipment of the product. This card must be removed before using the CD player.
Slide the OPEN switch to the right to unlock the CD door. Remove the ‘transit card’
from the player and discard it.
Power Sources
This personal CD player is designed to operate on two “AA” batteries, not included.
Use a well known brand of Alkaline batteries for longest life and best performance.
This player can also be operated by with an optional AC/DC converter/adapter, not
included. If you decide to purchase an optional AC/DC adapter the specification
must be as follows:
Input: 120V 60Hz AC
Output: 4.5V DC, 500 mA.
Plug: Female Type with Positive Center, “UL” Listed.
Positive (+)
You may also purchase a “Universal” type AC/DC adapter which allows you to
select the required output voltage and plug polarity, and normally includes multiple
plug sizes to fit most brands of equipment. Always look for the “UL” listing mark
when you purchase an adapter.
Negative (–)
3
HD9116_041006.p65 10/4/2006, 9:103
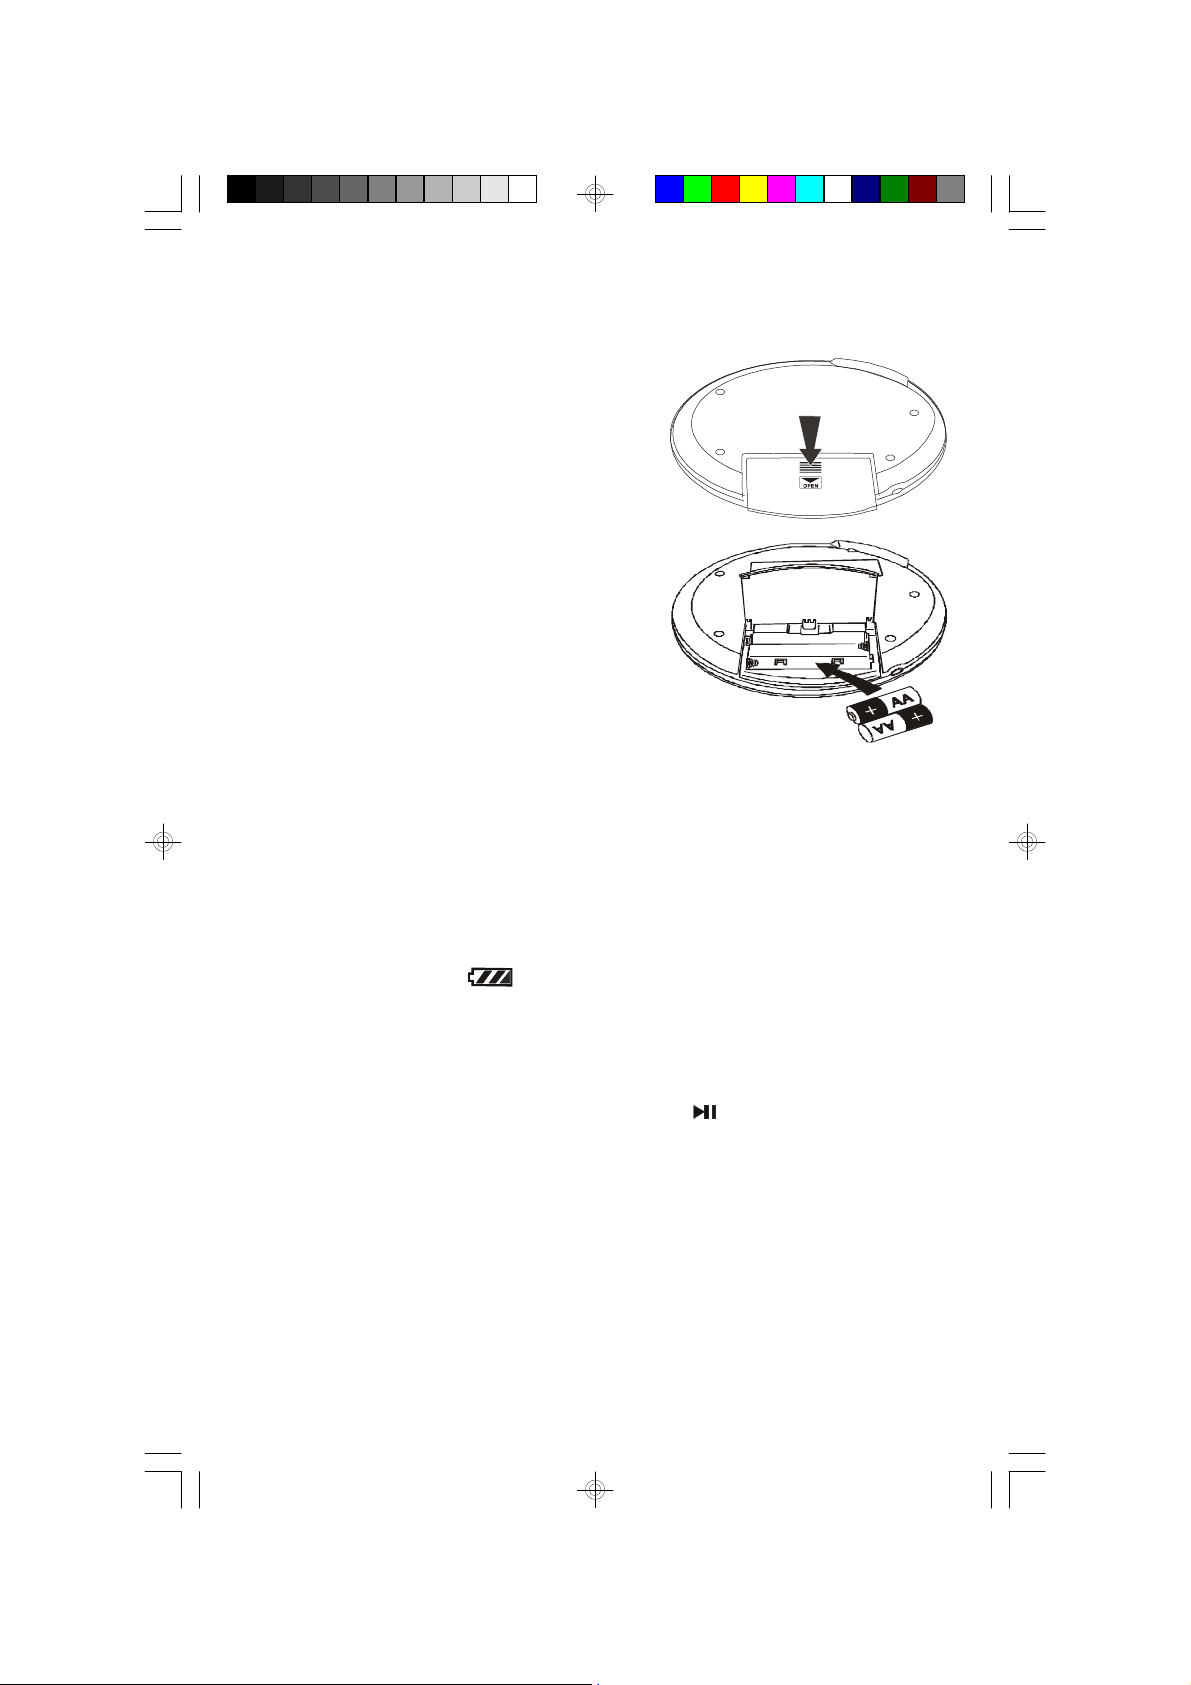
Installing The Batteries
NOTE: The battery compartment is located on the bottom cabinet.
1.) Press the battery door locking tab in the
direction of the ‘Arrow’ to open the battery
door. Lift the door upward as shown.
2.) Insert two alkaline “AA” batteries in the
battery compartment. Be sure to observe
the polarity markings engraved in the
battery compartment.
If the batteries are inserted incorrectly the
unit will not work.
3.) Close the battery door, and push the battery door downward until you hear a
‘click’ sound to lock the door again.
4.) Close the CD door.
Replacing The Batteries
When the battery symbol appears in the display the batteries are becoming
weak and should be replaced. Always replace both batteries at the same time with
new fresh alkaline batteries. Do not mix old and new batteries or different types of
batteries together.
If the display remains blank when you press the (Play/Pause) button, the
batteries are completely dead. Replace them immediately. If dead batteries are
left inside the battery compartment for a long period of time they may leak and
cause damage to the unit, and such damage or corrosion from leaking batteries is
not covered by your warranty.
4
HD9116_041006.p65 10/4/2006, 9:104
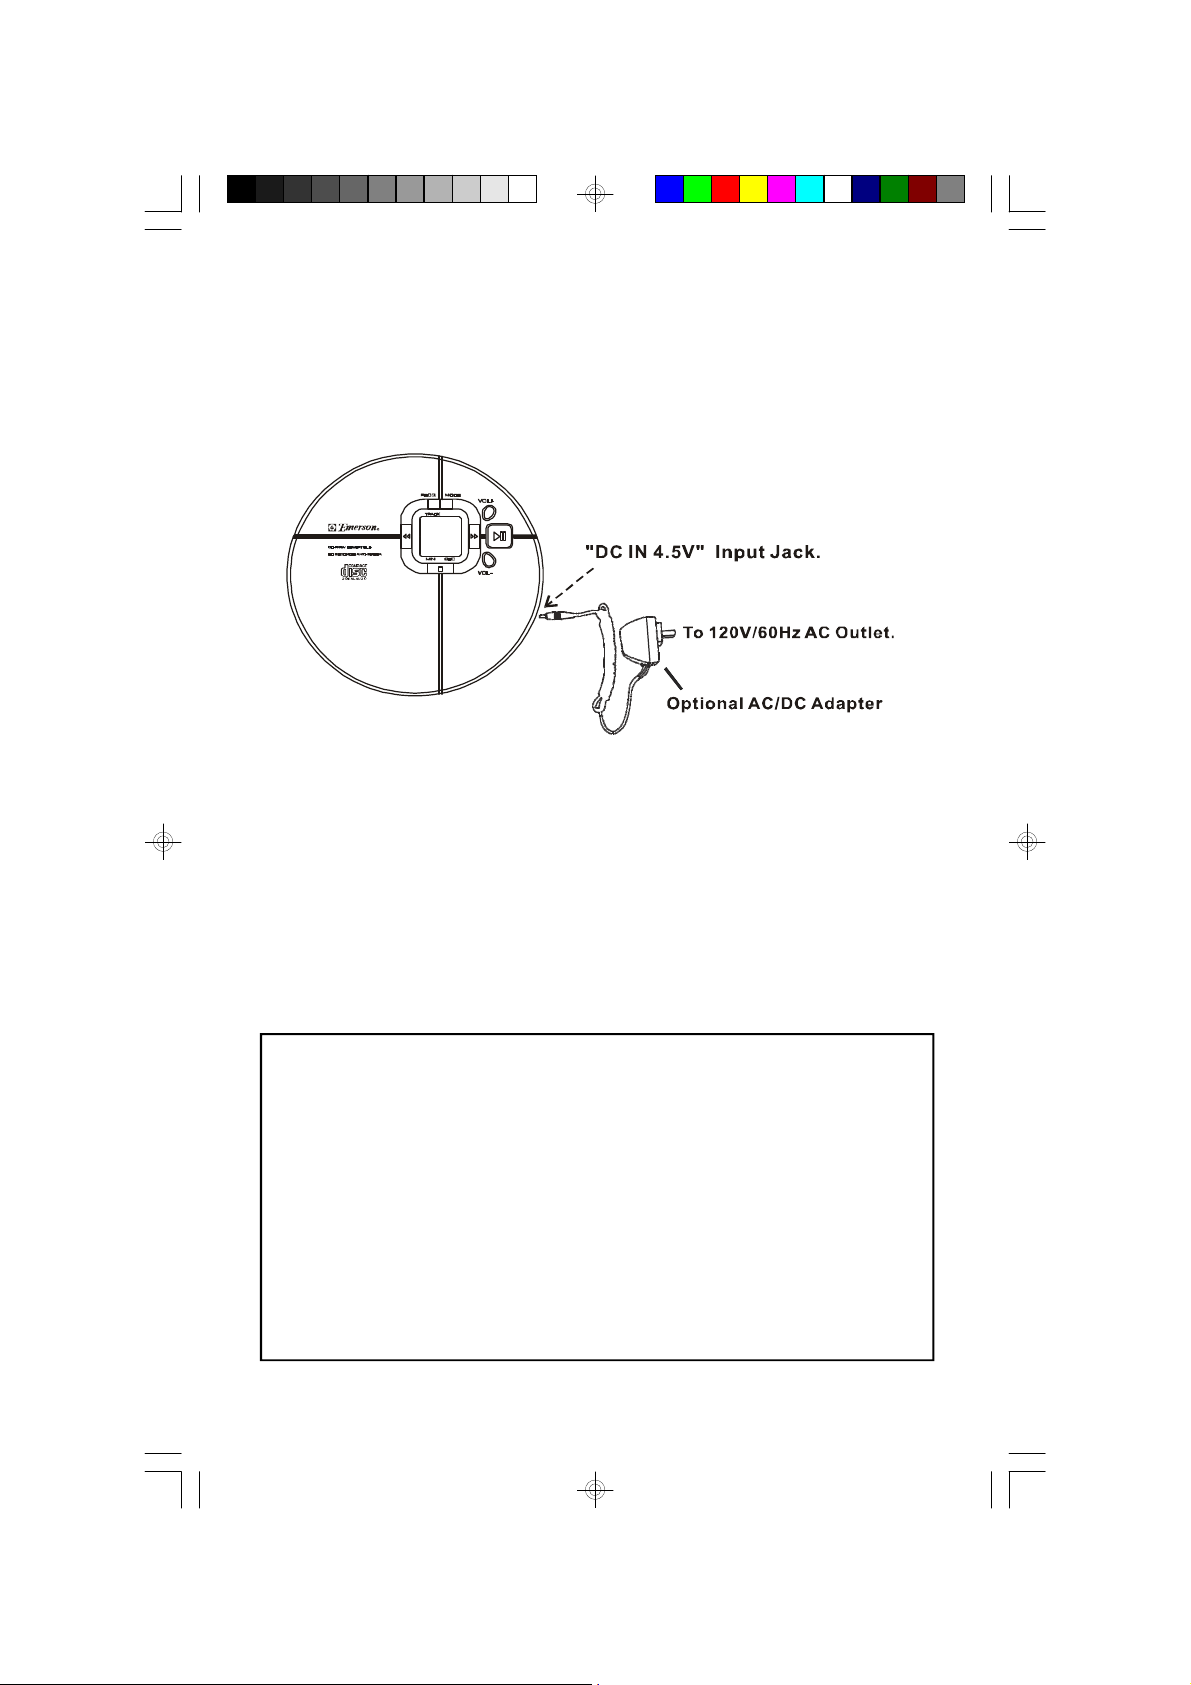
Connecting The Optional AC Adapter (Not Included)
1.) Connect the small female plug of the optional AC adapter to the “DC IN 4.5 V”
jack on the right side of the CD player.
2.) Connect the adapter housing to your 120V 60Hz AC outlet.
Notes:
• Never connect or disconnect the adapter from the AC outlet while your hands
are wet.
• The housing of the AC adapter may become warm during operation. This is
normal.
• The female plug of the AC adapter must be completely disconnected from the
CD player in order to operate the player on batteries.
BATTERY PRECAUTIONS
• Replacement of batteries must be done by an adult.
• Do not mix old and new batteries.
• Do not mix alkaline, standard (carbon-zinc) or rechargeable (nick el-cadmium)
batteries.
• The supply terminals are not to be short-circuited.
• Non-rechargeable batteries are not to be recharged.
• Exhausted batteries are to be removed.
• Only batteries of the equivalent type are to be used.
• Batteries are to be inserted with the correct polarity.
• Dis pose of batteries properly. Do not dispose of batteries in fire. The batteries
may explode or leak.
5
HD9116_041006.p65 10/4/2006, 9:105

Connecting The Stereo Headphones And Remote Control
•Connect the plug of the supplied stereo headphones directly to the green-colored
PHONES jack on the left side of the cabinet.
•Or you may connect the headphones to the supplied Remote Control, then to
the PHONES jack.
NOTE: The control buttons ( Play/Pause), (Stop), (Skip Forward),
(Skip Reverse), VOL+, and VOL– function same as those on front panel.
NOTE: Make sure that the plugs are inserted into the jacks as far as they will
go. If the plugs are not fully inserted, you may only hear sound from one side
of the headphones.
IMPORTANT!
Always set the VOL– control to a low level before you put the headphones on and
begin playing a CD. Then start playback and gradually increase the volume to a
comfortable listening level. Do not play the CD at loud volume levels that might
prevent you from hearing warning sounds such as car horns, etc.
6
HD9116_041006.p65 10/4/2006, 9:336
 Loading...