

Emergi-Lite EF11DX User Manual
Class I Division 2 – Groups A, B, C & D
Class I Division 2 – Groups A, B, C & D
Hazardous locations remote lighting fixture, Models EF11 or EF11D
These are UL listed for use with Emergi-Lite emergency lighting units
HZM Series.
Installation Instructions
1. Use a conduit to bring the DC supply wires into the electrical box.
Leave 6” of wire length in the junction box.
2. Fix the junction box to the wall or ceiling (screws not provided).
3. All the conduit holes have been sealed with a plug except one. Use
the conduit hole that is left open to insert the conduit. To ensure that
3 ½ threads are readily engaged, we added some thick petroleum
grease to each plug’s threads. If you need to use another conduit
hole, remove the plug, re-install it in another hole left open, if applicable, adding thick grease to the threads. Make sure every conduit hole
is sealed properly with a plug or a conduit.
4. Make the proper connections. The fixture is made for 6 or 12 VDC
(see lamp voltage on marking – H7553 6V 12W & H7557 6V 12W
sealed beam lamps only). Connect the white wires to the DC supply
wires.
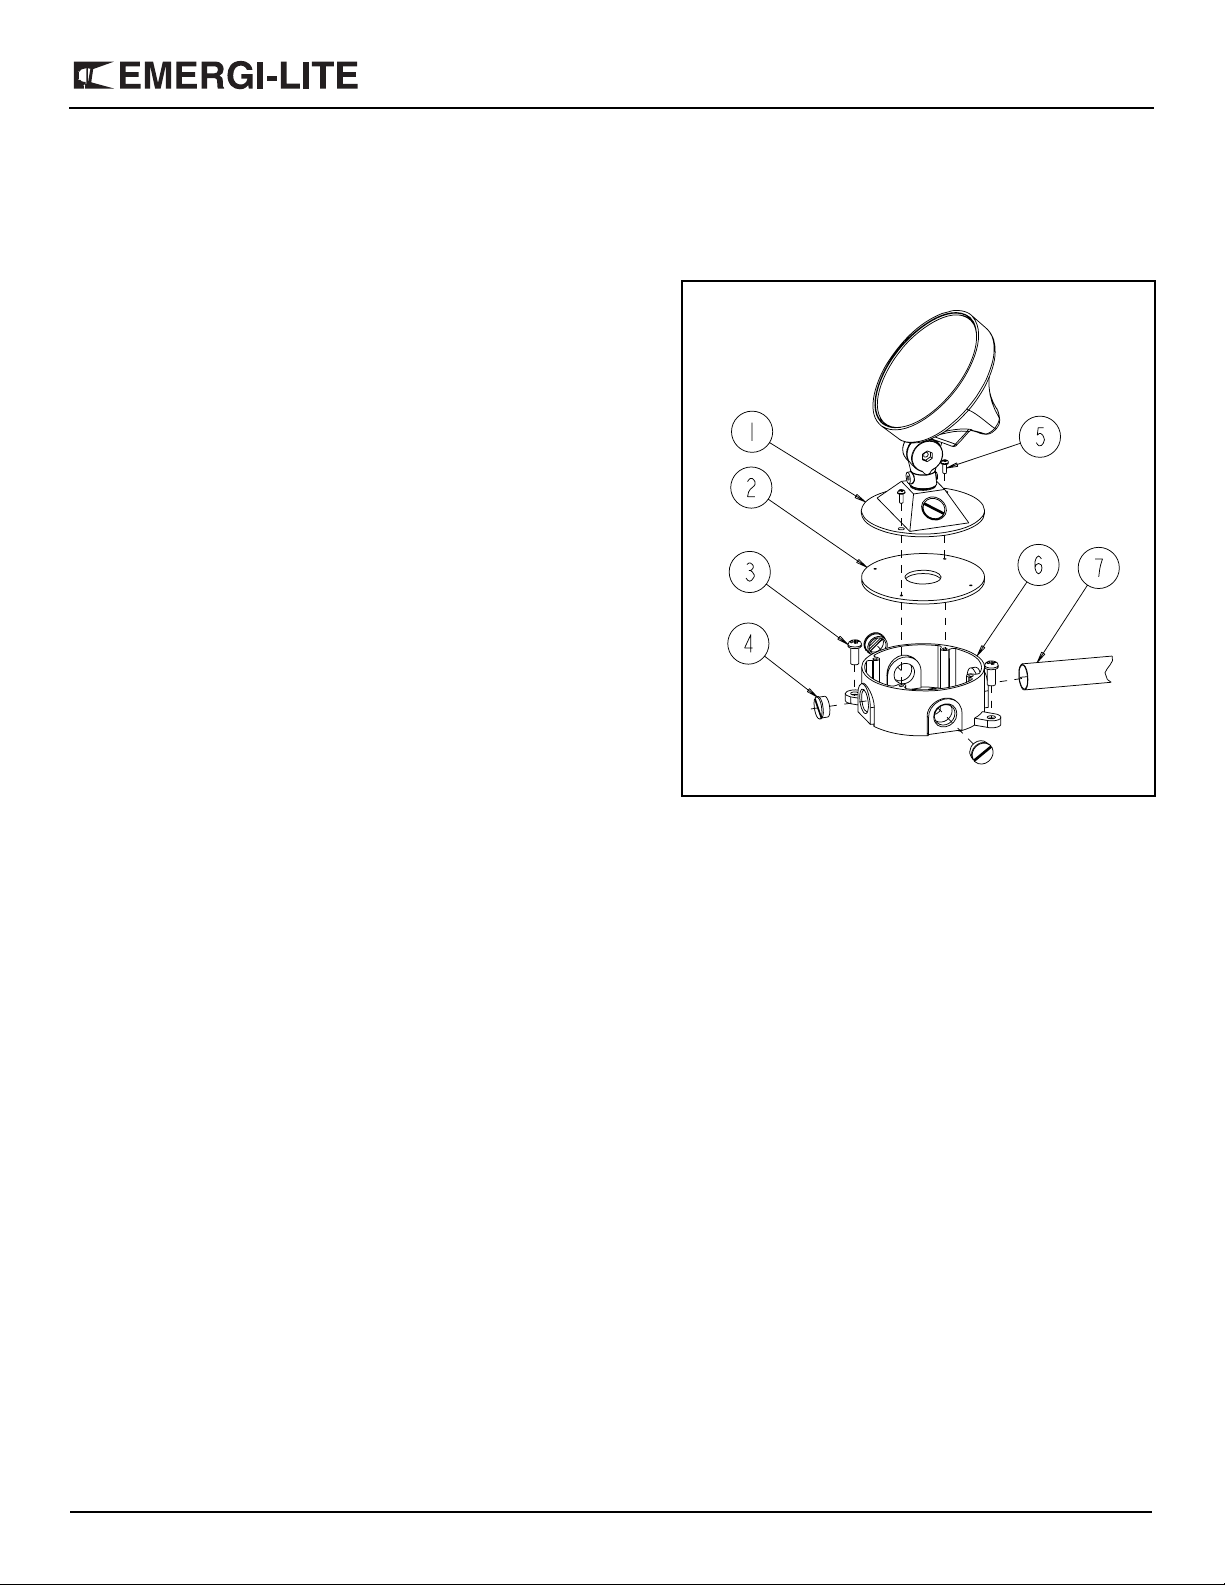
5. Place the gasket on top of the junction box, and then the lamp-coverassembly. Use the two cover screws to fix in place (see fig. 1).
6. All wiring must be to NEC 501-4 (b) wiring methods.
Figure 1
To replace a lamp head
To replace the head(s), you need to change the lamp-cover-assembly.
1. Remove the 2 screws holding the junction box cover.
2. Replace the old lamp-cover-assembly by the new one. Fix with the
cover screws.
Part List
1. Lamp-cover-assembly
2. Gasket
3. Junction box screw (2, not
provided)
4. Plug (4)
5. Cover screw (2)
6. Junction box
7. Conduit (not provided)
Emergi-Lite Tel: (888) 552-6467 Fax: (800) 316-4515 www.emergi-lite.com
02/09 750.0995 Rev. B
1/1
 Loading...