

embrace EVO Owner's Manual

DDeeaarr EEmmbbrraaccee EEVVOO™™ OOwwnneer
r
Thank you for choosing the Embrace EVO™ Blood Glucose Meter to help you manage
your diabetes. We designed the Embrace EVO™ Blood Glucose Meter to be accurate and
easy to use. The added convenience of the AutoCode features an innovative automatic
calibration feature that eliminates the manual coding step usually required by many blood
glucose meters before starting a new vial of test strips. This manual contains all of the information needed to use and maintain your new blood glucose meter. Please read carefully
before use.
Please call us at 1-877-979-5454 for questions and inquiries. Hours of operation are
Monday through Friday, 8am - 8pm EST. If you have any questions or need assistance outside the operational days and times, please contact your health care provider.
EVO
voice
EVO
EVO
voice
EVO
Blood Glucose Monitoring System
1

Intended Use
The Embrace EVO™ Blood Glucose Meter is intended for the quantitative measurement of
glucose in fresh capillary whole blood samples drawn from the fingertips, forearm, or palm.
Alternative site testing should be performed only during steady-state (when glucose is not
changing rapidly). Testing is done outside the body (In Vitro diagnostic use). It is indicated
for lay use by people with diabetes, as an aid to monitoring levels in Diabetes Mellitus and
should only be used by a single patient and it should not be shared. It is not indicated for
the diagnosis or screening of diabetes or for neonatal use.
IMPORTANT:
• Dehydration – Severe dehydration may lead to inaccurate blood glucose test result. If you
suspect you are severely dehydrated, contact your healthcare professional immediately.
• Hematocrit range – A hematocrit range that is higher than 55% or lower than 30% can
cause inaccurate blood glucose test results.
• Not intended for use on neonates (newborns).
Blood Glucose Monitoring System
2
EVO
EVO
EVO
voice
EVO

Important Safety Instructions
• The meter and lancing device are for single patient use. Do not share them with anyone,
including other family members. Do not use on multiple patients.
• All parts of the kit are considered biohazardous and can potentially transmit infectious
diseases, even after you have performed cleaning and disinfection.
• Users should wash hands thoroughly with soap and water after handling the meter, lancing device, or test strips.
The link of public health notification and standard practice guideline are :
• “FDA Public Health Notification: Use of Fingerstick Devices on More than One Person
Poses Risk for Transmitting Bloodborne Pathogens: Initial Communication” (2010)
http://www.fda.gov/MedicalDevices/Safety/AlertsandNotices/ucm224025.htm
• “CDC Clinical Reminder: Use of Fingerstick Devices on More than One Person Poses
Risk for Transmitting Bloodborne Pathogens” (2010) http://www.cdc.gov/injectionsafety/Fingerstick-DevicesBGM.html
Blood Glucose Monitoring System
3
EVO
EVO
EVO
voice
EVO

TTaabbllee ooff CCoonntteenntts
s
Understanding Your New Blood Glucose Kit
The Embrace EVO™ Meter . . . . . . . . . . . . . . . . . . . . . . . . . . . . . . . . . . . . . . . . . . . . . . . . . . . . . . . 6
The Embrace EVO™ Meter Display Screen . . . . . . . . . . . . . . . . . . . . . . . . . . . . . . . . . . . . . . . . 8
The Embrace EVO™ Blood Glucose Test Strip. . . . . . . . . . . . . . . . . . . . . . . . . . . . . . . . . . . . 10
Setting Up Your New System
Inserting (or Changing) the Battery . . . . . . . . . . . . . . . . . . . . . . . . . . . . . . . . . . . . . . . . . . . . . . 11
Setting the Clock. . . . . . . . . . . . . . . . . . . . . . . . . . . . . . . . . . . . . . . . . . . . . . . . . . . . . . . . . . . . . . . 13
Setting the Alarm . . . . . . . . . . . . . . . . . . . . . . . . . . . . . . . . . . . . . . . . . . . . . . . . . . . . . . . . . . . . . . 17
Turning ON/OFF Beep Sound . . . . . . . . . . . . . . . . . . . . . . . . . . . . . . . . . . . . . . . . . . . . . . . . . . 19
Control Solution Testing
Performing a Control Solution Test . . . . . . . . . . . . . . . . . . . . . . . . . . . . . . . . . . . . . . . . . . . . . . 21
Control Solution Trouble Shooting . . . . . . . . . . . . . . . . . . . . . . . . . . . . . . . . . . . . . . . . . . . . . . . 27
Testing Your Blood Glucose
Preparing Your Lancing Device. . . . . . . . . . . . . . . . . . . . . . . . . . . . . . . . . . . . . . . . . . . . . . . . . . 29
Blood Glucose Monitoring System
4
EVO
EVO
EVO
voice
EVO

Important Information on Alternative Site Testing (AST) . . . . . . . . . . . . . . . . . . . . . . . . . . . 31
Performing a Blood Glucose Test. . . . . . . . . . . . . . . . . . . . . . . . . . . . . . . . . . . . . . . . . . . . . . . . 33
Understanding Your Blood Glucose Test Results
What to Do If You Get a High or Low Reading. . . . . . . . . . . . . . . . . . . . . . . . . . . . . . . . . . . . 38
Viewing Stored Readings and 7-, 14-, 30-Day Average from Memory . . . . . . . . . 40
Caring for the Meter
Cleaning and disinfection procedures for meter and Lancing Device . . . . . . . . . . . . . . . 44
Purchase information for dispatch hospital cleaner disinfectant towels with bleach. . . . . .
52
Storage and Precautions. . . . . . . . . . . . . . . . . . . . . . . . . . . . . . . . . . . . . . . . . . . . . . . . . . . . . . . . 53
Solving Problems . . . . . . . . . . . . . . . . . . . . . . . . . . . . . . . . . . . . . . . . . . . . . . . . . . . . . . . . . . . . . . . 54
Product Warranty . . . . . . . . . . . . . . . . . . . . . . . . . . . . . . . . . . . . . . . . . . . . . . . . . . . . . . . . . . . . . . . 57
Specifications. . . . . . . . . . . . . . . . . . . . . . . . . . . . . . . . . . . . . . . . . . . . . . . . . . . . . . . . . . . . . . . . . . . 58
Blood Glucose Monitoring System
5
EVO
EVO
EVO
voice
EVO
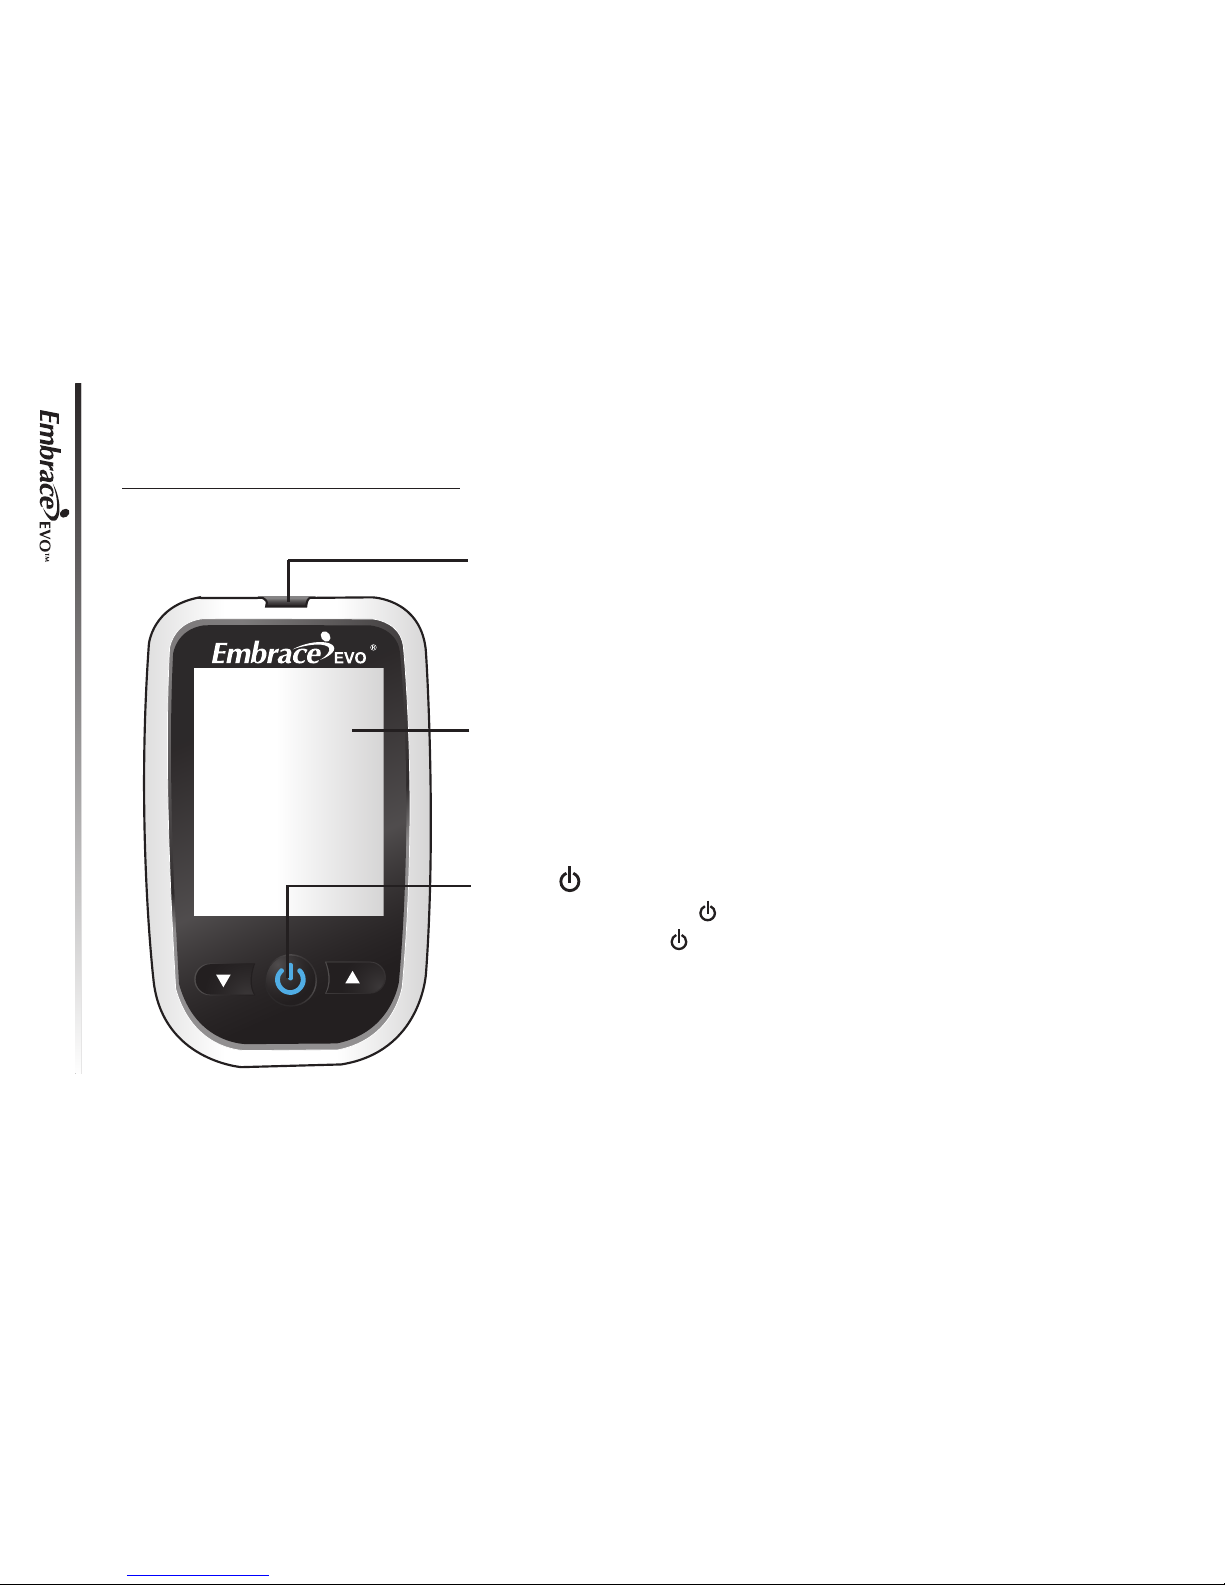
Embrace EVO™ Meter
Blood Glucose Monitoring System
6
Meter Display
Shows your blood glucose test results, memory values, averages,
and other messages
Enter ( ) and ▲▼buttons
Press and hold Enter ( ) for 2 seconds to turn the Meter on or
off, or press Enter ( ) to go into setup mode when not testing.
Press ▲ or▼ to enter control mode with test strip inserted, during meter setting, or to navigate the stored test values and averages.
TTeesstt SSttrriipp PPoorrtt
This is where you insert the test strip and the meter will turn on
automatically.
EVO
EVO
EVO
voice
EVO
Blood Glucose Monitoring System
7
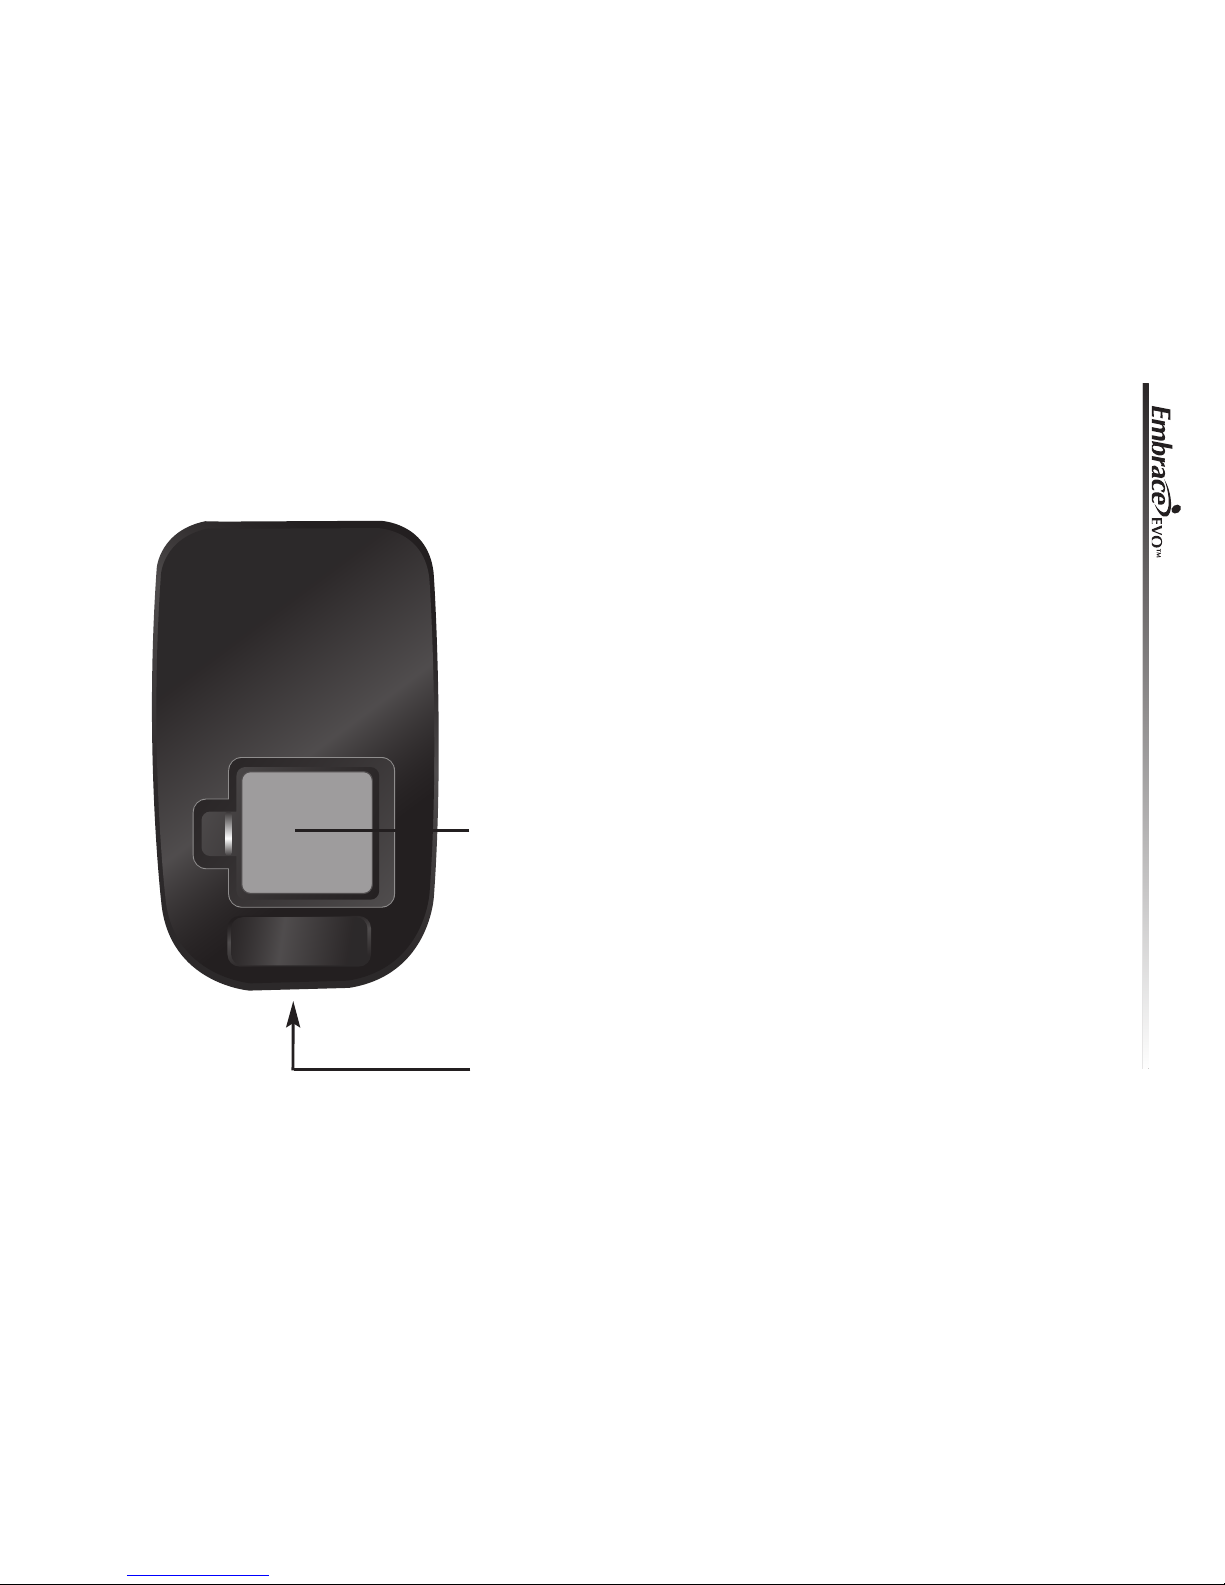
Battery Compartment
Holds one CR 2032 3V Lithium coin cell battery.
Data port
Please contact 1-877-979-5454 Monday through Friday between 8AM and 8PM (EST) for purchasing cable.
EVO
EVO
EVO
voice
EVO

The Embrace EVO™ Meter Display Screen
Blood Glucose Monitoring System
8
TONE
MAIN DISPLAY AREA
UNIT
MEMORY
BATTERY
TEMPERATURE
TEST STRIP
BLOOD DROP
DAY AVERAGE
MINUTES
HAPPY/SAD FACE ALARM CLOCK
HOUR
EVO
EVO
EVO
voice
EVO

MEMORY: . . . . . . . . . . . . . . Indicates the number in the display area is a stored test value
(see page 40)
MAIN DISPLAY AREA: . . Displays test results, stored test values, calculated result aver-
ages, and messages.
BATTERY: . . . . . . . . . . . . . . Appears when the battery is low and needs to be replaced.
TEMPERATURE:. . . . . . . . Appears when it is either too hot or too cold to test (outside the
ranges of 50˚F~104˚F).
TEST STRIP: . . . . . . . . . . . . This icon will flash to prompt you to insert a test strip for testing.
DAY AVERAGE:. . . . . . . . . Displayed when viewing 7-, 14-, or 30-day averages (on page
40).
UNIT:. . . . . . . . . . . . . . . . . . . Unit of Measurement for your blood glucose.
CTRL: . . . . . . . . . . . . . . . . . . This icon indicates a control solution test (see page 21).
TONE: . . . . . . . . . . . . . . . . . . Indicates the tone is on (see page 19).
ALARM CLOCK: . . . . . . . . Indicates the alarm function is turned on.
HAPPY FACE: . . . . . . . . . . This icon indicates the meter is working properly.
BLOOD DROP: . . . . . . . . . This icon will flash to indicate the meter is ready for testing.
Blood Glucose Monitoring System
9
EVO
EVO
EVO
voice
EVO
Blood Glucose Monitoring System
10
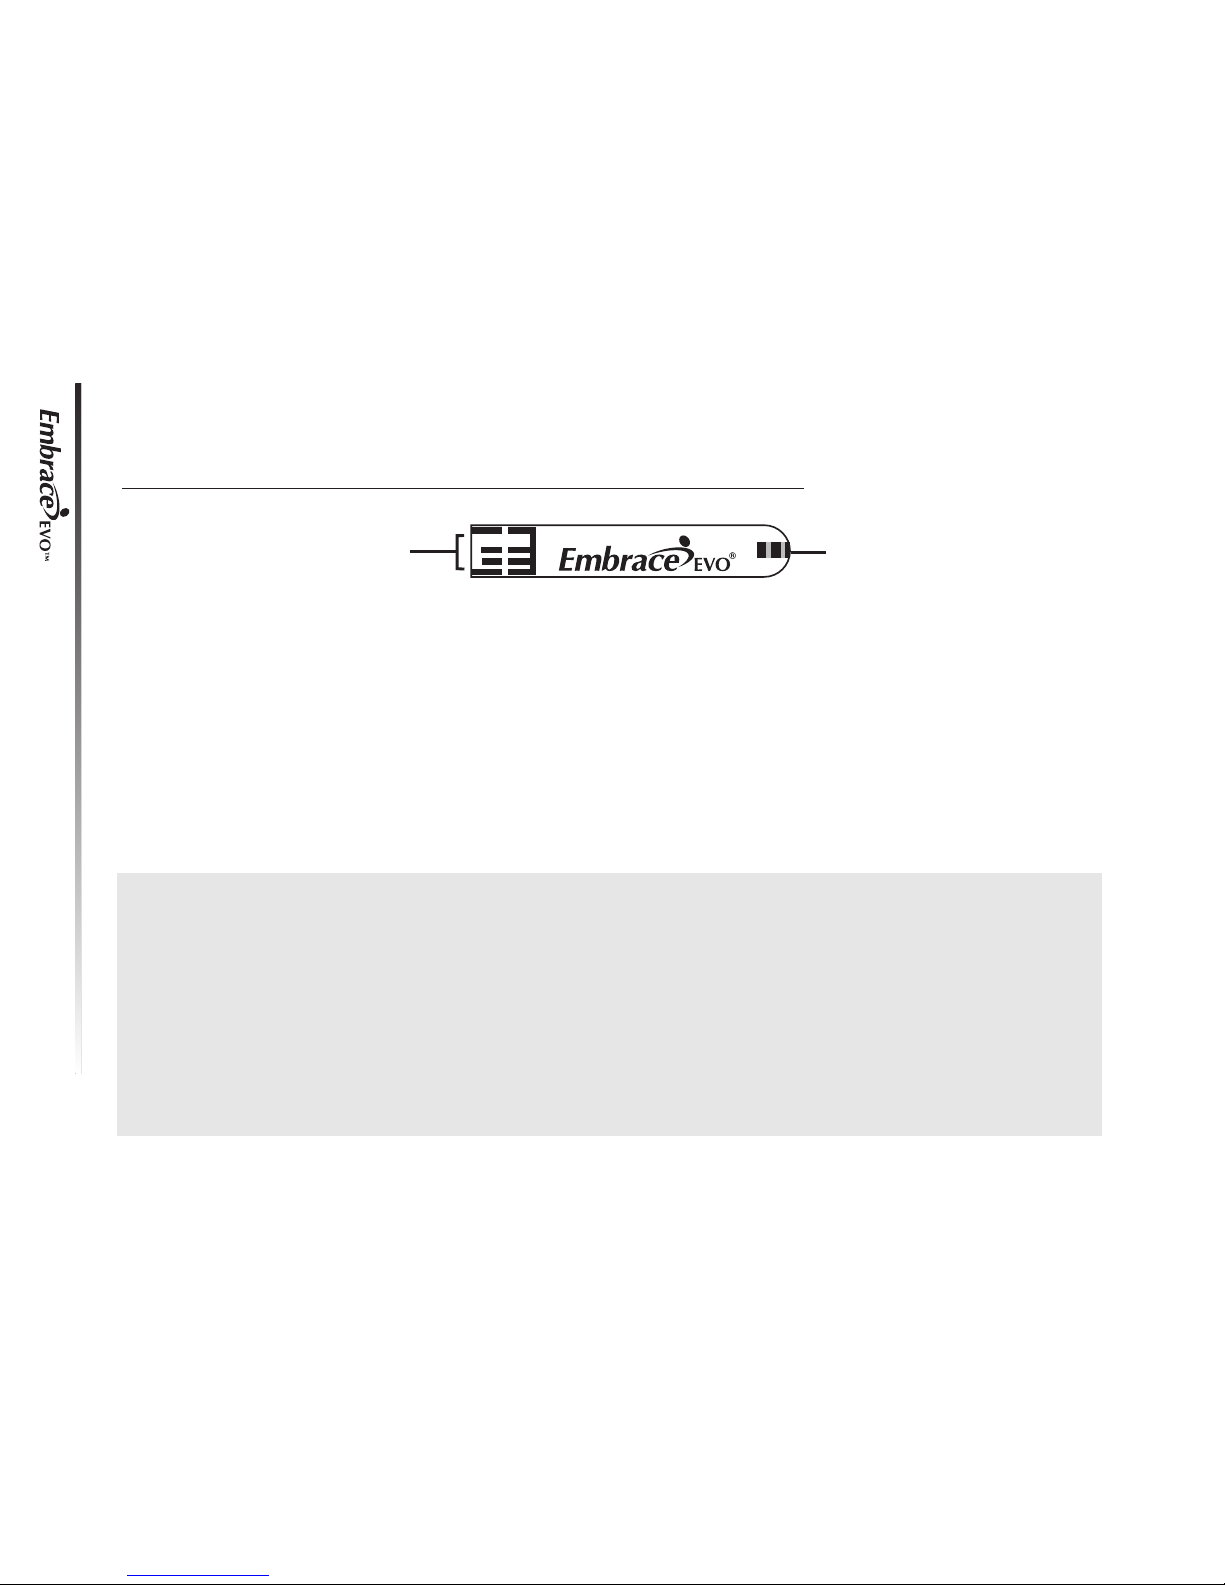
The Embrace EVO™ Blood Glucose Test Strip
The Embrace EVO™ Test Strips are glucose specific, biosensor-based test strips that can
test glucose in capillary whole blood in as quickly as 6 seconds and requires very little
blood sample. The test result is plasma referenced for easy comparison to lab results and
has under-fill detection to alert you when there is not enough blood to perform a test, so
you can be assured that each reading you get is an accurate and meaningful result.
IMPORTANT:
• Be sure to use only the Embrace EVO™ Test Strip with the Embrace EVO™ Blood Glucose Meter. Other brands of test strips will not work with the meter.
• The Embrace EVO™ Blood Glucose Test Strips are sensitive to moisture and light, it is important to close the vial cap of the test strip bottle tightly after each use. DO NOT leave
any test strips outside the bottle while not in use.
• Carefully discard used test strips and lancets in proper waste containers.
SSaammpplliinngg EEnndd
Apply blood or control
solution here
CCoonnttaacctt PPooiinnttss
Insert this end to the test
strip port on the meter
EVO
EVO
EVO
voice
EVO
SSeettttiinngg UUpp YYoouurr NNeeww SSyysstteem
m
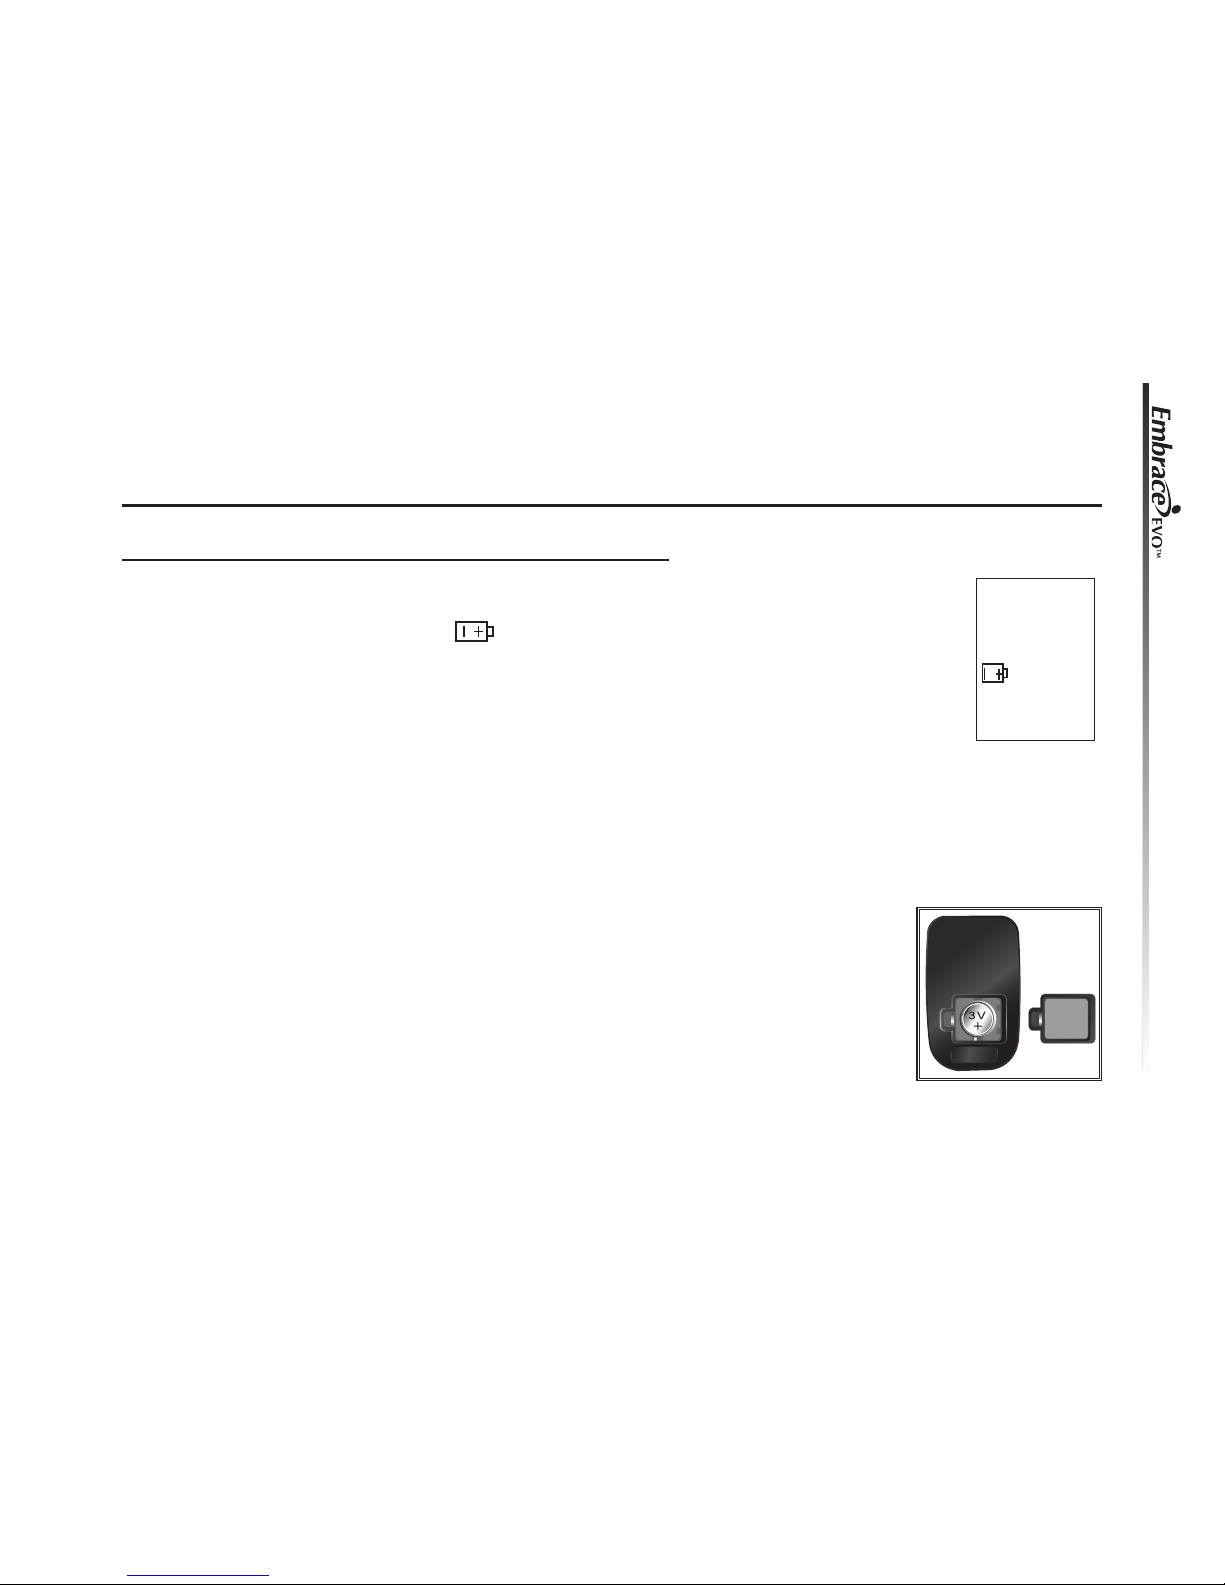
Inserting or Changing the Battery
The battery needs to be inserted before using your Embrace EVO™ Meter
for the first time or when the “ ” icon appears on the meter display.
MMaatteerriiaall yyoouu wwiillll nneeeedd::
• One CR 2032 3V Lithium coin cell battery
• Your Embrace EVO™ Meter
SStteepp 11..
Press firmly on the battery cover and slide in the direction of the arrow
to open the cover.
Blood Glucose Monitoring System
11
EVO
EVO
EVO
voice
EVO

SStteepp 22..
Insert a new battery according to the direction found on the battery
cover and inside the battery compartment. Slide the battery cover back
into the meter firmly.
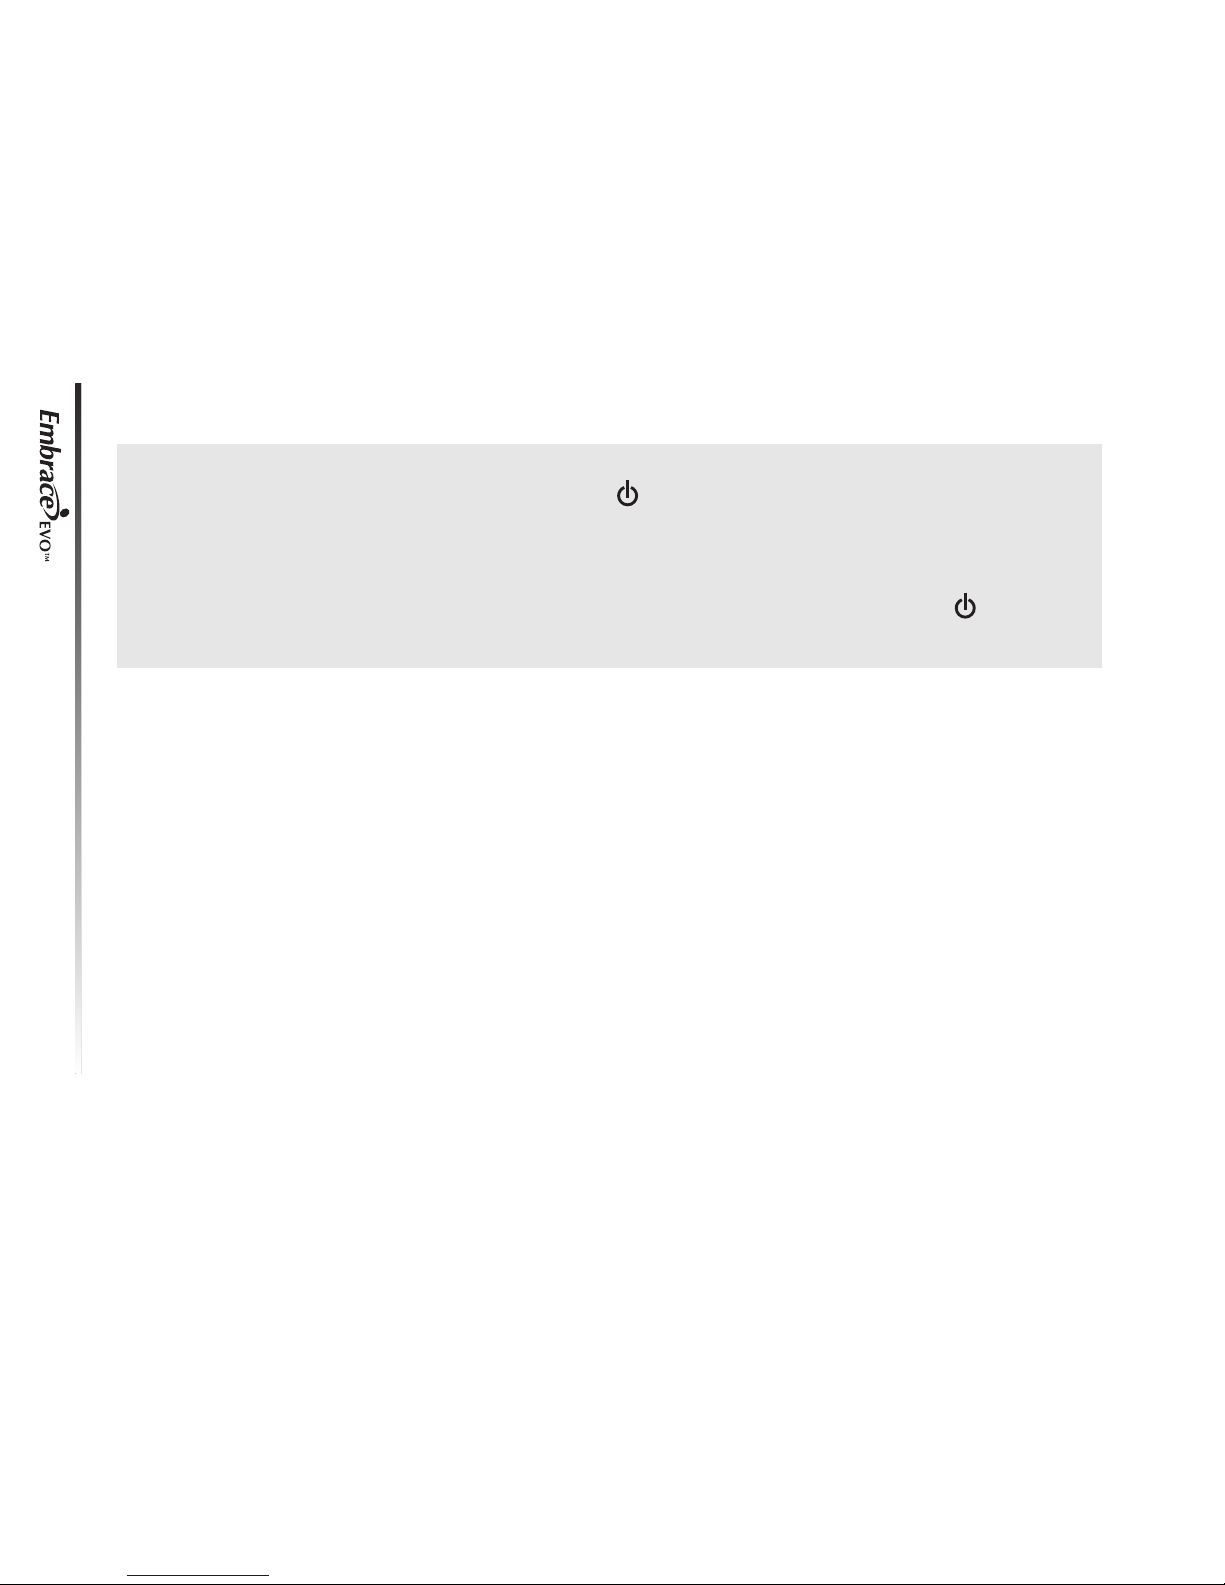
NOTE:
• When you change the battery, the meter automatically prompts you to check the time and
date when turned on either by a Test Strip or pressing “ .” If it is correct, press “ ”
again to exit, or if the time and date are not correct, see page 13 for Setting the Clock.
• The date and stored results will not be erased when the batteries are being changed.
• Discard used batteries according to your local regulation.
Blood Glucose Monitoring System
12
EVO
EVO
EVO
voice
EVO
Setting the Clock
MMaatteerriiaall yyoouu wwiillll nneeeedd::
• Your Embrace EVO™ Meter
Begin Set Up
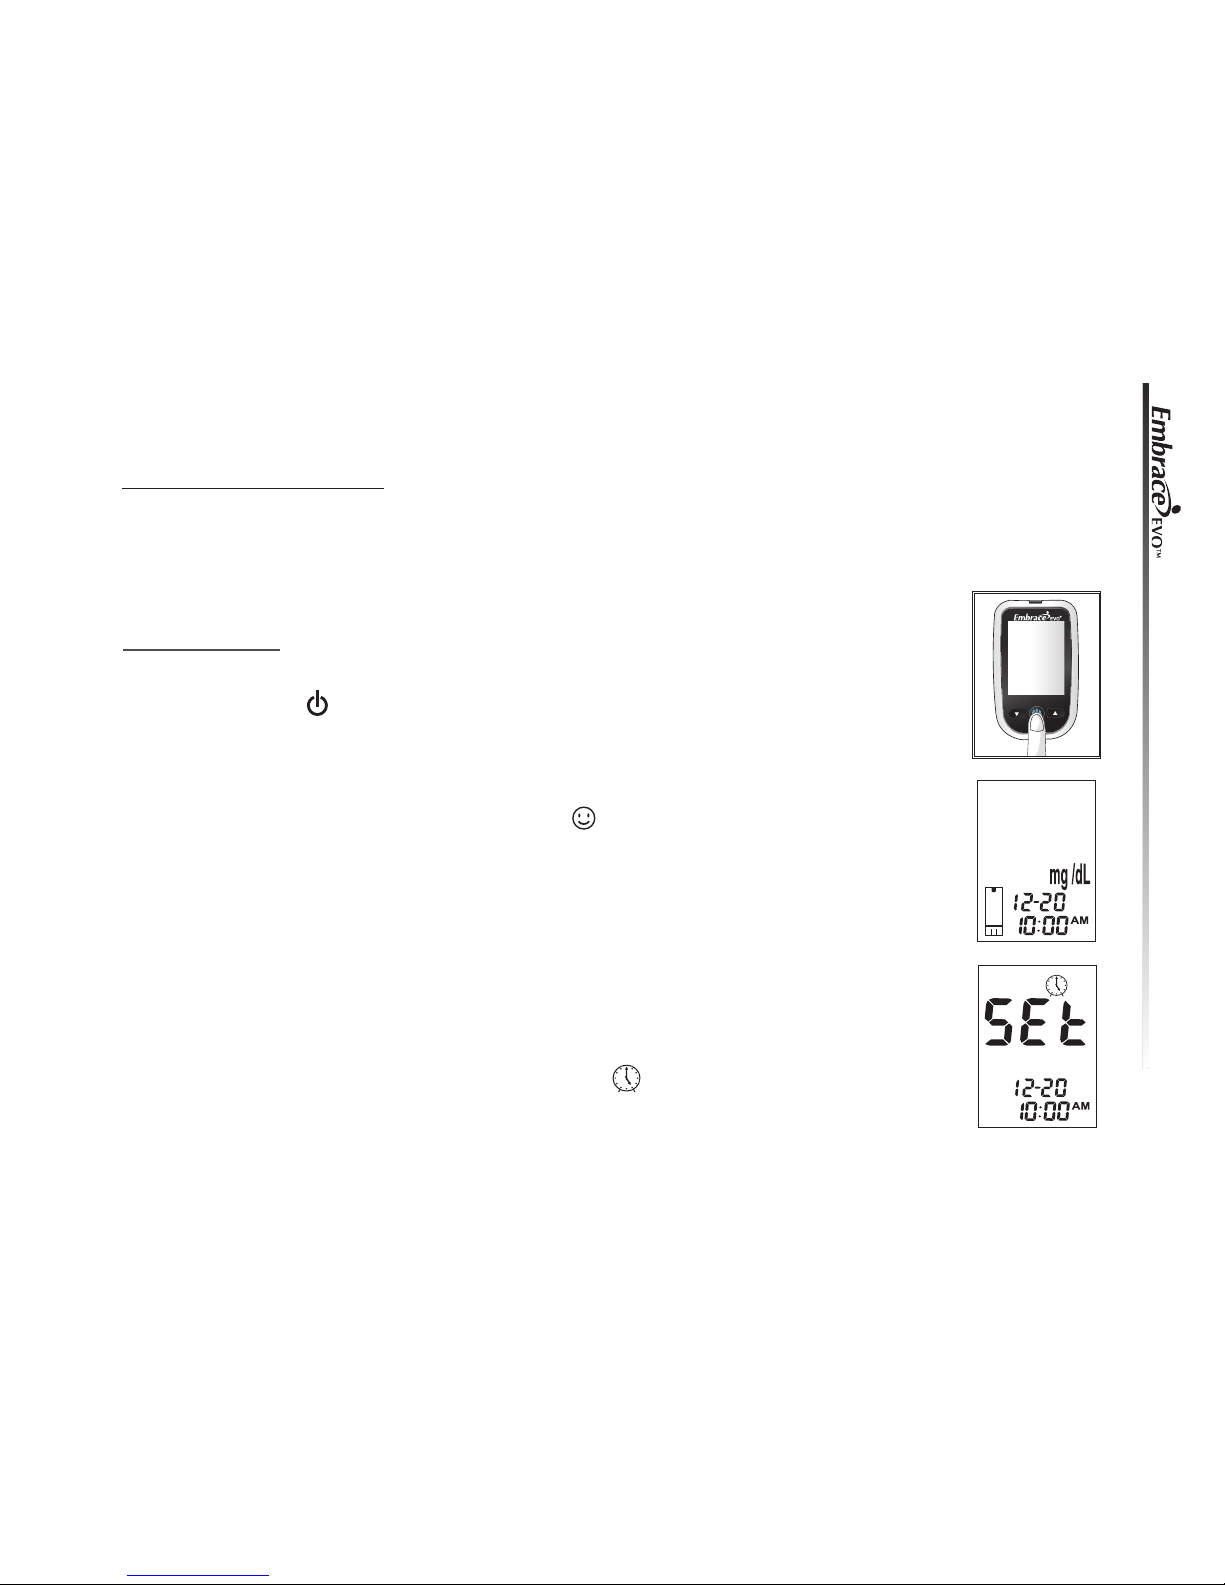
SStteepp 11..
Press and hold “ ” to turn on the meter.
SStteepp 22..
The meter will run a series of self tests. “ ” will appear on the screen before entering the main mode. If error messages (Err1, Err 3, etc) appears,
see Solving Problems on page 54.
SStteepp 33..
After a flashing test strip icon appears on the meter display screen, press
“▲” twice until meter display screen shows “ ”.
Blood Glucose Monitoring System
13
EVO
EVO
EVO
voice
EVO
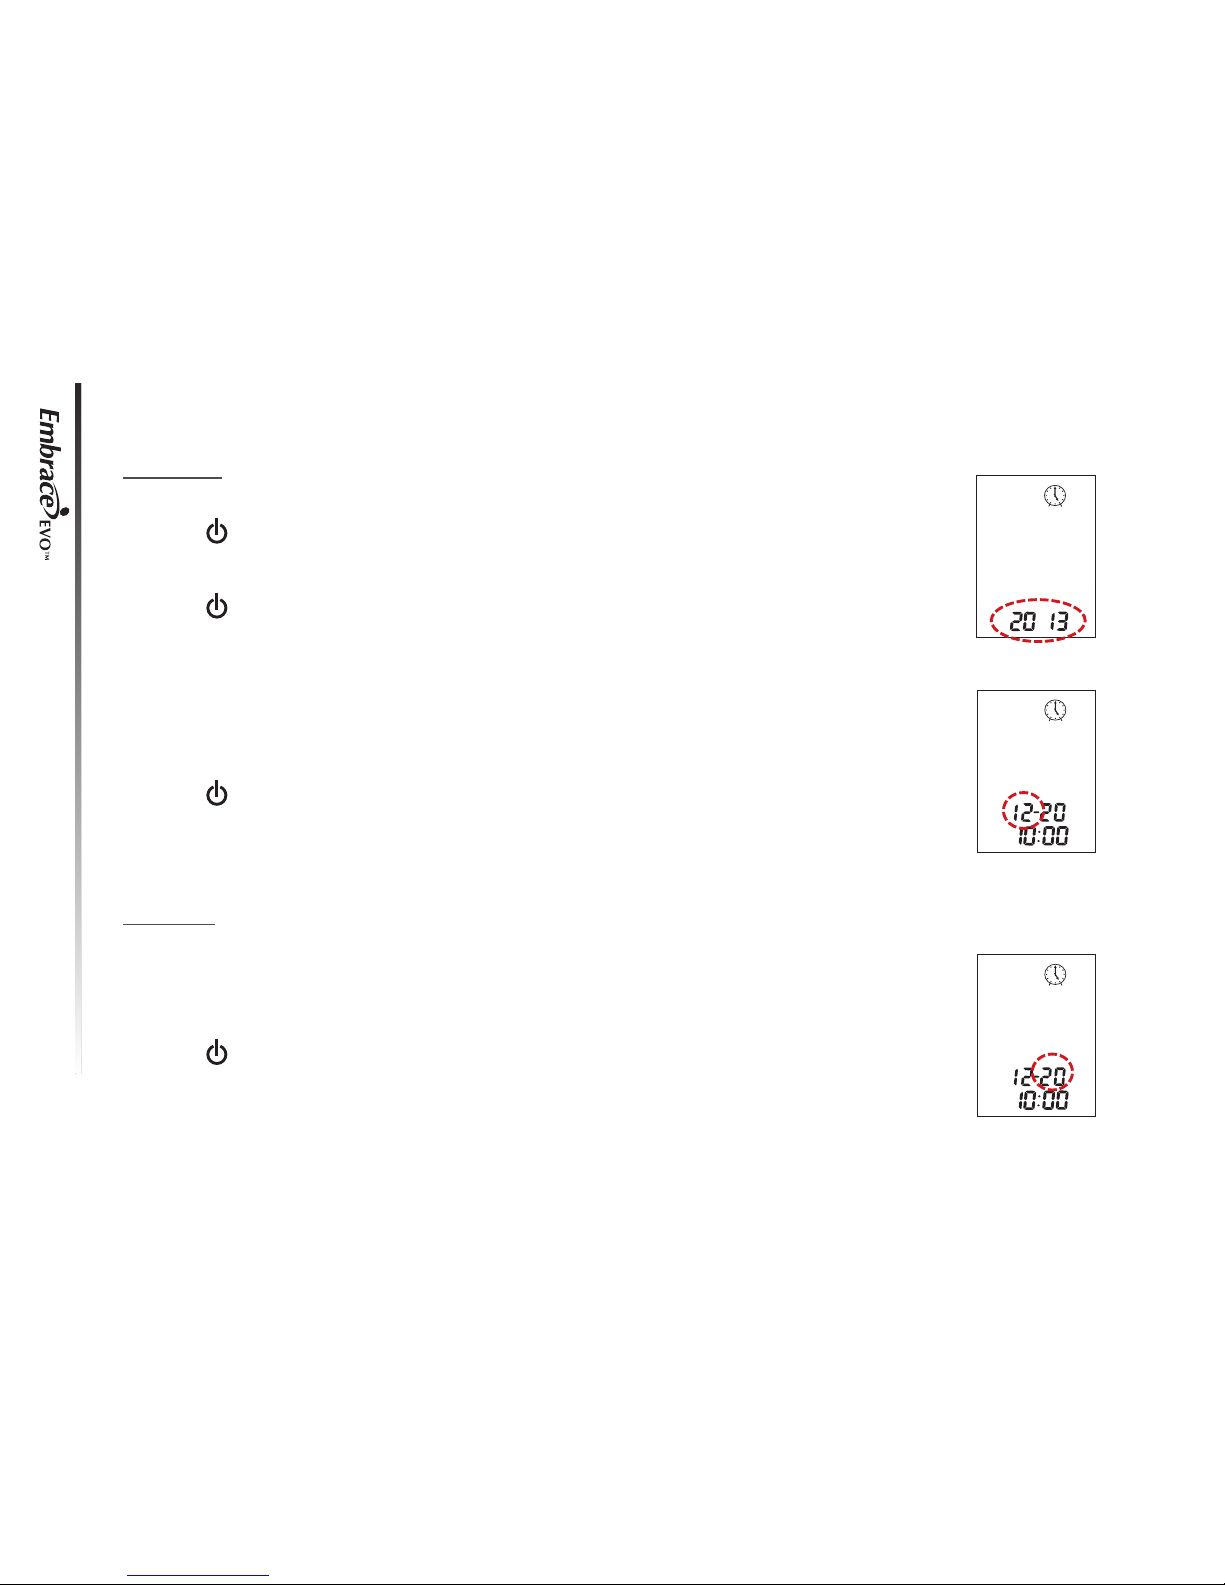
Set Year
SStteepp 44..
Press “ ” and the current year will flash. Use the “▲” or “▼” buttons to
select the correct year.
Press “ ” button to confirm your choice and to advance to set the month.
SStteepp 55..
The current month will flash. Use the “▲” or “▼” buttons to select the correct month.
Press “ ” to confirm your choice and to advance to set the day.
Set Day
SStteepp 66..
The current day will flash. Use the “▲” or “▼” buttons to select the correct
day.
Press “ ” to confirm your choice and to advance to set the 12-hour or 24hour time format.
Blood Glucose Monitoring System
14
EVO
EVO
EVO
voice
EVO

Set 12-hour or 24-hour Time Format
SStteepp 77..
The time format will flash. Use the “▲” or “▼” buttons to select the time format of your choice.
Press “ ” to confirm your choice and to advance to set the hour.
Set Hour
SStteepp 88..
The current hour will flash. Use the “▲” or “▼” buttons to select the correct
hour.
Press “ ” button to confirm your choice and to advance to set the minutes.
Set Minutes
SStteepp 99
.
The current minutes will flash. Use the “▲” or “▼” buttons to select the
correct minutes. Press “ ” to confirm your choice and exit time set up.
Blood Glucose Monitoring System
15
EVO
EVO
EVO
voice
EVO
NOTE:
Anytime during set up, you may either press “ ” to exit, or insert a Embrace EVO™ Test
Strip and begin testing. The changes you have done so far will be memorized by the meter.
Begin testing (see page 28, Testing your Blood Glucose), or press and hold “ ” to turn
off the meter.
Blood Glucose Monitoring System
16
EVO
EVO
EVO
voice
EVO
Setting the Alarm
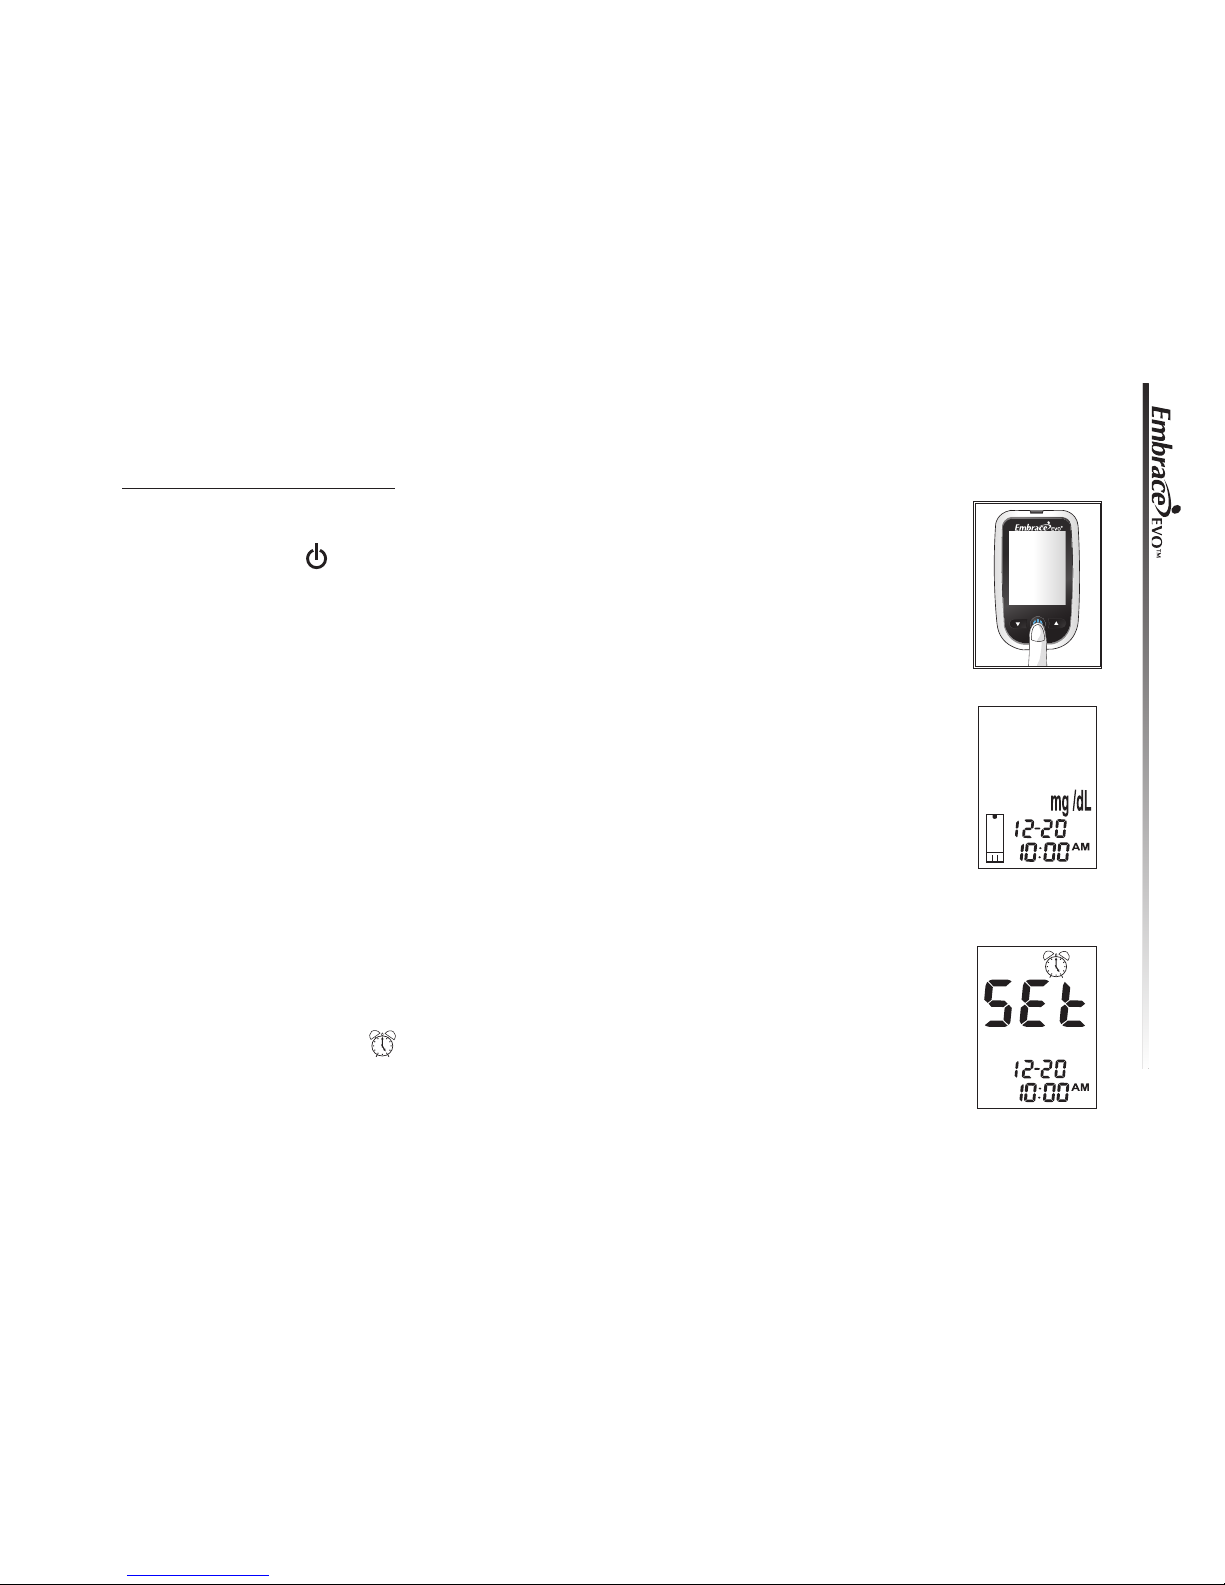
SStteepp 11..
Press and hold “ ” to turn on the meter.
SStteepp 22..
The meter will run a series of self tests before entering the main mode. If
other error messages (Err1, Err 3, etc) appear, see Solving Problems on
page 54 .
Step 3.
After a flashing test strip icon appears on the meter display screen, press
“▲” three times until “ ” flashes.
Blood Glucose Monitoring System
17
EVO
EVO
EVO
voice
EVO
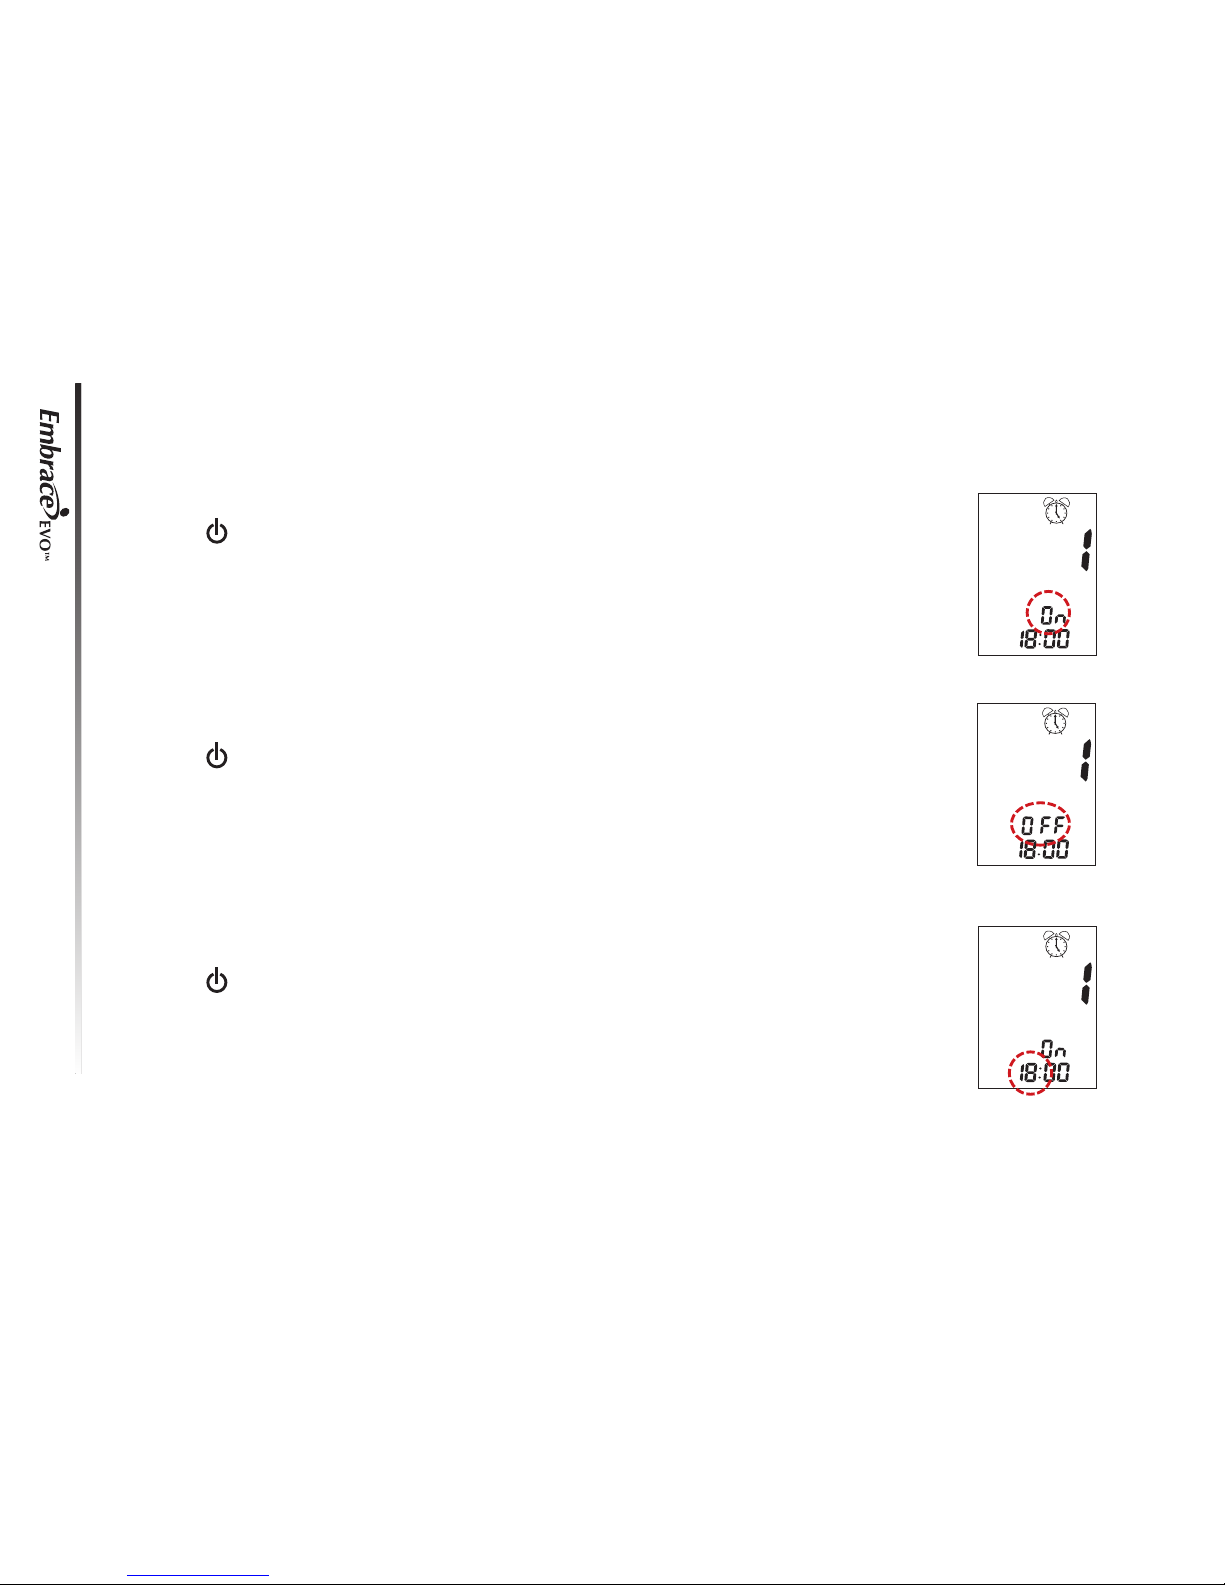
SStteepp 44..
Press “ ” to enter the alarm setting. Use the “▲” or “▼” buttons to turn
ON/OFF alarm 1.
SStteepp 55--TTuurrnn OOFFFF tthhee aallaarrmm
Press “ ” while the screen display shows alarm Off, then the screen will
advance to set alarm 2. Repeat the above for alarm 3.
SStteepp 66--TTuurrnn OONN tthhee aallaarrmm
Press “ ” while the screen display shows alarm On, The screen will advance to set the alarm hour. The alarm hour will flash. Use the “▲” or “▼”
buttons to select the correct alarm hour.
Blood Glucose Monitoring System
18
EVO
EVO
EVO
voice
EVO
 Loading...