


www.EmbieRacing.com
This kit contains lower and upper chassis with accessories. Front and rear shock towers with
accessories are sold separately. All parts are made of CNC machined carbon plate 2,5mm
thick. It is also possible to make the kit of glassfiber.
To be able to use this kit, you need to have mounted Yeah Racing knuckle arms - #TA01006BU (link) on your car. If you have another knuckle arms, please contact us. There is also
need to have driveshafts allowing big steering angle. Dogbones are highly not recommended.
Steering and upper arm turnbuckles need to be jointed, as in the pictures. With this kit, you
can change battery position to achieve required weight distribution. Recommended battery
position is transversal, right behind servo. Lenghtwise position possible too, but in some
cases, connectors could be hard to acces.
www.EmbieRacing.com
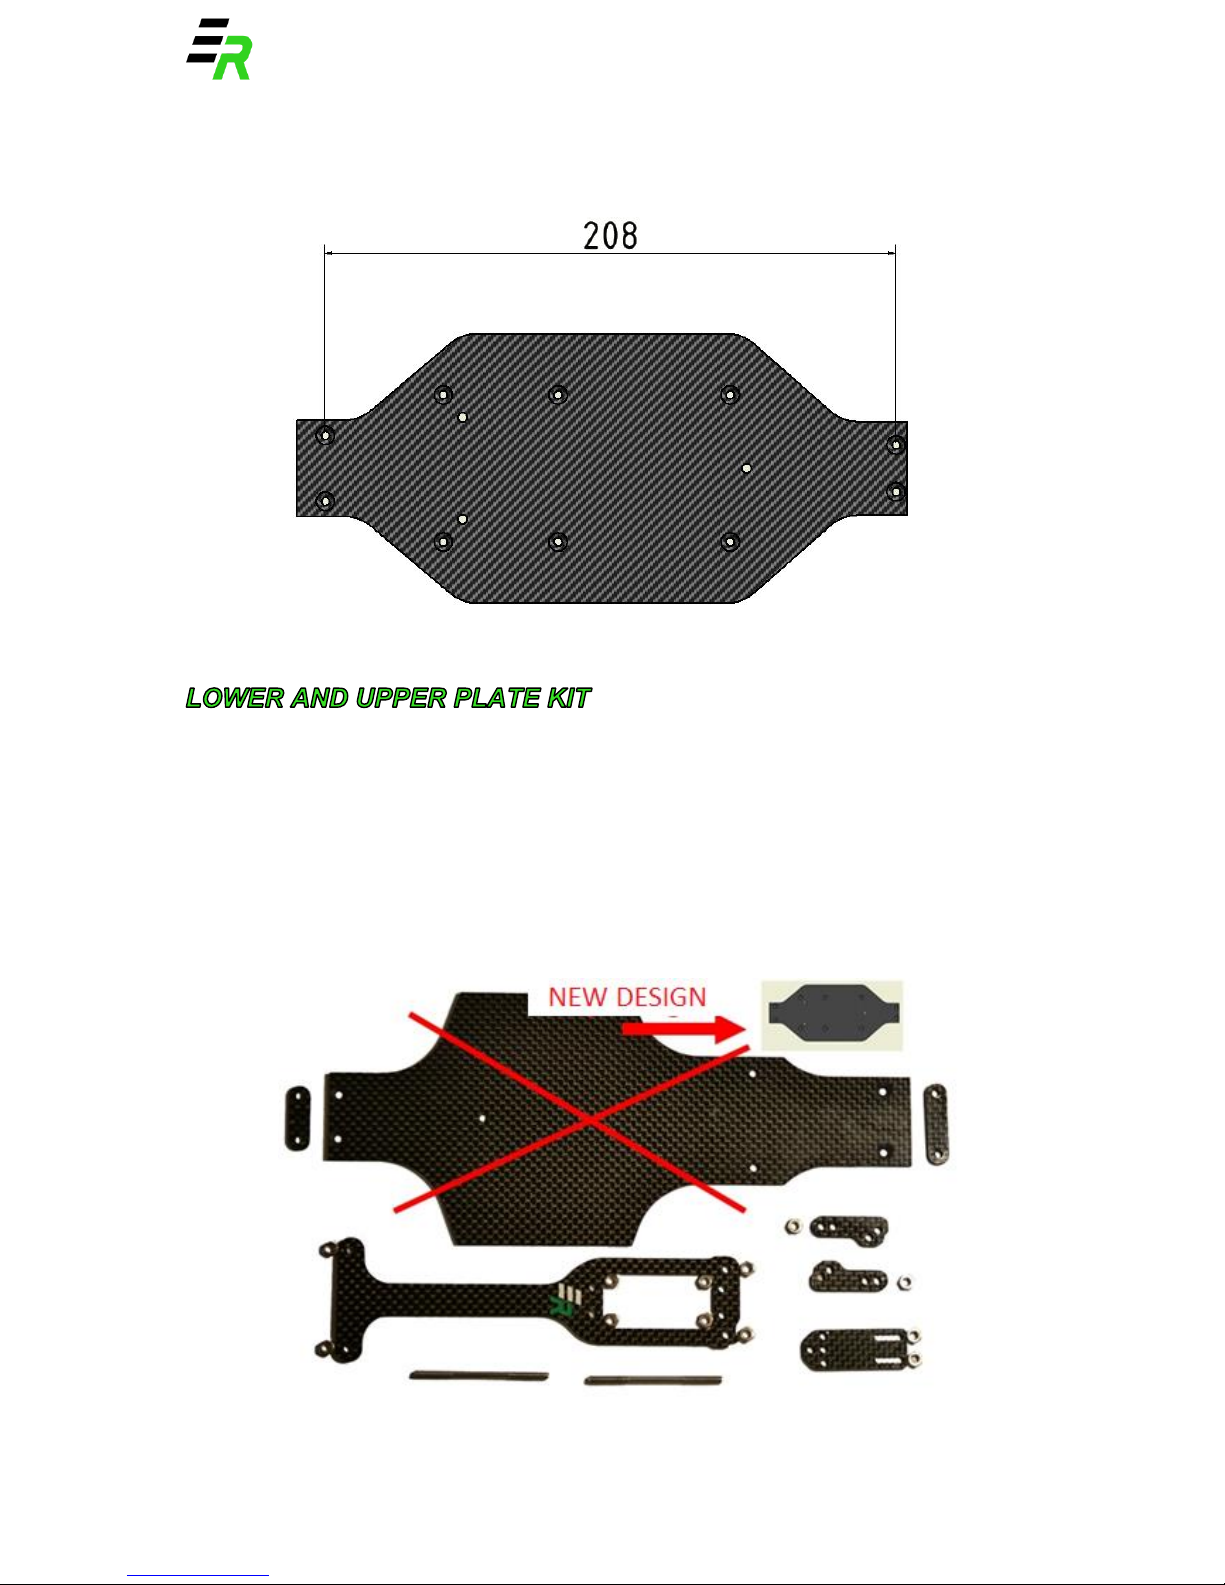
Please check first, that you have Tamiya TA02. Distance on your original chassis mounting
holes should be 208mm. Otherwise you have probably TA01 which has longer chassis.
- Lower plate
- Front and rear spacer for lower plate
- Upper plate
- Servosaver lever extender
- Knuckle arms lever extenders
- Threaded knuckle arm rods
- 12 pcs M3 nuts

www.EmbieRacing.com
1) Screw the lever extender to servosaver. In case you have OEM saver, drill second hole
in it to fix its position. Tuning or Hi-Torque saver recommended.
2) Screw servo with countersunk screw and nuts. Servo has to be on the top of upper
deck, see pictures.
3) Screw upper plate to front and rear gear case as shown in the picture. In front, upper
plate is above the case, in rear it is under the case. In rear part, put M3 nut inside the
hole as in the picture. It will help you to keep the nut in its position.
4) Grind rear end of chassis as shown.
5) Mount lower plate to gear cases. Use spacers between lower deck and gear case. It is
possible to glue on spacers to lower plate for easier handling, but be careful about

www.EmbieRacing.com
correct position. These spacers are lowering the gravity center and helping to keep
bottom line of your car without edges.
6) Screw knuckle arm levers, each with two M3 screws. Watch orientation in next
picture.
7) Use threaded rods to extend your steering rods and mount them as in the picture.
8) After placing your electronics, check weight distribution. If it’s not 50:50 between
front and rear axle, add some weight where it’s needed.

www.EmbieRacing.com
Shock towers from this kit are made to allow more choices of damper mounting. They also
allow to fully utilize working range of dampers, so car is able to touch the ground. If not other
mentioned, shock towers are designed for OEM dampers, but wide range of dampers is
produced as well. In that case, dimension of fully pressed damper length between centers of
mounting holes is required information, dimension of free length / not pressed damper is
useless in this case, because it is important that the chassis can touch the ground when
dampers are fully pressed.
When using this shock towers, use dampers with ball ends. This shock towers are also
providing more roll of chassis.
- Front shock tower
- Rear shock tower
- Mounting block for front shock tower
- 4 pcs M3 nuts

www.EmbieRacing.com
1) Mount front shock tower with use of included mounting block.
2) We recommend to use longer ball ends (for example #53601). OEM ones could be too
short with new position of your upper suspension arm.
3) If you will use outer holes in shock towers to mount upper suspension arms, you can
skip this. When using inner holes (recommended at front axle) cut a little your gear
cases as shown in the picture.
4) Use washers to mount body holders. Cut slightly the edges of mounting part of body
holders.

www.EmbieRacing.com
Battery holder is produced in two versions, one for transversal and one for lengthwise position
of short LiPo battery. When using some of battery types, there could be difficult to access
connectors in case of lengthwise position. There is also produced transversal battery holder
for standard size LiPo battery, short LiPo is recommended anyway. Holder fixes battery in
rear / front, left / right axis, not in upwards direction. One part of holder is fixed, second part
is sliding to be able to change the battery easily. See pictures at the end of this document.

www.EmbieRacing.com
 Loading...