

Page 1
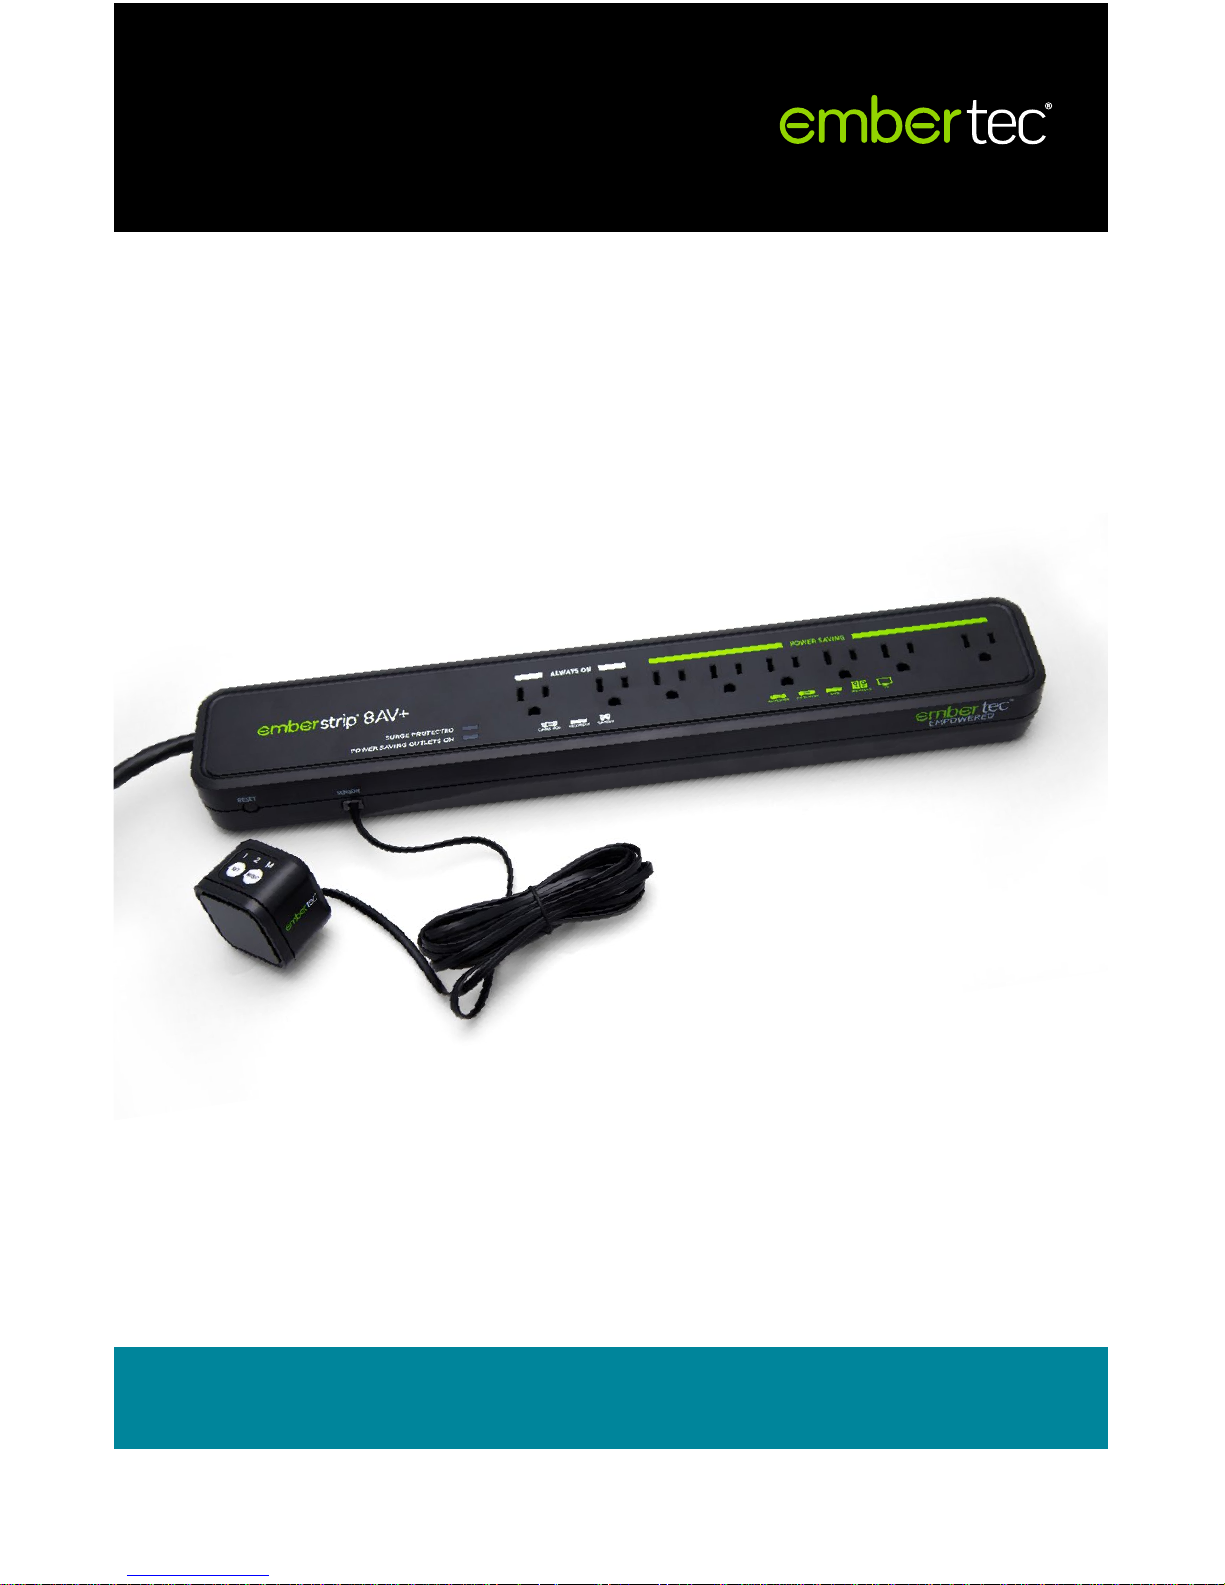
Emberstrip® 8AV+
With Classic Sensor
ESUSAV8-ET-10C
User manual
PATENTS GRANTED AND PATENTS PENDING
V12
Page 2
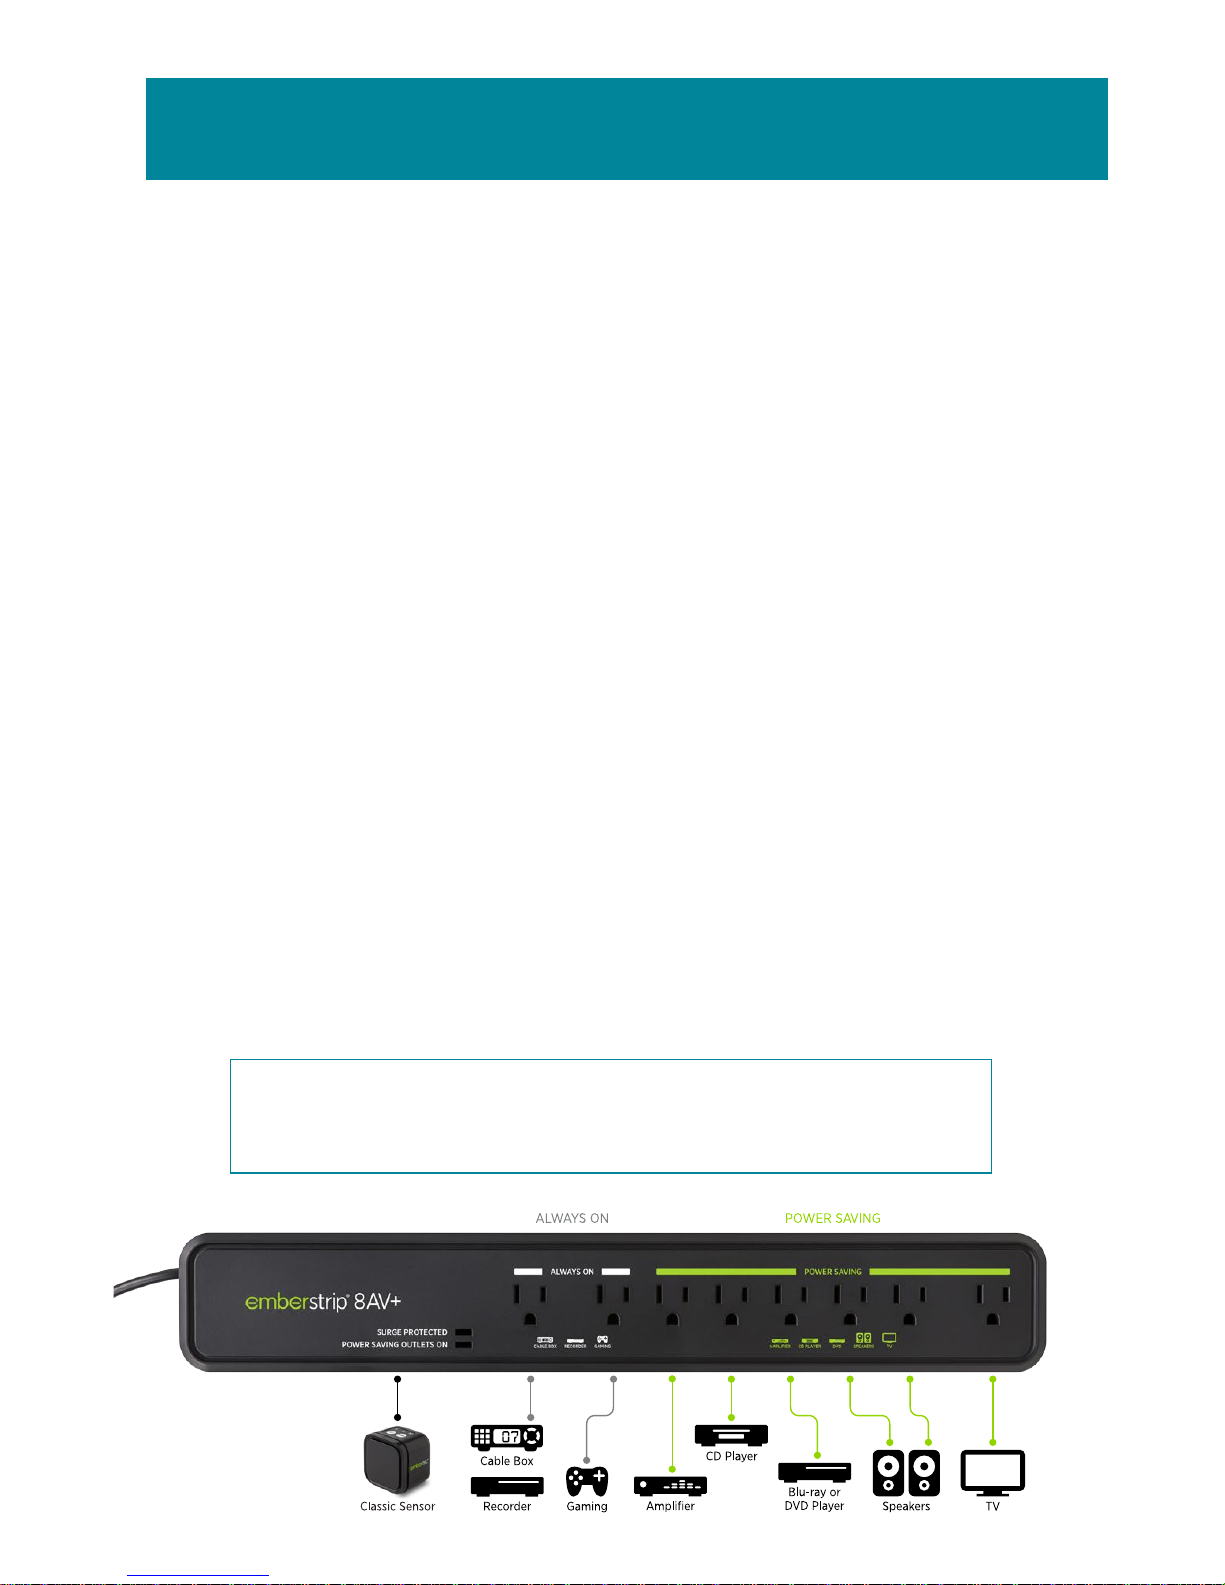
Setting up the Embertec Emberstrip® 8AV+
1. Connect the supplied Classic Sensor cable to the side of the
Embertec Emberstrip® 8AV+. Ensure the cable clicks into place.
2. Plug AV equipment that can automatically be switched off into
the Power Saving outlets on the strip (TV, Blu-ray, DVD, speakers,
amplifier/stereo receiver).
3. Identify equipment that requires constant power for cool down
period, timers, program guides and recording features and plug
into the outlets marked Always On, or into another wall outlet
(e.g. DVR, cable/hard drives/gaming etc.).
4. Place the Classic Sensor in a convenient location that is in line of
sight. Close to your television is the best position and within normal
operation of your existing remote control(s). The Classic Sensor
detects use of any of your remote controls to know when you are
using your AV equipment.
5. Plug the Embertec Emberstrip® 8AV+ into the wall outlet.
6. Power is now applied to the Power Saving outlets. The LED
monitoring light on the Embertec Emberstrip® 8AV+ will light up for
3 seconds. This also indicates that the Embertec Emberstrip® 8AV+
has performed its initialization process.
NOTE: Other appliances such as lamps, chargers etc., may be
plugged into the Always On outlets if needed, or the Power
Saving outlets if only needed when your AV system is being used.
Quick connection guide
2
Page 3
Turning ON your AV equipment
• To operate your Audio Visual (AV) components, press the volume
button on any existing remote control or press the button on the
Classic Sensor. This will apply power to all components making them
ready for use. Now use your existing remote(s) to operate your
television or other Audio Visual (AV) components in the normal way.
NOTE: To reactivate your TV components, you may be required
to press the power button again on the relevant remote control
after power has been restored. You may hear a ‘click’, or notice
that the TV standby light has switched on.
Turning OFF your AV equipment
• Simply turn your equipment off in the normal way. The Embertec
Emberstrip® 8AV+ will then remove power from the Power Saving
outlets after a delay of approximately 1 minute.
NOTE: The LED light on the Classic Sensor will flash for about
60 seconds to warn you that power is about to be removed
from the AV Power Saving outlets.
Active Powerdown®
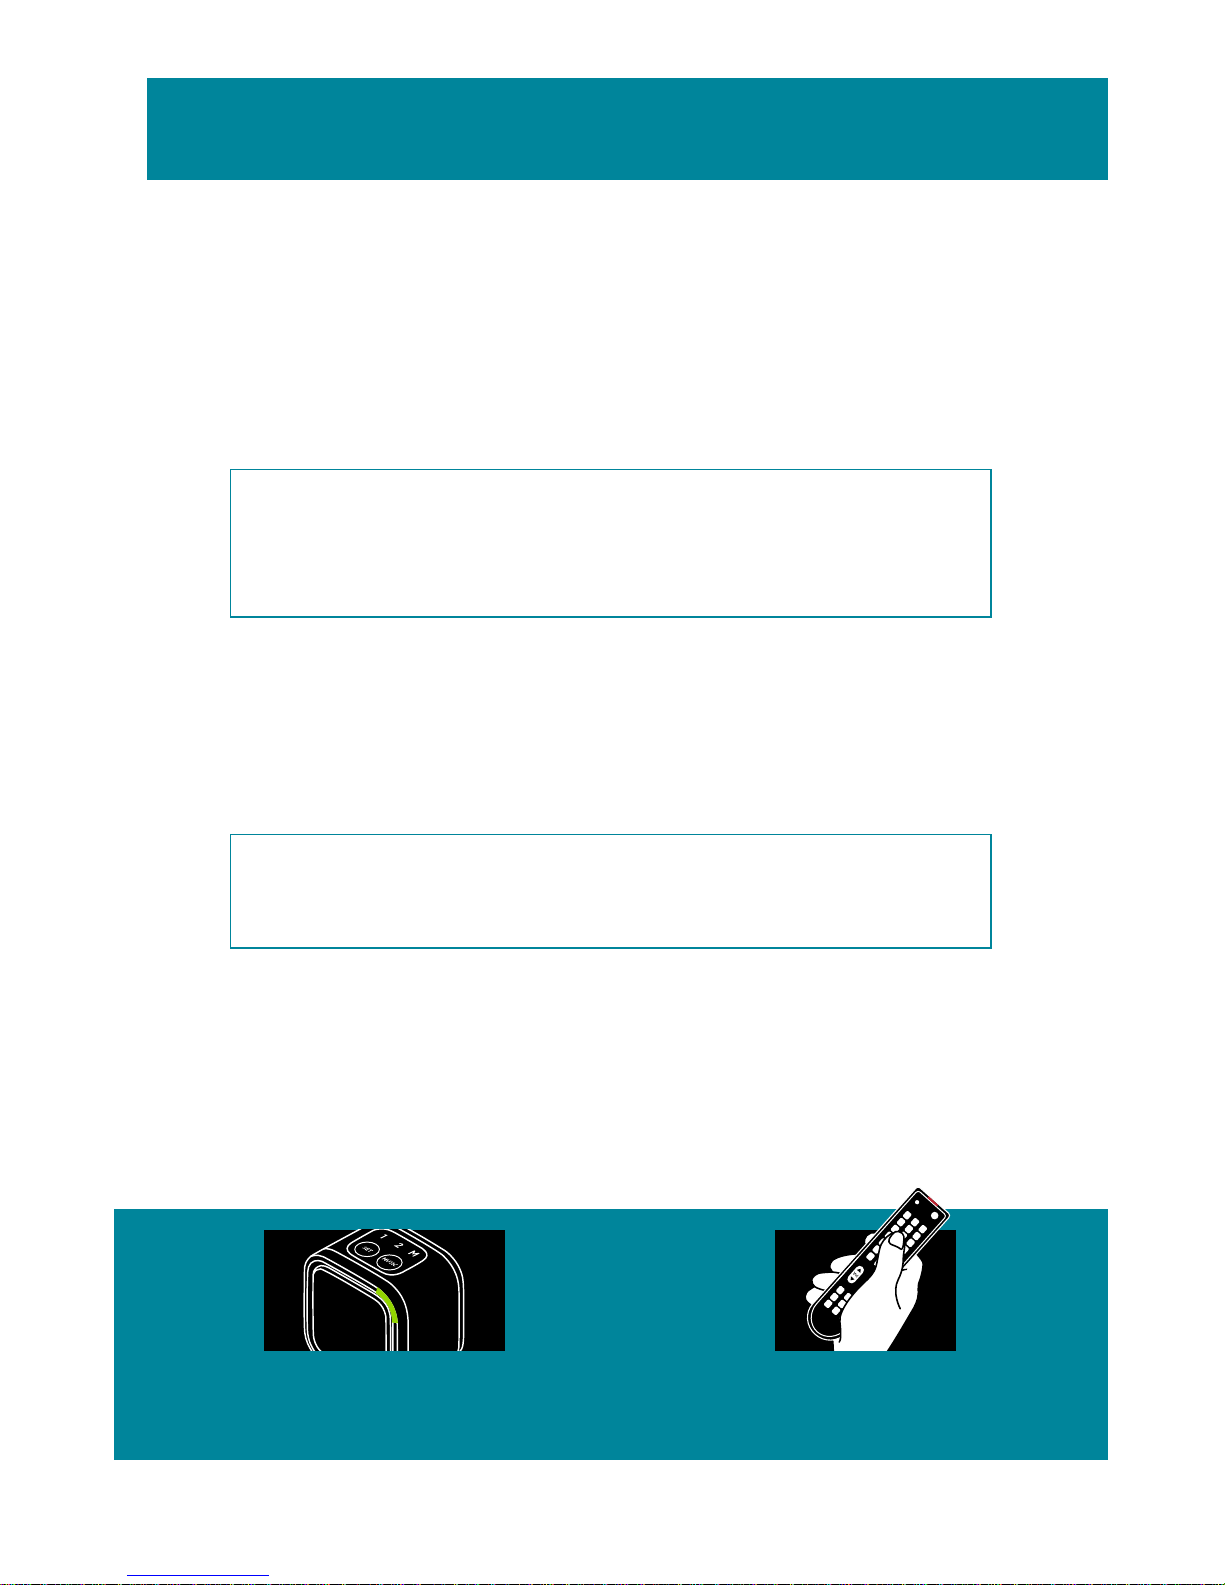
• If your Embertec Emberstrip® 8AV+ has not detected use of a
remote control for 1, 2 or 8 hours (depending on your settings),
Active Powerdown® will shut down power. The LED light on the
Classic Sensor will flash for approximately 10 minutes to warn you.
Quick operation guide
TO CONTINUE
USING YOUR
EQUIPMENT
A flashing light means
the system is getting
ready to shut down.
Press the volume
button on your
remote control.
3
Page 4

Contents
Quick connection guide 2
Quick operation guide 3
What you need to know 7
Active Powerdown® settings 10
MusicMode™ settings 11
BedroomMode™ settings 12
Fast facts 13
Specifications and compliance 14
Troubleshooting guide 16
Warranty 17
4
Page 5
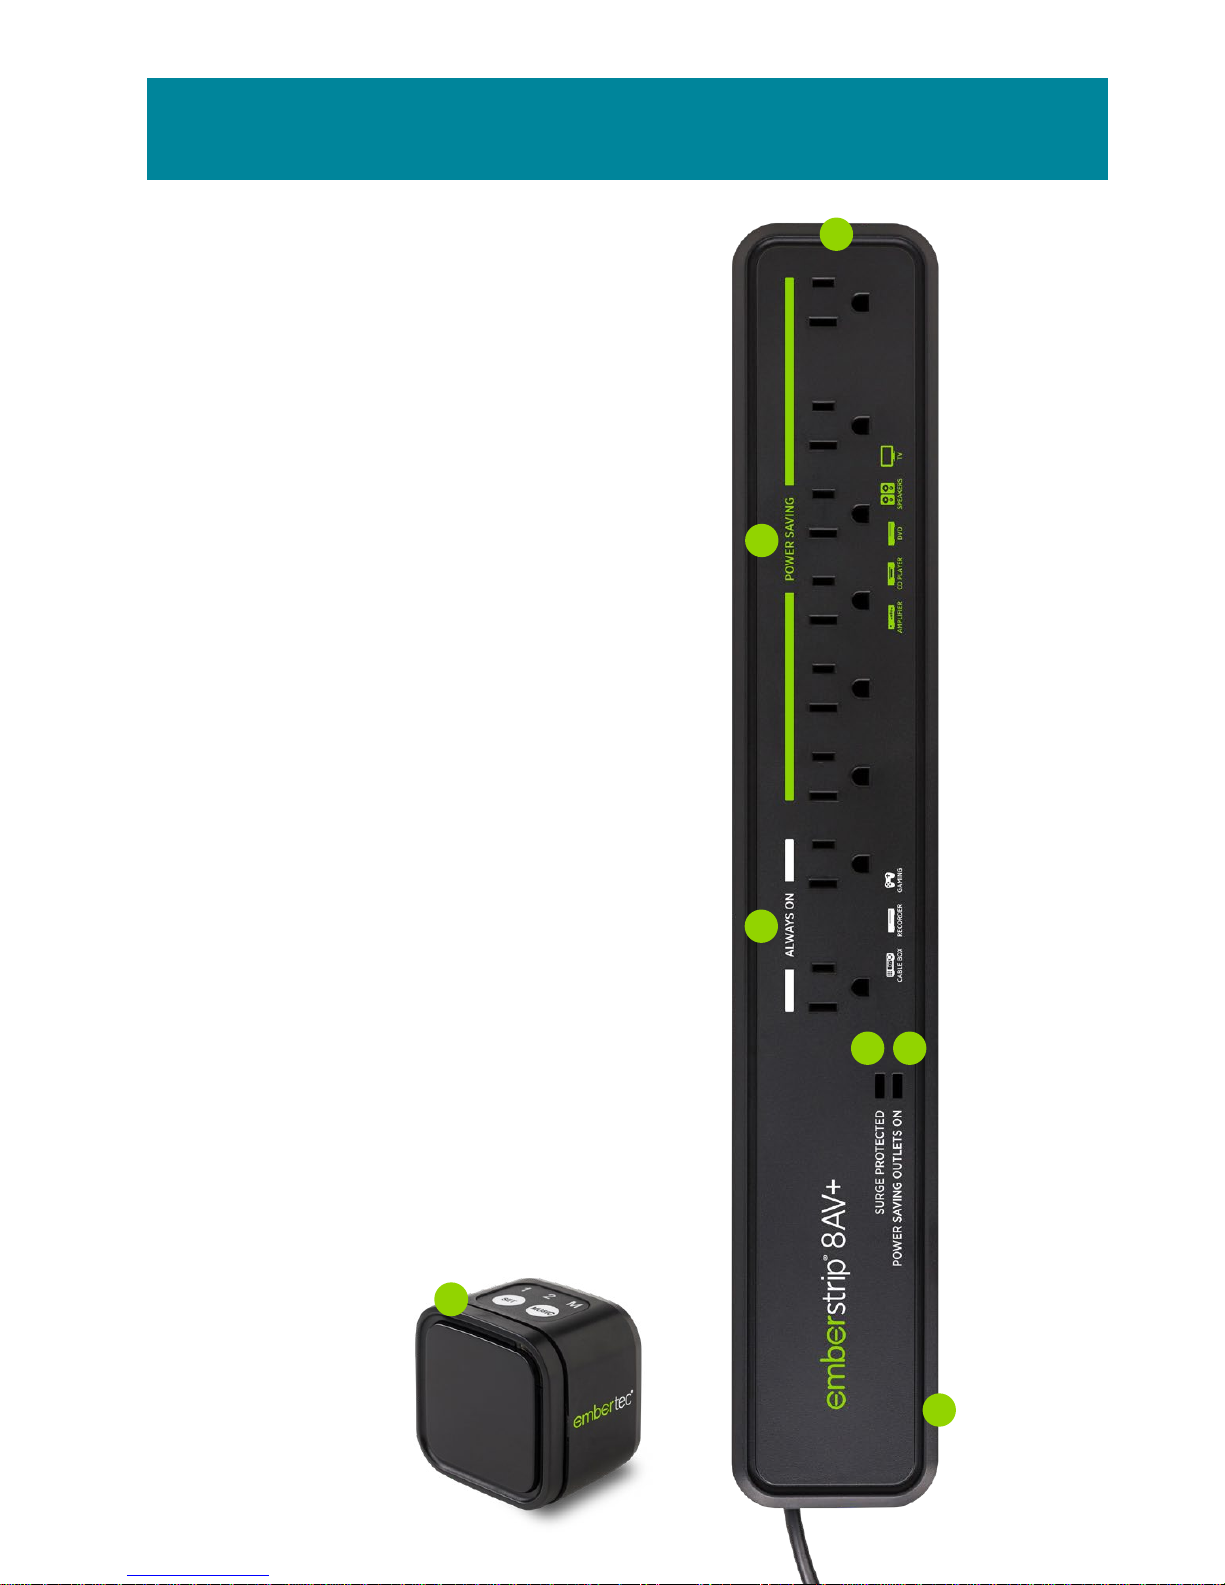
Your Embertec Emberstrip® 8AV+
1. Embertec Emberstrip® 8AV+
2. Classic Sensor
3. On/Off Power Saving
outlets indicator light
4. Power Saving outlets
5. Always On outlets
6. Overload protection
Reset Button
7. Surge protection light
2
7 3
6
1
4
5
5
Page 6

• The Always On outlets are recommended for use with Audio Visual
(AV) equipment that requires constant power for timers, program
guide and recording features (e.g. DVR, PVR, VCR, cable box, digital
TV receivers, game consoles, hard drives or bedside alarms). This will
ensure constant power is not interrupted to these devices.
• The Power Saving outlets are recommended for Audio Visual
(AV) equipment that can be automatically switched off (e.g.
televisions, amplifiers, stereos, speakers, sound bars, DVDs, CDs,
Blu-ray players, lamps).
• Overload protection circuit breaker reset button.
• 3 pins for use with standard North American wall outlets.
• The Infrared Classic Sensor activates the Power Saving outlets,
monitors activity and is also used to set the Active Powerdown®.
It comes with a 9.8 ft/3 m cable, LED light and integrated push
button control.
• The Protected light should be on. If this light turns off or is dim,
you may have a ground-wiring problem in your home and you
should contact an electrician to properly ground the outlet.
• The Power Saving Outlets On light shows the state of the Power
Saving outlets. When the light is on, the Power Saving outlets
are powered; if the light is off, no power is flowing to the Power
Saving outlets.
6
Page 7

Please read this instruction booklet before installing
your Embertec Emberstrip® 8AV+
• The Embertec Emberstrip® 8AV+ is an electrical device. Normal
safety precautions for use of an electrical device must be observed.
• Do not immerse the Embertec Emberstrip® 8AV+ in water.
• Needles, knives or any other metal or conductive item must not be
inserted into any Embertec Emberstrip® 8AV+ outlets.
• This device does not convert voltage. It must only be used with
appliances fitted with North American configuration electrical plugs
(2-pin or 3-pin) and rated at 110 – 120 V AC.
• Ensure the Embertec Emberstrip® 8AV+ is securely plugged into the
wall outlet to avoid it slipping out. Ensure cords plugged into the
Embertec Emberstrip® 8AV+ remain tangle free.
• It is recommended to regularly inspect the Embertec Emberstrip® 8AV+
for damage. The Embertec Emberstrip® 8AV+ must not be used if it
shows any signs of damage.
• This Embertec Emberstrip® 8AV+ is for indoor use only. Do not use
outdoors. Do not use this Embertec Emberstrip® 8AV+ for anything
other than its intended use. Misuse may cause injury or death.
• In normal use, this device intermittently emits a green flashing light.
People who experience photosensitive epilepsy or other forms of
photosensitivity should exercise caution when using the device.
• The outlet on the side of your Embertec Emberstrip 8AV (called
an RJ11 outlet) is for connection of your Classic Sensor only. It is
NOT for connection of a phone, LAN communication device or
any other equipment.
What you need to know
7
Page 8
We recommend connecting any home theater media center computers,
or appliances containing a hard drive into the Always On outlets. We
recommend connecting home theater projection equipment which
require a cool down period to the Always On outlets. This will prevent
damage to, and extend the life of your home theater projection lamps.
Embertec Emberstrip® 8AV+ has 2 power saving functions
1. Standby Powerdown automatically detects and saves power
wasted when equipment is left in standby mode, by switching the
power off to the equipment.
2. Active Powerdown® automatically switches the power off to Audio
Visual (AV) equipment connected to the Power Saving outlets
after 1 hour, if it has not detected any remote control use.
NOTE: The Embertec Emberstrip® 8AV+ is programmable and
has an Active Powerdown® default setting of 1 hour, which can be
permanently set to 2 hours, or temporarily 8 hours (MusicMode™).
When will Active Powerdown® switch the Audio Visual (AV)
equipment off?
• If your Embertec Emberstrip® 8AV+ detects that your Audio Visual (AV)
equipment is on but has not been used for a period of 1, 2 or 8 hours
(depending on your settings), the LED light on the Classic Sensor will flash
for approximately 10 minutes to warn you that power down is imminent.
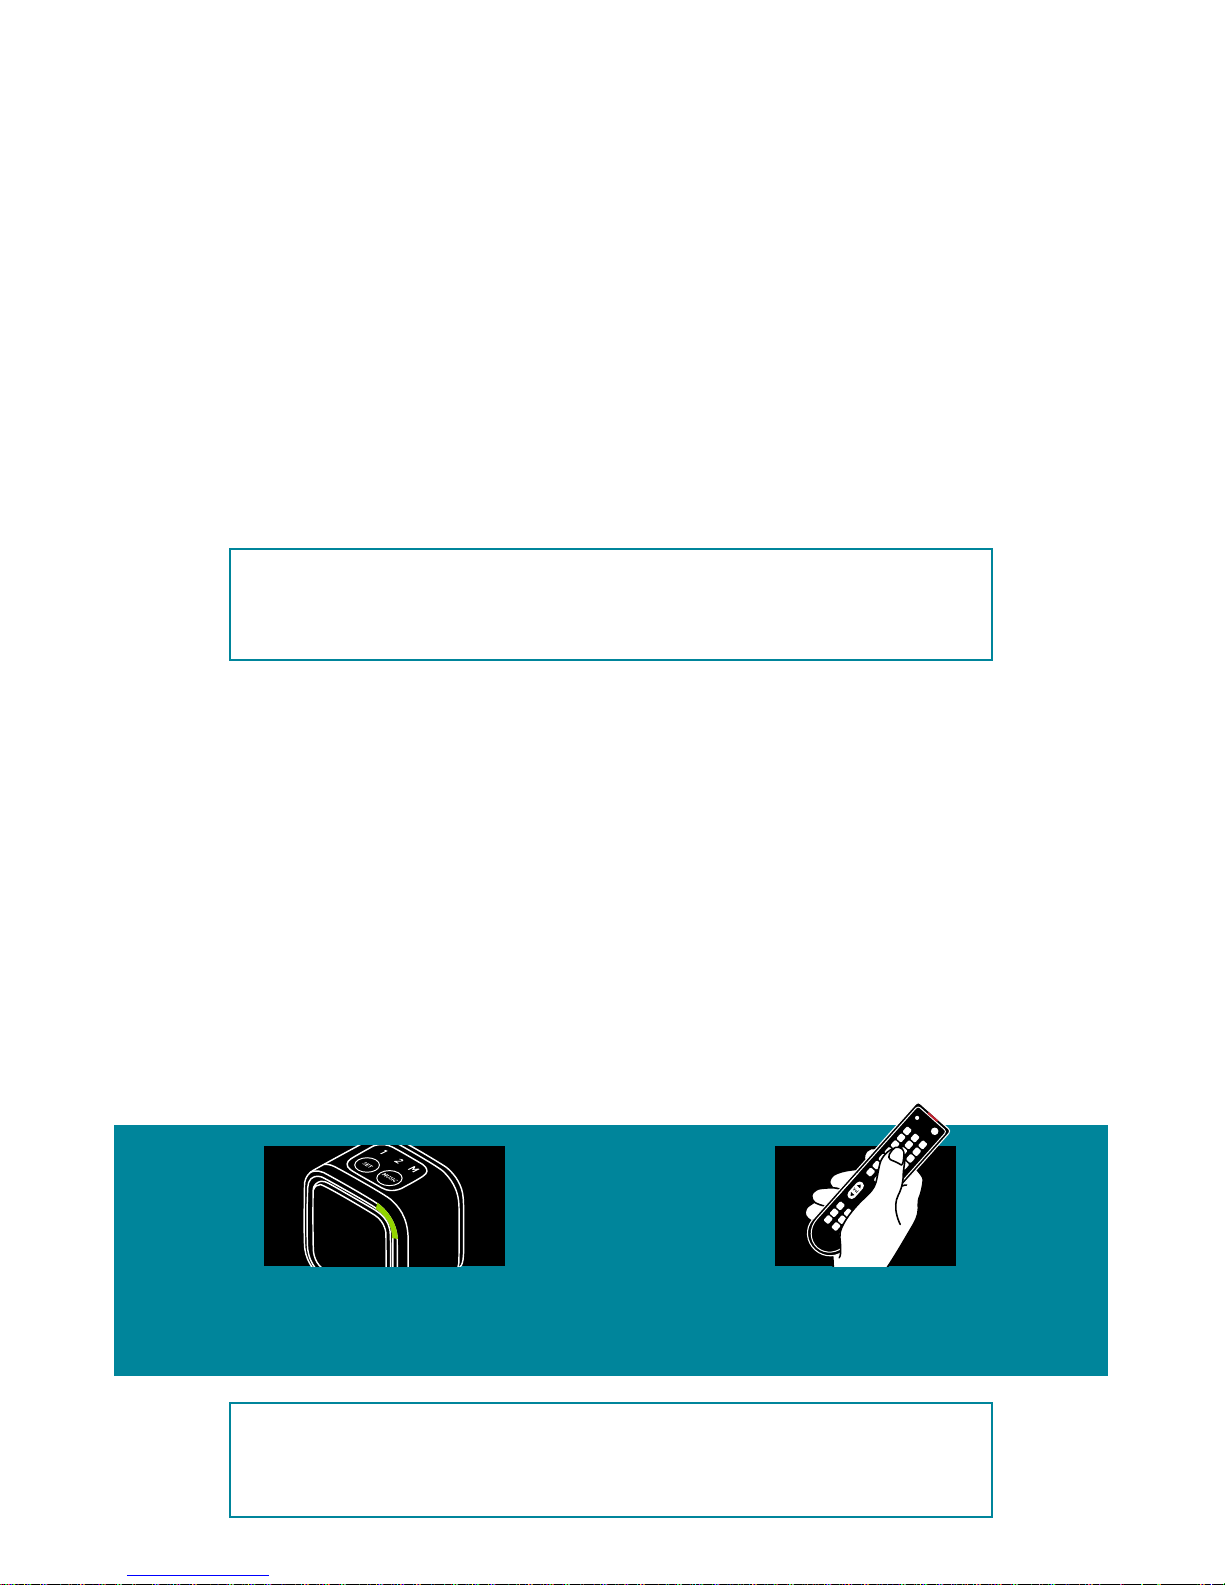
To continue using your equipment
• Simply press the volume button on ANY of your existing remote
controls or press the button on the Classic Sensor once. This will
cancel the Active Powerdown® and reset the timer to 1, 2 or 8 hours
(according to your existing setting).
NOTE: A flashing LED always means that your system will shut
down completely in a while. Press any remote control button to
stop the light flashing and continue using your system.
TO CONTINUE
USING YOUR
EQUIPMENT
A flashing light means
the system is getting
ready to shut down.
Press the volume
button on your
remote control.
8
Page 9

What Audio Visual equipment can be used with the
Embertec Emberstrip® 8AV+?
Always On outlets
• Audio Visual (AV) equipment that requires constant power for
timers, program guides and recording features, such as DVD
recorders, pay TV and PVR units, cable boxes, hard drives, game
consoles or digital receivers
• Certain home theater projectors that require a cool down period,
including rear projection televisions
Power Saving outlets – will be automatically switched off
• Televisions without in-built hard drives
• Home theater speaker systems
• Sound bars
• CD, DVD, and Blu-ray players
• Amplifiers
• Lamps
9
Page 10

Your Embertec Emberstrip® 8AV+ is equipped with a number of settings
to suit your lifestyle. You can set your timer to either 1 or 2 hours,
depending on usage habits. This means the Classic Sensor will flash
after the set period, warning of imminent power down. In every case
you can continue using your equipment by pressing the volume
button on any remote control.
The default setting is 1 hour, which is aimed to maximize your home’s
energy savings.
Follow these instructions to change Active Powerdown® to 2 hours,
(this may be preferred for longer movies or programs where remote
control activity is less frequent).
NOTE: Make sure your AV System is on before you start changing settings!
To set the Active Powerdown® timer, simply press the SET button on
top of the sensor.
The 1 and 2 LED lights on top of the sensor will light up to show the
current setting. Push the SET button to toggle between the 1 hour
and 2 hour Active Powerdown® settings.
Changing settings for Active Powerdown®
10
Page 11

Your Embertec Emberstrip® 8AV+ is equipped with a unique MusicMode™
feature. This feature enables you to override the Active Powerdown®
for a period of 8 hours. This feature is great for playing music, parties,
video nights or any time you want to keep your appliances on for an
extended period of time.
The Embertec Emberstrip® 8AV+ will revert to its previous setting
of 1 or 2 hours after the 8 hour period elapses, or you switch your
appliances off.
Remember
1. In this mode your system will stay on for 8 hours, unless you switch
your appliances off.
2. Your permanent Active Powerdown® timer setting will revert to
1 or 2 hours once you have switched your appliances off, or after
8 hours, whichever comes first.
NOTE: Make sure your AV System is on before you start changing settings!
Ensure your Audio Visual (AV) equipment is switched on.
To set the Active Powerdown timer to MusicMode™ (8 hours), simply
press the MUSIC button on top of the sensor. The M LED will light
up to show that MusicMode™ is currently selected.
MusicMode™ settings
11
Page 12

Your Classic Sensor is equipped with a unique feature which enables
you to reduce the brightness of the Classic Sensor ‘flash’ and to
reduce the length of flashing when your equipment is no longer
being used.
Your device is shipped with the brightness level set to maximum,
however you may wish to enable BedroomMode™ to reduce the
brightness of the Classic Sensor light in a bedroom. BedroomMode™
is not recommended for living rooms or brightly lit areas.
To Set using the Classic Sensor:
Make sure that at least your TV is switched on before starting.
1. Press and hold the SET button on the Classic Sensor for 3 seconds
then release. The LED light on the front of the sensor will flash,
starting from a faint flash slowly progressing to a bright flash.
2. When you are happy with the level of brightness, press the SET
button on the Classic Sensor again.
3. You can change the brightness of the Classic Sensor at any time by
following the above steps.
NOTE: Once BedroomMode™ is selected, the LED will flash for
about 10 seconds when you turn off your television before the
power is removed from the Power Saving outlets.
If you prefer the LED to flash for one minute, press the MUSIC
button instead of the SET button at step 2.
BedroomMode™ settings
12
Page 13

Specifications
• Surge protection is provided to all outlets. Conforms with UL 1449
and UL 1363.
• Senses total power being consumed by all controlled devices.
• Senses Infrared (IR) and true Root Mean Squared (RMS) power to
determine device usage of AV equipment.
• Hardware IR filtering technology and firmware to filter out rogue
non AV equipment IR interference from compact fluorescent lights
and sunlight.
• Automatically adjusts power switching threshold.
What power is wasted?
Many of today’s appliances for the home and office continue to use
power, even when the appliance is turned off. Appliances that are left
on unintentionally waste even more power.
Overload protection
The Embertec Emberstrip® 8AV+ is fitted with a safety device that
removes power in the event of overloading. Should this occur, turn
off and unplug all units, and press the reset button. Then plug into
the wall outlet again. Once reset, use any remote control to activate
power to the Power Saving outlets. Connect one device at a time. If
any of the devices cause the safety device to trip again then get the
offending device serviced. If the Embertec Emberstrip® 8AV+ fails to
operate, please contact Embertec on 1-800-838-9659.
Care and maintenance
To clean the outside of the Embertec Emberstrip® 8AV+ device, first
remove the device from the power point. Then wipe the exterior with
a soft dry cloth. Never use an abrasive cleaner or water.
Disposal/recycling
To protect the environment, the Embertec Emberstrip® 8AV+ should
be recycled, or disposed of safely at the end of its life. Please return to
a recycling center for safe recycling or disposal.
Fast facts
13
Page 14

Due to continual improvement in design or otherwise, the product you purchase may differ
slightly from the products shown in this information sheet.
Electrical specifications
Physical
Dimensions:
16.54 in L x 2.72 in W x 1.57 in D
(420 mm L x 69 mm W x 40 mm D)
Weight:
1.78 lb (810 g)
Color: Black body
Classic Sensor Cable Length: 9.8 ft (3 m)
Power Cord Length: 4 ft (1.22 m) with angled plug
Number of Outlets: 8
Always On: 2
Power Saving: 6
Environmental
Temperature (operating): 32 °F to +158 °F (0 °C to +70 °C)
Temperature (storage): -4 °F to +185 °F (-20 °C to +85 °C)
Humidity (operating): 95% RH at +122 °F (+50 °C)
Protection and Safety
Surge Compliance: UL 1449
Powerstrip Safety:
Underwriters Laboratories Tested and
Listed to UL 1449 and UL 1363
Total Surge: 1,974 Joules / 45,000 Amps for all outlets
Input Current: 15 Amps RMS via circuit breaker
Over-Current Threshold: 15 Amps RMS
Electrical Durability
Relay Endurance: Over 100,000 switching cycles at 15 Amps
Operating Voltage: 110 V AC +/- 10%
Maximum Output Current: 15 Amps RMS
Max Total Load: 1,800 W
Maximum Power Consumption
(In all modes of operation)
< 1 W @ 110 V / 60 Hz
Control
Classic Sensor Infrared Interface.
Visual indicator which verifies the APS is active and functioning.
Does not rely on the use of a single device in an AV environment to supply
power to other devices.
Resettable circuit breaker.
14
Page 15

This device complies with Part 15 of the FCC Rules. Operation is subject to the
following two conditions: (1) this device may not cause harmful interference,
and (2) this device must accept any interference received, including interference
that may cause undesired operation.
NOTE: This equipment has been tested and found to comply with the
limits for a class B digital device, pursuant to Part 15 of the FCC Rules.
These limits are designed to provide reasonable protection against
harmful interference in a residential installation. This equipment
generates, uses and can radiate radio frequency energy and, if not
installed and used in accordance with the instructions, may cause
harmful interference to radio communications. However, there is no
guarantee that interference will not occur in a particular installation.
If this equipment does cause harmful interference to radio or television
reception, which can be determined by turning the equipment off
and on, the user is encouraged to try to correct the interference by
one or more of the following measures:
• Reorient or relocate the receiving antenna
• Increase the separation between equipment and receiver
• Connect the equipment into an outlet on a circuit different from
that to which the receiver is connected
• Consult the dealer or an experienced radio/TV technician for help.
WARNING: Any changes or modifications not expressly approved
by Embertec Pty Ltd could void the user’s authority to operate
this equipment.
Specifications
15
Page 16

Problem To check
The Embertec Emberstrip® 8AV+
is not receiving power.
• The Protected light is on.
The Embertec Emberstrip® 8AV+
is not powering down my
equipment in standby mode.
• Ensure the equipment is plugged into
the Power Saving outlets, not into the
Always On outlets.
• The Embertec Emberstrip® 8AV+ has not
detected the equipment is in standby. Please
repeat this process by switching on the
Audio Visual (AV) component again, waiting
10 seconds, and switching off again making
sure all appliances are in standby mode.
The Classic Sensor is not operating. • Remove the Embertec Emberstrip® 8AV+ from
the power point, unplug the Classic Sensor
cable and then plug it back into the unit and
plug the Embertec Emberstrip® 8AV+ back
into the power point.
The Classic Sensor flashes
frequently during normal
operation.
• This may be an indication of unwanted infrared
activity in the area. Please check the immediate
area for infrared devices that maybe interfering
with the Embertec Emberstrip® 8AV+, such
as compact fluorescent lights, computers,
mobile phones, and other portable consumer
electronic devices. If possible relocate these
interfering devices.
• Move the Classic Sensor to another location
that is within line of sight and normal operation
range of your Audio Visual (AV) equipment
remote controls.
The Protected LED on the main
body of the Embertec Emberstrip®
8AV+ is on, but my Classic Sensor
LED does not work (when plugged
in and powered on).
• Please check your Classic Sensor connection
to the Embertec Emberstrip® 8AV+ by
ensuring the Classic Sensor cable is safely
and securely connected to the side of the
Embertec Emberstrip® 8AV+.
The Embertec Emberstrip® 8AV+
has stopped working.
• Unplug all the appliances connected into the
Embertec Emberstrip® 8AV+ adapter and then
unplug from the wall outlet. Then reconnect
everything again.
The TV keeps turning off
after 1 hour.
• The Classic Sensor default setting for Active
Powerdown® is 60 minutes.
• Please see Changing Classic Sensor setting
for Active Powerdown® to change Active
Powerdown® to 1 or 2 hours.
Troubleshooting guide
16
Page 17

Our Embertec Emberstrip® is designed and manufactured with precision and care, which
is why we offer a Limited Product Warranty and a Limited $25,000 Connected Equipment
Warranty for each Embertec Emberstrip®.
LIMITED PRODUCT WARRANTY
What is covered?
Except as limited here, this product warranty covers any defect in material or workmanship
with the Embertec Emberstrip®. If the initial purchase is by a utility or other entity that will
not itself be using the device, this warranty is transferable to any customer of such entity
who subsequently owns the device. Otherwise, this warranty is not transferable.
For how long?
This warranty runs for the lifetime of the Embertec Emberstrip®. The lifetime of the
Embertec Emberstrip® is 15 years from the date of purchase.
What will we do if the device fails during the limited product warranty period and
this warranty applies?
Subject to the limitations set forth in this warranty, we will elect (at our option) to either
repair or replace the defective device. If we elect to replace the device and it has been
discontinued, we will replace it with another device of equal or greater value. We will ship
the repaired or replacement device to you, and pay for those shipping costs.
What does this limited product warranty not cover?
This warranty does not cover any damage to the Embertec Emberstrip® caused by improper
use, accidents, acts of God (such as lightning strikes, floods or earthquakes), or normal wear
and tear. For purposes of this warranty, “improper use” means not installing or operating the
device in accordance with the manual. Any incidental, consequential, special or other indirect
damages are not recoverable under this warranty. Some states do not allow the exclusion of
incidental or consequential damages, so the foregoing limitation may not apply to you. You
will be responsible for any shipping or other transportation costs incurred in connection with
returning the defective product to us.
How do you request service under this limited product warranty?
To request service under this warranty for your Embertec Emberstrip®, (i) visit embertec.com
for our address or a list of authorized service providers near you, and (ii) either pack the
product carefully to prevent damage in transit and ship it, along with a brief description of
the defect, to our address, or bring it into one of our authorized service providers.
This warranty gives you specific legal rights. You may also have other rights which vary
from state to state.
LIMITED $25,000 CONNECTED EQUIPMENT WARRANTY
What is covered?
Except as limited here, this connected equipment warranty covers any equipment that is
damaged by a transient voltage surge or spike (an “Occurrence”) while properly connected
to an Embertec Emberstrip® that is properly connected to an AC power line with a protective
ground. If the initial purchase of the Embertec Emberstrip® is by a utility or other entity that
will not itself be using the device, this warranty is transferable to any customer of such entity
who subsequently owns the device. Otherwise, this warranty is not transferable.
Limited warranties
17
Page 18

For how long?
This warranty runs for the lifetime of the Embertec Emberstrip®. The lifetime of the
Embertec Emberstrip® is 15 years from the date of purchase.
What will we do if connected equipment is damaged during the limited connected
equipment warranty period and this warranty applies?
Subject to the limitations set forth in this warranty, we will elect (at our option) to repair or
replace any equipment damaged by an Occurrence, or to pay you an amount equal to the
replacement value for such equipment, not to exceed the overall maximum set forth below.
In connection with the foregoing, we reserve the right to examine the damaged equipment
at the site where the damage occurred. If we elect to replace the equipment and it has
been discontinued, we will replace it with similar equipment of equal or greater value,
subject to the overall maximum set forth below. We will pay for all shipping costs incurred
in connection with the delivery of any repaired or replacement equipment to you, subject
to the overall maximum set forth below.
What does this limited connected equipment warranty not cover?
This limited connected equipment warranty does not cover:
• Any damage to connected equipment caused by improper use of the Embertec Emberstrip®
or the connected equipment, accidents, acts of God (such as lightning strikes, floods or
earthquakes), or normal wear and tear of the Embertec Emberstrip® or the connected
equipment. For purposes of this warranty, “improper use” means not installing or
operating the Embertec Emberstrip® in accordance with the manual, or not installing or
operating the connected equipment in accordance with its manual.
• Any damage to equipment that is not properly connected to an Embertec Emberstrip®,
or damage to equipment connected to an Embertec Emberstrip® that is not properly
connected to an AC power line with a protective ground.
• Any damage to equipment connected to an Embertec Emberstrip® that had previously
experienced another Occurrence. After each Occurrence, the Embertec Emberstrip®
must be replaced.
• Any damaged equipment that has been disposed before we have examined the
equipment at the site where the damage occurred (or notified you that we would not be
visiting the site), and elected whether to repair or replace it or pay for its replacement
value, all in accordance with the terms set forth above.
• Any damage to satellite dishes.
THE MAXIMUM CUMULATIVE AMOUNT WE WILL PAY FOR ALL
REPAIRS, REPLACEMENT AND SHIPPING COSTS FOR ANY AND
ALL DAMAGED EQUIPMENT QUALIFYING UNDER THIS WARRANTY
SHALL NOT EXCEED TWENTY FIVE THOUSAND DOLLARS ($25,000).
Any incidental, consequential, special or other indirect damages are not recoverable
under this warranty. Some states do not allow the exclusion of incidental or consequential
damages, so the foregoing limitation may not apply to you.
If the connected equipment is covered by an applicable homeowner’s or renter’s insurance
policy, we reserve the right to be subrogated under such policy. In addition, this warranty
shall not apply to any damaged equipment covered under the manufacturer’s warranty.
How do you file a claim under this limited connected equipment warranty?
To file a claim for connected equipment qualifying under this warranty, visit embertec.com
or call 1-800-838-9659 and provide a full description of the damage.
This warranty gives you specific legal rights. You may also have other rights which vary
from state to state.
18
Page 19
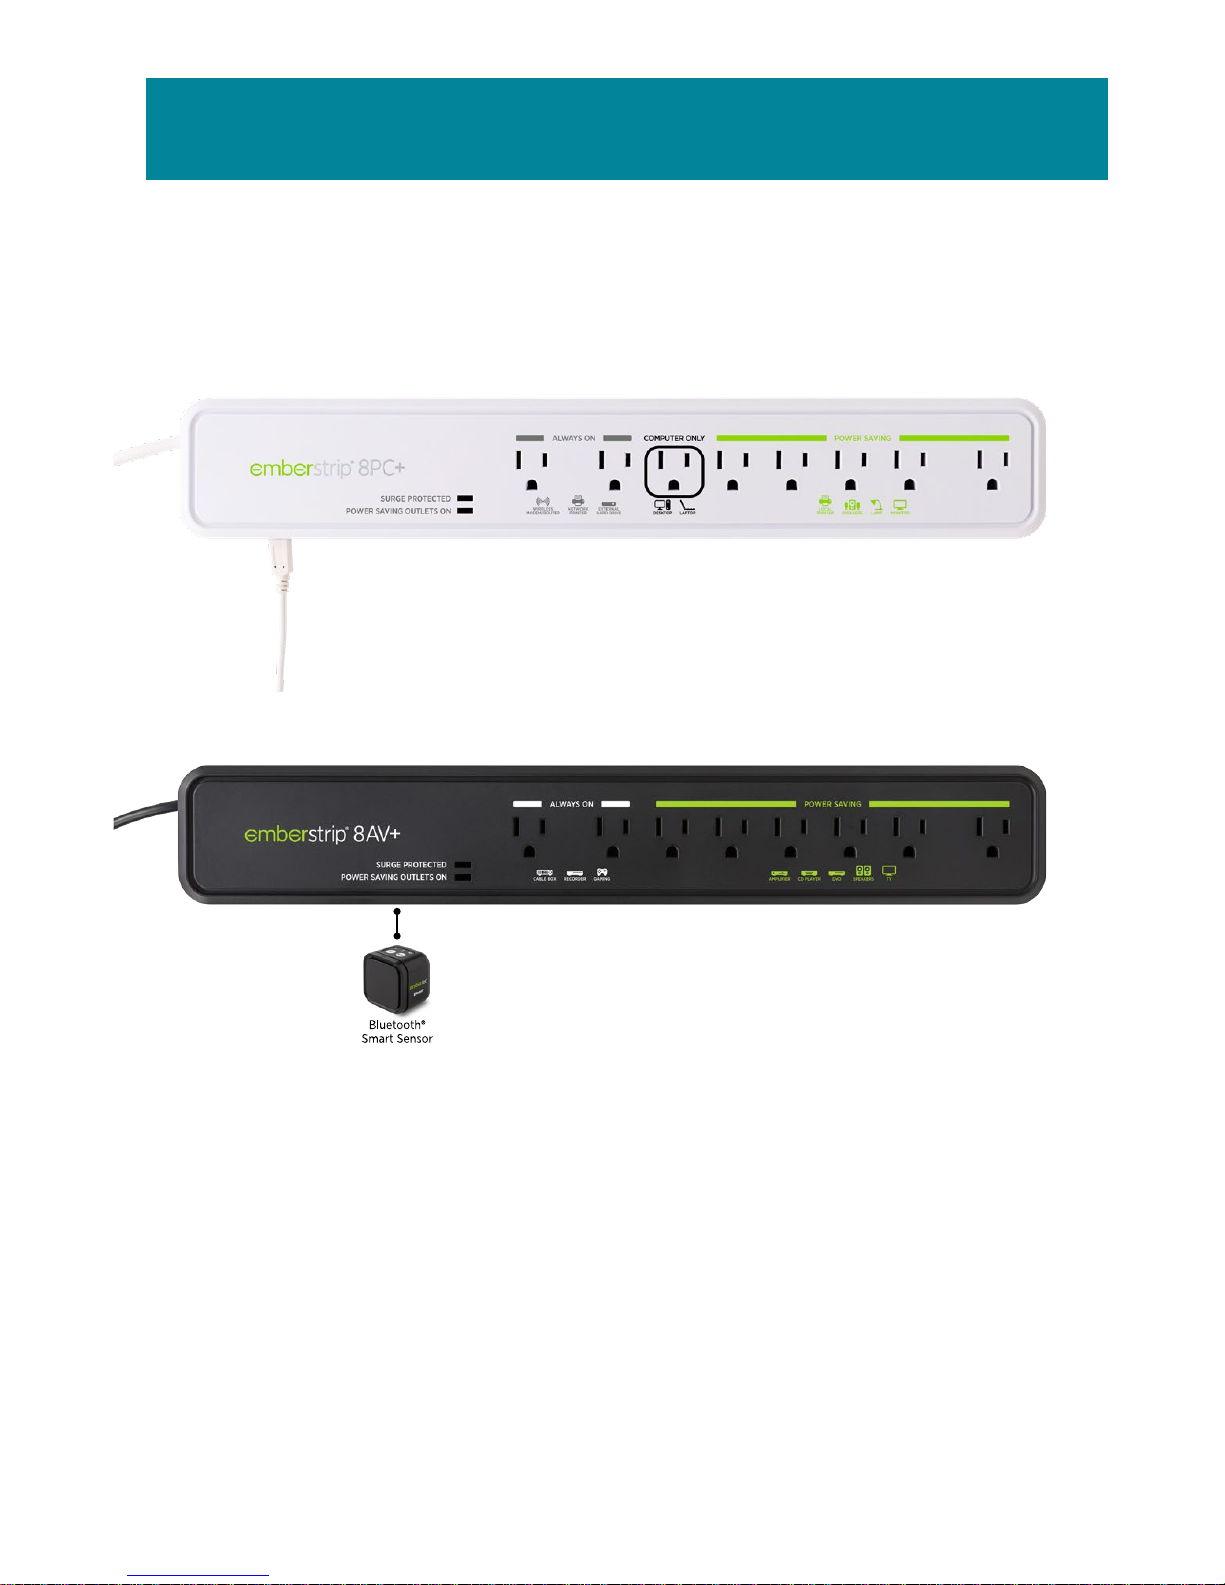
Automatic maximum power savings, zero effort for computers and IT
peripheral devices. Check with your utility company or visit us on the
web for more information.
Also in our range
Emberstrip® 8AV+ with Bluetooth® Smart Sensor
Emberstrip® 8PC+
19
Page 20

Embertec USA LLC
176 Seacli Drive
Aptos, CA 95003, USA
Due to continual improvement in design or otherwise, the product
you purchase may differ slightly from the illustration in this book. Issue V12
Please retain your instruction book for future use.
In the event that you need assistance, please contact us on 1-800-838-9659
or email us at [email protected] or, alternatively visit us
on our website at embertec.com
Except as required by law, Embertec is not responsible for special,
incidental, or consequential damages, or loss of data; or any loss or
damage arising from intentional misuse of the product. Such damages
and loss include, but are not limited to: lost business; business
downtime; component/equipment replacement and reconfiguration;
and the costs of retrieval of lost data.
Important
 Loading...