

Page 1
2. Connecting the Hardware
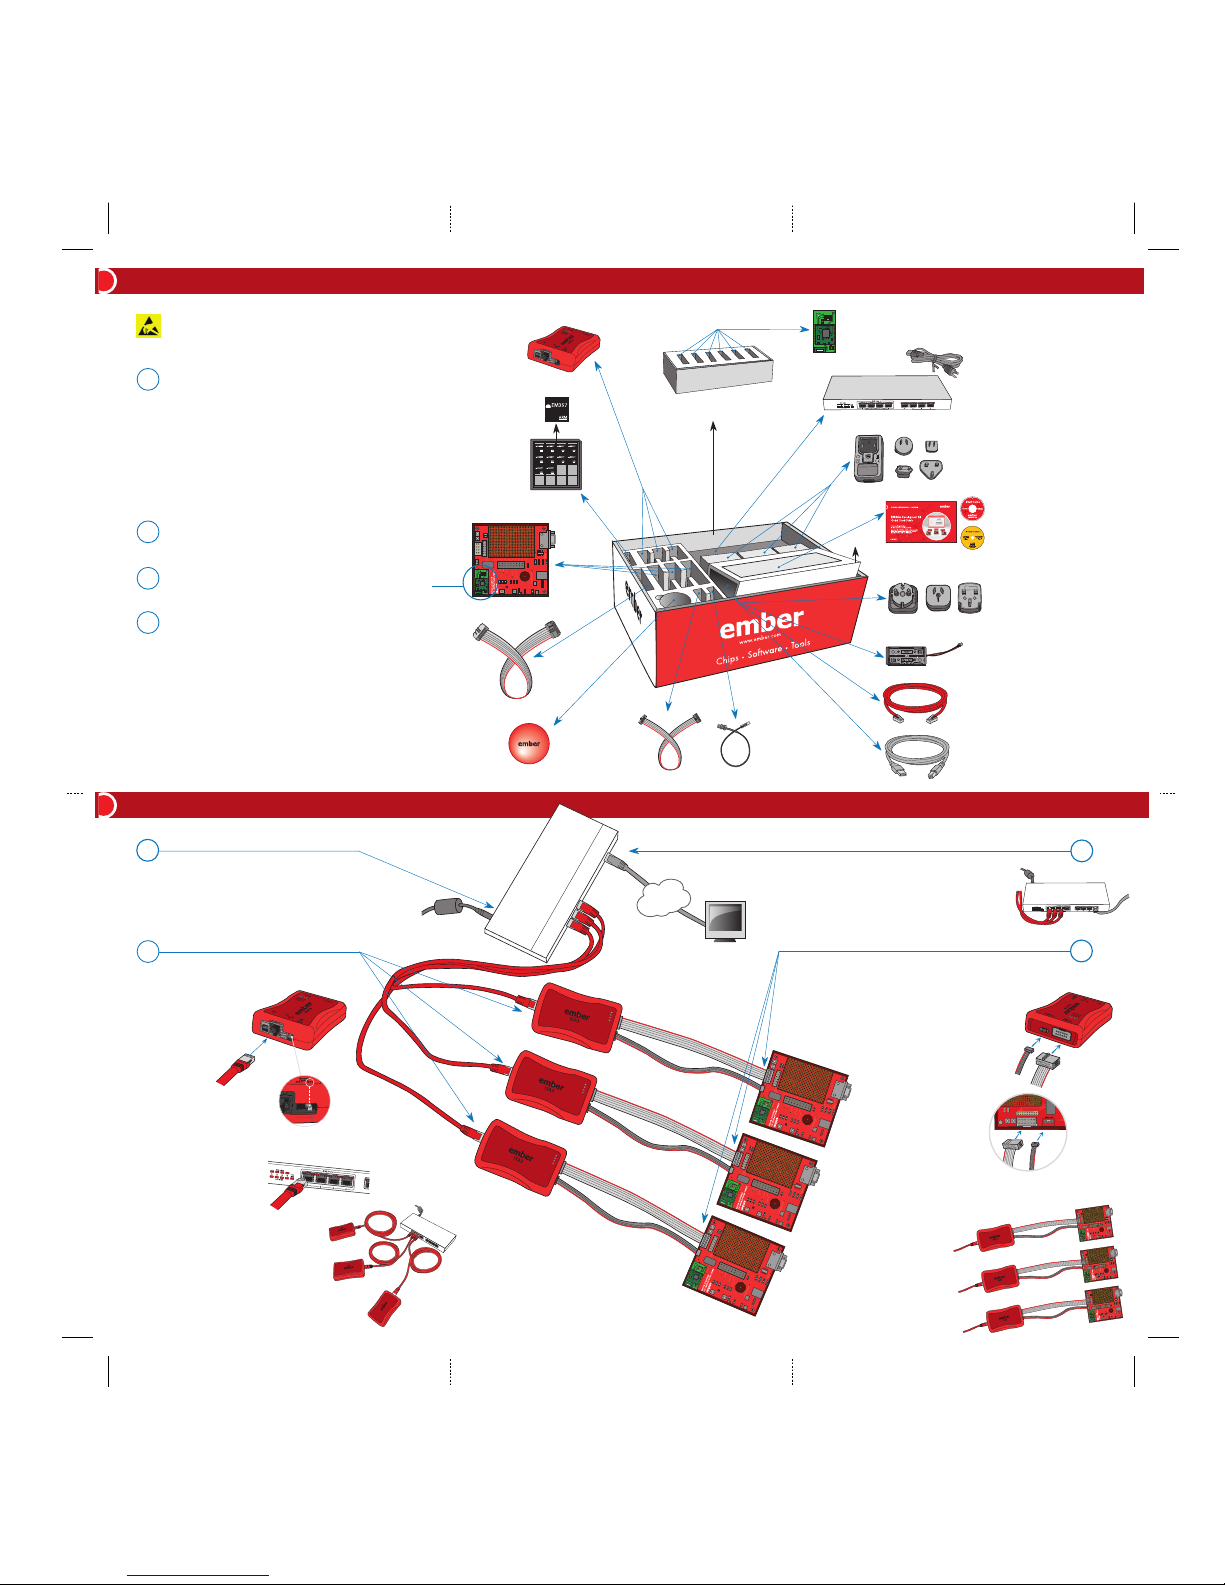
Remove visible components from their packaging:
• InSight
™
Adapters (ISA3s)
• EM357 Sample Chips
• EM35x Breakout Boards
• EM35x Modules
• Data Emulation Interface (DEI) Cables
• Ember Happy Fun Ball
• InSight Port (ISP) Cables
• Radio Frequency Cable
Place all components on a clean, dry surface.
1. Unpacking the Contents
Power over Ethernet (PoE) Switch
1. Remove PoE Switch from box.
2. Connect AC Power Supply and insert it into
a wall outlet. If needed, use an AC Plug
Power Adapter.
InSight Adapters (ISA3s)
1. Insert one end of Ethernet Cable (red)
into Ethernet port of InSight Adapter (ISA3).
EM35x Breakout Boards
One InSight Port (ISP) Cable and one Data Emulation
Interface (DEI) Cable are used to connect one ISA3
to one EM35x Breakout Board. One ISA3 is powering
one EM35x Breakout Board.
1. Insert one end of ISP Cable
into InSight Port of ISA3.
2. Insert one end of DEI Cable into
DEI Port of ISA3.
3. Attach other end of ISP Cable
to InSight Port on EM35x
Breakout Board.
4. Attach other end of DEI Cable
to DEI Port on EM35x
Breakout Board.
5. Repeat steps 1–4 for the two other ISA3s
and two EM35x Breakout Boards. This completes
the ISA3-to-EM35x Breakout Board setup.
Corporate Network
Connect customer-supplied Ethernet
Cable to PoE Port 8 of PoE Switch and
either a corporate network (using static
or DHCP addresses) or to a developer’s
PC (must use static IP addresses).
4. Repeat steps 1–3 for the two other
ISA3s and PoE Ports 2 and 3. This
completes the ISA3-to-PoE Switch setup.
3. Insert other end of Ethernet Cable into
Port 1 of PoE Switch.
2. Confirm the toggle switch
is set to ‘INT’ position.
A
A
Remove seal on EM35x Module Box. Count six
EM35x Modules. Set EM35x Module Box aside.
B
B
Remove USB Power Supplies with Adapters
and PoE Switch.
C
Remove Quick Start Guide, InSight Dekstop (ISD)
CD, IAR Embedded Workbench CD,
US-to-multinational AC Plug Power Adapter Kit,
AAA Battery Packs, Ethernet Cables, and USB
Cables. Set them aside.
D
C
D
DEI Cable
Ethernet Cables
Ethernet Cable
(not included)
PC
Power Supply
PoE Switch
ISP Cable
EM35x Module
x 6
InSight Adapter (ISA3)
x 3
InSight Port (ISP) Cable
x 3
EM35x Breakout Board
x 3
EM35x Module
x 3
Data Emulation Interface
(DEI) Cable
x 3
Ember Happy Fun Ball
x 1
EM357 Sample Chip
x10
EM35x Module Box
PoE Switch with Power Supply
x 1
Radio Frequency Cable
x 1
USB Power Supply with Adapters
x 3
Quick Start Guide
InSight Desktop (ISD) CD
IAR Embedded Workbench CD
x 1
Ethernet Cable
x 3
AAA Battery Pack
(batteries not included)
x 3
US-to-multinational
AC Plug Power Adapter Kit
x 1
USB Cable
x 3
3
Corporate
Network
ATTENTION: Observe precautions for handling
electrostatic sensitive devices.
Page 2
InSight Desktop only runs under Windows XP and requires
Java 1.5V6 or later.
1. Insert InSight Desktop (ISD) CD into CD-ROM drive.
If Setup doesn’t start automatically, browse to emberSetup.exe
in the CD’s root directory and run it.
2. Follow on-screen instructions to install ISD.
3. Installing InSight Desktop
Once you have connected the hardware and installed the software,
run ISD’s Setup Wizard to verify the installation.
1. Launch ISD: Start | All Programs | Ember | InSight Desktop | InSight Desktop.
2. Enter the Ember Support Portal username obtained from Ember Support
and click Save username and continue. If you don’t have a username,
click Continue without registration. Once you have a username, you can
register with Help | Register.
3. Launch ISD’s First-Time Setup Wizard: Click Start First-time Setup button
or select Help | First-time setup wizard.
4. Click Next and follow the on-screen instructions.
The First-Time Setup Wizard will search your network for attached ISA3s.
When done, you will have connected the ISA3s and loaded application
images on them. You are now ready to capture network traffic from the ISA3s.
CONGRATULATIONS!
5. Click Finish.
You must be a registered user of the Ember Support Portal to obtain support, download
the latest Ember Development Software, and receive automatic updates of ISD. To
create an account, go to http://www.ember.com/support_index.html and follow the
instructions there before continuing. You will need to provide the Ember Software Serial
Number on the Hardware Identification List attached to this guide.
A. IAR Workbench
1. Insert IAR
Embedded Workbench CD into CD-ROM drive.
If Setup doesn’t start automatically, browse to autorun.exe in the CD’s root
directory, and run it.
2. Follow the on-screen instructions to install IAR
Embedded Workbench.
Licenses and support are provided separately and can be obtained from
IAR Systems at http://www.iar.com.
By default, ISA3s are configured to acquire IP addresses using DHCP.
If your network environment instead requires use of static IP addresses,
configure each ISA3 as follows.
1. Browse to Utilities folder of ISD CD and run ISA3_Utilities.exe.
2. Disconnect one ISA3 entirely from PoE Switch.
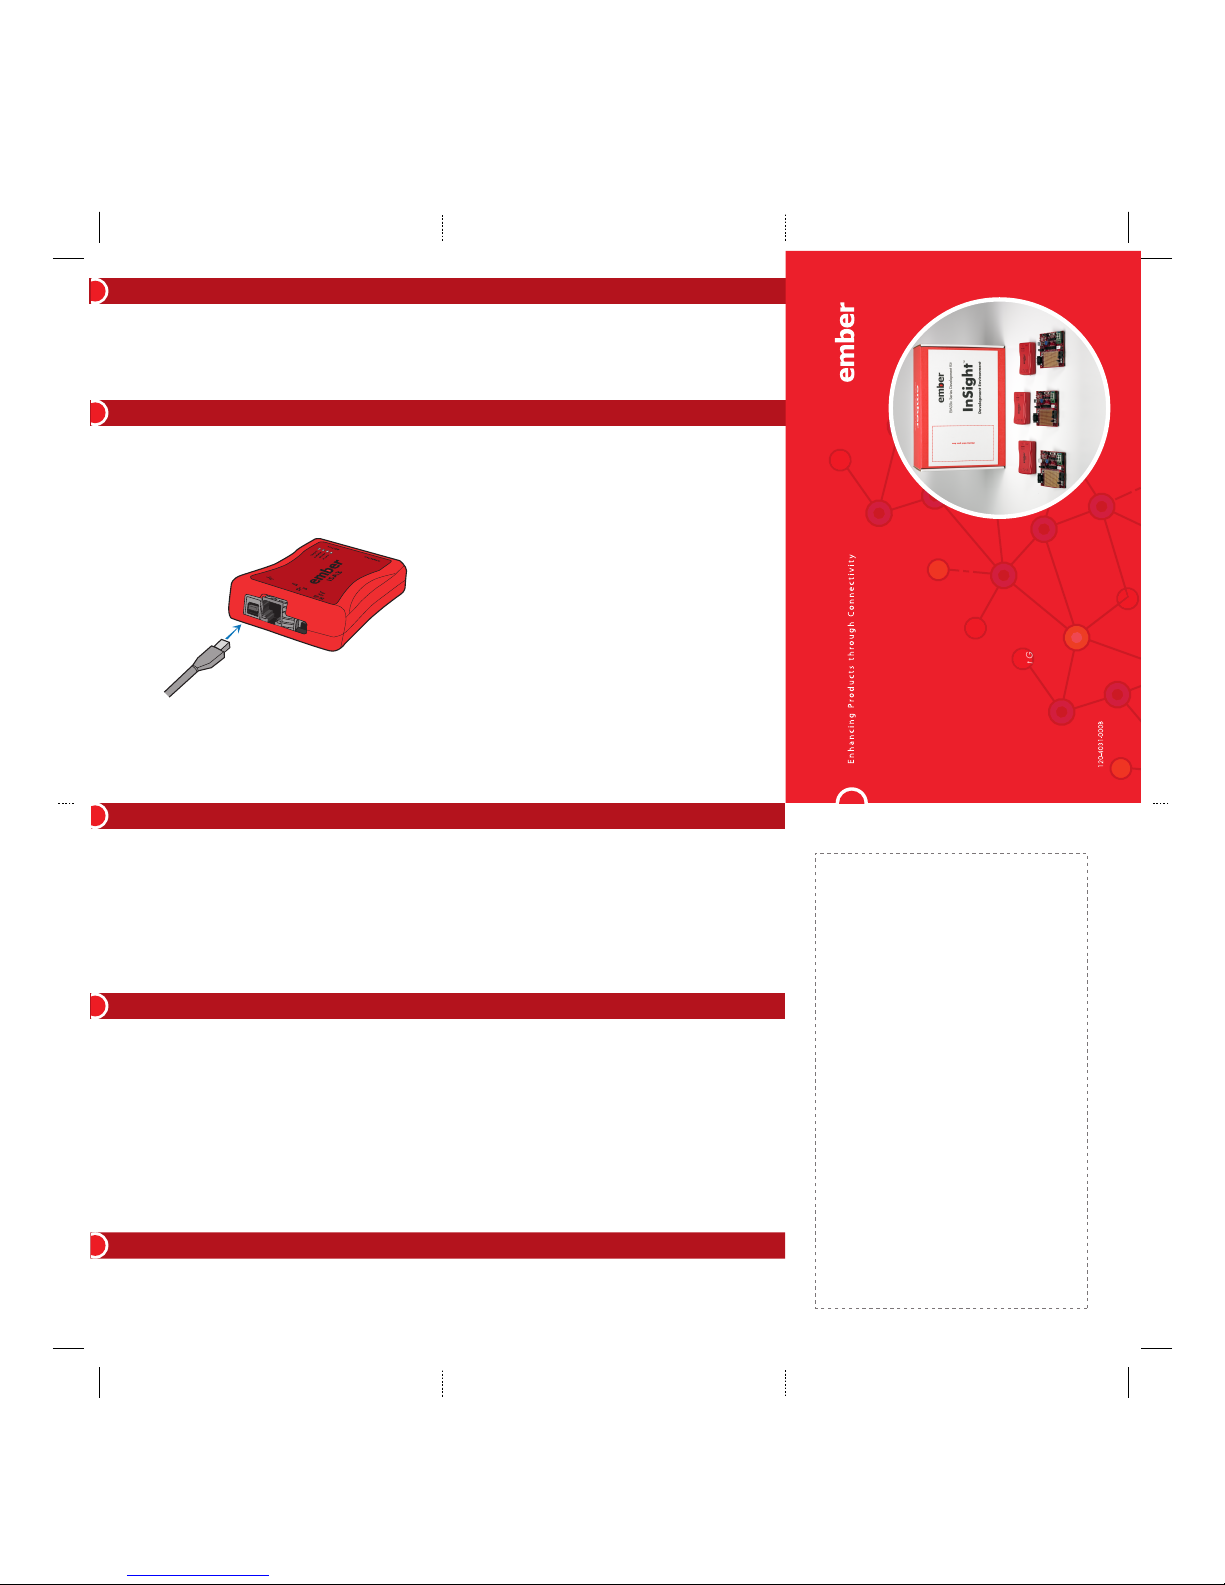
3. Connect one end of USB Cable to ISA3.
4. Connect other end of USB Cable to the PC.
5. Open a command window and change directory to:
C:\Program Files\Ember\ISA3 Utilities\bin (the default).
6. Run em3xx_isa.exe with these parameters to configure static IP settings:
em3xx_isa.exe - -admin "ip static IPADDR NETMASK GATEWAY"
Replace IPADDR, NETMASK, and GATEWAY with your desired settings.
Example
The following command line changes settings to a static IP address of
192.168.1.100 with a netmask of 255.255.255.0 and a gateway of 192.168.1.1.
C:\Program Files\Ember\ISA3 Utilities>
em3xx_isa.exe - -admin "ip static 192.168.1.100 255.255.255.0 192.168.1.1"
Result
Success: ip: (after reboot) Static 192.168.1.100 255.255.255.0 192.168.1.1
7. Run em3xx_isa.exe one more time with these parameters to disable DHCP:
C:\Program Files\Ember\ISA3 Utilities>em3xx_isa.exe - -admin "ip dhcp off"
Result
Success: ip: (after reboot) DHCP off
8. Unplug ISA3 from USB Cable, and reconnect ISA3 to PoE Switch
per “Connecting the Hardware” section.
9. Repeat steps 2–8 for the two other ISA3s.
4. Configuring Static IP Addresses (optional)
5. Running ISD’s First-Time Setup Wizard to Verify Installation
6. Doing Custom Development
7. For More Information
B. EmberZNet
1. Go to EmberZNet PRO for EM35x: http://portal.ember.com/em35x.
2. Log in with your username and password.
3. Follow the instructions to download and install the latest versions of all
Ember Development Software for your EM35x Development Kit.
If you have any installation issues, refer to the EM35x User Guide (120-4030-000).
You can also use the Ember Developer Portal at http://portal.ember.com.
Copyright © 2009 Ember Corporation. All rights reserved. Ember is a registered trademark and the
Ember logo and InSight are trademarks of Ember Corporation. All other trademarks are the property
of their respective holders.
USB Cable
Place Hardware Identification List here
EM35x Development Kit
Quick Start Guide
Thank you for purchasing
the Ember
EM35x Development Kit.
Please read this Quick Start Guide to get up and running
quickly. If you have any issues, refer to the “For More
Information” section at the end of this guide.
 Loading...