

Page 1
Video Adapters
QUICK START GUIDE
1. Uncrate the console and inspect for any damages.
2. Plug console into electrical outlet that has clean power.
CAUTION!
a) A power source with abnormal voltage or excessive noise can result
in improper console operation and possible damage not covered under
warranty. (ensure electrical outlet is not on an air-conditioning, heater,
refrigerator or range circuit).
b) For maximum battery backup time, allow the UPS to charge for a full
eight hours prior to console use.
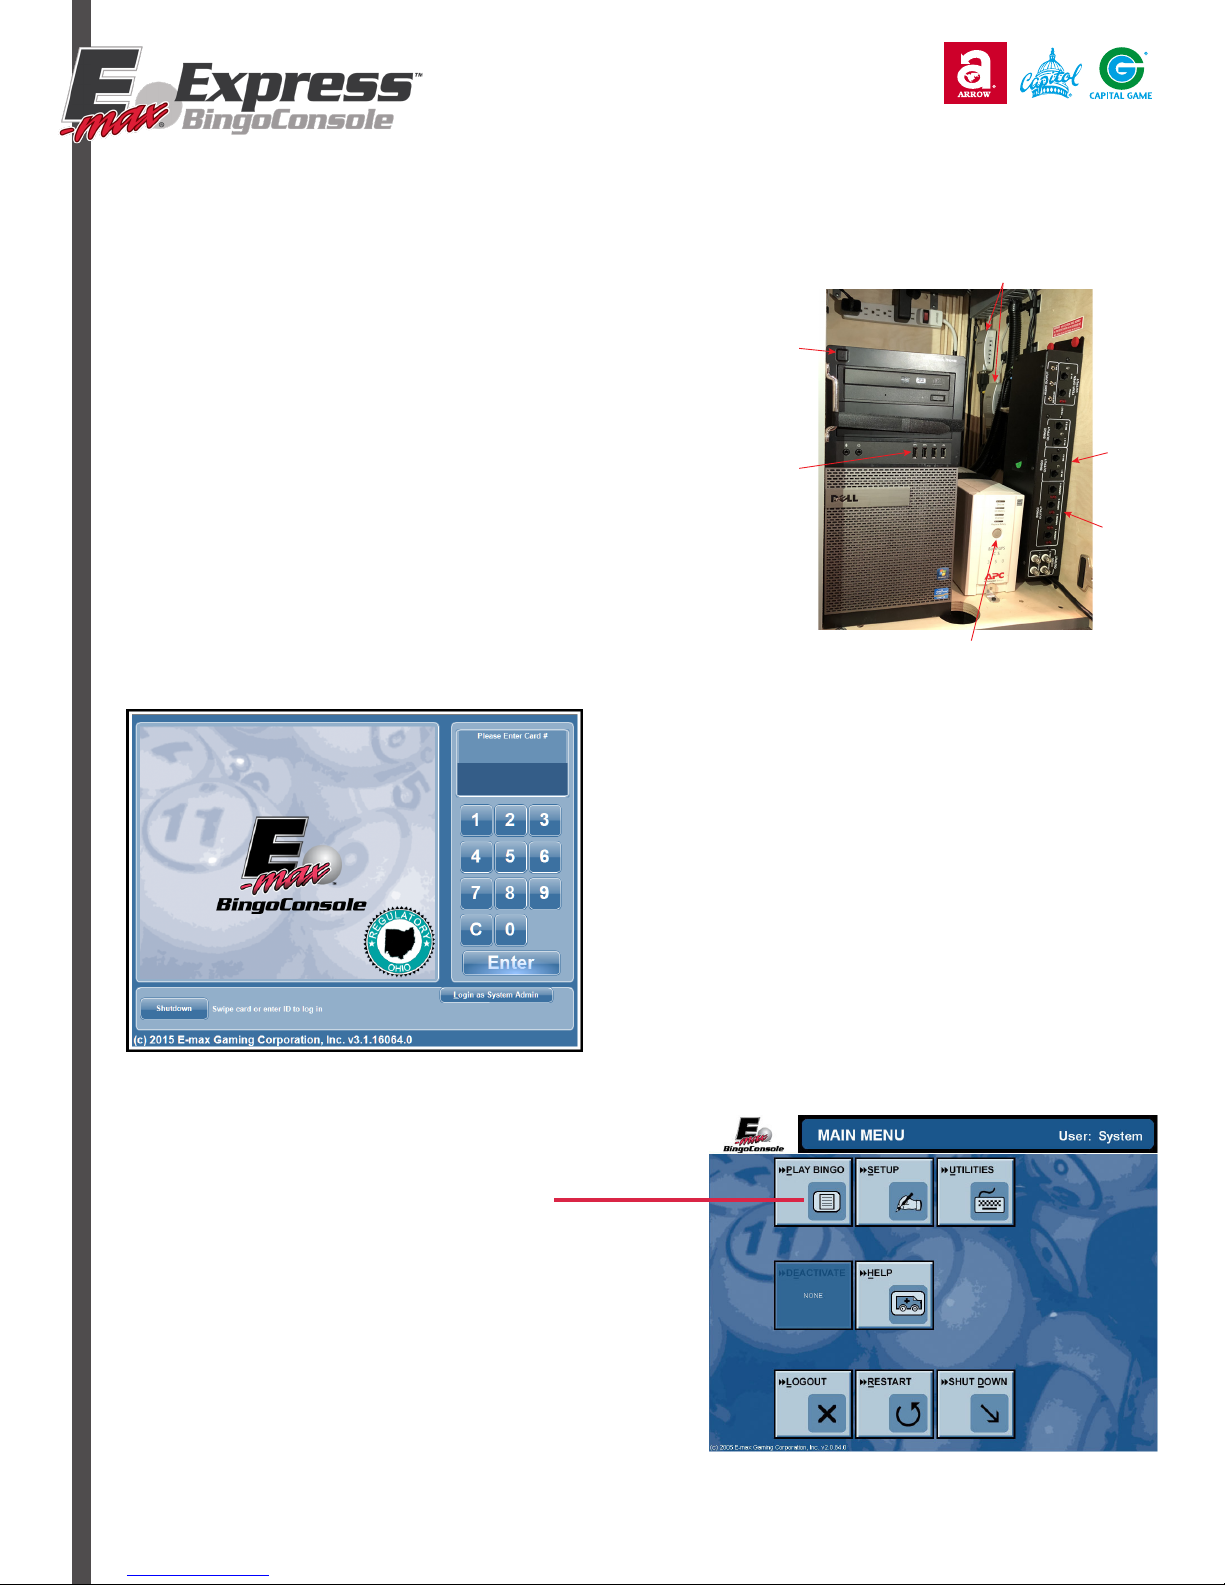
3. Push the UPS on/off button to power up the system and then the
computer power button.
Computer On
Button
USB Ports
© ARROW INTERNATIONAL INC.
Data Router
outputs for
Flashboards
Data Router
Indicator LED’s
UPS Power On
Button
7. On the main menu screen, press play bingo.
4. Ensure your state logo is on the log in screen.
5. To log in, swipe the Administrator card and enter the
password 13629
6. The electronic console contains a software security
key that must be activated prior to conducting bingo
operations with electronic gaming units. This key must
be periodically updated.
Page 2
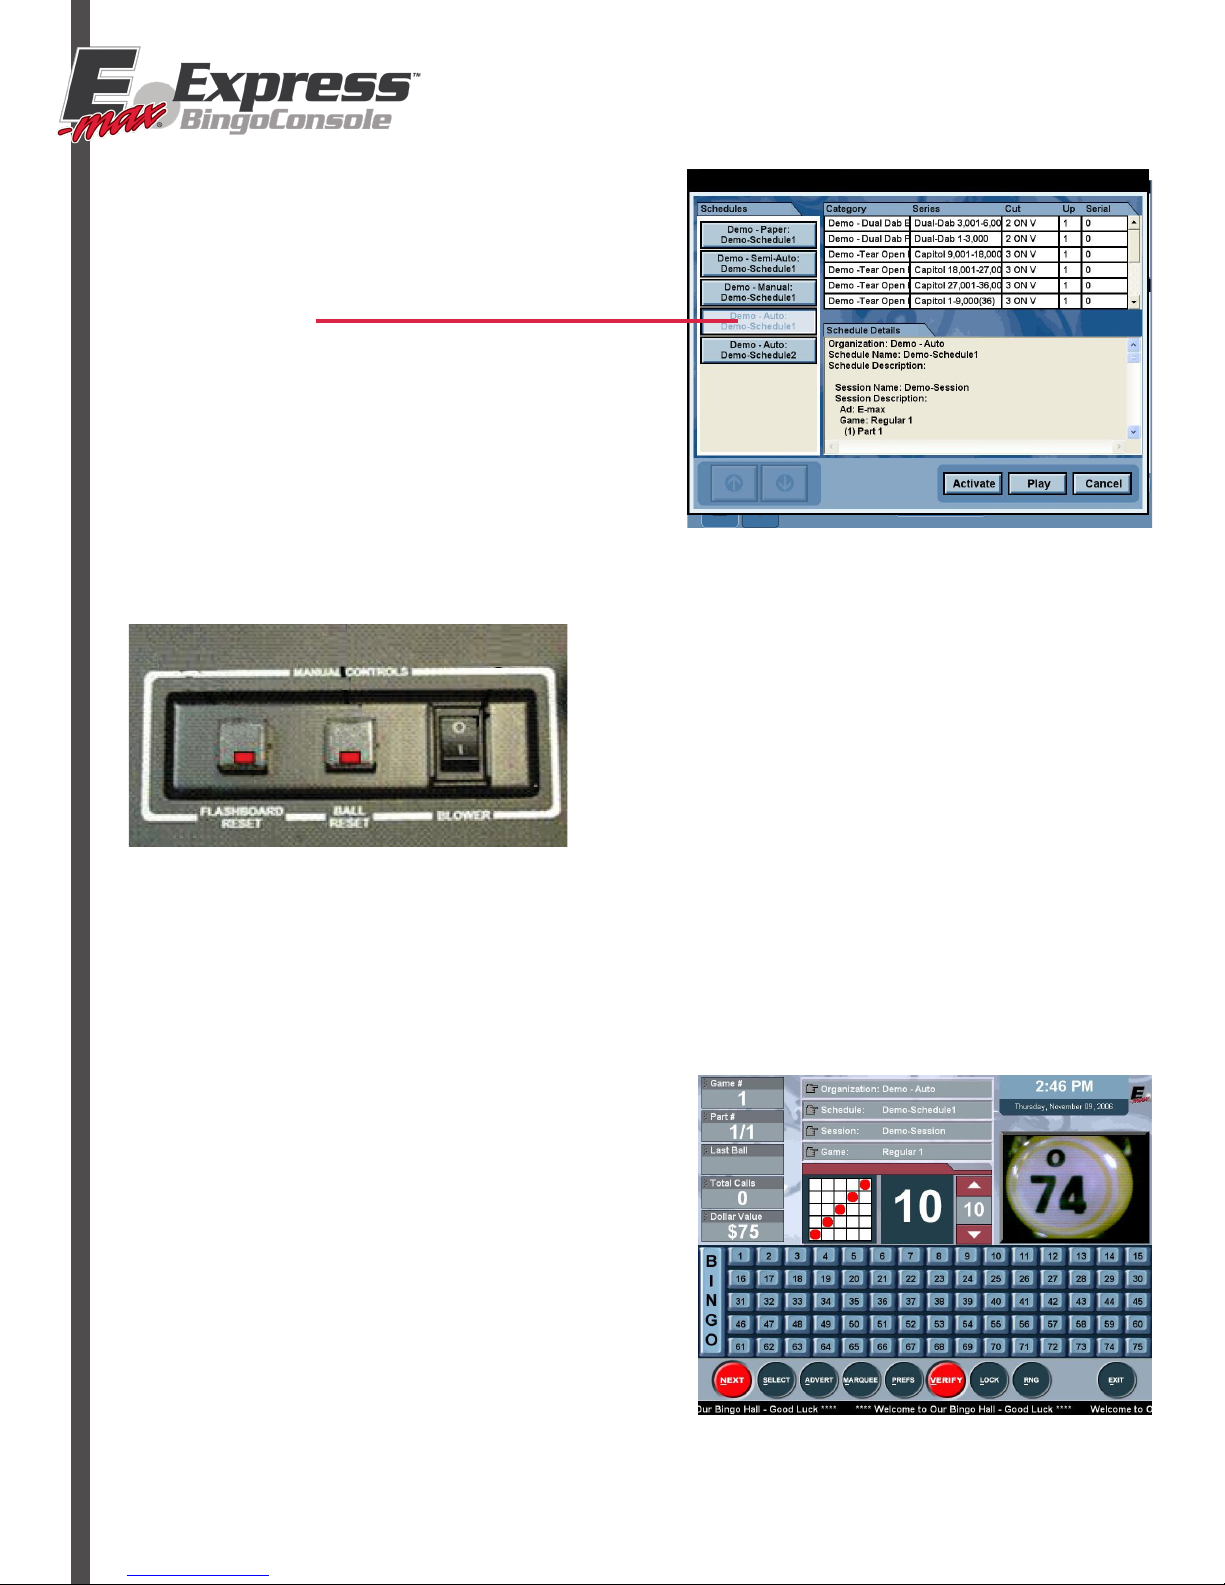
8. On the Organization/Schedule screen,
press demo auto.
QUICK START GUIDE
9. Load bingo balls into mixing chamber.
11. Now that the console is working, you may program
sessions.
10. Turn on blower switch.
Page 3
QUICK START GUIDE
12. Console Hierarchy: (order in which to build a bingo session)
a) HALL
b) Organization 1 - Employees
c) Schedule 1
d) Session 1
e) Game 1
f) Game Part 1
g) Category 1 (type/cut)
h) Series 1 (number)
For detailed programming help follow the demo session included within the console or refer to Chapter 6 of
the Operational Manual.
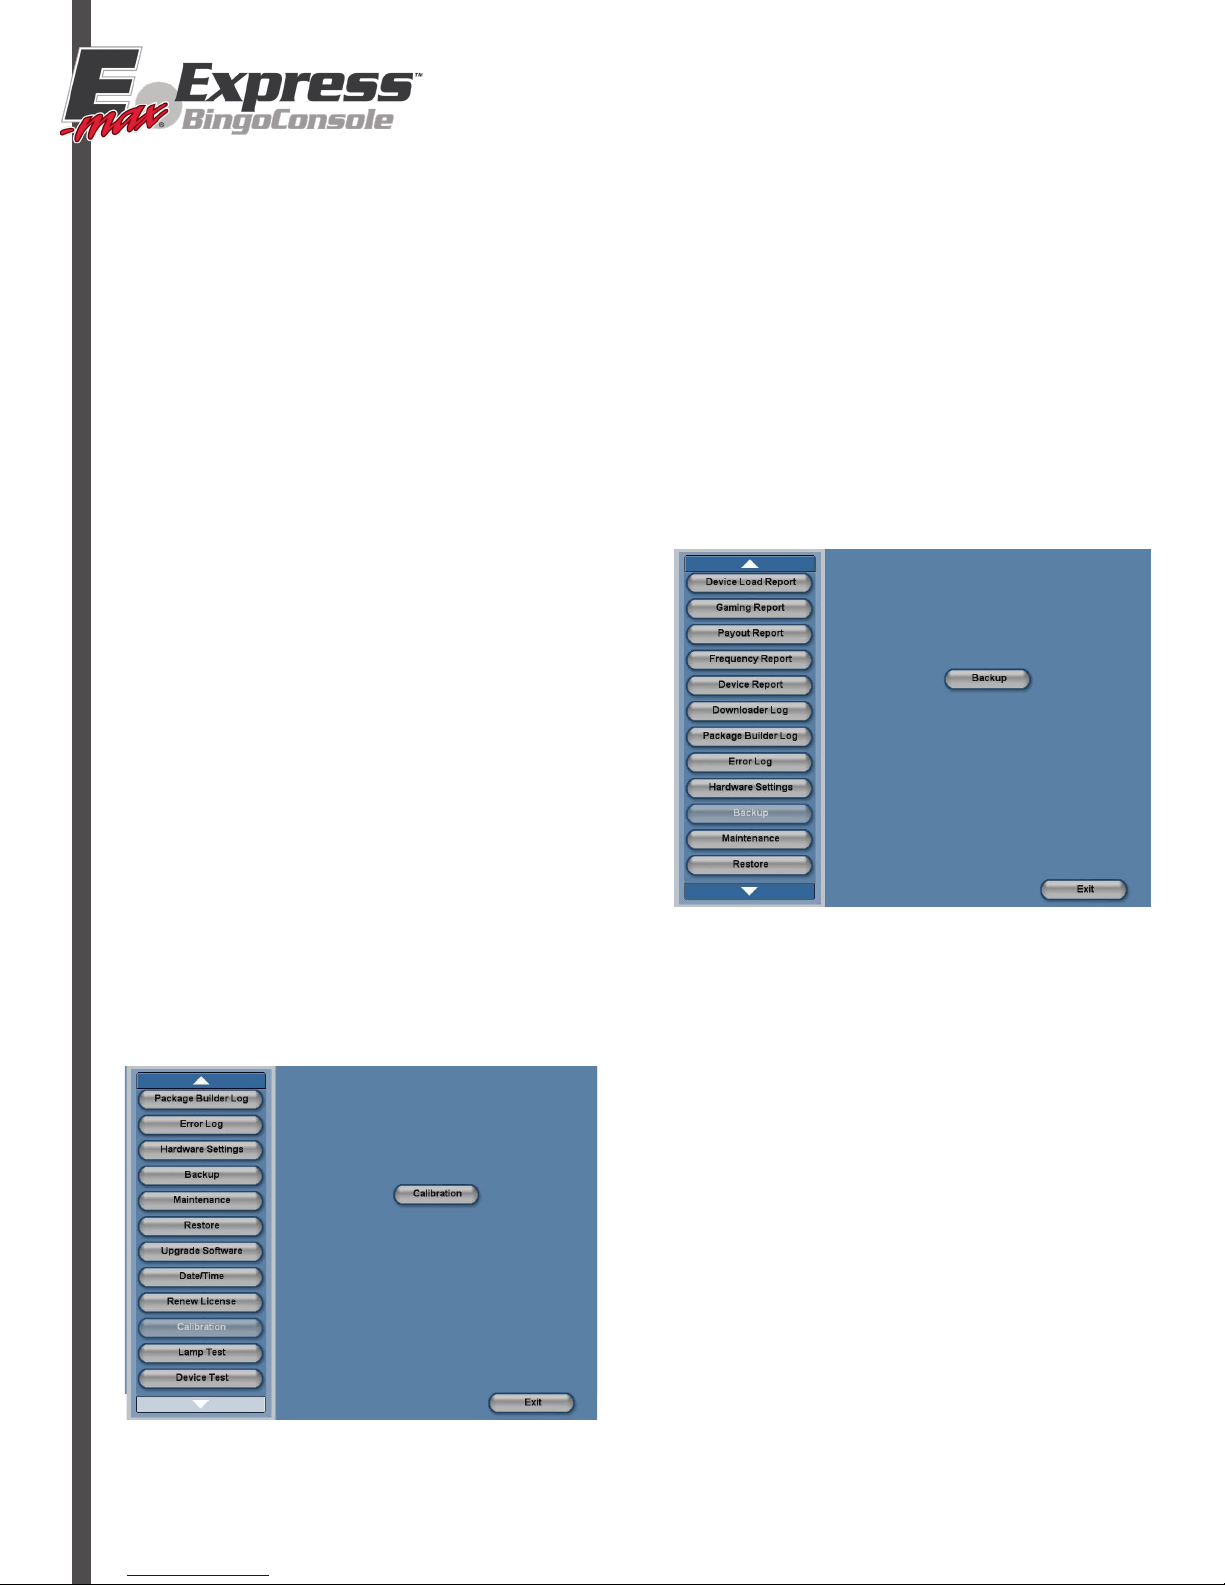
13. Create a backup USB drive by inserting the drive on
the computer.
a) Exit Session.
b) Press Utilities.
c) Press Backup on the left side menu.
d) Once the thumb drive is inserted the center
Backup button will be highlighted so you can
press the middle Backup and it will start.
e) When finished press the Eject Media and you
are done.
NOTE: Please back up your console frequently
in case you are hit with a power spike
you have all your data, games and programs ready to reinstall.
14. From the main menu press Utilities then select the
Calibration button to calibrate.
15. From the main menu press Utilities then select the
date/time button to set up.
Page 4
QUICK START GUIDE
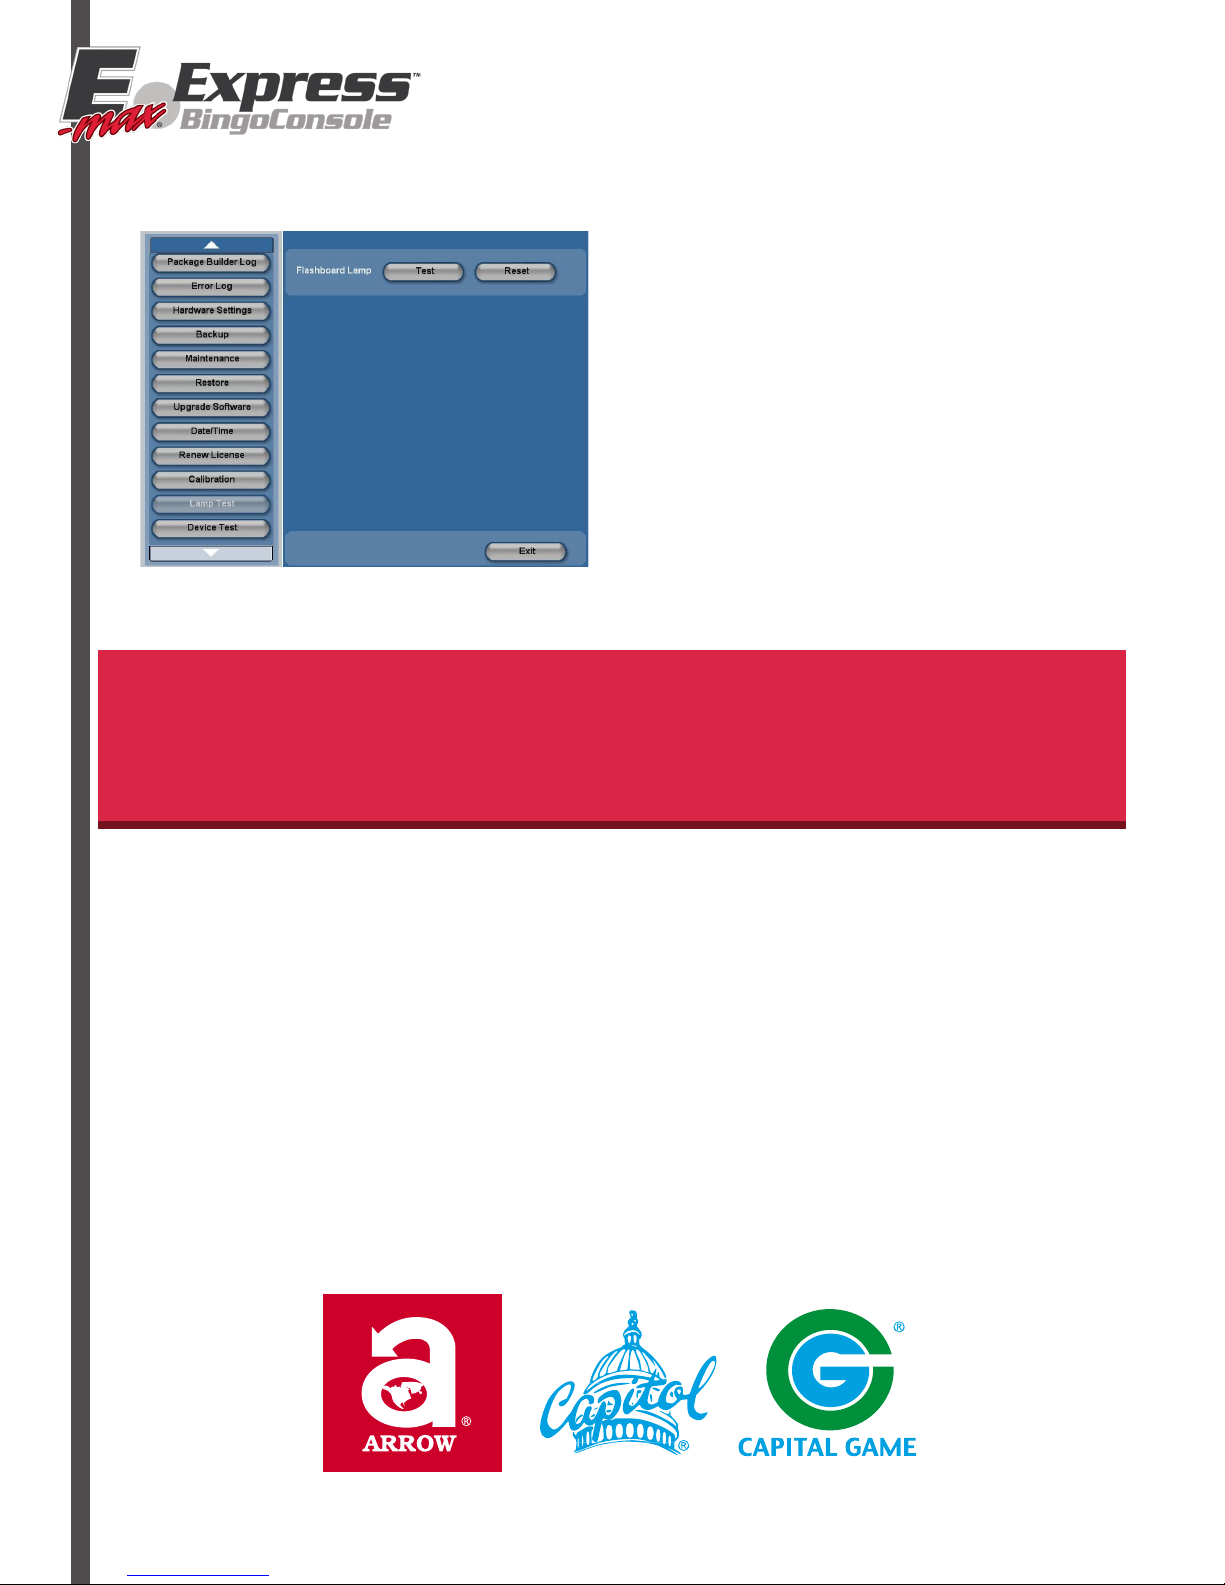
16. Hook up your flashboards into the data router.
17. From the main menu select the Lamp Test to check.
18. For details on full setup and operation, please refer
to the Operational Manual.
WARNING: A PROPER SHUTDOWN OF THE GAMING COMPUTER IS REQUIRED.
a) Close your Schedule
b) Log off the console by hitting LOGOUT on the main screen
c) Now hit the SHUTDOWN button on the main menu
d) Prompt messages appear reminding you to back up your system and confirm the shutdown
e) After the computer shuts down turn off the UPS backup.
Arrow Technical Assistance Center
Phone Support Hours: 8am to 12am
1-800-277-6214
© ARROW INTERNATIONAL INC.
HH1400-QKSTART
 Loading...