

Ematic EVH625BL Product Manual

1
1

Product Manual
EVH625BL

1
Functions
Functions
Thank you for purchasing this ActionCam. This product features clear, high-definition picture and video in AVI
format. The portable design makes it easy to take pictures and record video wherever you go. To get the most out of
your ActionCam, please make sure to carefully read this manual and keep it for future reference.
Screen display and diagrams used in this manual are for detailed and visualized introduction for this digital
ActionCam. Because of technical R&D, the displays and diagrams may vary within the actual digital ActionCam.
Precautions
Precautions
Before using the ActionCam, please carefully read this user’s manual to ensure that you use the ActionCam in a
correct and safe manner in order to achieve the best performance and good working condition.
Do not leave the ActionCam in direct sunlight for long periods of time. Keep the lens of the ActionCam away
from direct sunlight to avoid damaging the image sensor.
Please avoid water or sand entering the ActionCam while using it on sand beach or by water. Water, sand, dust or
particles containing salt may damage the ActionCam.
Keep the ActionCam away from dust and chemical materials. When not in use, store the ActionCam in a cool and
dry place with good ventilation. Do not store the ActionCam in a place with high temperature, humidity or dust in
order to prevent abnormal ActionCam operation.
In case of accumulated dirt or dust on the ActionCam, wipe the ActionCam with a soft, clean and dry cloth. In
case of dirt on the ActionCam or lens, gently blow off the dirt to clean.
To clean the surface of the ActionCam lens, first gently blow off the dust, then wipe it with soft cloth or wipe
suitable for cleaning optical instruments. If necessary, please clean ActionCam with lens cleaner. Do not clean the
lens with other cleaning materials, as it may damage the lens.
Touching the surface of the lens with finger may damage the lens.
Before inserting a memory card into the ActionCam, first make a back up of the data, and then format the
memory card for ActionCam use.
An external TF card is necessary for use with the ActionCam. The following may cause loss or damage of the
data:
1. Improper use of the memory card.
2. A broken or damaged memory card.
3. High temperatures and humidity or direct sunlight.
4. Static fields or electromagnetic field nearby.
5. Taking out the memory card while the ActionCam is on or while in use when plugged into a computer (when
memory card is reading, writing or formatting).
7. Using a memory card that is no longer in good working condition.
8. If the ActionCam freezes, press the reset hole on the bottom of the ActionCam with a paperclip. All data on SD
card will be lost.

2
About the Product
About the Product
This product is compact and features easy installation.
The product features high definition video and dynamic images. Even under low illumination, video can be
recorded, and it also supports AVI video format.
Support VGA (640x480) and HD (1280x720) capturing.
Three different image size options: 5M, 3M and 1M.
This product supports time and date watermark function. The time and date can be displayed while
recording.
USB 2.0 port
Support max. 32G TF card.
This product features loop recording. New video and images will replace the oldest files. Be sure to save all
files when the “Full Memory” message appears on the screen before the oldest files are erased.
This product is equipped with on-site replay function. You may check the video recorded on-site with the
display.
System Requirements
System Requirements
System Requirements
Operation system
Microsoft Windows 2000, XP, Vista, 7, or more
CPU
Above Intel Pentium III 800MHz or equivalent CPU
Memory
Minimum 512MB
Sound card, video card
Sound card and video card should support DirectX8 or higher version
Hard disk
Over 500MB free space
Others
1 standard USB1.1 or USB2.0 interface
3
ActionCam
ActionCam
Overview
Overview
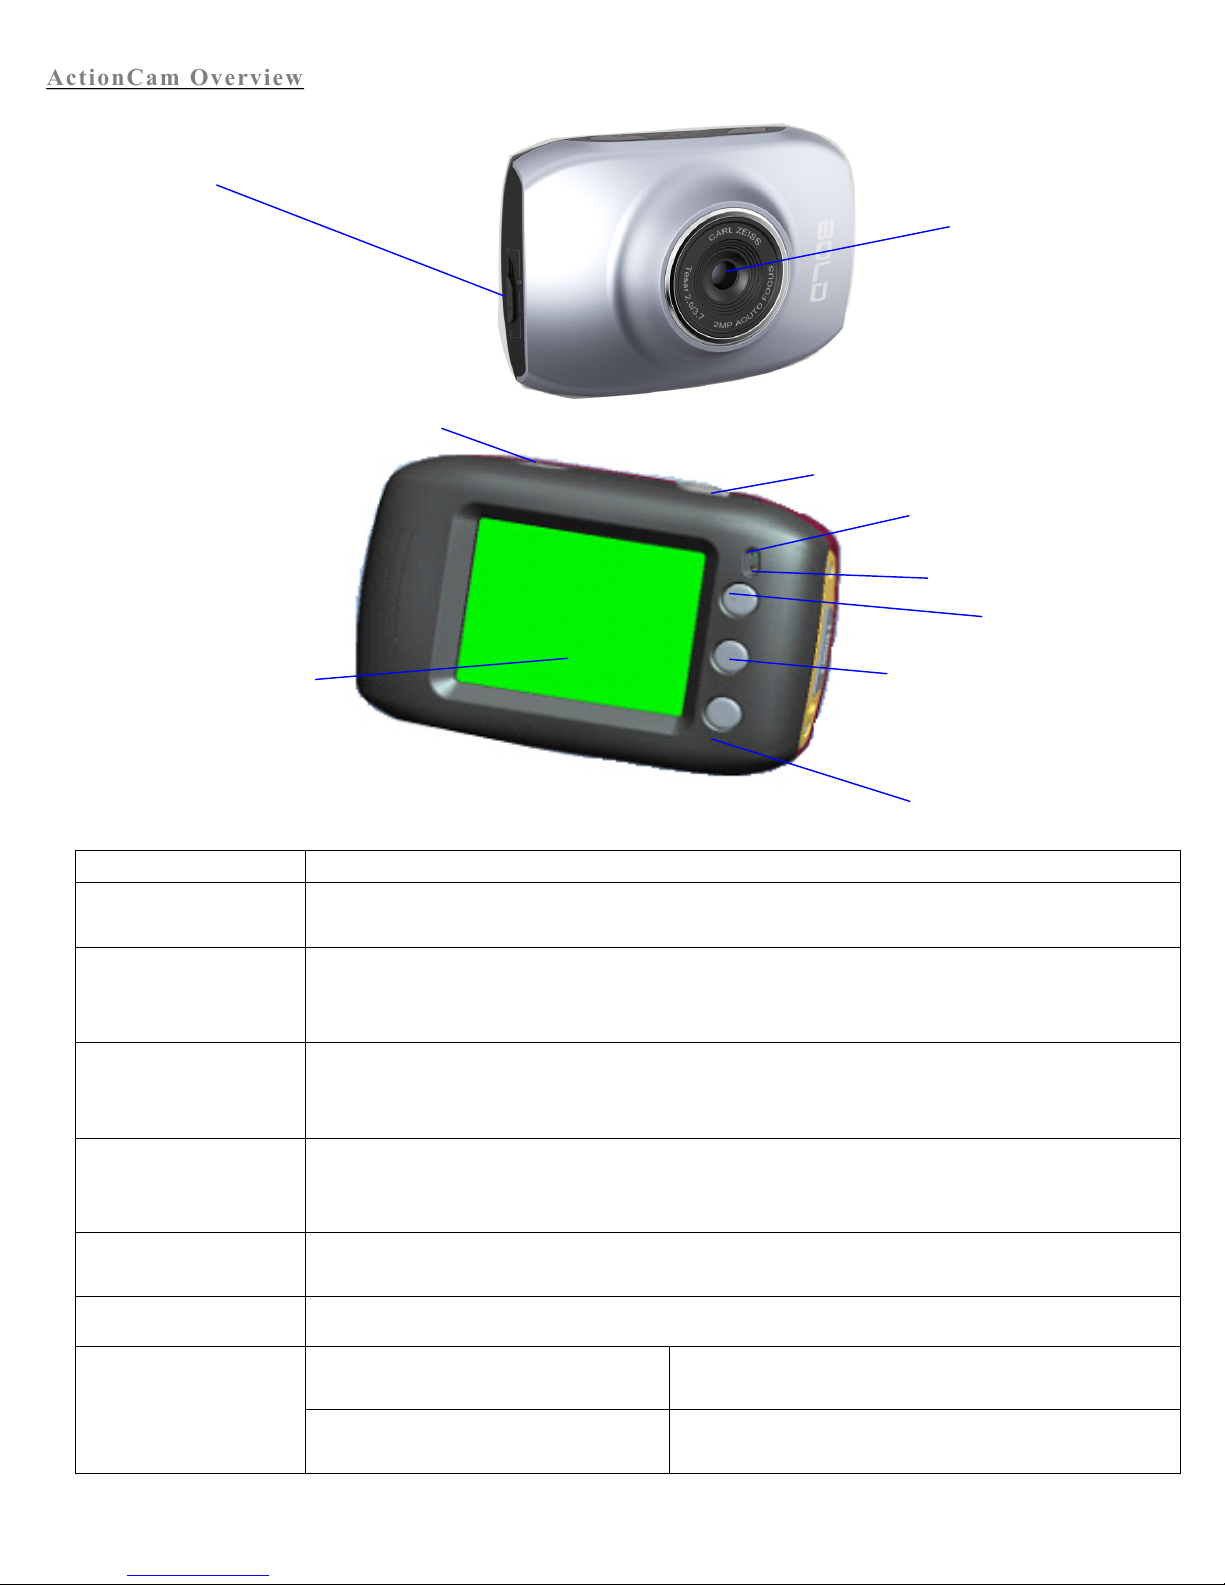
Key/Indicator
Function
Power On/Off
Power the ActionCam on or off. In menu mode, switch between normal (effect parameters and replay of
image, video) and setup menu.
Shutter-Release Button
In video mode, press to start/stop recording video. In capture mode, press to take a picture. In replay
mode, press to replay a video. In menu mode, press to confirm your selection.
Up key
Capture/Video Mode: Zoom In
Menu Mode: Scroll up in Menu Selection
Replay Mode: Pause/Play Video
OK key
Open or Exit Menu.
Replay Mode: Stop playing video
Down key
Capture/Video Mode: Zoom Out
Menu Mode: Scroll Down in Menu Selection
Mode switch
Switch between Capture Mode, Video Mode, and Replay Mode.
Light Indicators
The top light is a charging indicator.
In power-off state, the indicator will be lit when the
ActionCam is charging.
The bottom light is an
operation indicator.
Operation indicator will flash once when taking a picture. In
charging mode, the operation indicator will be lit.
Mode switch:
-Photograph
-Video
-Replay
Lens
LCD TFT
Power ON/OFF
Shutter
Charging Indicator
Operation Indicator
Up Key
OK Key
Down Key
4
Preparation
Preparation
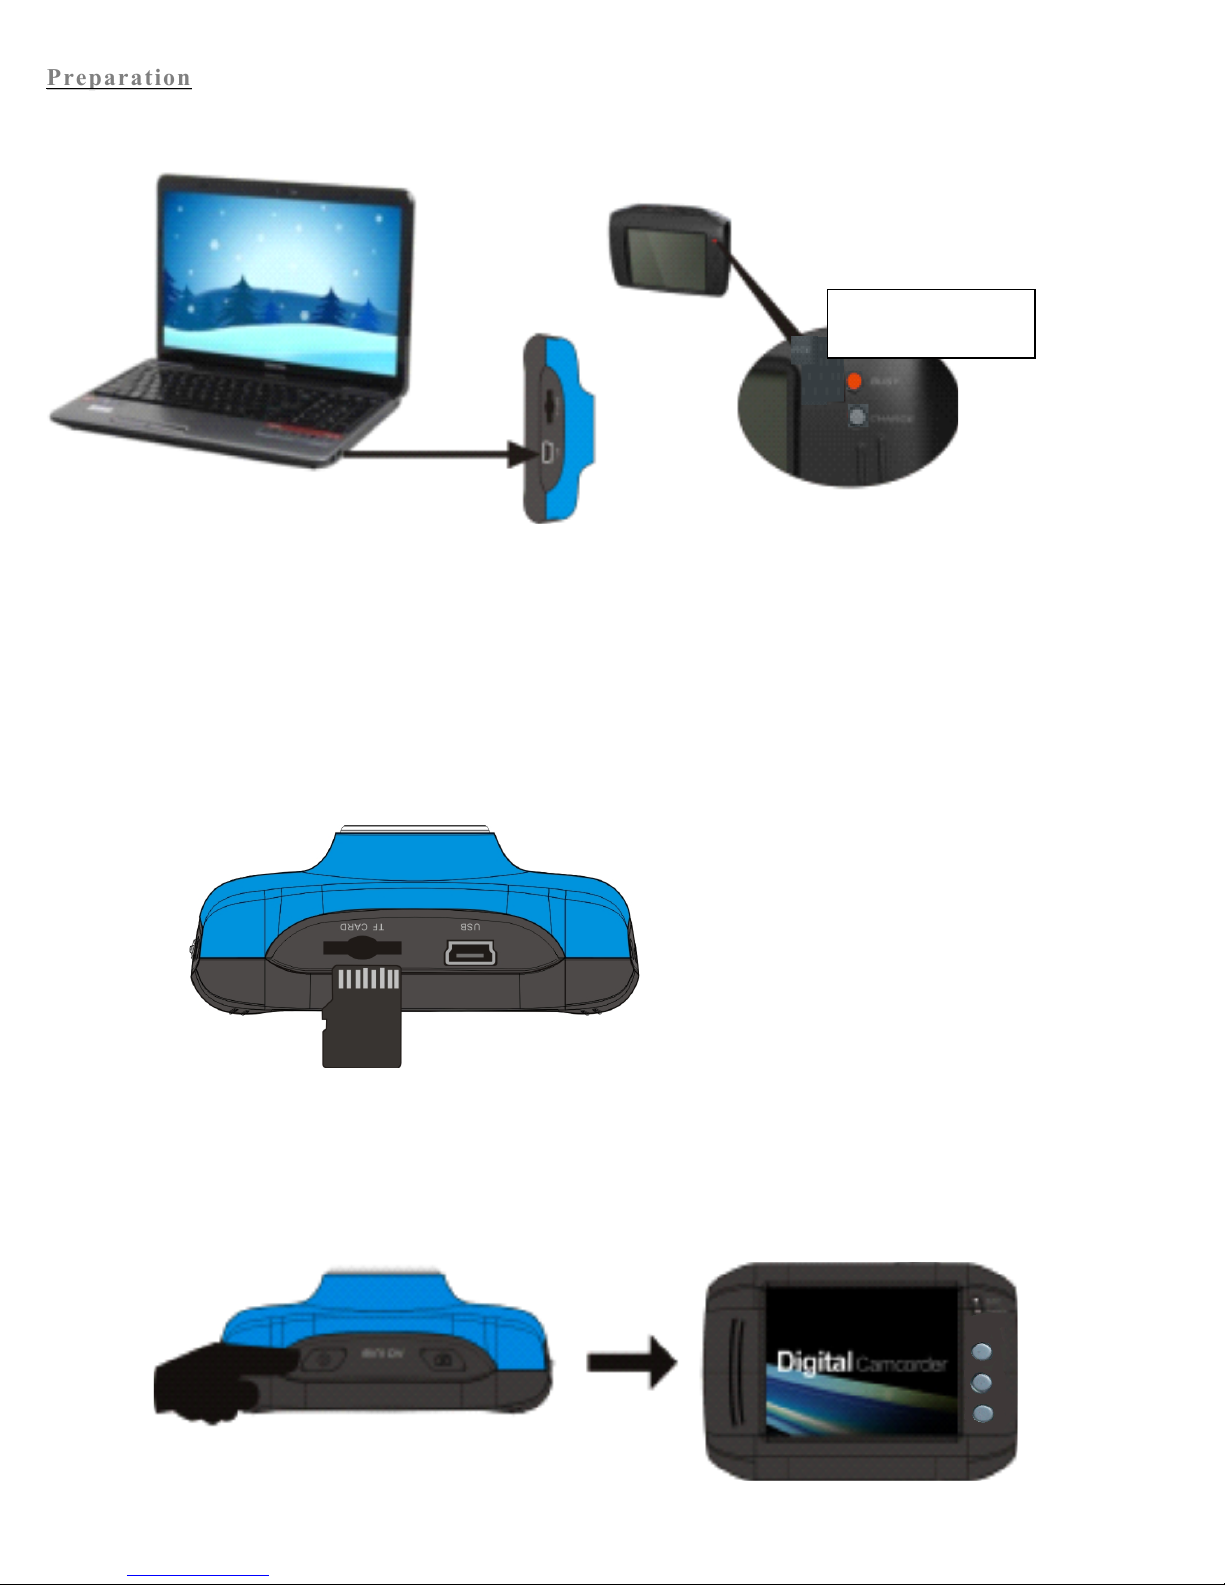
1. Charge built-in lithium battery
In power-off state, connect the ActionCam to a computer to begin charging. The charger indicator will light up when
charging, and will turn off when the ActionCam is fully charged. Generally, it takes about 2-4 hours for the
ActionCam to be fully charged.
2. Use memory card
1. Fully insert a memory card into the memory card slot.
2. To take out the memory card, gently press down the memory card to eject.
Note: The ActionCam is not equipped with a built-in memory, and thus a memory card is required.
3. Power On/Off:
1. Power On: Press and hold the power key for 3 seconds. The screen should turn on and the ActionCam will enter
the startup state.
USB 线
Charger Indicator Lights
 Loading...